


Roasting garlic in the air fryer is one of my favorite kitchen shortcuts. It gives you soft, caramelized cloves with very little prep and without heating up the whole kitchen.
It tastes great on bread, in mashed potatoes, and stirred into pasta dishes.
In this post, I am sharing how to roast garlic in the air fryer step by step, along with a few helpful tips. You'll also including the oven method so you can choose the option that works best for you.
Want to Save This Recipe?
Enter your email & I'll send it to your inbox. Plus, get great new recipes from me every week!
By submitting this form, you consent to receive emails from Walking on Sunshine Recipes.
This recipe has been updated since it first appeared in 2014 with new photos and an easy air fryer method.
Recipe at a Glance
Prep: 5 min | Cook/Bake: 15 min | Difficulty: Easy | Servings: 4
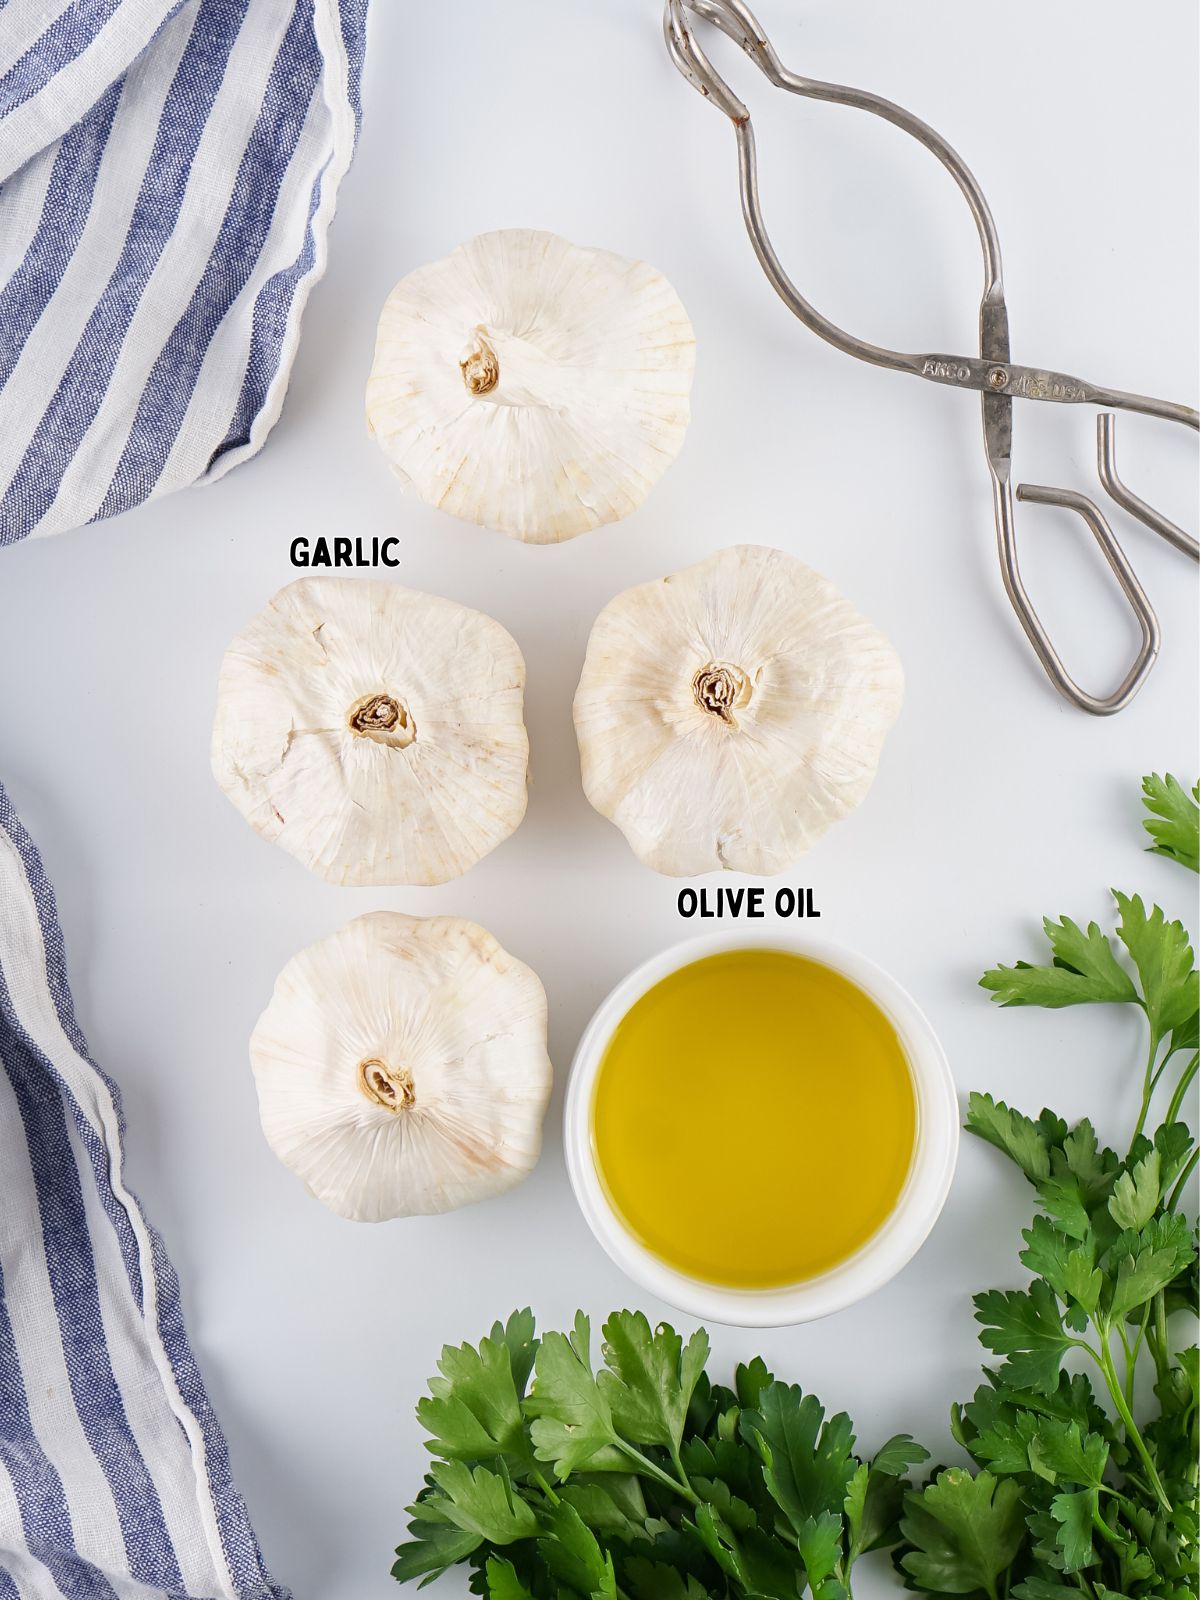
Main Ingredients: garlic bulbs, olive oil, salt, pepper, fresh parsley
Best For: spreading on bread, adding to pasta, mashed potatoes, and sauces
Freezer Friendly: yes!
Make Ahead: can be roasted in advance and refrigerated until ready to use
Storage: store in an airtight container in the refrigerator for up to 4 days
👉 Print it, save it, and cook it again! My Ultimate Meal Planner & Recipe Binder helps you keep every recipe right at your fingertips.
SUMMARIZE & SAVE THIS CONTENT ON
Table of Contents
- Recipe at a Glance
- Why My Family Loves Roasted Garlic (and Yours Will Too!)
- Ingredients You’ll Need
- Substitutions and Variations
- Step-by-Step Instructions
- Insider Tips from My Kitchen to Yours
- How to Roast Garlic in the Oven
- Storage & Serving Tips
- More Homemade Seasoning Recipes You Might Like
- LOVE this recipe? SAVE it for Later!
- 🗒️Shopping List
- 📖 Recipe Card
- 💬 Comments
Why My Family Loves Roasted Garlic (and Yours Will Too!)
My family loves roasted garlic because it adds so much flavor without being overpowering.
We spread it on bread, mix it into mashed potatoes, and stir it into pasta for an easy way to make simple meals taste special.
Looking for more ideas that use garlic? Try my Homemade Garlic Butter or my Garlic Chicken Cutlets. This is also delicious on garlic bread!

Ingredients You’ll Need
Below is a quick preview of the ingredients you’ll need. For exact amounts, check the recipe card below. You can also use the "Shopping List button" to create a printable shopping list, or the "Get Ingredients button" in the recipe card to order groceries online.
Substitutions and Variations
- Olive oil → You can use avocado oil or melted butter if that is what you have on hand.
- Fresh parsley → Try chives, thyme, or rosemary for a different flavor.
- Add a pinch of Italian seasoning before roasting for a herby flavor.
- Sprinkle with grated Parmesan after cooking for a savory finish.
- Drizzle with a little balsamic glaze before serving for a slightly sweet contrast.
This recipe has not been tested with other substitutions or variations. If you replace or add any ingredients, please let me know how it turned out in the comments below!
Step-by-Step Instructions
This section includes step-by-step photos and instructions to guide you through the recipe. For the complete printable version, scroll down to the recipe card below.
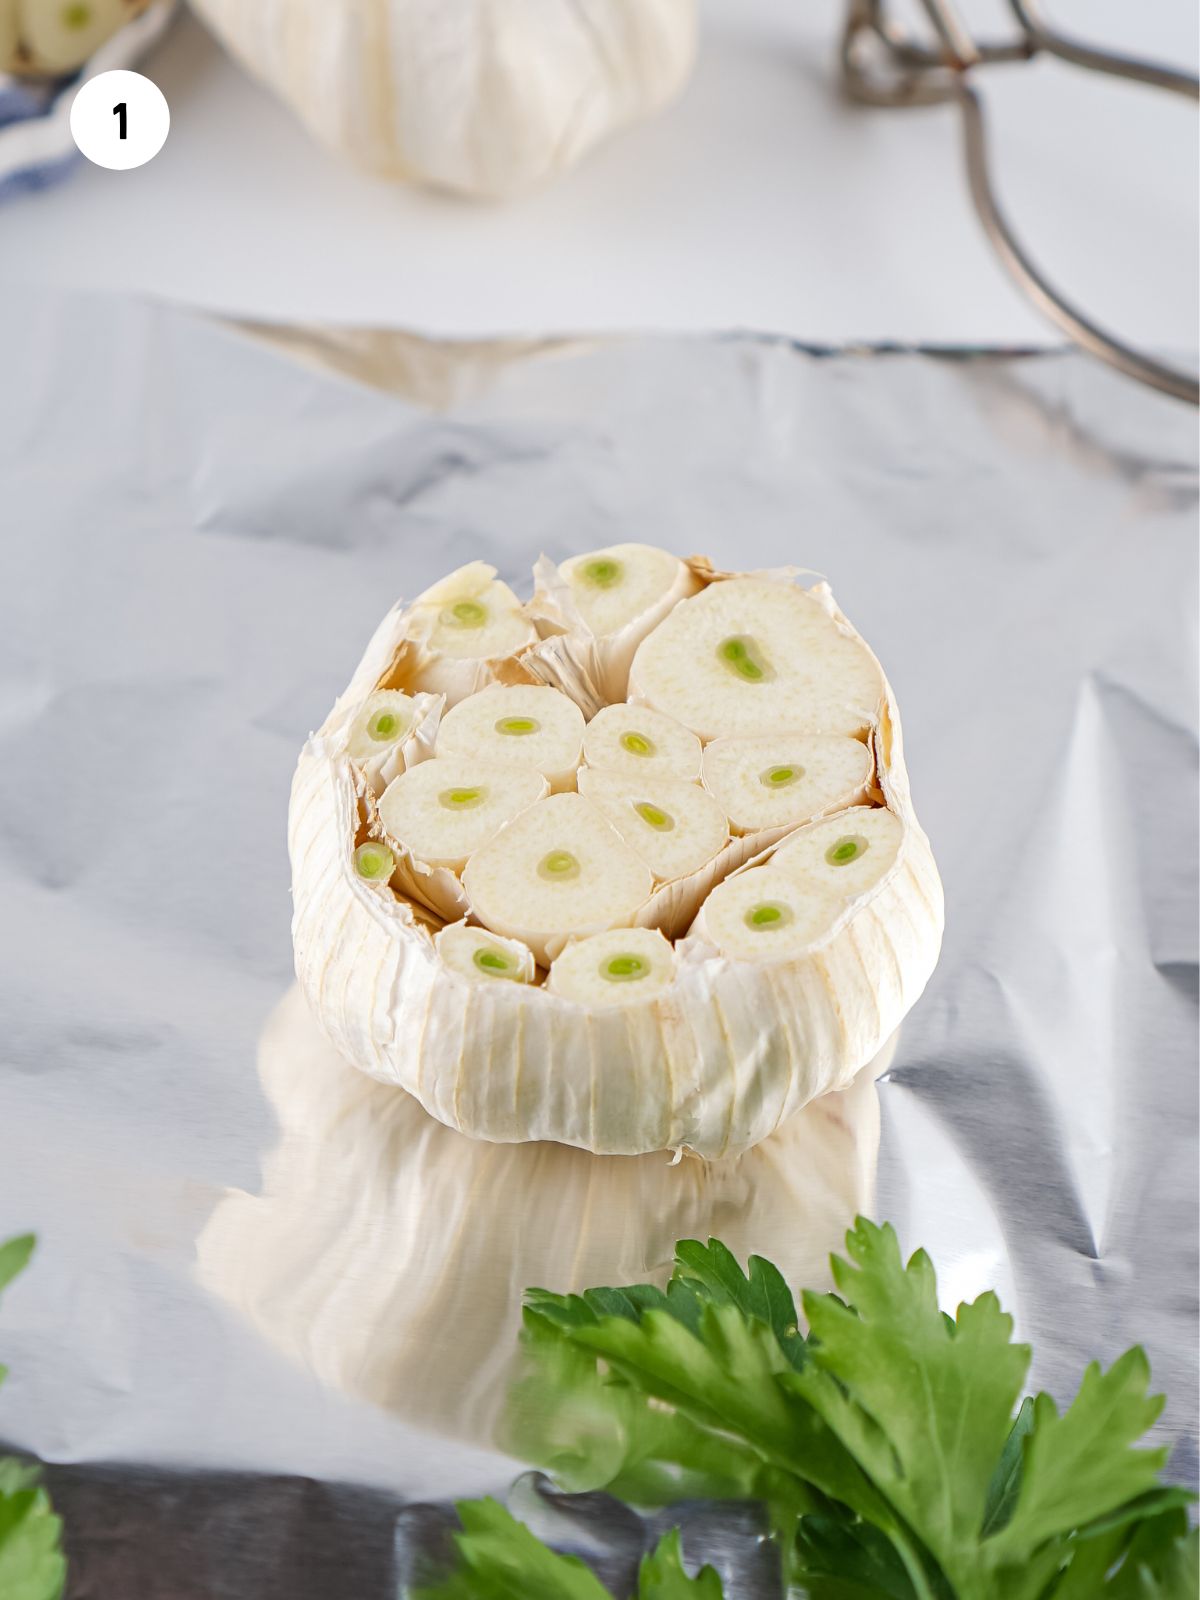
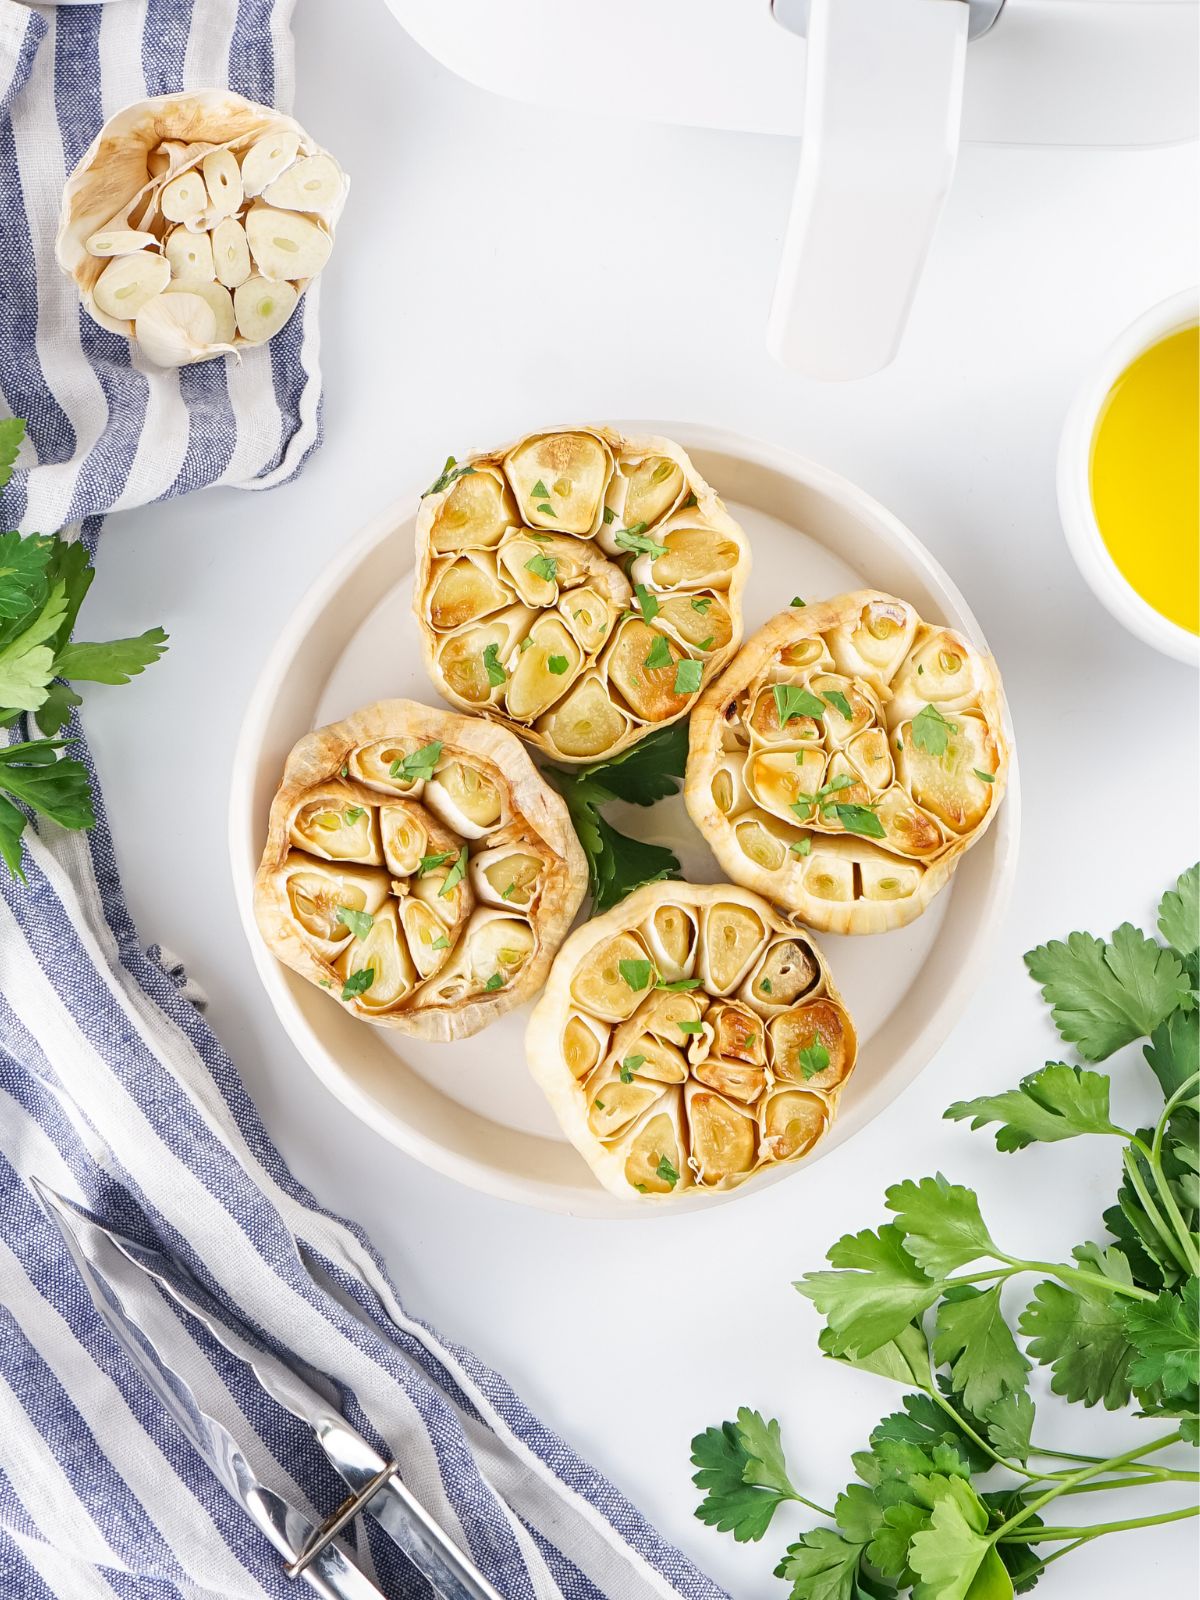
Step 1: Slice the top off each bulb of garlic to expose the cloves. This helps the garlic roast evenly and become soft and tender.
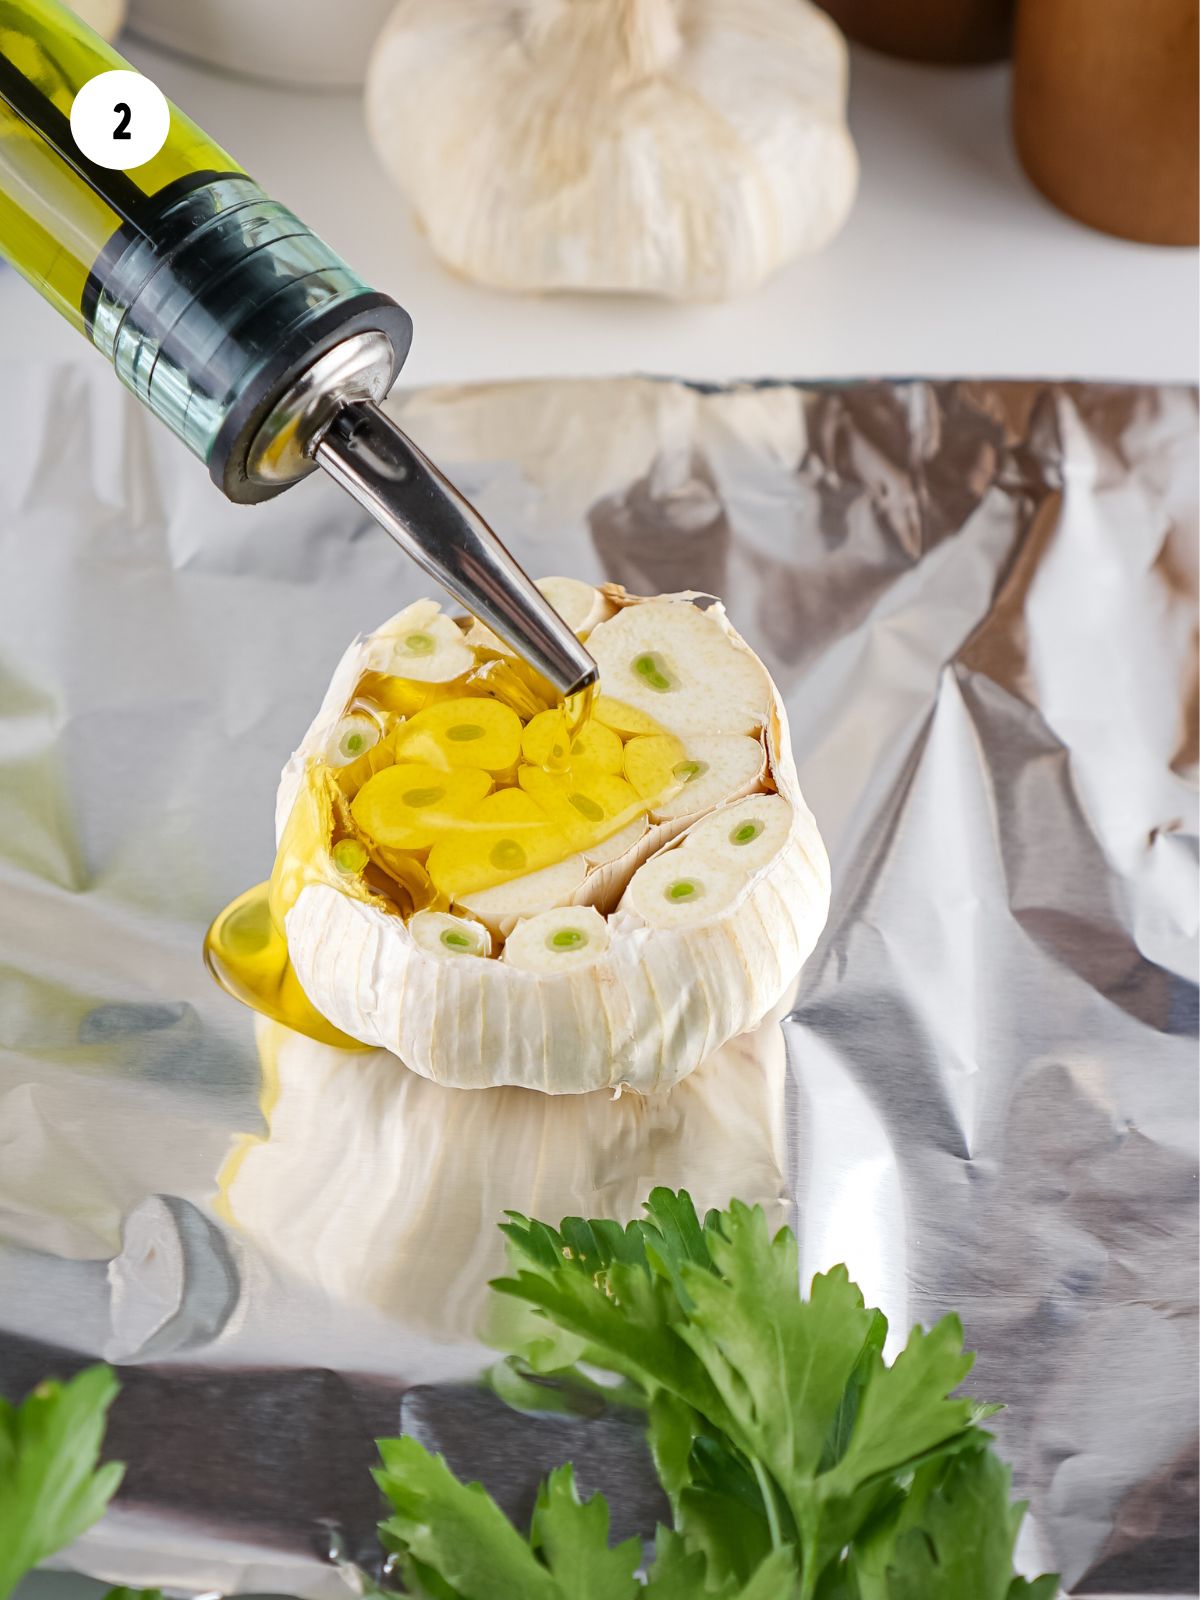
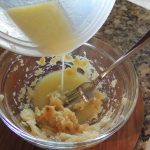
Step 2: Place each garlic bulb on its own square piece of aluminum foil. Drizzle the top of each bulb with 1 tablespoon of olive oil. Let the oil soak into the exposed cloves for the best flavor and texture. Sprinkle the garlic with salt and pepper, depending on how you plan to use it. You can adjust the seasoning to suit your taste or skip it if needed.
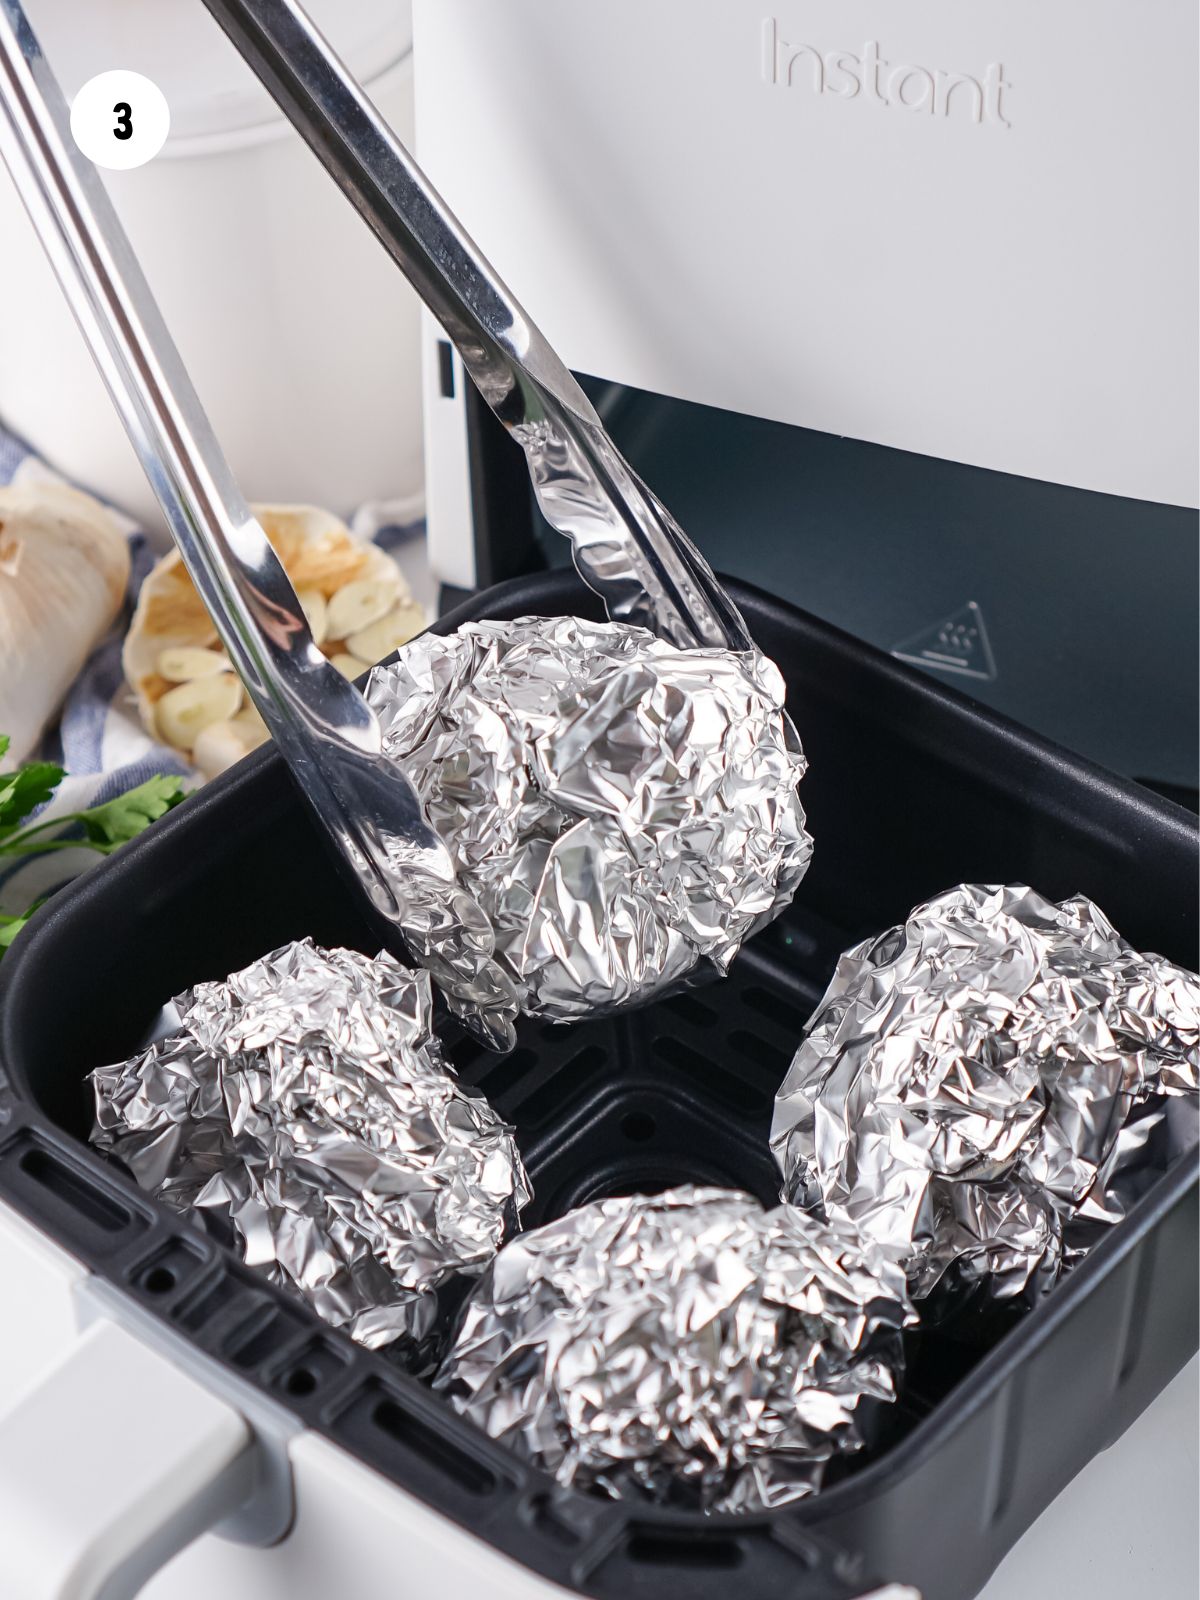
Step 3: Wrap the garlic bulbs tightly in the foil and place them in the air fryer basket in a single layer. Keeping them in one layer helps them cook evenly.
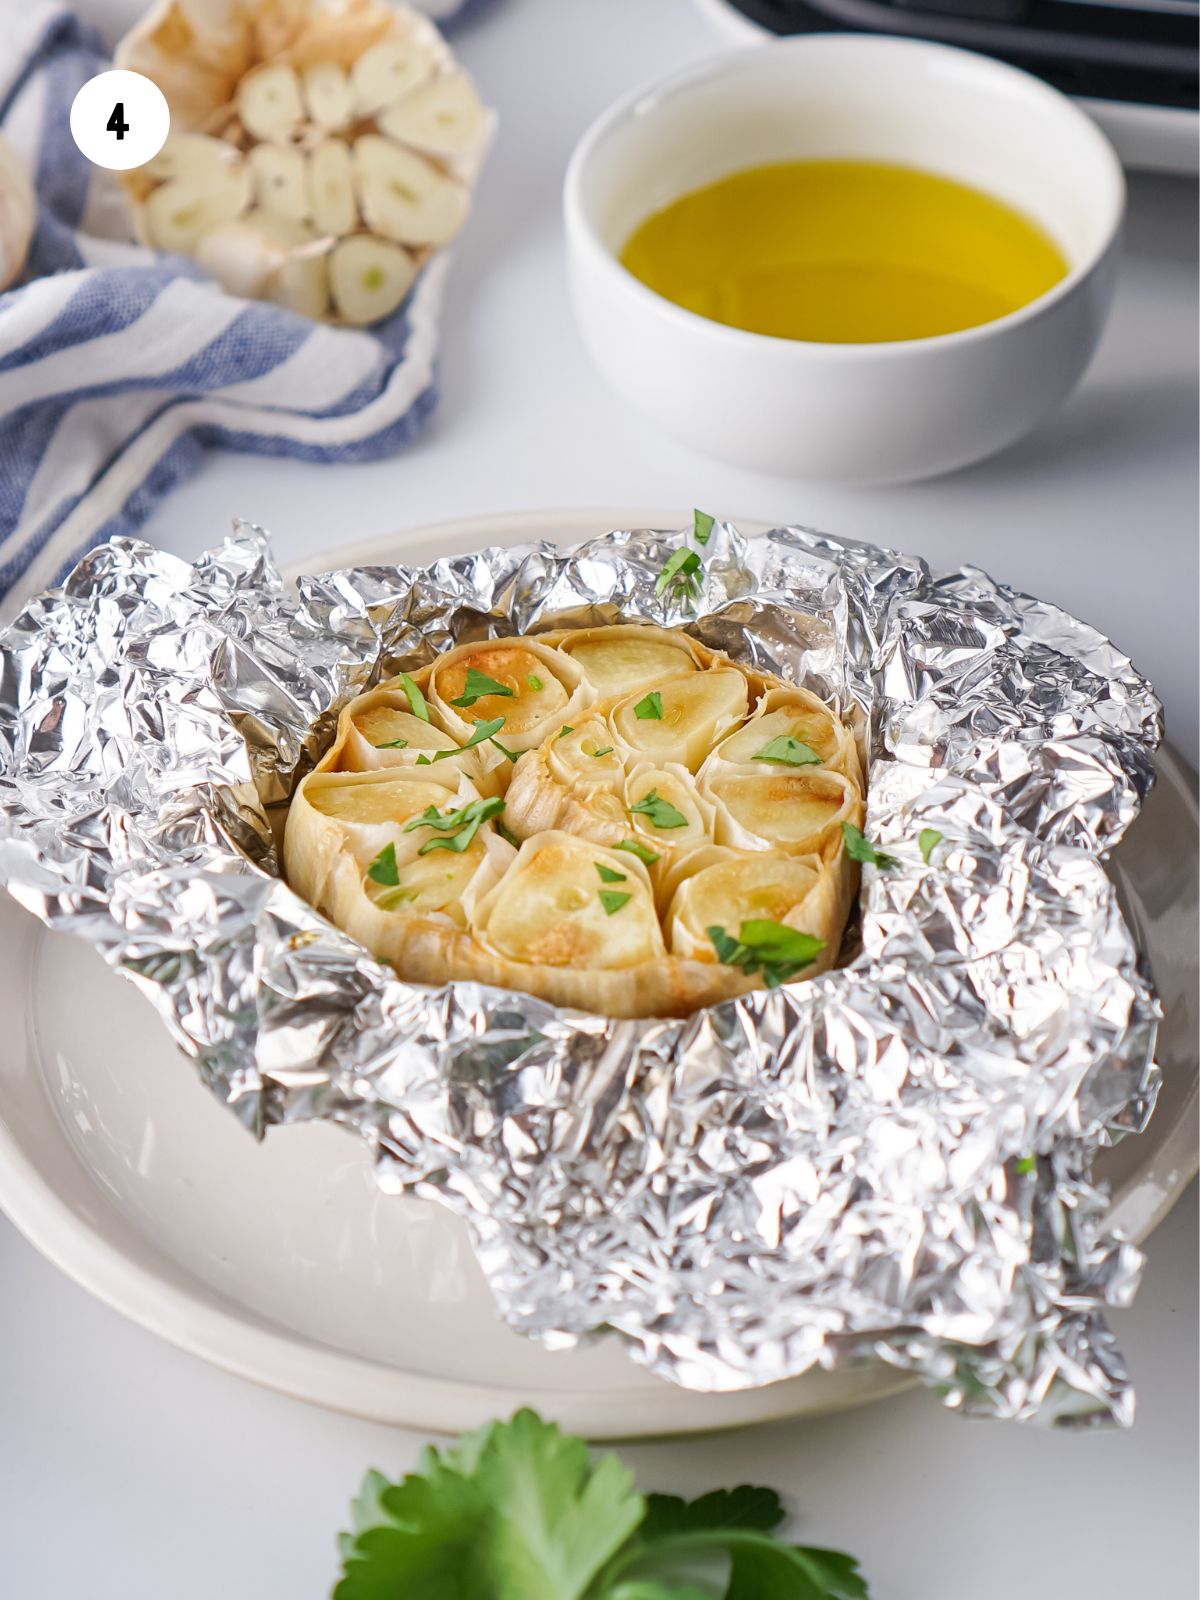
Step 4: Air fry at 400 degrees Fahrenheit for 15 minutes, or until the cloves are soft and lightly golden. Carefully unwrap one bulb to check doneness before removing them all.

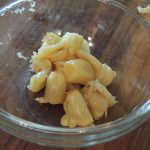
Step 5: Carefully unwrap the garlic and gently squeeze the soft cloves into a sealable container. Sprinkle with fresh minced parsley, if desired, and use as needed.
Insider Tips from My Kitchen to Yours
✔️ DO wrap the garlic bulbs tightly in foil so they steam and soften evenly while roasting.
❌ DO NOT place unwrapped garlic directly in the air fryer, as it can dry out and burn.
How to Roast Garlic in the Oven
Here is the traditional oven method for roasting garlic. Use this option if you do not have an air fryer or prefer to use the oven:
- Preheat the oven to 400°F and slice the top off each garlic bulb to expose the cloves. Place each bulb on a square of foil.
- Drizzle the tops with olive oil and sprinkle with salt and pepper if desired. Wrap the foil tightly around each bulb.
- Place the wrapped bulbs on a baking sheet and roast for 35–40 minutes, or until the cloves are soft and lightly golden. Let cool slightly, then squeeze out the cloves and use as needed.
Storage & Serving Tips
Refrigerate: Store roasted garlic in an airtight container in the refrigerator. It will keep well for up to 4 days.
Freezer: Roasted garlic can be frozen in small portions for easy use. Place cloves in a freezer-safe container or freeze in an ice cube tray, then transfer to a freezer bag. For best quality, use within 3 months.
Thaw and Reheat: Thaw in the refrigerator overnight or use directly from frozen in cooked dishes. Gently warm in a skillet or microwave if needed.
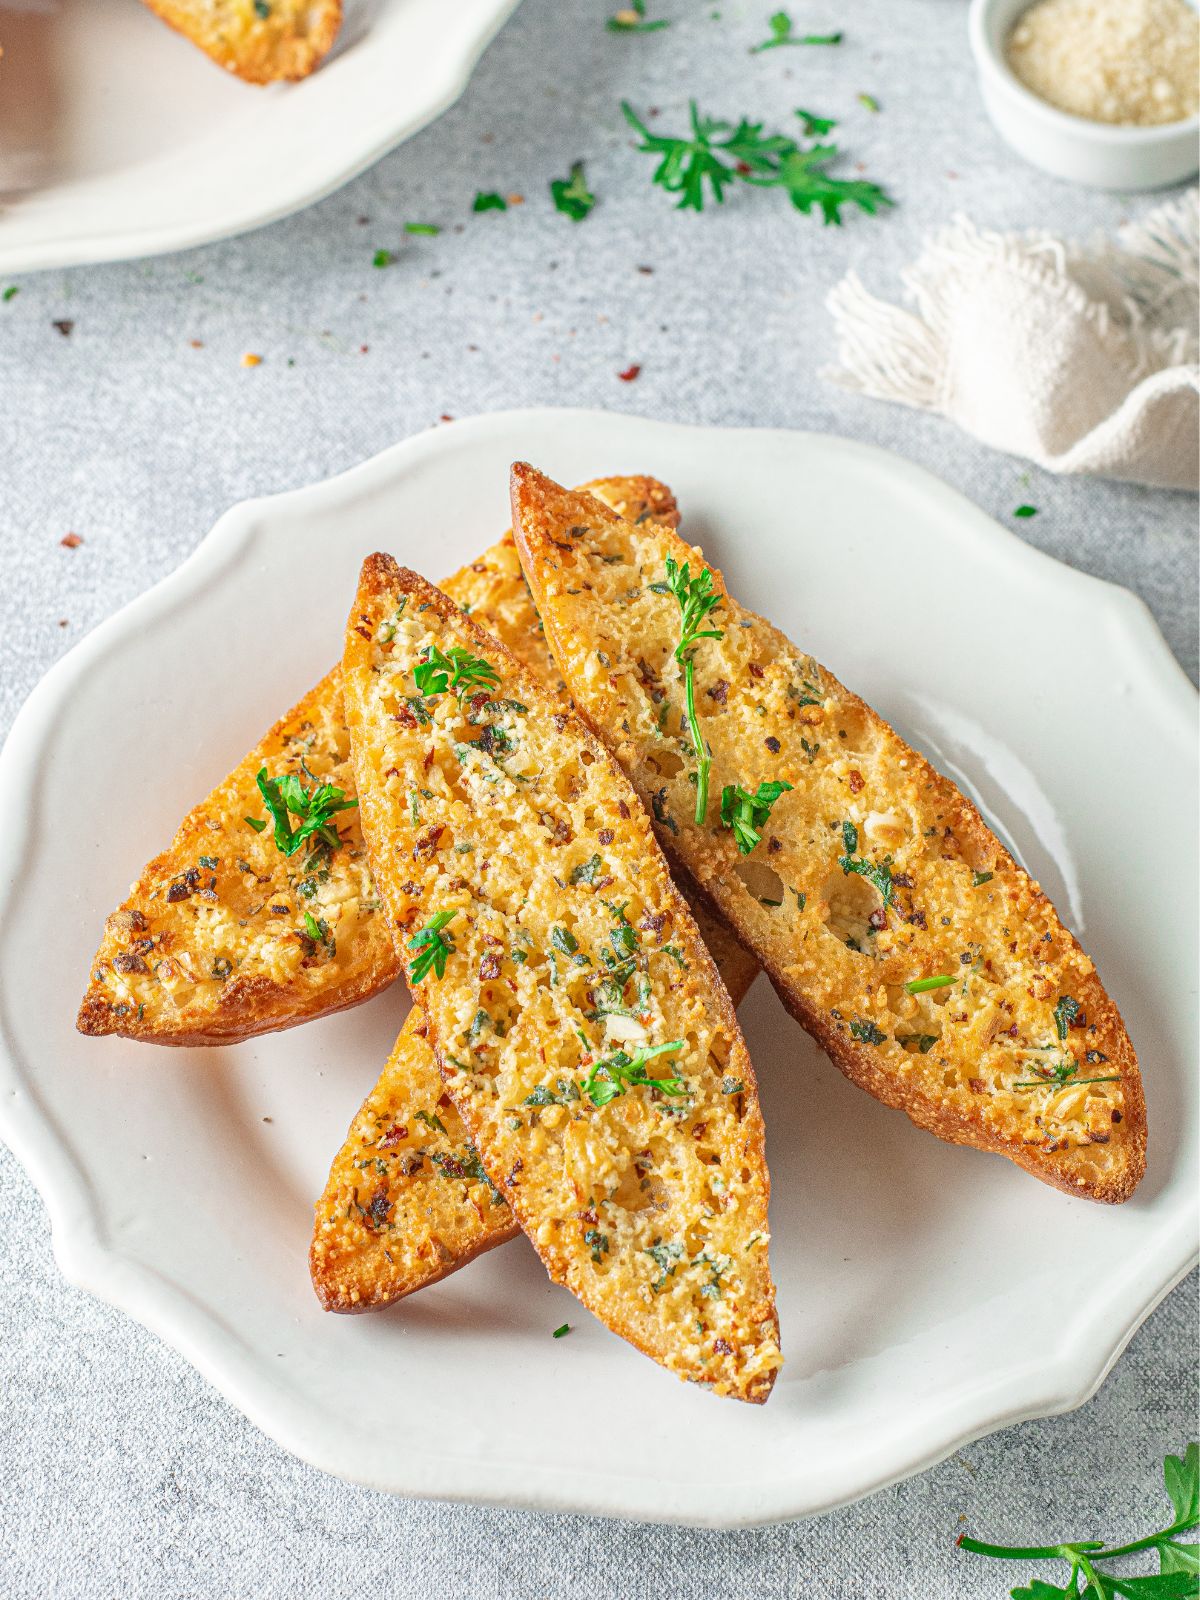
Serving Tips: Spread on bread or toast for an easy appetizer. Stir into mashed potatoes, pasta, sauces, or soups for added flavor. Use as a topping for roasted vegetables or mixed into salad dressings.


More Homemade Seasoning Recipes You Might Like


LOVE this recipe? SAVE it for Later!
❤️Tap the heart icon in the lower right corner to add the recipe to your recipe box for easy access anytime.
If you made it, leaving a star rating or quick review is always appreciated and helps other readers too.
Want to save this printed recipe? The Ultimate Meal Planner & Recipe Binder helps you keep recipes organized in one easy place.
🗒️Shopping List
Click the button below to instantly create a shopping list for this recipe.
📖 Recipe Card

How to Roast Garlic in the Air Fryer
Video
Ingredients
- 4 Large Garlic Bulbs
- 4 tablespoons Olive oil
- Salt and pepper
- Fresh parsley optional
Equipment
Method
- Cut the tops off the garlic bulbs to expose the cloves. Place each bulb on its own square of foil.
- Drizzle each bulb with 1 tablespoon of olive oil, letting it soak into the exposed cloves. Season with salt and pepper if desired.
- Wrap the foil tightly around each bulb and place them in the air fryer basket in a single layer. Make sure they are sealed so the garlic steams while cooking.
- Air fry at 400°F for 15 minutes, or until the cloves are soft and lightly golden. Carefully remove from the air fryer and let cool slightly.
- Unwrap the garlic and gently squeeze the soft cloves into a sealable container. Sprinkle with fresh minced parsley if desired and use as needed.
Nutrition
Notes
How to Use Roasted Garlic
- Spread roasted garlic on warm bread, toast, or crackers for an easy appetizer.
- Stir it into mashed potatoes, rice, or pasta to add rich flavor without extra work.
- You can also mix it into butter, cream cheese, or sour cream for a simple spread or dip.
- Roasted garlic works well in sauces, soups, and stews, and it is delicious tossed with roasted vegetables or used as a pizza topping.
- It can also be blended into salad dressings or marinades for a mild, savory flavor.
Tips:
- Choose firm garlic bulbs with tight skins for the best texture after roasting.
- Make sure the garlic is fully wrapped in foil so it steams and softens evenly.
- Check for doneness by gently squeezing a clove to see if it is soft and spreadable.
Storage and Make Ahead
- Roasted garlic can be made ahead and stored in the refrigerator for up to 4 days.
- For longer storage, freeze in small portions and use as needed.
- Let the garlic cool completely before storing to prevent excess moisture.

Esme Slabbert says
Dear Lois, Congratulations, your post will be featured at SSPS 394, see you Monday. Thanks for sharing.
Esme Slabbert says
Love roasted garlic, although never done it in the AF. For sure something to remember and try next time
Thank you for linking to SSPS 393. See you again on Monday
Trish Martin says
Thanks so much for stopping by and linking up at The Southern Special linky party. What an awesome tip. I love garlic. Have a wonderful week.
Kelly says
So simple! I will be trying this soon! Thanks!
bayanasci says
Your recipe looks so delicious. I'll try it now. I've been watching fondly shares. Thank you.