


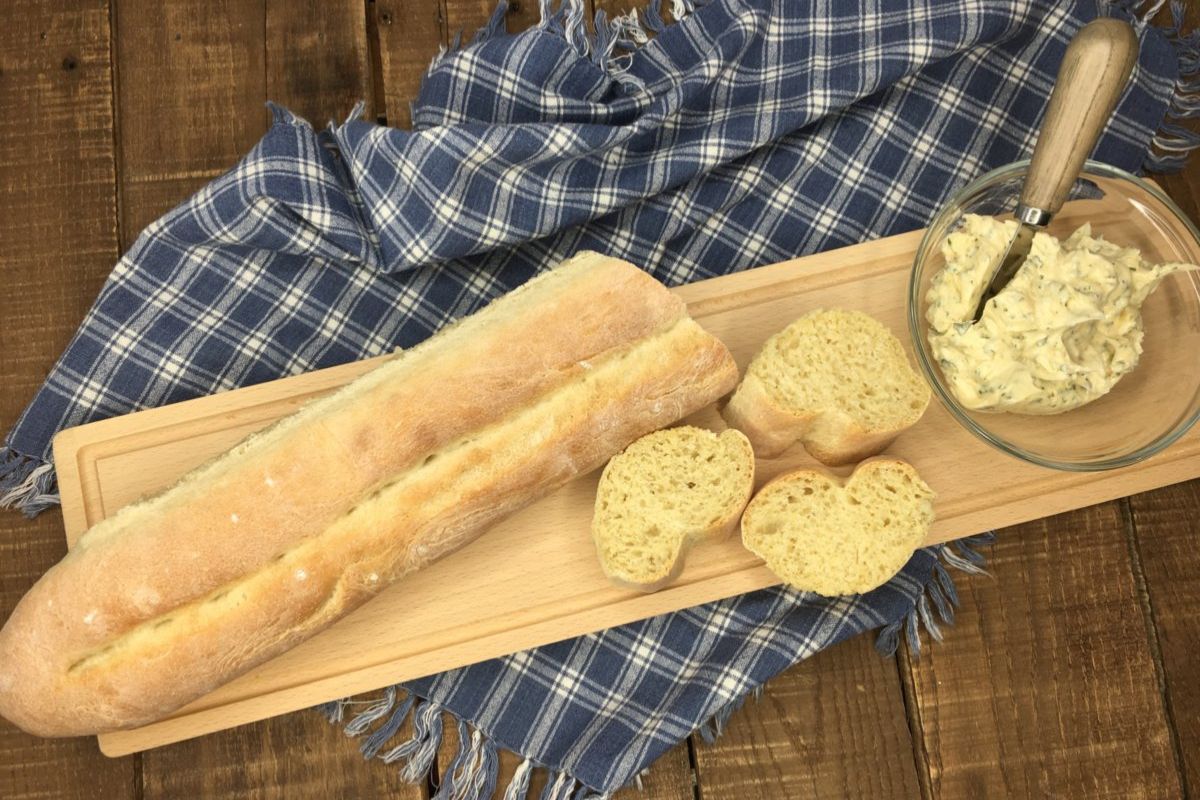
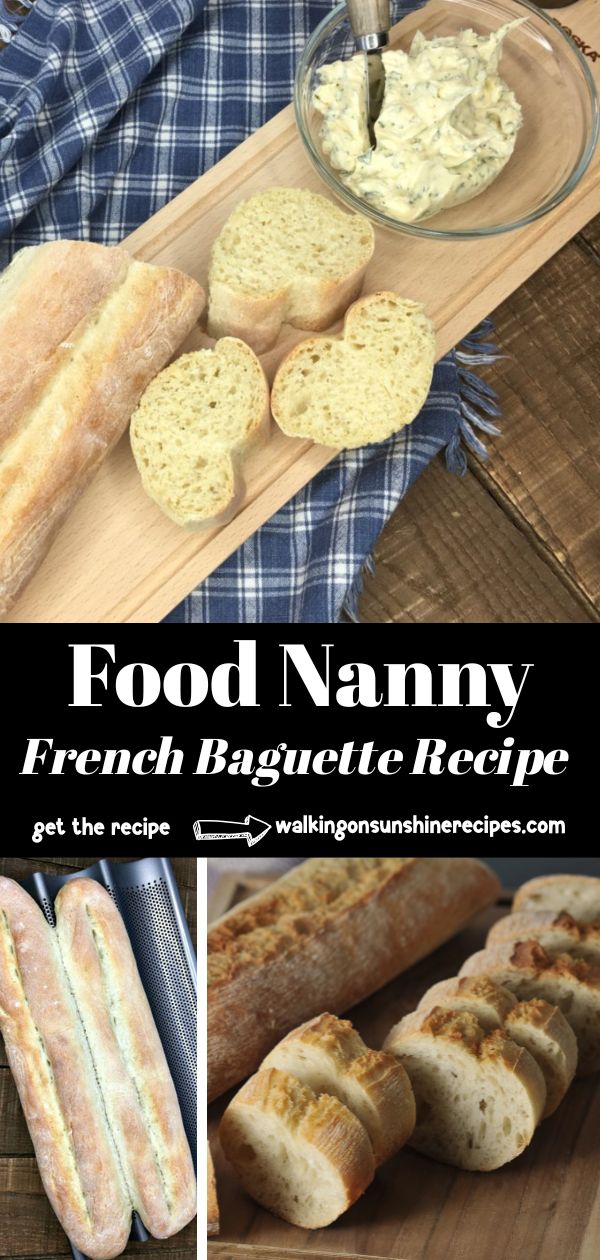
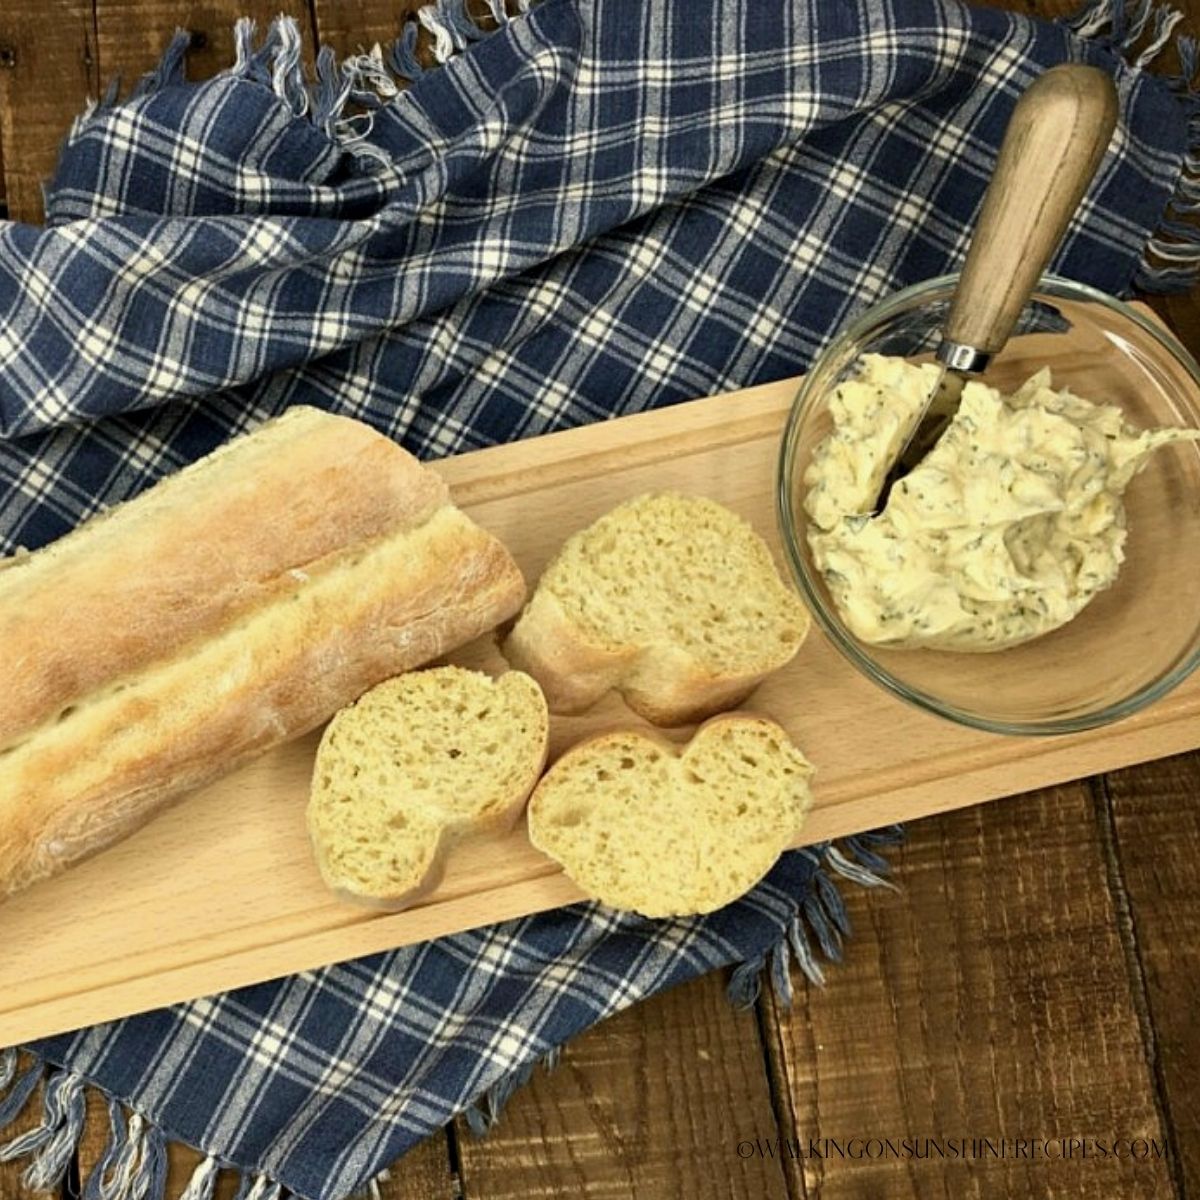
You only need five ingredients to make this crispy loaf of Food Nanny Baguette Recipe.
Crispy, crunch on the outside, yet tender and chewy on the inside and I'm a little embarrassed to say we devoured this recipe in one night...yes, both loaves.
Let me show you how to create the perfect side dish for any family dinner in just about an hour – a recipe that's sure to become a favorite.

Want to Save This Recipe?
Enter your email & I'll send it to your inbox. Plus, get great new recipes from me every week!
By submitting this form, you consent to receive emails from Walking on Sunshine Recipes.
Recipe at a Glance
Prep: 40 min | Cook/Bake: 15 min | Difficulty: Easy
What it is: A crisp, chewy Food Nanny–style French baguette with a tender interior and that classic golden crust made from simple pantry staples.
Why you’ll love it: The dough comes together quickly with basic ingredients and delivers bakery-quality loaves perfect for family dinners or entertaining.
How to make it: Mix flour, yeast, salt, and water into a smooth dough, let it rise, shape into baguettes, then bake until the crust is deeply golden and crackly.
👉 Want to save this printed recipe? My Ultimate Meal Planner & Recipe Binder is the perfect place to keep all your favorite recipes organized and ready to use again and again!
Table of Contents
- Recipe at a Glance
- French Baguette Recipe
- Recommended Kitchen Tools
- My Kitchen Tools Essentials
- Main Ingredients Needed
- Step-by-Step Directions
- How to Shape French Baguette
- Insider Tips from my Kitchen to Yours
- How to Store a Baguette
- How to Soften French Baguette
- LOVE this recipe? SAVE it for Later!
- 📖 Recipe Card
- 💬 Comments
French Baguette Recipe
A French baguette is a long, thin loaf of bread that has a crisp crust. It's of French origin and the dough is usually lean. They're crunchy on the outside and chewy on the inside.
I found this original recipe from The Food Nanny on Instagram. I've adjusted a few different things like the dough raising time, but it's still her recipe I'm sharing today.
Looking for more Homemade Bread Recipes? Try my Homemade Bagels, Italian Bread, or my No Knead Bread Recipe.
Recommended Kitchen Tools
For a full list of kitchen tools used in this recipe, be sure to check the recipe card below. You can also browse my Favorite Kitchen Tools by clicking the photo below.

Check out my list...
My Kitchen Tools Essentials
Tools that will make your time easier and faster in the kitchen!
Eparé French Baguette Bread Pan for Baking - 15 KneadAce Upgraded Extractable & Magnetic Bread Lame Dough Scoring Tool - Professional Sourdough scoring tool for Sourdough Bread baking & Bread Making Tools - Scoring Patterns booklet & 5 Razor BladesYIMITEE 150 Pack Paper Bread Bag with Window, 18


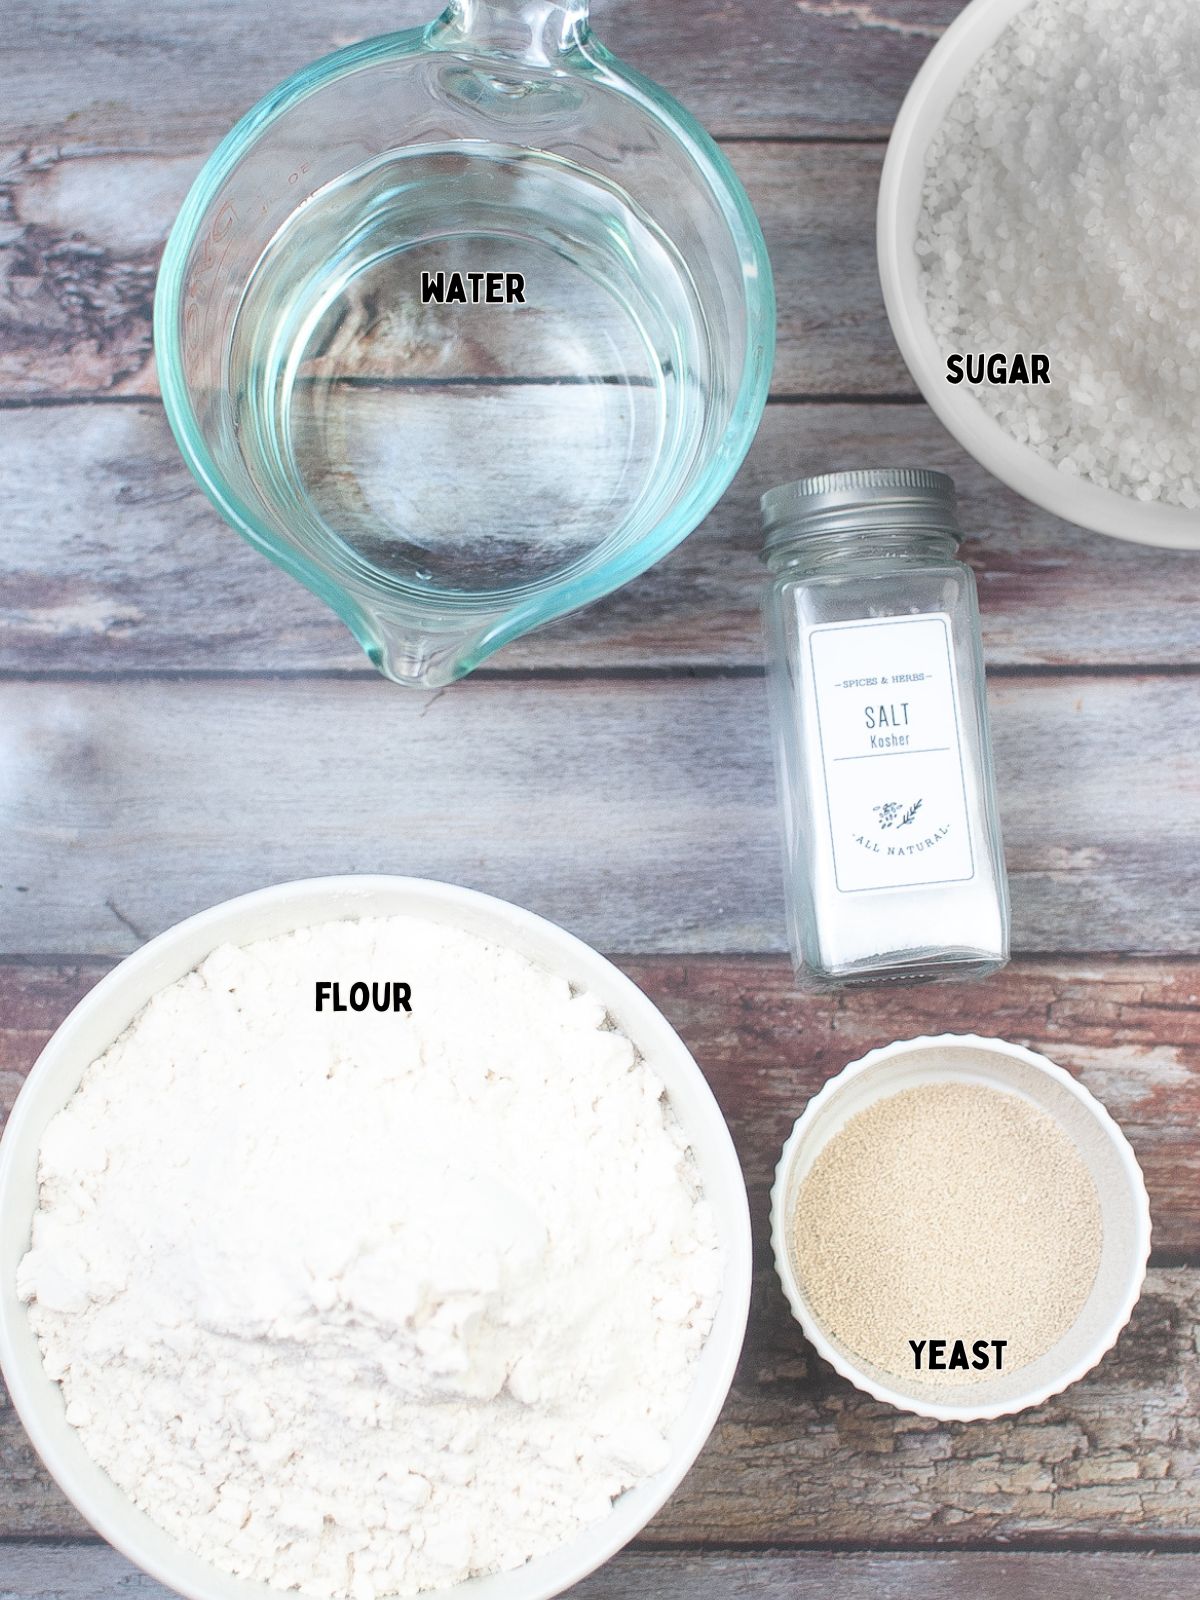
Main Ingredients Needed
Here's a quick overview of the ingredients for this recipe. Find the exact amounts and click the Instacart button to easily add them to your cart – all in the printable recipe card below!
Step-by-Step Directions
This section includes step-by-step photos and instructions to guide you through the recipe. For the complete printable version, scroll down to the recipe card below.

Step 1: Check that the water is between 105 °F and 115 °F using a thermometer, then stir in one teaspoon of sugar to help the yeast grow. Cover the bowl with a small plate to hold in the warmth so the yeast proofs properly.
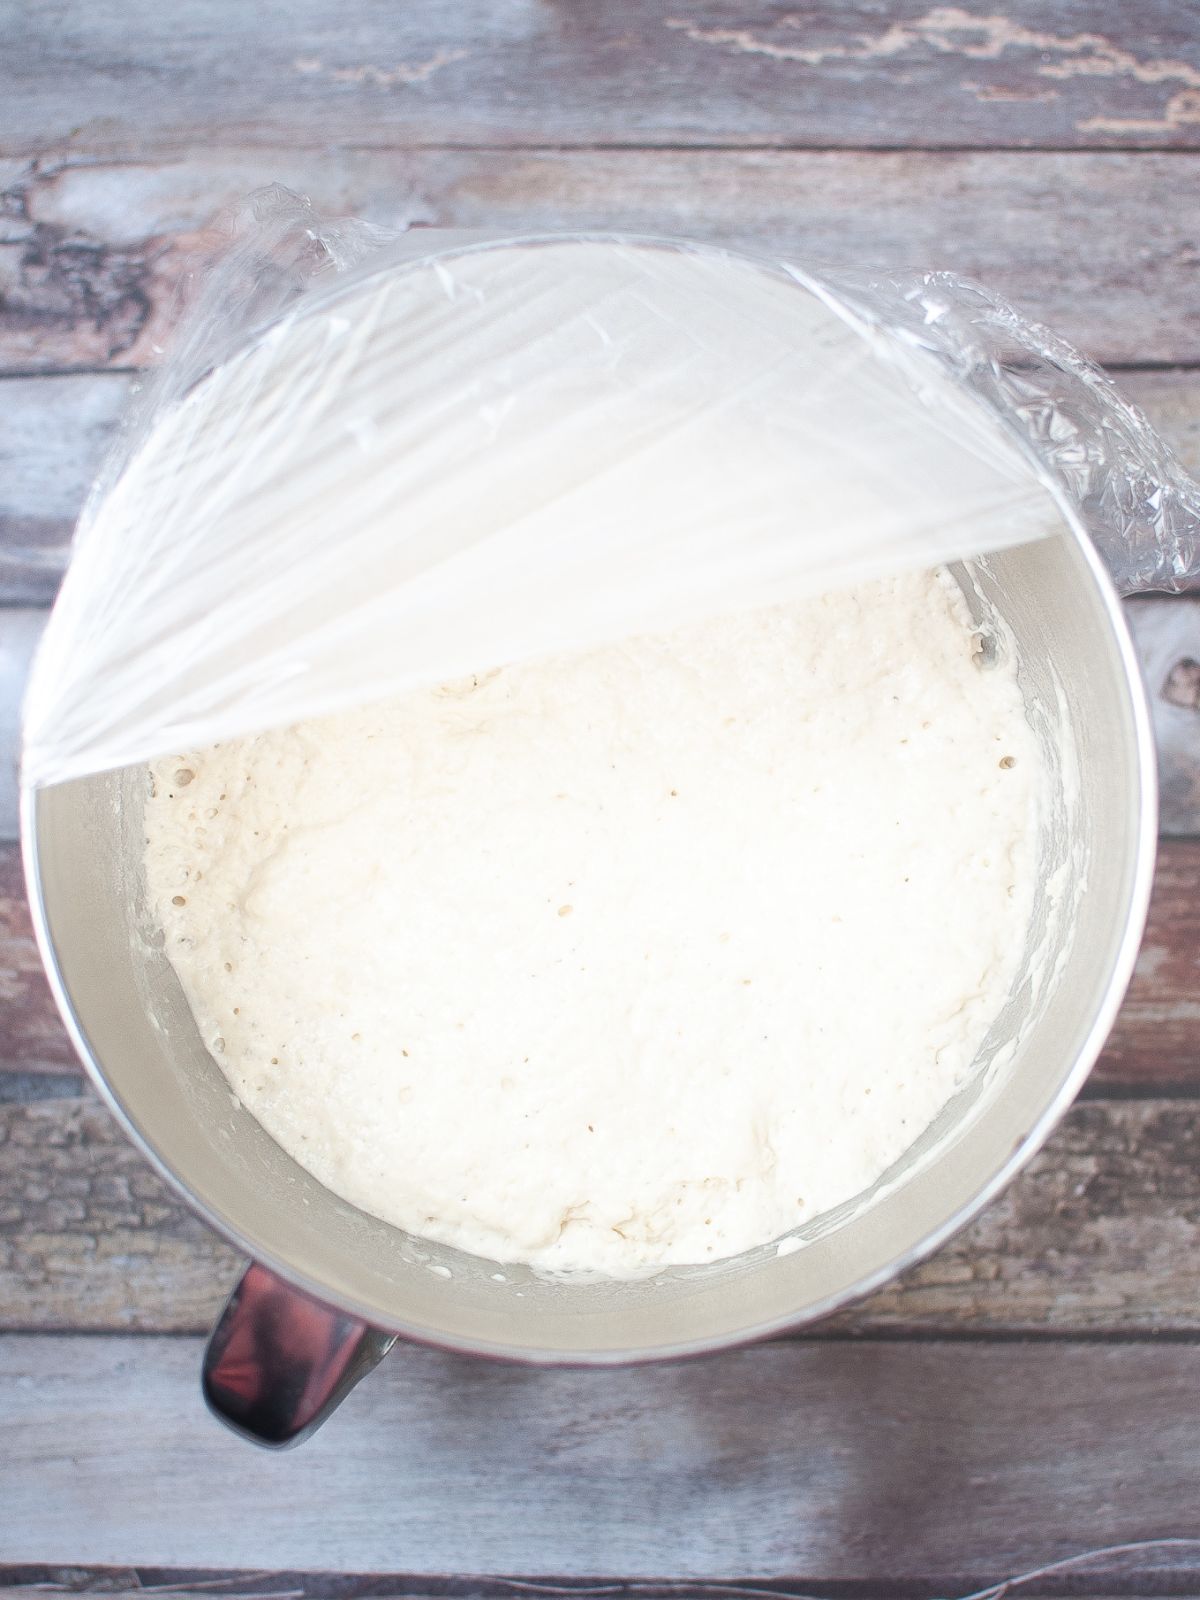
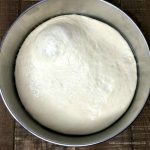
Step 2: In the bowl of your KitchenAid mixer, blend the flour, salt, and remaining teaspoon of sugar, then add the yeast mixture and gradually pour in the last cup of warm water until the dough forms a ball and pulls away from the sides. Knead with the mixer for 5 minutes, adding a little flour if needed, then turn the dough onto a floured board, shape into a ball, and place it in a lightly oiled bowl. Cover with a clean dish towel or plastic wrap and let rise in a warm spot for 20-30 minutes.
How to Shape French Baguette

Step 4: Punch down the dough and transfer it to a floured surface. Divide it in half, then gently roll each piece into a smooth, even log about 14 inches long, tapering the ends slightly to form classic baguette shapes.

Step 5: Lightly grease a baguette pan with non-stick cooking spray and set the shaped loaves in the wells. Cover with a dish towel and let them rise in a warm spot for about 15-30 minutes. No baguette pan? Simply place the loaves on a parchment-lined baking sheet instead.

Step 6: While the dough rises, preheat your oven to 450 degrees Fahrenheit. Place an oven-safe pan filled with water on the bottom rack to create steam during baking. Just before baking, score the top of each baguette with a sharp knife or Bread Lame Dough Scoring Tool. Bake for 15 minutes at 450°F or until golden brown and makes a hollow sound when tapped.
Insider Tips from my Kitchen to Yours
✔️ DO: Proof the yeast until it’s bubbly before adding to the flour; place a baking dish filled ¾ full of water on the oven’s bottom rack to create steam for a crisp crust; and if the baguettes soften, re-crisp them by baking directly on the rack in a hot oven for about 5 minutes, watching carefully.
❌ DO NOT: Use yeast that isn’t bubbly, over-bake when re-crisping, or store leftover baguettes in plastic—wrap in parchment or a brown paper bag instead.
How to Store a Baguette
Storing: Let your homemade baguettes cool completely before tightly wrapping them in parchment paper or placing in a paper bread bags with window. Store at room temperature for 1-2 days to preserve freshness.
YIMITEE 150 Pack Paper Bread Bag with Window, 18
Freezer: Wrap the baguettes in plastic wrap and place in a freezer bag or container for up to 3 months.
Thawing and Reheating: Thaw overnight or for a few hours at room temperature, then bake at 350 °F for 10–15 minutes until warm and crisp.
How to Soften French Baguette
Quick Oven Refresh: Mist crust with water, wrap in foil, and warm at 350 °F for 10–15 minutes, opening foil briefly for a crisp finish.
Microwave with a Damp Towel: Wrap in a slightly damp towel and microwave on medium power for 10–20 seconds.
Steam Method: Place a small dish of water in the oven while reheating at 350 °F to add steam and soften the bread.


LOVE this recipe? SAVE it for Later!
❤️Tap the heart icon in the lower right corner to add the recipe to your recipe box for easy access anytime.
If you made it, leaving a star rating or quick review is always appreciated and helps other readers too.
Want to save this printed recipe? The Ultimate Meal Planner & Recipe Binder helps you keep recipes organized in one easy place.
📖 Recipe Card
Food Nanny Baguette Recipe – Easy French Baguette at Home
Video
Ingredients
- 1 ½ cups warm water 105 - 115 degrees, divided
- 1 ½ tablespoon active dry yeast
- 2 teaspoon sugar divided
- 2 ¾ to 3 ¼ cups bread flour
- 2 teaspoons salt
Method
- Combine ½ cup of the water, the yeast and 1 teaspoon of sugar in a bowl. Stir to combine. Let the mixture stand for about 5 minutes or until it's bubbly.
- In the bowl of your Kitchen Aid Mixer, blend the flour, salt and the other 1 teaspoon of sugar.
- Add the yeast mixture.
- Gradually add the remaining cup of warm water; slowly until the dough starts to form a ball and pull away from the sides of the bowl.
- Set a kitchen timer for 5 minutes and allow the machine to knead the dough adding a little bit of flour if the dough looks too sticky.
- Turn the dough out onto a floured board and shape it into a ball.
- Place the ball into a lightly oiled bowl and cover with a clean dishtowel.
- Let the dough rest in a warm environment for 20 - 30 minutes.
- Punch the dough down and turn it out onto a floured bowl.
- Divide the dough in half and shape into the shape of a baguette or a long log about 14 inches long.
- Grease a baguette pan with non-stick cooking spray and place the loaves in the pan; seam side down. Using a sharp knife, score both loaves down the middle. Cover with a dish towel and place in a warm area to rise for 15 minutes
- Preheat the oven to 450°F while the dough is rising.
- Place an oven-safe pan on the bottom rack of the oven and fill with water. This will create steam while the baguettes bake.
- Using a sharp knife, score both loaves down the middle. Place the pan in the oven and bake for about 15 minutes or until they have a hollow sound when you tap them.
Nutrition
Notes
Tried this recipe?
Let us know how it was!This recipe has been updated since it first appeared in 2018 with new photos, information and a new printable recipe card that includes nutritional information. I hope you enjoy the updates as much as I enjoyed working on them!

Linda says
This is a perfect recipe! I started it at 2pm and it was ready in plenty of time for dinner (and we eat early - 5pm). Shared it with my daughter as my granddaughter is really showing a lot of interest in cooking/baking.
Lois says
What a wonderful comment! Thank you so much for the 5-star rating!
Dave says
Just made this recipe, bread came out golden brown, it just wasn’t as crispy as it should have been. I’ll make it again but this time I’ll spritz the tops of the loaves with water when they go into the oven. Otherwise, it’s a solid recipe, Thank You.
Lois says
Glad you enjoyed the recipe. I find that when the loaves come out of the oven and sit for awhile, they will soften up. I'll put them back in the oven at 450°F for a few minutes to crisp them up before serving.
Debrashoppeno5 says
Oh, my this looks so good. I love serving bread with dipping oils. The homemade bread would be so delicious with the herbs.
Lois says
My husband loves dipping oils as well. Thanks for visiting!
Michelle James says
Oh yum! Nothing like homemade bread! Thank you for linking up at Merry Monday. Hope you will link up with us again! https://ourcraftymom.com/12-easy-ways-to-decorate-with-succulents/
Lois says
Thanks Michelle! Your party is a favorite of mine!