


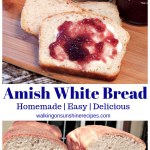
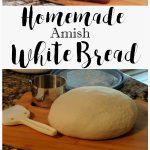
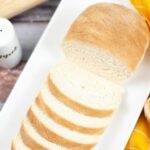
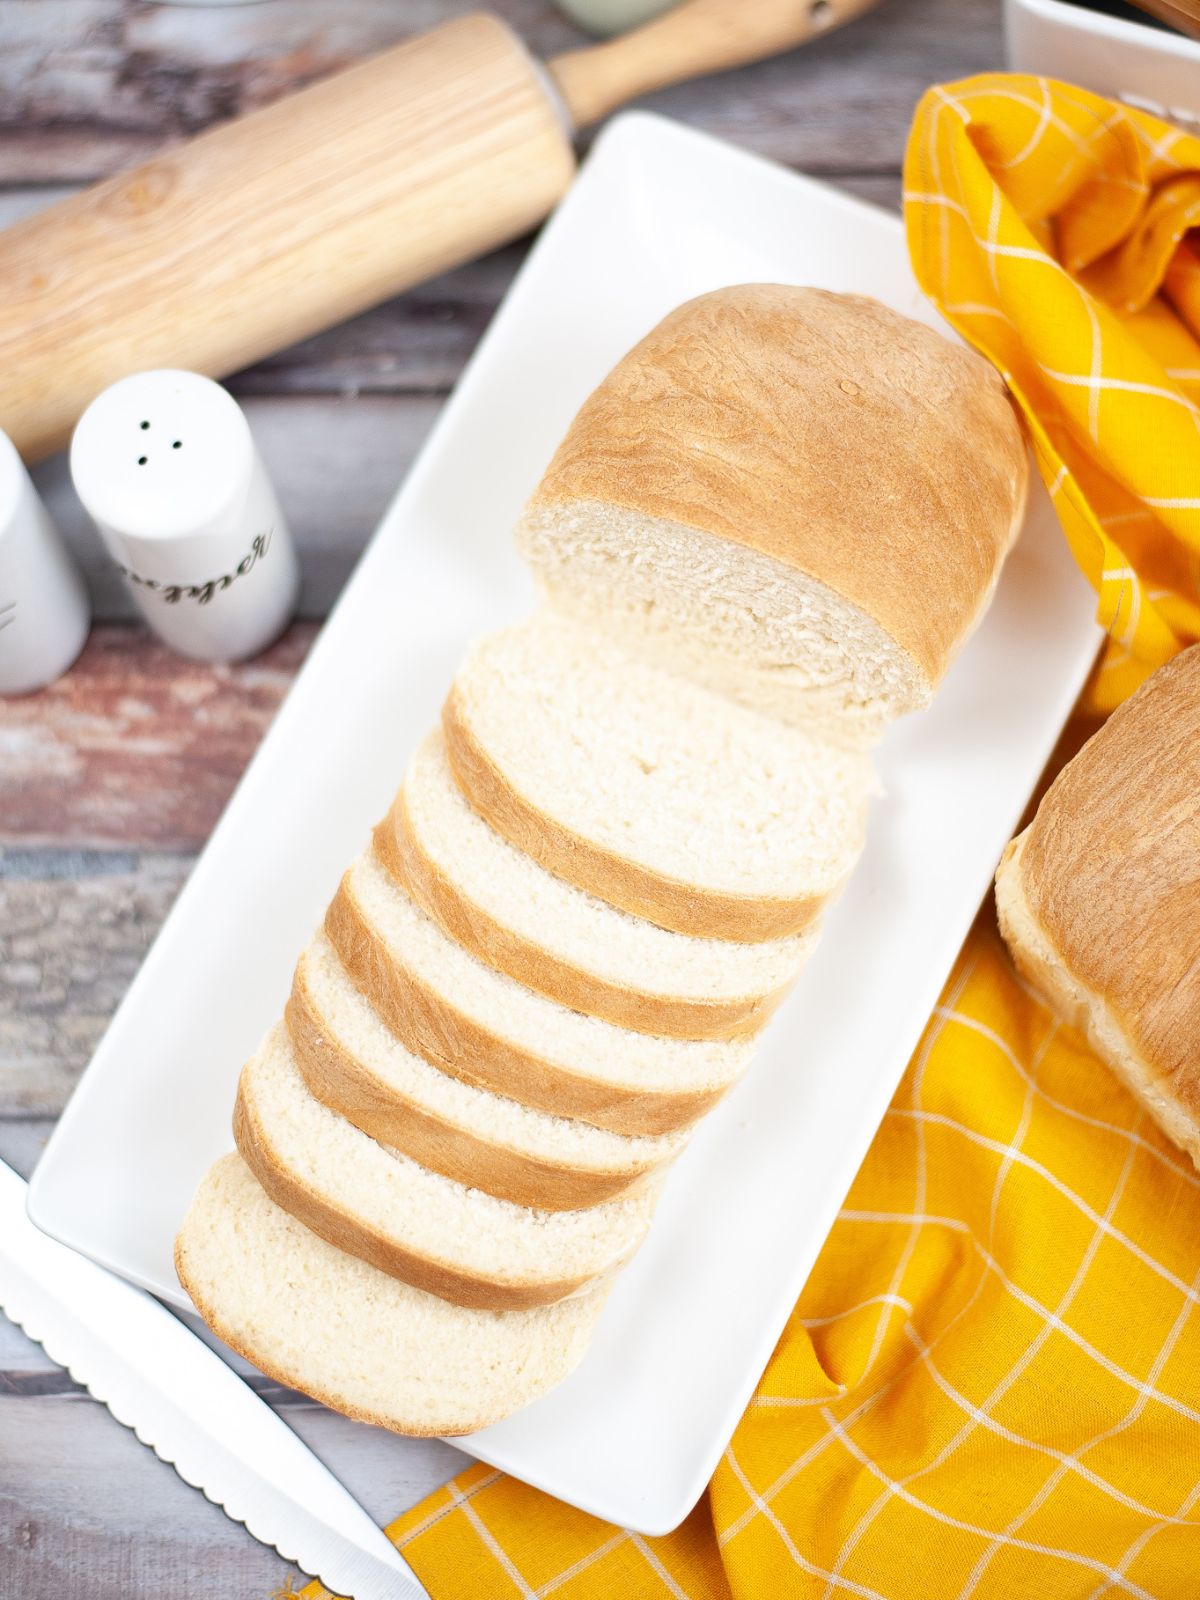
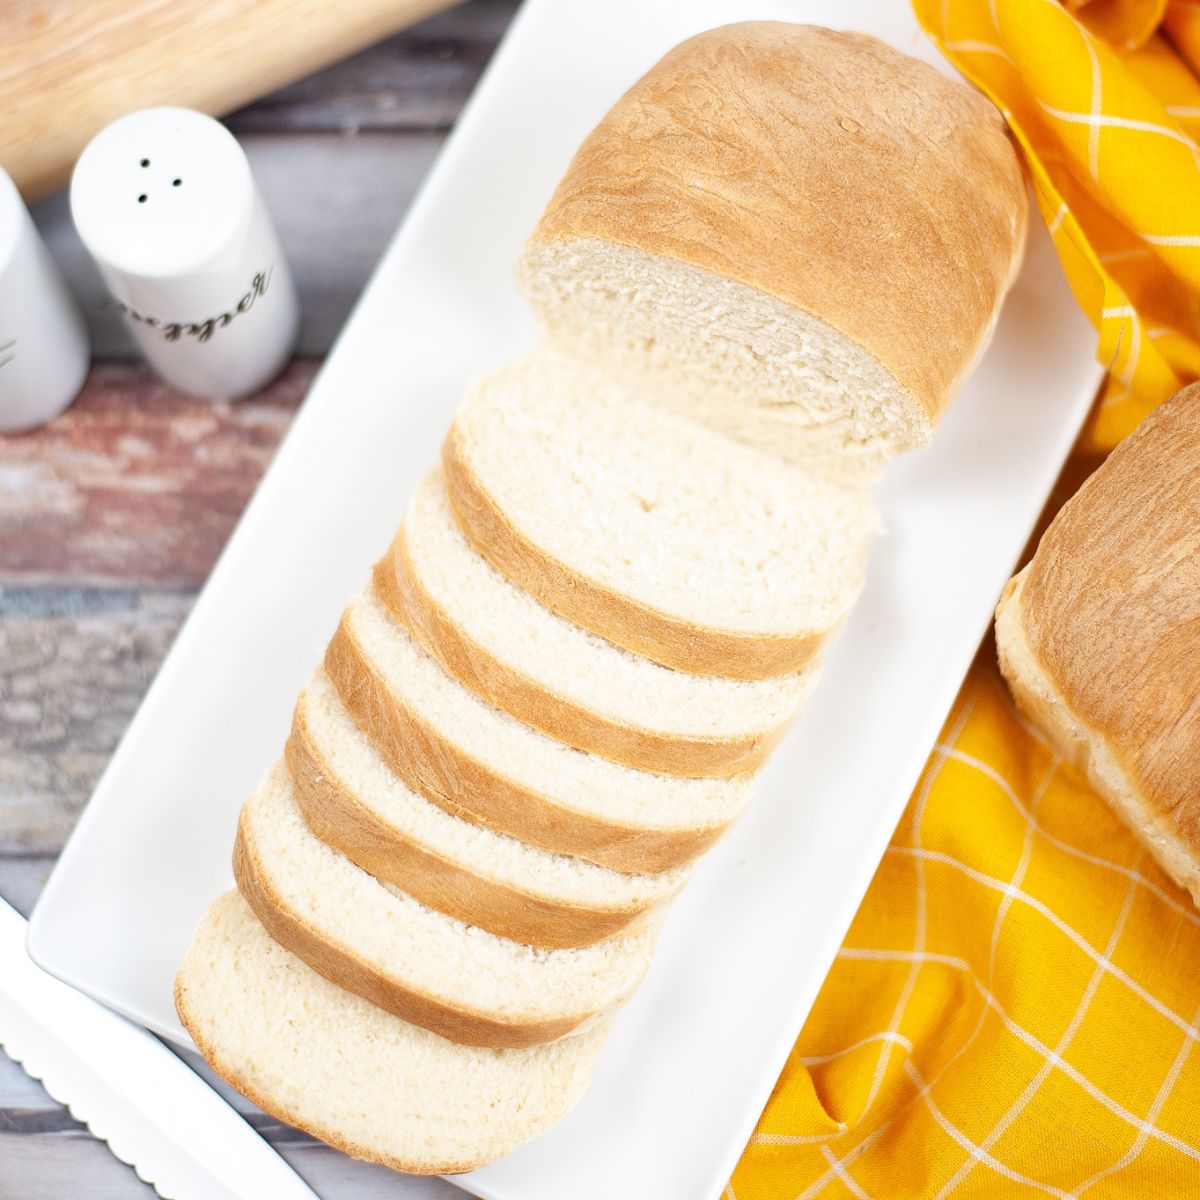
There’s nothing quite like the smell of freshly baked bread filling your kitchen, and this Amish Bread recipe is a must-try for any home baker.
This recipe was my first experience with yeast, and it instantly made me fall in love with homemade baking! This simple, time-tested recipe delivers consistently delicious results.
For a cozy homemade meal, pair this recipe with one of my Family Dinner Ideas—be sure to check out the full collection for even more delicious inspiration!
Want to Save This Recipe?
Enter your email & I'll send it to your inbox. Plus, get great new recipes from me every week!
By submitting this form, you consent to receive emails from Walking on Sunshine Recipes.
I've been making this bread recipe for over 30 years—it was the first yeast bread dough I taught myself how to make, and it's been a favorite ever since.
Only back then, there was no internet or blogs to guide me through baking bread from scratch.
When I first made this recipe, all I had was a big blue bowl and a wooden spoon—no KitchenAid mixer in sight. So if you don’t have a stand mixer, don’t worry—you can still make this by hand and get delicious results!
If you're looking for another homemade option, try my Homemade Honey Wheat Bread , or if you'd rather skip the yeast, check out my easy No Knead Bread Recipe made without it!
Table of Contents
- Why my Family LOVES this Homemade Bread Recipe:
- Helpful Kitchen Items
- Recipe Ingredients
- Recipe Substitutions and Variations
- Step-by-Step Instructions
- What does Foamy Yeast Look Like?
- Expert Tips
- Baking Instructions
- LOVE this recipe? SAVE it for Later!
- Amish Bread Machine Recipe
- How to Store, Freeze and Reheat
- Recipe FAQ's
- More Bread Recipes to LOVE
- 📖 Recipe Card
- Food Safety Tips
- 💬 Comments
Why my Family LOVES this Homemade Bread Recipe:
It's easy to make – Perfect for beginners, with simple ingredients and step-by-step instructions.
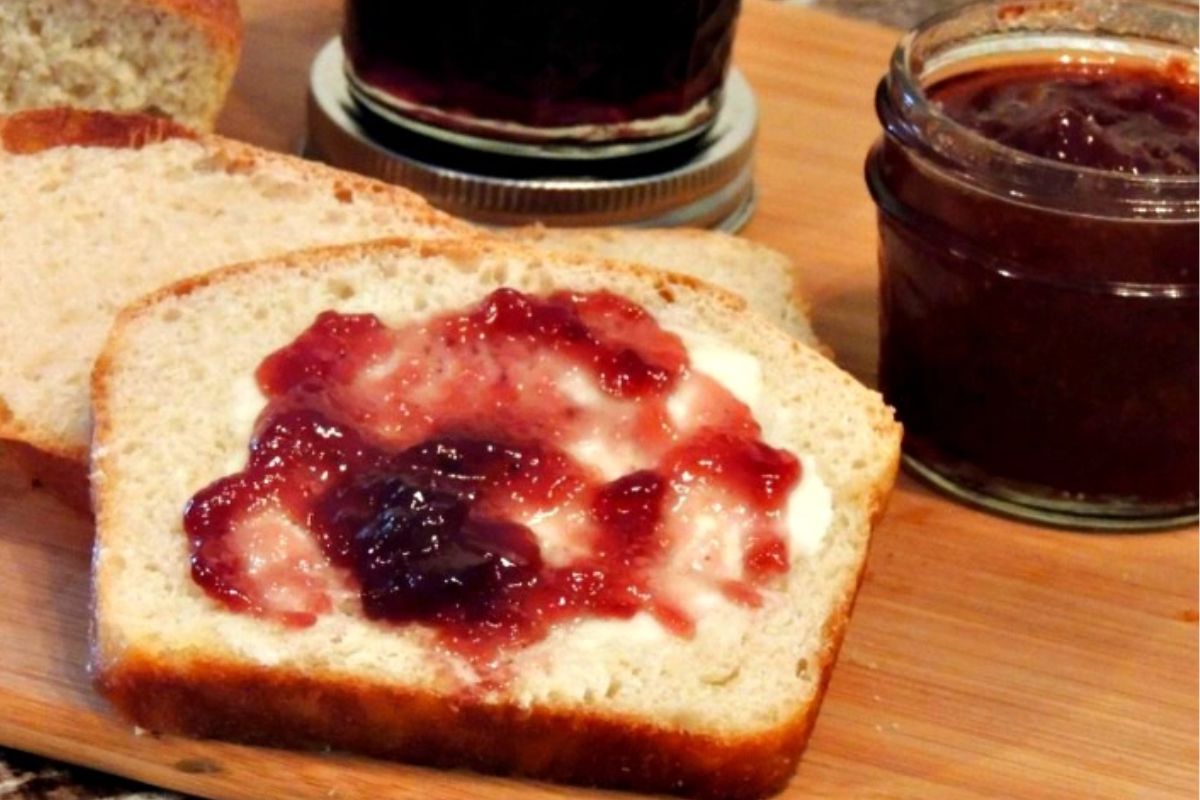
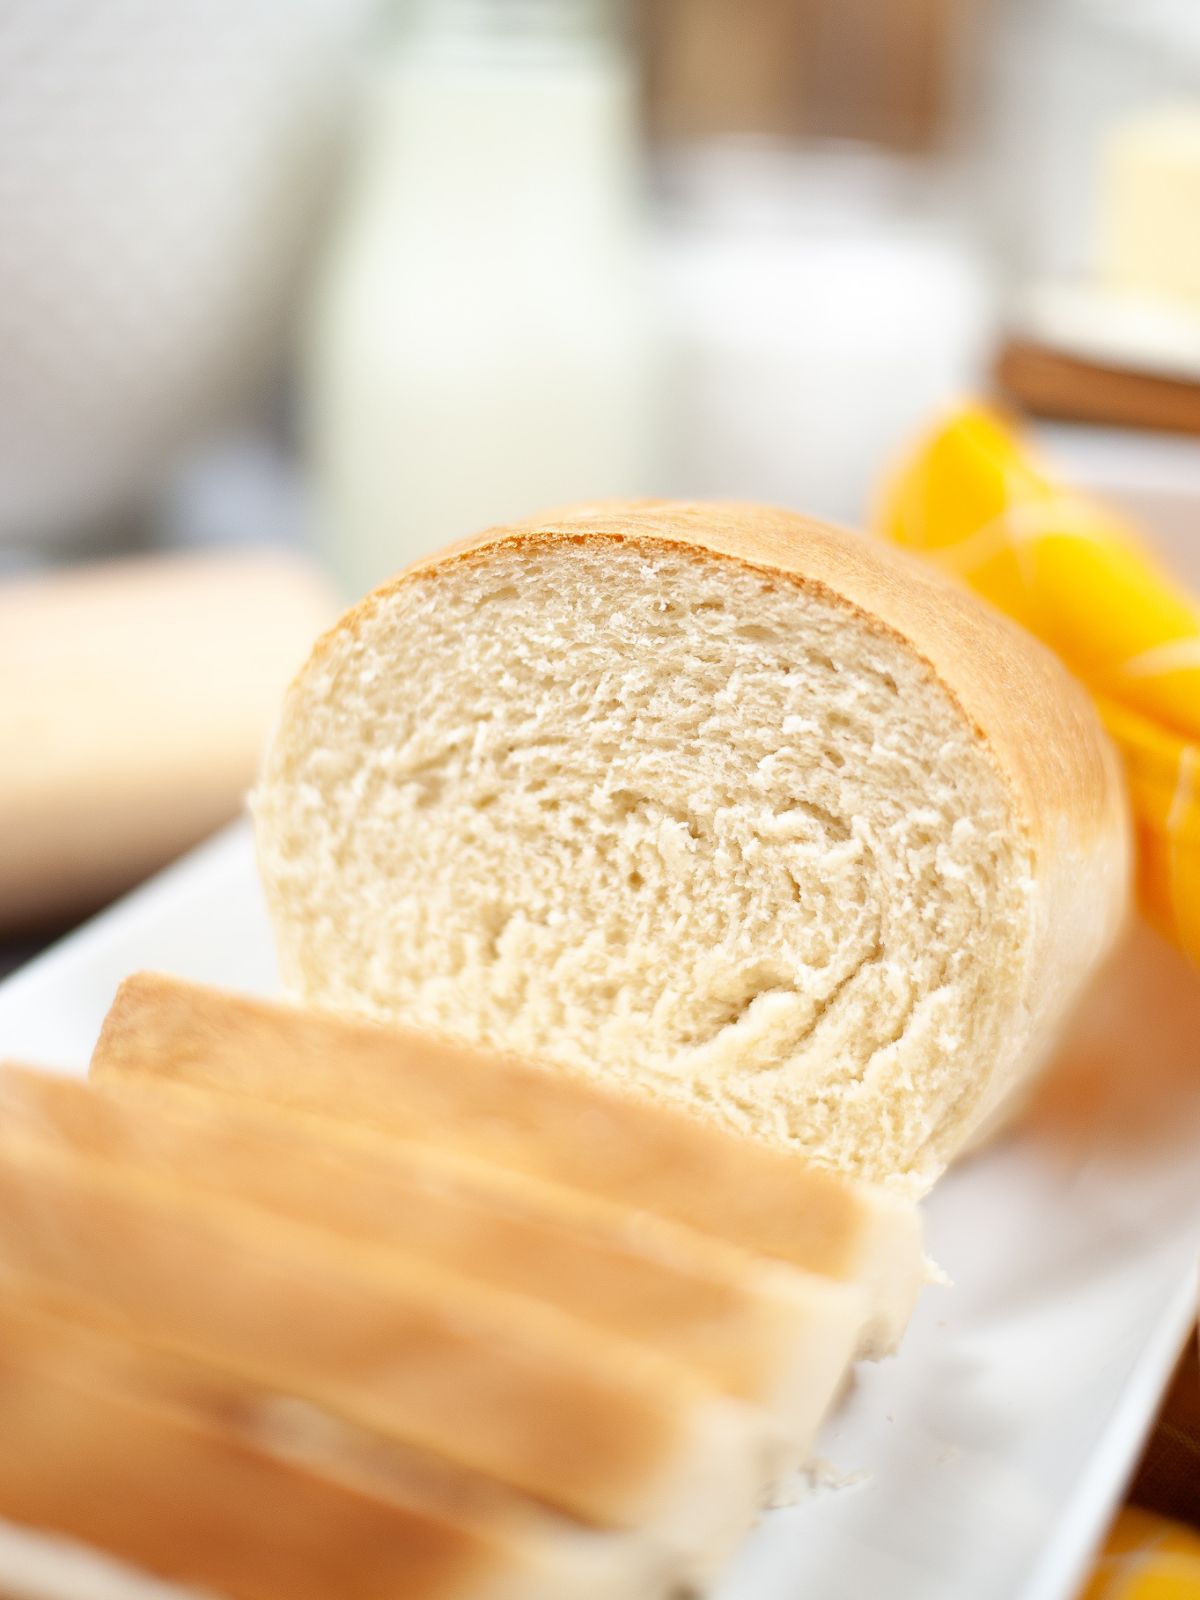
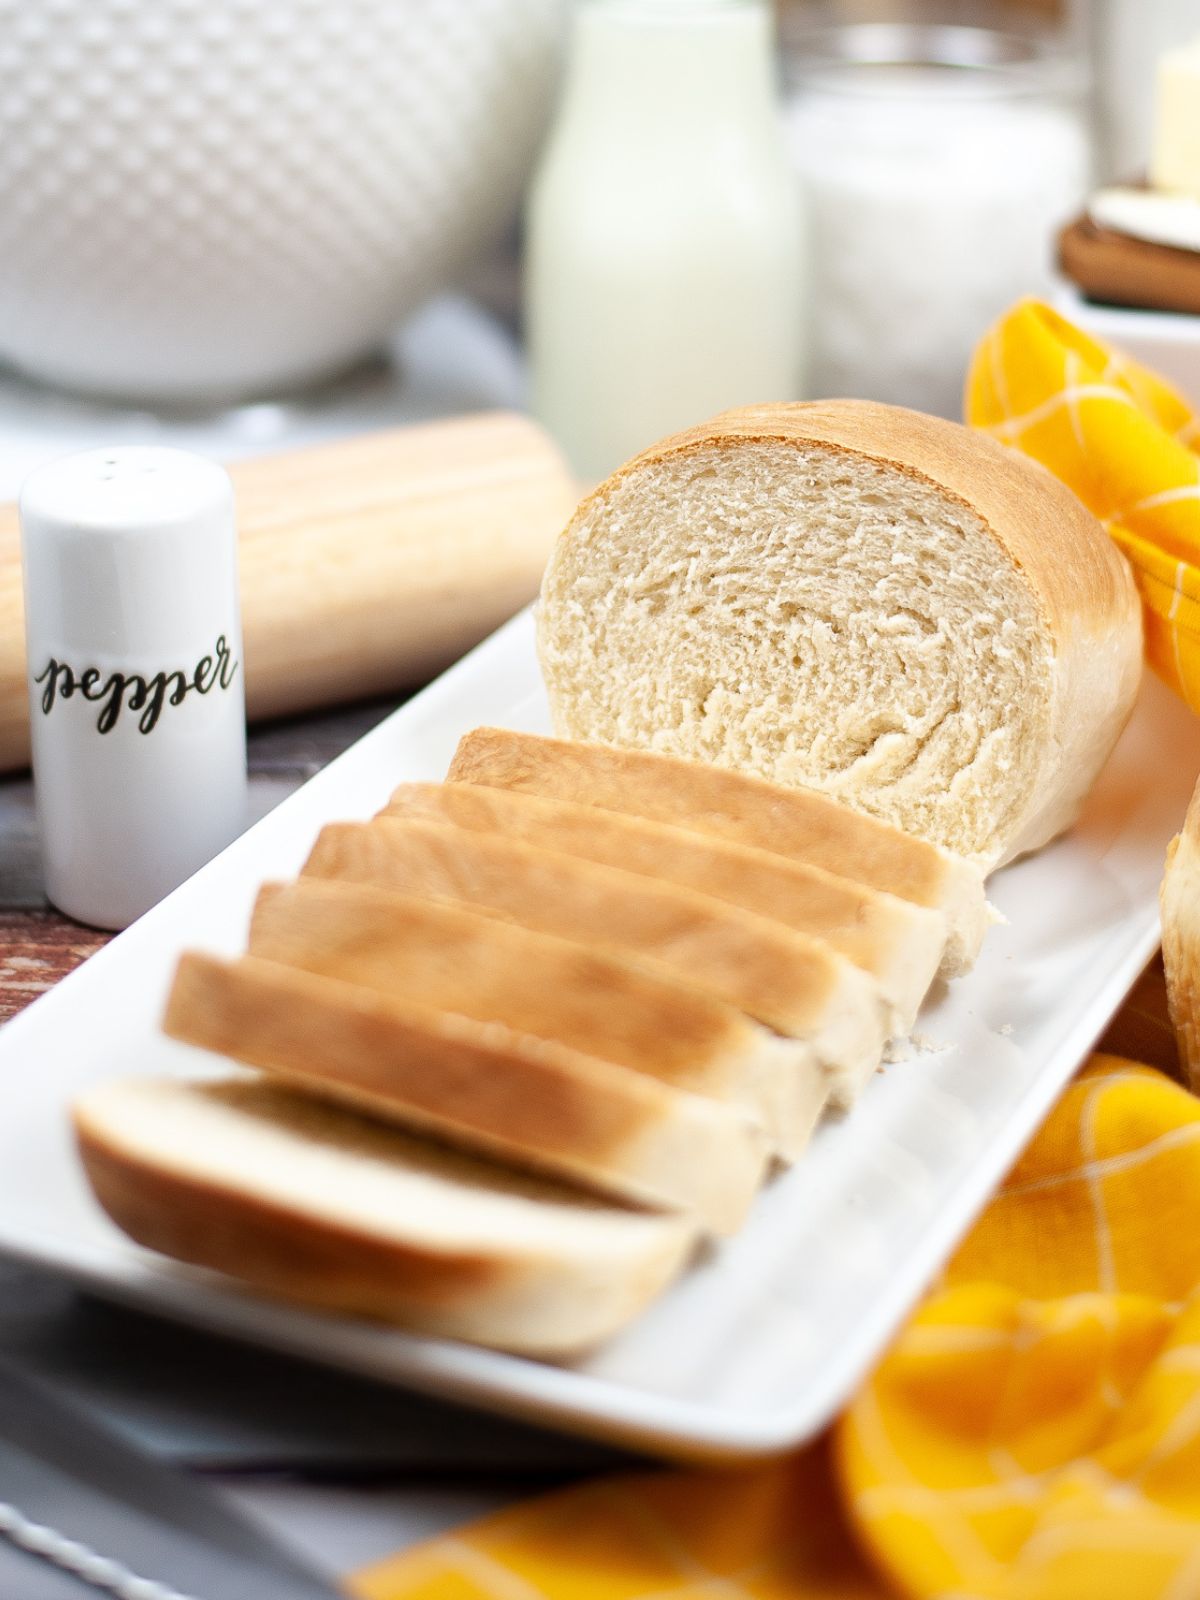
Soft and slightly sweet – The texture is light and fluffy, making it great for sandwiches, toast, or even as a side for dinner. I've even used it for pizza dough!
Better than store-bought – Freshly baked at home means no preservatives, just pure homemade goodness.
No special equipment needed – No stand mixer? No problem! This recipe can be made by hand with just a bowl and a spoon.
Versatile and family-friendly – Enjoy it fresh, use it the next day for French toast, or turn it into delicious homemade croutons!
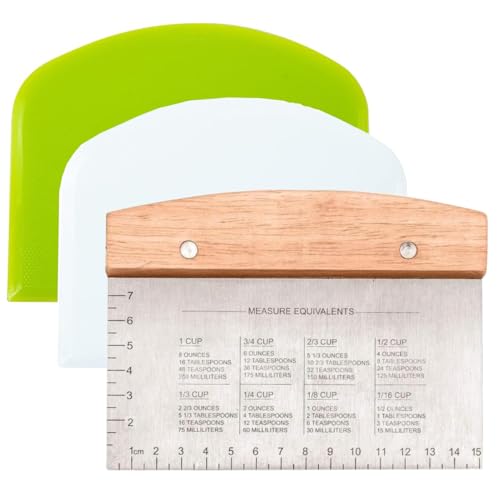
Helpful Kitchen Items
KitchenAid® 7 Quart Bowl-Lift Stand Mixer, Blue Velvet Premium Stainless Steel Dough Cutter and Scraper - Versatile Kitchen Utensil for Bread, Pizza, and Flat Top Griddles - Commercial Grade Bench Scraper and ChopperGoodCook Set of 2 Medium Non-Stick 8” x 4” Bread Loaf Pans – Loaf Bread Pan for Baking, Steel Bread Baking Supplies, Baking Pans for Meatloaf, Breads, Cakes, Brownies, Lasagnas, CasserolesThermoMaven ProfessionaI Meat Thermometer Digital, 3X Faster 0.5 Sec Instant Read, NIST Certified Accuracy ±0.5°F, 100% Waterproof Probe, Auto-Rotate Bright Indicator, for Candy/Grill/BBQ, Red & Gray


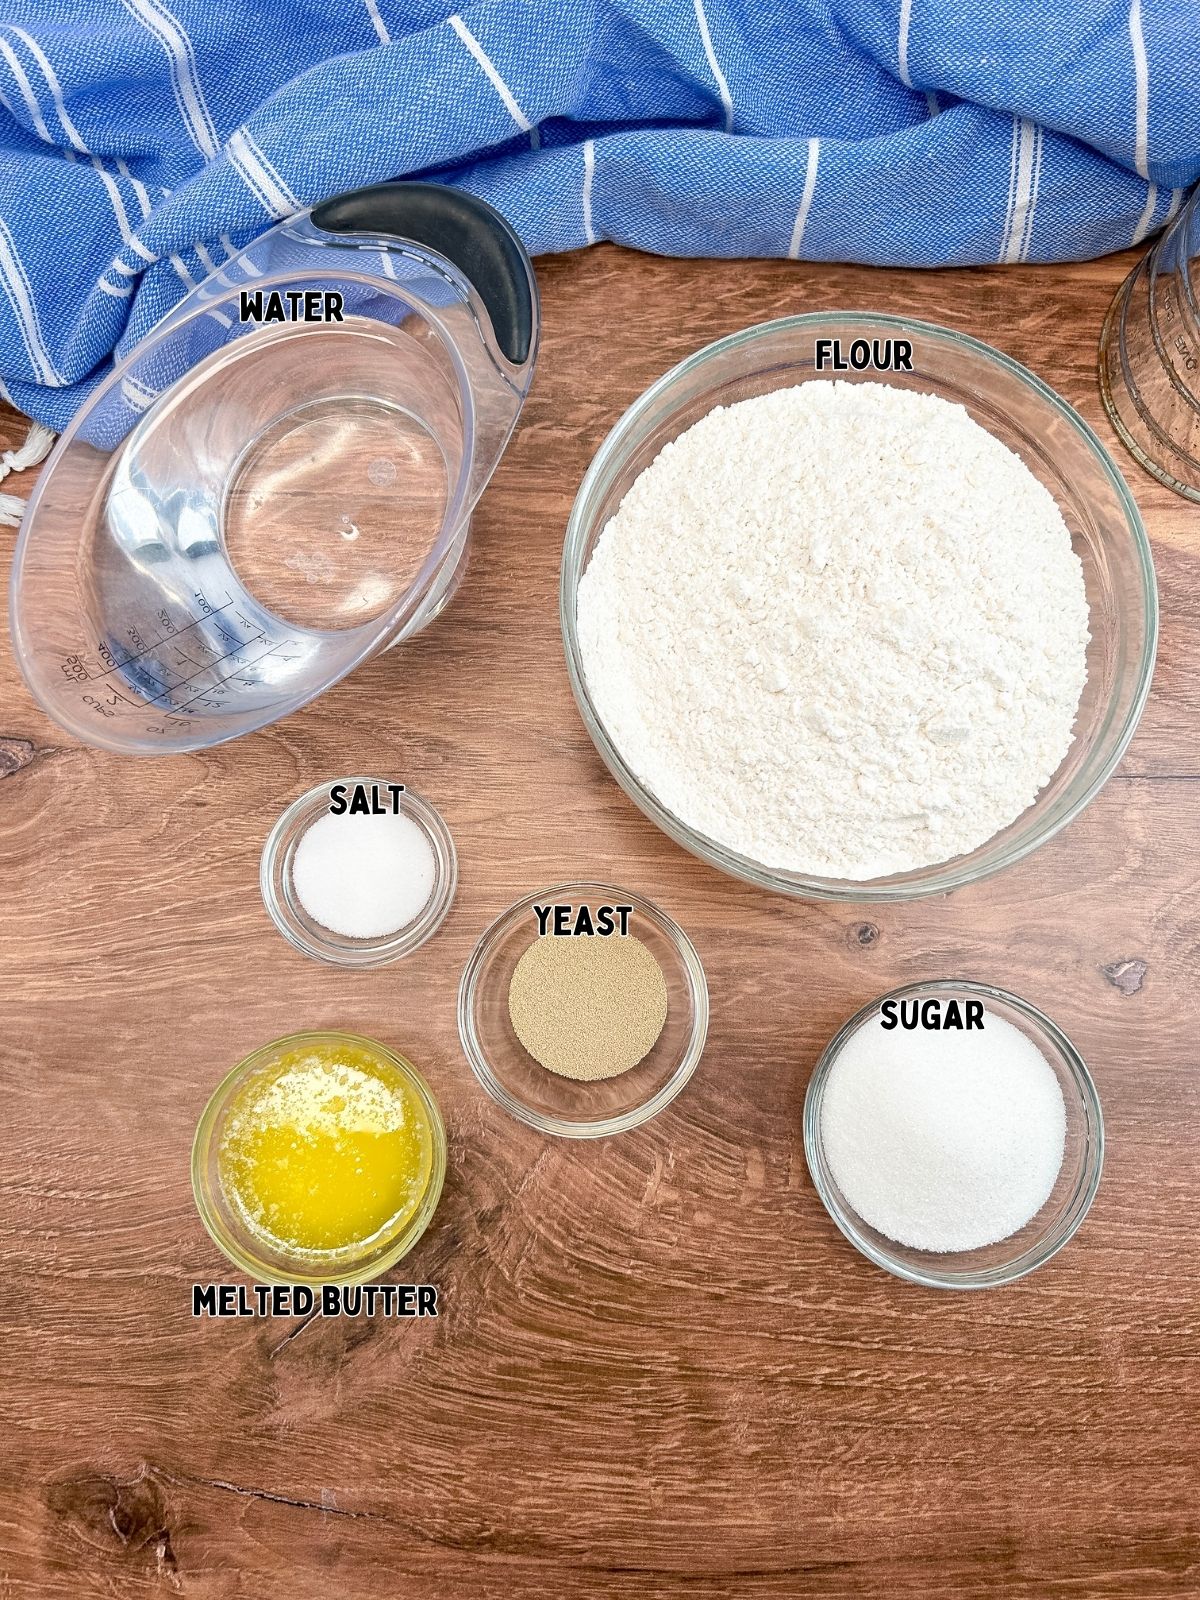
Recipe Ingredients
Below is a quick preview of the ingredients you’ll need. For exact amounts, check the recipe card below. You can also use the "Shopping List button" to create a printable shopping list, or the "Get Ingredients button" in the recipe card to order groceries online.
Recipe Substitutions and Variations
- Instead of all-purpose flour, you can use bread flour. It will have less protein, but it still works well.
- You could also substitute 25-50% of the white flour with whole wheat flour which will add more fiber and a heartier texture.
- If you're looking for a gluten-free option, try using a 1:1 baking blend with xanthan gum for best results.
- Looking for a homemade bread that's perfect for sandwiches? Try my Amish Sandwich Bread—it's a delicious everyday favorite!
Step-by-Step Instructions
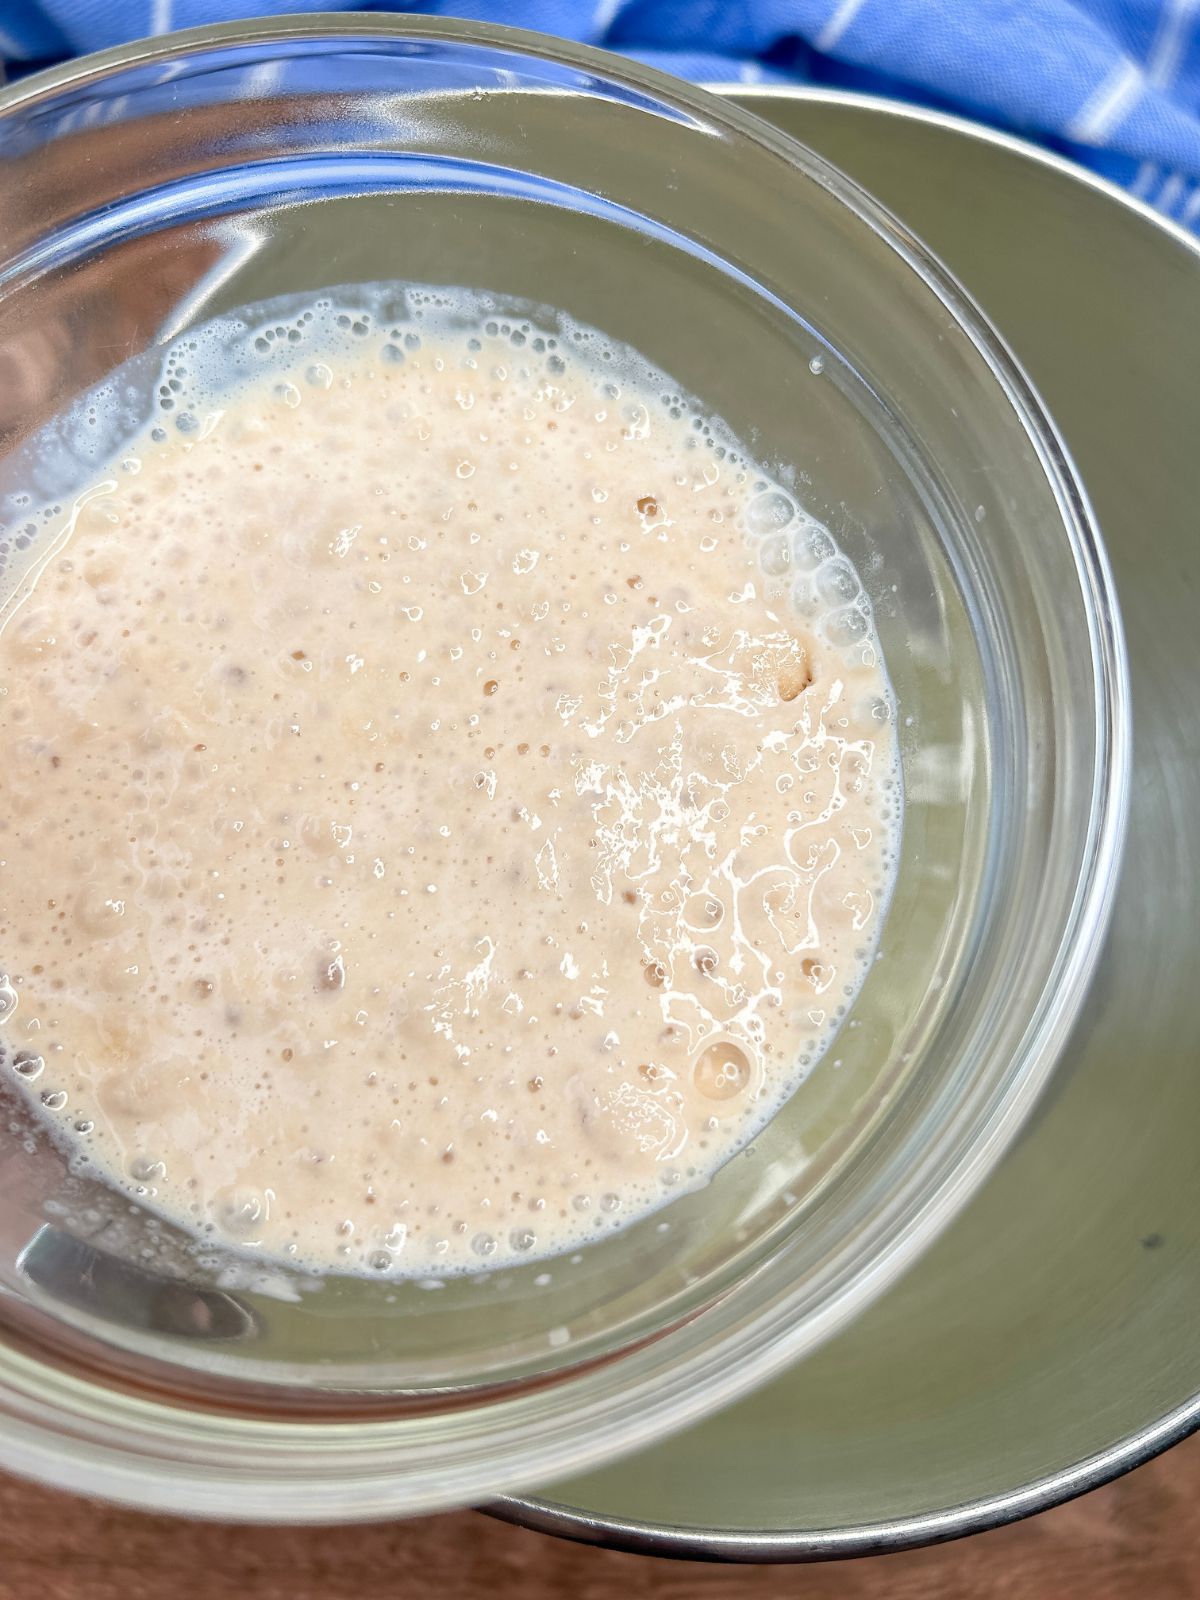
Step 1: In a small bowl, combine the yeast with 1 teaspoon of sugar and ½ cup of warm water. Stir to dissolve, cover with a plate to trap the heat, and let it sit for about 5 minutes until foamy and bubbly.
Step 2: Cover with a plate to keep the heat in, then let it sit for about 5 minutes until it becomes foamy and bubbly.
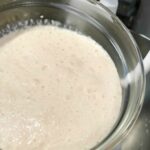
What does Foamy Yeast Look Like?
Foamy yeast, also known as proofed or activated yeast, looks like a bubbly, frothy layer on top of the liquid it was mixed with.
It typically has a creamy, slightly tan color and can appear thick and foamy, similar to the head on a glass of beer. The foam forms when the yeast feeds on sugar and produces carbon dioxide, indicating that it is alive and ready to use for baking.
If your yeast mixture doesn’t look like the photo above and remains flat after 5–10 minutes, it’s best to try again or start over with fresh yeast to ensure your dough rises properly.
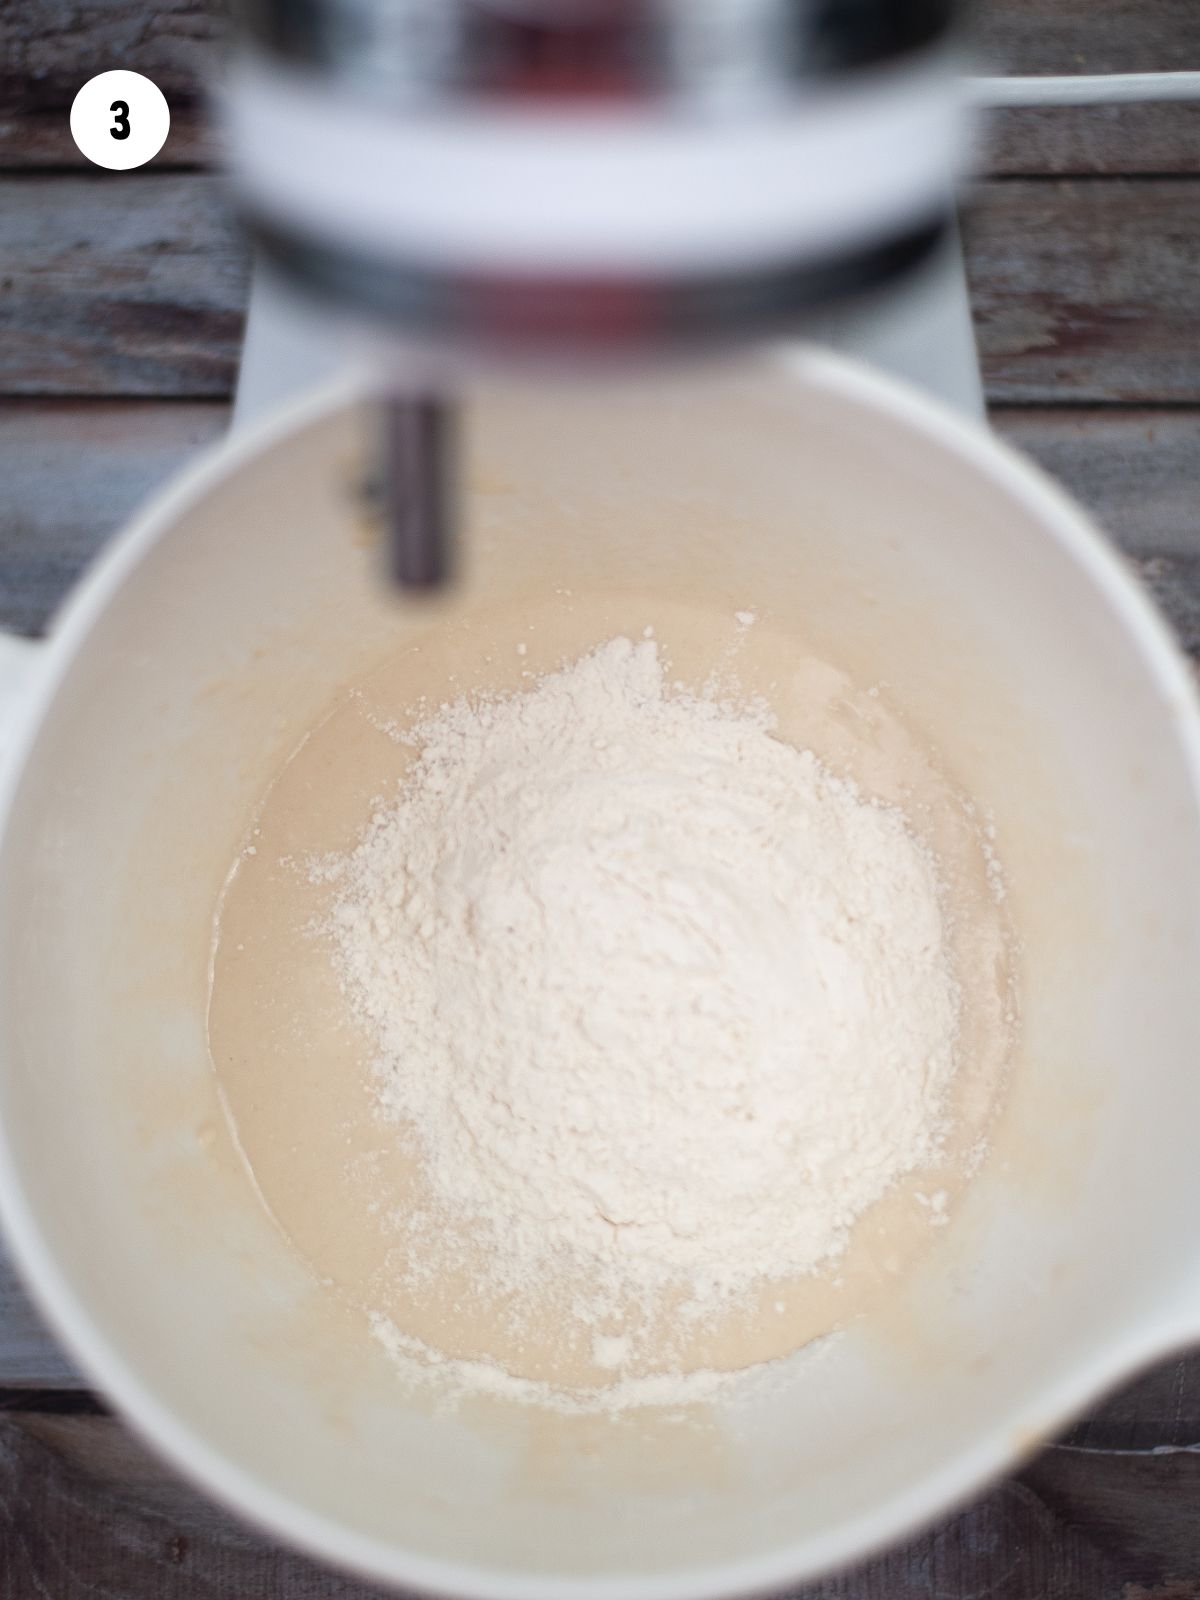
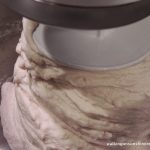
Step 3: In a stand mixer with a dough hook, combine sugar, salt, warm water, melted butter. Then add the proofed yeast.
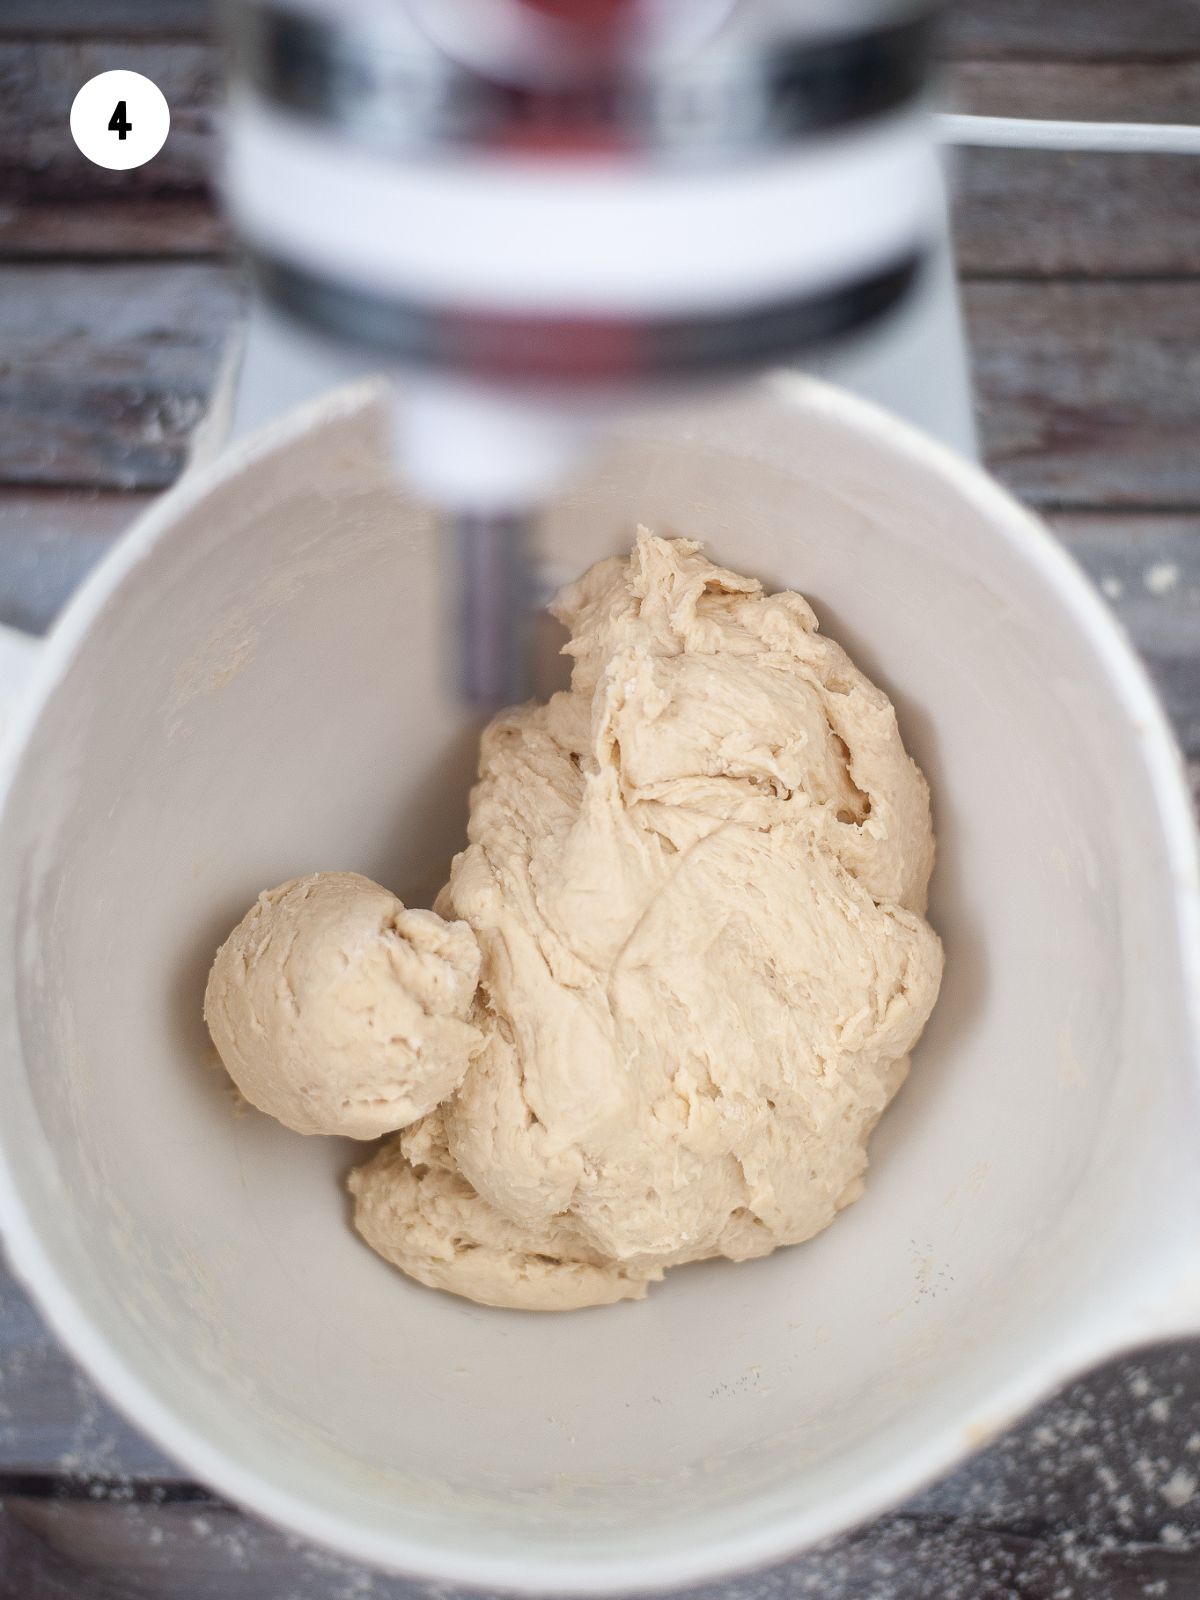
Step 4: Gradually add flour, one cup at a time, until the dough pulls away from the bowl. Knead for 5 minutes.
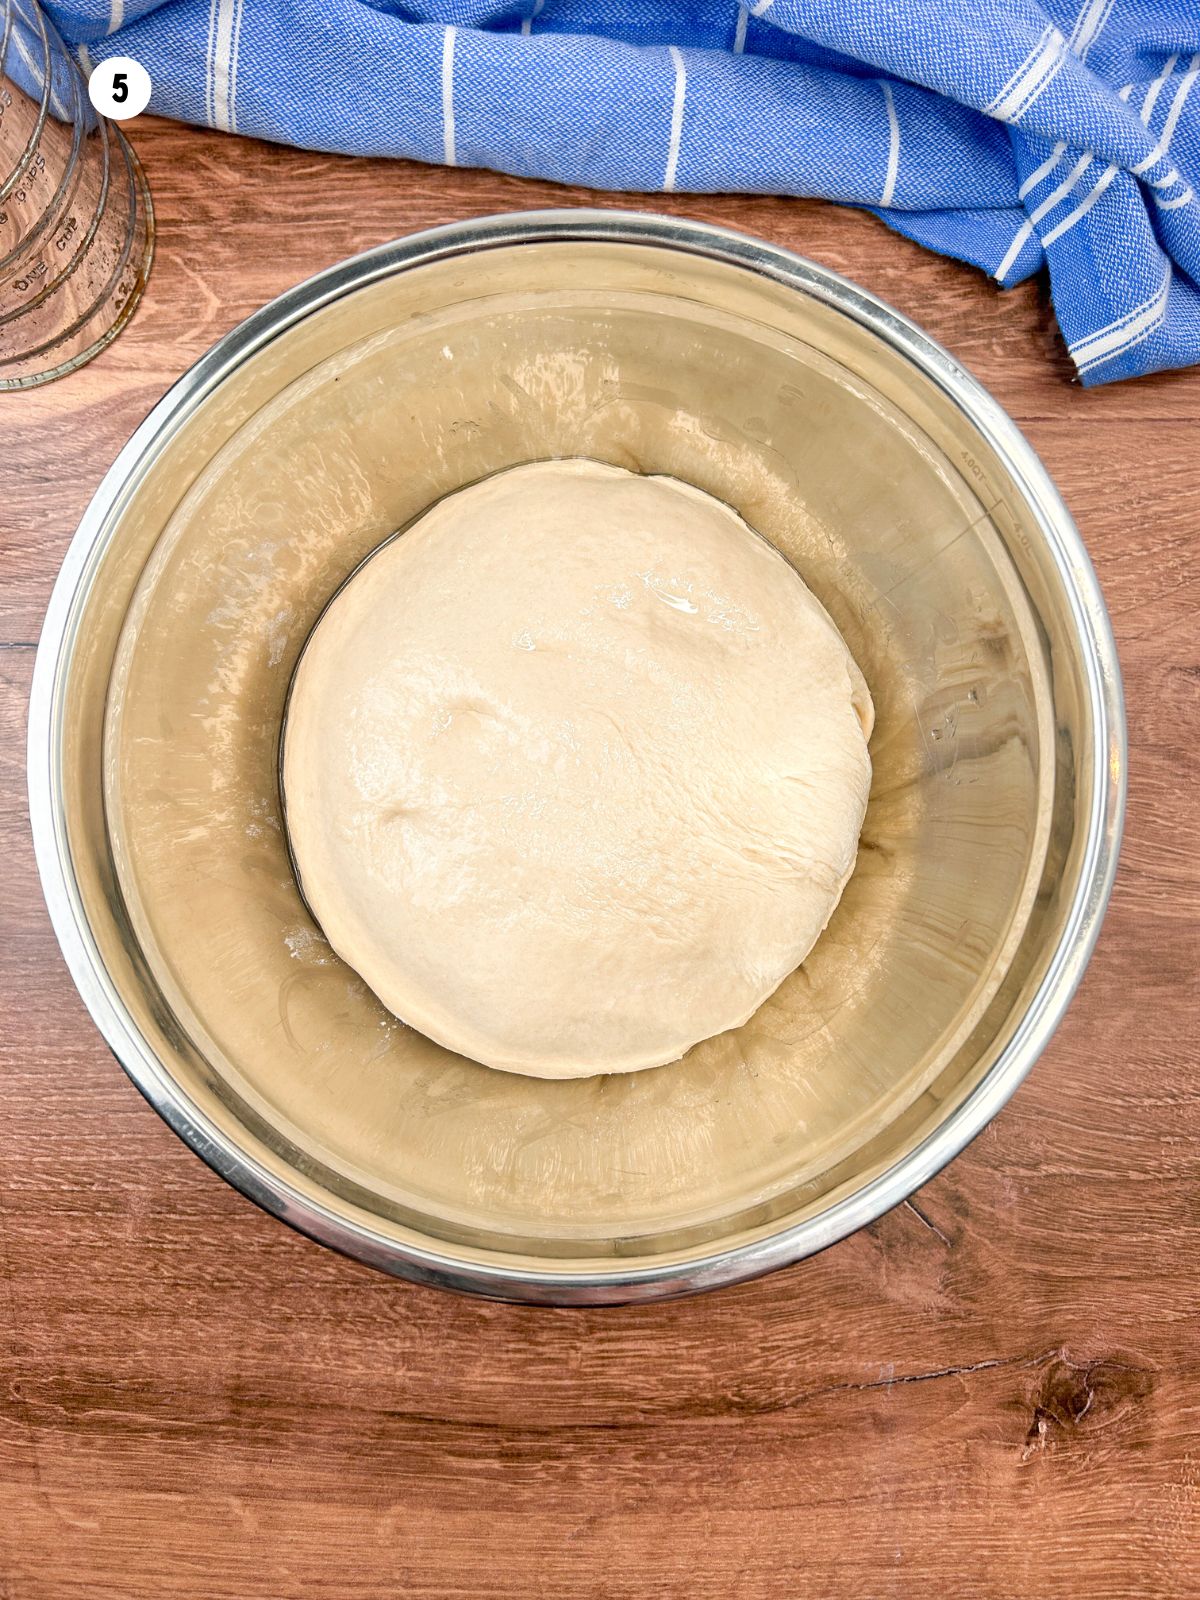
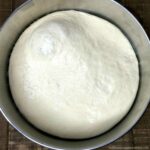
Step 5: Transfer the dough to a lightly floured surface, knead a few times, then place it in an oiled bowl, turning to coat both sides. Cover with a clean kitchen towel and set it aside.
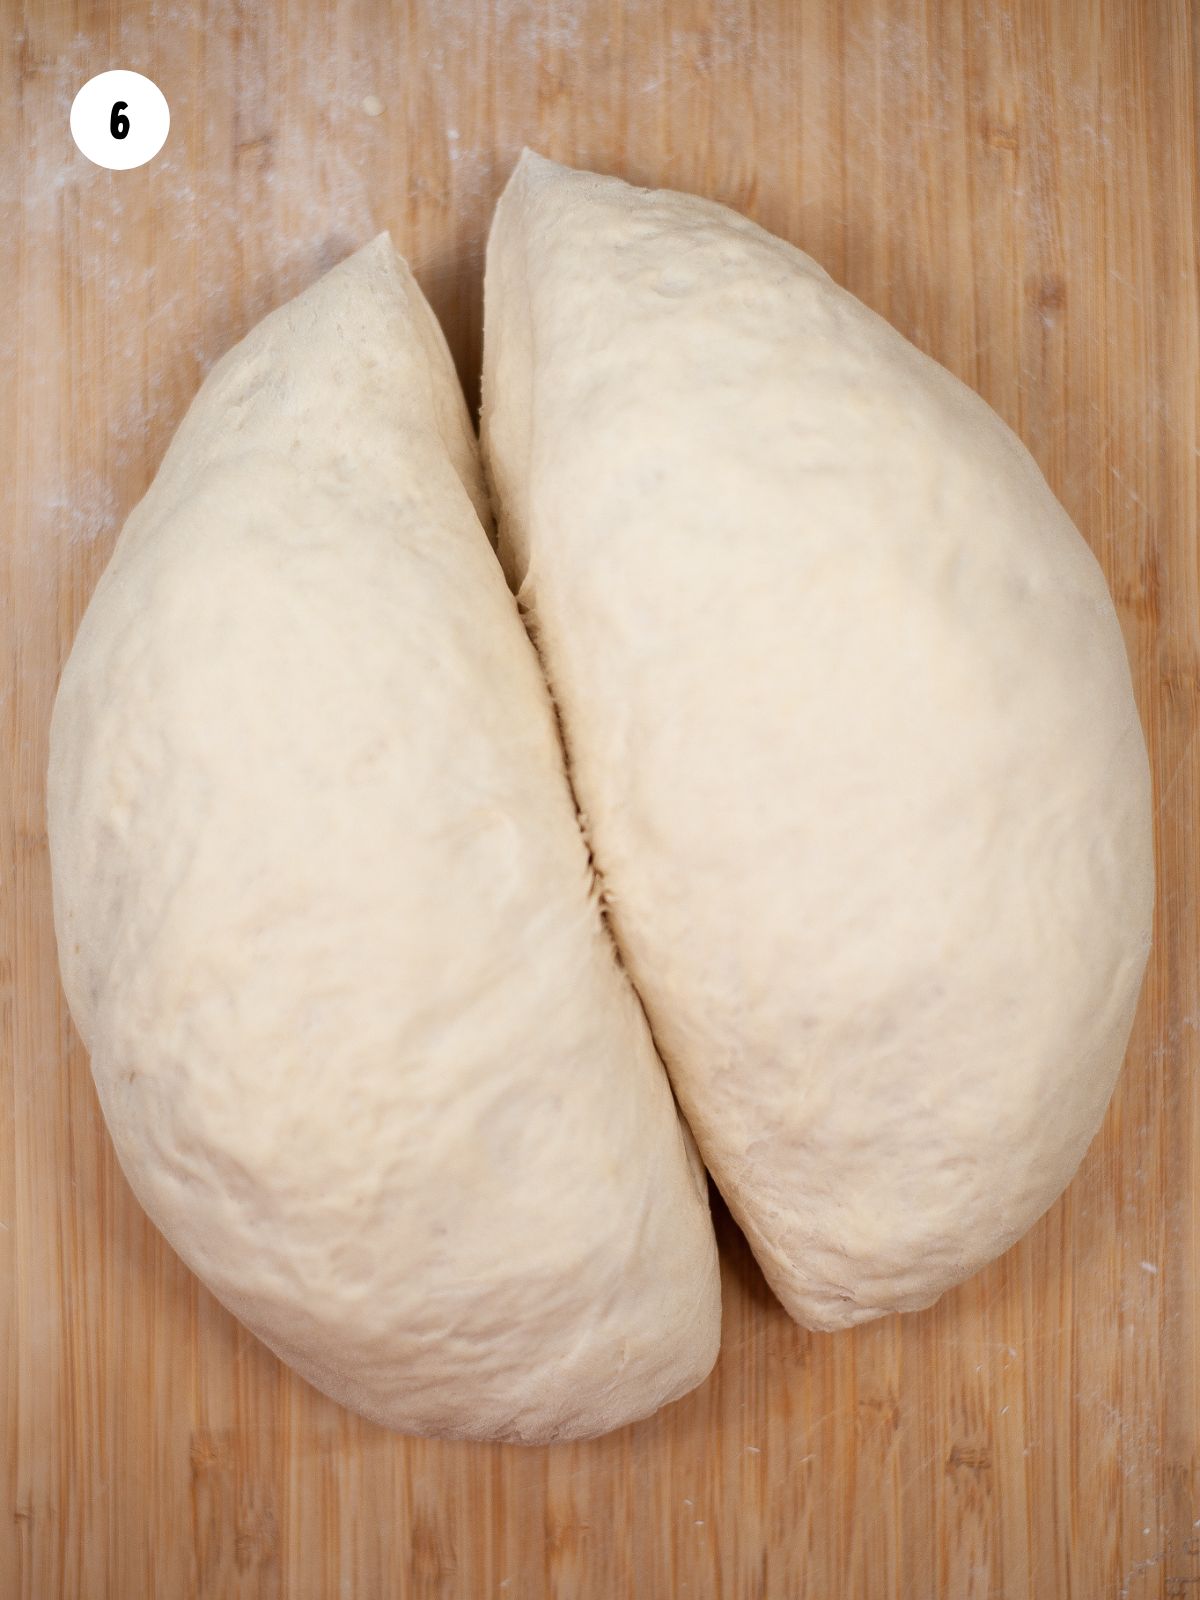
Step 6: Let the dough rise for about an hour, or until it doubles in size. Once risen, punch it down and divide it into two equal portions.
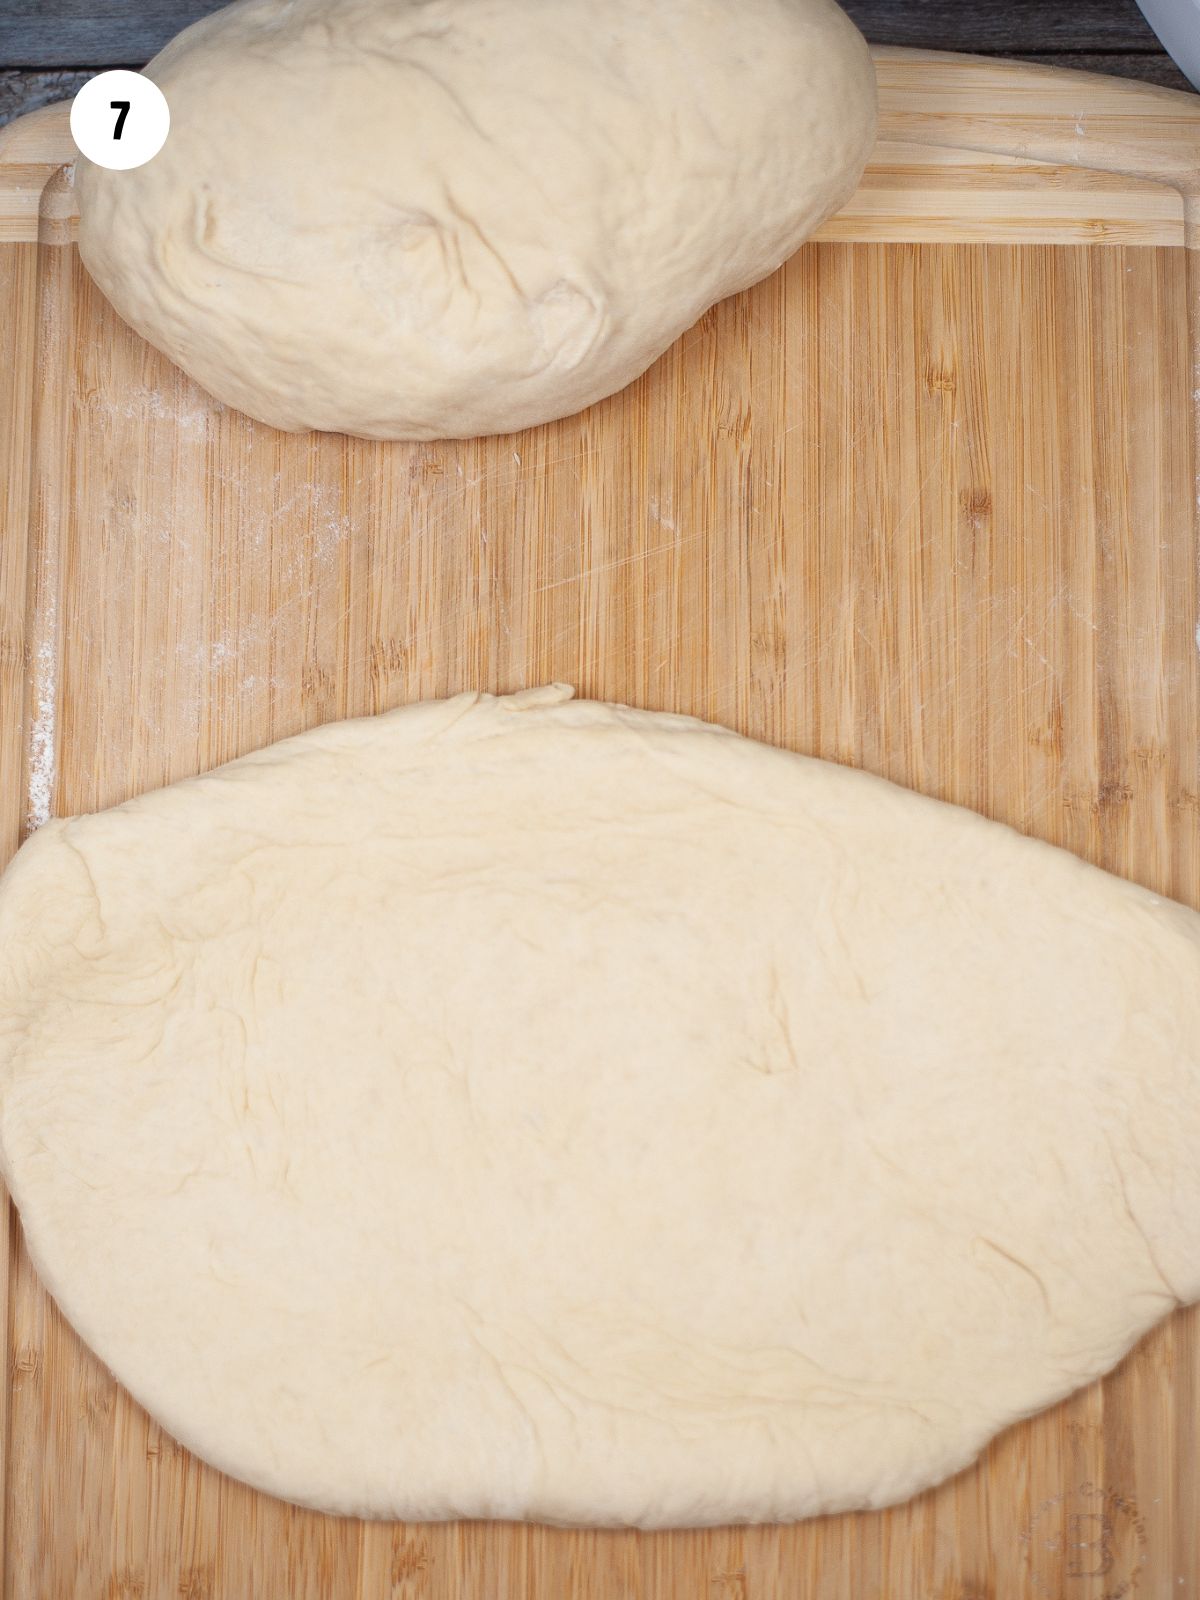
Step 7: Roll each portion of dough into a 12x7-inch rectangle using a rolling pin. If it sticks, sprinkle a little flour on the dough or rolling pin.
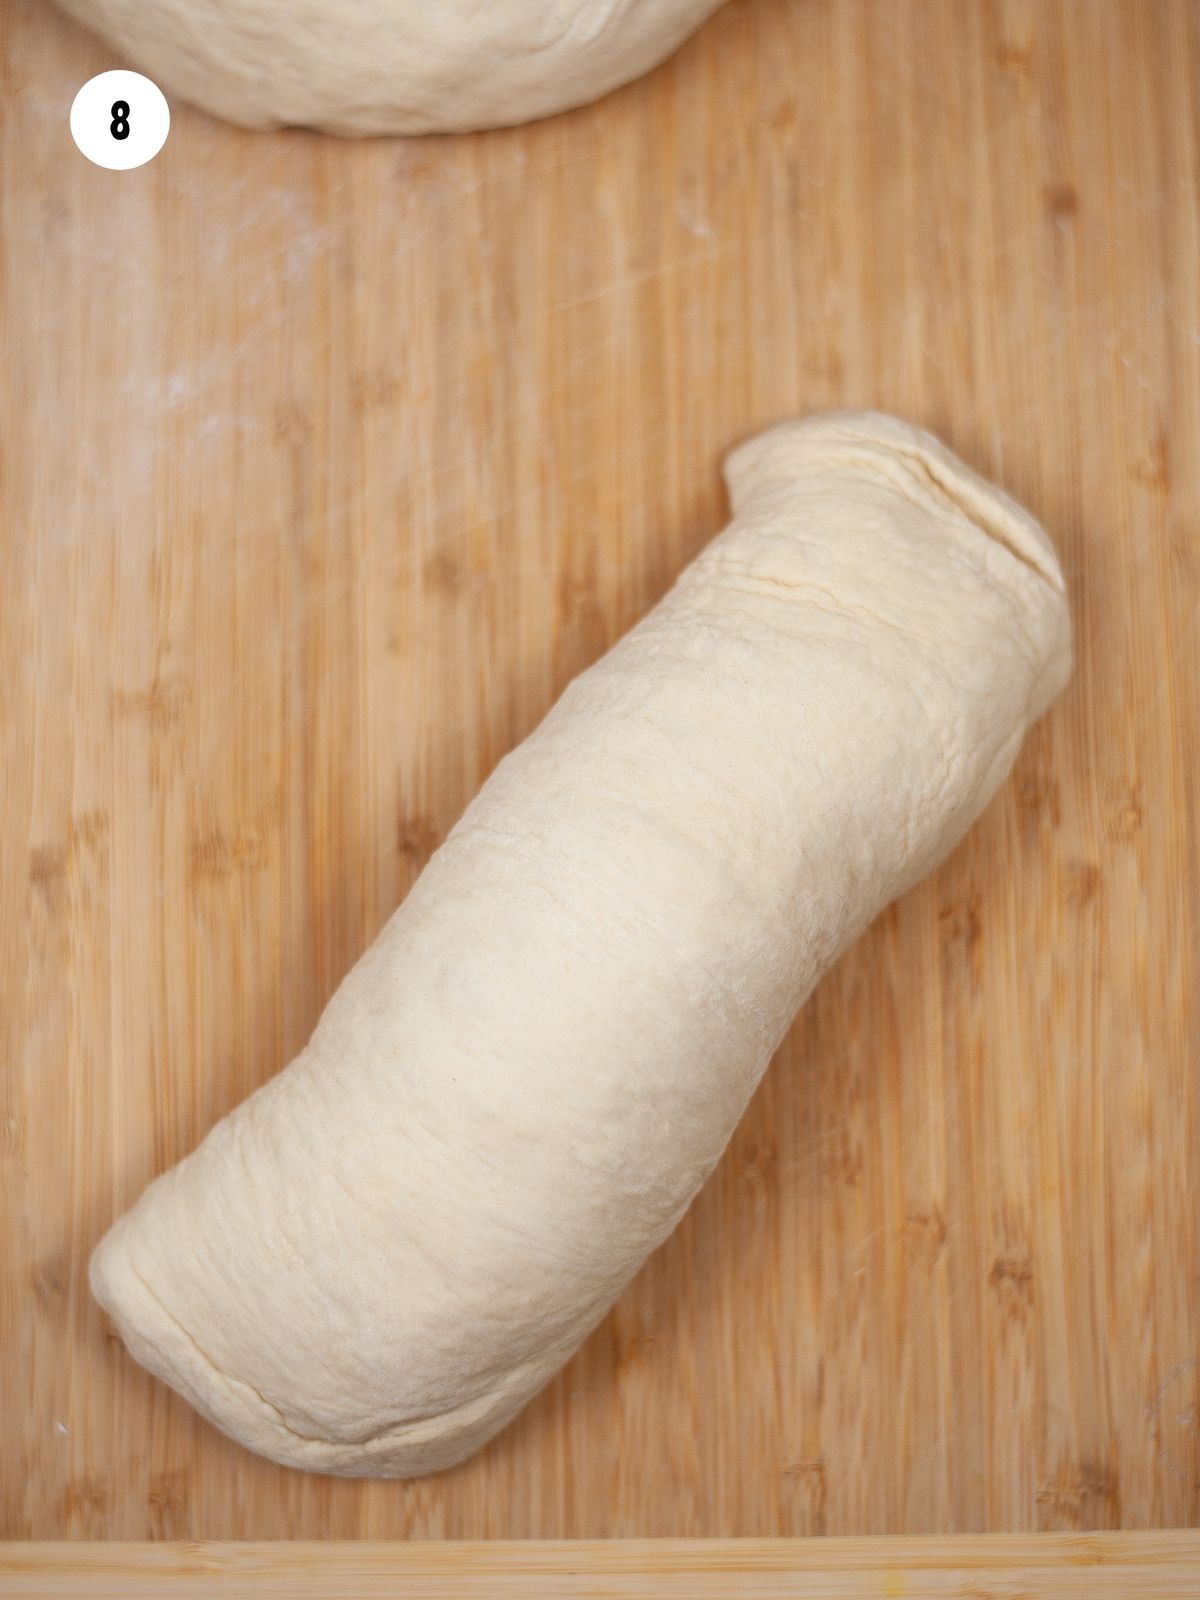
Step 8: Next, roll the dough tightly into a log, starting from the shorter side of the rectangle, and tuck the ends underneath.

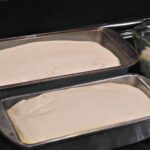
Step 9: Spray the loaf pans with cooking spray. Add the two loaves of bread into each pan.
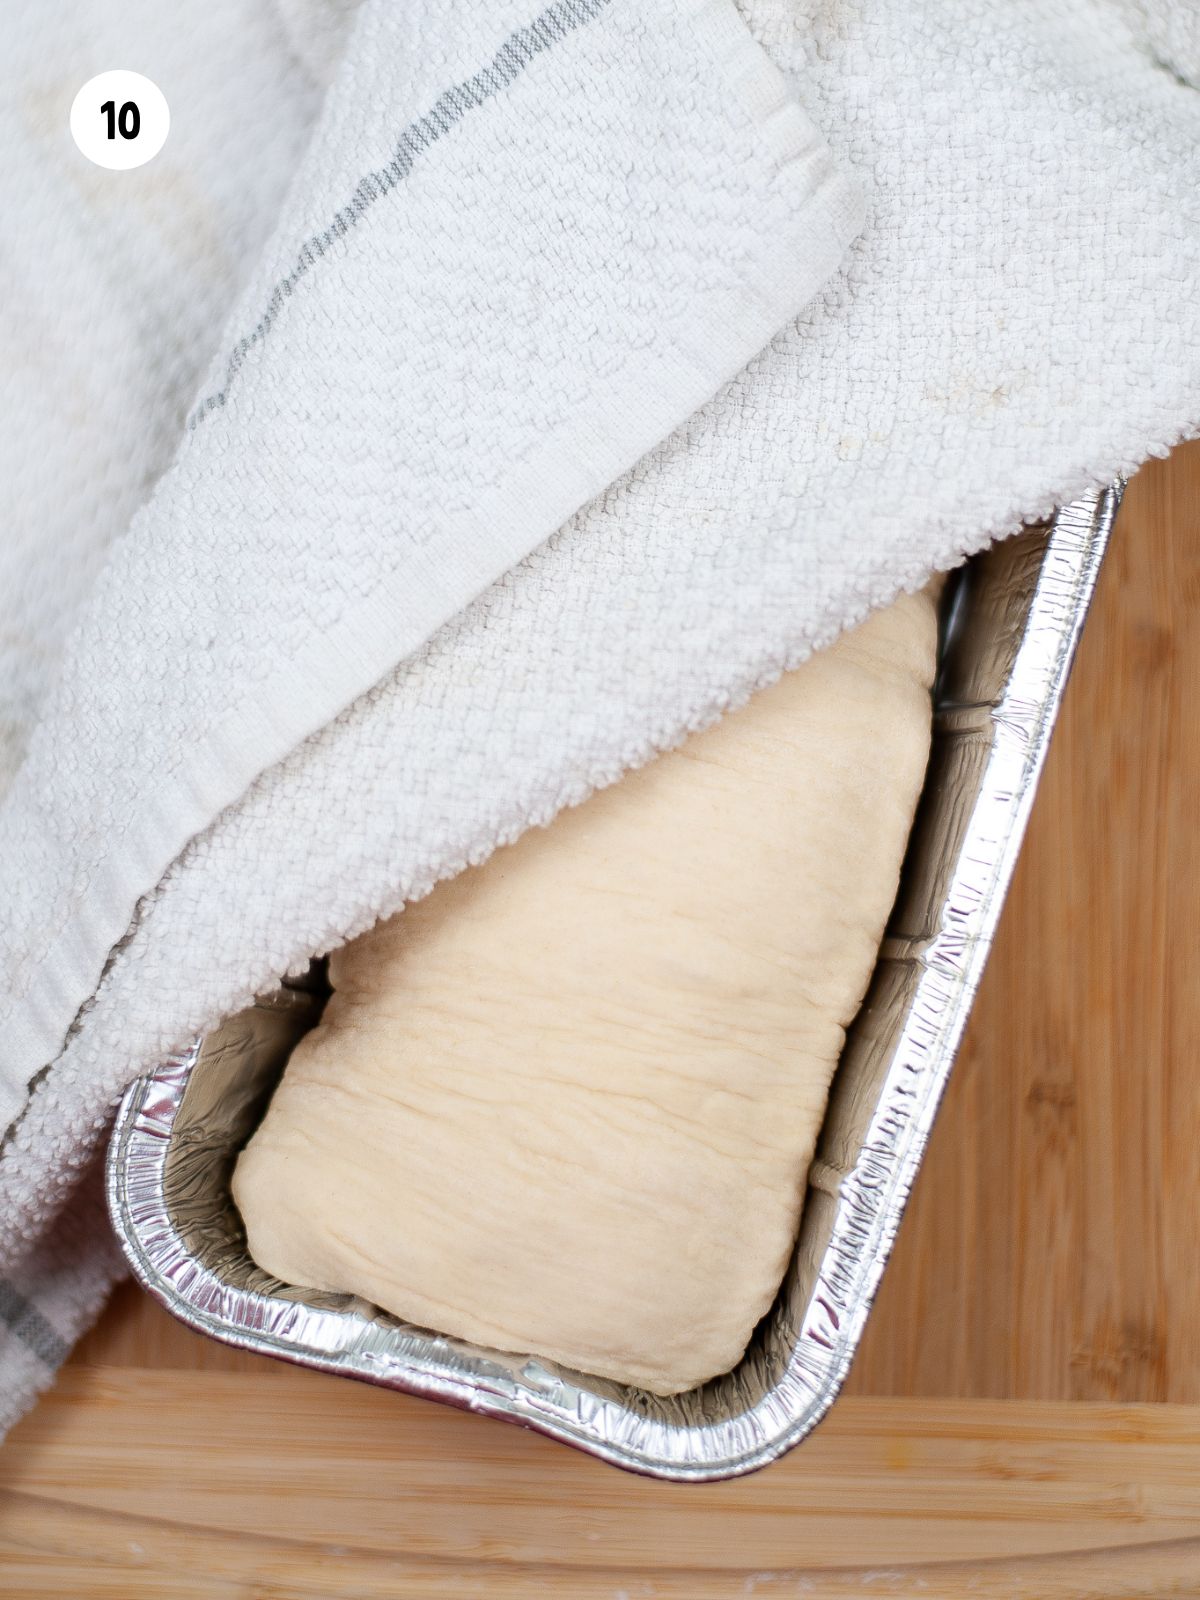
Step 10: Cover each pan with a clean kitchen towel and set aside for an additional 45 minutes.
Expert Tips
- Covering the yeast bowl with a plate helps retain the warmth from the water, creating the ideal environment for activation. This allows the yeast to develop the foamy layer that signals it's ready for baking.
- Covering the bowl of dough with a plate or a clean kitchen towel helps trap warmth and maintain the right level of humidity, creating the perfect environment for the yeast to work its magic.
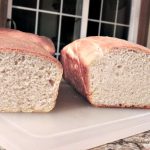
- Bake until the crust is golden brown, about 25-30 minutes. To check for doneness, tap the top of the loaf—if it sounds hollow, it's fully baked. For accuracy, use a thermometer; the internal temperature should reach 190-200°F.
Baking Instructions
Step 11: After your bread is done rising at 45 minutes, bake for 20 to 30 minutes until golden brown. Every oven is different so keep an eye out.
LOVE this recipe? SAVE it for Later!
❤️Tap the heart icon in the lower right corner to add the recipe to your recipe box for easy access anytime.
If you made it, leaving a star rating or quick review is always appreciated and helps other readers too.
Want to save this printed recipe? The Ultimate Meal Planner & Recipe Binder helps you keep recipes organized in one easy place.
Amish Bread Machine Recipe
To make this recipe in a bread machine, follow your manufacturer's guidelines for White Bread; adding ingredients, typically starting with liquids, then dry ingredients, and yeast last.
Then, select the appropriate setting for white or basic bread and let the machine handle the mixing, kneading, and baking for a perfect homemade loaf.
If you prefer baking in a traditional oven, remove the dough after the first rise, shape it, place it in baking pans, and let it rise again before baking as directed above.
How to Store, Freeze and Reheat
Room Temperature: Store bread in a bread box, airtight container, or wrapped in a kitchen towel. Avoid plastic bags unless eating quickly, as they soften the crust. It stays fresh for 2-3 days at room temperature.
Refrigerator: While refrigeration can extend shelf life, it can also dry out the bread faster. Store it in an airtight container for 5-7 days.
Freezer: Wrap the bread tightly in plastic wrap or aluminum foil, then place it in a freezer bag. Freeze for up to 3 months.
Thawing and Reheating Tips: Allow the bread to thaw at room temperature. Warm it in the oven for a fresh-baked taste.
Recipe FAQ's
To view the answers, simply click on the down arrow (⬇) next to each question. If you have any other questions not answered here, please leave a comment!
Amish bread is often healthier than store-bought bread because it’s made with simple ingredients and free from preservatives, additives, and excessive sodium. However, some recipes can be higher in sugar and fat, and unlike commercial breads, it’s not fortified with extra nutrients.
This could be due to expired yeast, water that was too hot or too cold, or a cool room temperature slowing the rise, which is why I like to cover the bowl with a plate or towel to help create a warm, stable environment for the dough to rise properly.
If you only have instant yeast, you can skip the proofing step and mix it directly with the dry ingredients—it will still work just as well!


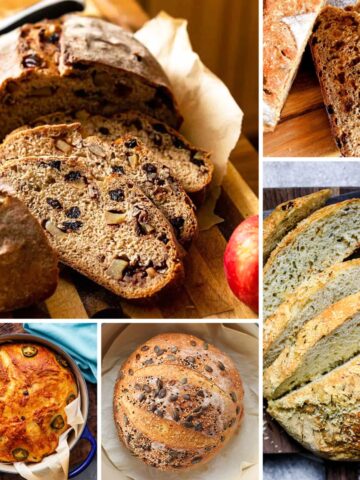
More Bread Recipes to LOVE
Try my Homemade French Baguettes or this recipe for One Hour Bread.


📖 Recipe Card
Homemade Amish White Bread
Ingredients
- 2 ¼ teaspoons active dry yeast
- ½ cup warm water; 105 - 115 degrees
- ⅓ cup sugar
- 2 teaspoons salt
- 2 cups warm water 105 - 110°F
- 2 ½ tablespoons butter melted
- 6 cups flour
Method
- In a small bowl, dissolve the yeast with 1 teaspoon of the sugar in ½ cup warm water. Cover the bowl with a plate to help trap the heat inside. Set the bowl aside for about 5 minutes or until the yeast is foamy and bubbly.
- In the bowl of a stand mixer with the bread hook attachment, add the remaining sugar, salt, two cups warm water and melted butter. Then add the yeast mixture that's been proofed.
- Gradually add the flour, one cup at a time, to form a soft dough. Mix until the dough pulls away from the sides of the bowl. Allow the machine to knead the bread for about 5 minutes.
- If you find the dough is sticking to the sides of the machine, you'll most likely need to sprinkle more flour into the mixer as the machine is kneading.
- Remove the dough from the mixer and place on a lightly flour surface. Knead the dough a few times and then place in an oiled bowl. Make sure you turn the dough to coat both sides.
- Cover with a plate or a clean dish towel and set aside for it rise and double in size. This should take about an hour.
- Once the dough has risen and doubled in size, punch it down and divide into two equal portions.
- Use a rolling pin to shape each loaf of dough into a 12x7-inch rectangle, adding a light dusting of flour if it sticks. Then, starting from the shorter side, roll it tightly into a log and tuck the ends underneath.
- Place each rolled loaf of dough into loaf pans sprayed with non-stick baking spray. Cover with a clean dish towel and let them rise until doubled in size, about 60 minutes.
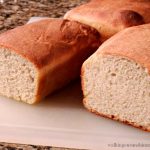
- Bake in a preheated 350°F oven for 20 to 30 minutes or until the crust is golden brown and when you tap the top of the bread you hear a hollow sound.
- Allow the bread to cool in the loaf pans for about 10 minutes and then turn the bread loaves out onto a cooling rack to finish cooling.
- Brush the tops of the baked bread loaves with melted butter before serving.
Nutrition
Notes
Bread Machine Directions:
To make this recipe in a bread machine, follow your manufacturer's instructions for White Bread, typically adding liquids first, followed by dry ingredients, and yeast last. Select the white or basic bread setting and let the machine handle the mixing, kneading, and baking for a fresh homemade loaf.Tried this recipe?
Let us know how it was!This recipe has been updated since it first appeared in 2013 with new photos and a new printable recipe card that includes nutritional information. I hope you enjoy the updates as much as I enjoyed working on them!

Food Safety Tips
- Cook to a minimum temperature of 165 °F (74 °C)
- Do not use the same utensils on cooked food, that previously touched raw meat.
- Wash hands after touching raw meat.
- Don't leave food sitting out at room temperature for extended periods.
- Never leave cooking food unattended.
- Use oils with high smoking point to avoid harmful compounds.
- Always have good ventilation when using a gas stove.

joanne says
That looks so yummy! There is nothing quite like fresh bread, warm from the oven.
Roseann Hampton says
Thanks for sharing your delicious looking bread recipe with us at the Snickerdoodle link party! This will be one of my features this Saturday!
Lois says
Thank you for hosting a fun party!