


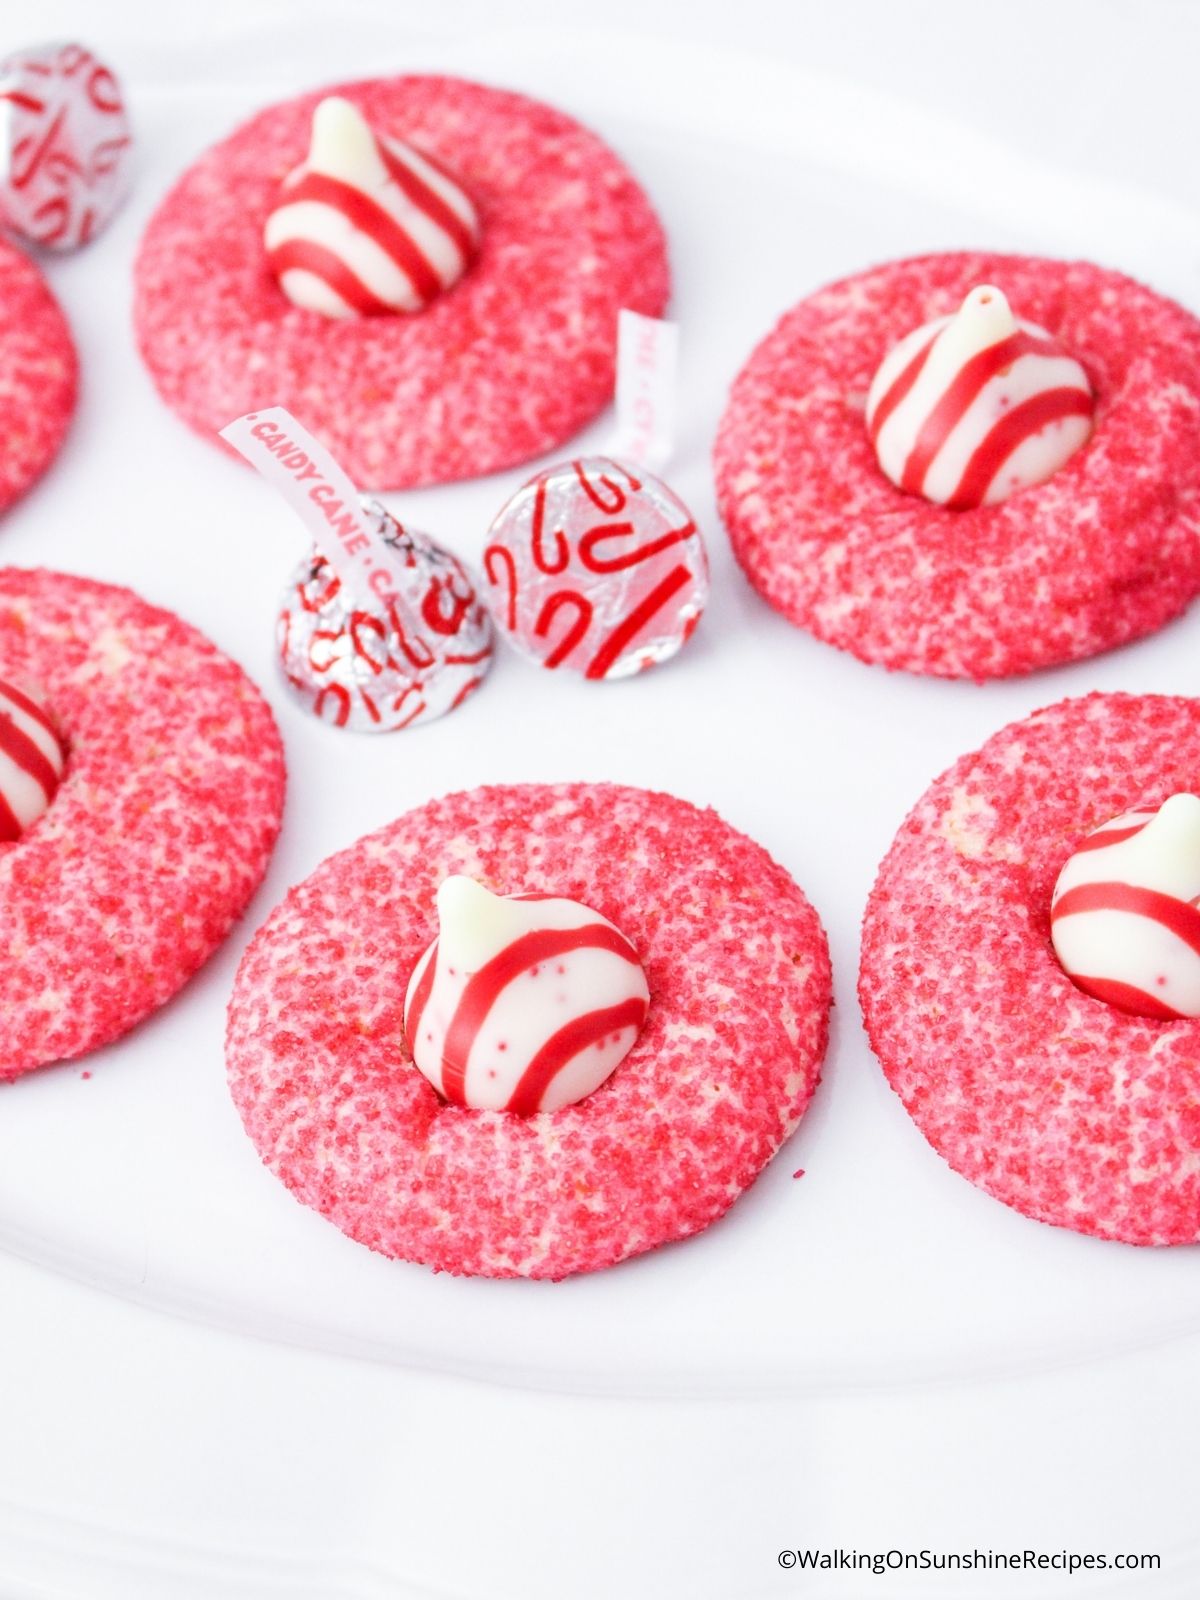
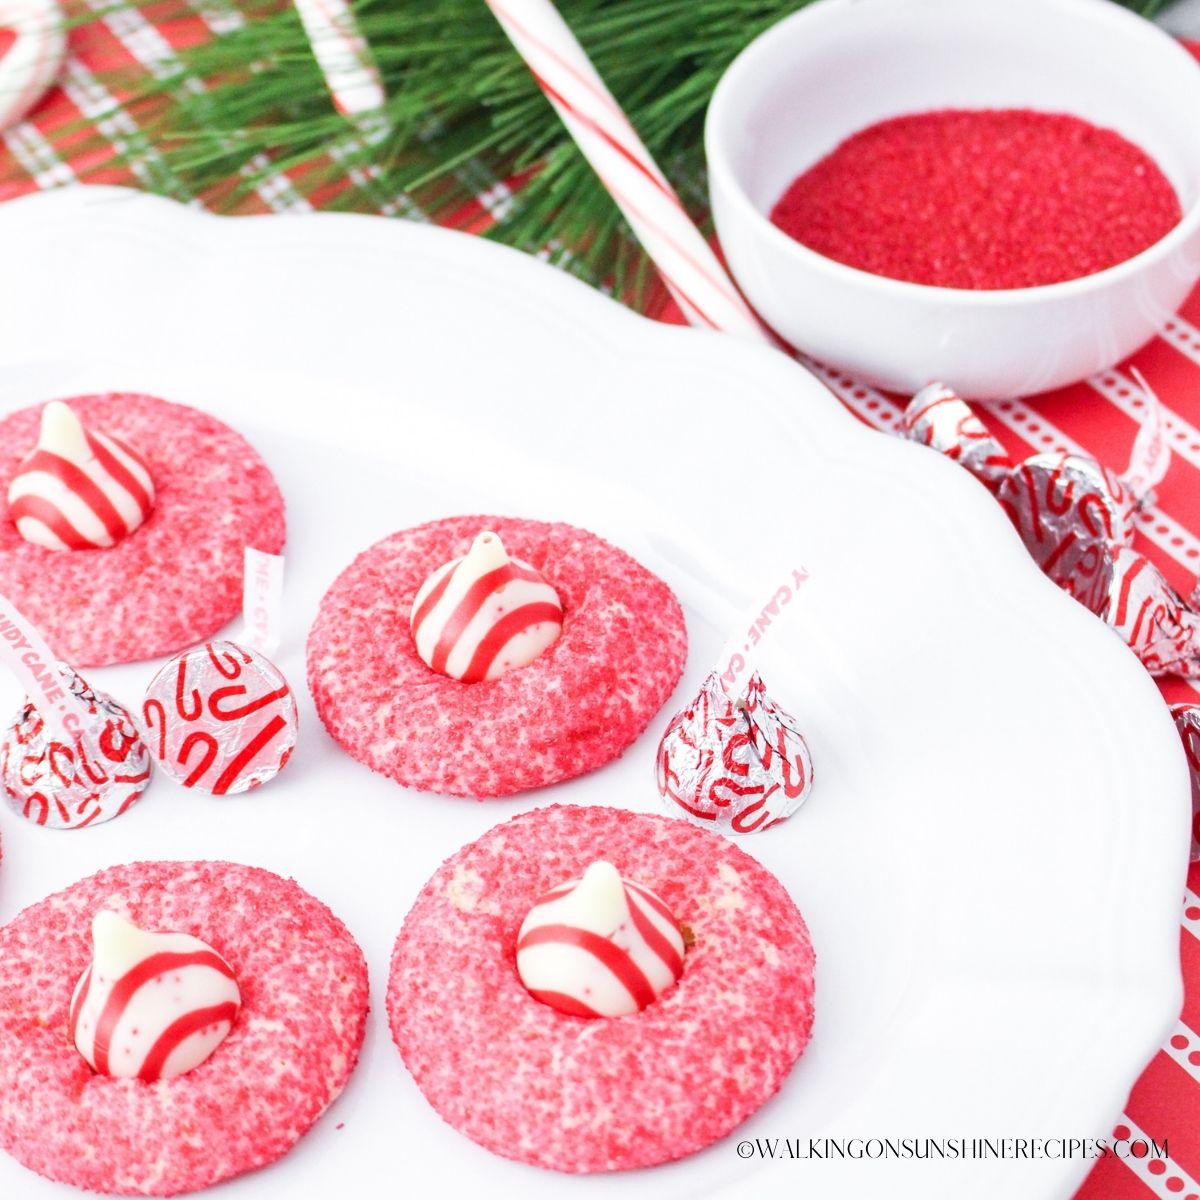
If you're a fan of candy canes, these Peppermint Blossom Cookies are a must-bake this Christmas!
Rolled in festive red sugar and topped with a classic Hershey's Candy Kiss, each bite delivers a burst of refreshing minty flavor.
Make sure you check out all the other Christmas Cookies available for you to make for your family this holiday season!

Want to Save This Recipe?
Enter your email & I'll send it to your inbox. Plus, get great new recipes from me every week!
By submitting this form, you consent to receive emails from Walking on Sunshine Recipes.
These peppermint blossom cookies are soft, chewy and so festive with the red and white striped candy kisses in the center.
This was inspired by my Peppermint Christmas Cookies published during last year's 12 Days of Christmas Cookies Celebration on this site. It's also very similar to the Peanut Butter Blossom cookies that are my daughter's favorite.
Table of Contents
- Blossom Cookie Baking Guide: Helpful Hints
- Recommended Kitchen Tools
- My Kitchen Tools Essentials
- Main Ingredients Needed
- Substitutions and Variations
- Step-by-Step Instructions
- Baking Tips
- Storing and Thawing Tips
- More Peppermint Recipes to LOVE
- LOVE this recipe? SAVE it for Later!
- 📖 Recipe Card
- Peppermint Blossom Cookies
- 💬 Comments
Blossom Cookie Baking Guide: Helpful Hints
Chill Your Dough: Chilling the dough helps prevent the cookies from spreading too much in the oven. This is especially important for blossom cookies, as you want them to hold their shape and create a nice well for the kiss.
Use a Cookie Scoop: A cookie scoop ensures consistent cookie sizes, which means they'll bake evenly. It also helps you create perfectly rounded balls of dough.
Press the Kisses Gently: You want the kisses to sink into the cookie slightly, but you don't want to flatten the entire cookie.

Recommended Kitchen Tools
For a full list of kitchen tools used in this recipe, be sure to check the recipe card below. You can also browse my Favorite Kitchen Tools by clicking the photo below.

Check out my list...
My Kitchen Tools Essentials
Tools that will make your time easier and faster in the kitchen!
More InformationMore InformationMore InformationMore InformationMore Information


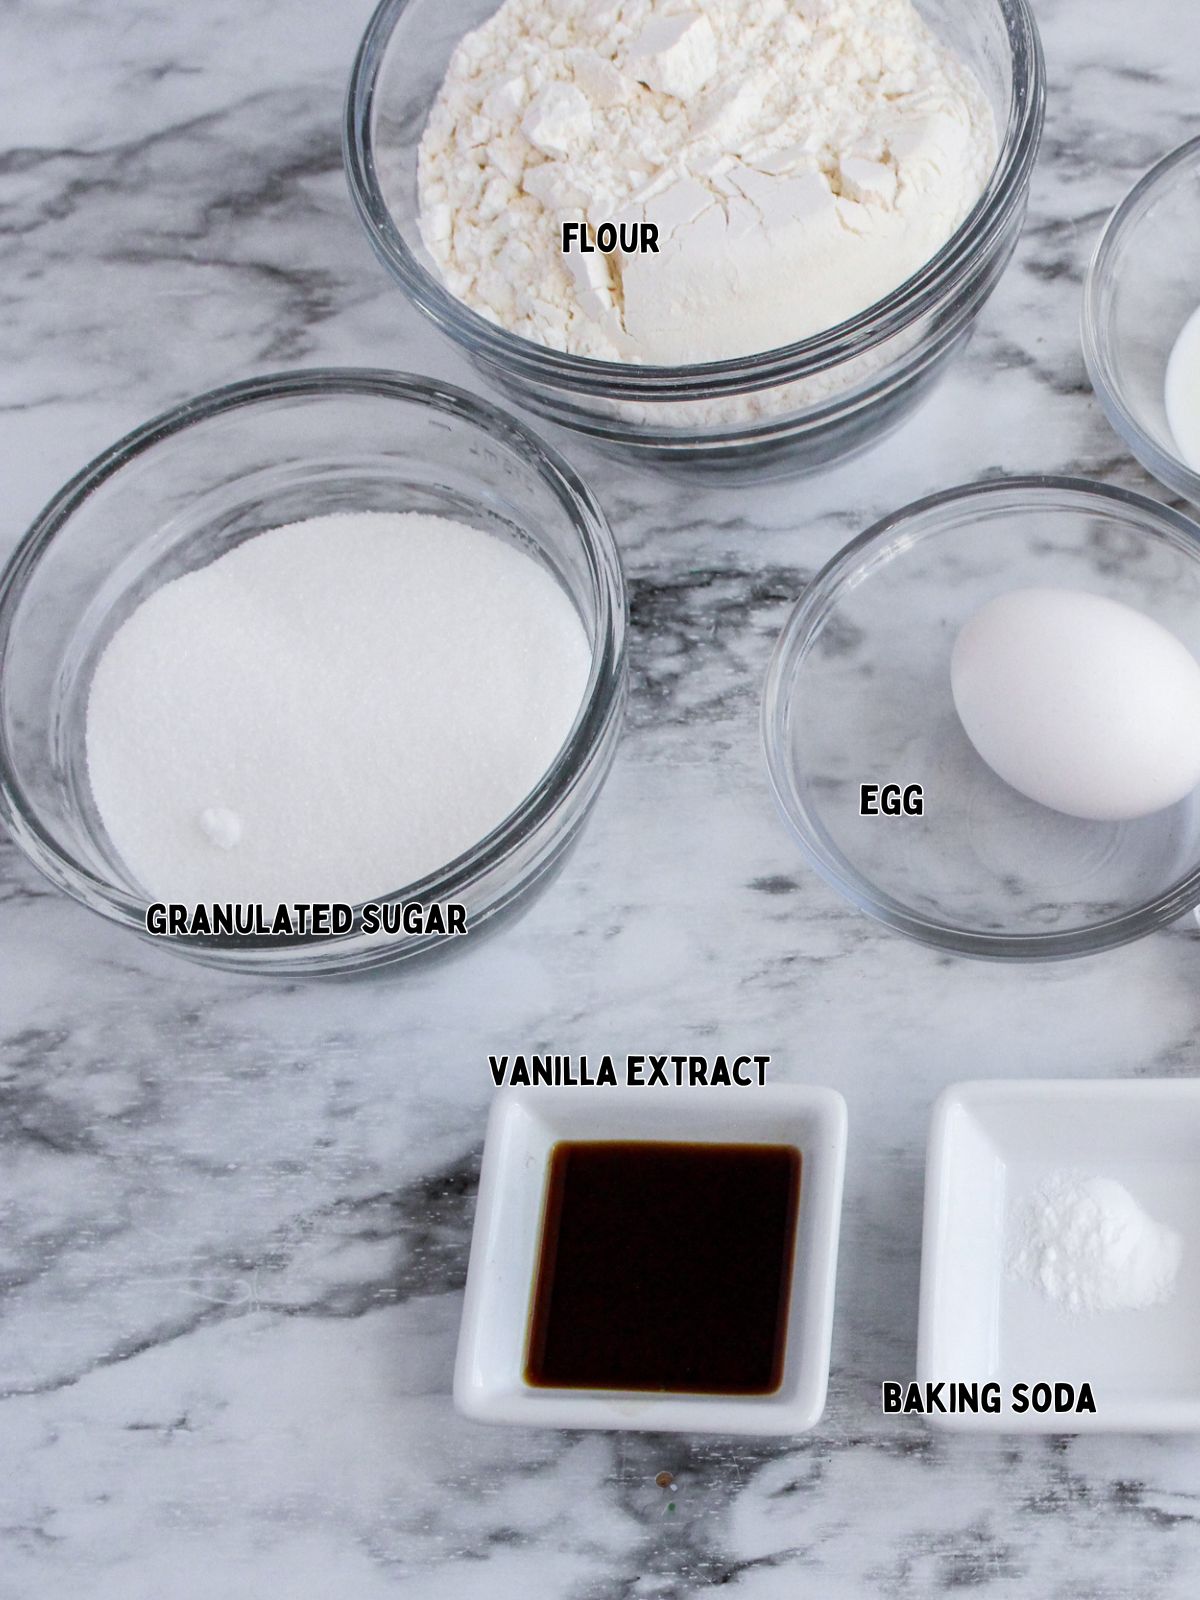
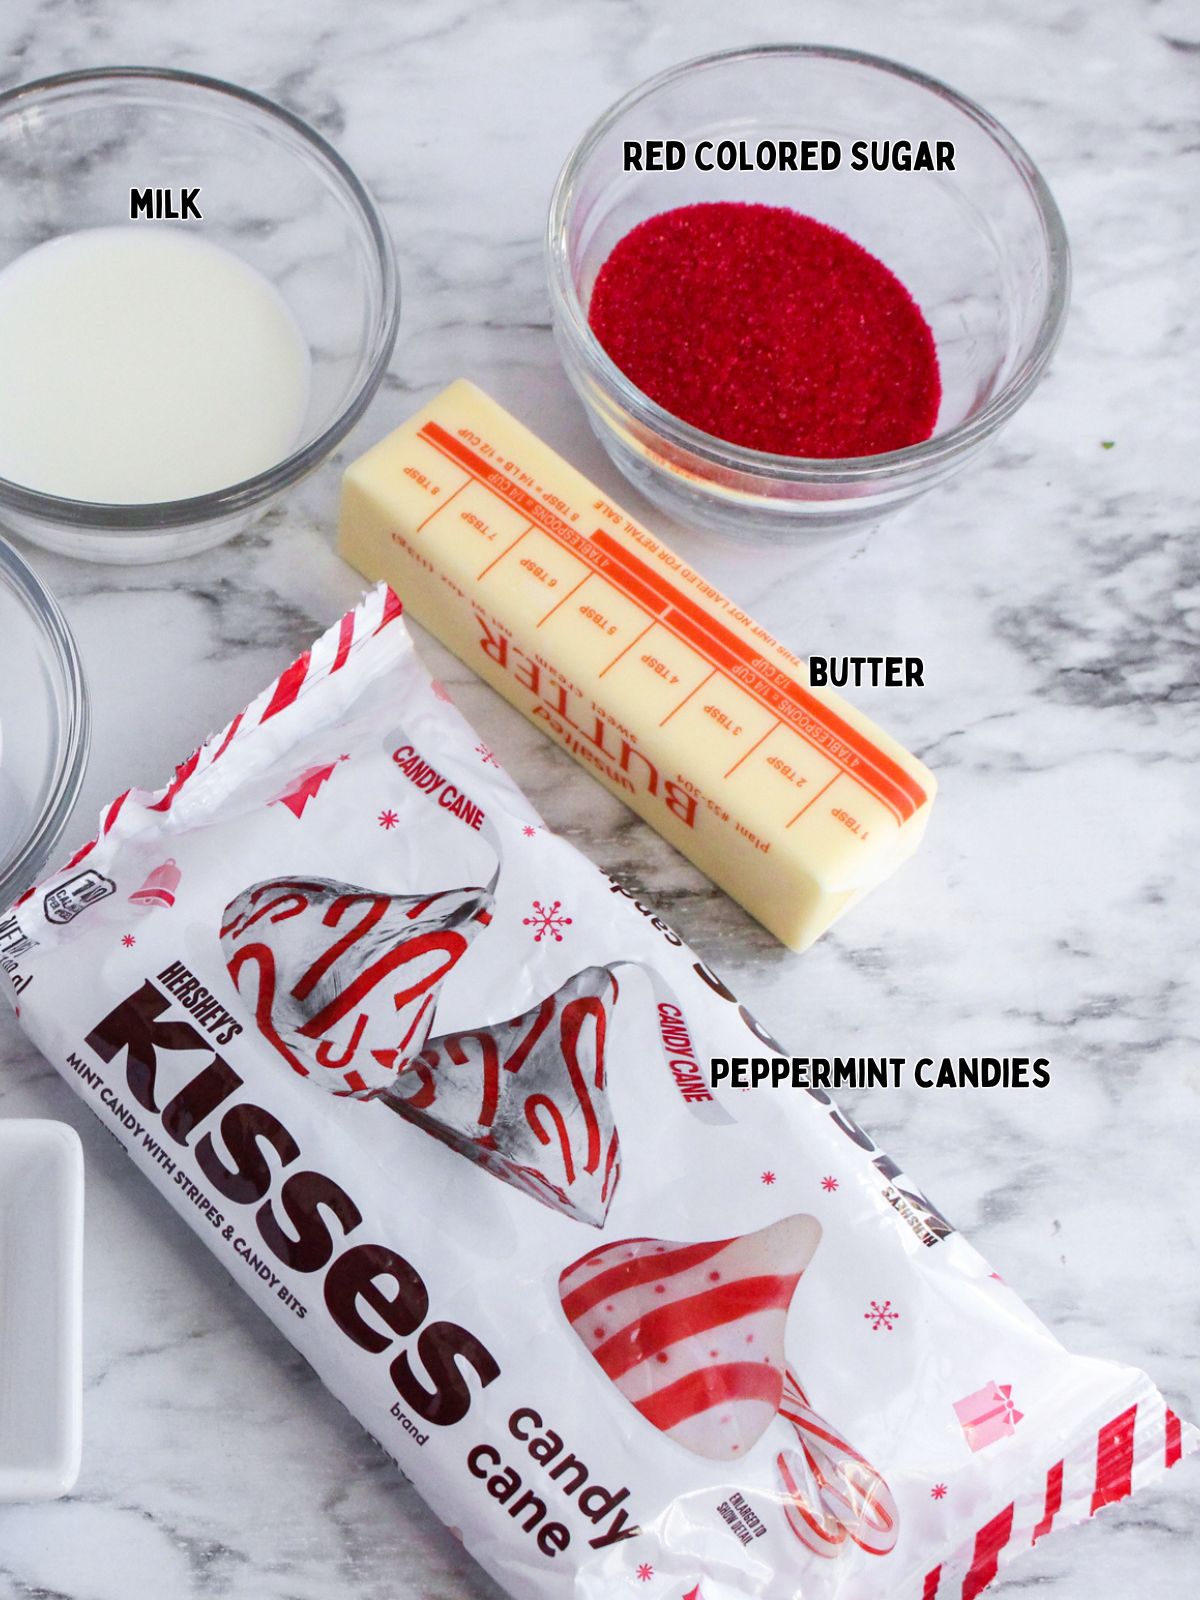
Main Ingredients Needed
Here's a quick overview of the ingredients for this recipe. Find the exact amounts and click the Instacart button to easily add them to your cart – all in the printable recipe card below!
Substitutions and Variations
- Chocolate Kisses- if your family is not a fan of peppermint kisses, use traditional chocolate kisses.
- Try baking the cookies using a peanut butter cookie recipe like I do with my Peanut Butter Blossom Cookie Recipe.
- You might also like my Christmas Cookies with Peppermint that start out with a cake mix.
Step-by-Step Instructions
This section includes step-by-step photos and instructions to guide you through the recipe. For the complete printable version, scroll down to the recipe card below.
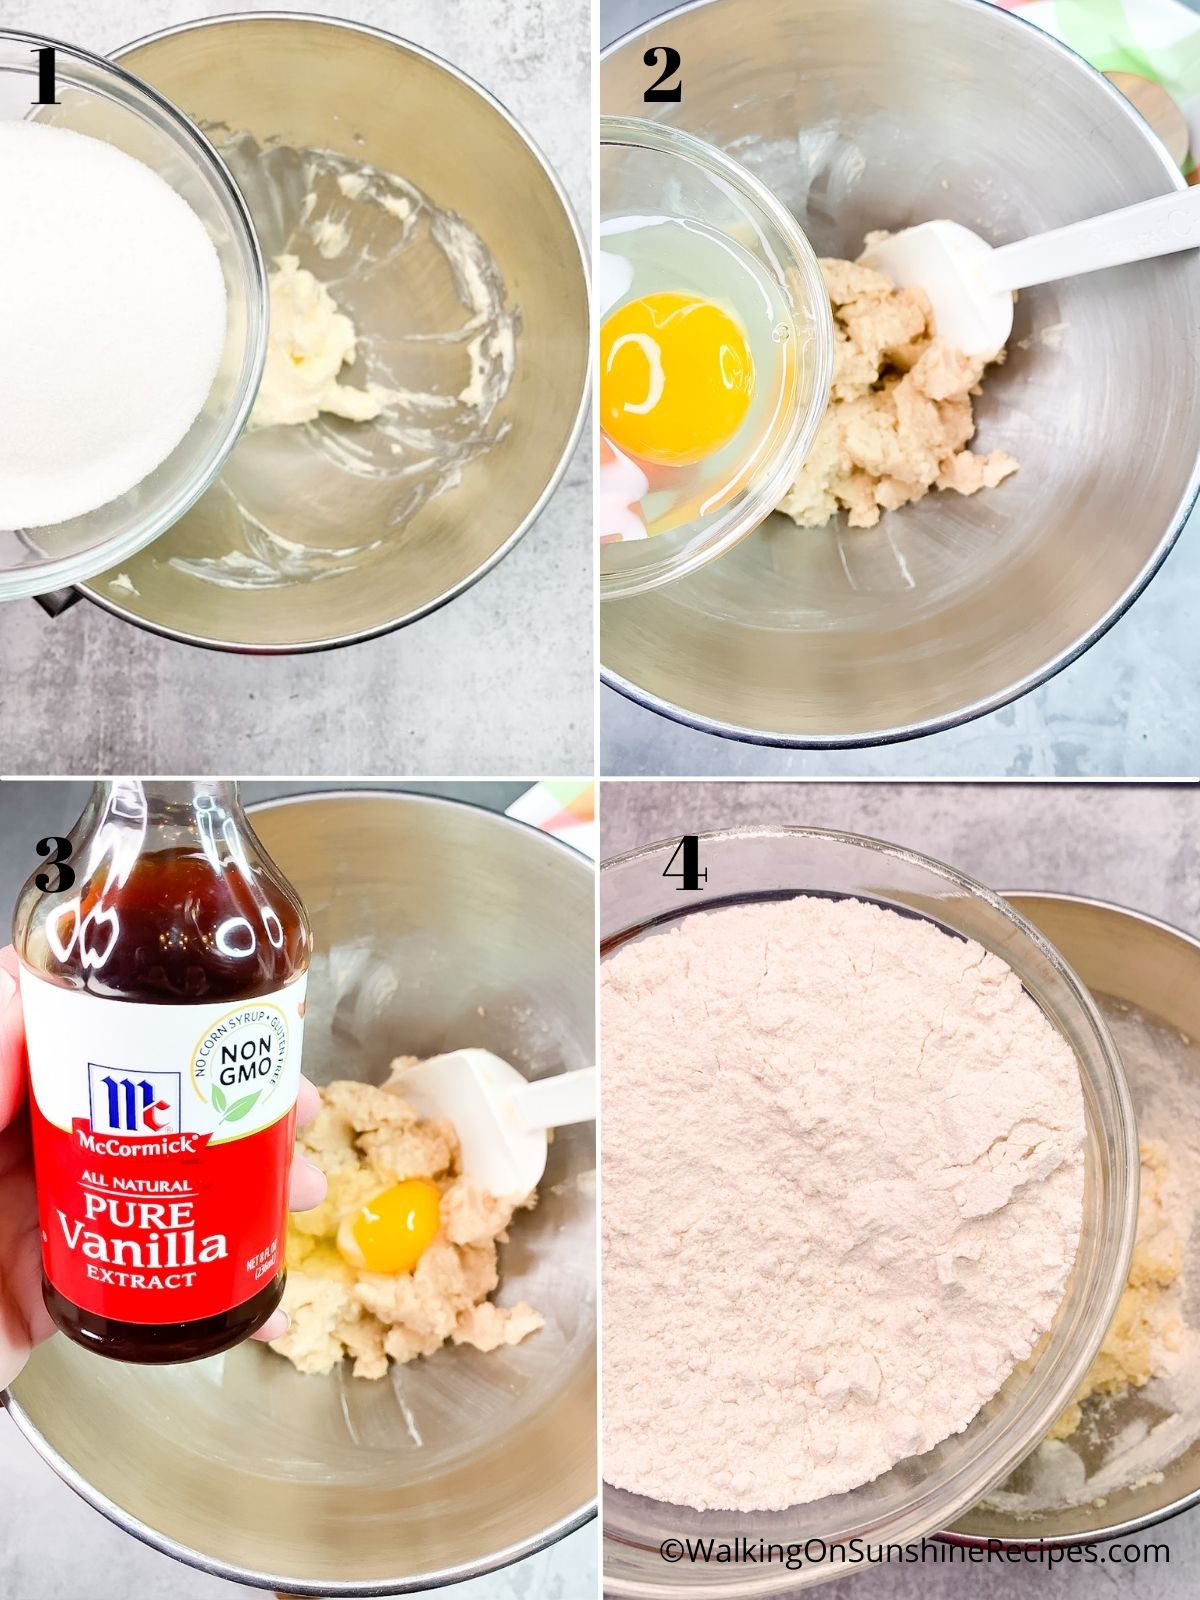
Step 1: Using a stand mixer (like a KitchenAid), beat the butter until it's light and fluffy. Gradually add the sugar, continuing to beat for about 5 minutes until the mixture is well combined.
Step 2: Add the egg and beat. Make sure the egg is incorporated completely.
Step 3: Then add in the vanilla extract. Beat to combine.
Step 4: Finally add the flour mixture.
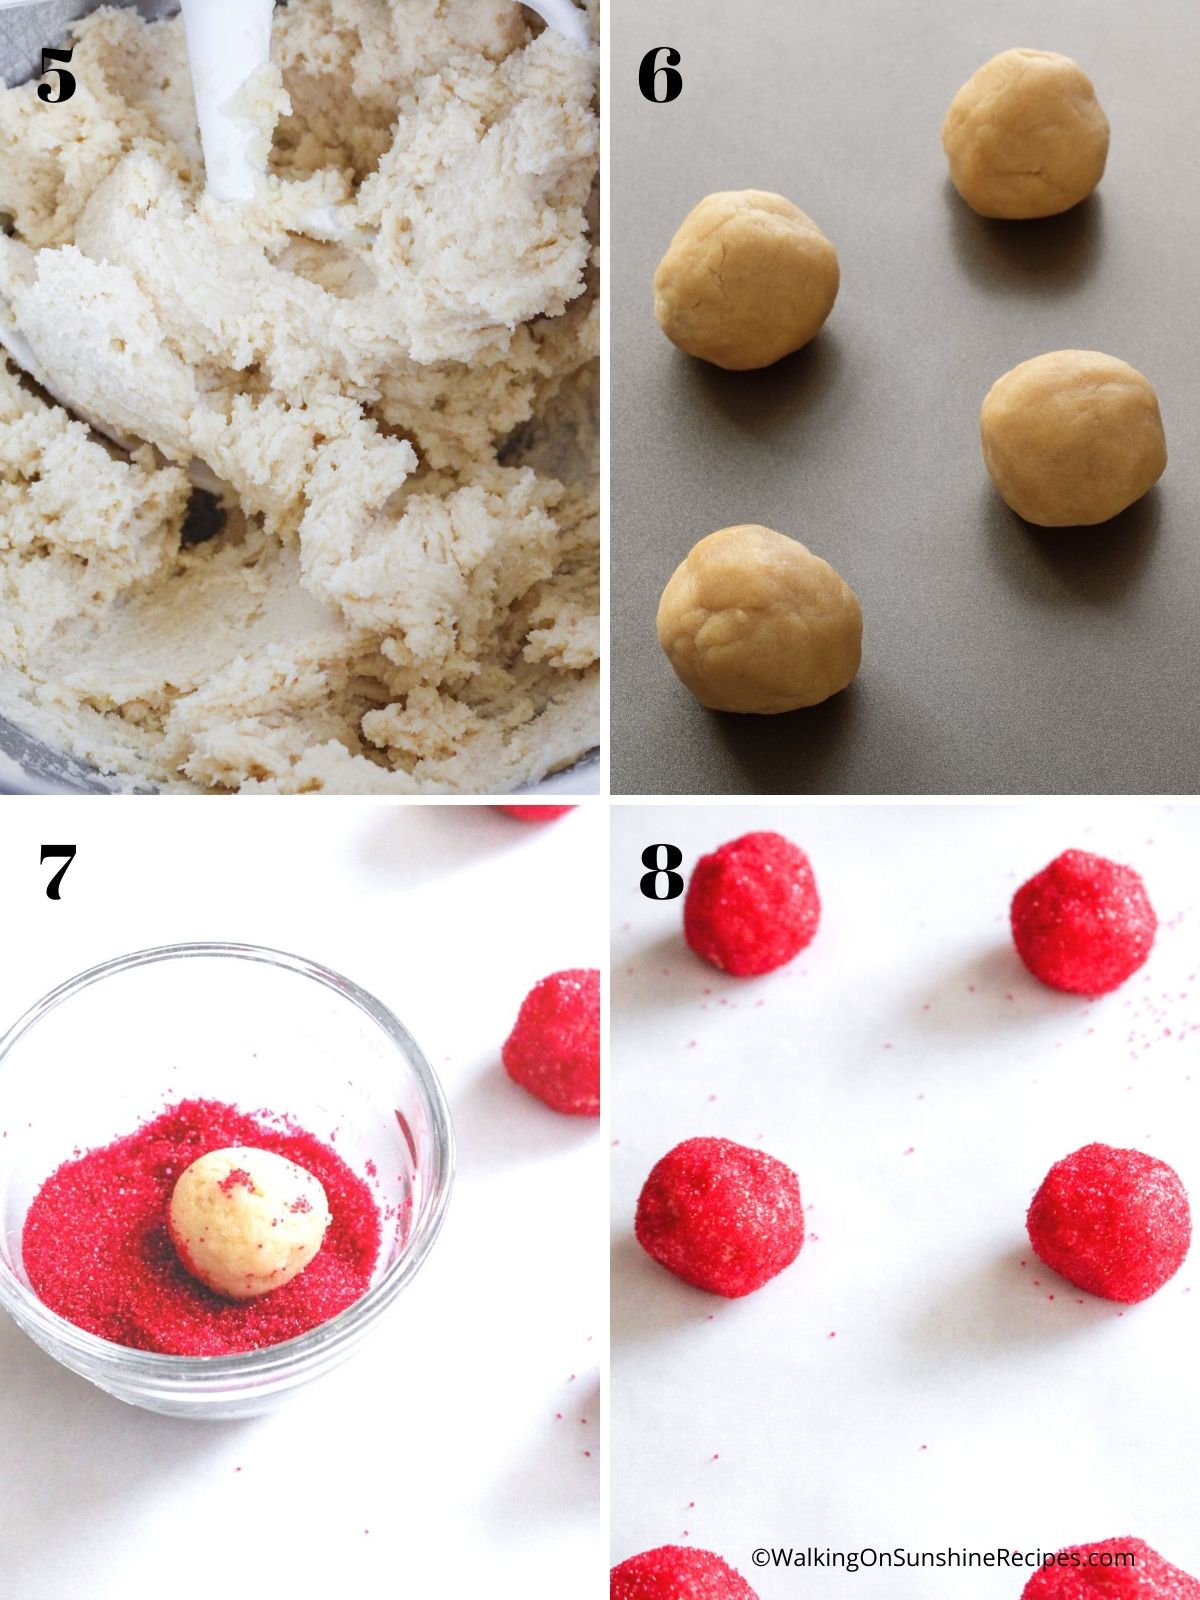
Step 5: With the mixer running on low speed, slowly pour in the milk. Add just enough milk to bring the dough together, making it soft and pliable.
Step 6: Then, use a small cookie scoop (about 1 tablespoon) to form the dough into neat little balls.
Step 7: Roll each ball in the red sanding sugar until it's completely coated.
Step 8: Finally, place the coated cookie balls on a parchment-lined baking sheet, leaving about an inch between each one.
Baking Tips
Always try to chill the dough after it's been formed into balls for at least 30 minutes before baking. This will help the cookies not to spread as much.
Don't add the kisses into the hot cookies immediately after removing them from the oven. Wait a few minutes. If you do, the candies will melt and not hold their shape.
Step 9: After chilling the cookie balls for 30 minutes, bake them in a preheated 350°F oven. Keep an eye on them—they're ready when they look slightly puffed and the edges have a nice golden color.
Step 10: Now for the fun part—adding the peppermint kisses! But hold on! Don't add them right away. Let the cookies cool for a few minutes on the baking sheet. If you add the kisses too soon, they'll melt into a puddle. After a few minutes, transfer the cookies to a wire rack to cool completely.

Storing and Thawing Tips
Pantry: Store in an airtight container for up to 1 week at room temperature.
Refrigerator: You can also store them in the refrigerator for up to 3 weeks.
Freezer: Cooled cookies can be frozen, however, be aware the candies may not be as pretty when you defrost them.
Thawing Tips: Allow the cookies to defrost in the refrigerator overnight.


More Peppermint Recipes to LOVE
If you love baking with peppermint, you’ll find more festive favorites in my peppermint Christmas cookie recipes roundup.


LOVE this recipe? SAVE it for Later!
❤️Tap the heart icon in the lower right corner to add the recipe to your recipe box for easy access anytime.
If you made it, leaving a star rating or quick review is always appreciated and helps other readers too.
Want to save this printed recipe? The Ultimate Meal Planner & Recipe Binder helps you keep recipes organized in one easy place.
📖 Recipe Card
Peppermint Blossom Cookies
Video
Ingredients
- 2 cups flour
- ¼ teaspoon baking soda
- ¼ teaspoon salt
- ½ cup 1 stick unsalted butter, room temperature
- 1 cup sugar
- 1 egg
- 1 ½ teaspoon vanilla extract
- 1 to 2 tablespoons milk
- ⅓ cup colored red sugar
- 48 Hershey’s Kisses Candy Cane candies unwrapped
Method
- Preheat oven to 350°F.
- Whisk together the flour, baking soda and salt. Set aside.
- In the bowl of a KitchenAid mixer, or regular mixer, beat the butter on medium speed for 5 minutes. Scrape down the sides.
- Add the sugar and continue beating for an addiitonal 5 minutes or until fluffy.
- Add the egg and vanilla extract, beating until evenly combined.
- Then add the flour mixture and beat until mixed.
- Finally add the milk to the dough slowly as the mixer runs, adding just enough to soften the dough.
- Using a small (1 tablespoon) cookie scoop, portion the cookie dough and shape into balls.
- Roll each ball in the red colored sugar.
- Place on parchment lined baking sheets about 1 inch apart.
- Chill the cookie balls for about 30 minutes.
- Bake for 8 to 10 minutes or until the cookies are puffed and the edges are set.
- Cool the cookies on the baking sheet for 4 minutes before pressing one candy kiss into the center of each cookie.
- Transfer to a wire rack and allow the cookies to cool completely.
- The candies will look like they are melting but do not disturb them and they will resolidify into the correct shape.

Comments
No Comments