

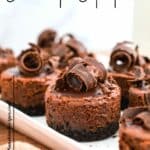
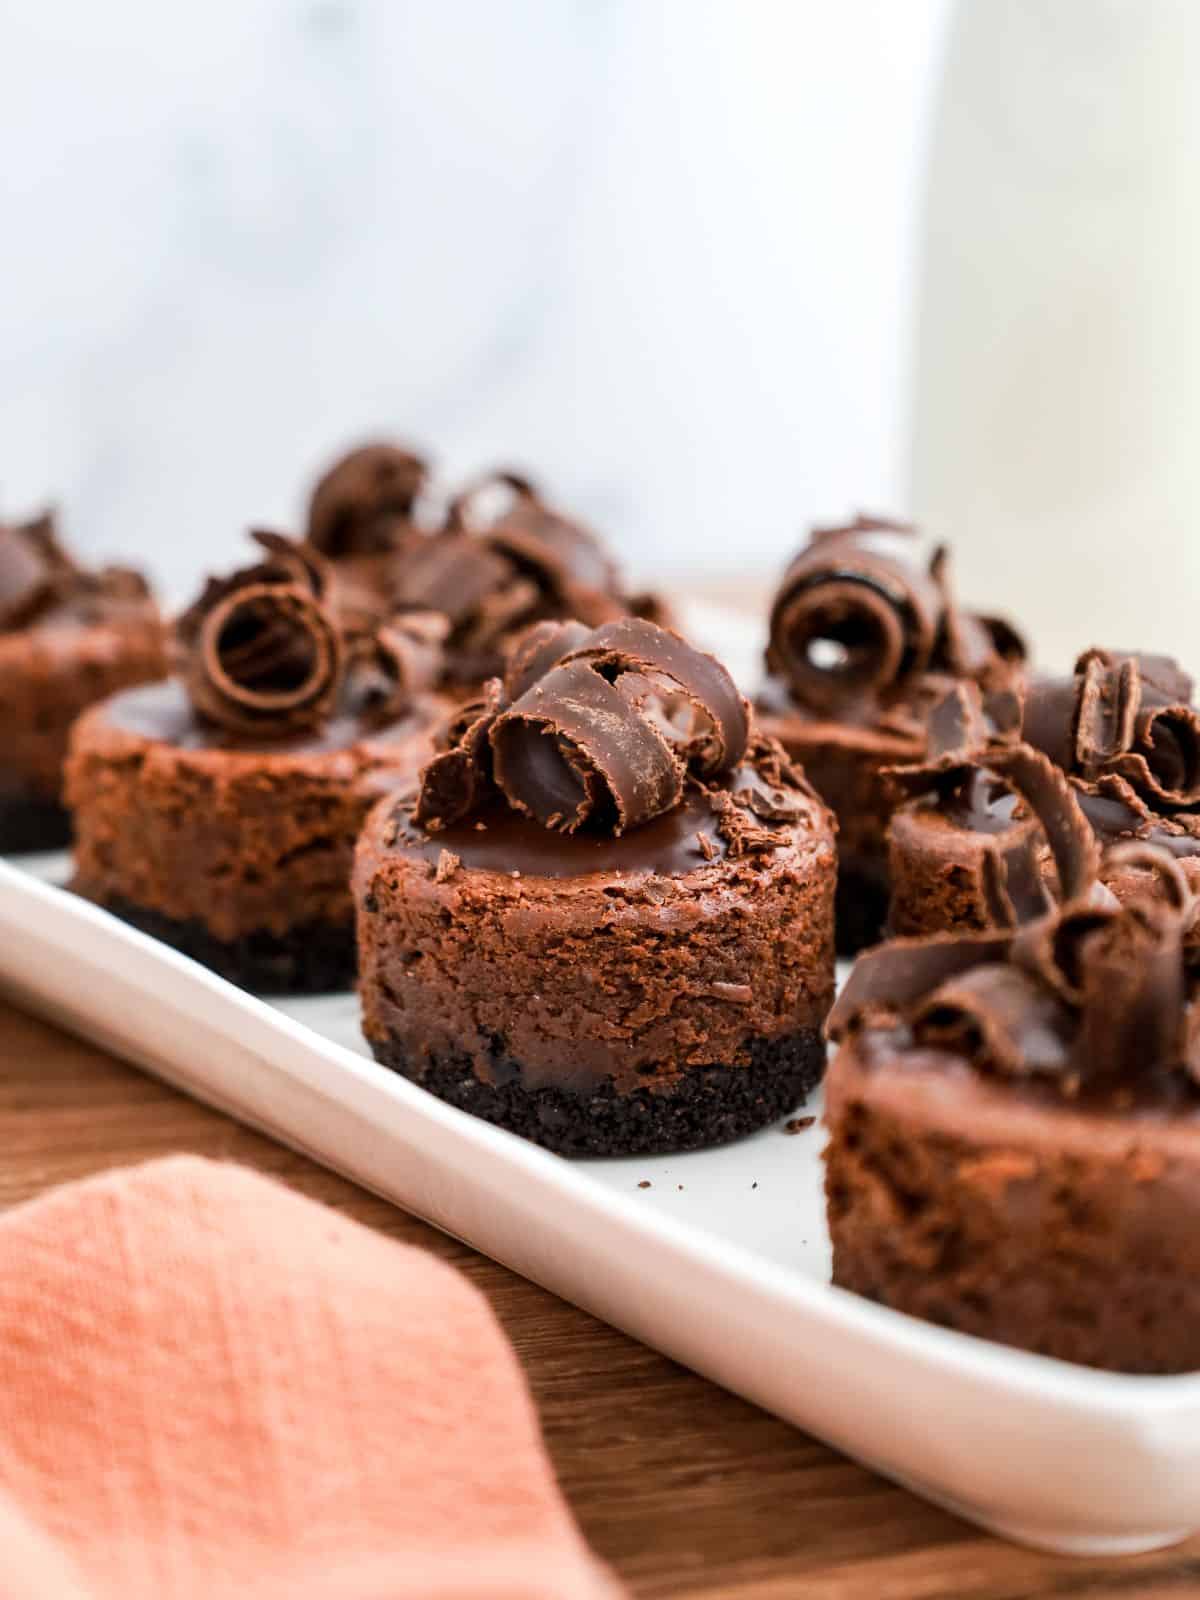
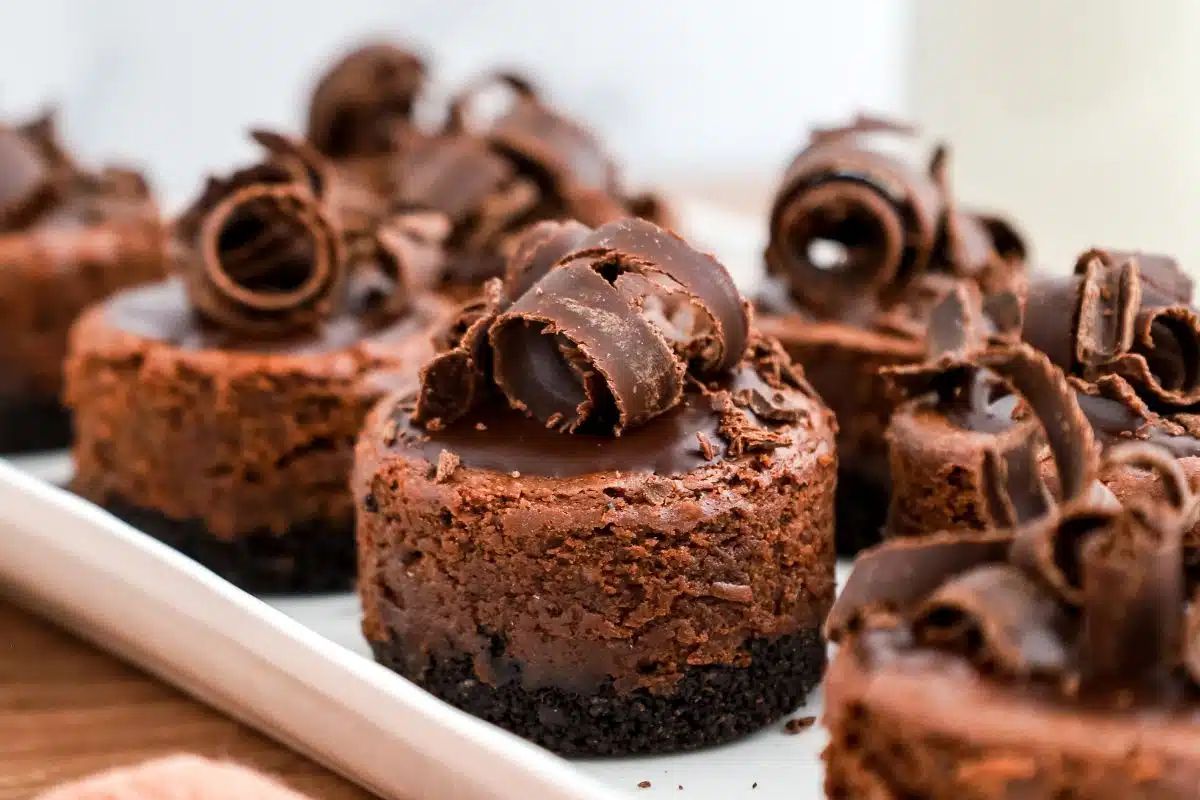
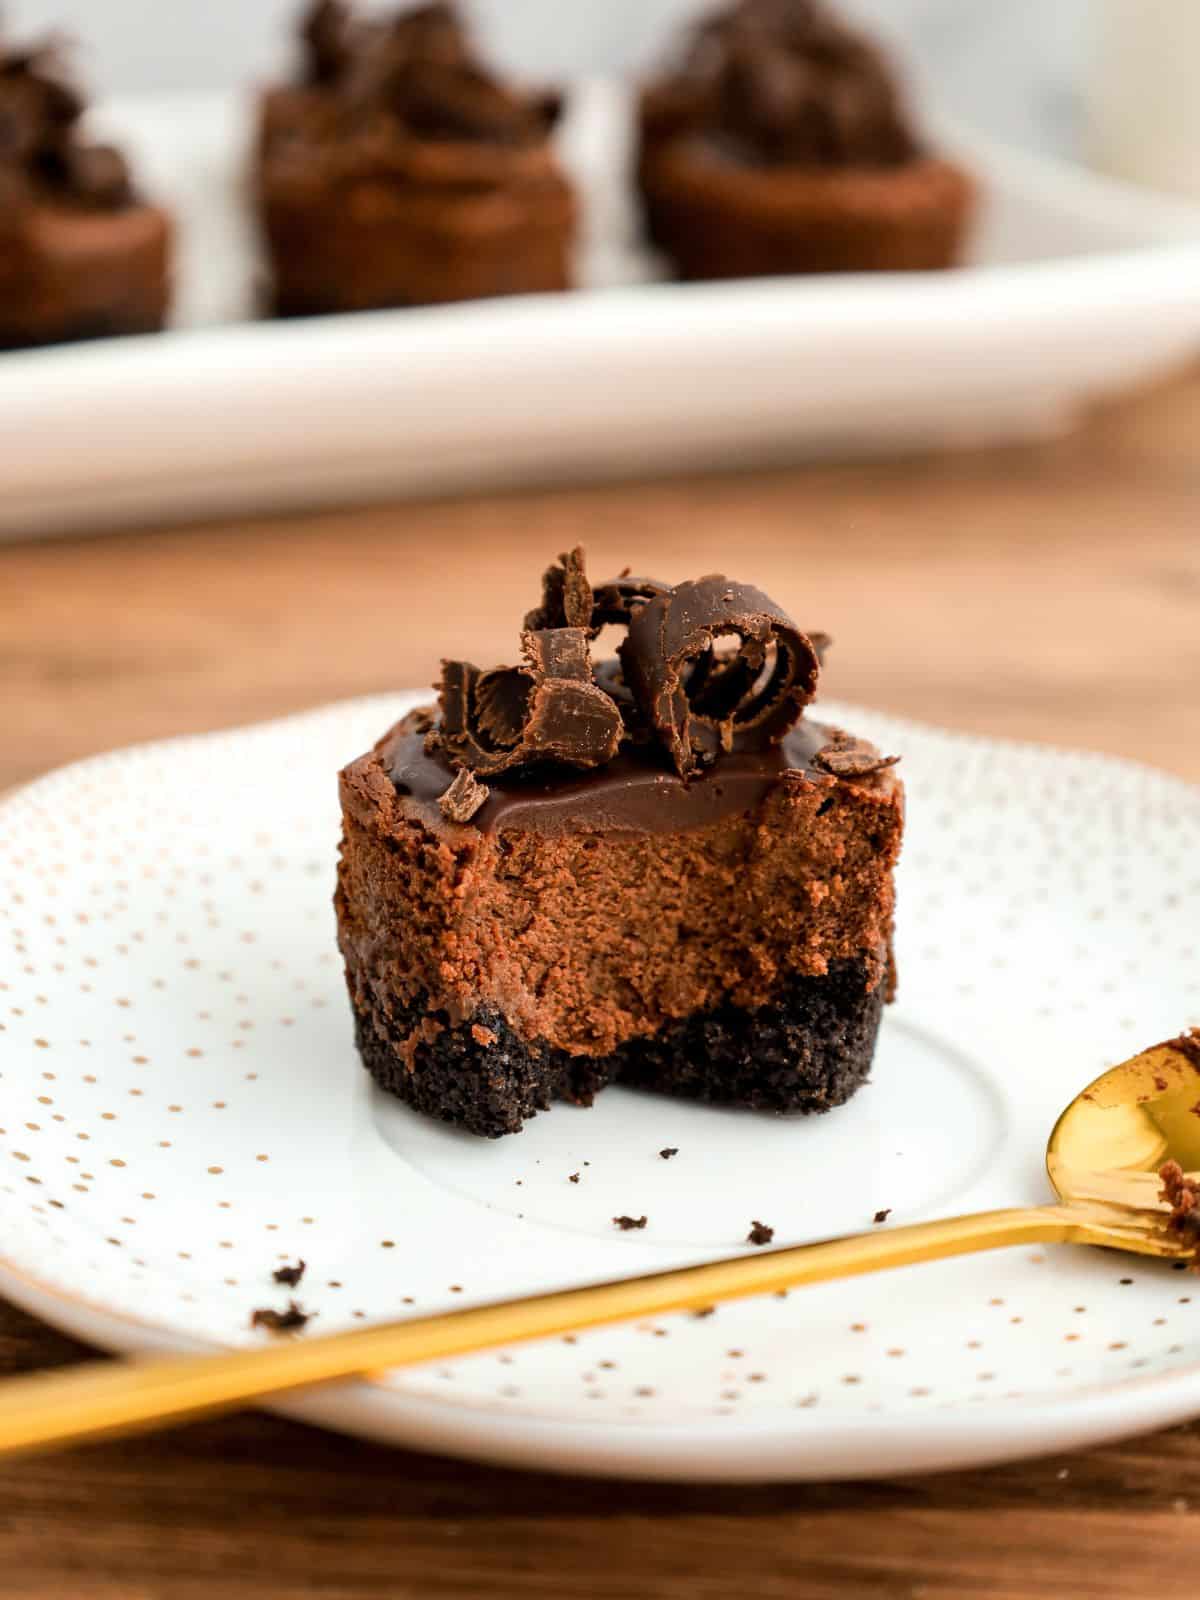
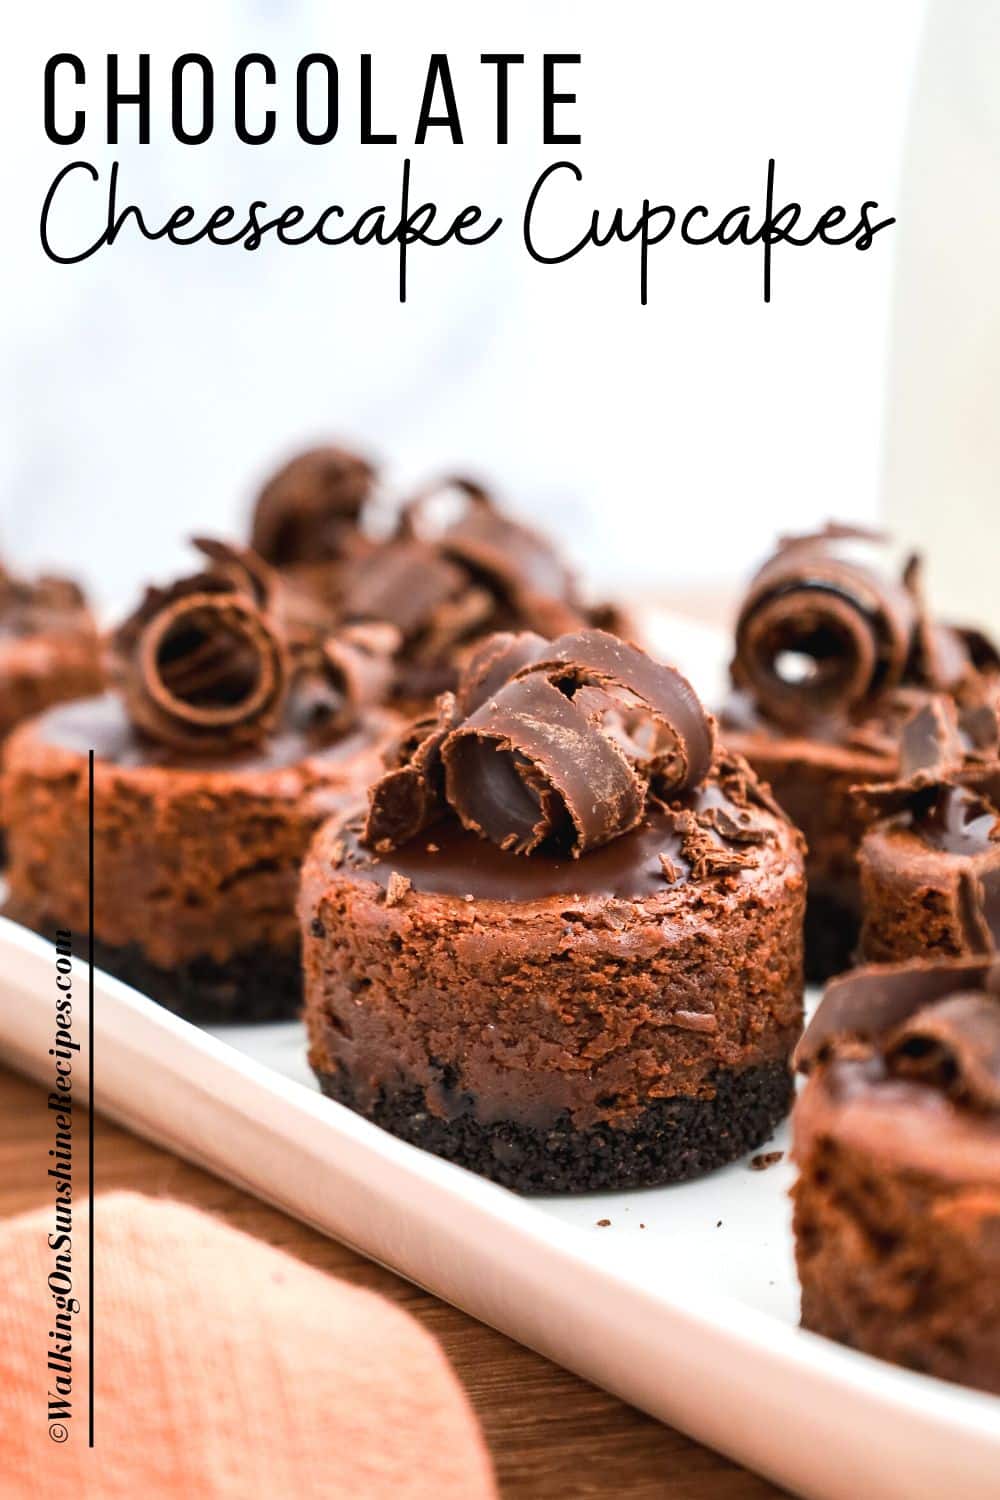
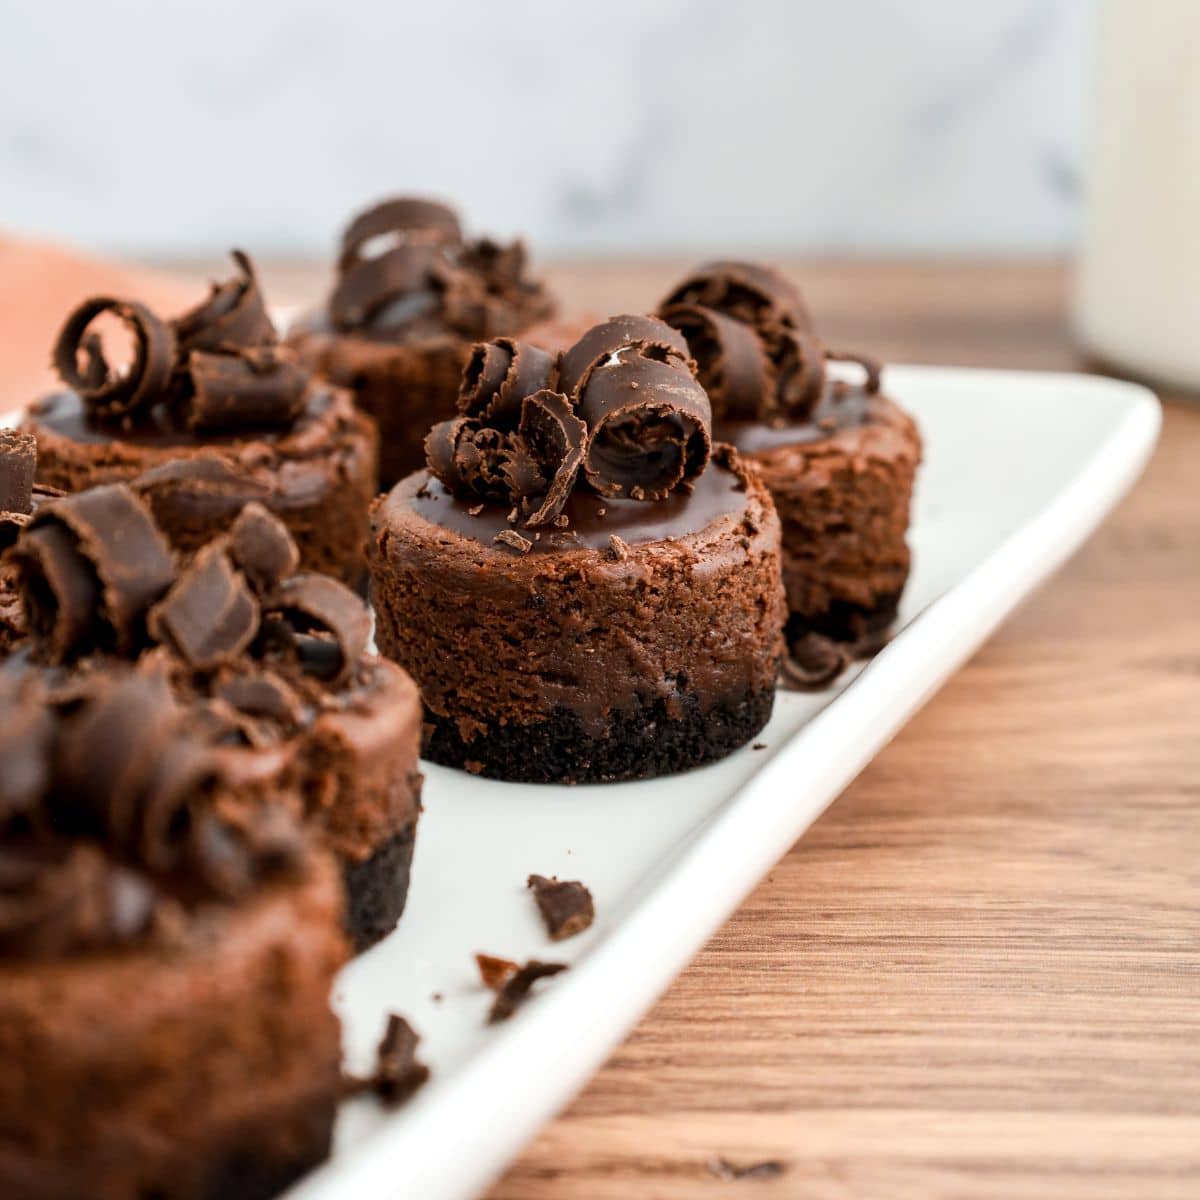
Made with a crunchy Oreo cookie base, a rich filling, and a ganache topping, these chocolate cheesecake cupcakes are the ultimate bite-sized treat for any celebration.
This is another one of my mini cheesecake recipes that comes together quickly and delivers rich, crowd-pleasing flavor without any complicated steps.
Want to Save This Recipe?
Enter your email & I'll send it to your inbox. Plus, get great new recipes from me every week!
By submitting this form, you consent to receive emails from Walking on Sunshine Recipes.
Recipe at a Glance
Prep: 20 min | Cook/Bake: 25 min | Difficulty: Easy
What it is: Decadent chocolate cheesecake cupcakes built on an Oreo cookie crust and finished with a rich, silky chocolate ganache for every bite.
Why you’ll love it: They’re perfect for when you want an elegant dessert in cupcake form.
How to make it: Press Oreo crumbs into cupcake liners, bake a cheesecake filling in the center, then bake until set. Once cooled, pour over the chocolate ganache and chill for best texture.
SUMMARIZE & SAVE THIS CONTENT ON
Table of Contents
- Recipe at a Glance
- What is a Mini Cheesecake Pan?
- Ingredients You’ll Need
- Substitutions and Variations
- Step-by-Step Instructions
- How long to cook cheesecake cupcakes?
- How to Make Chocolate Curls
- Insider Tips from My Kitchen to Yours
- Storage & Serving Tips
- Recipe FAQ
- More Recipes to Love
- LOVE this recipe? SAVE it for Later!
- 🗒️Shopping List
- 📖 Recipe Card
- 💬 Comments
What is a Mini Cheesecake Pan?
A mini cheesecake pan is designed to help you easily bake delicious miniature desserts. Made from heavy duty metal, this specialty kitchen tool comes with a removable bottom plates for easy release of the baked mini-cheesecakes.
If you don't have a cheesecake pan, you can use a regular-sized cupcake pan. Keep in mind that the size of the cheesecakes will be larger and the baking time will likely be longer when using a regular-sized cupcake pan instead of a mini cheesecake pan.
Looking for more easy desserts ? Try my Chocolate Bliss Cheesecake, or my Christmas Mini Cheesecakes.
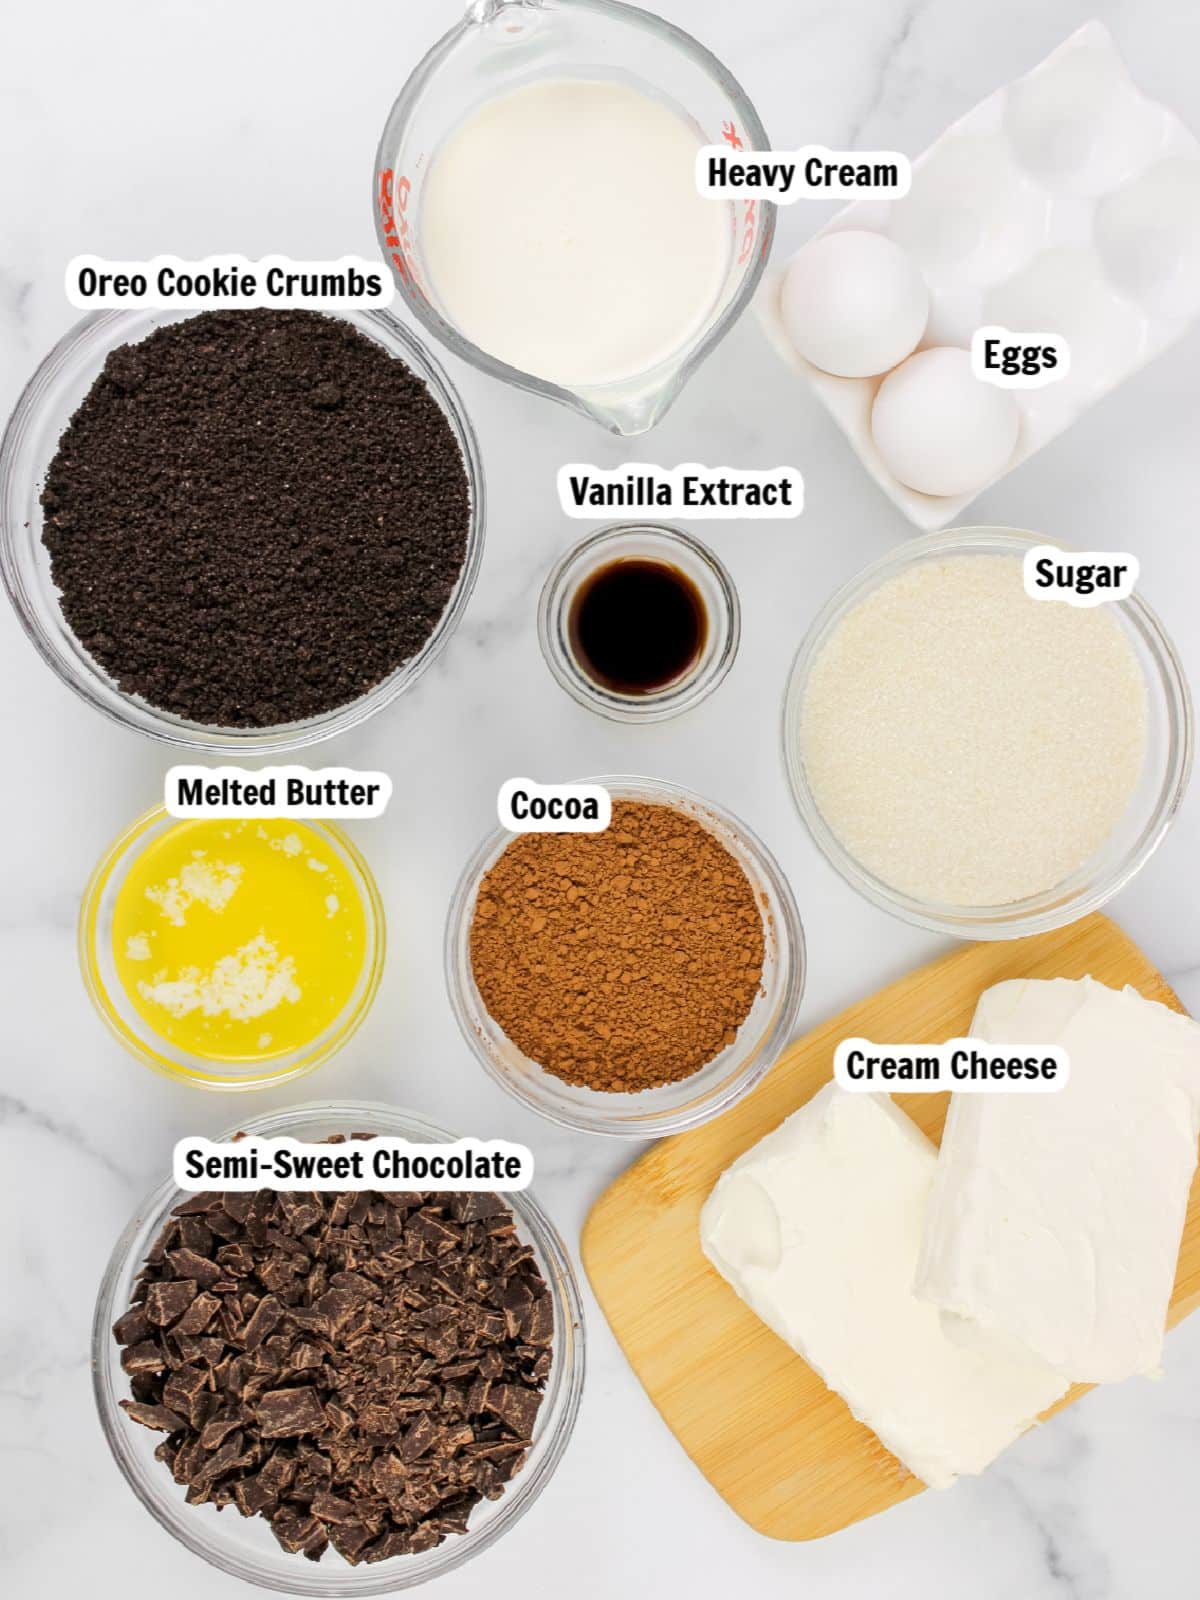
Ingredients You’ll Need
Below is a quick preview of the ingredients you’ll need. For exact amounts, check the recipe card below. You can also use the "Shopping List button" to create a printable shopping list, or the "Get Ingredients button" in the recipe card to order groceries online.
Substitutions and Variations
- Flavor Variations: Swap the Oreo crust for chocolate graham crackers, vanilla wafers, or chocolate wafer cookies to change up the flavor.
- Espresso Powder: Add a pinch of espresso powder to the filling for a mocha twist.
- Dairy Alternatives: For a slightly lighter version, use Neufchâtel cheese instead of full-fat cream cheese, or try a trusted dairy-free cream cheese if you need a non-dairy options.
Step-by-Step Instructions
This section includes step-by-step photos and instructions to guide you through the recipe. For the complete printable version, scroll down to the recipe card below.
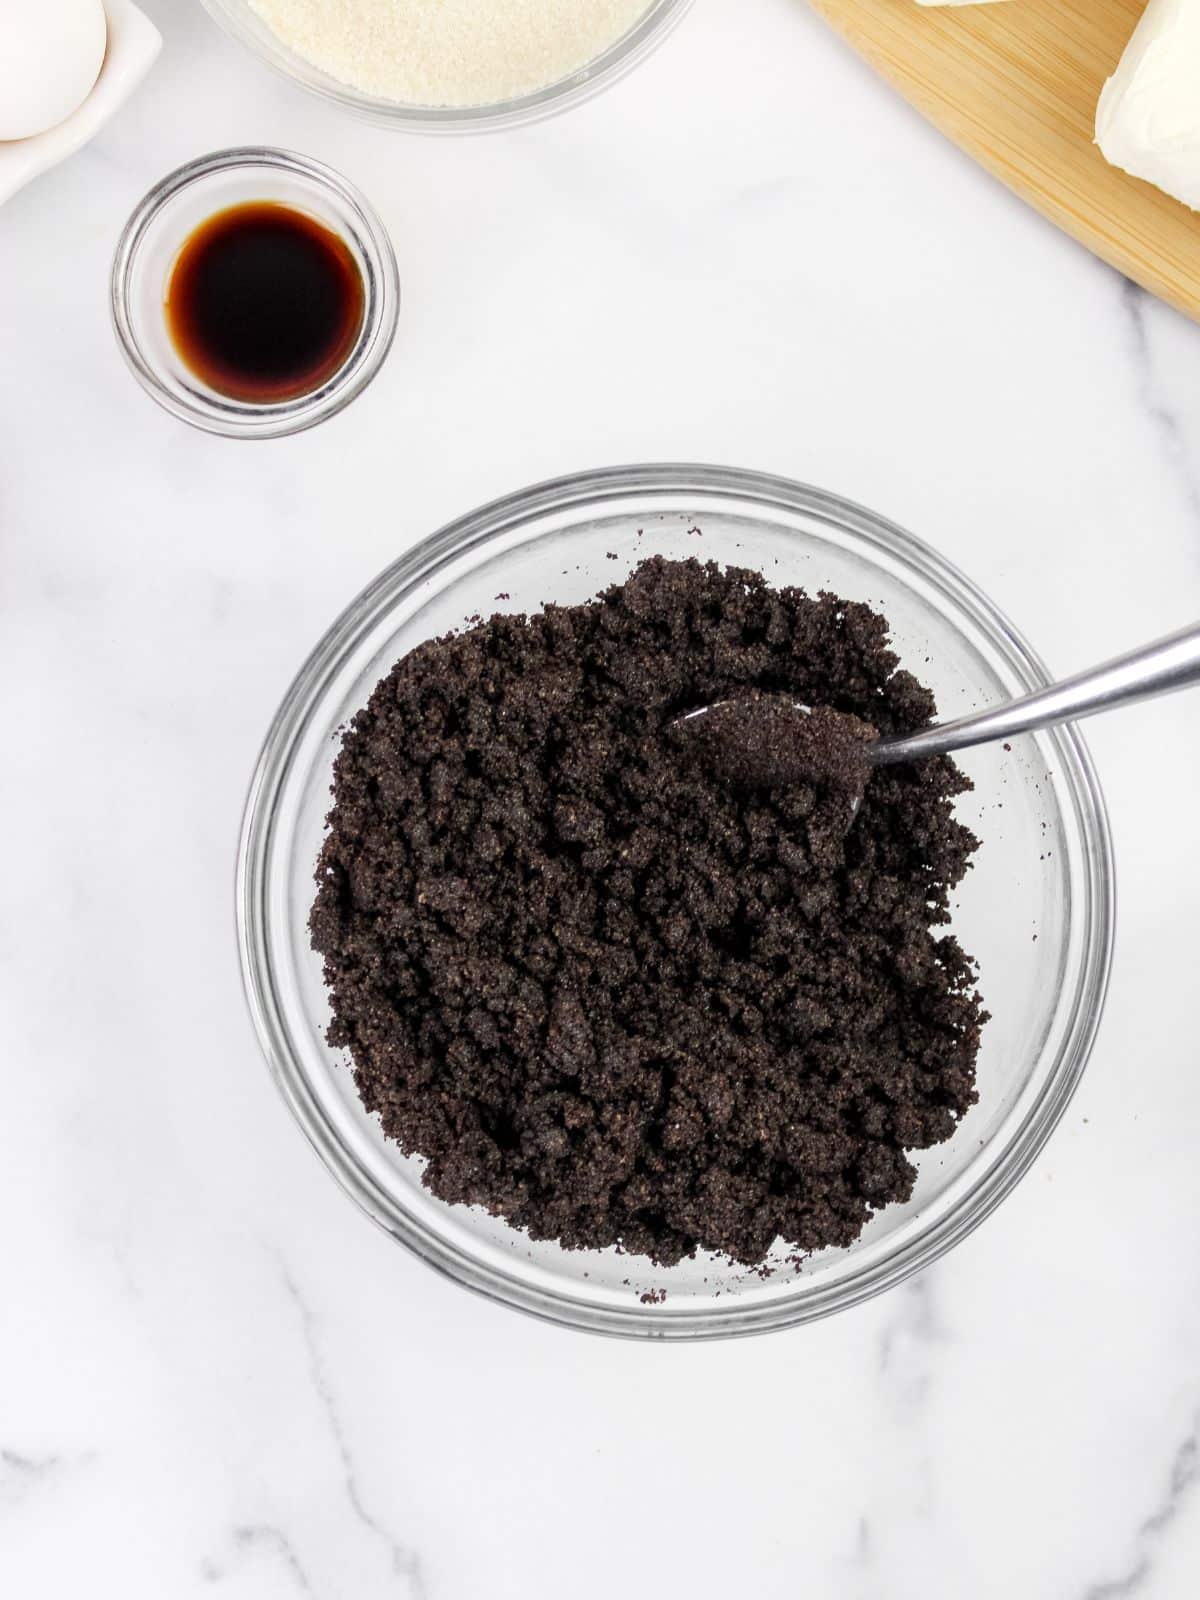
Step 1: Mix the melted butter into the cookie crumbs. Stir to combine.
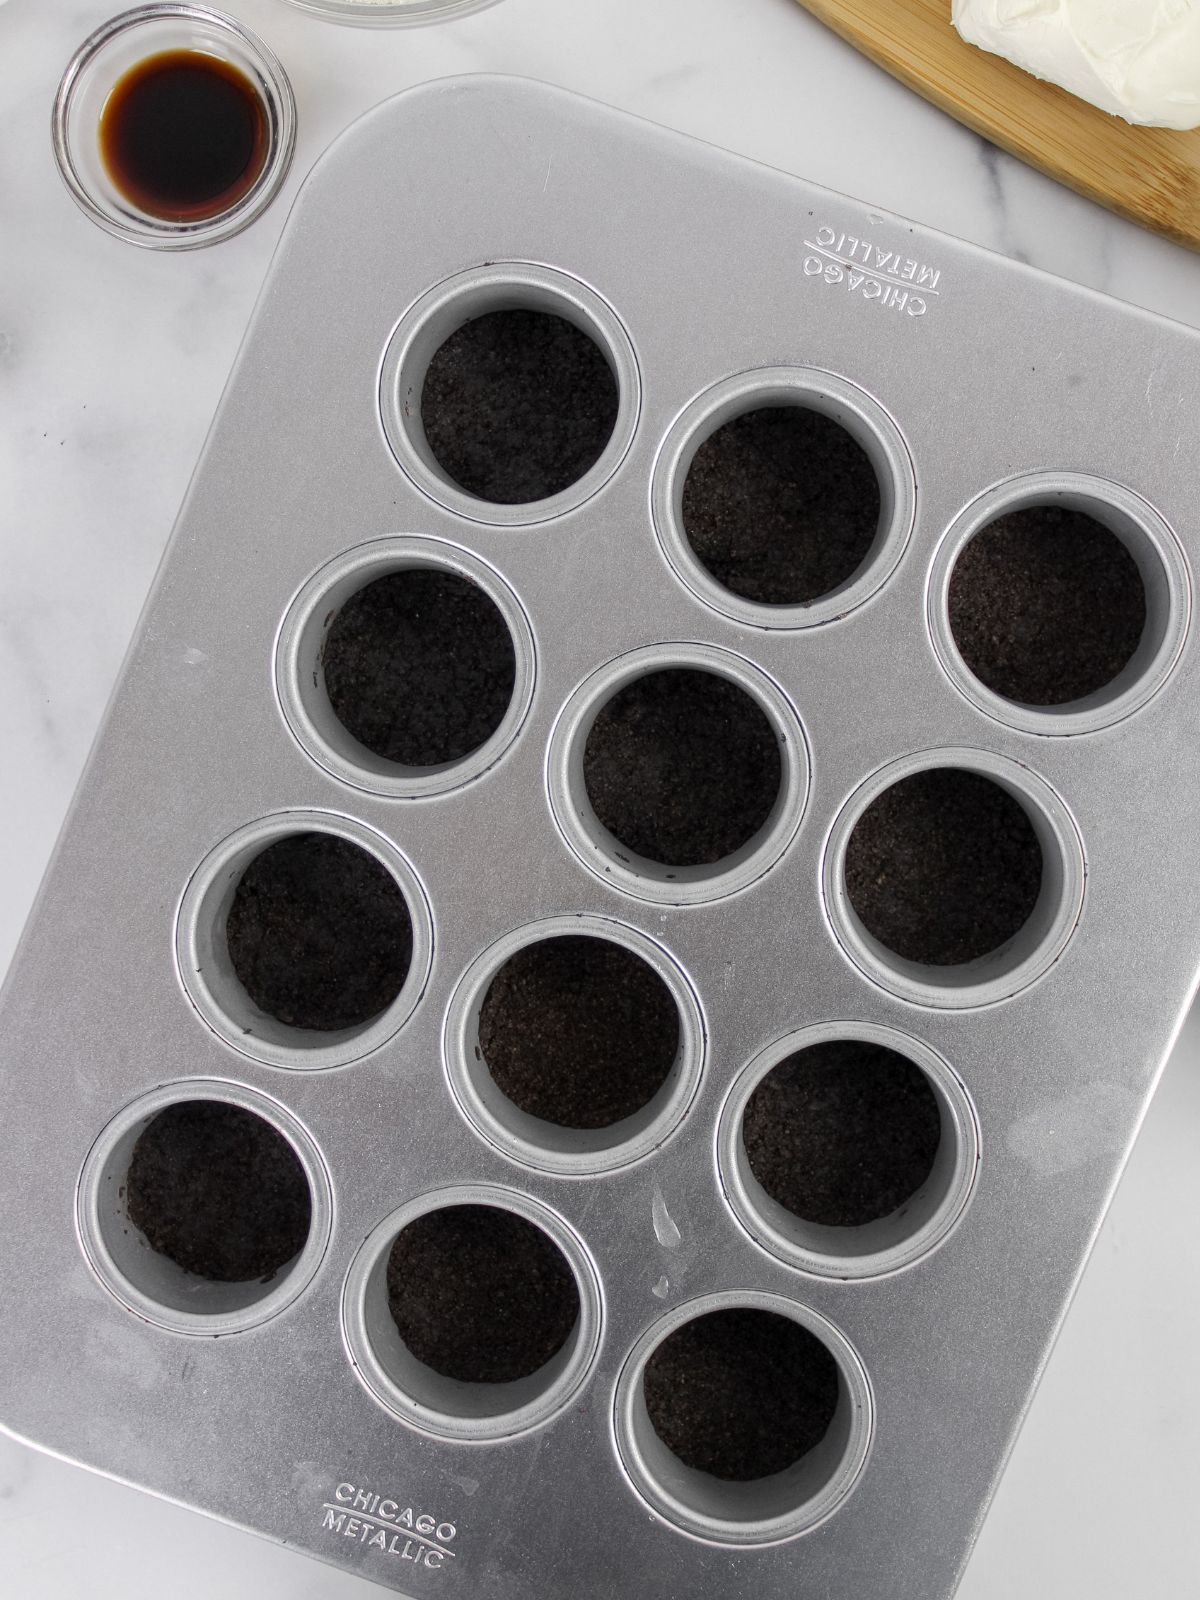
Step 2: Spoon the mixture into each cavity of the cheesecake pan. Use a tart tamper to press the crumbs into an even layer at the bottom.
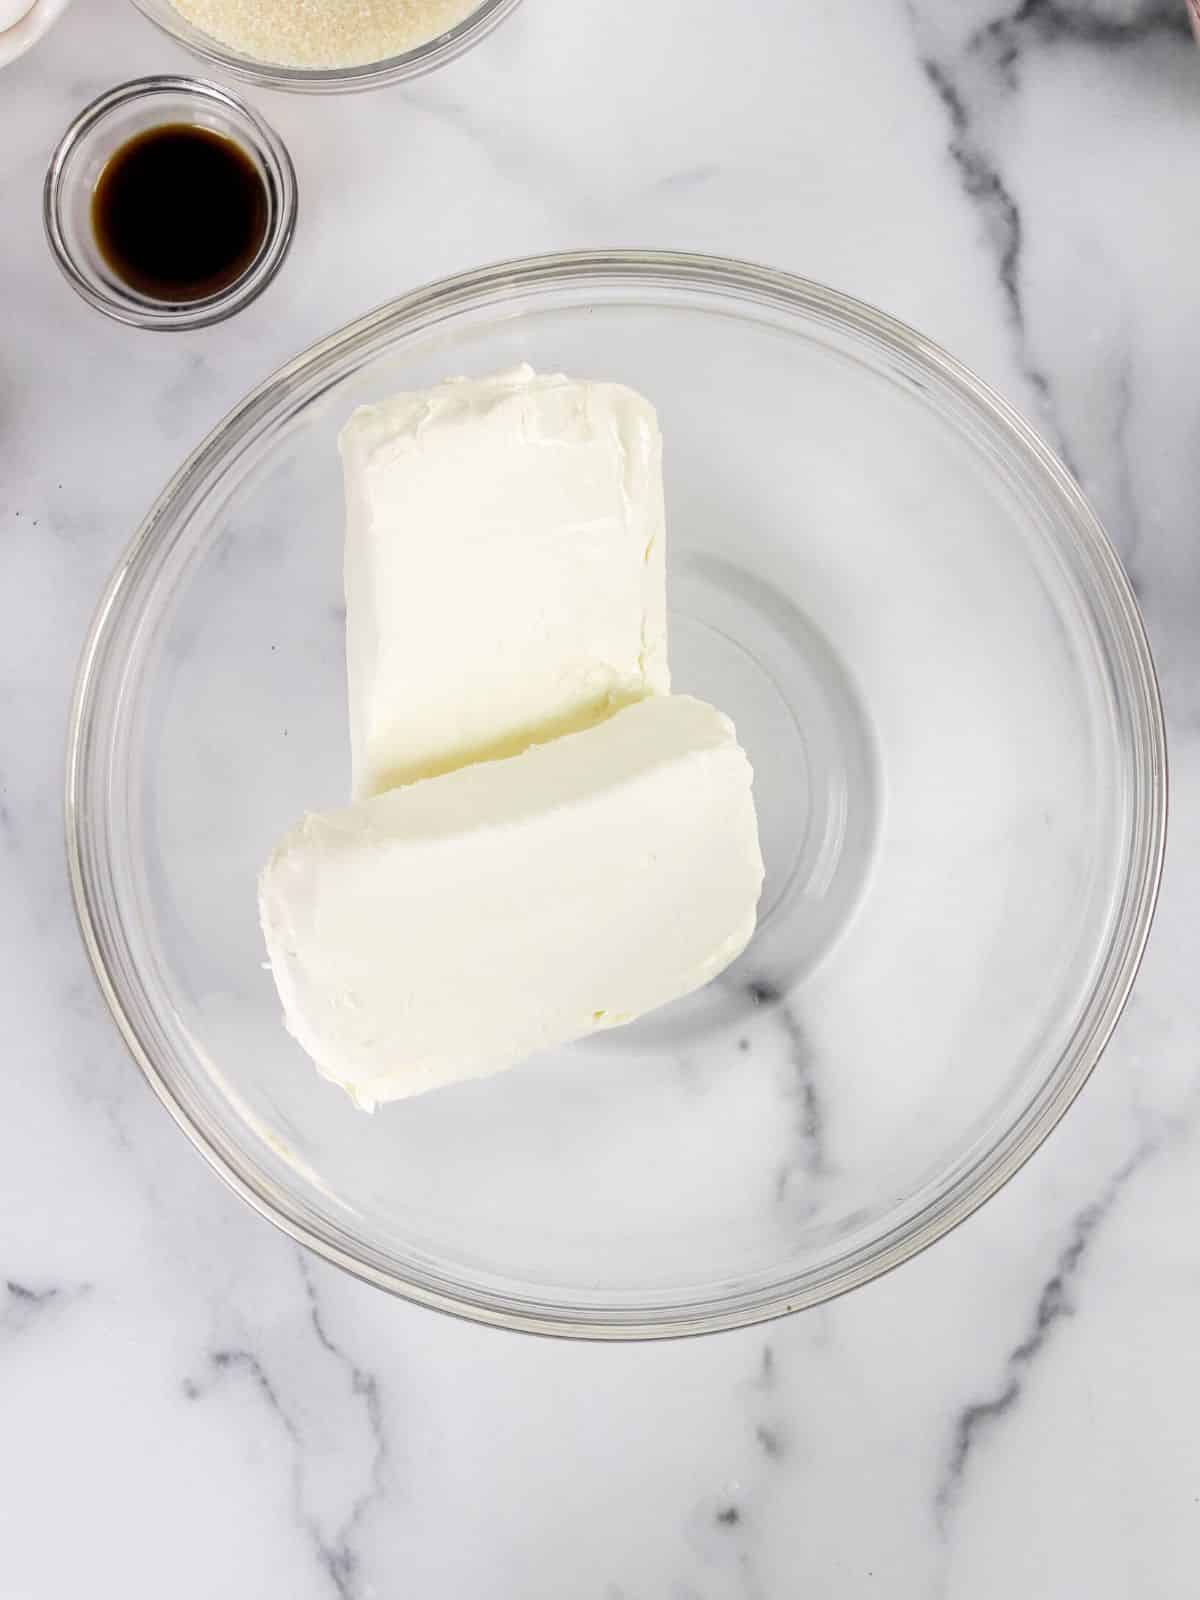
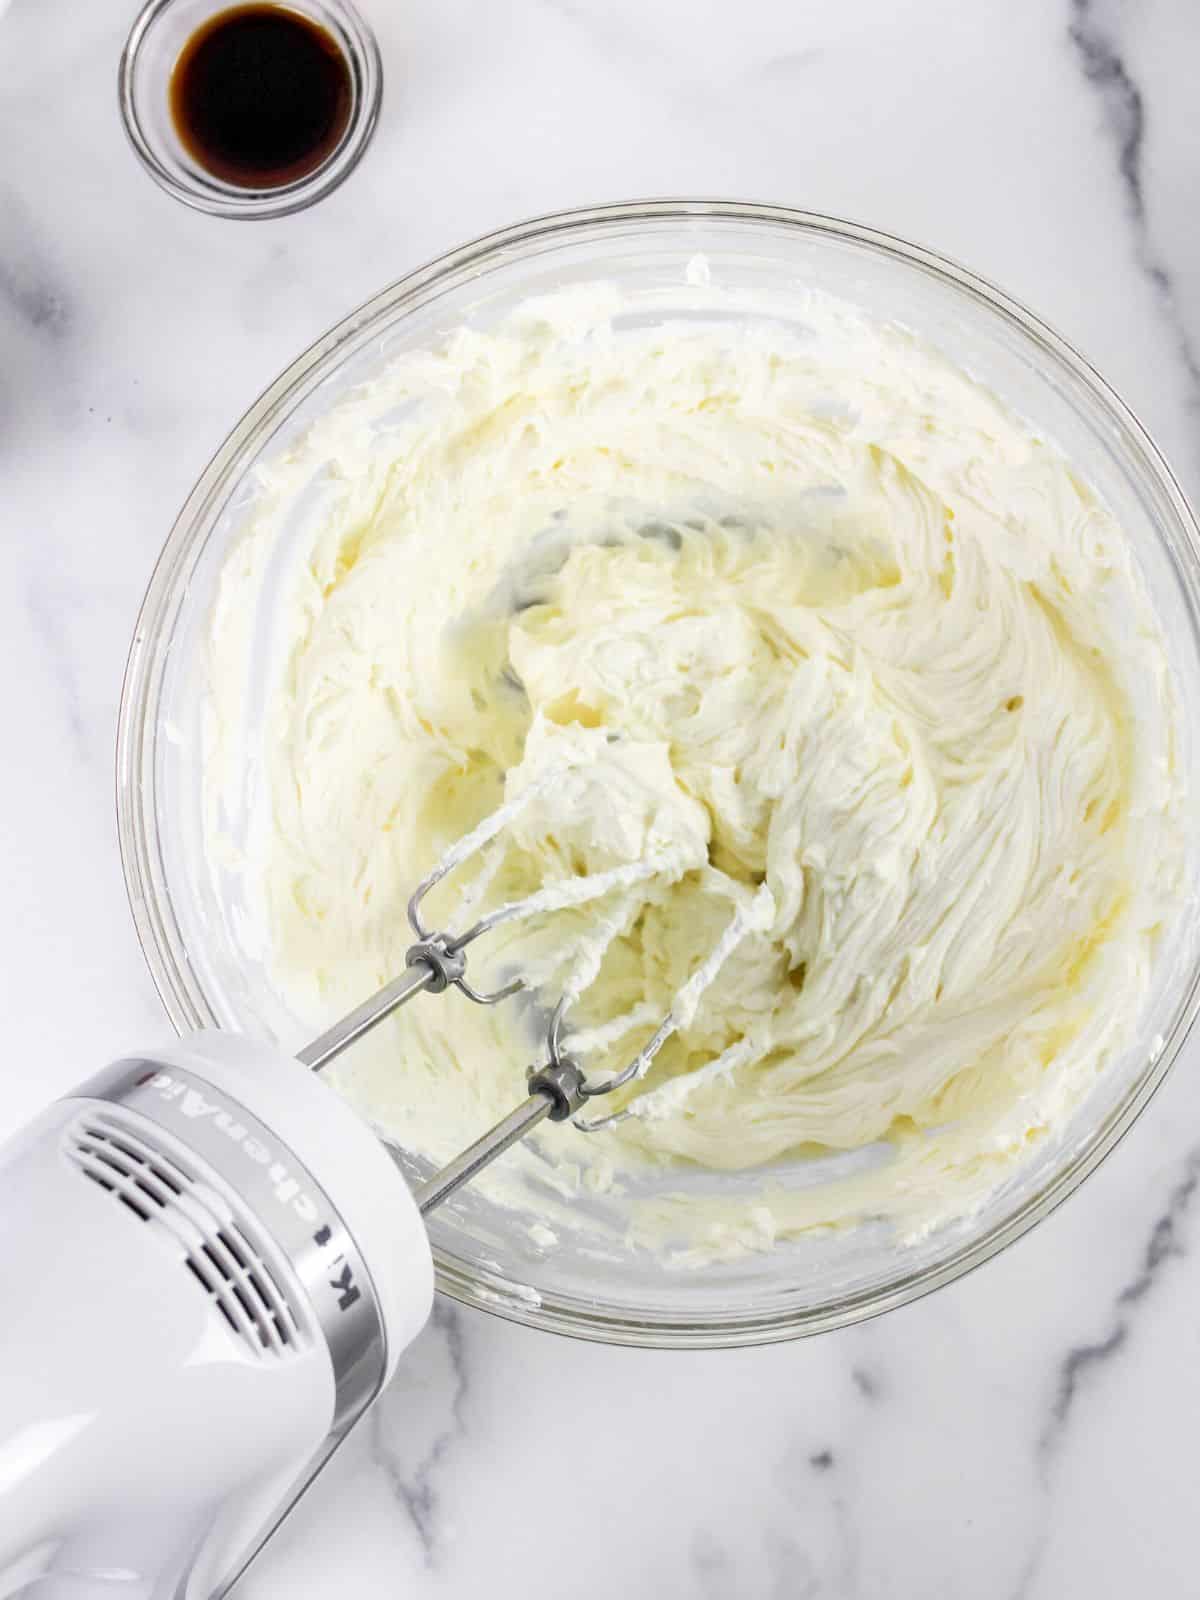
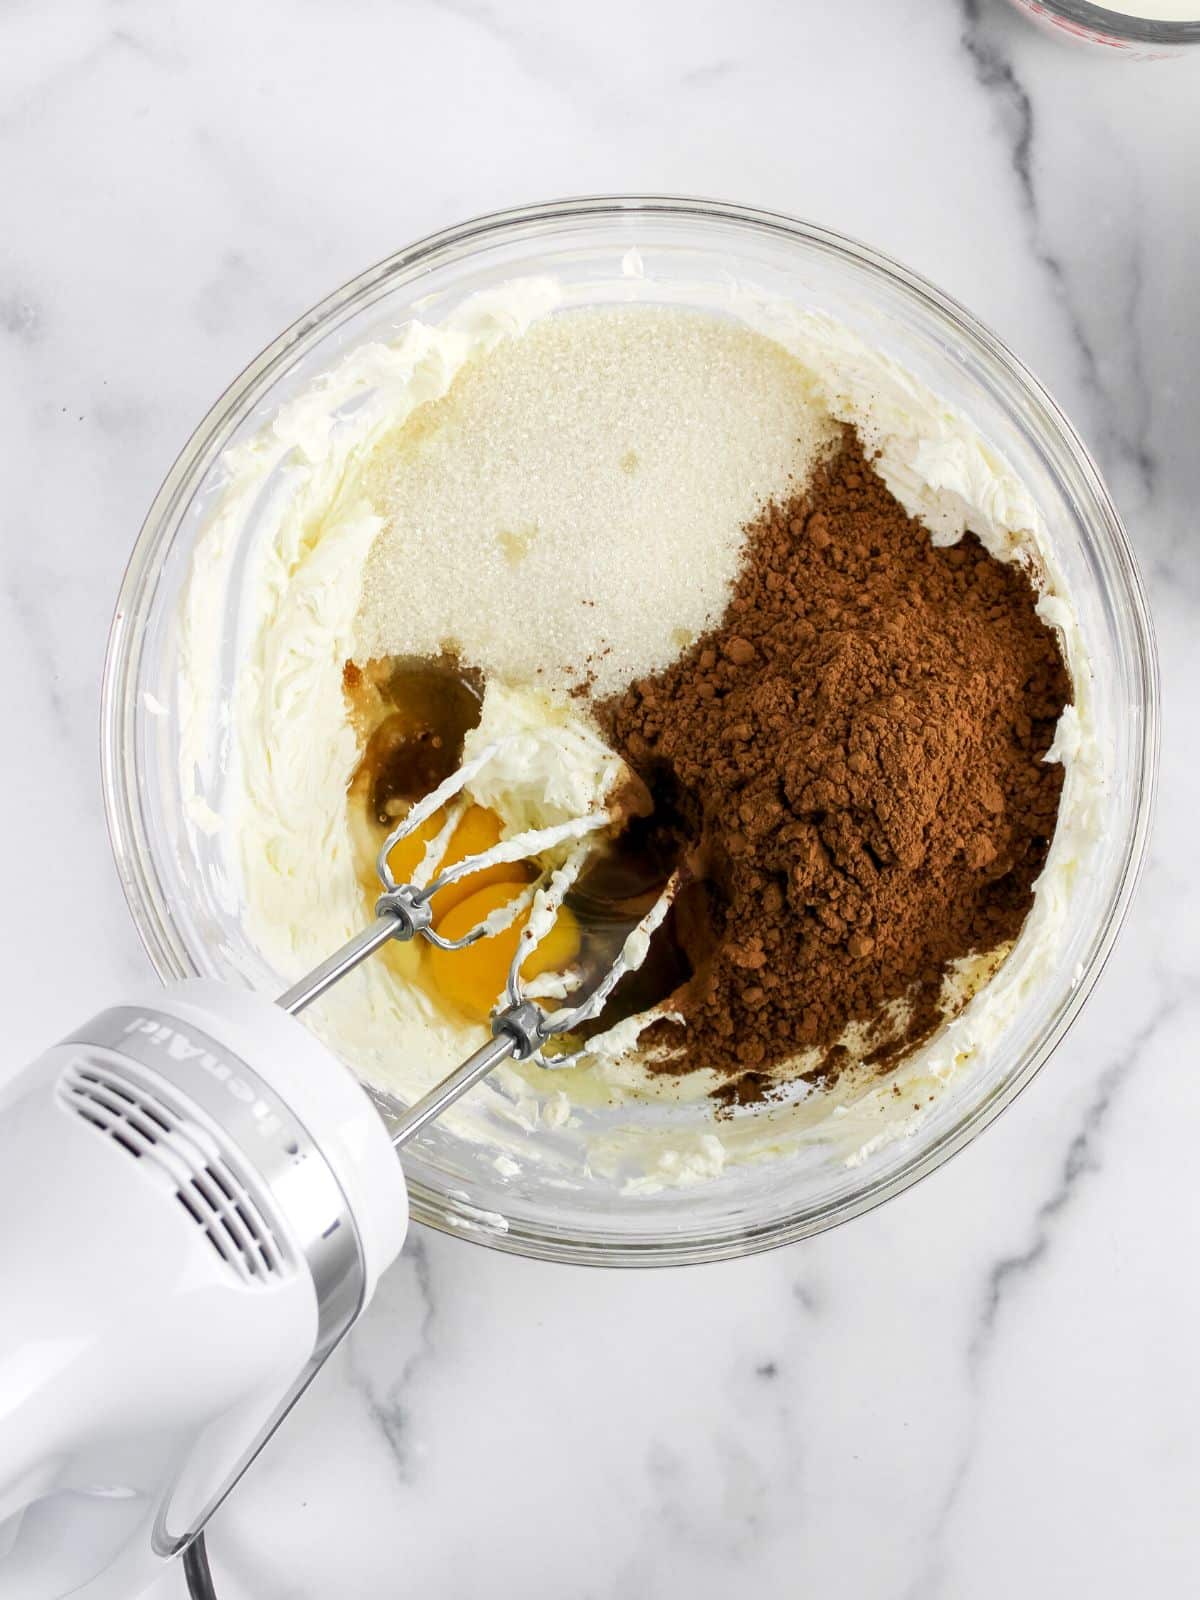
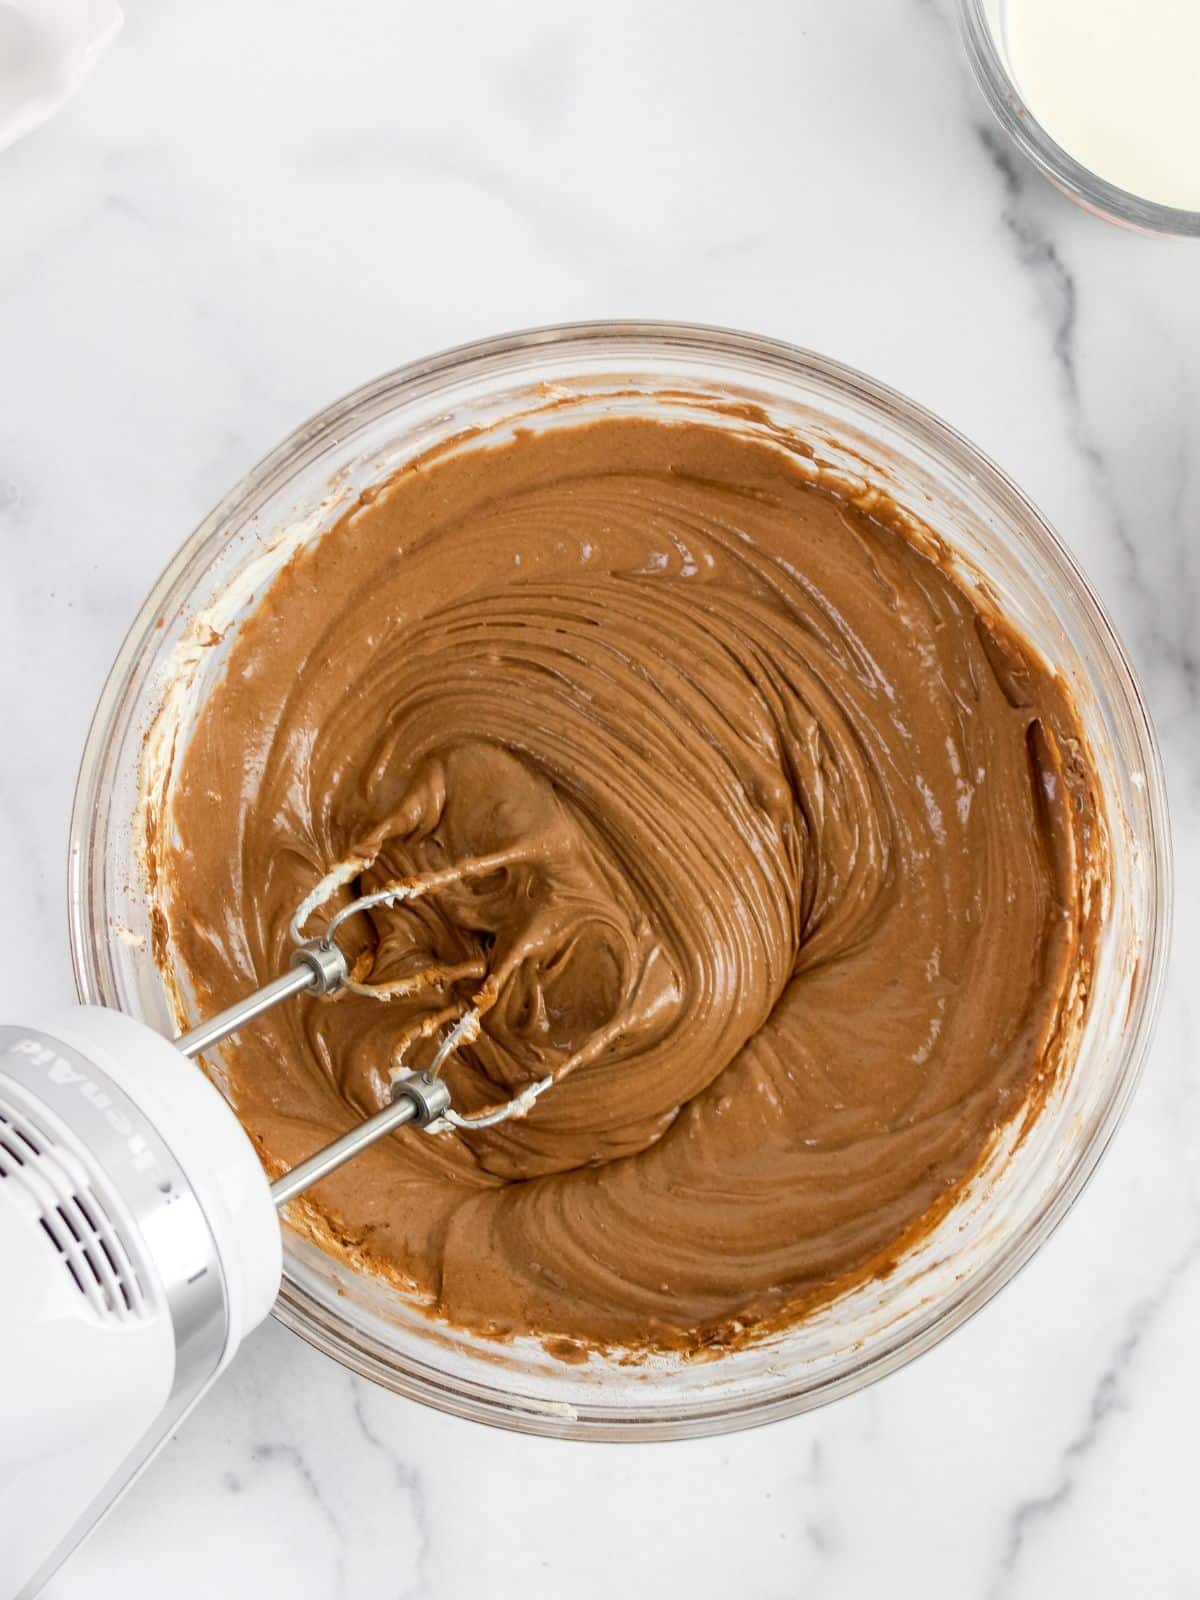
Step 3: Start by beating the cream cheese until it's nice and smooth. Next, add the sugar, cocoa powder, eggs, and vanilla extract. Beat the mixture until everything is well-combined and has a creamy texture.
How long to cook cheesecake cupcakes?
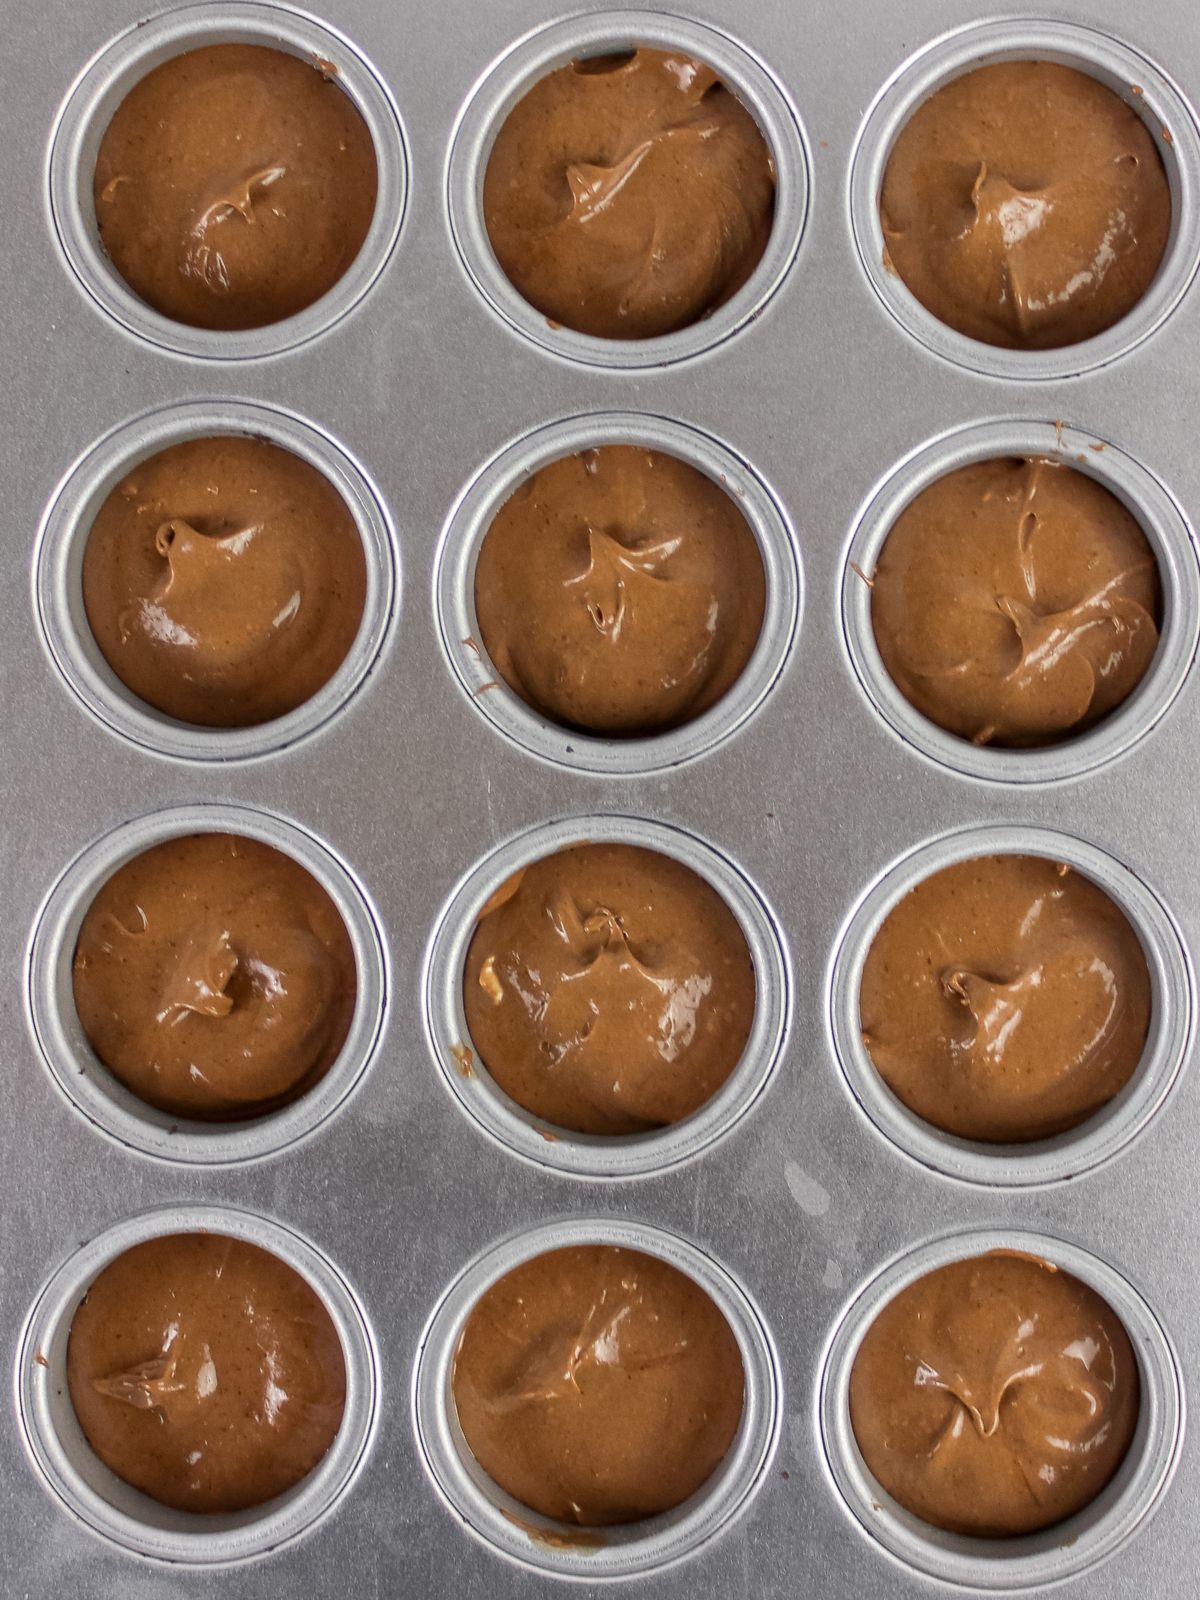
Step 4: Fill each cavity about ¾ of the way full and bake in a preheated 350°F oven for 20 minutes. If using a cheesecake pan, place it on a lined baking sheet for extra stability. Allow the baked treats to cool to room temperature before transferring them to the refrigerator to chill.
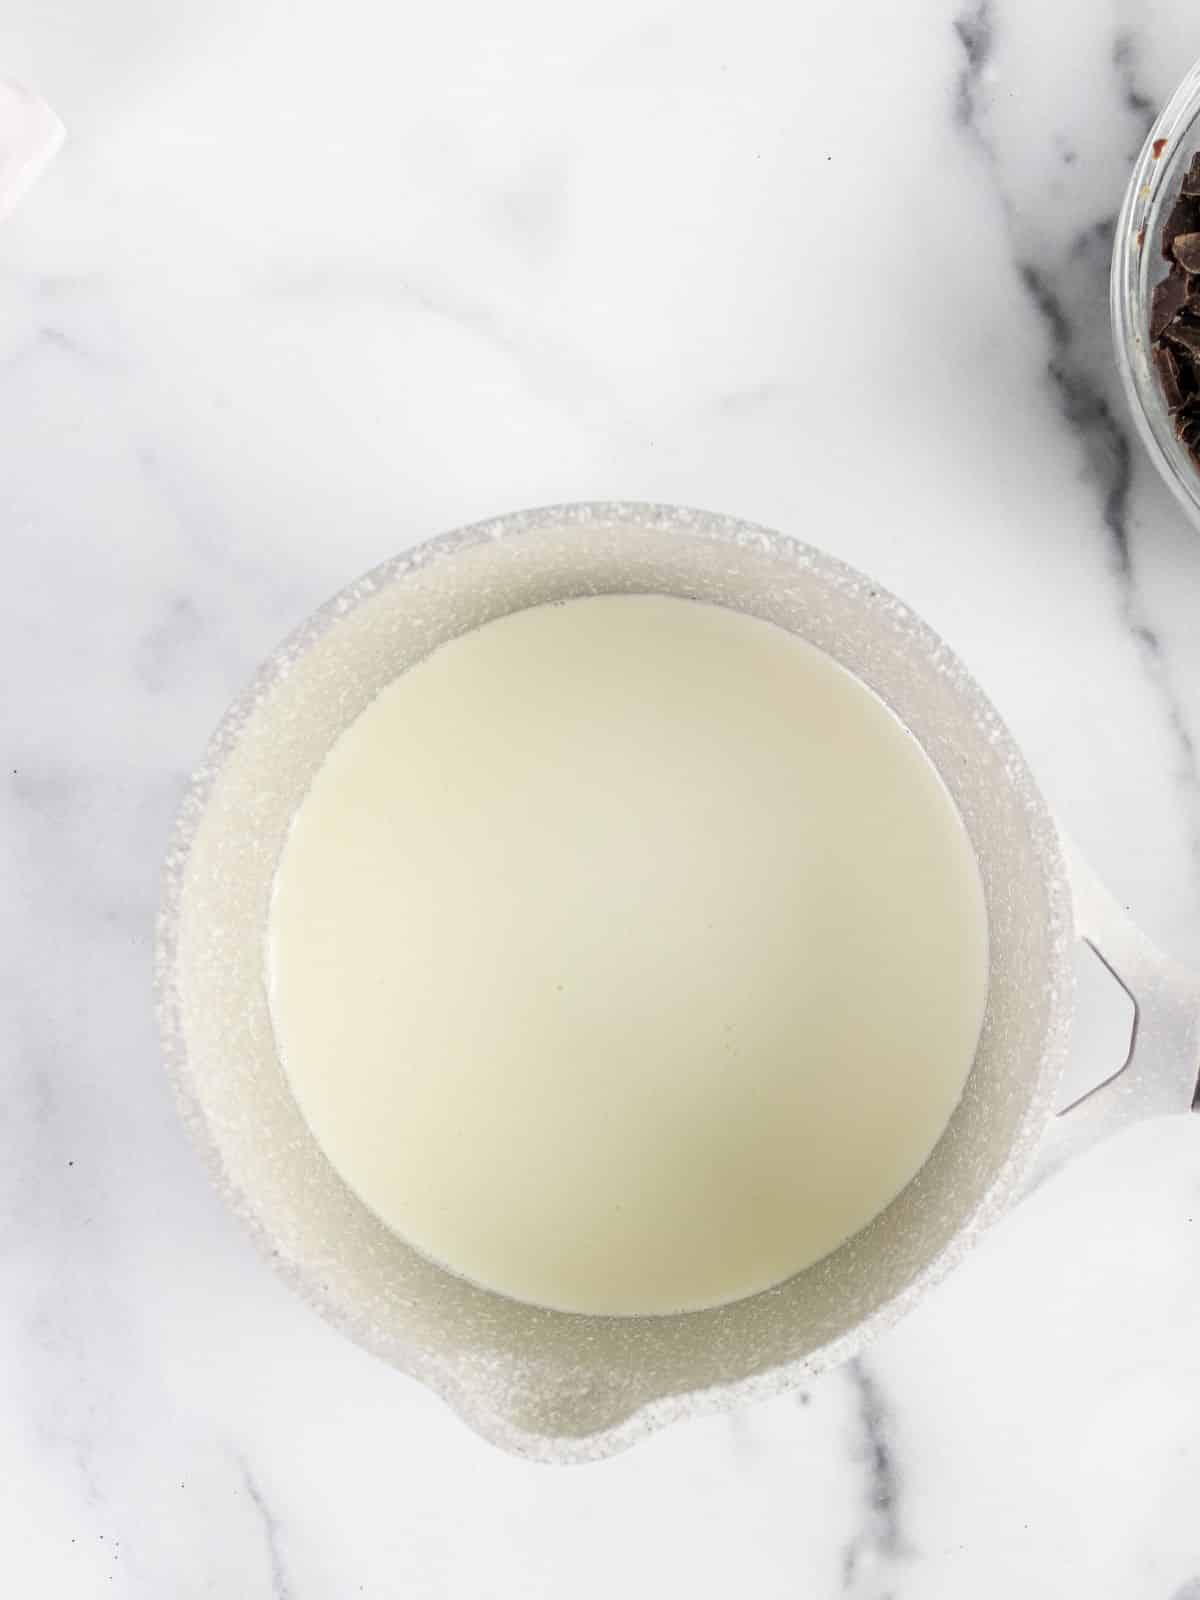
Step 5: Heat the heavy cream in a small saucepan over medium-low heat. Watch for tiny bubbles forming around the edges.
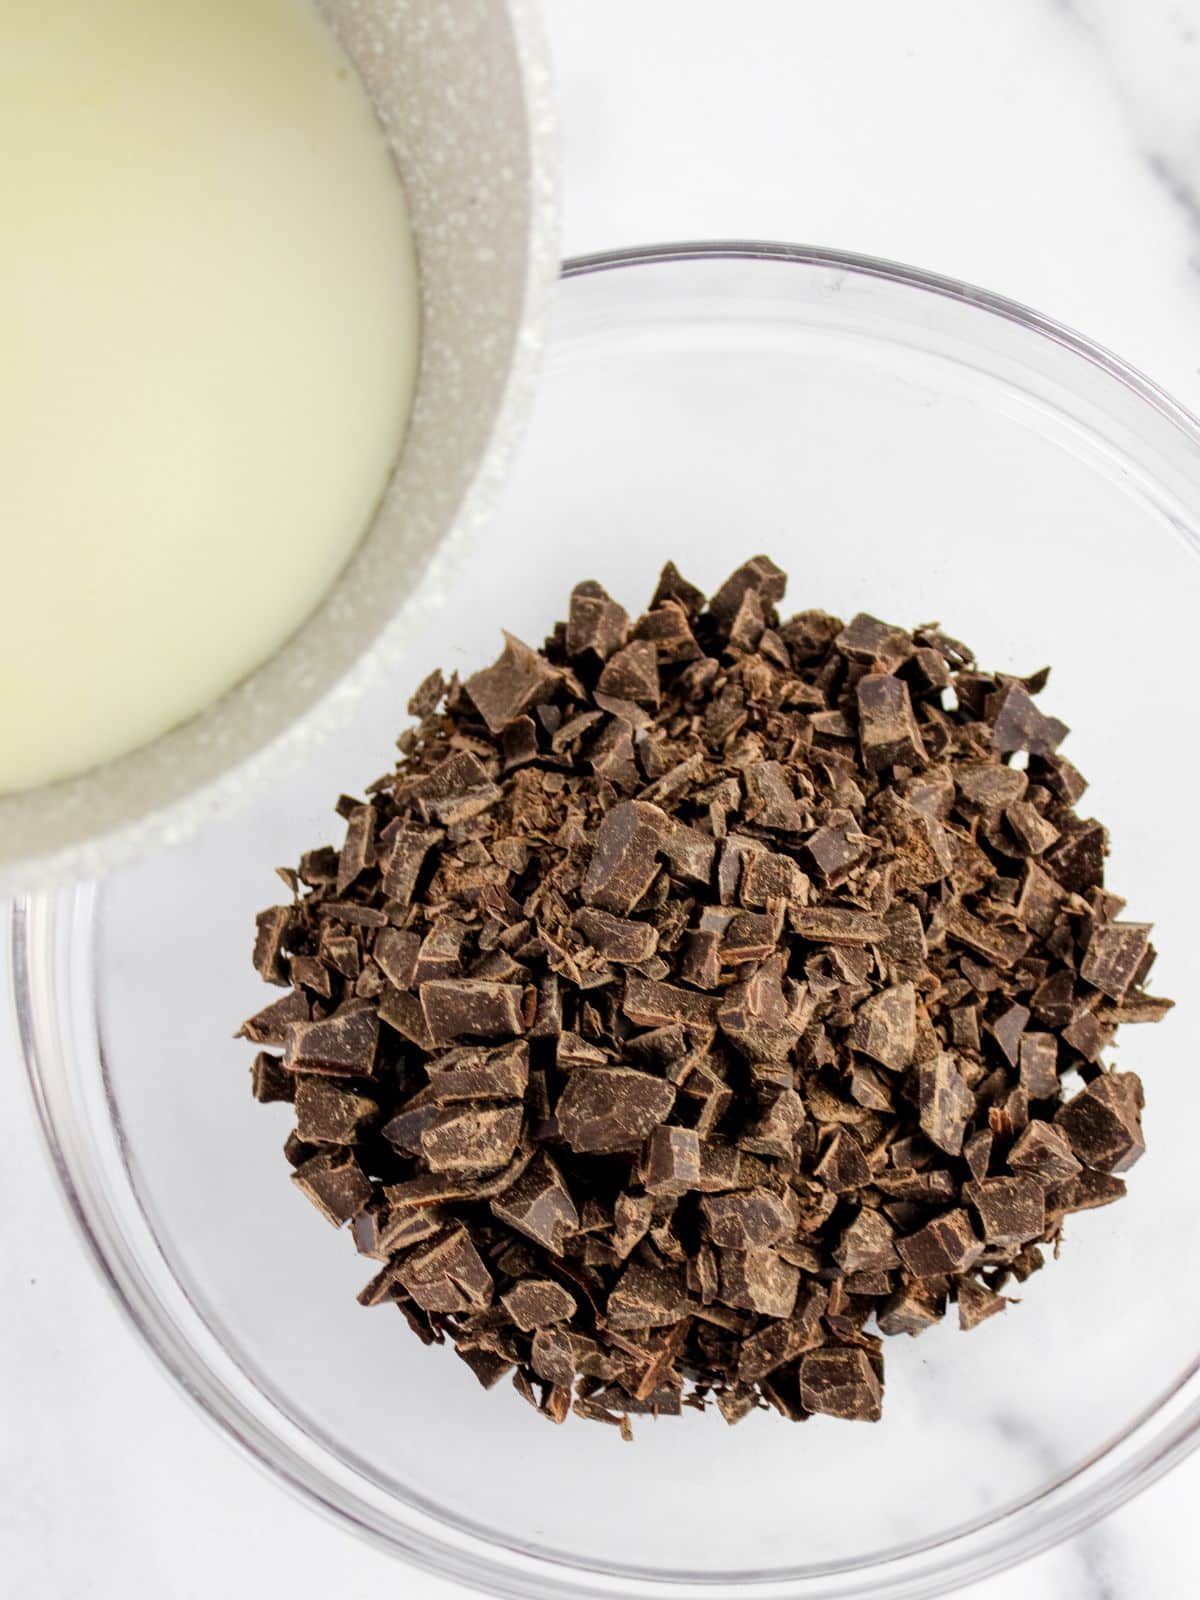
Step 6: Remove from heat immediately. Pour the warm cream over the semi-sweet chocolate pieces. Stir continuously until the mixture transforms into a smooth ganache.
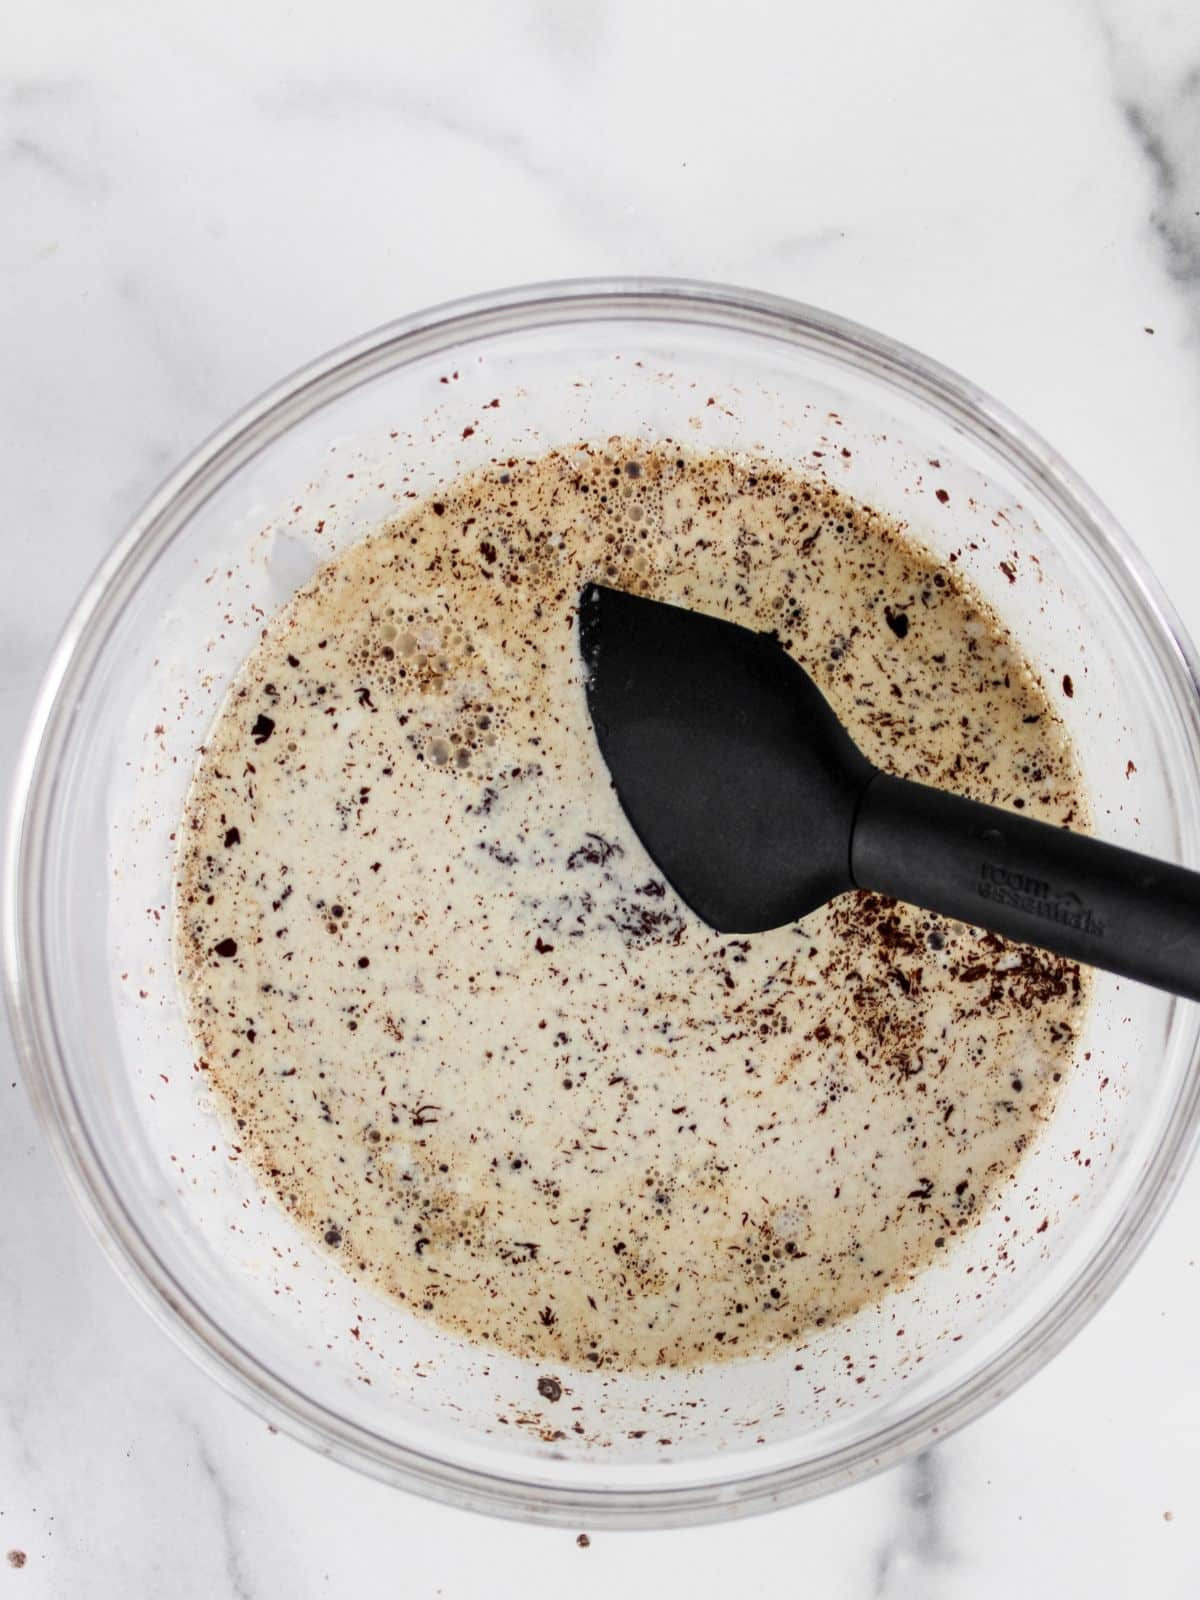
Step 7: The mixture will start to thicken as you stir. Keep stirring until it reaches a smooth ganache consistency.
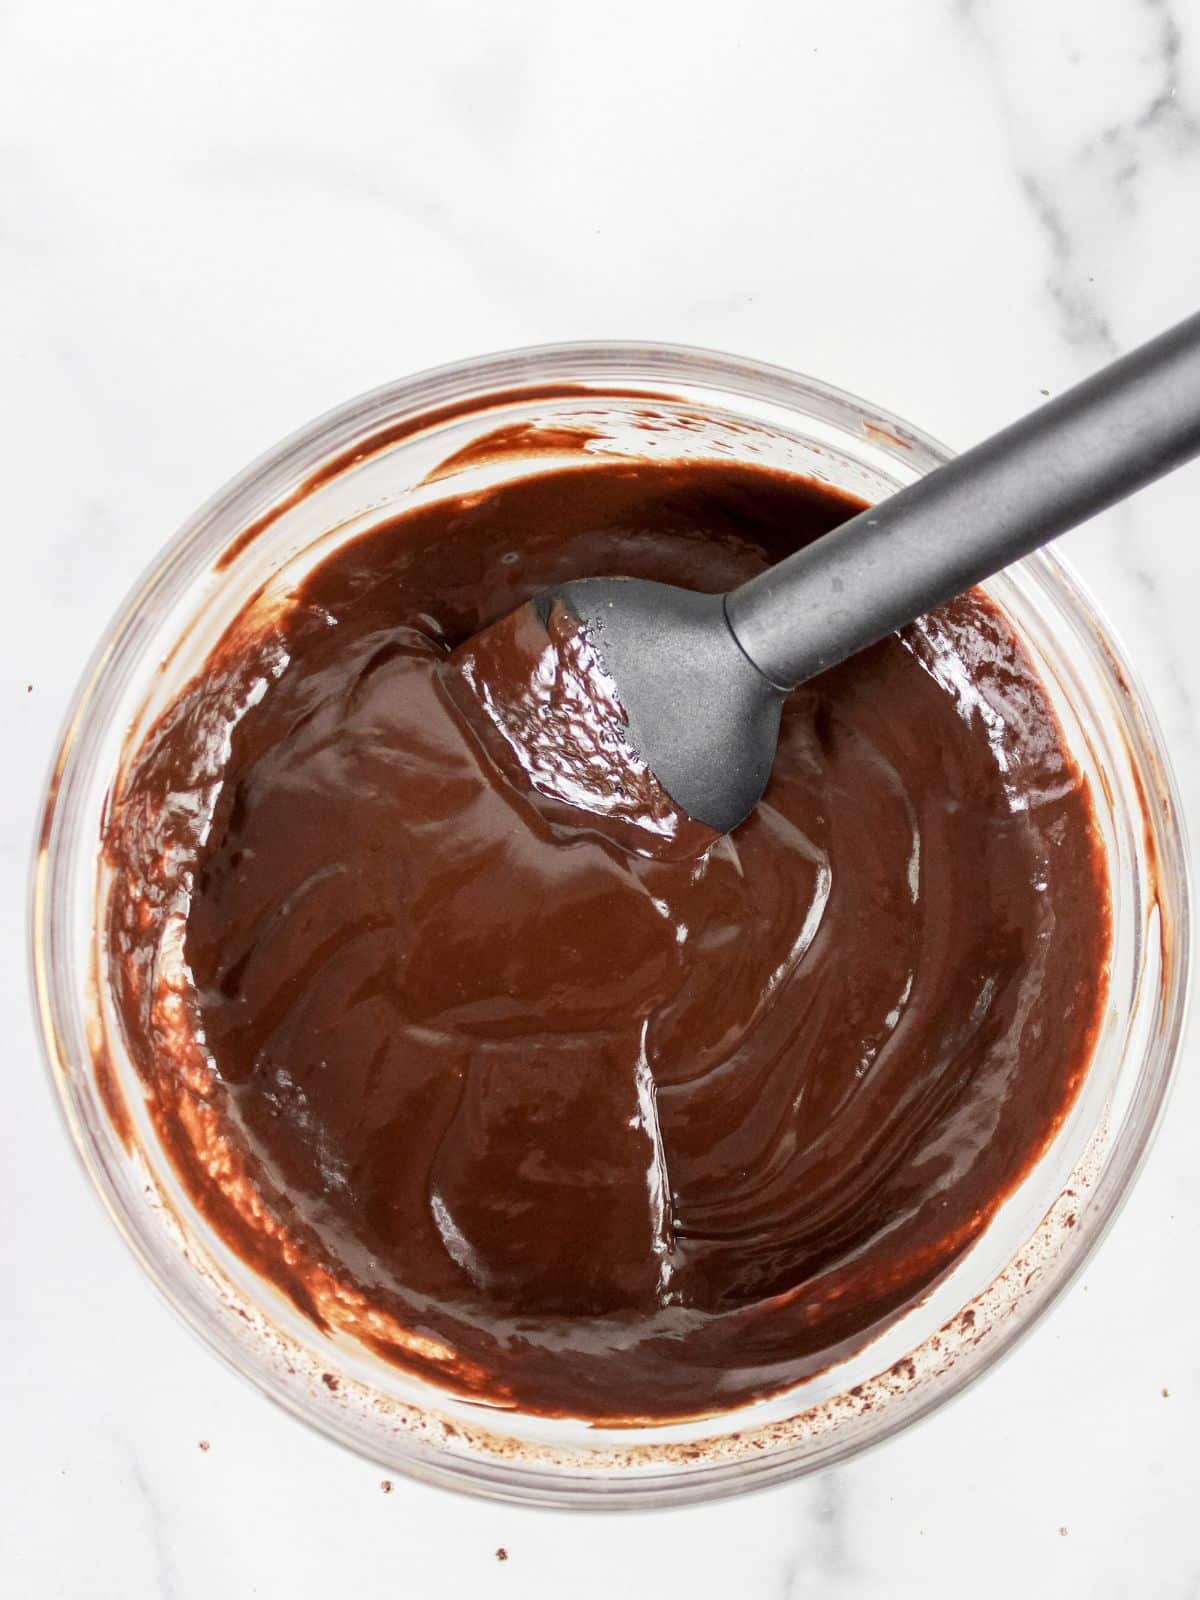
Step 8: It might not seem like it wants to mix at first, but trust the process – a smooth ganache is on its way!
How to Make Chocolate Curls
- All you need is a bar of high-quality chocolate and a vegetable peeler.
- Start by chilling the chocolate in the freezer for about 10 minutes. When it's nice and cold, use the vegetable peeler to shave off thin pieces of the chocolate from one side of the bar, allowing them to drop onto a plate or parchment paper below.
- Continue shaving off small sections at an angle until you’ve reached your desired amount of curls.
- Let the curls sit at room temperature for a few minutes before adding them to the top of the mini cheesecakes.
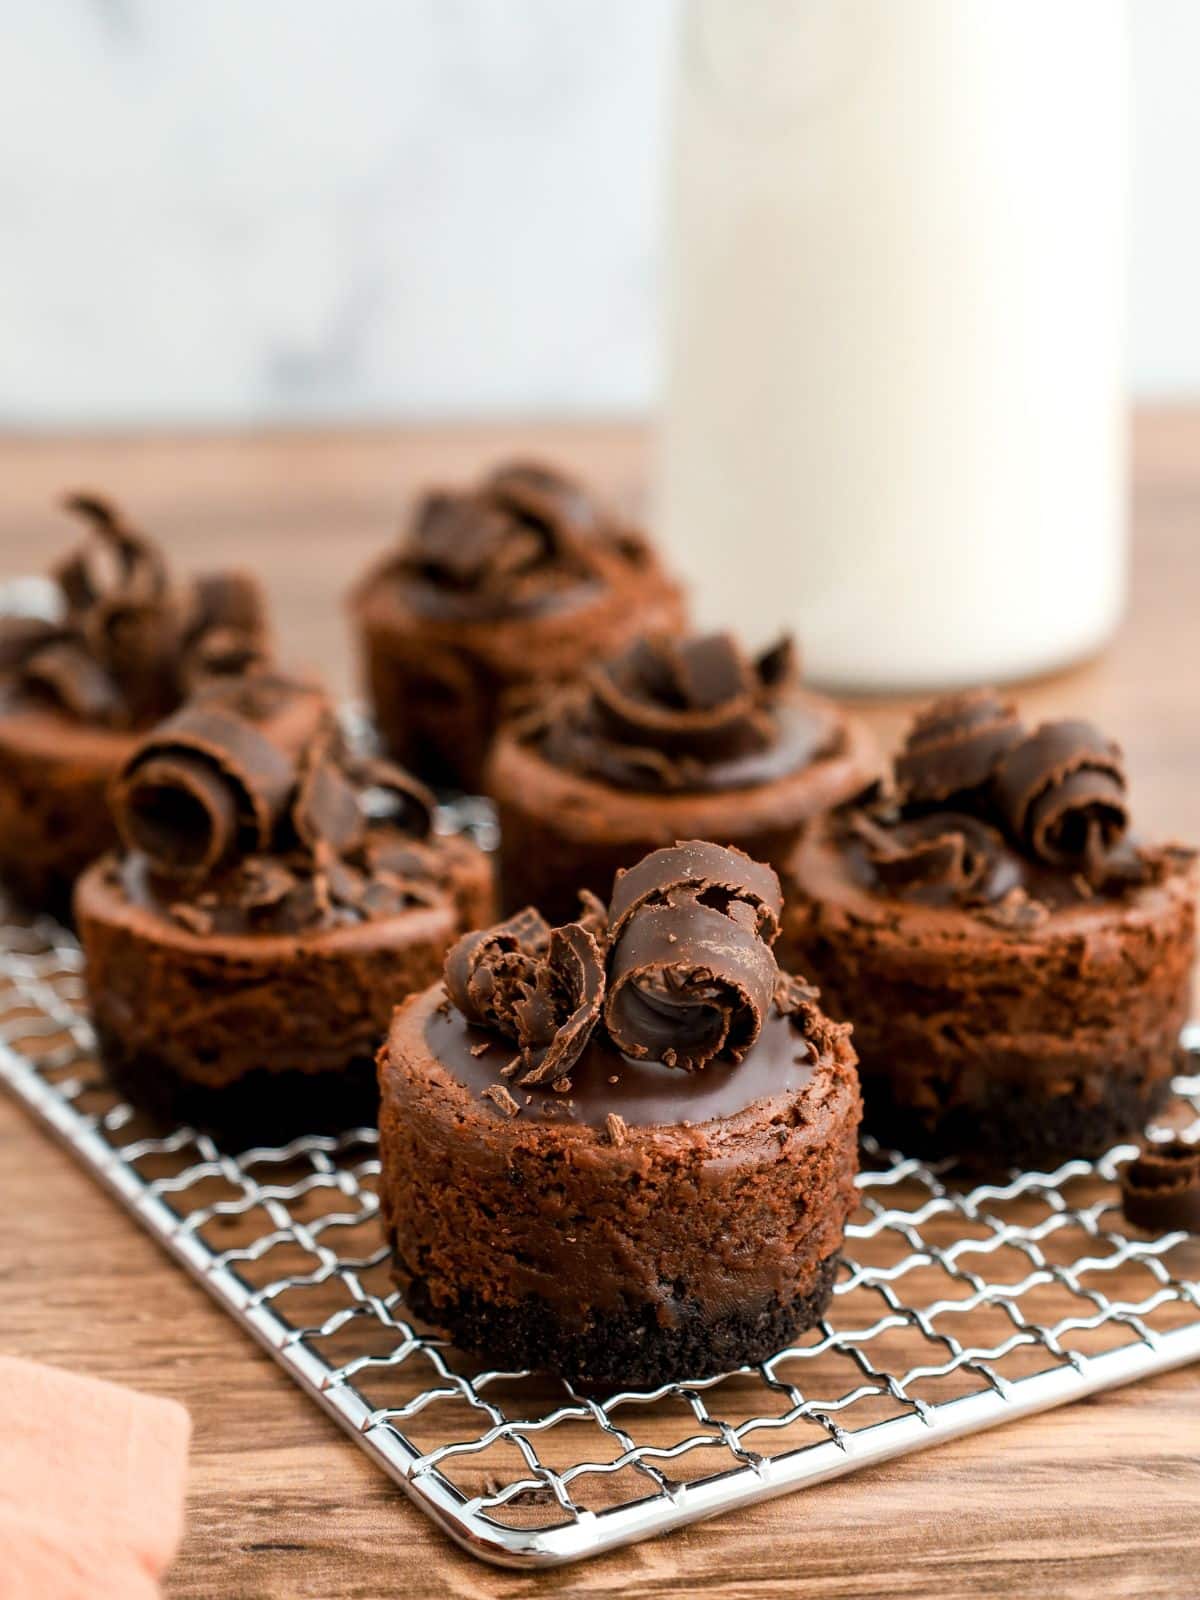
Step 9: Carefully remove your cheesecakes from the pan. To do this, gently press upwards on the bottom of each cavity while lifting the cheesecake out. Next, add a small dollop of ganache to the center of each cheesecake. Be careful not to overfill it! Finally, get creative with your garnish – sprinkle on some extra chocolate pieces or add a fancy touch with chocolate ribbon curls.
Insider Tips from My Kitchen to Yours
✔️ DO bring the cream cheese and eggs to room temperature before mixing for a smooth, creamy batter.
❌ DO NOT overmix the batter or it may lead to cracks—if a few appear anyway, the chocolate ganache will cover them beautifully.
Storage & Serving Tips
Refrigerate: Cover and chill the cupcakes for up to 4 days to keep them fresh and creamy.
Freezer: Freeze the cupcakes without the ganache for up to 2 months; thaw in the refrigerator overnight and add the ganache before serving.
Serving Tips: Top with the chocolate ganache just before serving and add a sprinkle of crushed cookies or berries for a pretty finish.
Recipe FAQ
To view the answers, simply click on the down arrow (⬇) next to each question. If you have any other questions not answered here, please leave a comment!
Sinking in the middle is a common issue when making individual chocolate cheesecakes. This is usually caused by the air bubbles that form during baking, which leads to an uneven surface. To prevent this, try tapping the tray with the cheesecake cups on the counter before baking to release any built-up air and help set the filling evenly. Once baked, chill the cheesecake for at least two hours before serving for best results.

More Recipes to Love

LOVE this recipe? SAVE it for Later!
❤️Tap the heart icon in the lower right corner to add the recipe to your recipe box for easy access anytime.
If you made it, leaving a star rating or quick review is always appreciated and helps other readers too.
Want to save this printed recipe? The Ultimate Meal Planner & Recipe Binder helps you keep recipes organized in one easy place.
🗒️Shopping List
Click the button below to instantly create a shopping list for this recipe.
📖 Recipe Card
Chocolate Cheesecake Cupcakes
Equipment
Ingredients
- 2 cups Oreo cookie crumbs about 20 cookies crushed
- 2 eggs
- ¼ cup butter melted
- 1 cup granulated sugar
- 16 ounces cream cheese softened
- ½ cup unsweetened cocoa powder
- 1 teaspoon vanilla extract
For the Chocolate Ganache
- 4 ounces semi-sweet chocolate chopped
- ½ cup heavy cream
Instructions
- Preheat the oven to 350°F.
- Combine melted butter with the cookie crumbs until evenly combined. Place a spoonful in each cavity of a mini cheesecake or a muffin pan. Use a tart tamper to get the crumbs into the bottom of the pan.
- Bake for 5 minutes then remove from the oven and set aside.
- Turn the oven down to 300°F.
- In a large mixing bowl, beat cream cheese until smooth.
- Add in the sugar, cocoa powder, eggs and vanilla extract. Beat until smooth and creamy.
- Fill each cavity ¾ of the way and bake for 20 minutes. Remove them before they begin to crack.
- Let cool to room temperature, then place in the refrigerator to chill.
Prepare the Chocolate Ganache
- In a saucepan, simmer the heavy cream over medium heat. Remove just before it begins to boil.
- Pour over the semi-sweet chocolate and stir until smooth.
- Remove the cheesecakes from the pan and place on a baking rack. Place a small spoonful of the ganache on top of each cheesecake, The chocolate ganache should just fill the middle of each cheesecake before spilling over.
- Decorate the tops of the cheesecakes with chocolate shavings or chocolate curls.
Notes
- If you overcook the cheesecake, and they begin to crack don't worry!!! They still taste amazing and the chocolate ganache will cover any cracks.
- A mini cheesecake pan is designed to help you easily bake delicious miniature desserts. Made from heavy duty metal, this specialty kitchen tool comes with a removable bottom plates for easy release of the baked mini-cheesecakes.
- If you don't have a cheesecake pan, you can use a regular-sized cupcake pan. Keep in mind that the size of the cheesecakes will be larger and the baking time will likely be longer when using a regular-sized cupcake pan instead of a mini cheesecake pan.

Meg says
It was very tasty but you are missing the sugar and eggs in your recipe ingredients. The picture let me know how many eggs but had to totally guess on the Sugar and only knew I needed it because of the picture.
May also want people to know mini cheese cake and mini muffin tins are not interchangeable
Lois says
Thank you so much for catching the error! I adjusted the recipe card and also included your tips for the two different types of pans.
Kerryanne says
These chocolate cheesecake cupcakes sound so decadent Lois!
Thank you for sharing your recipe at Create, Bake, Grow & Gather this week. I'm delighted to be featuring it at the party tonight and pinning too.
Hugs,
Kerryanne
Lois says
Thank you Kerryanne!
Donna @ Modern on Monticello says
These looks amazing. I am excited to feature this recipe at the party this week. Pinned of course! #HomeMattersParty
Lois says
Thank you so much Donna!!!
Beth says
We LOVE anything chocolate, Lois! We will be featuring you starting Wednesday at the Creative Crafts Linky Party! Pinned and shared!
Creatively, Beth
Lois says
Thank you for visiting and pinning Beth!
Claire Justine says
Oh wow, these look so good. I could just eat one 🙂
Lois says
Thank you!