


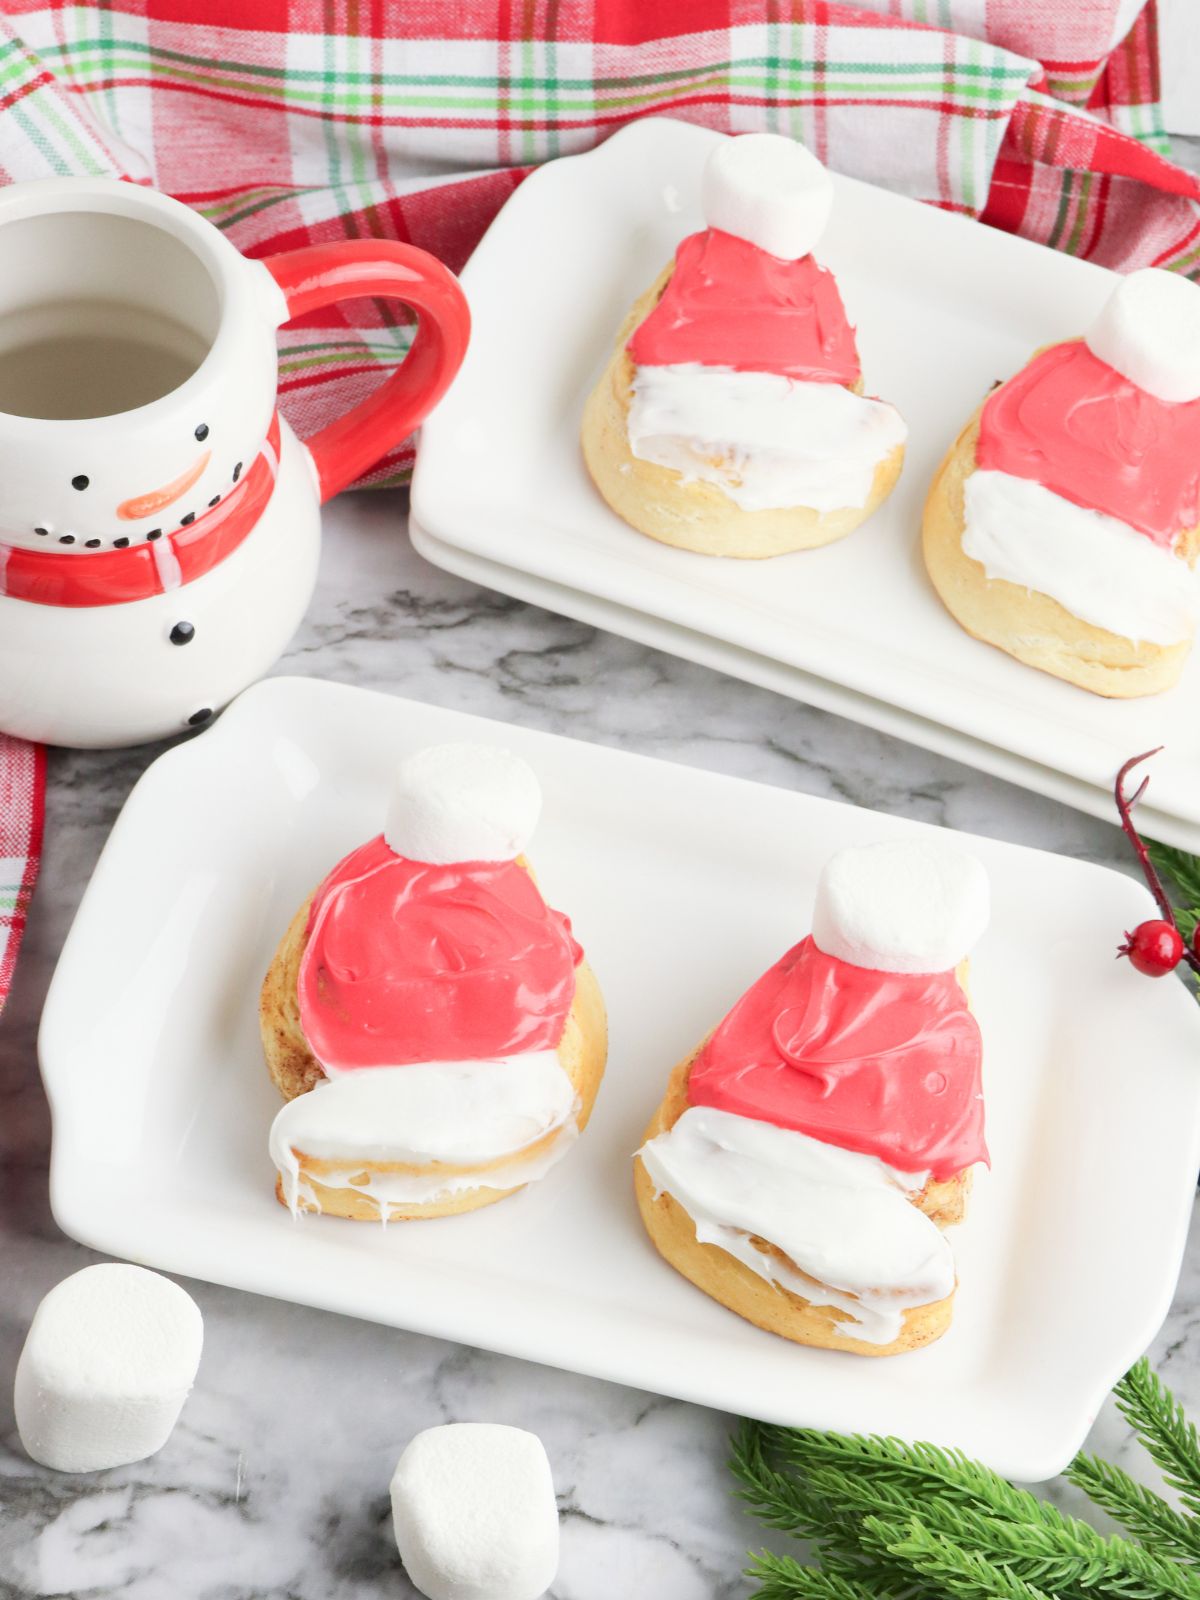
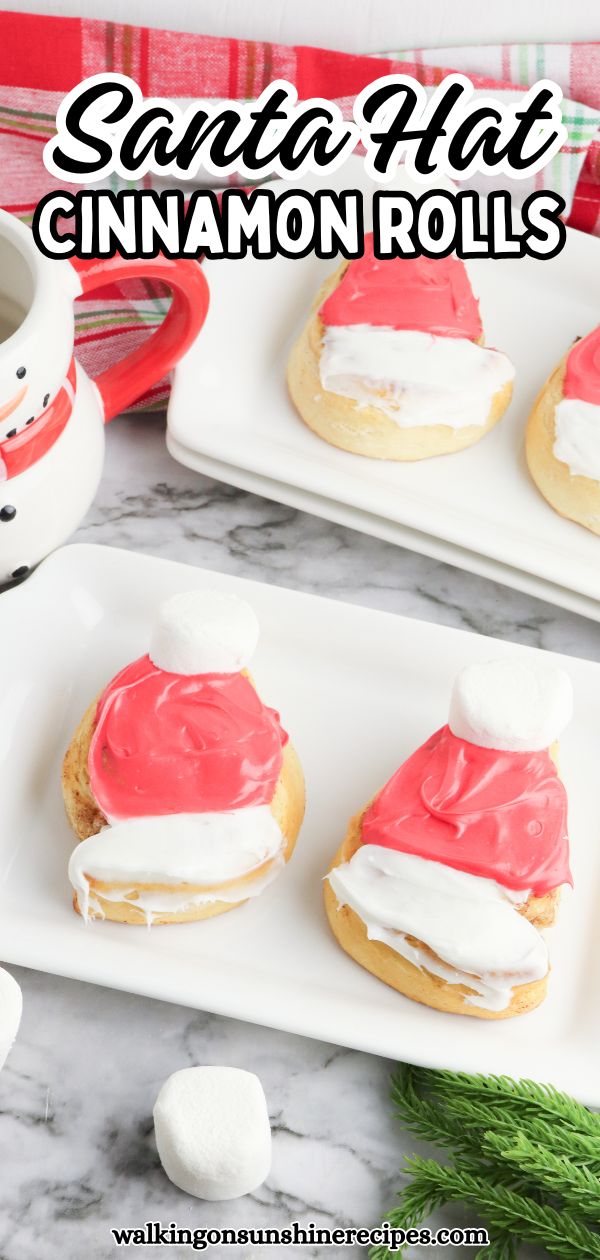
These festive Santa Hat Cinnamon Rolls are a fun and delicious way to bring holiday cheer to your breakfast table.
Made with soft, gooey rolls topped with creamy red tinted frosting, they’re easy to make and almost too cute to eat.
Another one of my best cinnamon rolls that's perfect for Christmas morning or a holiday brunch. It adds a touch of whimsy and warmth to every bite.
Want to Save This Recipe?
Enter your email & I'll send it to your inbox. Plus, get great new recipes from me every week!
By submitting this form, you consent to receive emails from Walking on Sunshine Recipes.
Recipe at a Glance
Prep: 10 min | Bake: 13 min | Decorating Time: 10 min. | Difficulty: Easy
What it is: A festive twist on classic refrigerated cinnamon rolls topped with creamy frosting and a marshmallow to look like Santa hats. They make an adorable holiday breakfast or dessert.
Why you’ll love it: These fun treats come together quickly with refrigerated cinnamon rolls.
How to make it: Bake cinnamon rolls until golden, spread with frosting, and top each with a marshmallow for the finishing touch.
👉Want to keep Christmas morning stress-free? My Christmas Shaped Cinnamon Rolls eBook includes eight easy, festive designs that make holiday baking simple and fun.
Table of Contents
- Recipe at a Glance
- Why You’ll Love Shaped Cinnamon Rolls
- Want the full collection of Shaped Cinnamon Roll Recipes in one easy-to-follow eBook?
- Recommended Kitchen Tools
- My Kitchen Tools Essentials
- Ingredients You’ll Need
- Substitutions and Variations
- Step-by-Step Instructions
- Insider Tips from My Kitchen to Yours
- Storage & Serving Tips
- Recipe FAQ's
- Didn't find the answer you're looking for?
- More Christmas Breakfast Recipes You'll Love!
- Want the full collection of Shaped Cinnamon Roll Recipes in one easy-to-follow eBook?
- LOVE this recipe? SAVE it for Later!
- 📖 Recipe Card
- Food Safety Tips:
- 💬 Comments
Why You’ll Love Shaped Cinnamon Rolls
This recipe is part of my Shaped Cinnamon Rolls for the Holidays mini series—a week of fun, festive ideas made with simple Pillsbury cinnamon rolls.
Each one starts with a can of refrigerated cinnamon rolls that’s transformed into a cute, themed shape perfect for celebrating the season.
Here’s what’s coming next:
- Day One: Santa Hat Cinnamon Rolls (you’re here!)
- Day Two: Christmas Tree Cinnamon Rolls on a Stick
- Day Three: Rudolph Shaped Cinnamon Rolls
- Day Four: Pull Apart Pillsbury Cinnamon Rolls Christmas Tree
- Day Five: Pillsbury Snowmen Cinnamon Rolls
- Day Six: Roundup: Christmas Shaped Cinnamon Rolls
- Day Seven: Pillsbury Cinnamon Roll Christmas Wreath
- Day Eight: Pillsbury Candy Cane Shaped Cinnamon Rolls
- Day Nine: Cinnamon Roll Shaped Christmas Trees

Want the full collection of Shaped Cinnamon Roll Recipes in one easy-to-follow eBook?
My brand new Christmas Shaped Cinnamon Rolls eBook brings all eight designs together with step-by-step photos and clear instructions.


Recommended Kitchen Tools
For a full list of kitchen tools used in this recipe, be sure to check the recipe card below. You can also browse my Favorite Kitchen Tools by clicking the photo below.

Check out my list...
My Kitchen Tools Essentials
Tools that will make your time easier and faster in the kitchen!
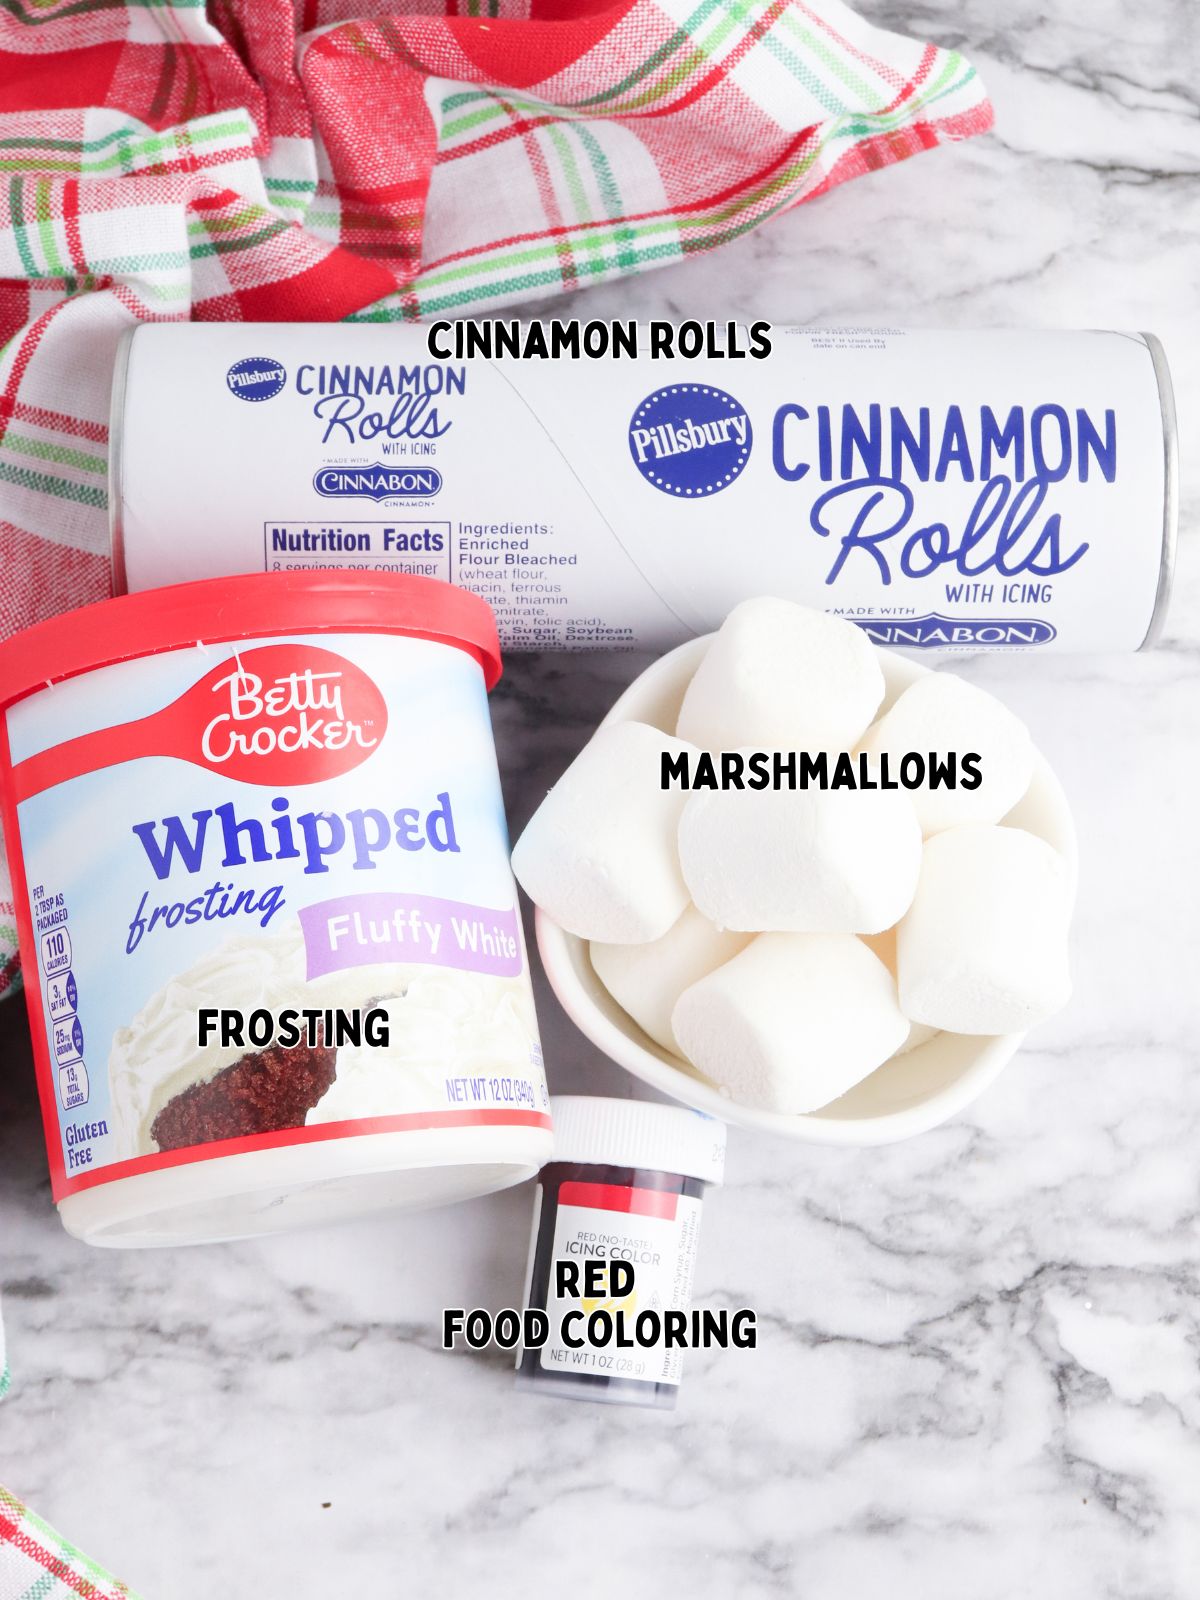
Ingredients You’ll Need
Below is a quick preview of the ingredients you’ll need. For exact amounts, check the recipe card below. You can also use the "Shopping List button" to create a printable shopping list, or the "Get Ingredients button" in the recipe card to order groceries online.
Substitutions and Variations
• Use homemade cinnamon rolls: Swap the refrigerated dough for your favorite homemade cinnamon roll recipe if you want a from-scratch version.
• Try different toppings: Replace the frosting with cream cheese icing or whipped cream for a lighter touch.
• Add fresh fruit instead: Instead of the red frosting, top each roll with a fresh strawberry and a small dollop of white frosting or whipped cream to create the Santa hat look.
• Make mini versions: Use mini cinnamon rolls to create bite-sized treats perfect for brunch buffets or classroom parties.
This recipe has not been tested with other substitutions or variations. If you replace or add any ingredients, please let me know how it turned out in the comments below!
Step-by-Step Instructions
This section provides step-by-step photos and instructions to guide you through the recipe. For the complete printable version, scroll down to the recipe card below.
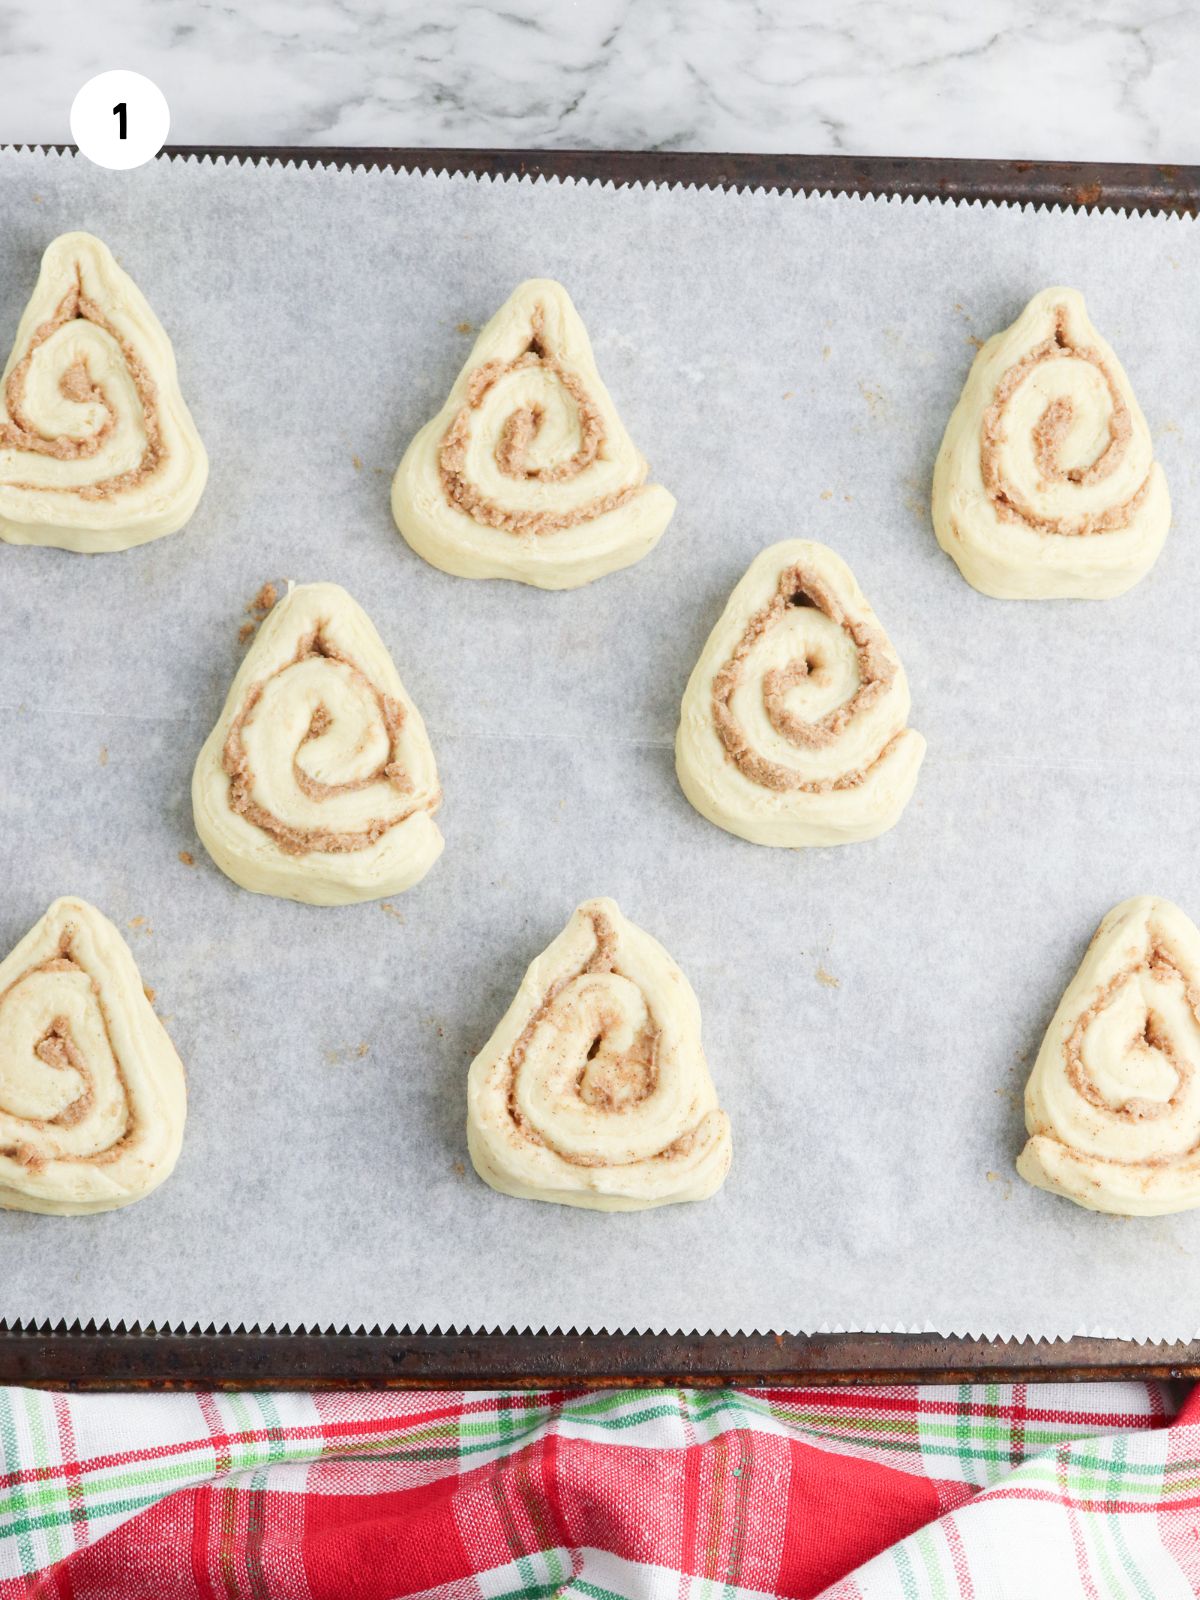
Step 1: Place the cinnamon rolls on a parchment lined baking sheet. Form each roll into a triangle shape.

Step 2: Bake at 375°F for 11-13 minutes until golden brown.
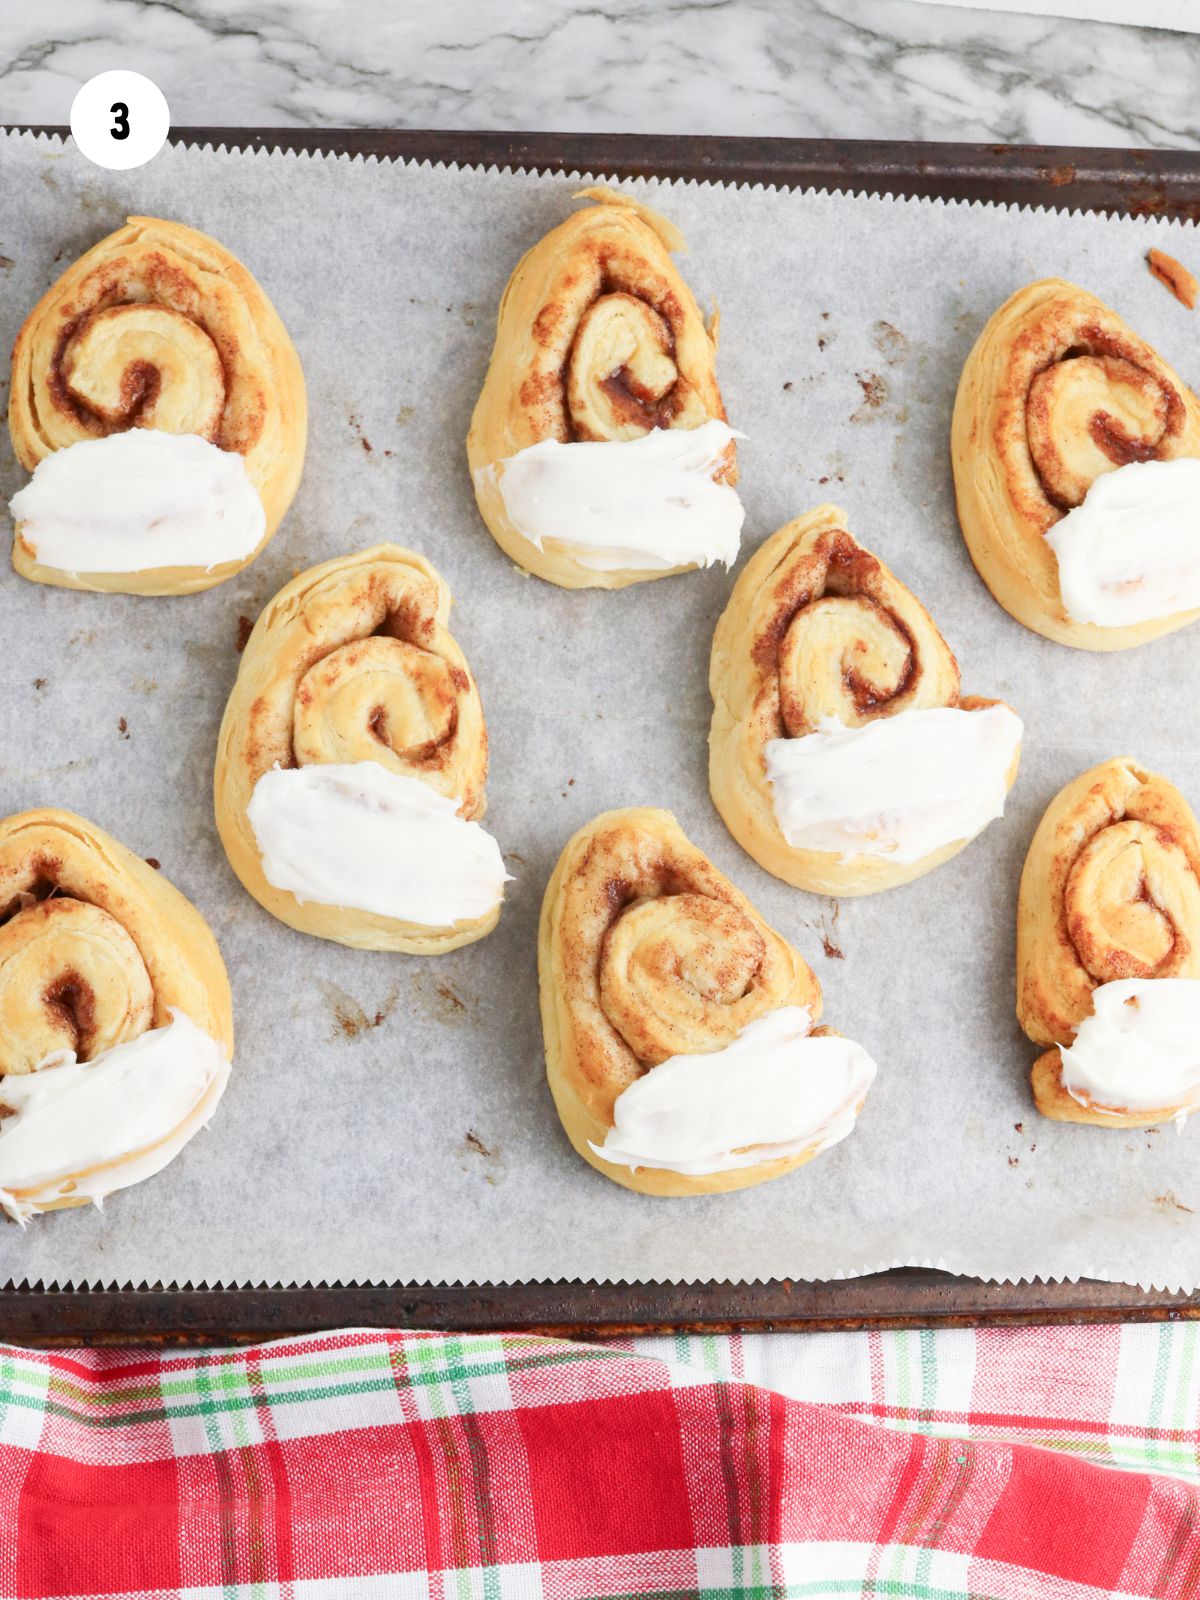
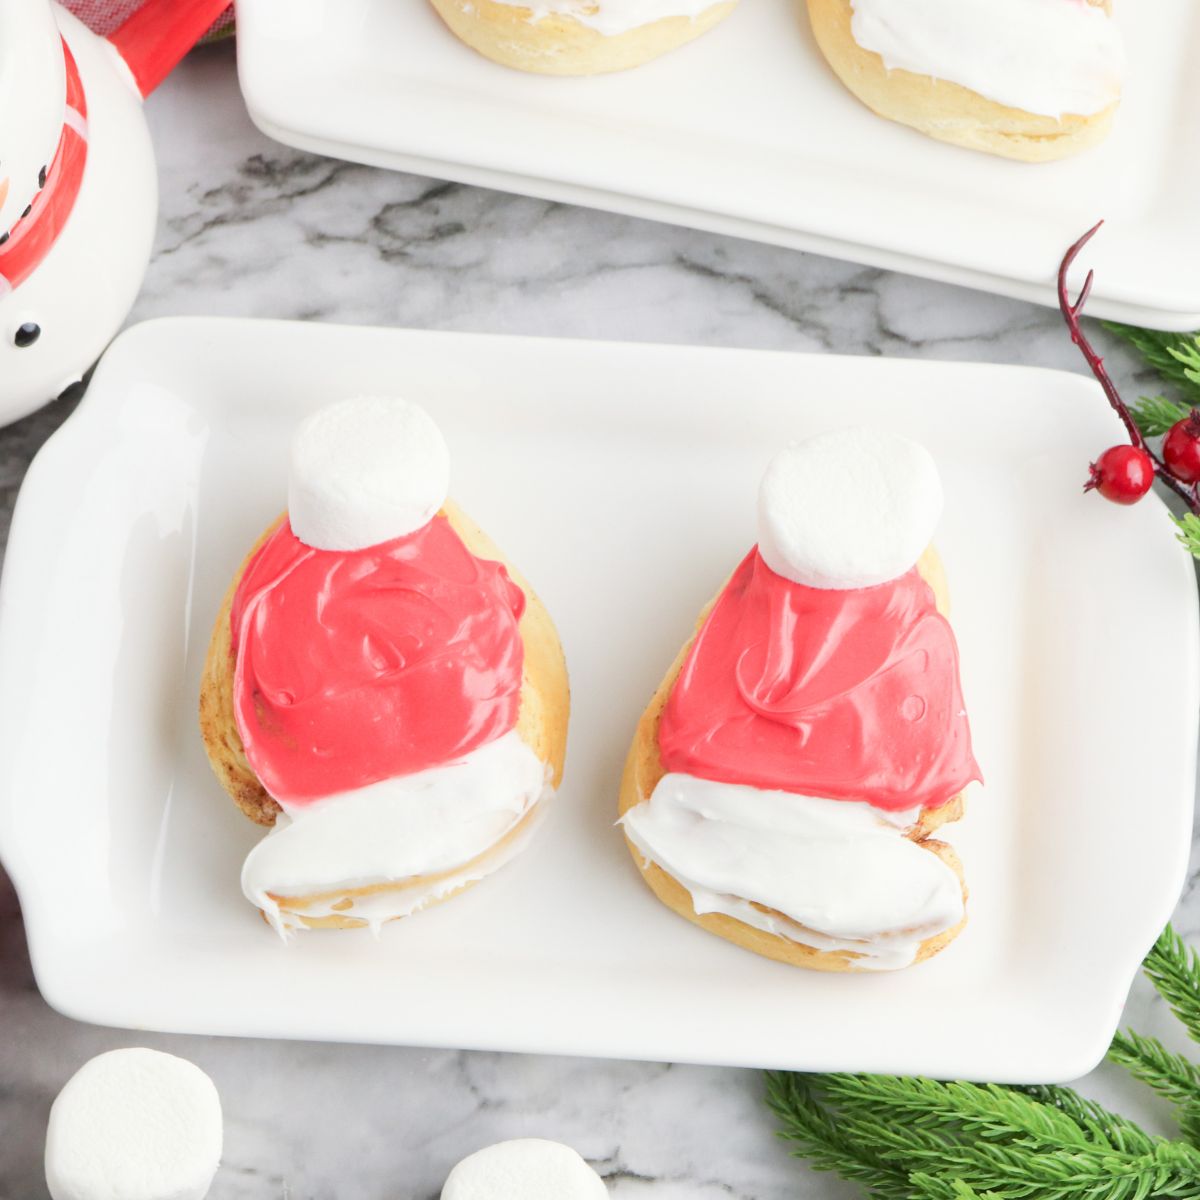
Step 3: After the cinnamon rolls have cooled, spread white frosting along the bottom of each triangle.
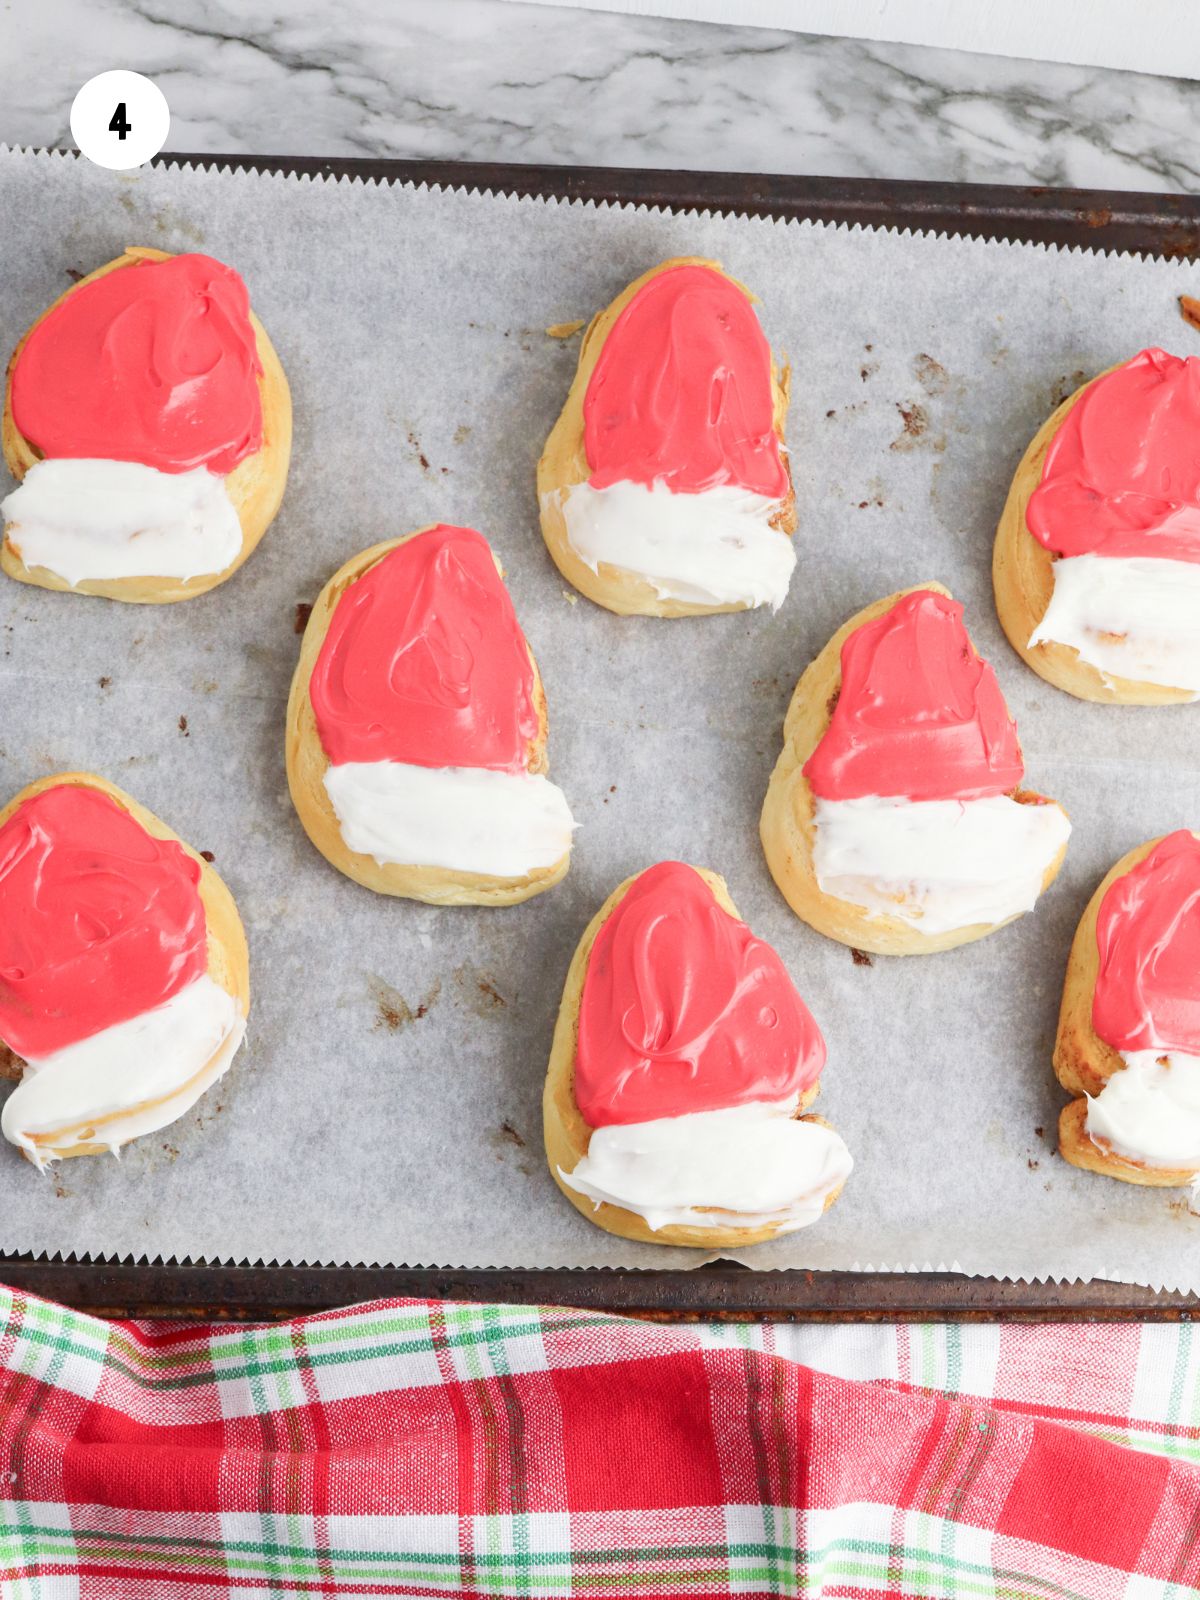
Step 4: Tint the remaining frosting red, and frost the rest of the triangles with the red frosting.
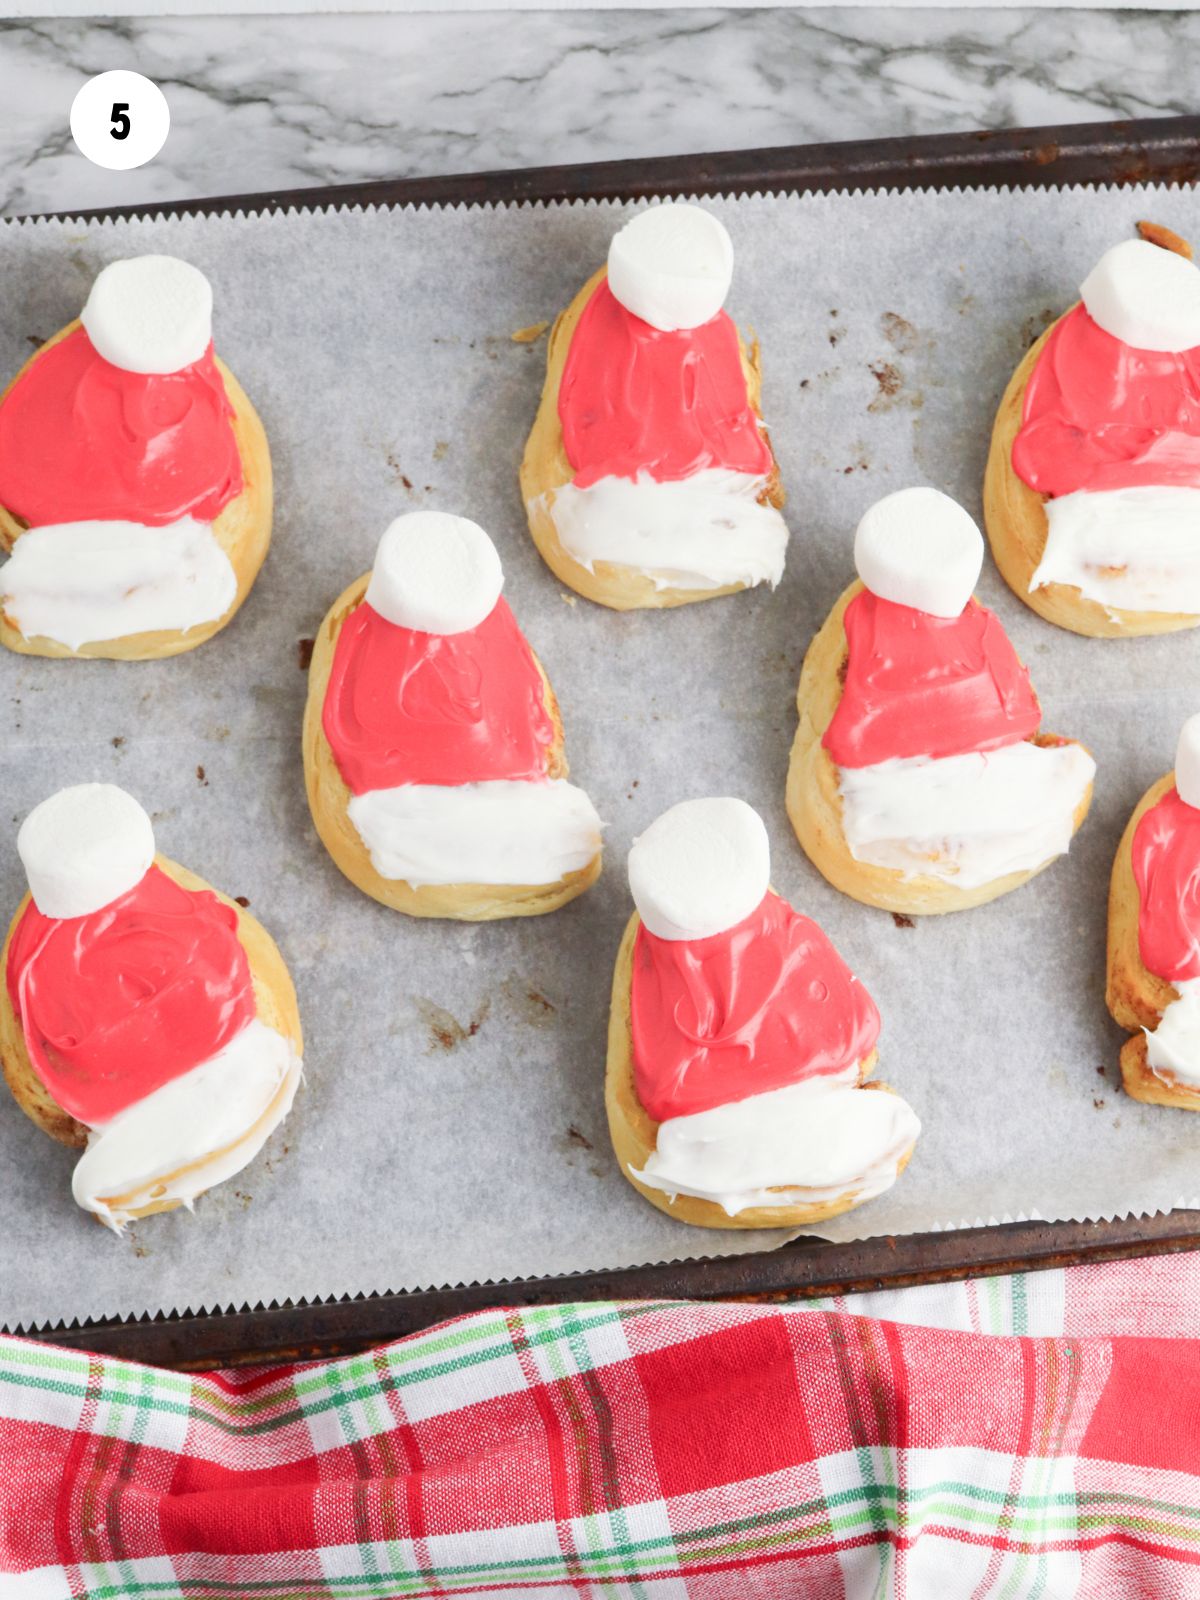
Step 5: Cut the marshmallows in half then add to the tops of each triangle. Serve and enjoy!
Insider Tips from My Kitchen to Yours
✔️ DO let the cinnamon rolls cool slightly before decorating so the frosting doesn’t melt and lose its shape.
❌ DO NOT use thin or runny frosting for the red “hat” layer or it will slide off and ruin the design.

Storage & Serving Tips
Refrigerate: Store decorated cinnamon rolls in an airtight container in the refrigerator for up to 3 days. Let them come to room temperature before serving.
Freezer: Freeze undecorated cinnamon rolls tightly wrapped in plastic wrap and foil for up to 1 month. Add the frosting and decorations after thawing.
Thaw and Reheat: Thaw in the refrigerator overnight, then warm in the microwave for 10–15 seconds before decorating or serving.
Serving Tips: Arrange on a festive platter or cake stand and add a few mini marshmallows around the base for an extra holiday touch.
Recipe FAQ's
To view the answers, simply click on the down arrow (⬇) next to each question. If you have any other questions not answered here, please leave a comment!
Yes! You can absolutely use homemade cinnamon roll dough instead of canned. Just make sure to bake the rolls until golden brown and let them cool slightly before decorating. The key is that the rolls hold their shape so you can easily add the frosting and create the Santa hat design.
If you’d rather skip the red frosting, you can use fresh strawberries to create the Santa hat look. Simply place a strawberry on top of each frosted roll and add a small dollop of white frosting or whipped cream for the trim and pom-pom effect. It’s a simple and festive alternative that adds a fresh flavor, too.
Yes, it’s best to let the cinnamon rolls cool for about 10 minutes before decorating. If they’re too warm, the frosting can melt and lose its shape. Cooling them slightly helps the frosting stay thick and lets your Santa hat design look neat and defined.
Didn't find the answer you're looking for?
Ask AI to answer based on this specific recipe.
More Christmas Breakfast Recipes You'll Love!
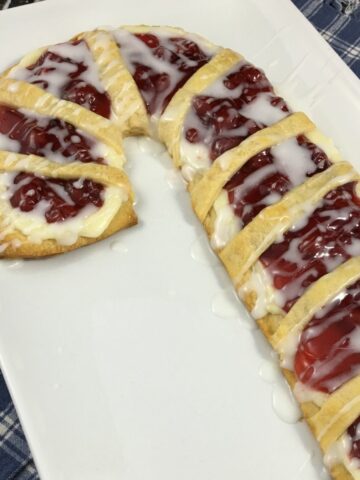
Looking for more Christmas breakfast recipes? Try my Christmas Tree Cream Cheese Danish or my Christmas Pancakes.


Want the full collection of Shaped Cinnamon Roll Recipes in one easy-to-follow eBook?
My brand new Christmas Shaped Cinnamon Rolls eBook brings all eight designs together with step-by-step photos and clear instructions.
LOVE this recipe? SAVE it for Later!
❤️Tap the heart icon in the lower right corner to add the recipe to your recipe box for easy access anytime.
If you made it, leaving a star rating or quick review is always appreciated and helps other readers too.
Want to save this printed recipe? The Ultimate Meal Planner & Recipe Binder helps you keep recipes organized in one easy place.
📖 Recipe Card
Santa Hat Cinnamon Rolls
Video
Ingredients
- 8 count package cinnamon rolls
- 1 container white or cream cheese frosting
- red food coloring
- 4 marshmallows
Method
- Preheat the oven to 375°F and line a baking sheet with parchment paper.
- Remove the cinnamon rolls and place them on the prepared baking sheet, at least one inch apart.
- Use your hands to shape each cinnamon roll into a triangle shape, then bake for 11 to 13 minutes, until golden brown.
- If the cinnamon rolls spread as the bake, use two spatulas to press the rolls back into the triangle shape immediately after removing them from the oven while they’re still hot.
- Allow the cinnamon rolls to cool to room temperature.
- Spread a line of white frosting along the bottom of each triangle, then tint the remaining icing with red food coloring.
- Spread the red tinted frosting over the rest of the cinnamon roll.
- Cut each marshmallow in half with scissors and press it into the top of each roll before serving.
Nutrition
Notes
Tips
- Let the cinnamon rolls cool slightly before decorating so the frosting holds its shape.
- Use gel food coloring for the red frosting to achieve a vibrant, holiday color without thinning the icing.
- If using canned rolls, bake them in a round cake pan for evenly shaped rolls that are easy to decorate.
Storage & Make Ahead
- Store decorated rolls in an airtight container in the refrigerator for up to 3 days.
- Reheat in the microwave for 10–15 seconds before serving.
- For best results, add the frosting and decorations just before serving if making ahead.
Tried this recipe?
Let us know how it was!Food Safety Tips:
- Baked goods are done when they reach their recommended internal temperature—usually between 190–210°F (88–99°C), depending on the type. Always check the recipe for exact guidance.
- Avoid cross-contamination by using separate utensils for raw meat and cooked foods.
- Use separate utensils and surfaces for raw ingredients, especially eggs, to prevent cross-contamination.
- Always wash your hands thoroughly after handling raw meat.
- Refrigerate or consume food promptly; don’t leave it at room temperature for extended periods.
- Keep a close eye on food while cooking to prevent accidents.
- Choose oils with a high smoking point to minimize the release of harmful compounds.
- Maintain good ventilation when using a gas stove to ensure safety and comfort.

Comments
No Comments