

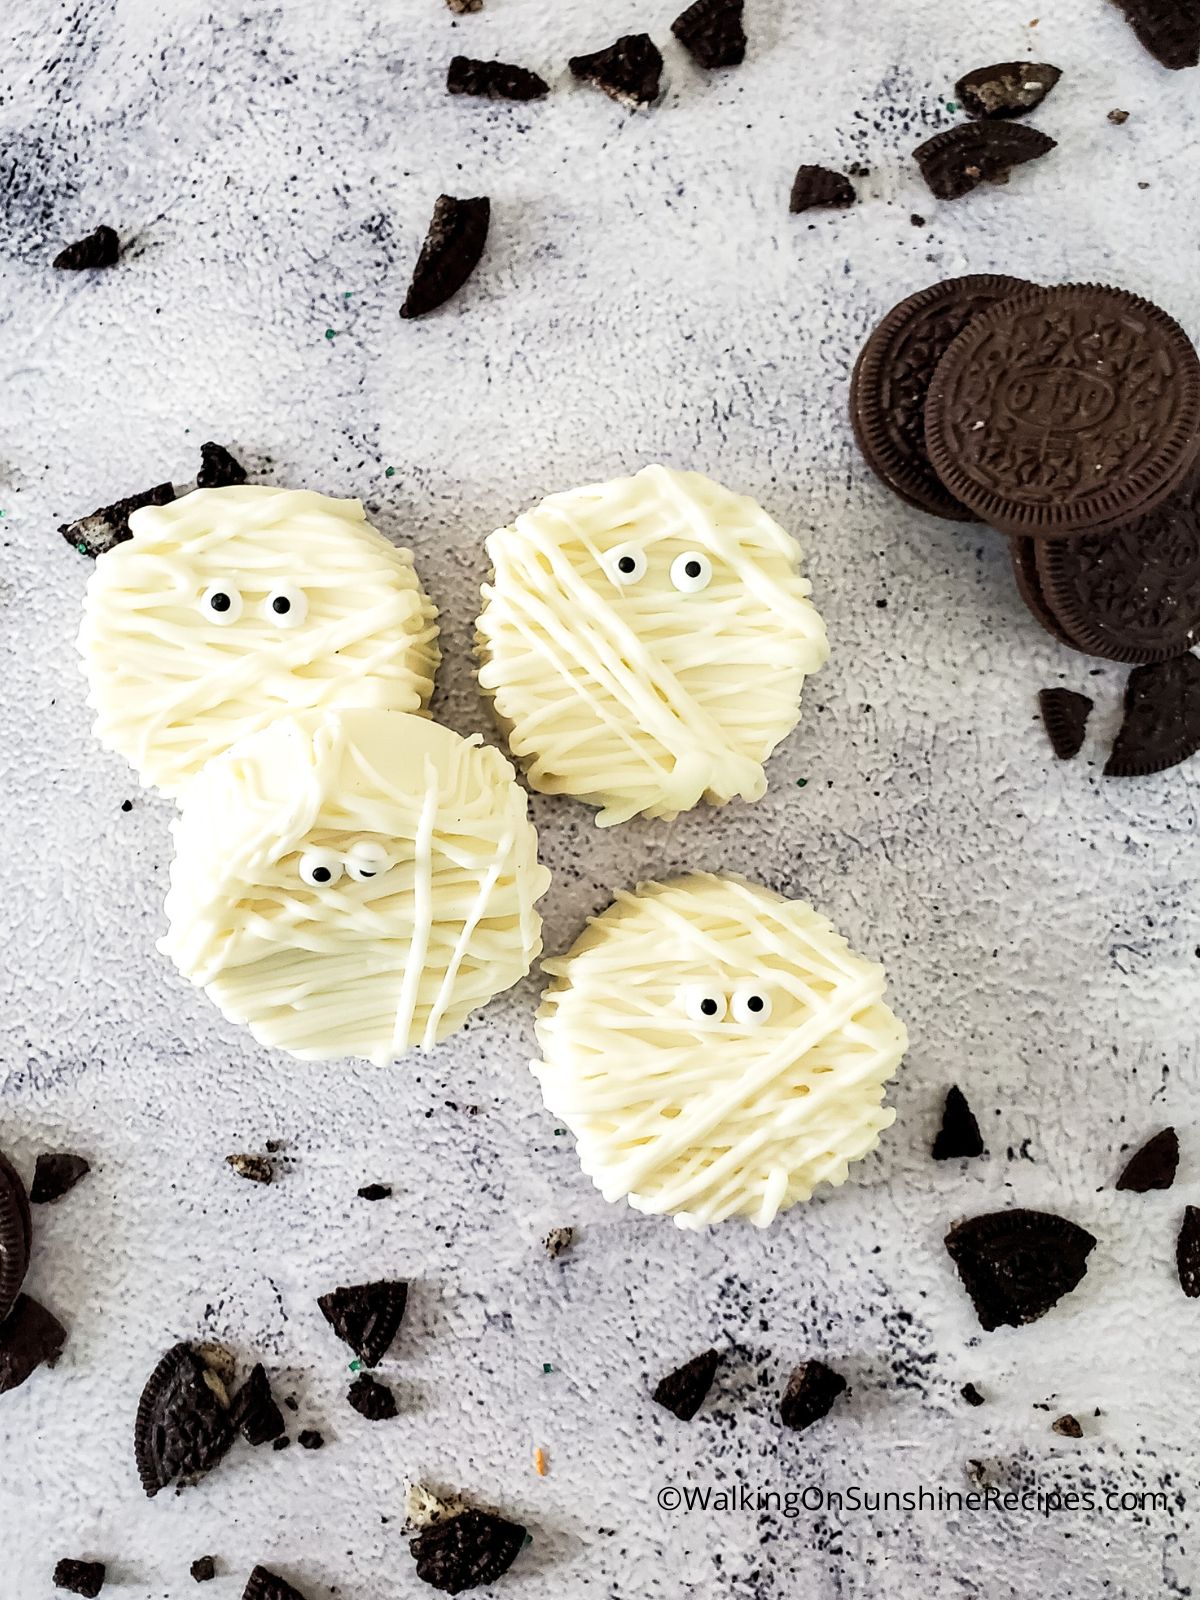
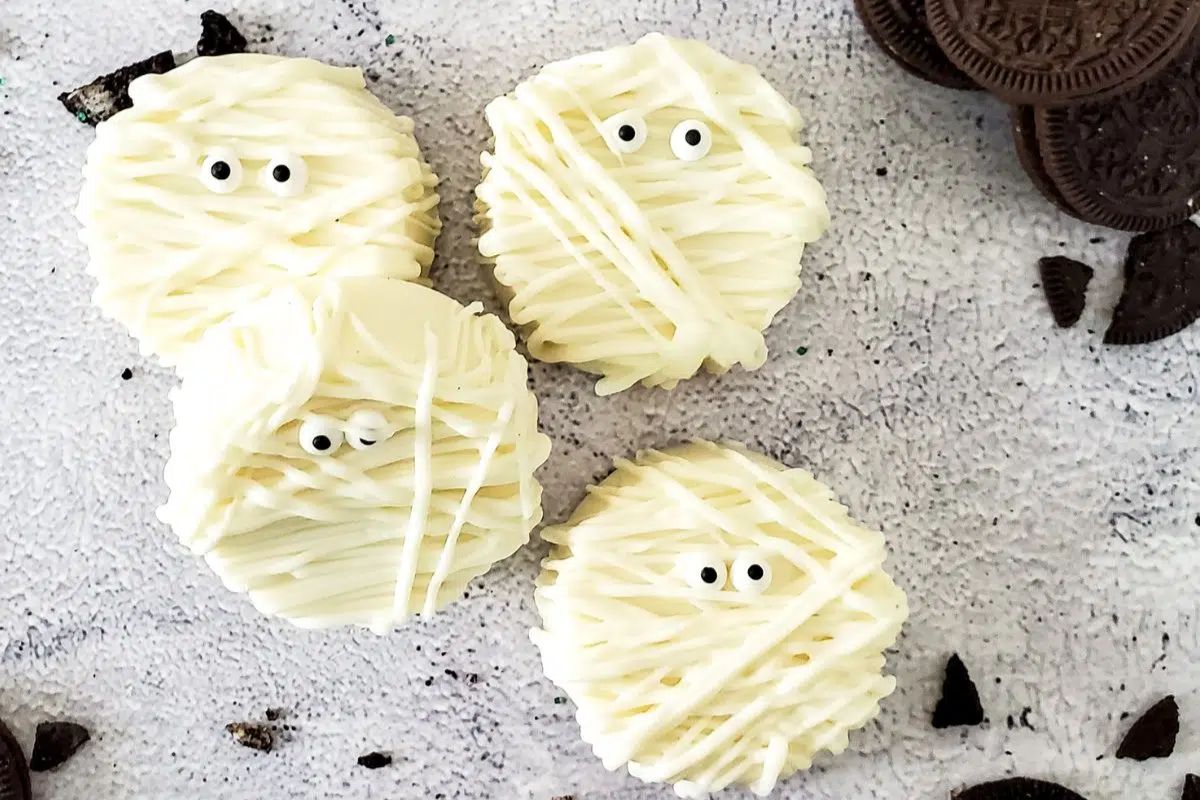
Looking for a fun and easy Halloween treat? These Mummy Halloween Cookies are perfect! Made with melted white chocolate, candy eyes and everyone's favorite Oreo cookie, they come together quickly and are sure to be a hit.
Your family and friends will be both impressed and frightened by these delicious, spooky mummy cookies!
Check out all the other Halloween Themed Recipes for even more fun ideas.
Want to Save This Recipe?
Enter your email & I'll send it to your inbox. Plus, get great new recipes from me every week!
By submitting this form, you consent to receive emails from Walking on Sunshine Recipes.
For this fun Halloween classic treat, I used traditional Oreo cookies, but you could also use Double Stuff or even the Halloween edition Oreos that are out right now.
Whatever you have on hand will work great. With just a few ingredients and a bit of time, you'll have a fun and festive treat that everyone will love.
This recipe was inspired by two other no-bake Halloween cookie recipes, Nutter Butter Mummies and Mummy Cookies.
Looking for more Easy Dessert Recipes? Halloween Thumbprint Cookies, Halloween Brownies or my Easy Halloween Cookies to Bake. Both are perfect school parties or celebrating at home with family.
Table of Contents
How to Melt Chocolate
This recipe calls for melting chocolate. You can use either melting chips or almond bark. Whichever you have on hand. I had the almond bark in my pantry, so that's what I used.
I have both melting chips and almond bark listed in the Helpful Kitchen Tools section so you can easily click and check them out.
There are two ways I prefer to melt chocolate. One is the double boiler method and the other is using the microwave. Whichever way you choose, the most important thing to remember is not to overcook the chocolate, or it will become grainy and clumpy.
Double Boiler Method:
- Choose a high-quality chocolate. This will make a big difference in the taste and texture of your melted chocolate.
- Chop the chocolate into small pieces. This will help it melt evenly and quickly.
- Place the chocolate in a heat-proof bowl. Set the bowl over a pot of simmering water, making sure that the bottom of the bowl does not touch the water.
- If any water gets into the chocolate, you need to throw it away and start over.
- Stir frequently. This will help the chocolate melt evenly and prevent it from burning.
- Remove from heat when almost melted. The residual heat will finish melting the chocolate, so it's important not to overdo it. Once the chocolate is melted, you can use it in any way you like!
Microwave Method:
Another way to melt chocolate is in the microwave; which is my favorite way.
- First, break the chocolate into small pieces and place them in a microwave-safe bowl.
- Then, heat the chocolate on medium power for 30 seconds.
- Stir the chocolate and continue to heat it in 15-second increments until it is melted and smooth.
If you're looking for gift ideas, check out my Halloween Cookie Gifts post. Tons of ideas with gift ideas perfect for the baker in your life.
Helpful Kitchen Tools
Oreo Cookie Chocolate MoldMore InformationWilton Candy MeltsMore InformationCandy EyesMore InformationParamount CrystalsMore InformationVanilla Almond BarkMore Information


Main Ingredients Needed
Here's a quick overview of the ingredients for this recipe. Find the exact amounts and click the Instacart button to easily add them to your cart – all in the printable recipe card below!
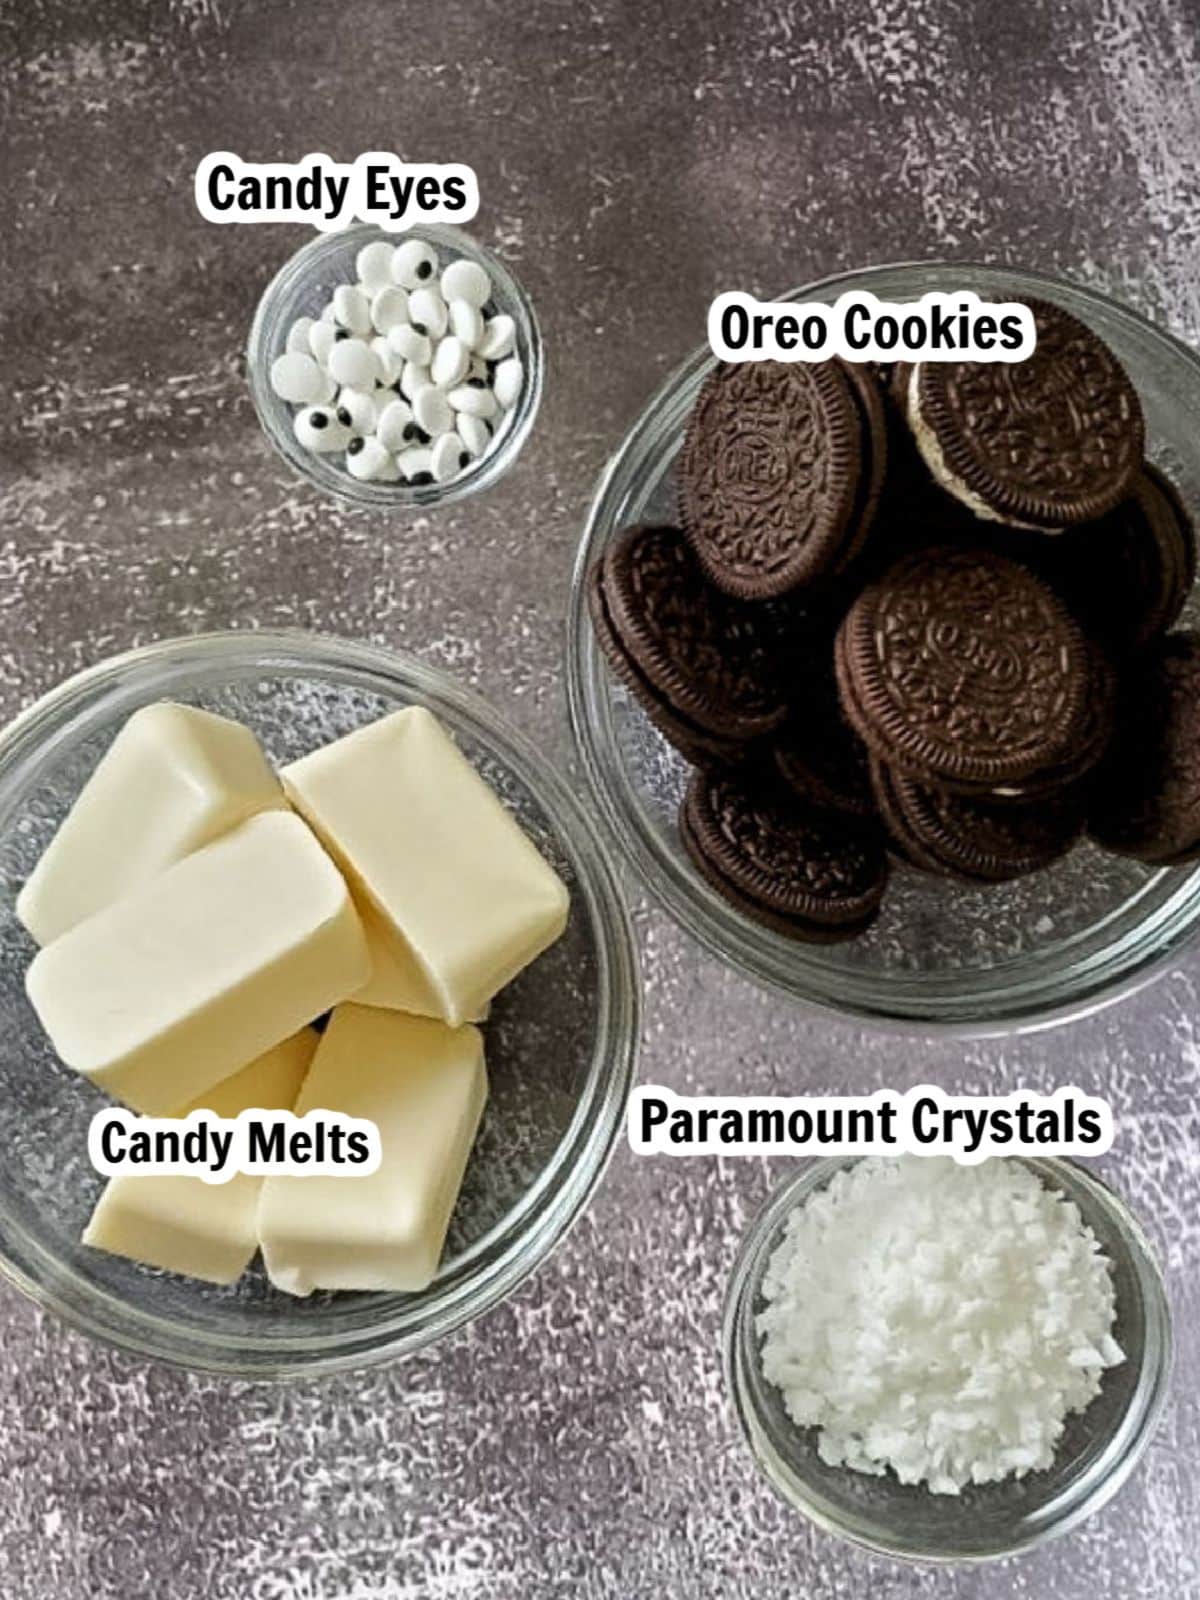
📌Quick Tip: Paramount Crystals are used to help melt chocolate and candy melts. It also helps to make decorating smooth and easier to pour into decorating bags or candy molds.
Step-by-Step Instructions
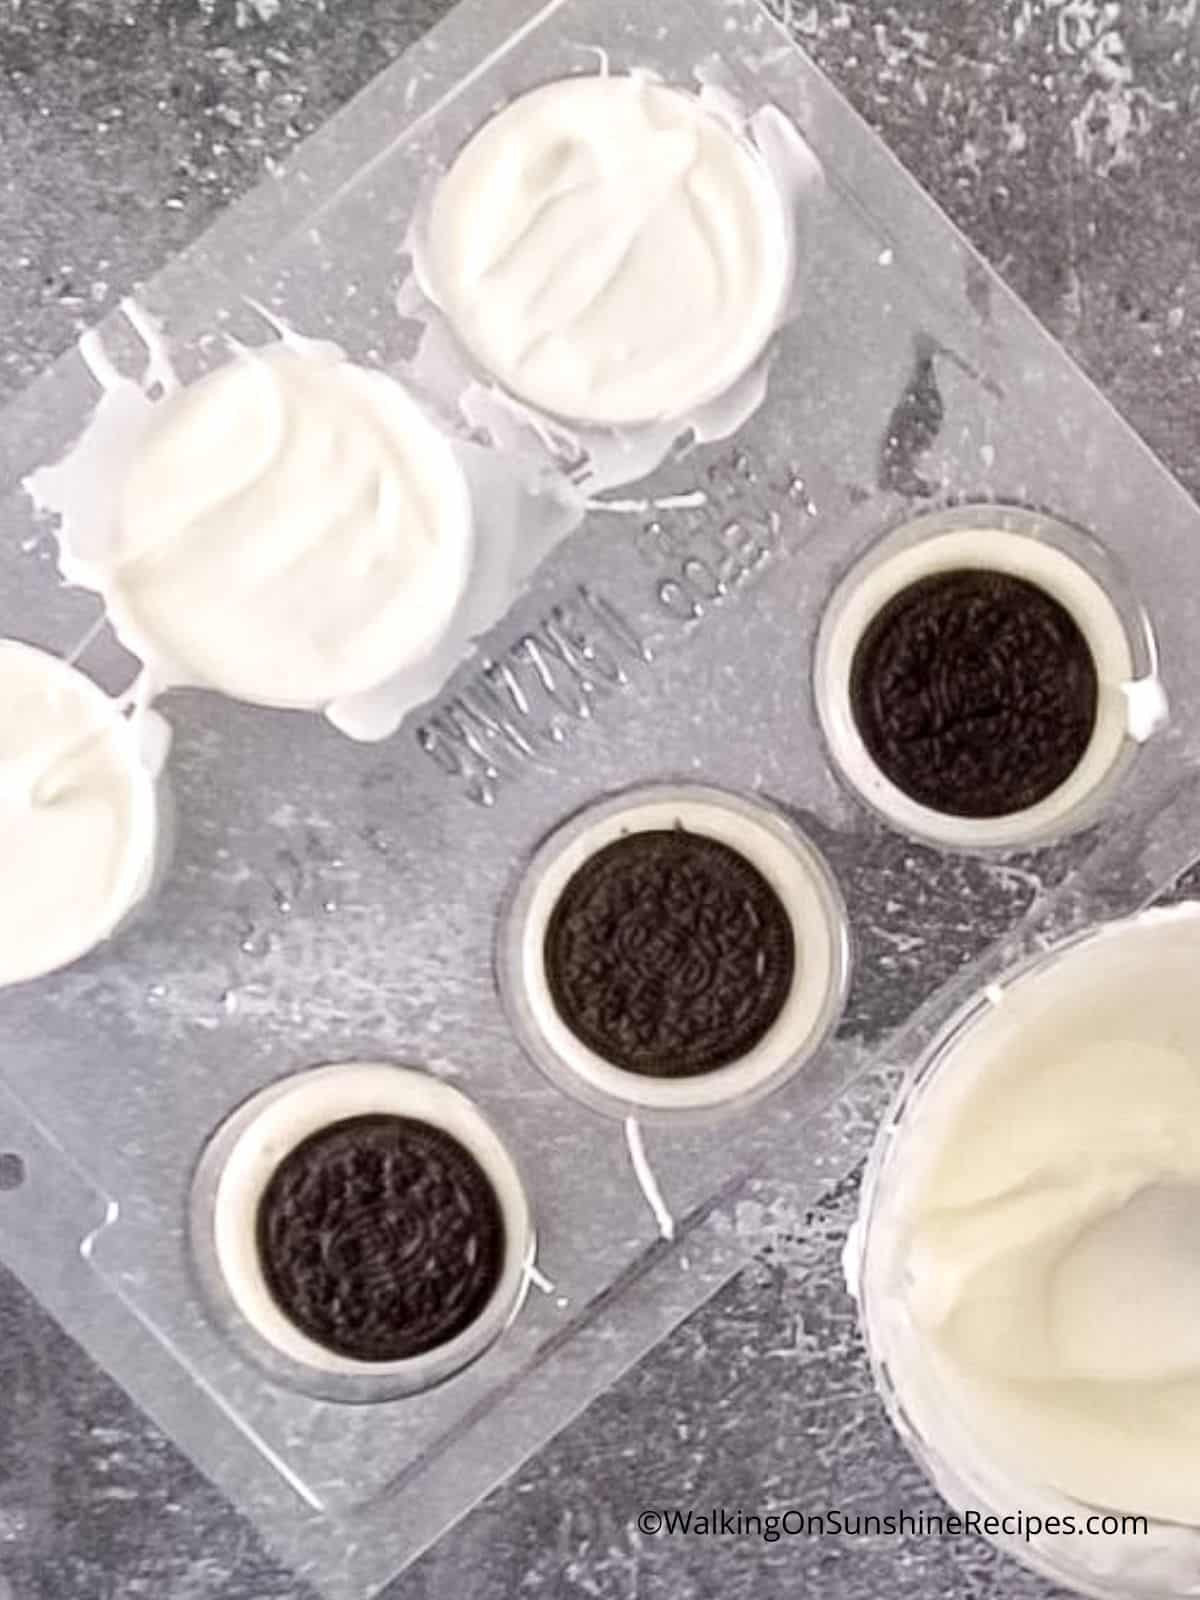
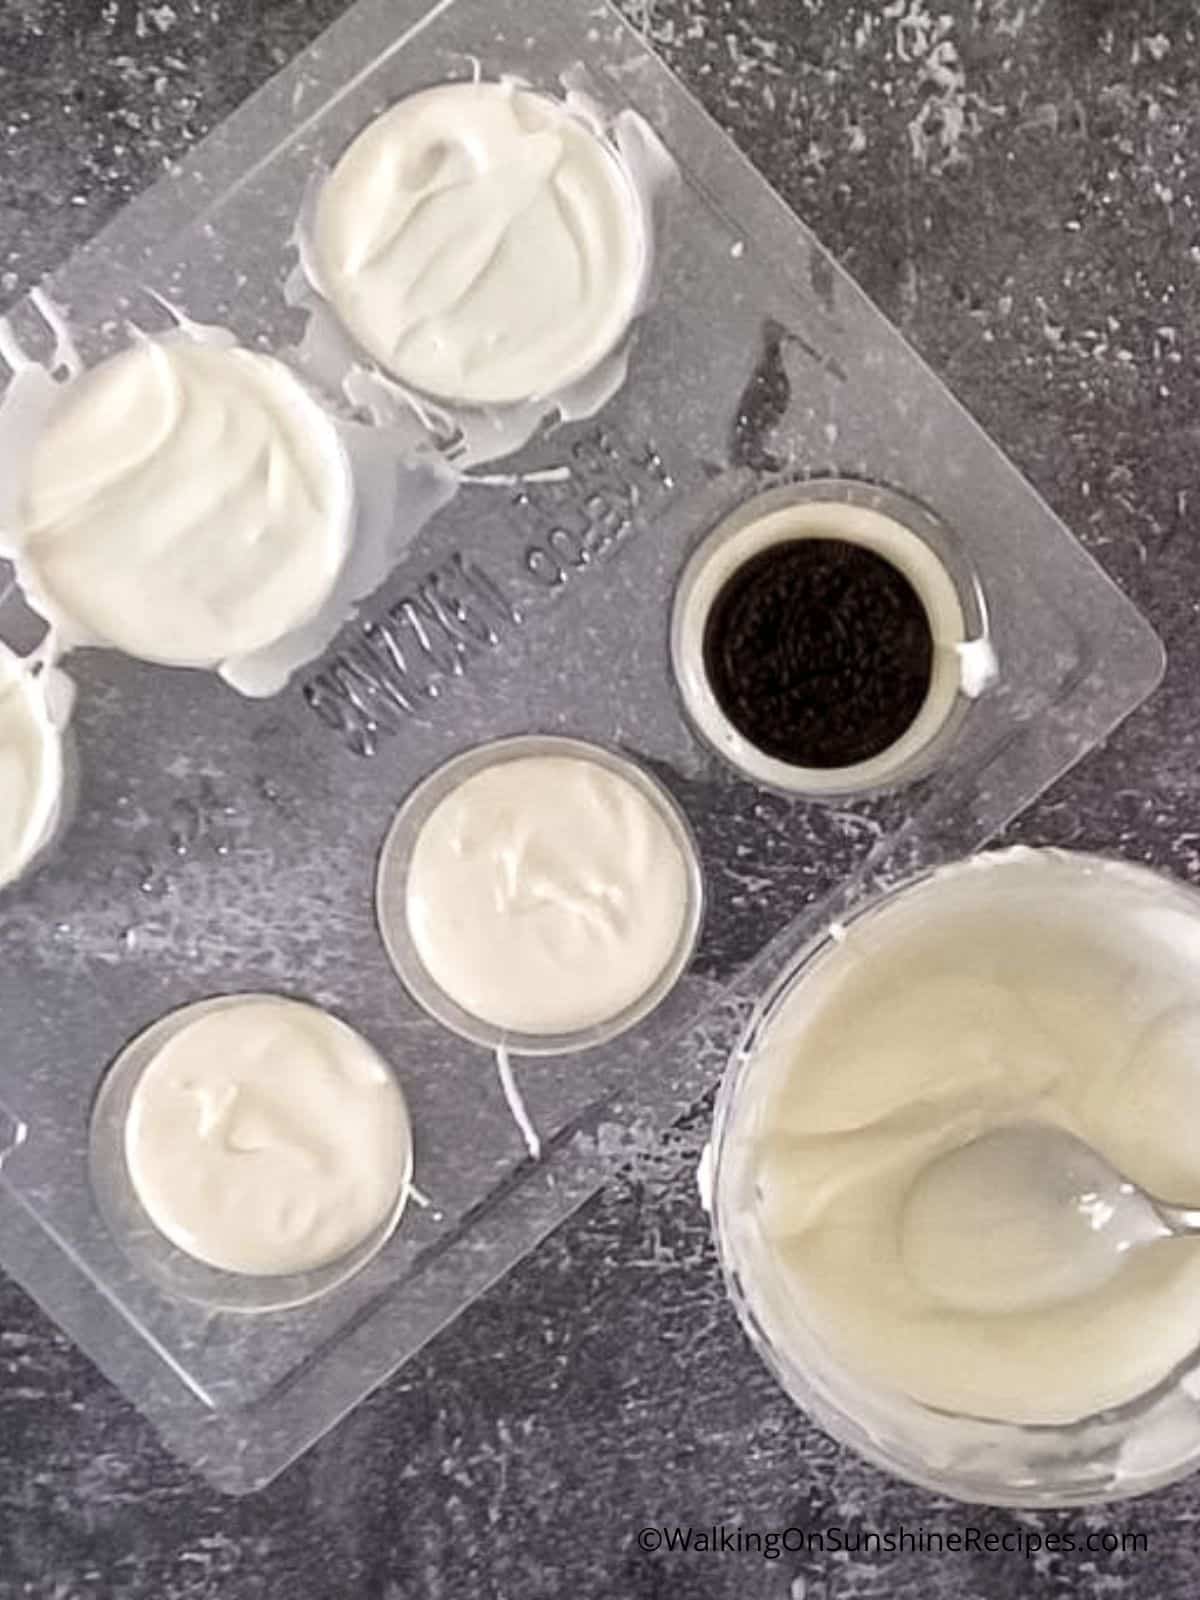
- Step 1: Melt the chocolate according to either of the directions listed above. I used the microwave method. Drop about ¼ cup of the melted candy into the bottoms of the molds.
- Step 2: Then place an Oreo cookie in the center of the holes and press down slightly. Don't press too far that you'll see it when you take them out of the molds. Spread more chocolate on top filling to the top of the mold.
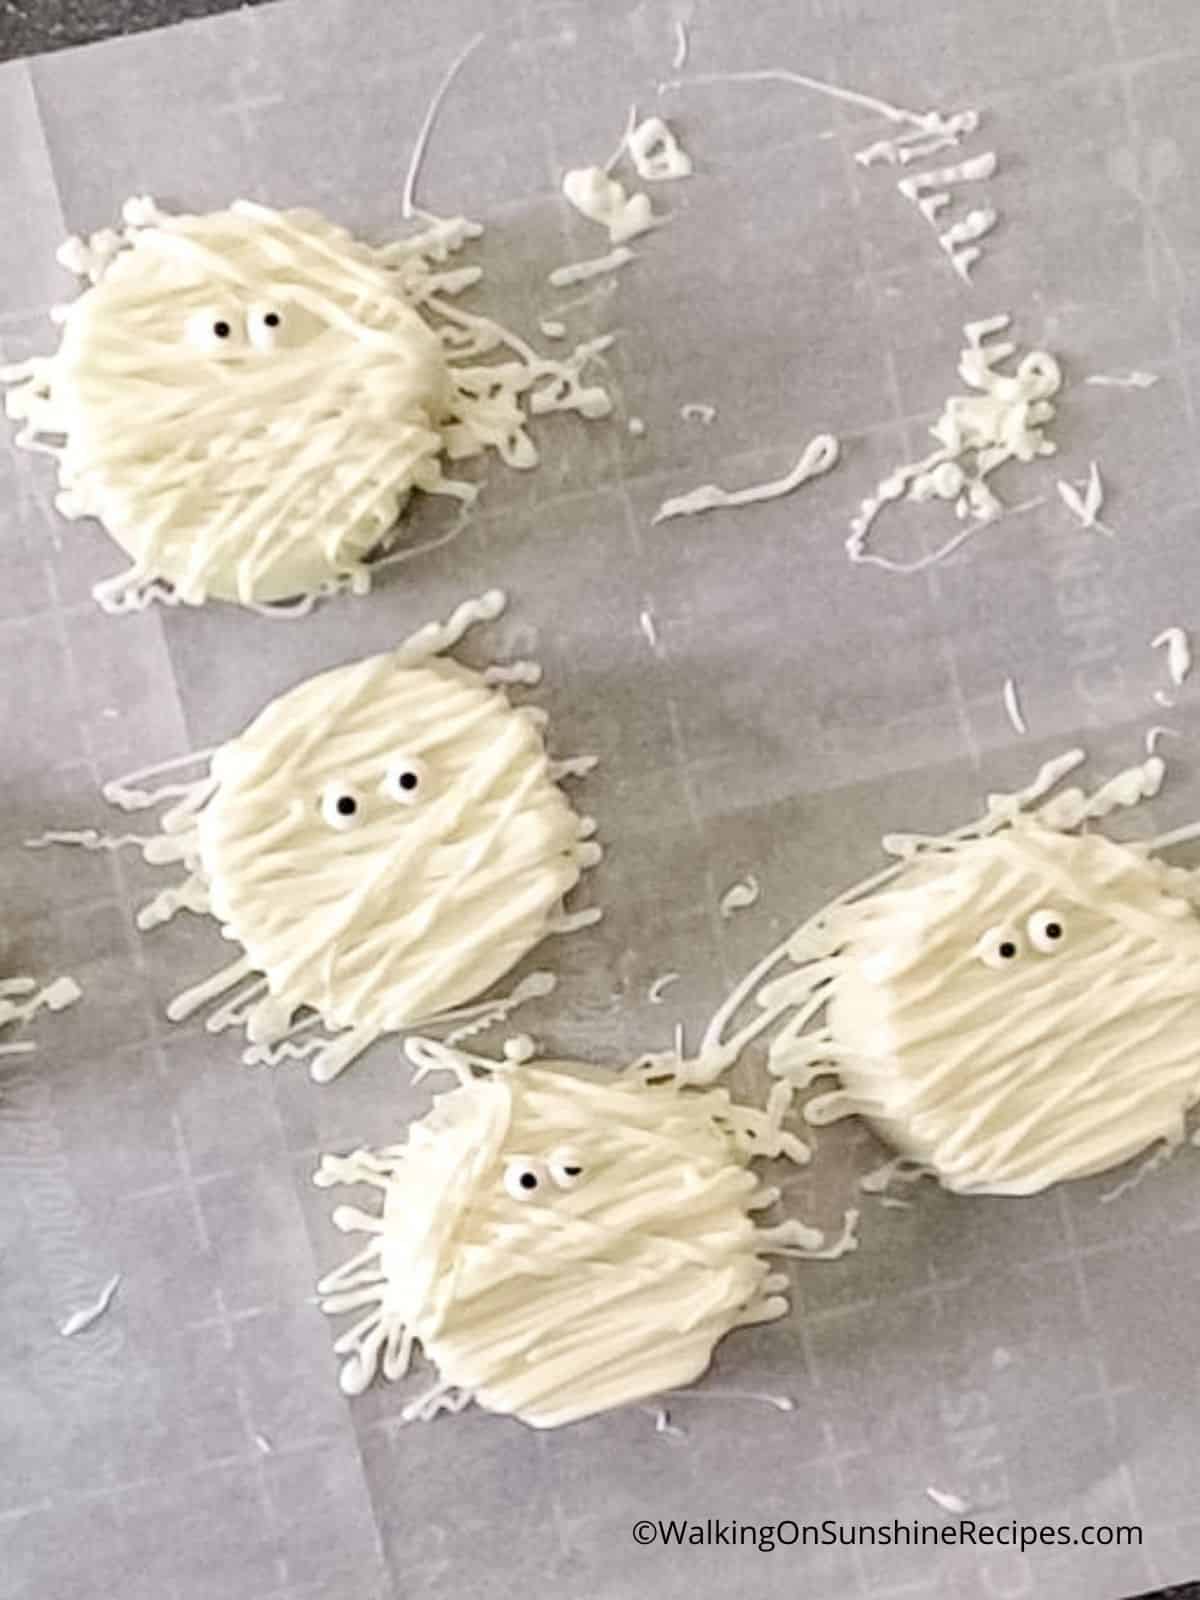
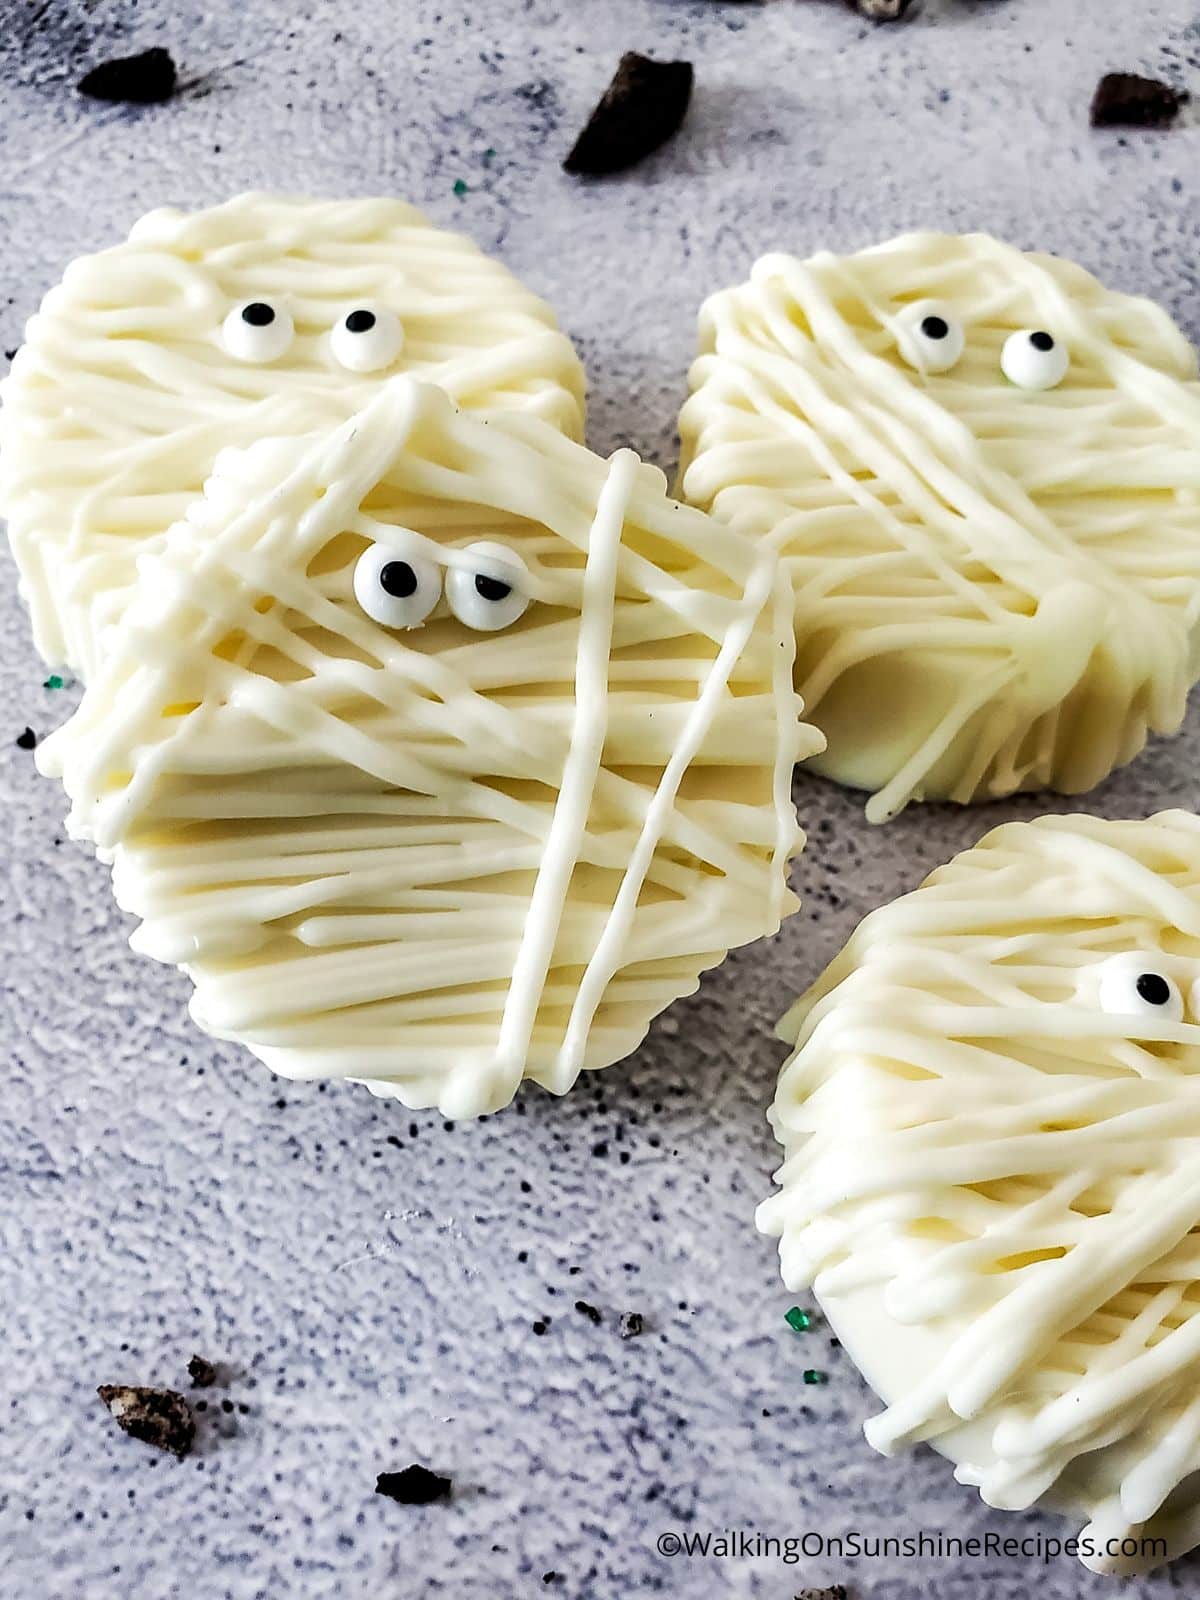
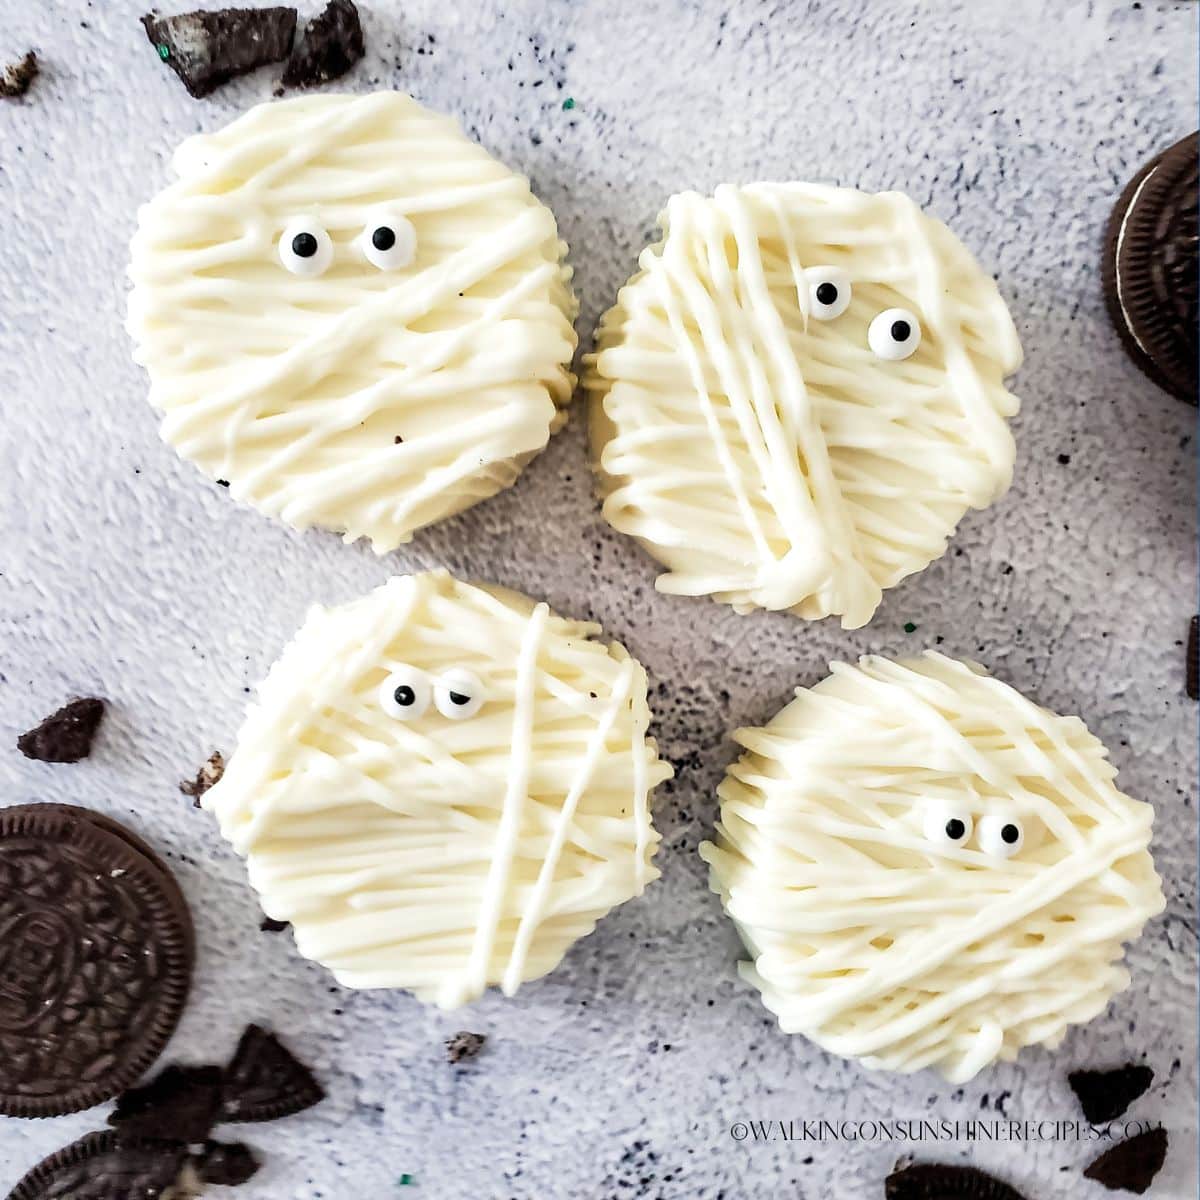
How to Decorate Mummy Cookies
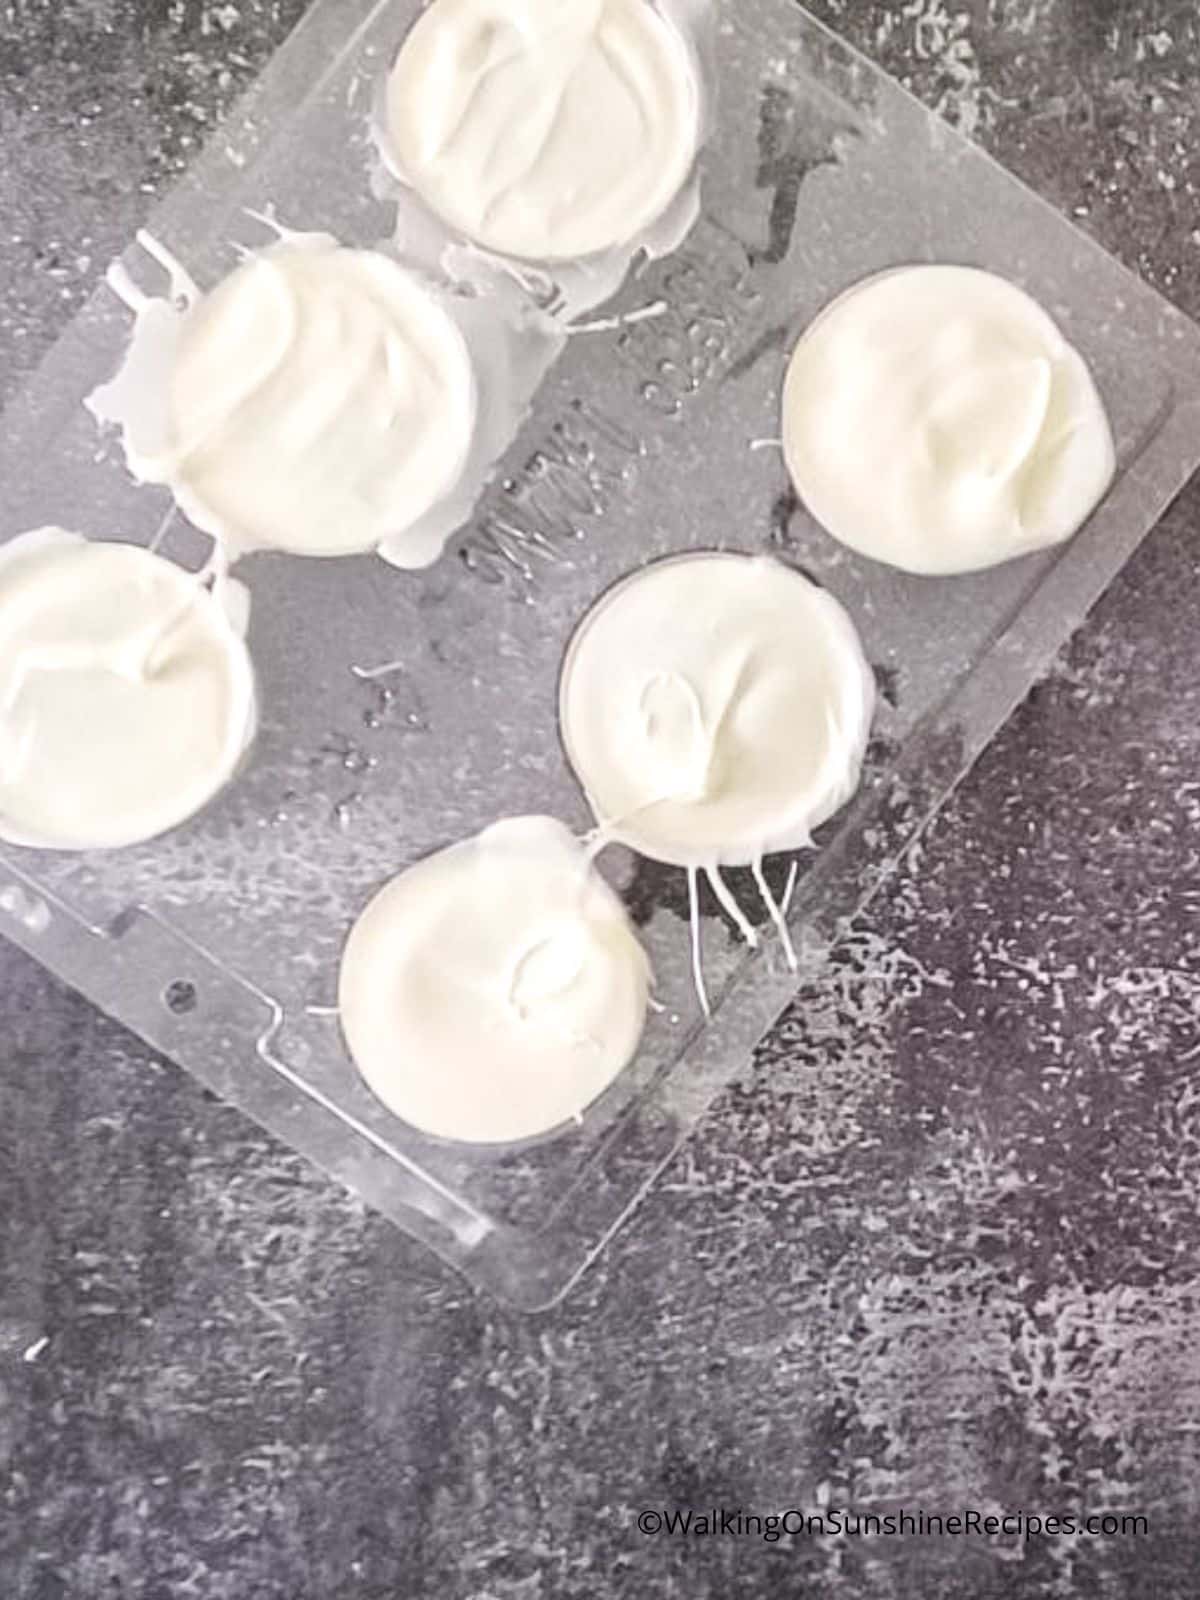
- Step 3: Set the molds aside so the chocolate fully sets; about an hour. Once the candy melt is set, you can remove the covered Oreo cookies from the mold.
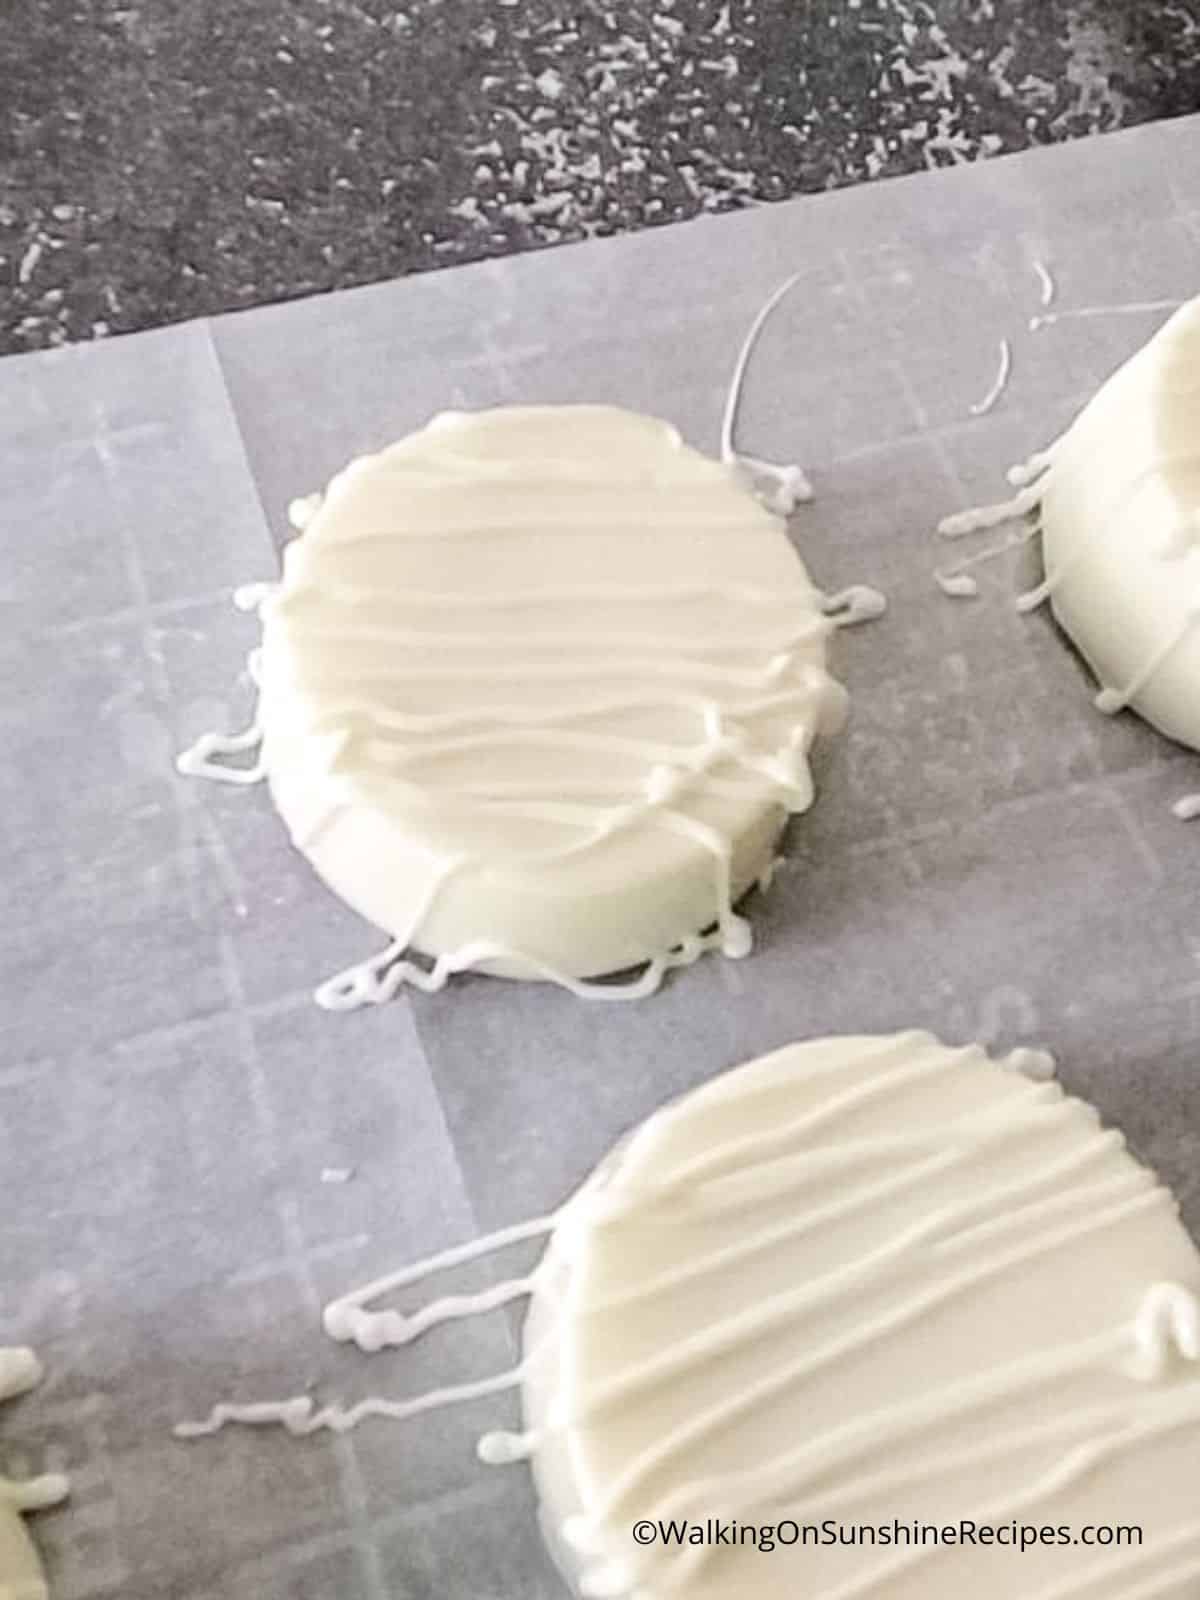
- Step 4: Melt another ½ cup of white candy melts only this time add 1 teaspoon of paramount crystals to thin out the chocolate. You might need to add more.
- Step 5: Place the chocolate in a piping bag and cut a small hole at the top. Drizzle irregular stripes across the cookie to help resemble the "fabric" of a mummy.
- Step 6: While the chocolate is still wet, place the candy eyeballs in the top ⅓ of the cookie. Allow the cookies to fully set before serving.
Before You Begin!
If you make this recipe, please leave a review and star rating. This helps my business thrive and continue providing FREE recipes.
Storage Tips
- The best way to store chocolate-covered Oreos is in an airtight container in the fridge.
- Be sure to layer the cookies in the container so that they don't touch each other. You can also place a layer of wax paper or parchment paper between the layers of cookies to prevent them from sticking together.
- Once you've stored the cookies in the fridge, be sure to eat them within a week for the best results.
If you don't want to use paramount crystals, you can add a little bit of vegetable shortening or vegetable oil to the melted candy to help thin it out a little. However, you need to be careful and not add too much or the melted chocolate will not set or harden properly.
It's probably because the temperature got too high causing the chocolate to seize up and become hard. This is because the cocoa butter in the chocolate starts to separate from the other ingredients. In order to prevent this from happening, it's important to melt the chocolate slowly and carefully.
Scare Up Some Fun with Our Halloween Activity Pack Sale!


📖 Recipe Card
Mummy Halloween Cookies
Ingredients
- 12 ounces white candy melts; reserve ½ cup for decorating.
- 1 teaspoon Paramount Crystals; see note below
- 6 regular Oreo cookies
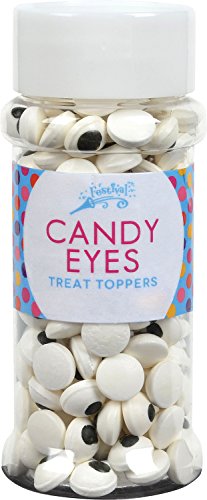
- 12 candy eyes
Method
- Melt the chocolate according to the directions on the back of the bag.
- Drop about ¼ cup of the melted candy into the bottoms of the molds.
- Then place an Oreo cookie in the center of the holes and press down slightly. Don't press too far that you'll see it when you take them out of the molds.
- Spread more chocolate on top filling to the top of the mold.
- Set the molds aside so the chocolate fully sets; about an hour.
- Once the candy melt is set, you can remove the covered Oreo cookies from the mold.
- Melt another ½ cup of white candy melts only this time add 1 teaspoon of paramount crystals to thin out the chocolate. You might need to add more.
- Place the chocolate in a piping bag and cut a small hole at the top. Drizzle irregular stripes across the cookie to help resemble the "fabric" of a mummy.
- While the chocolate is still wet, place the candy eyeballs in the top ⅓ of the cookie.
- Allow the cookies to fully set before serving.

Comments
No Comments