

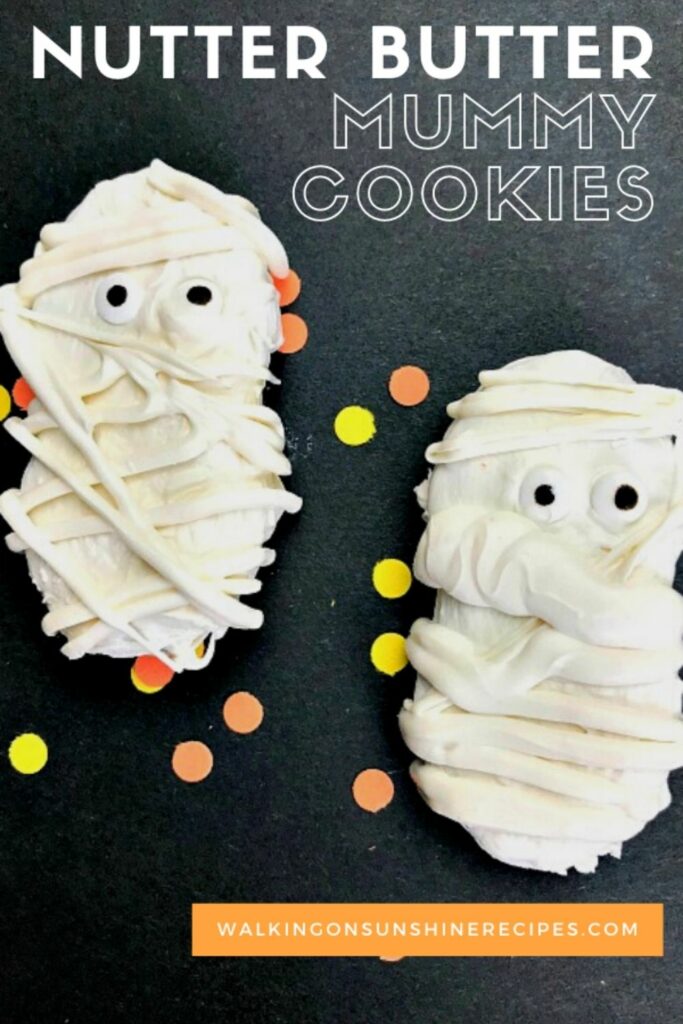
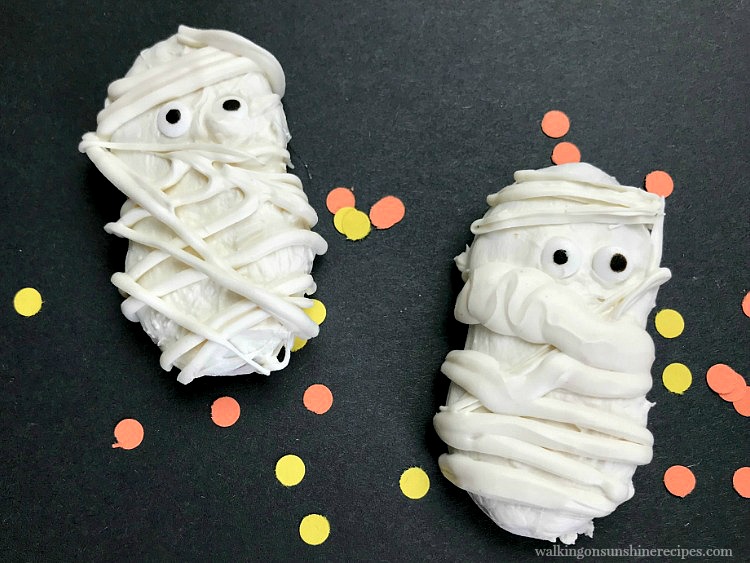
These Nutter Butter Mummies are made with a store-bought cookie, melted chocolate and fun googly eyes.
Let me show you how to make these "scary" Halloween Themed cookies little kids and big kids are going to love.
Want to Save This Recipe?
Enter your email & I'll send it to your inbox. Plus, get great new recipes from me every week!
By submitting this form, you consent to receive emails from Walking on Sunshine Recipes.
You'll have fun Halloween Nutter Butter Mummy Cookies in no time that the kids or grand kids are going to love. Use my Halloween Printable Tags and these cookies make a fun gift too.
These mummy cookies get their shape from Nutter Butter Cookies. They come in a delicious peanut butter flavor and are the perfect cookie to use to create a "scary" Halloween treat for the family.
Looking for more Easy Dessert Recipes? Halloween Thumbprint Cookies, Halloween Themed Desserts or my Easy Halloween Cookies to Bake. Both are perfect school parties or celebrating at home with family.
Table of Contents
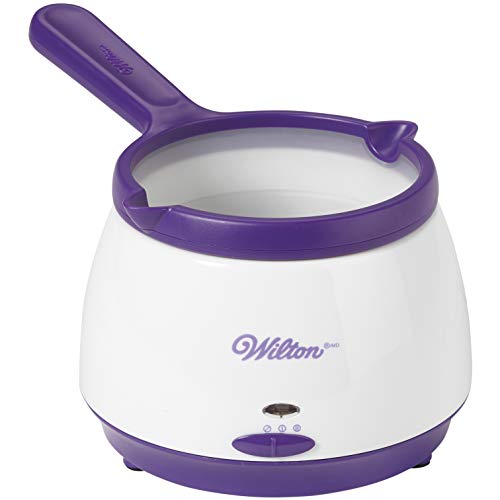
Helpful Kitchen Tools
Wilton Candy Melts Candy And Chocolate Melting Pot, 2.5 Cups Wilton Candy Melt-N-Decorate Bottle - Candy Making Supplies3 Pcs Halloween Party Serving Trays and Platters Halloween Home Party100 Pack Halloween Paper Napkins 6.5 Inch Cute Ghost Napkins


Main Ingredients Needed
Here's a quick overview of the ingredients for this recipe. Find the exact amounts and click the Instacart button to easily add them to your cart – all in the printable recipe card below!
- Nutter Butter Cookies
- Wilton White Candy Melts
- Small Candy Eyeballs
More InformationMore InformationMore Information


📌Melting Chocolate Tip: If the candy coating is too thick, you can add two teaspoons of vegetable shortening to help thin out the candy but do not add any other type of liquid as the candy will seize and harden...trust me on this one, okay?
Step-by-Step Directions
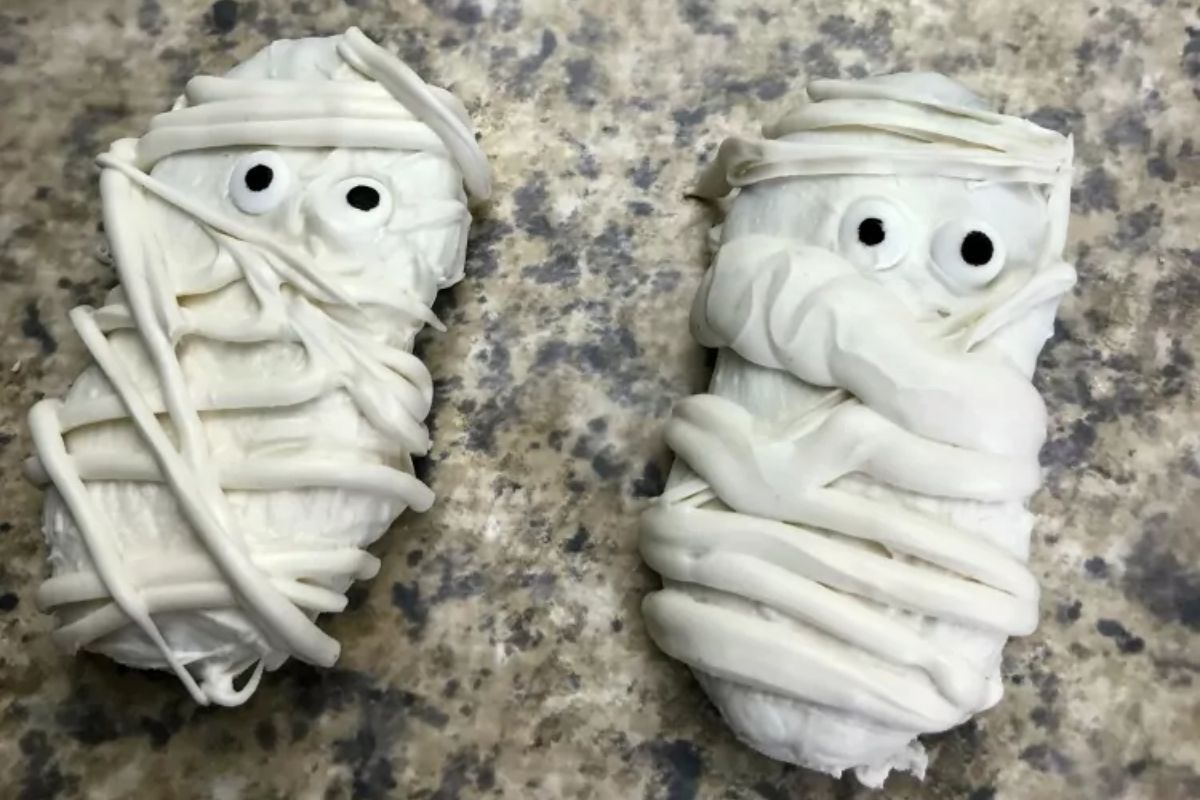
- Step 1: Melt the candy coating according to package directions giving special care not to overheat the candy.
- Step 2: Resting the cookie on a fork, spoon candy coating over the cookie and then tap the fork against the side of your bowl to remove excess candy coating.

- Step 3: Add the candy eyeballs while the candy is still wet.
- Step 4: Place the cookies on waxed paper to dry.

How to Decorate Halloween Cookies
- Pour remaining candy coating into a disposable piping bag.
- Snip the end of the piping bag and drizzle each cookie with candy coating to form the straps of the mummy material.
- Allow candy coating to harden. If necessary, cut any excessive candy coating that overlapped the edge of each cracker using a sharp knife.

Before You Begin!
If you make this recipe, please leave a review and star rating. This helps my business thrive and continue providing FREE recipes.

Tips for Making Nutter Butter Mummies
- If you don't have googly candy eyes on hand or don't want to spend the money, chocolate chips work great too.
- Store in an airtight container at room temperature.
- Placing in the refrigerator may cause the cookie to soften.
- Try my Halloween Brownies which are another way to make a spooky mummy treat!
More Recipes to Love
Try my Nutter Butter Ghosts, Nutter Butter Reindeer Cookies or Nutter Butter Snowman Cookies for a few other holiday ideas with this fun store-bought cookie.
Scare Up Some Fun with Our Halloween Activity Pack Sale!

Recipe Card
📖 Recipe Card
Nutter Butter Mummy Cookies
Ingredients
- 1 - 16 ounce package Nutter Butter Cookies
- 1 - 12 ounce package of Wilton White Candy Melts
- Small Candy Eyeballs
Method
- 1. Melt the candy coating according to package directions giving special care not to overheat the candy. If the candy coating is overheated, it will be too thick. You can add two teaspoons of vegetable shortening to help thin the candy but do not add any other type of liquid as the candy will seize and harden.
- 2. Resting the cookie on a fork, spoon candy coating over the cookie and then tap the fork against the side of your bowl to remove excess candy coating.
- 3. Add the candy eyeballs while the candy is still wet. Place on waxed paper to dry.
- 4. Pour remaining candy coating into a disposable piping bag. Snip the end of the piping bag and drizzle each cookie with candy coating.
- 5. Allow candy coating to harden. If necessary, cut any excessive candy coating that overlapped the edge of each cracker using a sharp knife.
Nutrition
Notes
Tried this recipe?
Let us know how it was!This recipe has been updated since it first appeared in 2018 with new photos, information and a new printable recipe card that includes nutritional information. I hope you enjoy the updates as much as I enjoyed working on them!


Michelle | Thistle Key Lane says
Thank you for sharing your cute Halloween mummy cookies. I'm excited to feature your post on the Tuesday Turn About Link Party!
Marilyn says
********************************************************
Thank you for sharing at #OverTheMoon. Pinned and shared. Have a lovely week. I hope to see you at next week’s party too! Please stay safe and healthy. Come party with us at Over The Moon! Catapult your content Over The Moon! @marilyn_lesniak @EclecticRedBarn
********************************************************
Creatively Beth says
Super cute, Lois!! I'd love for you to share over at our weekly Wednesday Creative Crafts Linky Party
https://creativelybeth.com/creative-crafts-linky-party-9-join-in-the-fun/
Have a great week!
Creatively, Beth
Lois says
Thanks Beth! I do join your party every week!
Sylvia | Grace for a Gypsy says
How cute for Halloween party! I made something similar for a baby shower, but Im loving these for Halloween!