


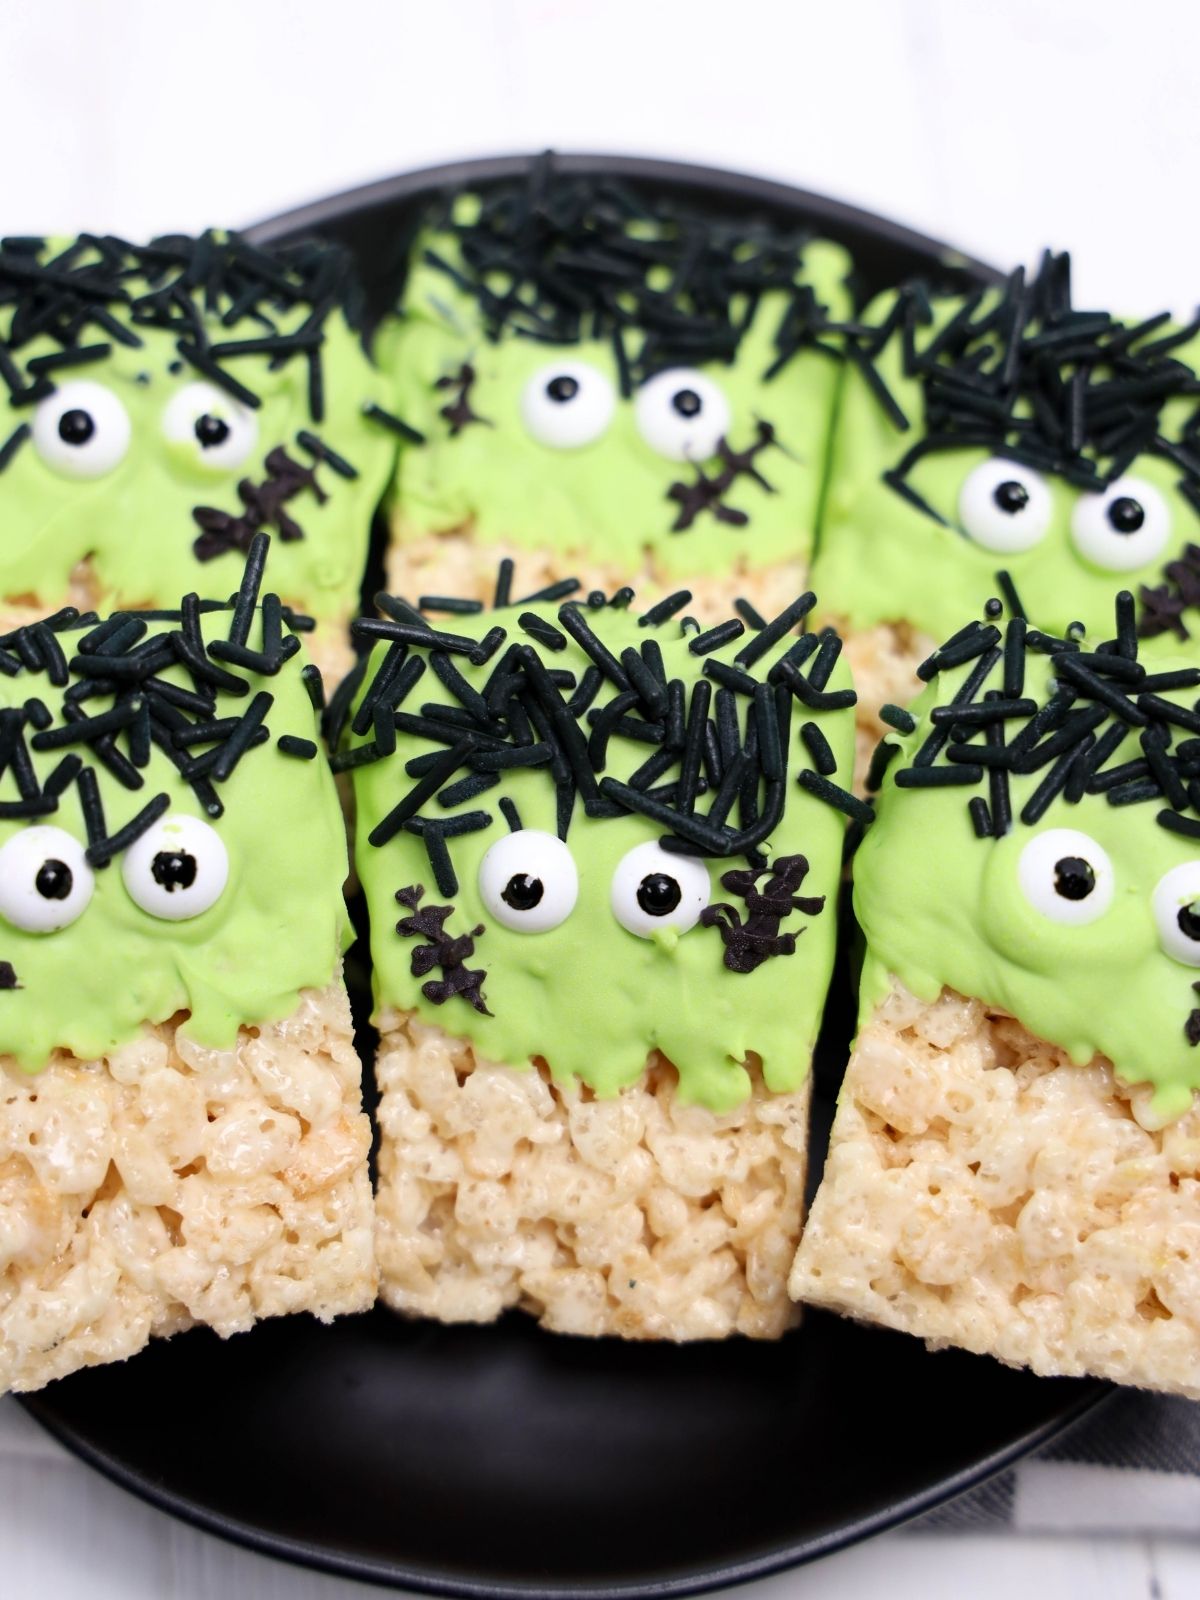
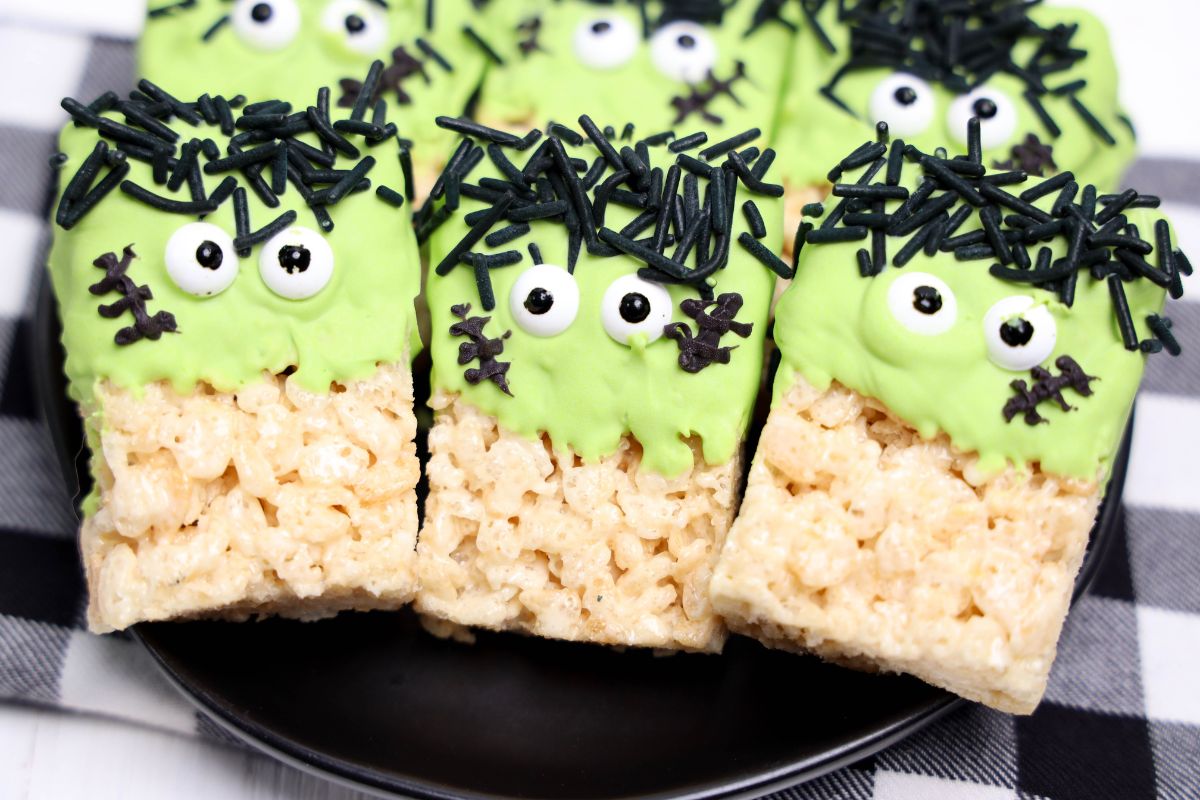
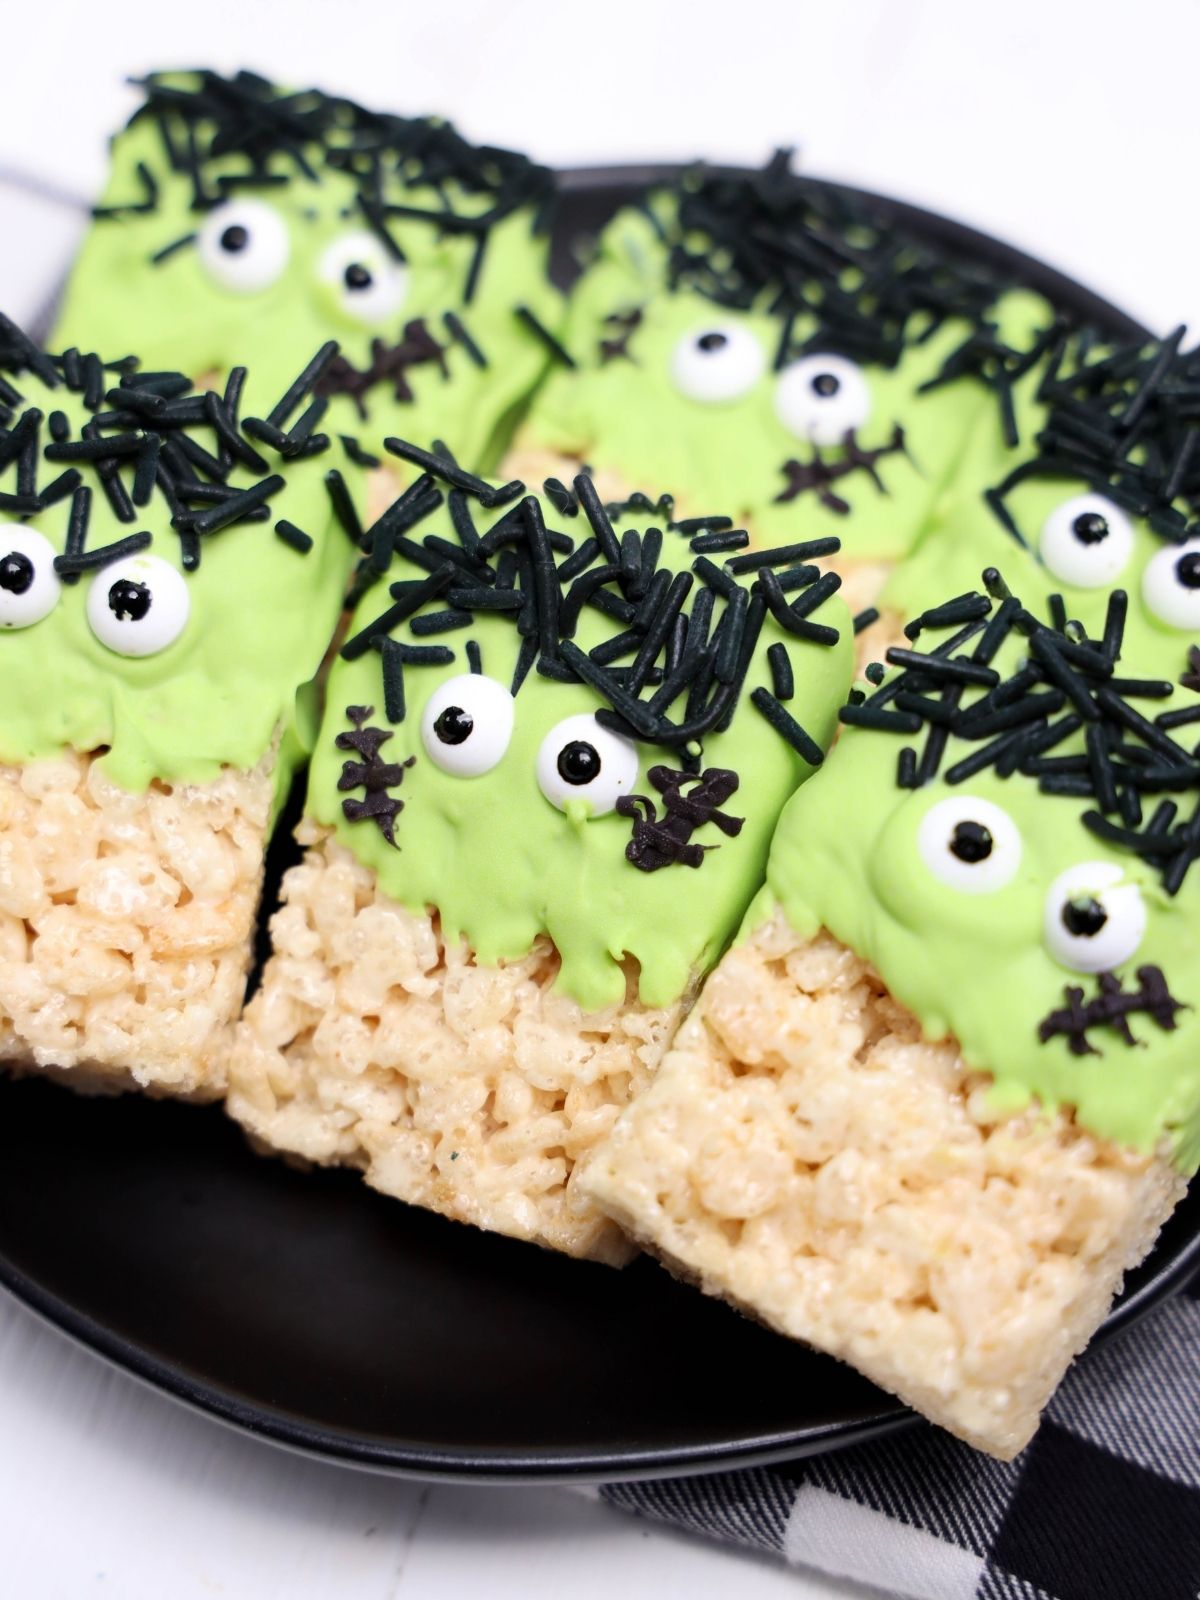
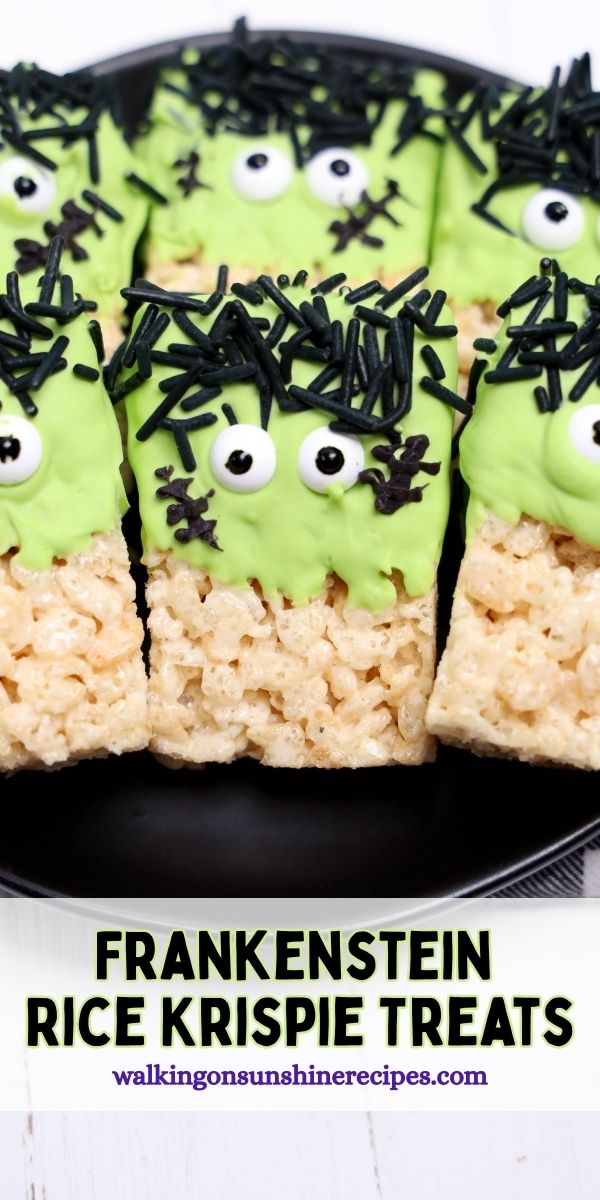
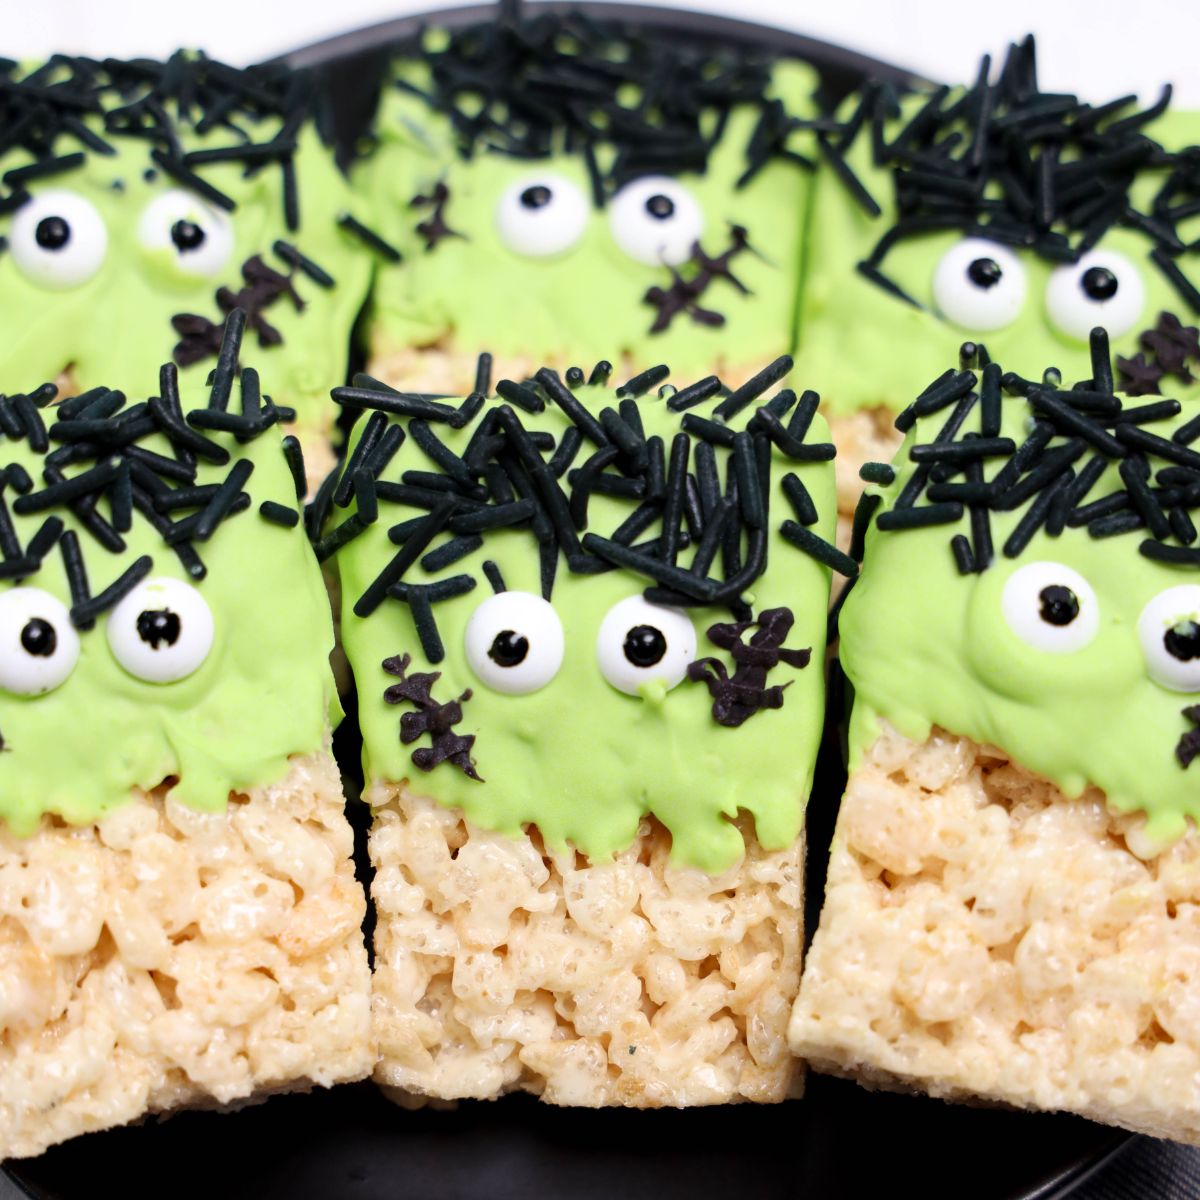
Bring spooky fun to your Halloween dessert table with Frankenstein Rice Krispie Treats, decorated with green coloring, candy eyes, and chocolate hair.
They’re festive, no-bake, and come together quickly—perfect for parties, school events, or simply adding a playful touch to all your Halloween themed recipes.
Want to Save This Recipe?
Enter your email & I'll send it to your inbox. Plus, get great new recipes from me every week!
By submitting this form, you consent to receive emails from Walking on Sunshine Recipes.
Recipe at a Glance
Prep: 20 min | Cook: 0 min | Difficulty: Easy
What it is: A no-bake Halloween treat made with sRice Krispie Treats, green candy melts, chocolate sprinkles, and candy eyes for a fun and spooky snack.
Why you’ll love it: Quick to assemble, kid-friendly, and perfect for parties, school events, or last-minute holiday fun.
How to make it: Unwrap all the treats first for easy decorating. Dip in melted green candy, add sprinkles and candy eyes, and let them set before serving.
👉 Hosting a Halloween party? Grab my Halloween Activity Pack here
Table of Contents
- Recipe at a Glance
- Recommended Kitchen Tools
- My Kitchen Tools Essentials
- Ingredients You’ll Need
- Substitutions and Variations
- Step-by-Step Instructions
- Insider Tips from My Kitchen to Yours
- Insider Tips from My Kitchen to Yours
- Storage & Serving Tips
- Recipe FAQ's
- More Cute Halloween Treats You'll Love!
- LOVE this recipe? SAVE it for Later!
- 📖 Recipe Card
- Tips
- Halloween Placemat Activity BUNDLE
- Food Safety Tips:
- 💬 Comments
They're perfect for school parties or a fun treat to make for your kids before heading out for trick-or-treating.
With the classic flavor everyone loves and a playful design that’s sure to get smiles, they’re a festive twist on a favorite snack.
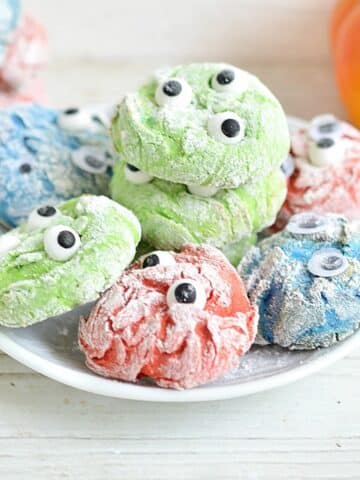
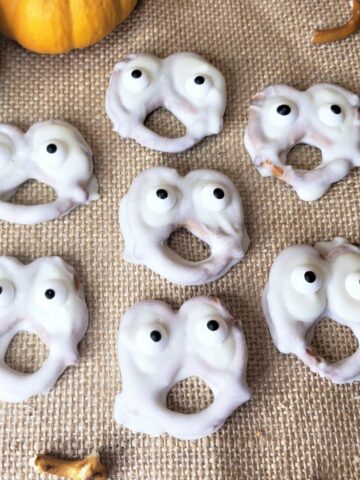
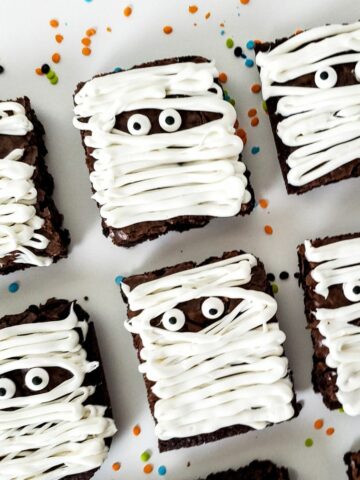
Looking for more festive no bake treats? Try my Halloween Decorated Brownies, Mummy Halloween Cookies, and even my Halloween Cake Mix Cookies. Yum!
Recommended Kitchen Tools
For a full list of kitchen tools used in this recipe, be sure to check the recipe card below. You can also browse my Favorite Kitchen Tools by clicking the photo below.

Check out my list...
My Kitchen Tools Essentials
Tools that will make your time easier and faster in the kitchen!
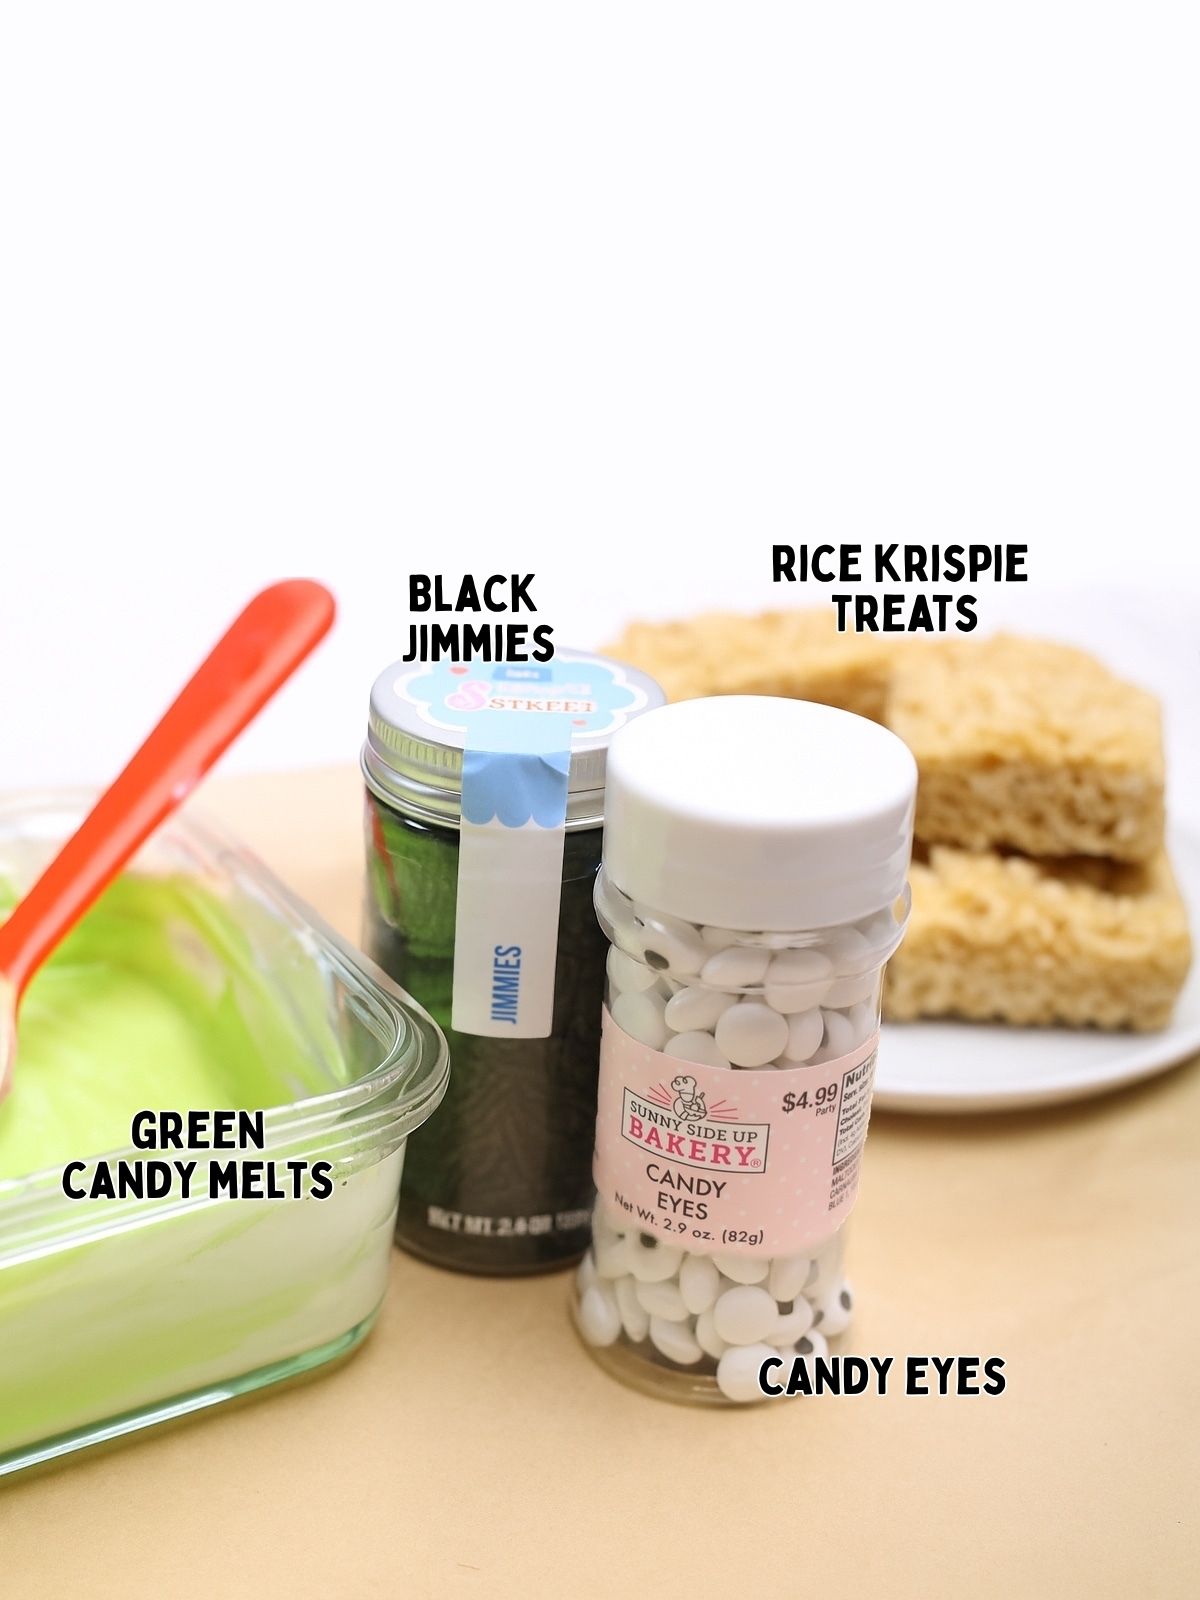
Ingredients You’ll Need
Below is a quick preview of the ingredients you’ll need. For exact amounts, check the recipe card below. You can also use the "Shopping List button" to create a printable shopping list, or the "Get Ingredients button" in the recipe card to order groceries online.
Substitutions and Variations
Different Candy Melts: Swap green for purple or orange candy melts to create other spooky characters.
Homemade Base: Use homemade Rice Krispie Treats instead of store-bought if you want a bigger batch or fresher flavor.
Eyes & Faces: Use mini M&Ms, gel icing, or candy corn in place of candy eyes for different monster expressions.
This recipe has not been tested with other substitutions or variations. If you replace or add any ingredients, please let me know how it turned out in the comments below!
Step-by-Step Instructions
This section provides step-by-step photos and instructions to guide you through the recipe. For the complete printable version, scroll down to the recipe card below.
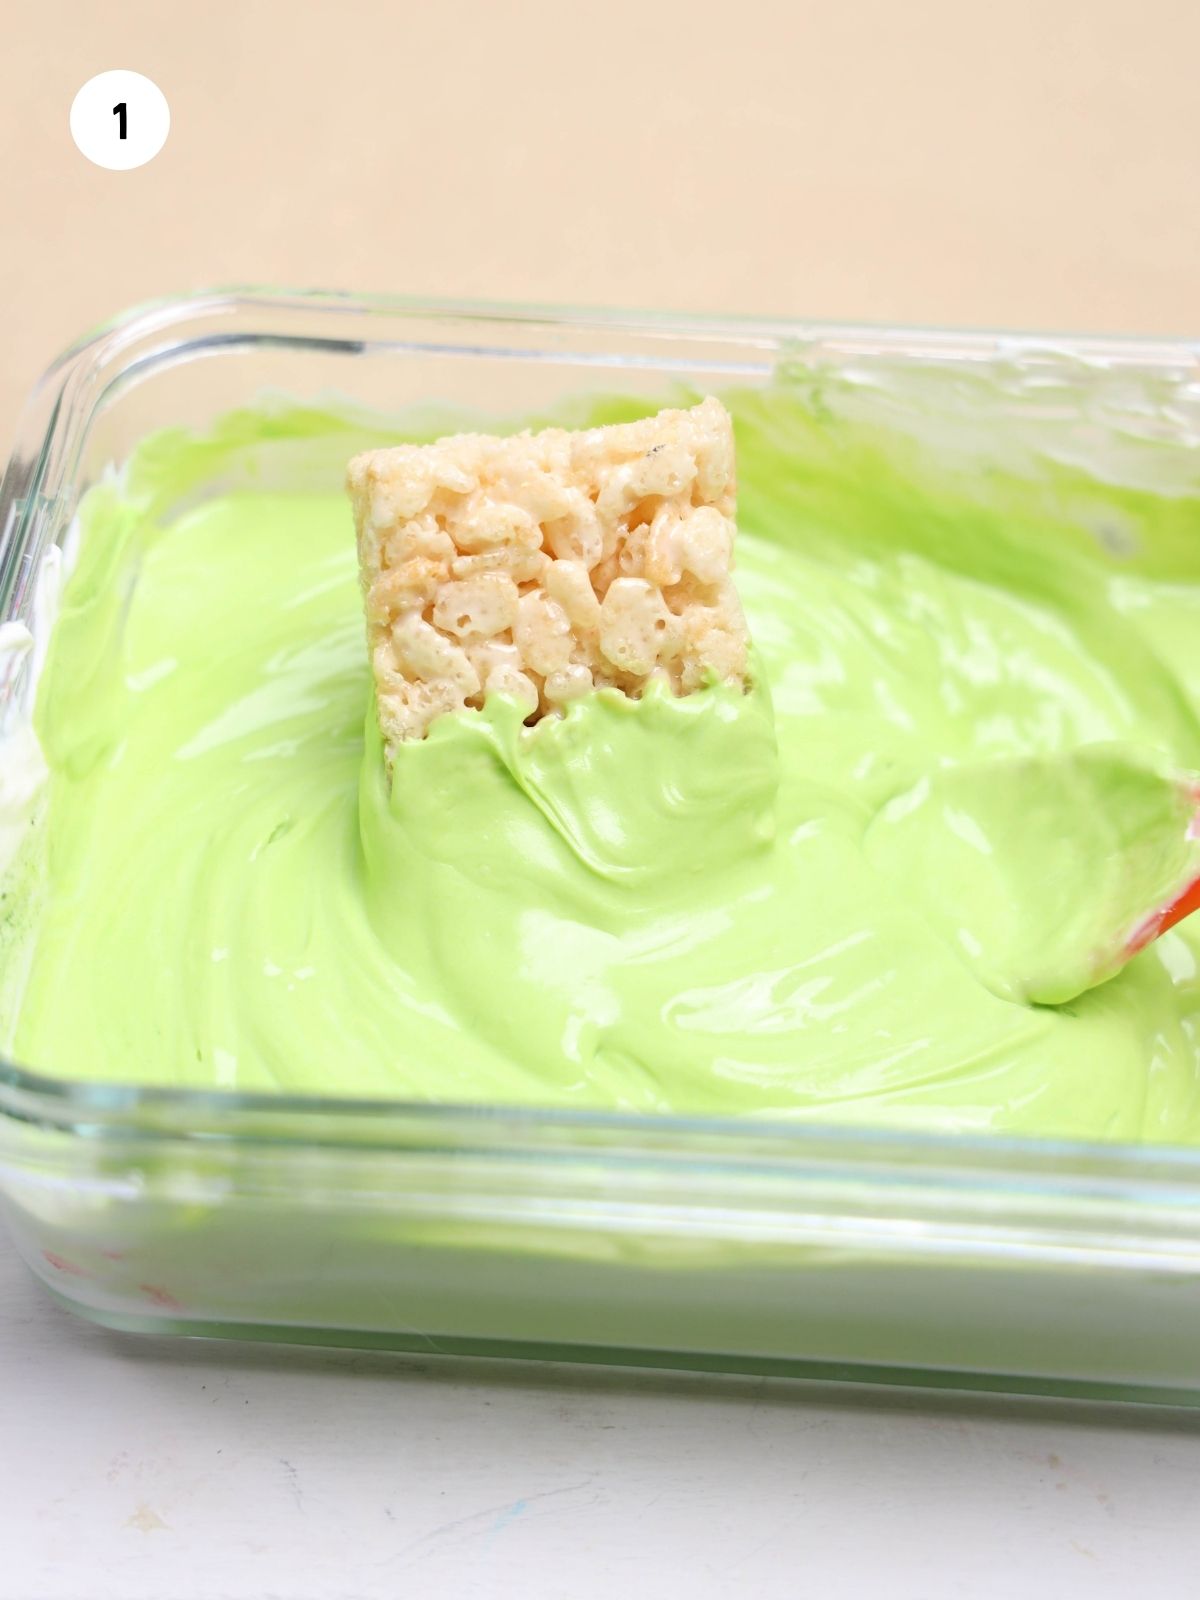
Step 1: Melt the candy wafers according to the package directions then dip the top half of the Rice Krispie treats.
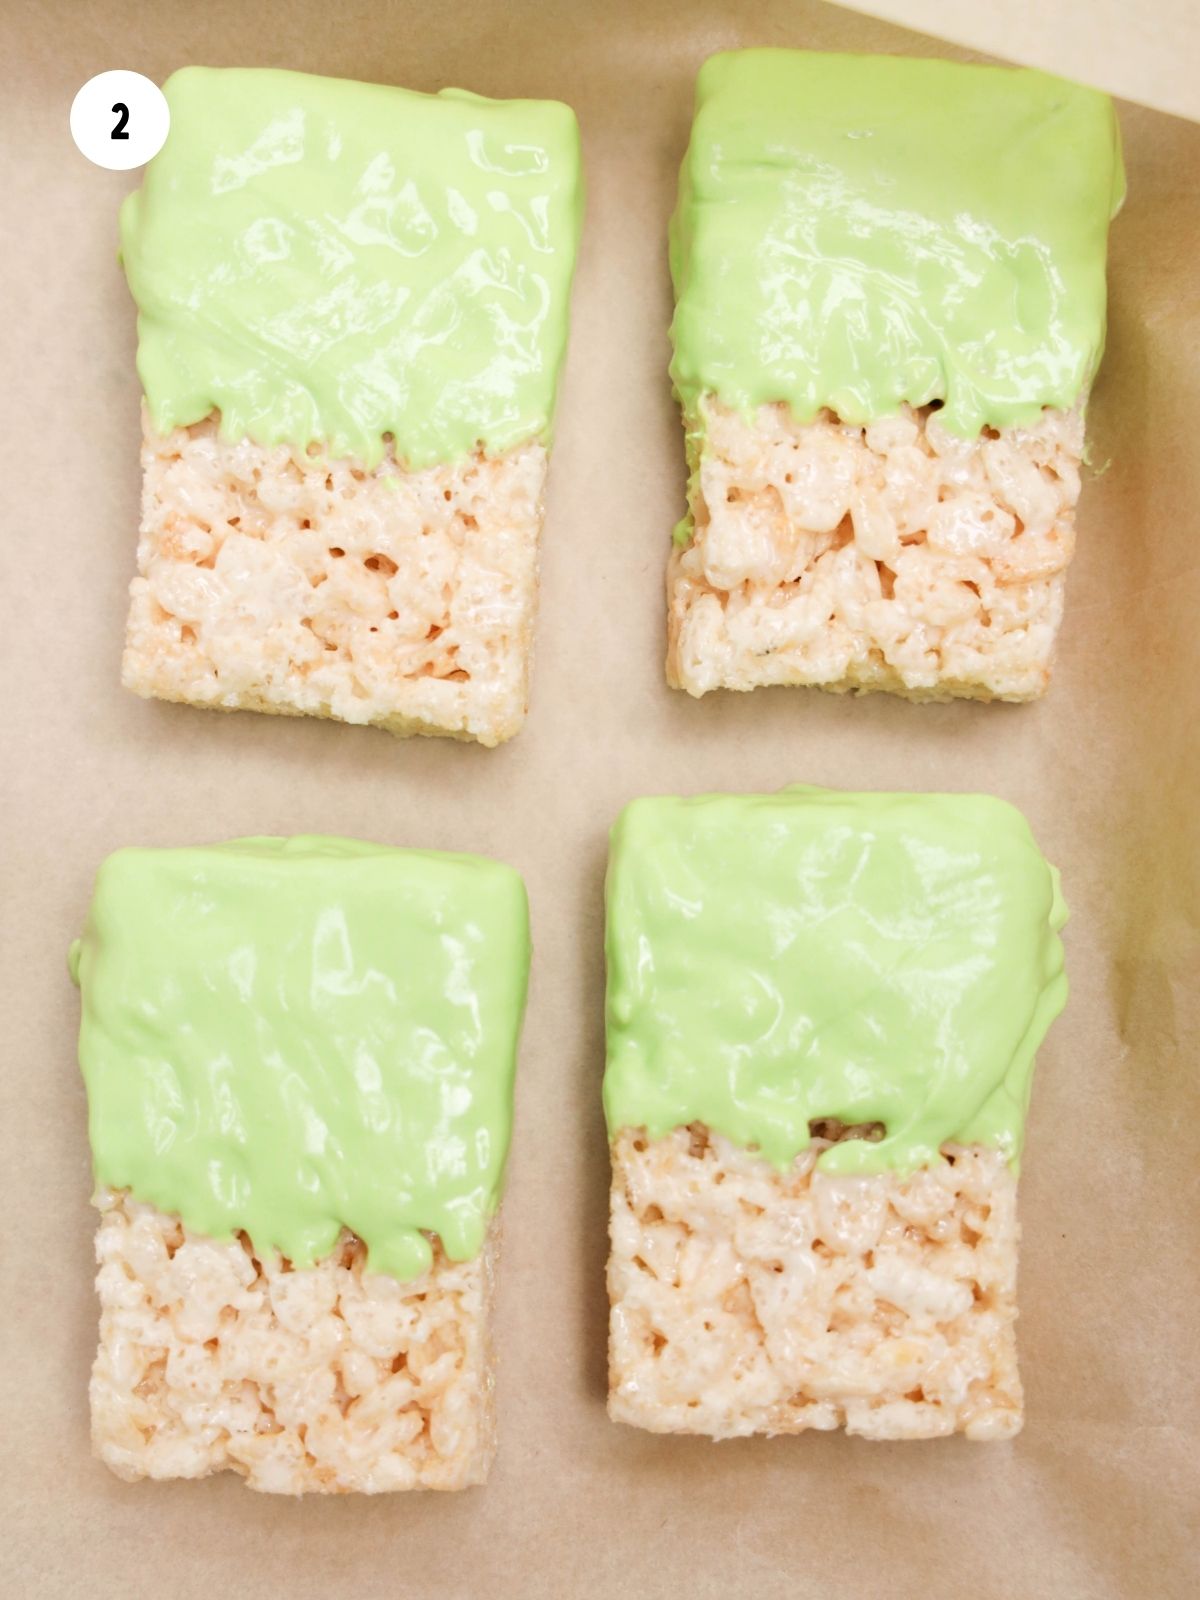
Step 2: Place the dipped treats on parchment or wax paper.
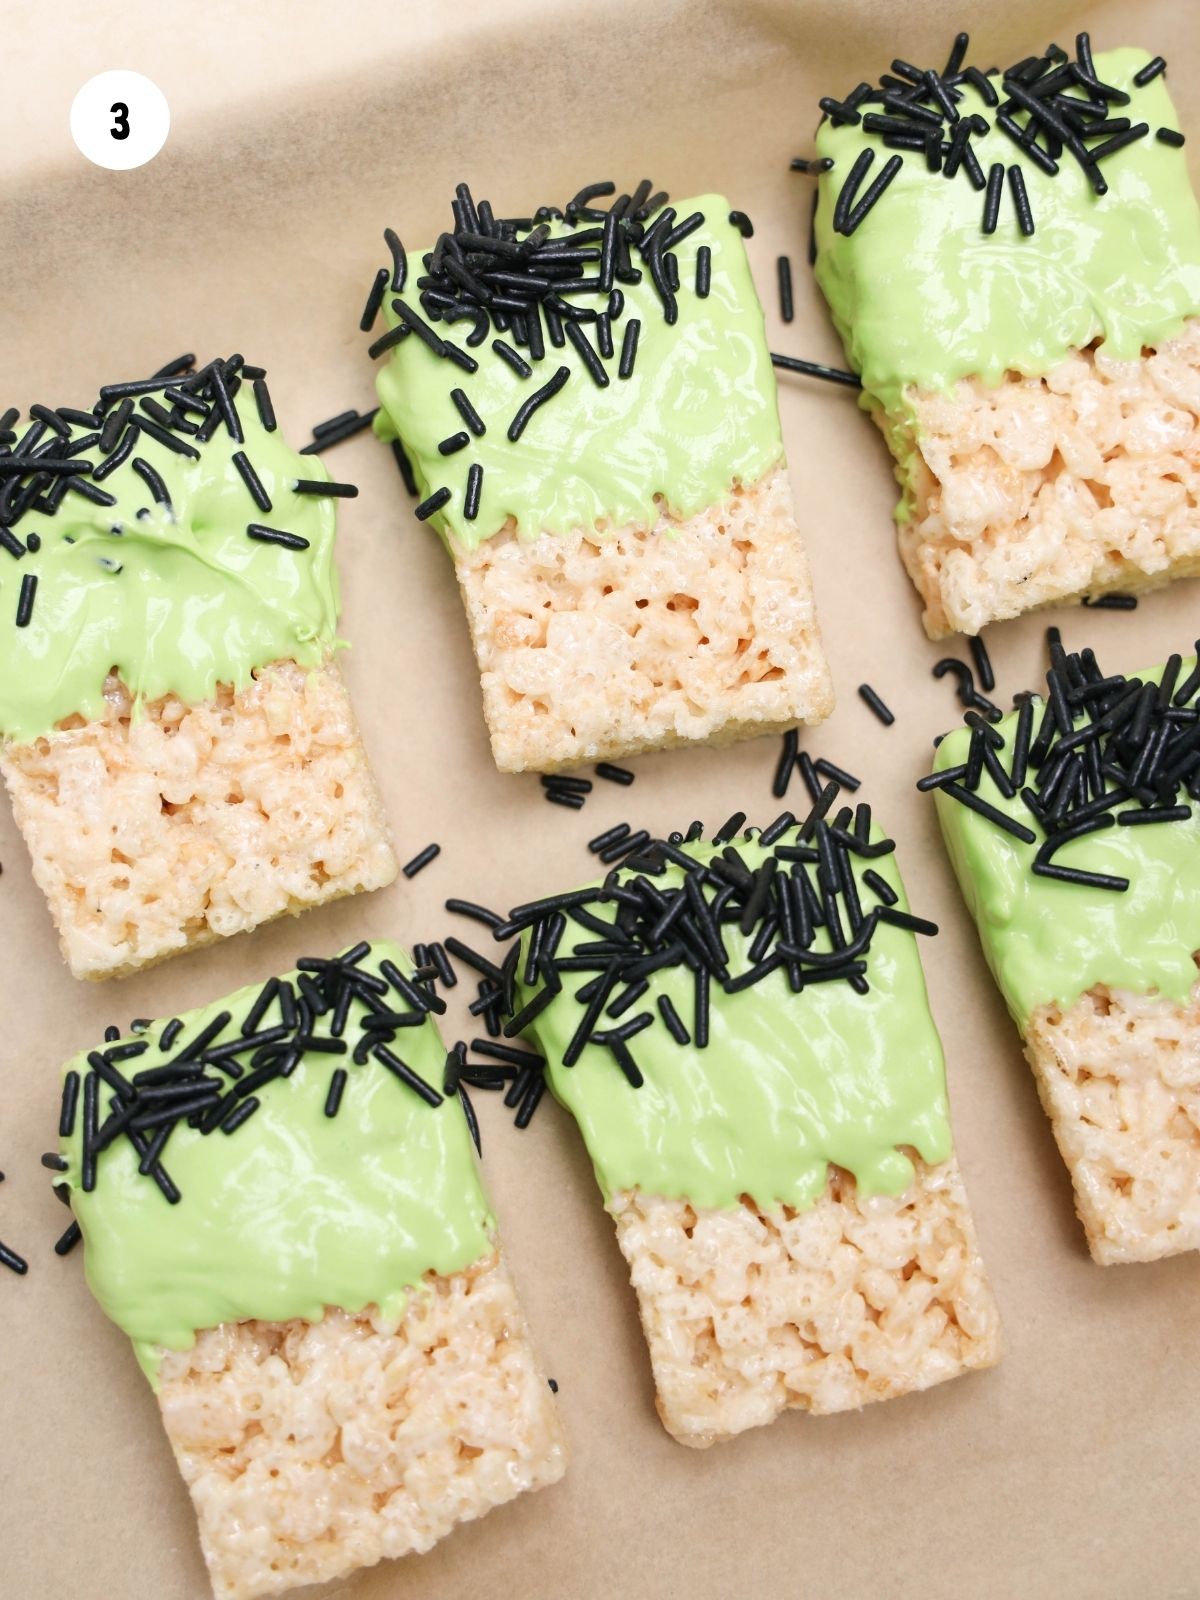
Step 3: While the chocolate is still wet, add the black jimmies on the very top to resemble the hair.
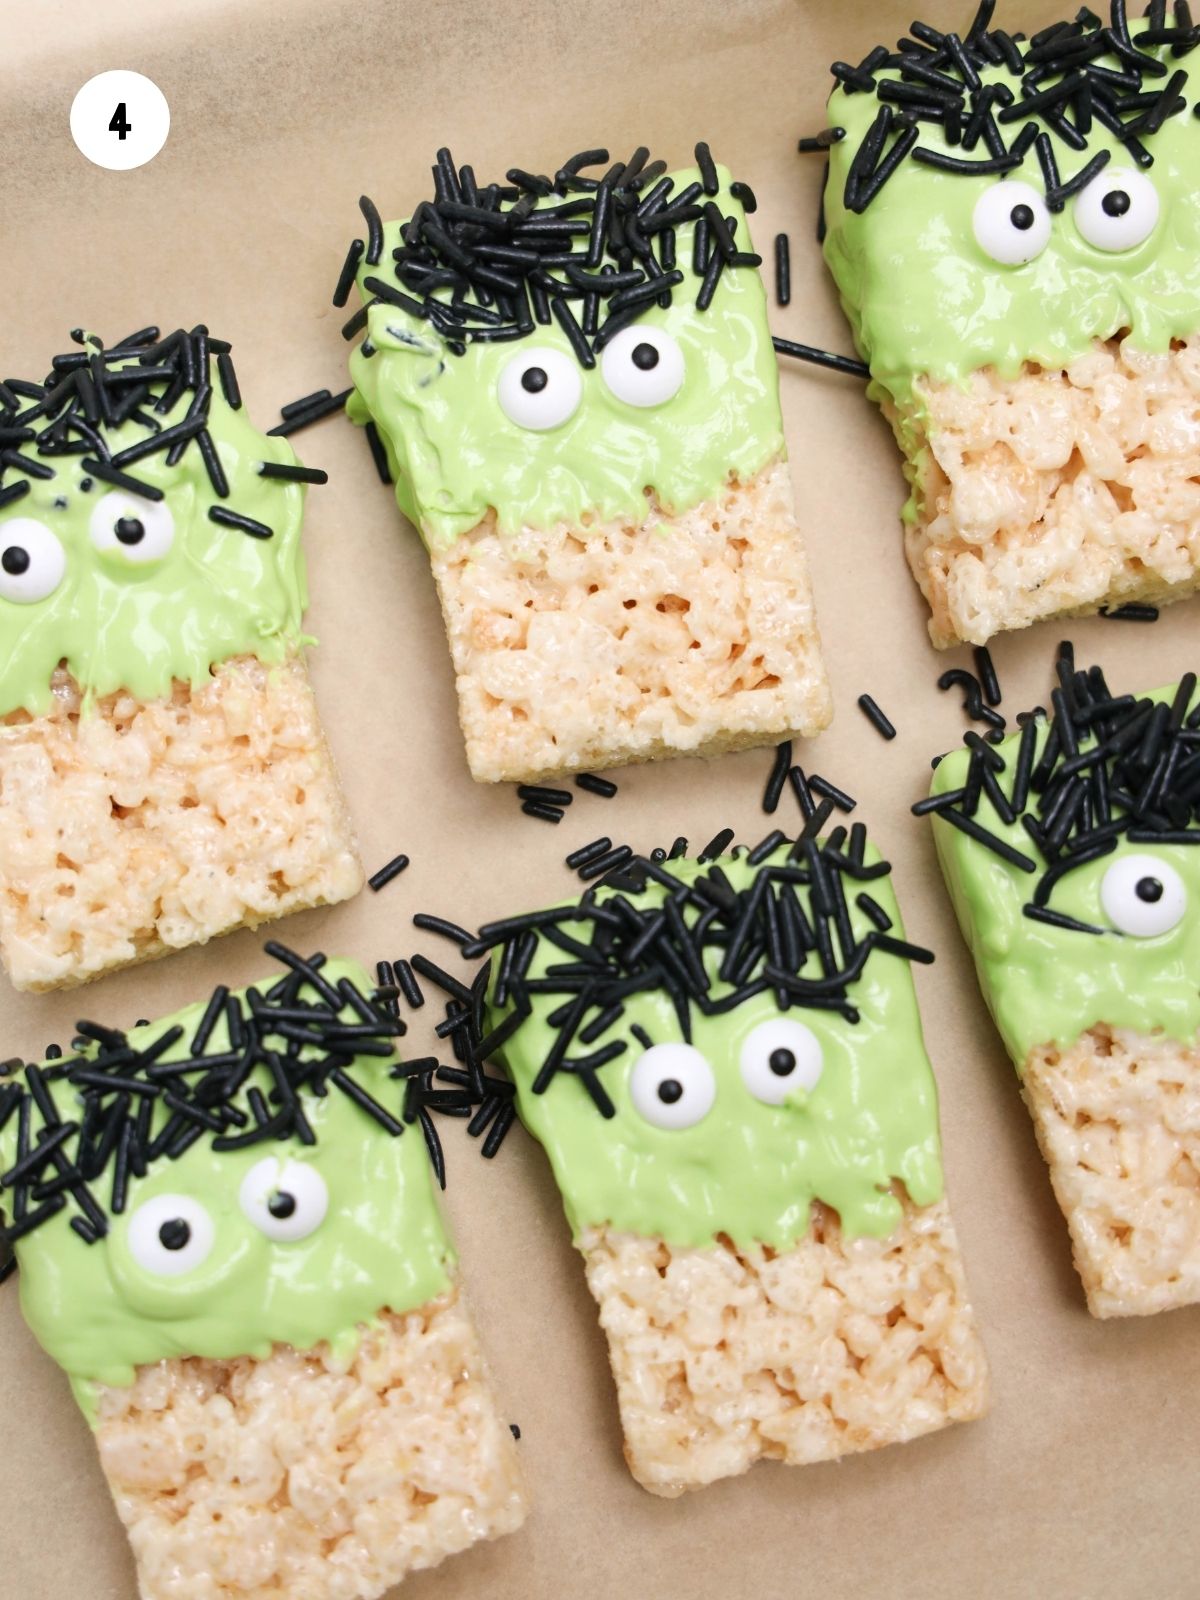
Step 4: Then press in 2 candy eyes right below the hair.
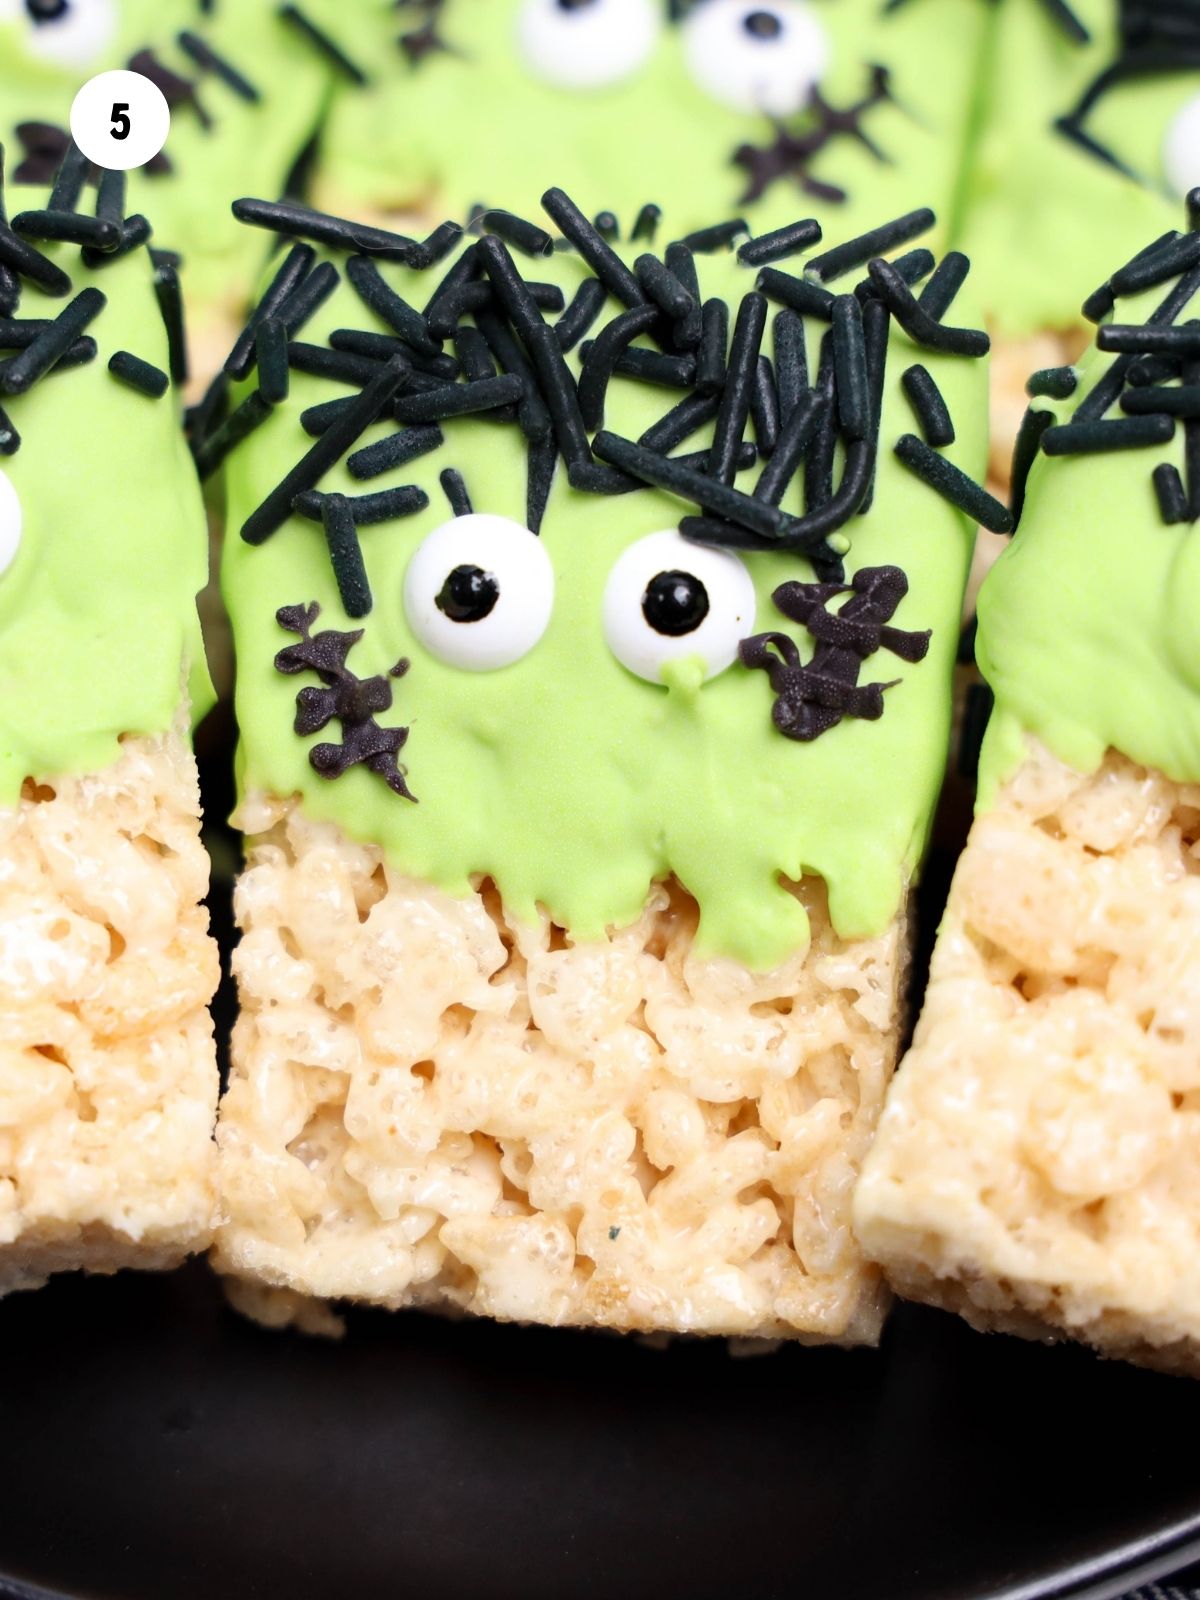
Step 5: Pipe melted black candy wafers on to create stitches. Allow the treats to completely set.
Insider Tips from My Kitchen to Yours
✔️ DO unwrap and prep all your Rice Krispie Treats and decorations before melting the candy so assembly goes quickly.
❌ DO NOT overheat the candy melts, as they can seize and become difficult to coat smoothly.
Insider Tips from My Kitchen to Yours
✔️ DO melt the candy coating slowly and stir often for the smoothest finish when dipping.
❌ DO NOT skip letting the coating set fully before adding sprinkles and eyes, or they may slide off.
Storage & Serving Tips
Refrigerate: Store in an airtight container for up to 5 days. Let sit at room temperature for a few minutes before serving so the candy coating softens slightly.
Freezer: Freezing is not recommended once decorated, as the candy coating and sprinkles may crack or lose their texture.
Serving Tips: Arrange on a Halloween platter or wrap individually in cellophane bags for parties, bake sales, or classroom treats.
👉 Add a playful touch to your celebration by serving these spooky treats on my Halloween Placemats—a fun activity bundle kids will love while enjoying their sweets.
Recipe FAQ's
To view the answers, simply click on the down arrow (⬇) next to each question. If you have any other questions not answered here, please leave a comment!
Decorated Frankenstein Rice Krispie Treats will stay fresh for about 3 days when stored in an airtight container at room temperature. If you need them to last longer, you can refrigerate them for up to 5 days, but let them sit at room temp for a few minutes before serving so the candy coating softens slightly.
To keep candy melts from cracking, make sure the Rice Krispie Treats are at room temperature before dipping and avoid moving them straight from a cold area to a warm one. Also, don’t make the candy coating too thick— a light, even layer sets more smoothly and is less likely to break.
More Cute Halloween Treats You'll Love!


LOVE this recipe? SAVE it for Later!
❤️Tap the heart icon in the lower right corner to add the recipe to your recipe box for easy access anytime.
If you made it, leaving a star rating or quick review is always appreciated and helps other readers too.
Want to save this printed recipe? The Ultimate Meal Planner & Recipe Binder helps you keep recipes organized in one easy place.
📖 Recipe Card
Frankenstein Rice Krispie Treats
Video
Ingredients
- 6 Rice Krispie Treats
- 12 oz green candy melts
- 3 tablespoons black jimmies sprinkles
- 12 candy eyes
- 3 oz black candy melts
Method
- Place green candy melts in a microwave-safe bowl and heat on the defrost setting for 2 minutes. Continue heating in 1-minute intervals, stirring after each, until fully melted and smooth.
- Dip each Rice Krispie Treat halfway into the melted candy, turning to coat all sides evenly. Set on parchment paper to dry.
- While the coating is still wet, decorate the top with black jimmies for hair.
- Press on two candy eyes.
- Add black candy melts to a piping bag and heat on defrost for 2 minutes, then in 1-minute intervals as needed until melted.
- Snip the tip of the bag and pipe stitches across the coated area to create Frankenstein’s face.
- Allow treats to set completely before serving.
Nutrition
Notes
Tips
- Unwrap all the Rice Krispie Treats and have decorations ready before melting the candy for easier assembly.
- Melt candy melts slowly in the microwave, stirring between intervals to avoid overheating.
- Press sprinkles and candy eyes into the coating while it’s still soft so they stick firmly.
Storage & Make Ahead
- Store in an airtight container at room temperature for up to 3 days.
- Refrigerate up to 5 days, but allow treats to come to room temperature before serving.
- Freezing is not recommended once decorated, as the coating and sprinkles may crack.
Tried this recipe?
Let us know how it was!Halloween Placemat Activity BUNDLE
Each placemat features a variety of Halloween-themed activities such as coloring pages, Tic-Tac-Toe squares, a word search, word scramble, and more.


Food Safety Tips:
- Use separate utensils and surfaces to prevent cross-contamination when handling raw ingredients.
- Wash hands thoroughly after working with raw ingredients like eggs or dough.
- Avoid leaving no-bake treats or raw components at room temperature for extended periods.
- Ensure all utensils, bowls, and surfaces are clean before starting.
- Store no-bake recipes, such as pudding pies and candy, in the refrigerator to keep them fresh and safe.
- Provide good ventilation when using a gas stove for melting or heating chocolate, butter or other ingredients.

Comments
No Comments