Indulge in a mouthwatering twist on traditional pizza with our Pizza and Pepperoni Braid.
Made with a can of refrigerated pizza dough, pepperoni slices and mozzarella cheese, this recipe not only looks great, but is a fun and easy twist on traditional pizza that is ready fast!
For more inspiration, be sure to explore our other refrigerator biscuit dough recipes, offering a variety of delicious ideas to try!

Want to Save This Recipe?
Enter your email & I'll send it to your inbox. Plus, get great new recipes from me every week!
By submitting this form, you consent to receive emails from Walking on Sunshine Recipes.
You can have dinner on the table in under 30 minutes when you add this recipe for a to your weekly meal plan. Add a side salad and dinner is served!
This recipe welcomes your creativity by easily accommodating your favorite pizza toppings. Explore the list of substitutions and variations provided below for endless possibilities.
Looking for more pizza recipes? Try my recipe for homemade beer dough crust, or these easy Pizza Crescent Rolls.
Table of Contents
Braided Stromboli
Why not get creative with your favorite luncheon meats and craft a delicious braided stromboli?
Whether it's ham and Swiss cheese for a classic pairing or salami and provolone cheese for a more robust flavor, the possibilities abound.
This versatile braided pizza bread is perfect for serving as appetizers during football Sundays or for accommodating a large crowd with various flavors.
Your family will undoubtedly adore this recipe, and you'll appreciate its simplicity in preparation.
Making it for a 2nd time! Kids love it and it’s so quick & easy! This will be on repeat for a quick lunch/dinner.
- Jenn

🛒Helpful Kitchen Tools
More InformationMore InformationMore Information
How to Braid Pizza Crust?
Divide the dough: Divide the dough into equal portions depending on how many braids you want to create. For a classic three-strand braid, you'll need three equal portions.
Roll each portion into ropes: Roll each portion of dough into a long rope, roughly of equal length. Aim for about ½ to 1 inch in diameter, depending on how thick you want your braids.
Braid the dough: Place the ropes of dough parallel to each other on a lightly floured surface. Pinch the ends together at one end to secure them. Then, simply braid the dough as you would braid hair, crossing the outer ropes over the middle rope alternately until you reach the other end. Pinch the ends together to seal.
📋Ingredients
Here's a quick overview of the ingredients for this recipe. Find the exact amounts and click the Instacart button to easily add them to your cart – all in the printable recipe card below!
- Refrigerated Pizza Dough - for this recipe you want to use the kind that comes in a can, not fresh pizza dough that you usually see me use for pizza recipes.
- Pizza sauce - you can use your favorite jar or try my homemade marinara sauce that works great for pizza.
- Mozzarella cheese
- Pepperoni slices
- Italian seasoning
- Melted butter
Substitutions and Variations
Try any of these meats in place of the pepperoni:
- Sausage - brown the sausage first before adding it to the top of the cheese.
- Cooked Meatballs - slice them small and add to the top of the cheese.
- Deluxe - add all your favorite pizza toppings!
- Taco Meat - make the braid for Taco Tuesday and use your favorite taco meat and toppings.
You can swap out any of the following for the refrigerator pizza dough:
- Refrigerator Crescent Rolls - like my Crescent Roll Pizza Braid.
- Crescent Roll Sheet Dough
- Homemade Pizza Dough
Step-by-Step Instructions
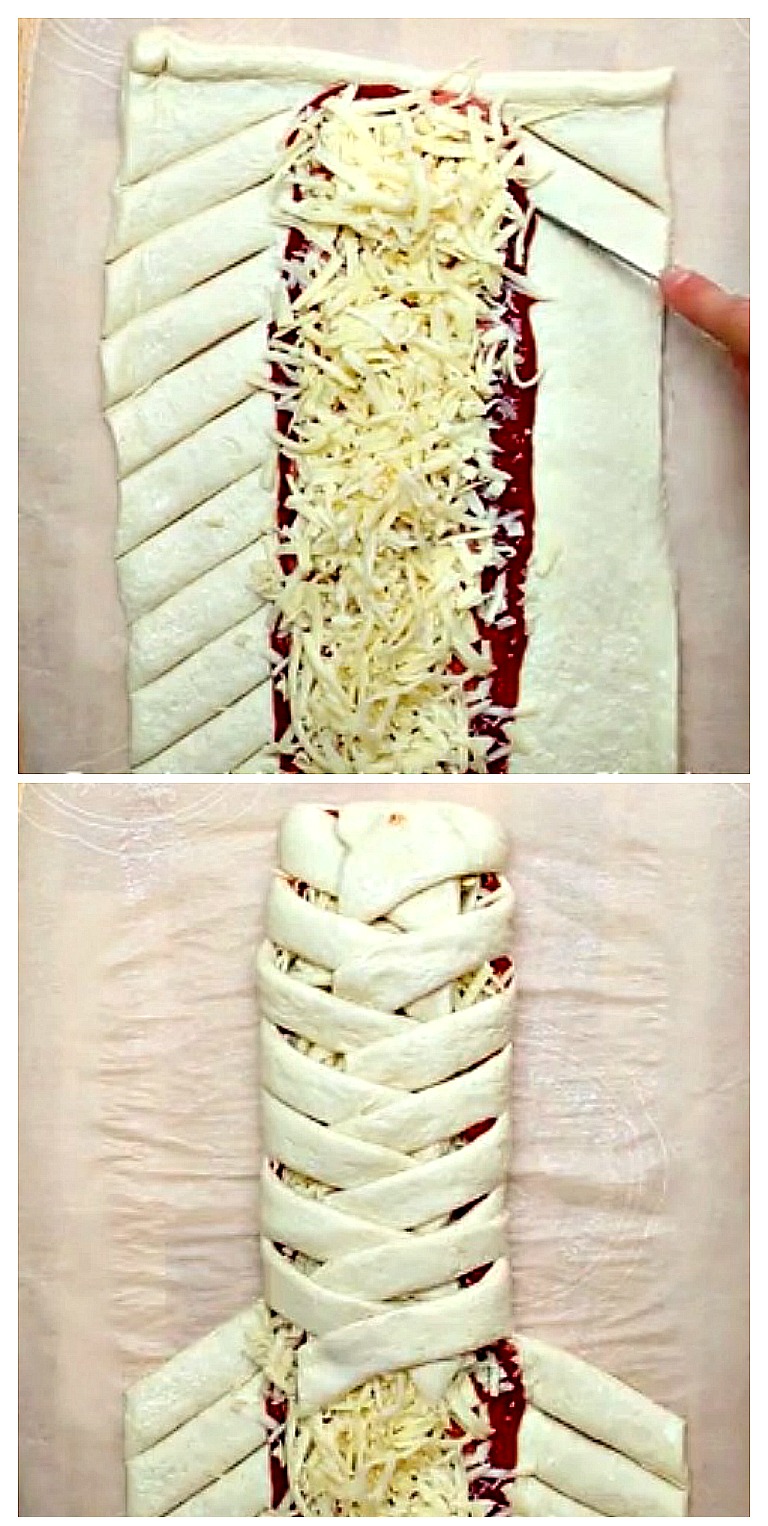
Step 1: Preheat oven to 400°F. Unroll the can of refrigerated pizza dough onto a baking tray that has been sprayed with non-stick cooking spray or you can line the tray with parchment paper. Press the dough into a rectangle shape.
Step 2: Spread the pizza sauce down the center of the dough. Then add the pepperoni slices on top of the pizza sauce followed by the mozzarella cheese.
Step 3: Using a pizza cutter or sharp knife, cut the dough into strips on both sides of the toppings. Be careful not to slice the dough too close to the center or the filling will seep out while it bakes.
Step 4: Fold one strip over the toppings and then fold one strip from the opposite side over the first strip. Repeat to form a braid.
Baking Instructions
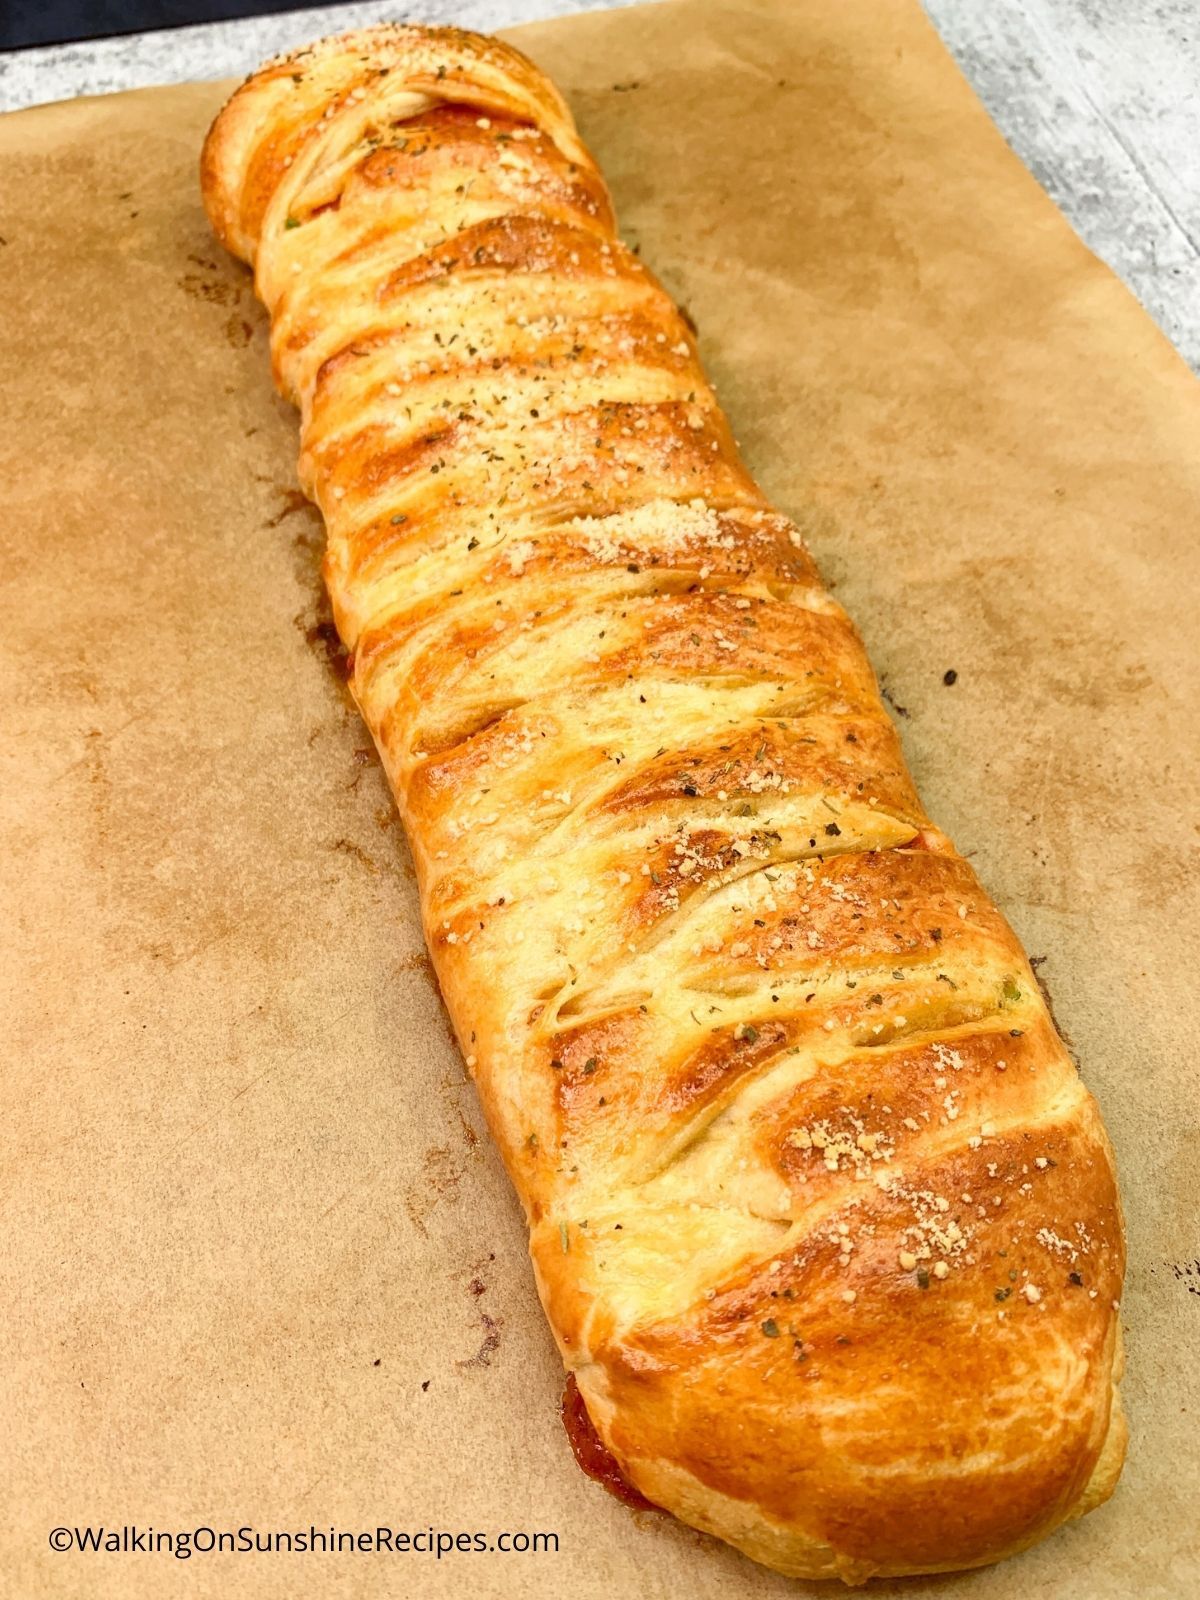
Step 5: Brush the braid with the melted butter. Sprinkle the top with a little extra Parmesan cheese and Italian seasoning. Gently lift up the edges of the parchment paper and place either on top of a baking tray or a pizza stone. Bake in the preheated oven for 18-20 minutes or until the crust is golden brown.
Step 6: Cut into slices and serve warm with extra pizza sauce on the side
Before You Begin!
If you make this recipe, please leave a review and star rating. This helps my business thrive and continue providing FREE recipes.

Storage Tips
You can store any leftovers in the refrigerator in an air-tight container or you can wrap in aluminum foil.
Freezing Tips
This pizza braid can be frozen up to 6 months.
Reheating Tips
To reheat, wrap the pizza braid in aluminum foil and place in a preheated 400°F oven until heated through.
Try these recipes next...
You might enjoy making my recipe for Cast Iron Pizza. It's an individual size pizza made in a cast iron pan. Low Carb Cauliflower Crust Pizza help you still enjoy pizza while following a low-carb lifestyle.
Also check out this collection of Pillsbury Pizza Dough Recipes for more ways to use this versatile dough!
📖 Recipe Card
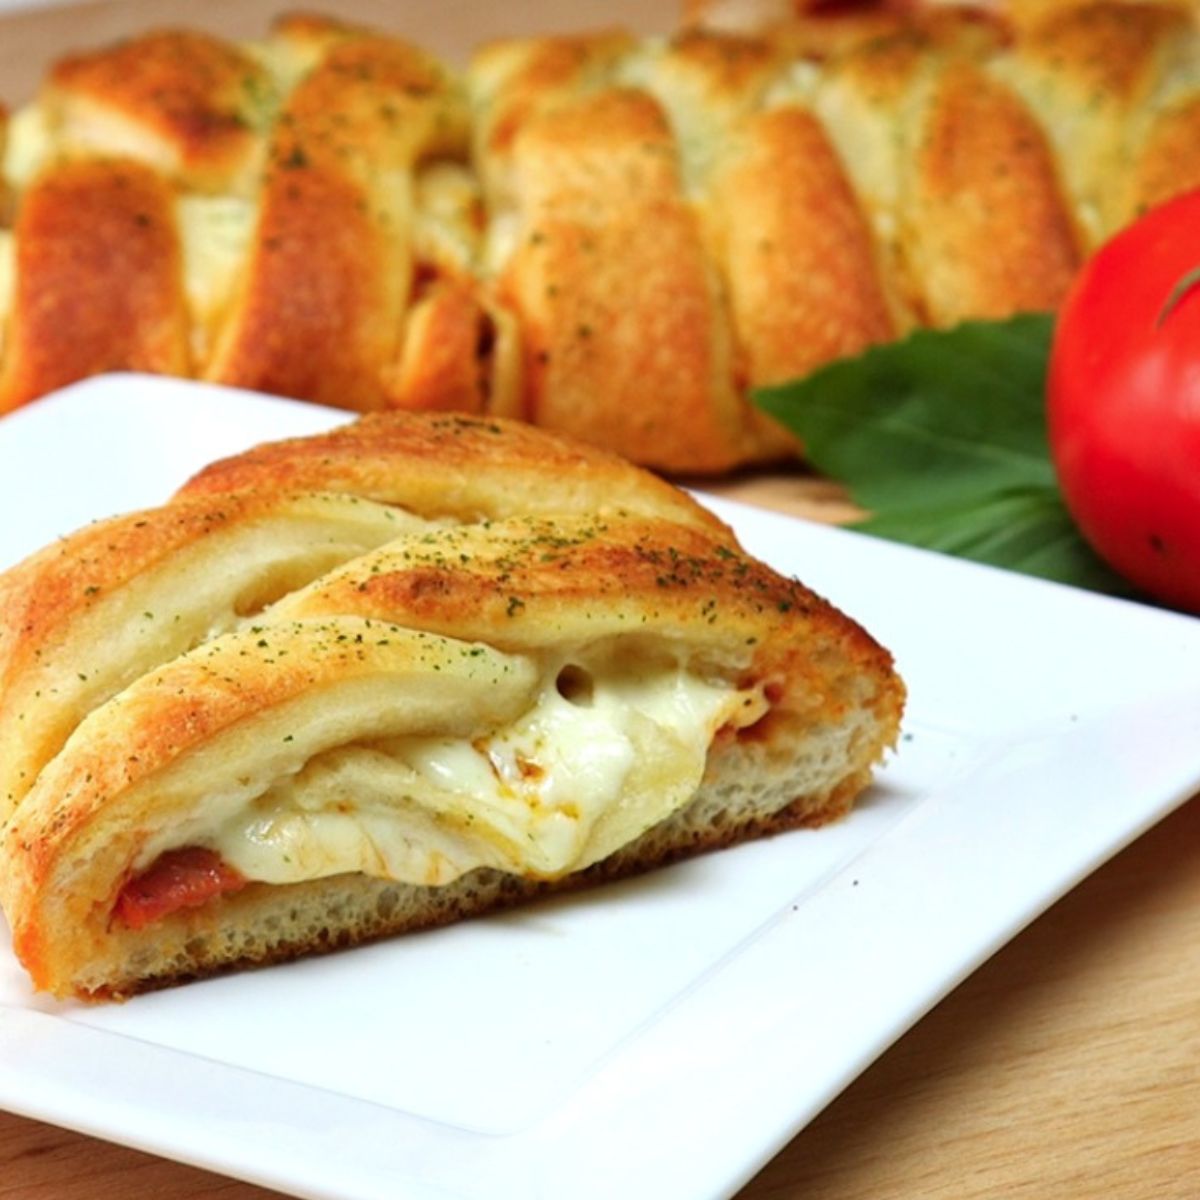
Pizza and Pepperoni Braid
Video
Ingredients
- 1 can 8 oz refrigerated pizza dough
- ⅓ cup pizza sauce
- ½ cup mozzarella shredded cheese
- Pepperoni slices
- ½ teaspooon Italian seasoning
- 2 tablespoons melted butter
Method
- Preheat oven to 400°F.
- Unroll the can of refrigerated pizza dough onto a baking tray that has been sprayed with non-stick cooking spray or you can line the tray with parchment paper.
- Press the dough into a rectangle shape.
- Spread the pizza sauce down the center of the dough.
- Add the pepperoni slices on top of the tomato sauce.
- Add the mozzarella cheese.
- Using a pizza cutter or sharp knife, cut the dough into strips on both sides of the toppings.
- Fold one strip over the toppings and then fold one strip from the opposite side over the first strip.
- Repeat to form a braid.
- Brush the braid with the melted butter and sprinkle the top with the Italian seasoning.
- Bake 18 to 20 minutes or until light golden brown.
- Cut into slices and serve warm with extra tomato sauce on the side.
Nutrition
Notes
Tried this recipe?
Let us know how it was!This recipe has been updated since it first appeared in 2017 with a new printable recipe card that includes nutritional information. I hope you enjoy the update as much as I enjoyed working on them!




Joanne says
That looks delicious!
Jenn P says
Making it for a 2nd time! Kids love it and it’s so quick & easy! This will be on repeat for a quick lunch/dinner.
Lois says
Thank you Jenn! I added your comment/review to the blog post!
Roro says
Love this recipe! I add a handful of spinach or arugula. It delicious!
Lois says
That sounds like a great addition!
Marisa F. Stewart says
This would last two seconds at our house. Nothing like a pizza filling wrapped up with delicious dough and cheese oozing out. I'm drooling looking at the photo. I've made several stuffed braids but not with this type of filling. I've waited too long.
Lois says
Yes, it's gone pretty quick in our house too when I make it. I suggest making two! Thanks for visiting.
Veena Azmanov says
Love cheese and everything in making this amazing Pizza Braid. I am drooling with the look of it.
Jolina says
I loooove this. I like making braids but I've only ever made sweet ones (surprise surprise lol!!). I think next time I'll make a savoury one because pizza and pepperoni 🙂
Annie says
Tried for the first time, followed the recipe exactly. Baked at 350 for 25 mins before I finally had to turn the temp up to 425 and just keep baking. Has anyone else had this issue? (Used canned pizza crust Walmart version of Pillsbury.)
Lois says
I'm sorry you had a problem. I did recheck the recipe and when I bake it for my family, I do bake it at 400°F for about 18 - 20 minutes. I hope you enjoyed the recipe, even if it take you a little longer to bake 🙂 I adjusted the recipe card, so please print it out again for you to save. Thank you!
Gloria says
I know or sure I would devour this. I could make a meal out of it...with a nice glass of wine. What a fun recipe. Perfect for entertaining too.
html color says
I like such dishes which take less time to prepare but a delicious taste.