


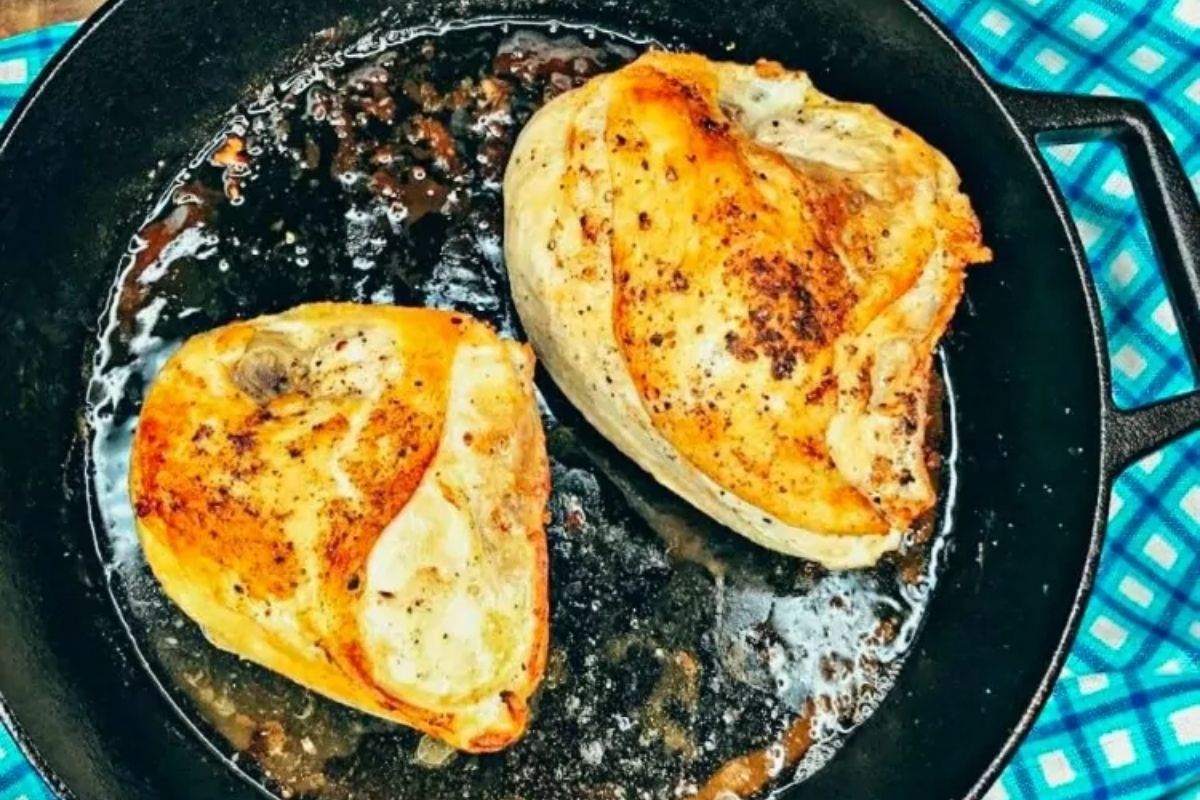
Let me help you turn boring chicken breasts into a delicious, easy-to-make dinner option with my recipe for Cast Iron Pan-Roasted Chicken Breasts.
Using a heavy bottom skillet is a delicious and easy way to cook poultry. The key to success is to start with a hot pan on top of the stove so the skin gets nice and crispy. Then finish cooking in the oven so it still turns out juicy!
Check out the complete list of Top Family Favorite Chicken Recipes that are perfect for dinner any day of the week.

Want to Save This Recipe?
Enter your email & I'll send it to your inbox. Plus, get great new recipes from me every week!
By submitting this form, you consent to receive emails from Walking on Sunshine Recipes.
Table of Contents
- Why you'll LOVE this recipe:
- Pan Seared Oven Baked Chicken
- Main Ingredients Needed
- Substitutions and Variations
- Step-by-Step Directions:
- What temp to finish chicken in oven?
- Recipe FAQ's
- Money Saving Tips
- Storing and Reheating Tips
- How to Clean a Cast Iron Pan
- Like this recipe? Try these other Chicken Recipes
- LOVE this recipe? SAVE it for Later!
- 🗒️Shopping List
- 📖 Recipe Card
- Mouth-Watering Recipes Ready in 30 Minutes for Busy Weeknights
- 💬 Comments
Why you'll LOVE this recipe:
Easy & Quick – It delivers a restaurant-quality meal in under 30 minutes, making it perfect for busy weeknights.
Crispy & Juicy – Cooking in a cast-iron skillet creates a beautifully crispy skin while keeping the chicken tender and juicy inside.
Minimal Ingredients, Maximum Flavor – Simple seasonings enhance the natural taste of the chicken, making it both delicious and accessible.
Versatile – Pairs well with a variety of sides like roasted veggies, mashed potatoes, or a fresh salad.
If you want to roast a whole chicken, please check out my recipes for Dutch Oven Roast Chicken or my rotisserie-style Dutch Oven Whole Chicken.
Pan Seared Oven Baked Chicken
Did you know?
Searing chicken doesn’t lock in the juices, but it does create a deep, flavorful crust as the surface browns and caramelizes, enhancing the overall taste of the dish.
Main Ingredients Needed
Below is a quick preview of the ingredients you’ll need. For exact amounts, check the recipe card below. You can also use the "Shopping List button" to create a printable shopping list, or the "Get Ingredients button" in the recipe card to order groceries online.
- 2 bone-in chicken breasts
- Salt and pepper or you can use this recipe for Homemade Chicken Seasoning Mix.
- Butter
- Oil - yes you need both for this recipe
Substitutions and Variations
Chicken Cuts – Swap bone-in, skin-on chicken breasts for chicken thighs, drumsticks, or even boneless breasts (adjust cooking time as needed).
Try my Cast Iron Skillet Chicken Breasts recipe which is made with seasoned breadcrumbs and ready in 30 minutes!
Garlic Butter Herb Chicken – Add butter, minced garlic, and fresh thyme or rosemary to the skillet before transferring it to the oven.
Lemon Herb Chicken – Squeeze fresh lemon juice over the chicken before roasting and sprinkle with parsley or oregano for a bright, zesty flavor.
Spicy Kick – Rub with chili powder, cayenne, or red pepper flakes for extra heat.
Cheesy Twist – Sprinkle Parmesan or mozzarella on top during the last few minutes of baking for a melty, golden crust.
Step-by-Step Directions:
This section includes step-by-step photos and instructions to guide you through the recipe. For the complete printable version, scroll down to the recipe card below.

Step 1: If necessary, trim any excess skin or fat before seasoning. Leaving the skin on helps create a crispy, golden-brown finish when searing in a cast iron skillet. To keep counters clean and sanitary, place the chicken on waxed paper or parchment paper to reduce mess and make cleanup easier.
Step 2: Heat a cast iron pan until hot, then add butter and oil. Season the chicken with salt and pepper, place it skin-side down in the pan, and season the other side. Sear for at least 3 minutes to develop a golden crust, then flip and cook for another 1-2 minutes.Transfer to the oven to finish cooking.
What temp to finish chicken in oven?

Step 3: Place the cast iron pan in a preheated 425°F oven and cook until it reaches an internal temperature of 165°F.
Step 4: After cooking, let the chicken rest for a few minutes to allow the juices to redistribute, ensuring every bite is tender, juicy, and full of flavor.

Recipe FAQ's
To view the answers, simply click on the down arrow (⬇) next to each question. If you have any other questions not answered here, please leave a comment!
For bone-in, skin-on chicken breasts, bake at 400°F for 15-20 minutes after searing.
After searing, transfer the chicken to a 400°F oven. Bake bone-in, skin-on chicken breasts for 15-20 minutes and boneless, skinless chicken breasts for 10-15 minutes, or until the internal temperature reaches 165°F.
Money Saving Tips
- A great money-saving tip for this recipe is to buy bone-in, skin-on chicken breasts in bulk when they’re on sale. They’re often cheaper than boneless, skinless cuts and have more flavor. You can freeze extra portions for future meals, saving time and money.
- Save the bones after cooking to make homemade chicken broth, reducing food waste and adding even more value to your grocery budget!
Storing and Reheating Tips
Refrigerator: Allow the chicken to cool to room temperature before storing.Place the chicken in an airtight container or wrap it tightly in foil or plastic wrap. Store in the refrigerator for up to 4 days.
Freezer: Let the chicken cool completely before freezing. Wrap each piece tightly in plastic wrap or foil, then place them in a freezer-safe bag or container. Label with the date and store for up to 3 months. To prevent freezer burn, remove as much air as possible from the storage bag.
Thawing and Reheating: Allow the chicken to thaw overnight in the refrigerator. You can reheat it in a preheated 350°F oven for 10-15 minutes or in the microwave using short intervals (30 seconds) to prevent it from drying out.
Quick Tip: Cover the chicken with a damp towel when using the microwave to reheat.
How to Clean a Cast Iron Pan
A lot of people are intimidated cooking with cast iron pans because they don't know how to clean and care for them properly. Check out my post on How to Care and Clean and even Season a Cast Iron Pan in the post I wrote a few years ago. You'll soon be enjoying and using these wonderful pans as much as I do.
Like this recipe? Try these other Chicken Recipes
- Hasselback Chicken Stuffed with Mozzarella, Tomatoes and Basil
- Grilled Chicken Sandwiches
- Chicken Cutlets Italian Style
- Crock Pot Salsa Chicken

LOVE this recipe? SAVE it for Later!
❤️Tap the heart icon in the lower right corner to add the recipe to your recipe box for easy access anytime.
If you made it, leaving a star rating or quick review is always appreciated and helps other readers too.
Want to save this printed recipe? The Ultimate Meal Planner & Recipe Binder helps you keep recipes organized in one easy place.
🗒️Shopping List
Click the button below to instantly create a shopping list for this recipe.
📖 Recipe Card
Cast Iron Pan-Roasted Chicken Breasts
Ingredients
- 2 bone-in chicken breasts
- Salt and pepper
- 1 tablespoon butter
- 1 tablespoon oil
Method
- Preheat oven to 425°F.
- Preheat your cast iron pan on top of the stove for just a few minutes.
- Generously salt and pepper the skin side of the chicken breasts.
- Add the butter and oil at the same time.
- Once the butter and oil are melted and heated, add the chicken breasts skin side down.
- Allow them to sear for a few minutes.
- Salt and pepper the other side of the chicken breasts.
- Flip the chicken breasts and allow the other side to sear for another minute or two.
- Place the cast iron pan in the preheated oven and continue to cook the chicken for about 20 to 30 minutes or until the chicken reaches an internal temperature of 165°F.
- Allow the chicken to rest for 5 minutes before slicing.
Nutrition
Notes
- Cooking time will vary depending on how thick your chicken breasts are.
- I always check the internal temperature with an instant read thermometer.
- Do not attempt this recipe with frozen chicken breasts. Make sure they are thawed completely before cooking.
Recipe Variations:
- Chicken Cuts – Swap bone-in, skin-on chicken breasts for chicken thighs, drumsticks, or even boneless breasts (adjust cooking time as needed).
- Try my Cast Iron Skillet Chicken Breasts recipe which is made with seasoned breadcrumbs and ready in 30 minutes!
- Garlic Butter Herb Chicken – Add butter, minced garlic, and fresh thyme or rosemary to the skillet before transferring it to the oven.
- Lemon Herb Chicken – Squeeze fresh lemon juice over the chicken before roasting and sprinkle with parsley or oregano for a bright, zesty flavor.
- Spicy Kick – Rub with chili powder, cayenne, or red pepper flakes for extra heat.
- Cheesy Twist – Sprinkle Parmesan or mozzarella on top during the last few minutes of baking for a melty, golden crust.
Storage and Reheating Tips
Refrigerator: Allow the chicken to cool to room temperature before storing.Place the chicken in an airtight container or wrap it tightly in foil or plastic wrap. Store in the refrigerator for up to 4 days. Freezer: Let the chicken cool completely before freezing. Wrap each piece tightly in plastic wrap or foil, then place them in a freezer-safe bag or container. Label with the date and store for up to 3 months. To prevent freezer burn, remove as much air as possible from the storage bag. Thawing and Reheating: Allow the chicken to thaw overnight in the refrigerator. You can reheat it in a preheated 350°F oven for 10-15 minutes or in the microwave using short intervals (30 seconds) to prevent it from drying out. Quick Tip: Cover the chicken with a damp towel when using the microwave to reheat.Tried this recipe?
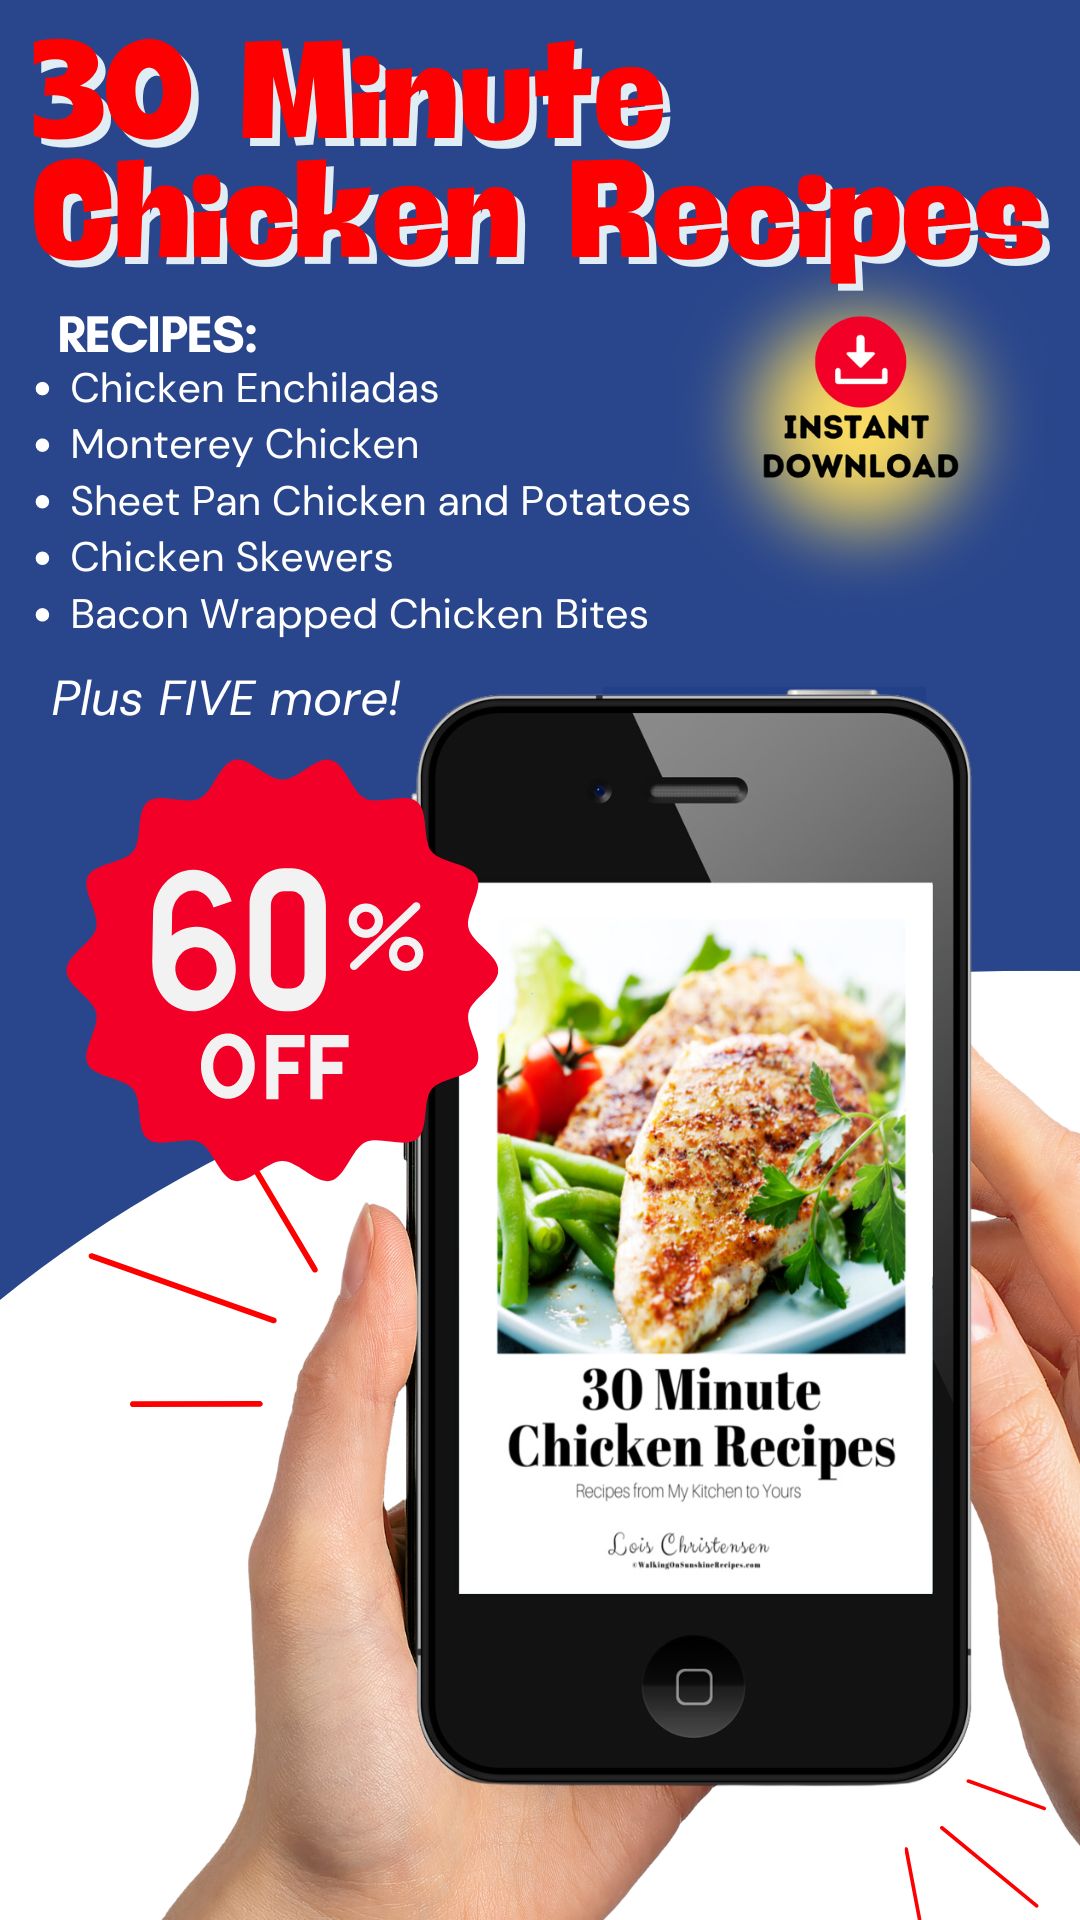
Let us know how it was!Mouth-Watering Recipes Ready in 30 Minutes for Busy Weeknights
10 mouth-watering recipes that are ready in just 30 minutes, this e-cookbook is the perfect solution for busy weeknight dinners.

This recipe has been updated since it first appeared in 2019 with new photos and a new printable recipe card that includes nutritional information. I hope you enjoy the updates as much as I enjoyed working on them!


Joanne says
I'm trying to cook more recipes in our cast iron pans and this looks so delicious and easy. Thank you!
Estelle Forrest says
A classic chicken recipe that we all need in our kitchen. Thanks so much for adding your post to the #SSPS this last week. I will be featuring your post on next week's post.
Alison Libby says
My chicken turned out great using this method. Crisp on the outside and juicy on the inside. I just serve with some wild rice and a veggie. I am newer to using cast iron and got a Stargazer pan. Appreciate all the recipes I can find.
Lois says
Thanks for the great comment!
Agnius says
Hello.
Do You cover iron pan when puting in oven?
Lois says
No, cook the chicken uncovered. Thank you for visiting.
Janie Kathleen says
I love this recipe! I made these last night on my new well seasoned CI Skillet.
The sear was perfect and finishing in the oven was so ez - they were a beautiful sight coming out.
Served them with balsamic pasta salad with chopped red bell pepper and chopped red onion. Garlic and olive oil. I should have added capers.
I’ll be doing thighs next.
Lois says
Glad to hear you enjoyed the recipe! Thanks for reporting back.
Yessika Patapoff says
Same on the smoke detector issue. The flavor was great! But, after prompting a neighbor to come down to make sure the place hadn’t set on fire, I looked up the smoking point of butter and it’s in the mid to low 300’s. So baking at 425 burned the butter and smoked up the entire oven, which set off the alarms. I think next time I’ll just use the butter for basting after it comes out of the oven. 😀
Lois says
Adding butter after the chicken has cooked sounds like a great idea. Thanks for sharing your experience with the recipe.
Steve says
Ever since I re-seasoned our old cast iron, I try every use in the book for it and love it.
This pan seared oven finished chicken was a big hit with Rigatoni.
I live in a small apartment, and the process set off the smoke detector a couple times, but this recipe was a three alarm winner!
Lois says
I love using my cast iron pan. Too funny about the smoke alarm. Thanks for visiting.
Sally says
These look so succulent. Normally pan cooked chicken dries out, but it doesn't look like it here. I'll be giving this one a go. Yummy!
Michelle Frank | Flipped-Out Food says
My cast-iron skillet and I are inseparable. I did NOT know that they work on induction stoves. This recipe is so amazingly simple, and yet it can't help but be delicious—especially since you have that gorgeous sear that develops with the help of the skillet.
Lois says
Thanks. I was a little surprised when the oven was delivered and they told me I couldn't use my regular NEW pots on it. But I'm happier now because it forced me to learn to love my cast iron pans. Thanks for visiting!