


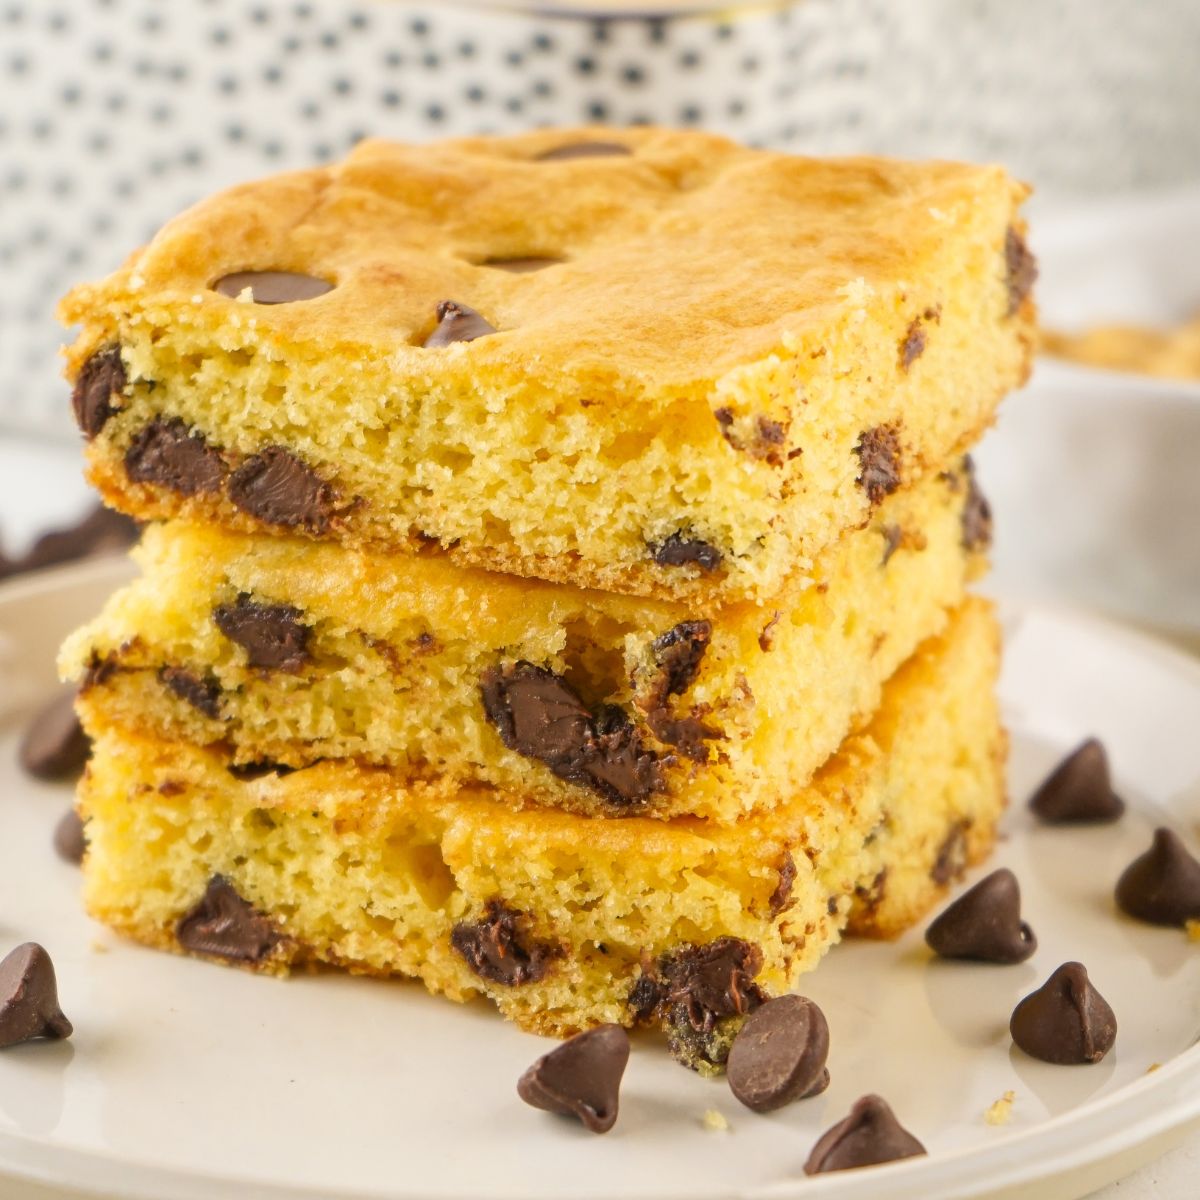
Whip up a batch of Chocolate Chip Bar Cookies with Cake Mix for an easy, crowd-pleasing dessert that combines two classic favorites in one delicious treat.
With just a few simple pantry ingredients, these soft and chewy bars come together in no time—one of the easiest Cake Mix Cookies you'll ever try!
Perfect for busy weeknights, parties, or anytime you need a quick treat, they're loved by kids and adults alike—and great for grab-and-go snacking.

Want to Save This Recipe?
Enter your email & I'll send it to your inbox. Plus, get great new recipes from me every week!
By submitting this form, you consent to receive emails from Walking on Sunshine Recipes.
Skip the hassle of scooping individual cookies—this easy twist turns your favorite cookie dough into soft, chewy bars baked right in a 13x9-inch pan.
Fun fact: most cookie recipes that make 36 to 42 cookies can be baked as bars with delicious results!
And the best part? You can easily customize these cake mix cookie bars with your favorite mix-ins like nuts, chocolate chunks, or sprinkles!
Looking for more easy dessert or cookie recipes? Try my Candy Cookie Bars, Peanut Butter Chocolate Chip Bars, and even my M&M Cookie Bars.
Table of Contents
- Updated for Today’s Cake Mix Sizes
- Cake Mix Cookie Bars
- Recommended Kitchen Tools
- My Kitchen Tools Essentials
- Main Ingredients Needed
- Substitutions and Variations
- Step-by-Step Directions
- Baking Instructions
- LOVE this recipe? SAVE it for Later!
- Insider Tips from My Kitchen to Yours
- Storage and Reheating Instructions
- Recipe FAQ's
- More Recipes to Love
- 📖 Recipe Card
- 💬 Comments
Updated for Today’s Cake Mix Sizes
This recipe was originally created and published in 2013 using a 15.25-ounce box of cake mix.
Most cake mixes today are 13.25 ounces, but the recipe still works well with the smaller size. When updated in 2025, a 13.25-ounce cake mix was used with great results.
If you'd like to match the original recipe more closely, you can use a few spoonfuls from my Homemade Mason Jar Cake Mix to bring your box mix up to 15.25 ounces.
Cake Mix Cookie Bars
Fold, Don’t Mix: After adding the chocolate chips, skip the mixer and gently fold them in with a rubber spatula to avoid overmixing.
Don’t Overdo the Chocolate Chips: Too many chips can make the bars fall apart, even after resting. They’ll taste great, but might be too gooey to handle.
Let Them Cool Before Slicing: Allow the bars to cool completely in the pan before cutting. This helps them set up and hold their shape.
Use the Right Knife: A plastic or serrated knife works best for clean, neat slices without tearing the bars.
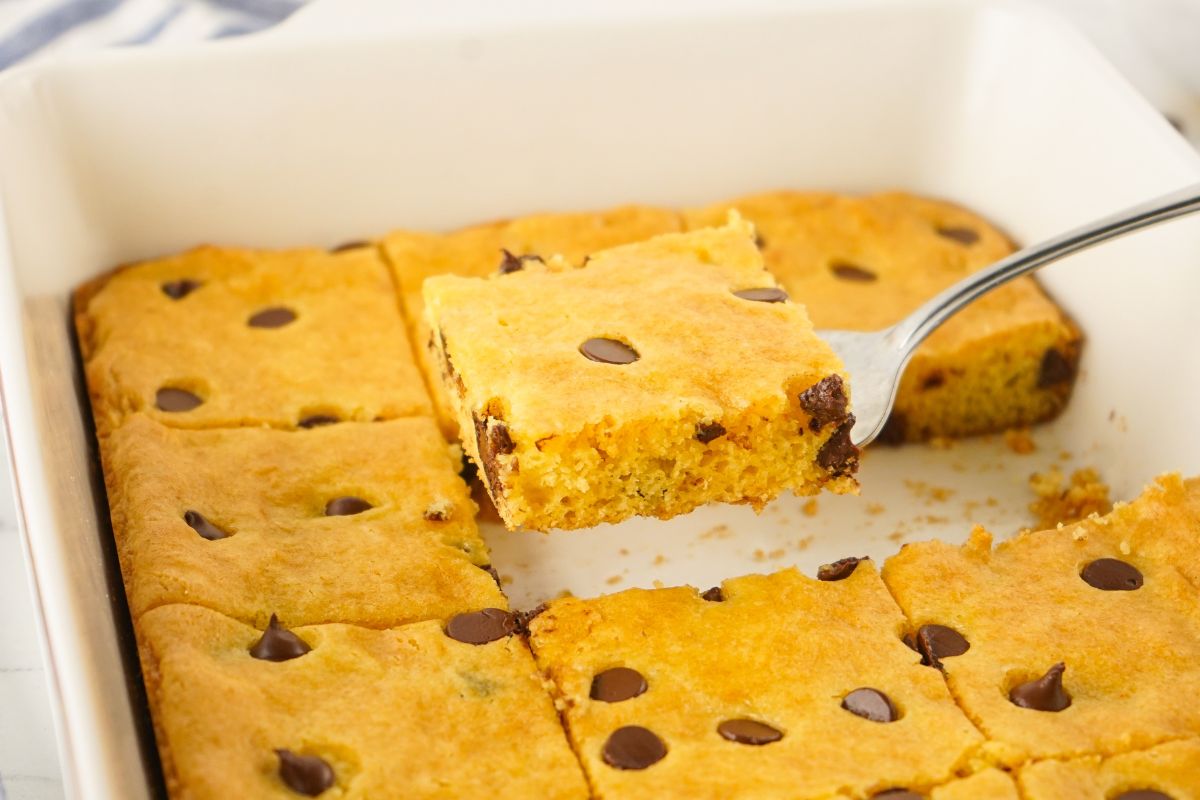
Expect a Softer Texture: These bars are meant to be softer than cookies—that's part of their charm and what makes them so satisfying!
Recommended Kitchen Tools
For a full list of kitchen tools used in this recipe, be sure to check the recipe card below. You can also browse my Favorite Kitchen Tools by clicking the photo below.

Check out my list...
My Kitchen Tools Essentials
Tools that will make your time easier and faster in the kitchen!
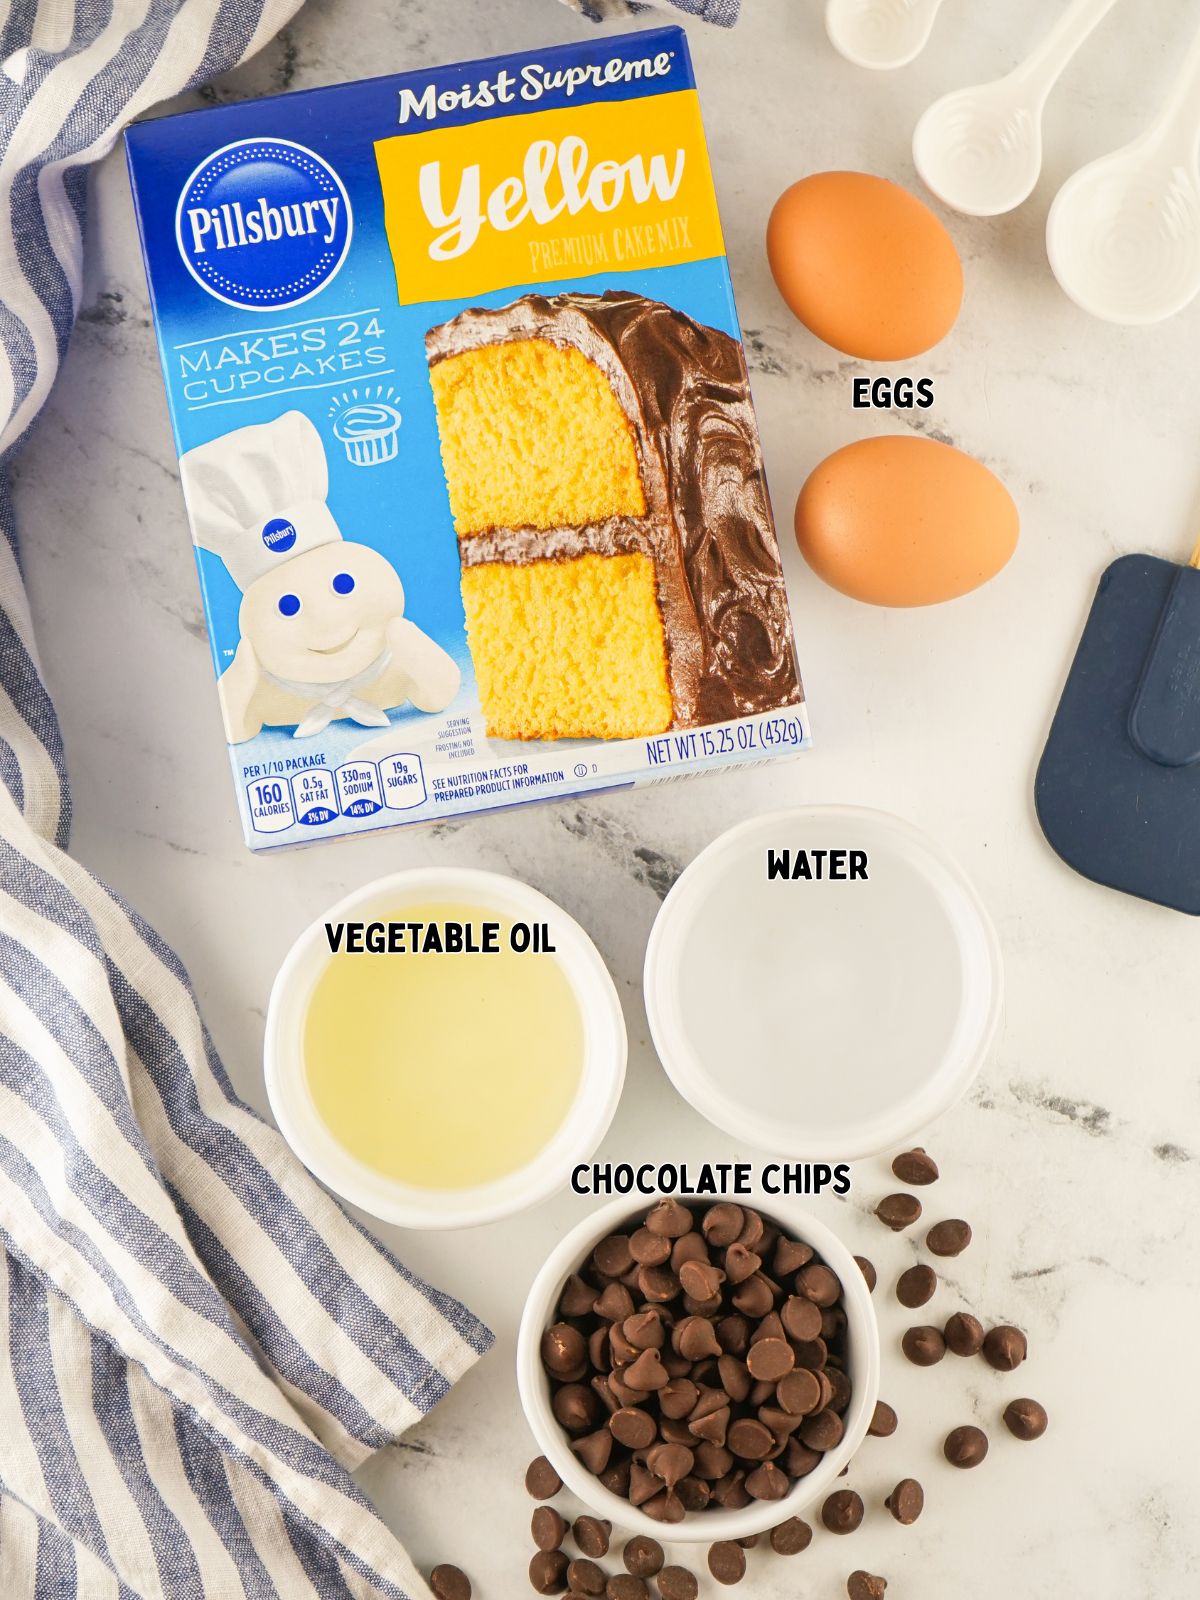
Main Ingredients Needed
Below is a quick preview of the ingredients you’ll need. For exact amounts, check the recipe card below. You can also use the "Shopping List button" to create a printable shopping list, or the "Get Ingredients button" in the recipe card to order groceries online.
Substitutions and Variations
- Swap out milk chocolate chips for dark chocolate, white chocolate, or peanut butter chips. Add chopped nuts like walnuts, pecans, or almonds for a crunchy texture.
- Drizzle melted chocolate over the cooled cookie bars.
- Serve the cookie bars warm with a scoop of ice cream.
- A smaller pan will give you thicker bars, so be sure to lower the oven temperature to 325°F and increase the baking time slightly.
This recipe has not been tested with other substitutions or variations. If you replace or add any ingredients, please let us know how it turned out in the comments below!
Step-by-Step Directions
This section includes step-by-step photos and instructions to guide you through the recipe. For the complete printable version, scroll down to the recipe card below.
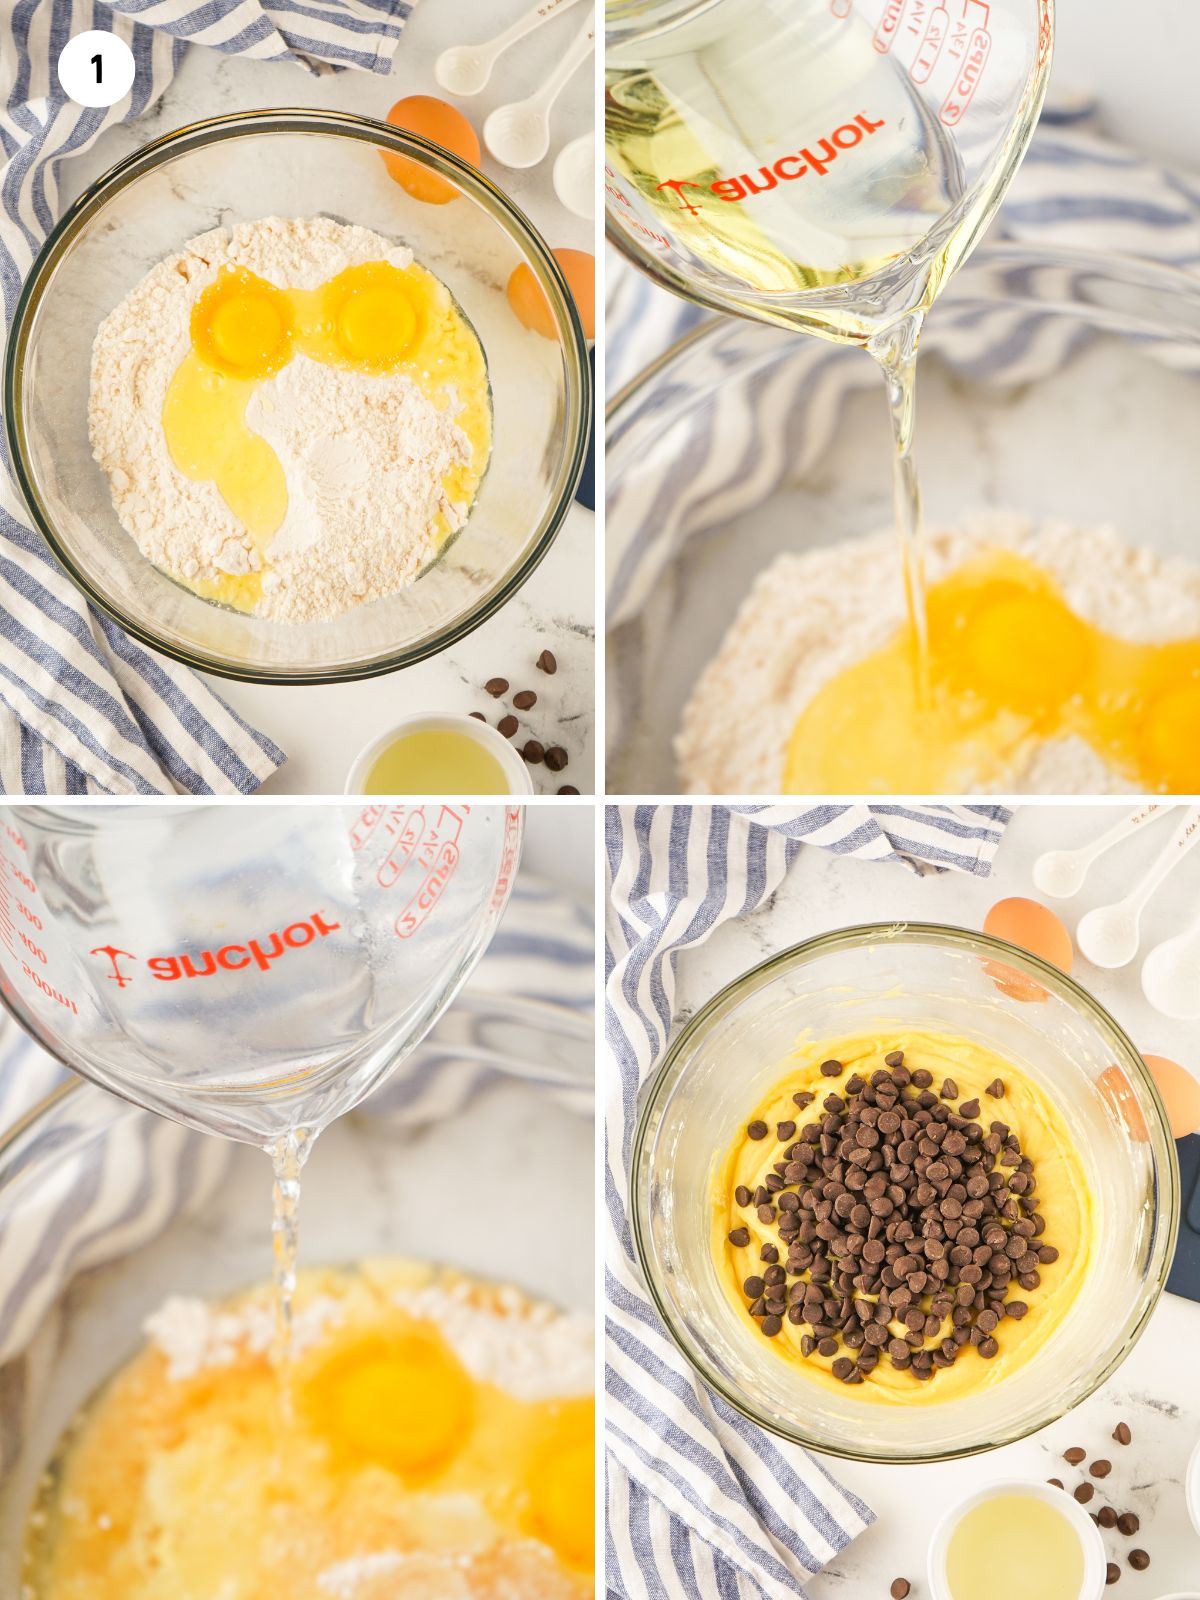
Step 1: Preheat oven to 350°F and spray a 9x13-inch pan with nonstick spray. In a large bowl, mix all ingredients except chocolate chips until smooth, then fold in ¾ cup of chips.
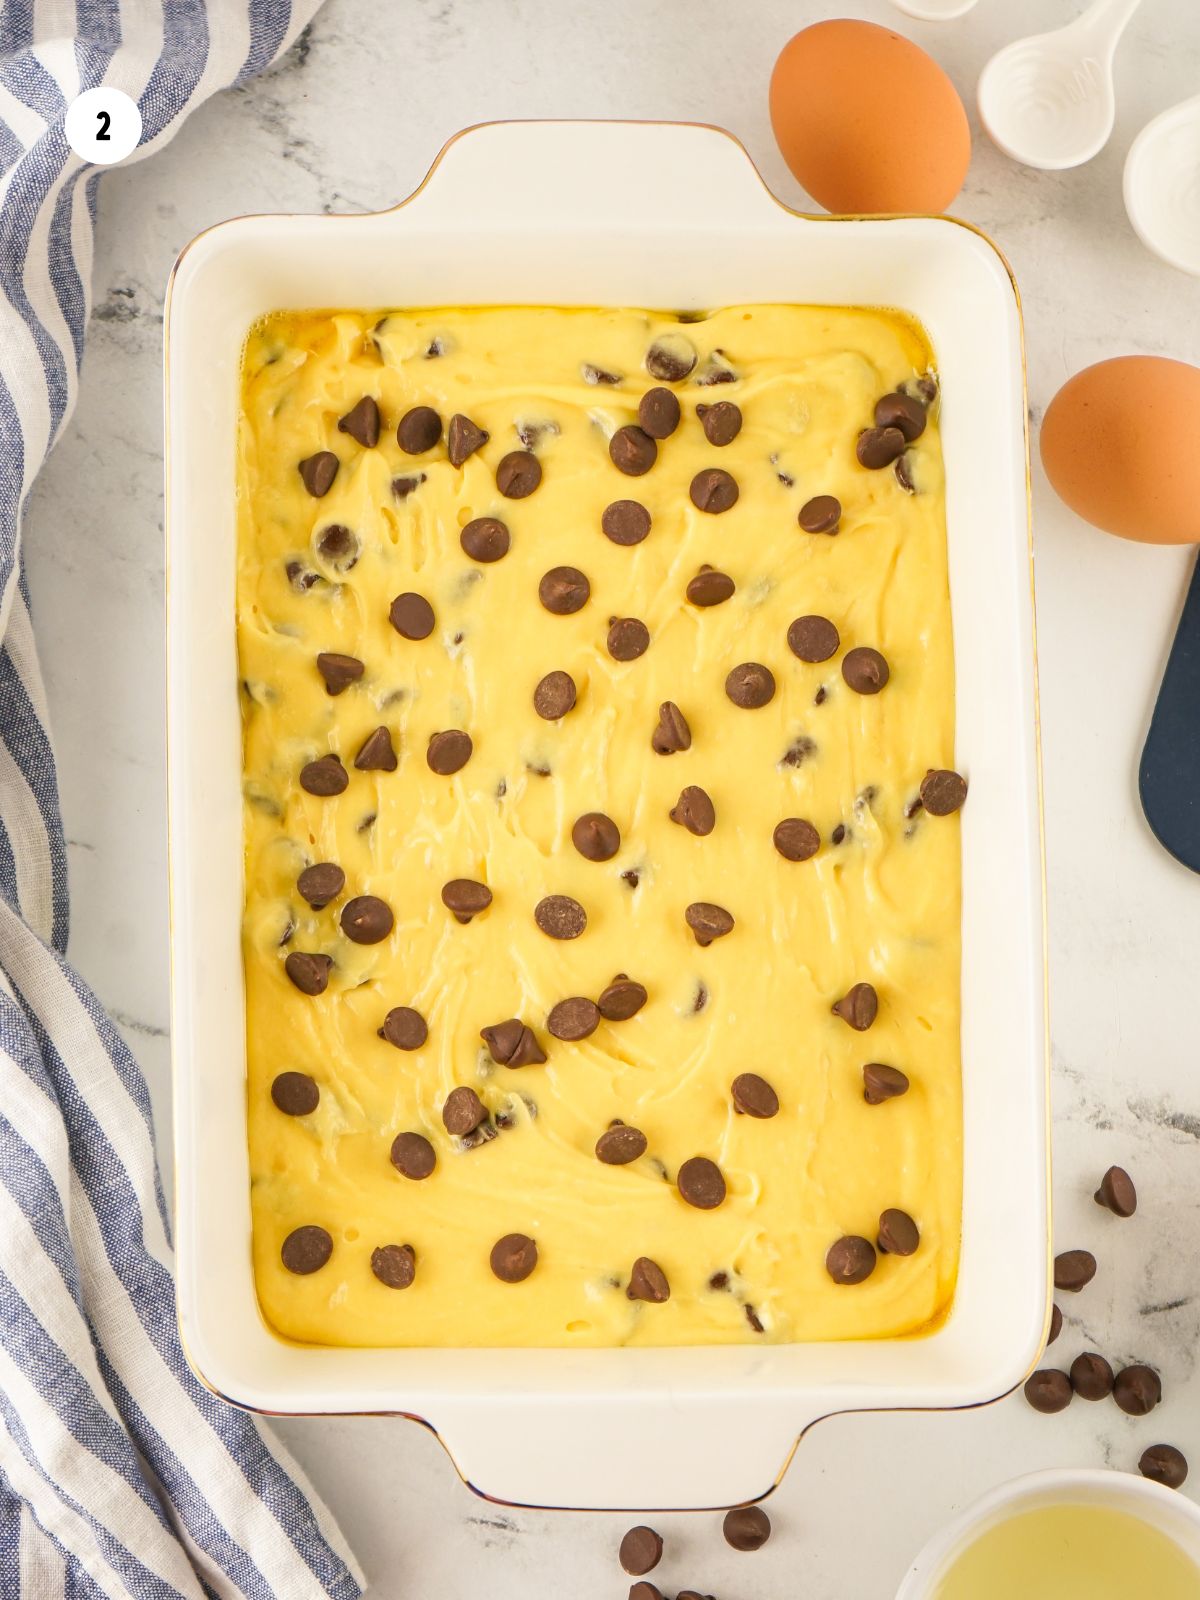
Step 2: Spread the batter evenly in the pan, sprinkle a few chips on top,
Baking Instructions
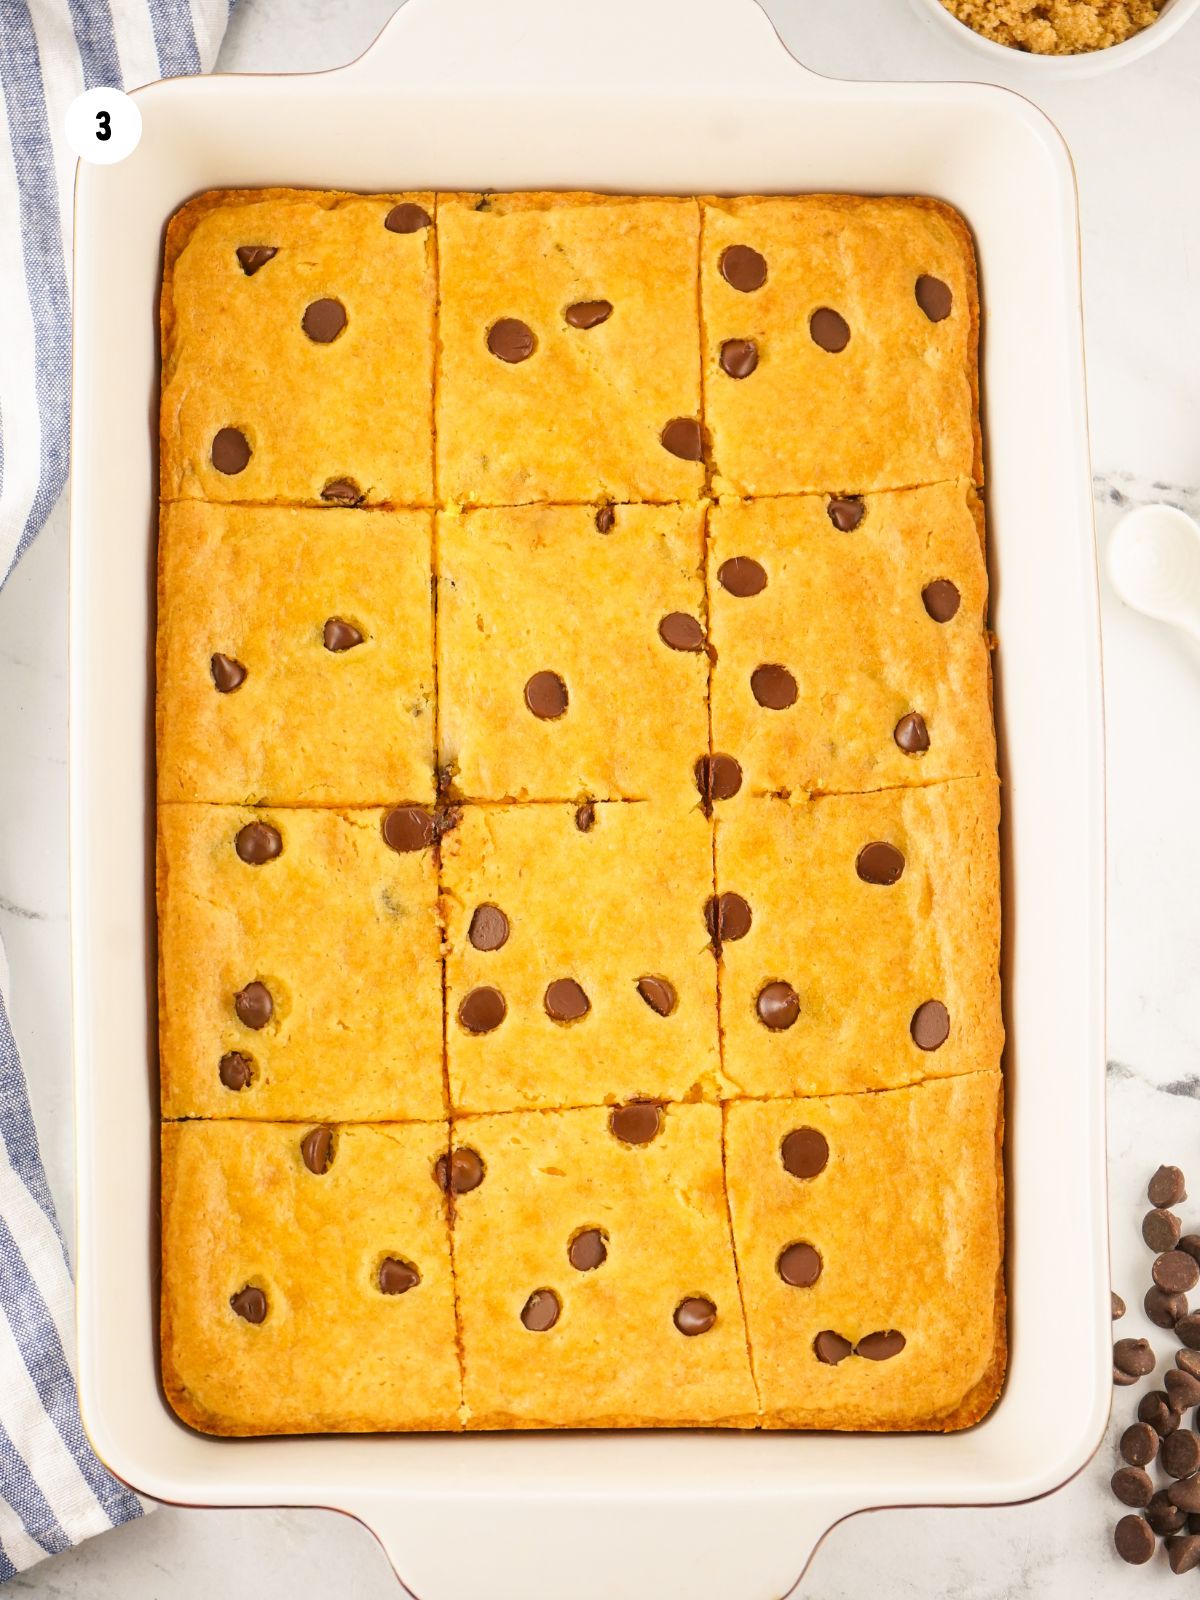
Step 3: Bake for 24 minutes, or until a toothpick comes out slightly gooey.
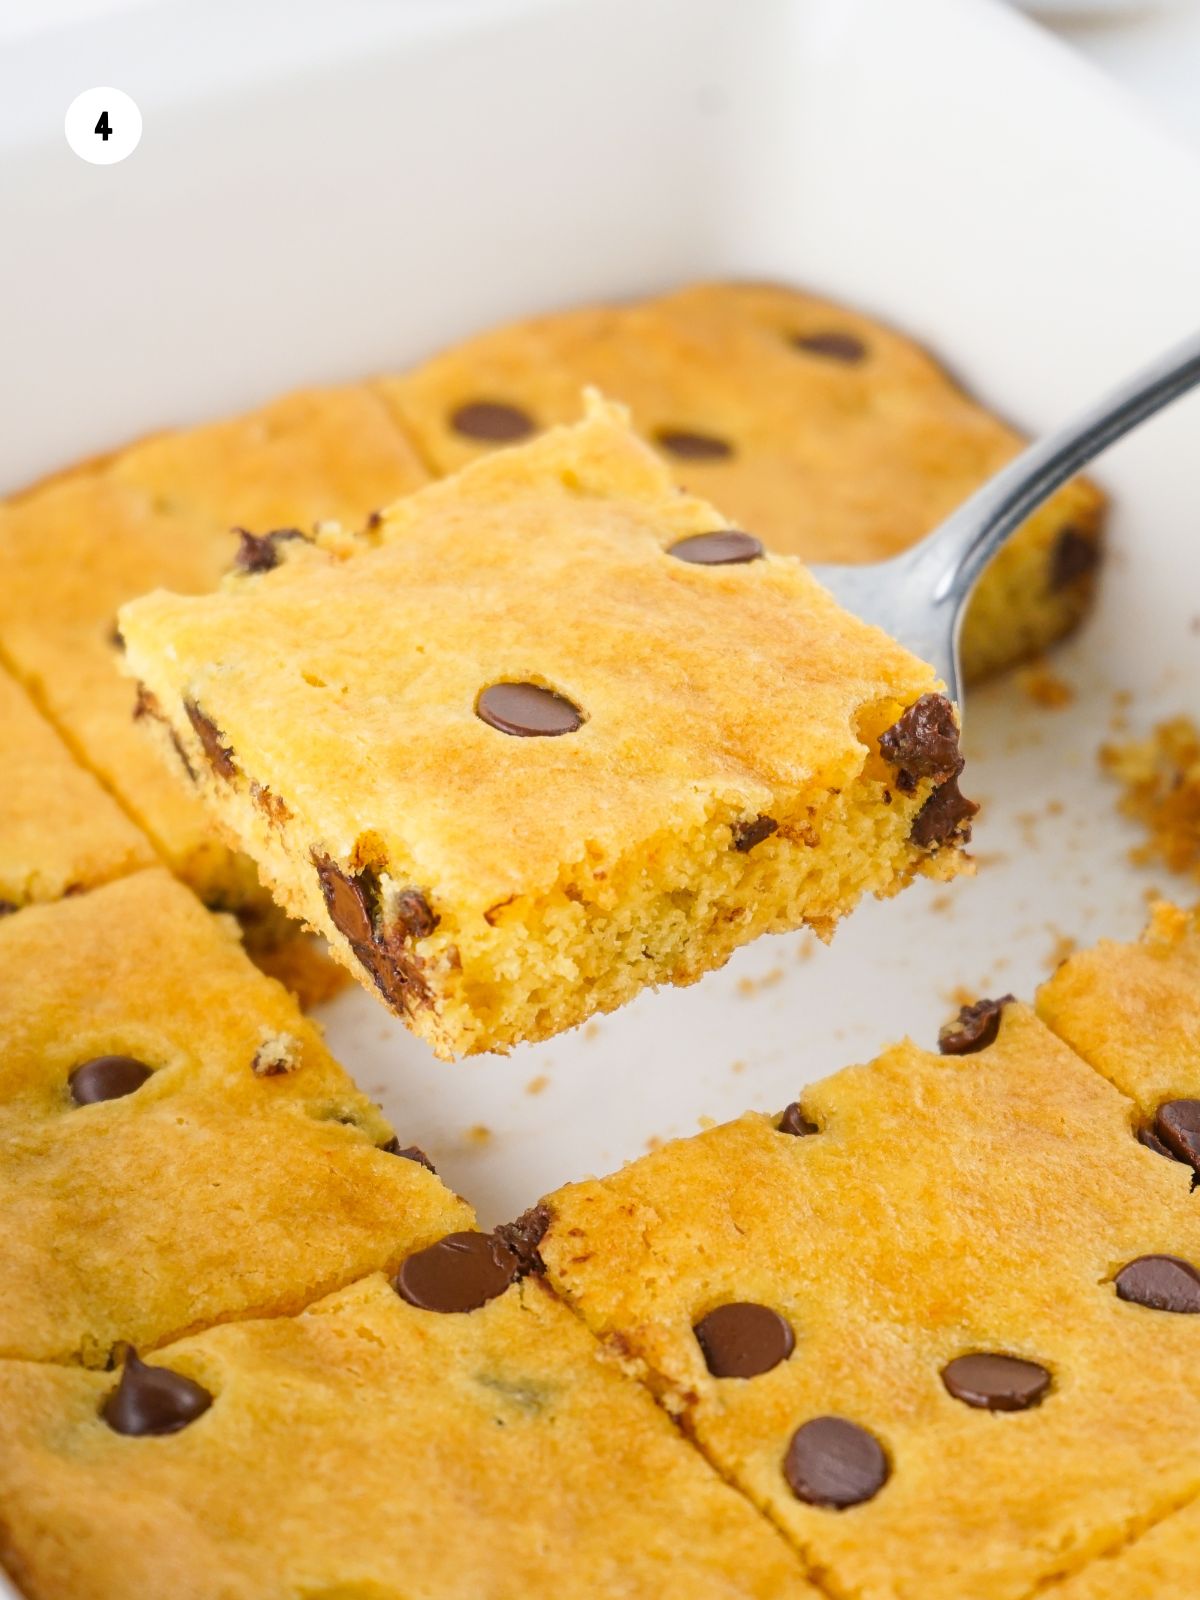
Step 4: Let cool in the pan for 20–30 minutes before slicing and serving.
LOVE this recipe? SAVE it for Later!
❤️Tap the heart icon in the lower right corner to add the recipe to your recipe box for easy access anytime.
If you made it, leaving a star rating or quick review is always appreciated and helps other readers too.
Want to save this printed recipe? The Ultimate Meal Planner & Recipe Binder helps you keep recipes organized in one easy place.

Insider Tips from My Kitchen to Yours
Want to make this recipe even better? Don’t miss my favorite tips below for boosting flavor, perfecting texture, and saving time in the kitchen!
✔️ DO let the bars cool completely in the pan before slicing to help them hold their shape and cut cleanly.
❌ DO NOT overbake—these bars continue to cook slightly as they cool, so remove them when the center is still a little soft for chewy results.
Storage and Reheating Instructions
Room Temperature: Leftover bar cookies can be stored in an airtight container at room temperature for up to 3 days.
Freezer: You can freeze them in an airtight container for up to 3 months. Wrap each cookie individually in plastic wrap or wax paper. This will help to prevent them from sticking together and drying out.
Thaw and Reheat: Allow the bar cookies to defrost overnight in the refrigerator. A fun tip is to reheat them in the microwave for a 10-15 seconds to warm up the chocolate chips!
Recipe FAQ's
To view the answers, simply click on the down arrow (⬇) next to each question. If you have any other questions not answered here, please leave a comment!
Metal bakeware heats quickly and browns evenly, making it ideal for cookies and cakes, while glass is better for casseroles and dishes needing even heat distribution without browning. Choose the material that best suits your recipe!
To avoid thick and dry cake mix bar cookies, make sure to use the correct ratio of cake mix to wet ingredients, don't overbake, and be mindful of your oven temperature. If your bars still turn out dry, try a different cake mix or add a touch more moisture to the dough.


More Recipes to Love
Check out my other recipe for M&M Chocolate Chip Cookies. Or you might like this recipe for Sugar Cookie Bars or Nutella Bar Cookies.


📖 Recipe Card
Chocolate Chip Bar Cookies with Cake Mix
Ingredients
- 1 13.25 ounce yellow cake mix
- ½ cup vegetable oil
- ⅓ cup water
- 2 eggs
- ¾ cups semi-sweet chocolate chips
Method
- Preheat your oven to 350°F. Lightly spray a 9x13-inch baking pan with nonstick spray and set it aside.
- In a large mixing bowl, stir together all the ingredients—except for the chocolate chips—until the batter is smooth and free of lumps. Gently fold in ¾ cup of chocolate chips.
- Pour the batter into the prepared pan and spread it out evenly. Sprinkle a few extra chocolate chips on top, then bake for about 24 minutes, or until a toothpick inserted in the center comes out slightly gooey. You want them slightly underdone, as they’ll continue to cook as they cool.
- Remove the pan from the oven and let the bars rest for 20–30 minutes in the pan before slicing. If you cut them too soon, they may fall apart.
- Once cooled, slice into bars, serve, and enjoy!
Nutrition
Notes
- This recipe was originally created and published in 2013 using a 15.25-ounce box of cake mix. Most cake mixes today are 13.25 ounces, but the recipe still works well with the smaller size.
- When updated in 2025, a 13.25-ounce cake mix was used with great results. If you'd like to match the original recipe more closely, you can use a few spoonfuls from my Homemade Mason Jar Cake Mix to bring your box mix up to 15.25 ounces.
- Leftover bar cookies can be stored in an airtight container at room temperature for up to 3 days.
- You can freeze them in an airtight container for up to 3 months. Wrap each cookie individually in plastic wrap or wax paper. This will help to prevent them from sticking together and drying out.
Tried this recipe?
Let us know how it was!This recipe has been updated since it was first published in 2013 to reflect current cake mix sizes and improved instructions.


Karen says
We are renting in FL and there is no mixer here! Can I just stir the cake mix by hand?
Lois says
Of course!!! Hope you are enjoying the beautiful weather in Florida and the recipe. Thank you for visiting.
Joyce says
Will it make a difference if I use white cake mix instead? I’ve never cared for yellow cake.
Donna @ Modern on Monticello says
I love how it starts out with a box of cake mix. Makes it so much easier to bake these without all of the extra fuss. Thanks for sharing at #HomeMattersParty Pinned!