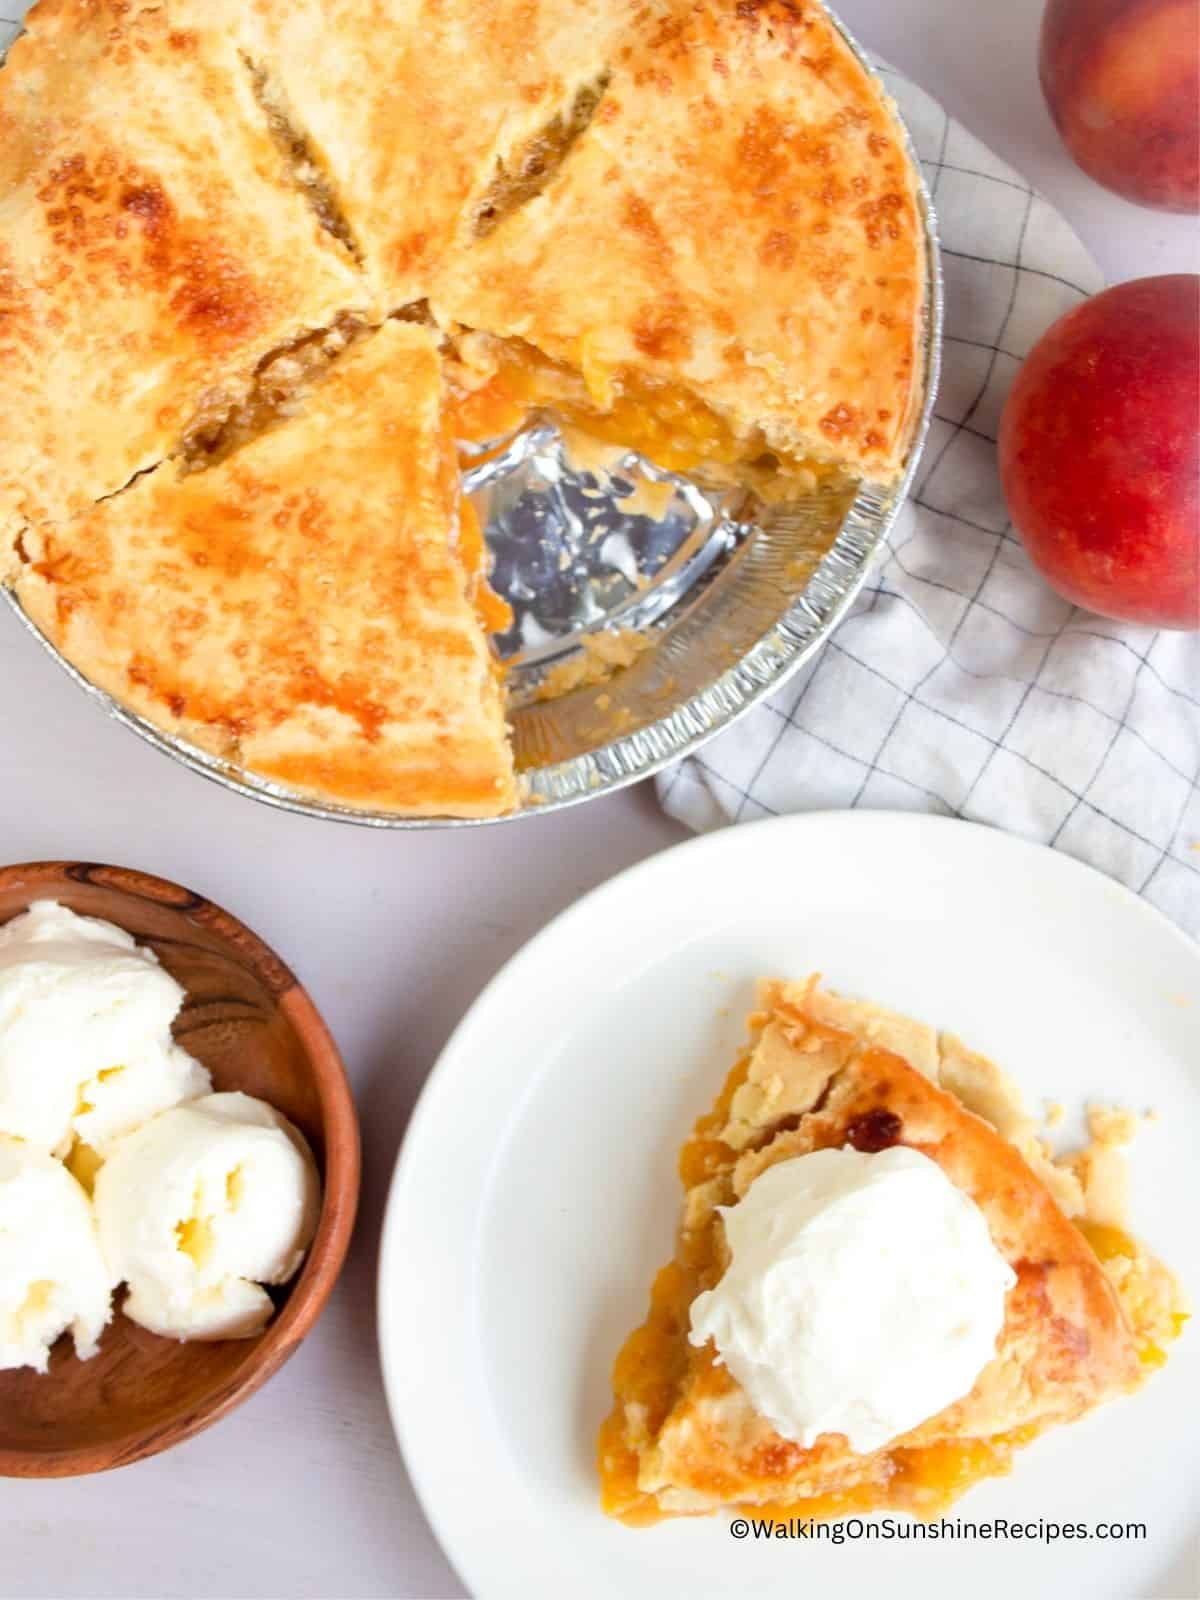
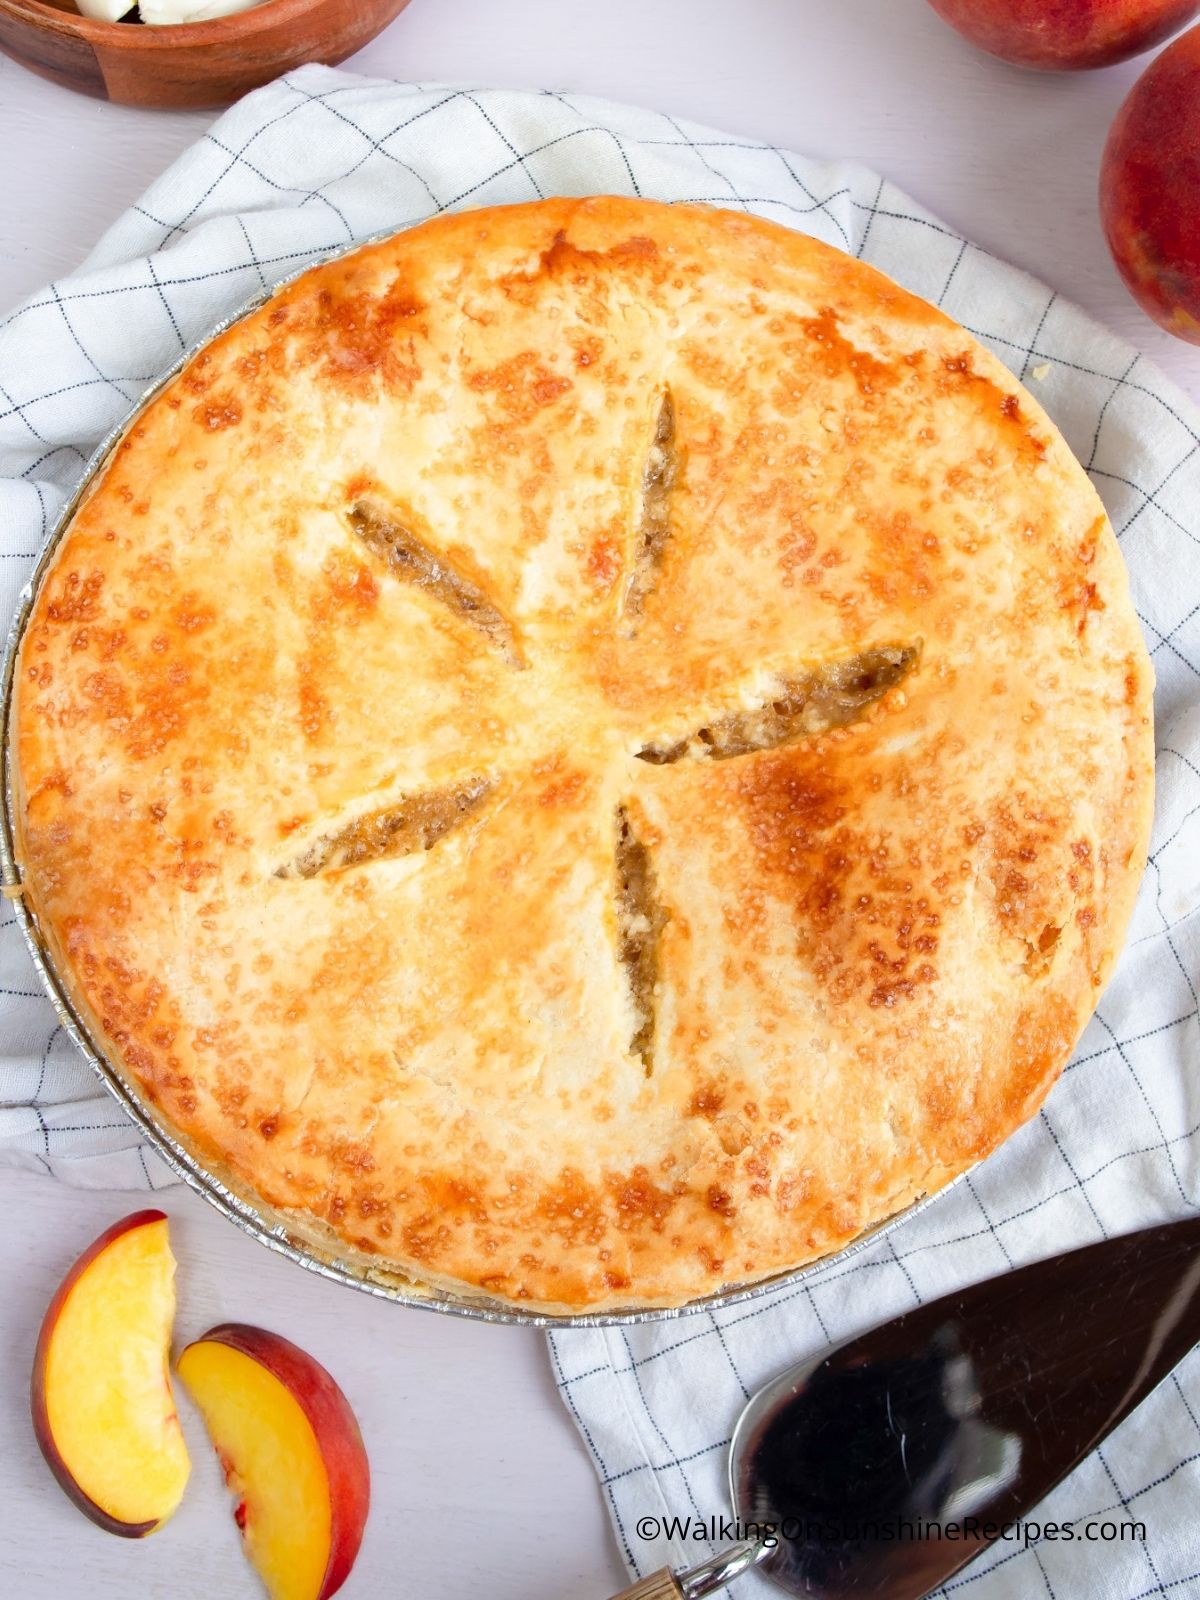
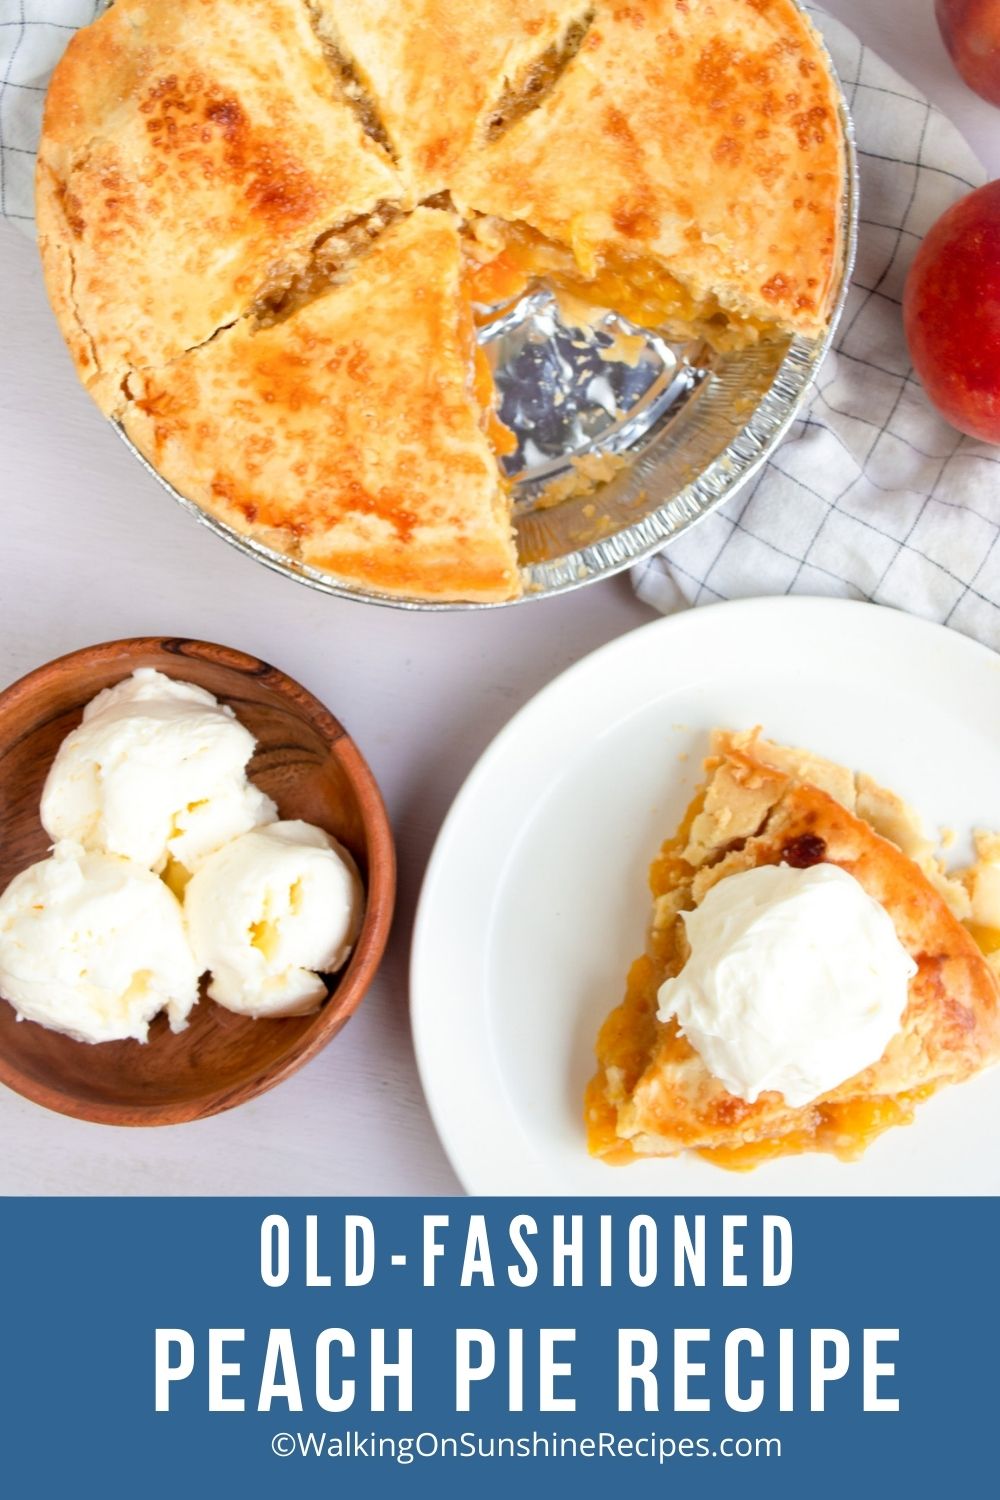
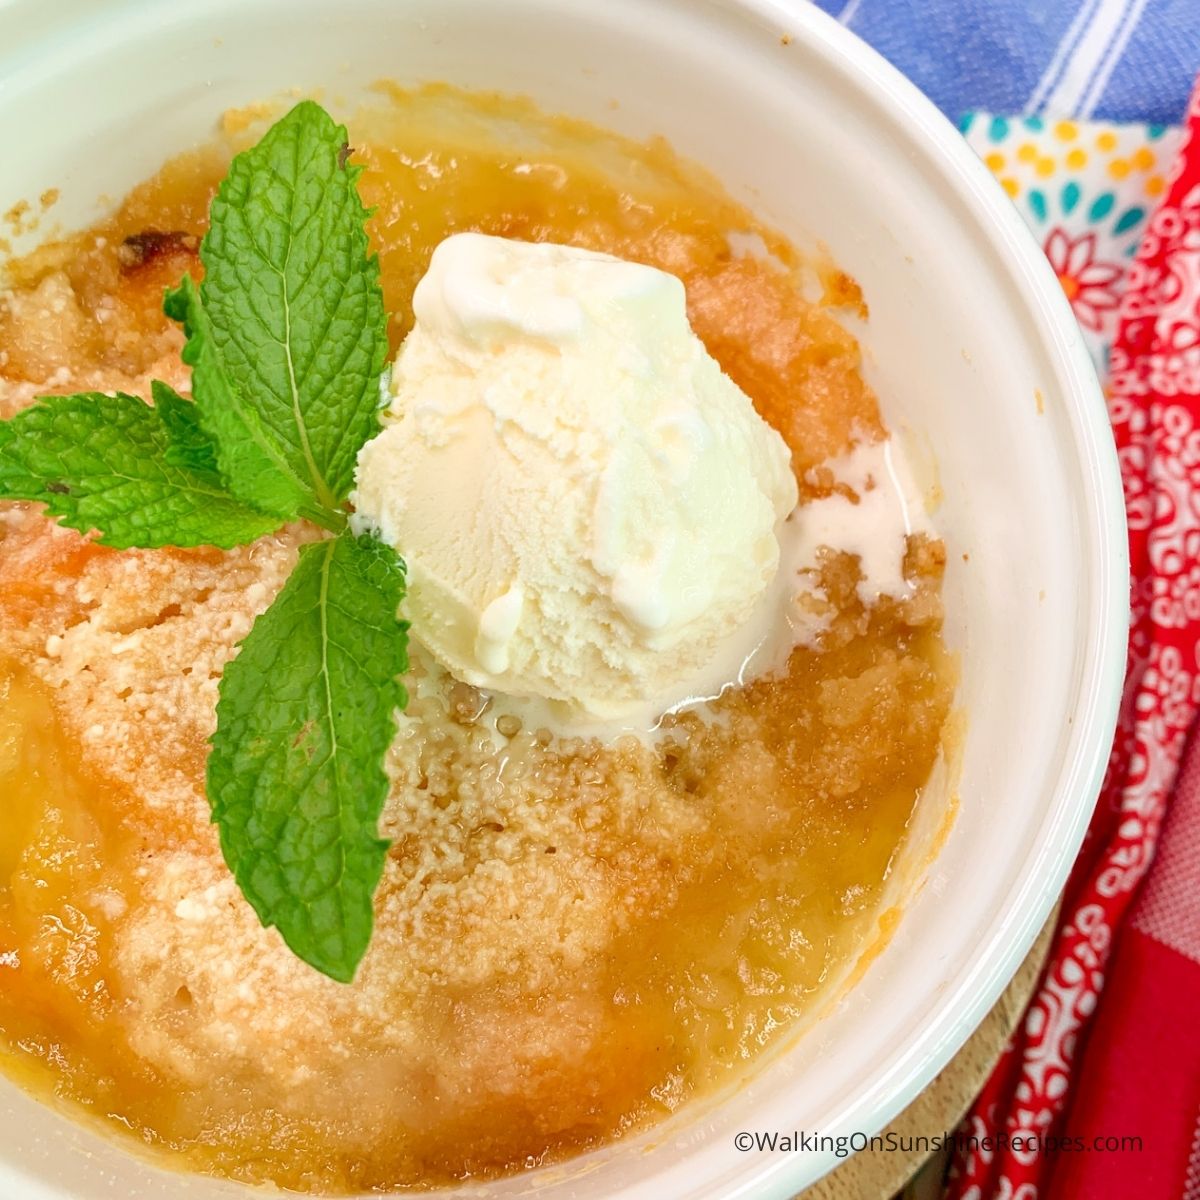
There's nothing like homemade peach pie recipe! The scent of fresh peaches baking in a flaky, buttery crust is enough to make your mouth water.
This recipe is the perfect way to enjoy summer's freshest fruit. With simple pantry ingredients, you can easily create a mouth-watering dessert that is sure to be a crowd-pleaser.
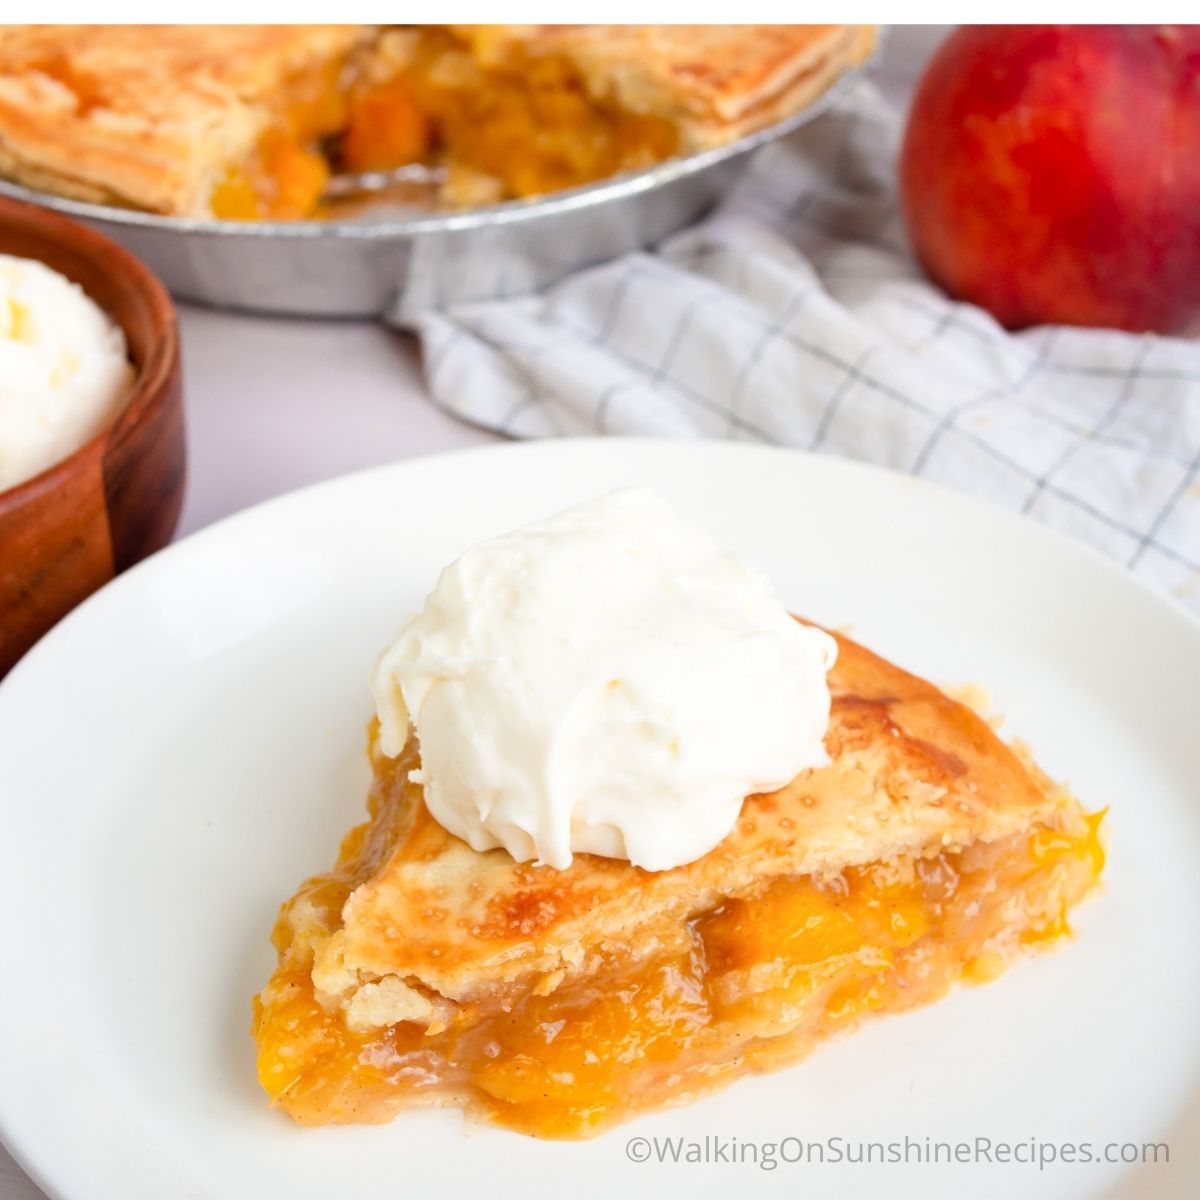
Serve warm with a scoop of vanilla ice cream and you'll have a dessert you'll be making a few times every summer!
There's nothing quite like a homemade peach pie for dessert during the summer! Whether you're serving it for a special occasion or simply enjoying a sweet treat at home, this recipe is sure to please.
The key to a perfect peach pie is using ripe, juicy peaches. If you can't find fresh peaches, this recipe also works with canned or frozen peaches. Just be sure to drain them well before using.
I guarantee that this recipe for homemade peach pie will become a summertime favorite.
Fresh, ripe peaches have a bright flavor and aroma that can't be replicated with canned or frozen peaches. However, there are times you might want to reach for a can or bag of frozen peaches:
Canned peaches are convenient and available all year round.
You don't have to worry about peeling and slicing them.
Canned and frozen peaches are more affordable when fresh peaches are not in season.
They can be just as sweet and flavorful as fresh peaches especially if they are canned in syrup.
Reader Review
I like a thick gooey pie filling. This pie was very good. Perfectly sweetened. Absolutely delicious with vanilla ice cream and warm pie.
- Karen S.
⭐⭐⭐⭐⭐
How to Choose the Perfect Peach
Freestone Peaches - these are the best peaches to use for cooking and baking. The peach flesh is not attached to the pit and that makes it really easy to remove, peel and even slice.
Clingstone Peaches - everything is attached to the skin which usually means you have more work cut out for you when prepping them for recipes.
A quick way to ripen hard peaches is by using a paper bag, only make sure the peaches aren't touching each other.
Lay the bag on the counter and slide the peaches in making sure they're not touching. Close the bag and check them in 24 hours. They should be ripe enough to use.
Do you peel peaches for pie?
I like to peel peaches before using them in a pie, as the skin can affect the texture and appearance of the filling. The skin can become tough and chewy, and it can also cause the filling to look unattractive.
Peeling peaches is easy! I use the same technique for peeling peaches as I list in my Peeling Tomatoes Tips post:
Wash the peaches.
Bring a large pot of water to boil on the stove top.
Place a small “X” in the bottom of each peach and submerge in boiling water for 30 seconds.
Immediately place the peaches in a bowl of ice water.
Then careful pick up a peach and begin to pull the outer layer of skin off.
The outer layer of skin comes off very easily.
Immediately place the peaches in a bowl of ice water.
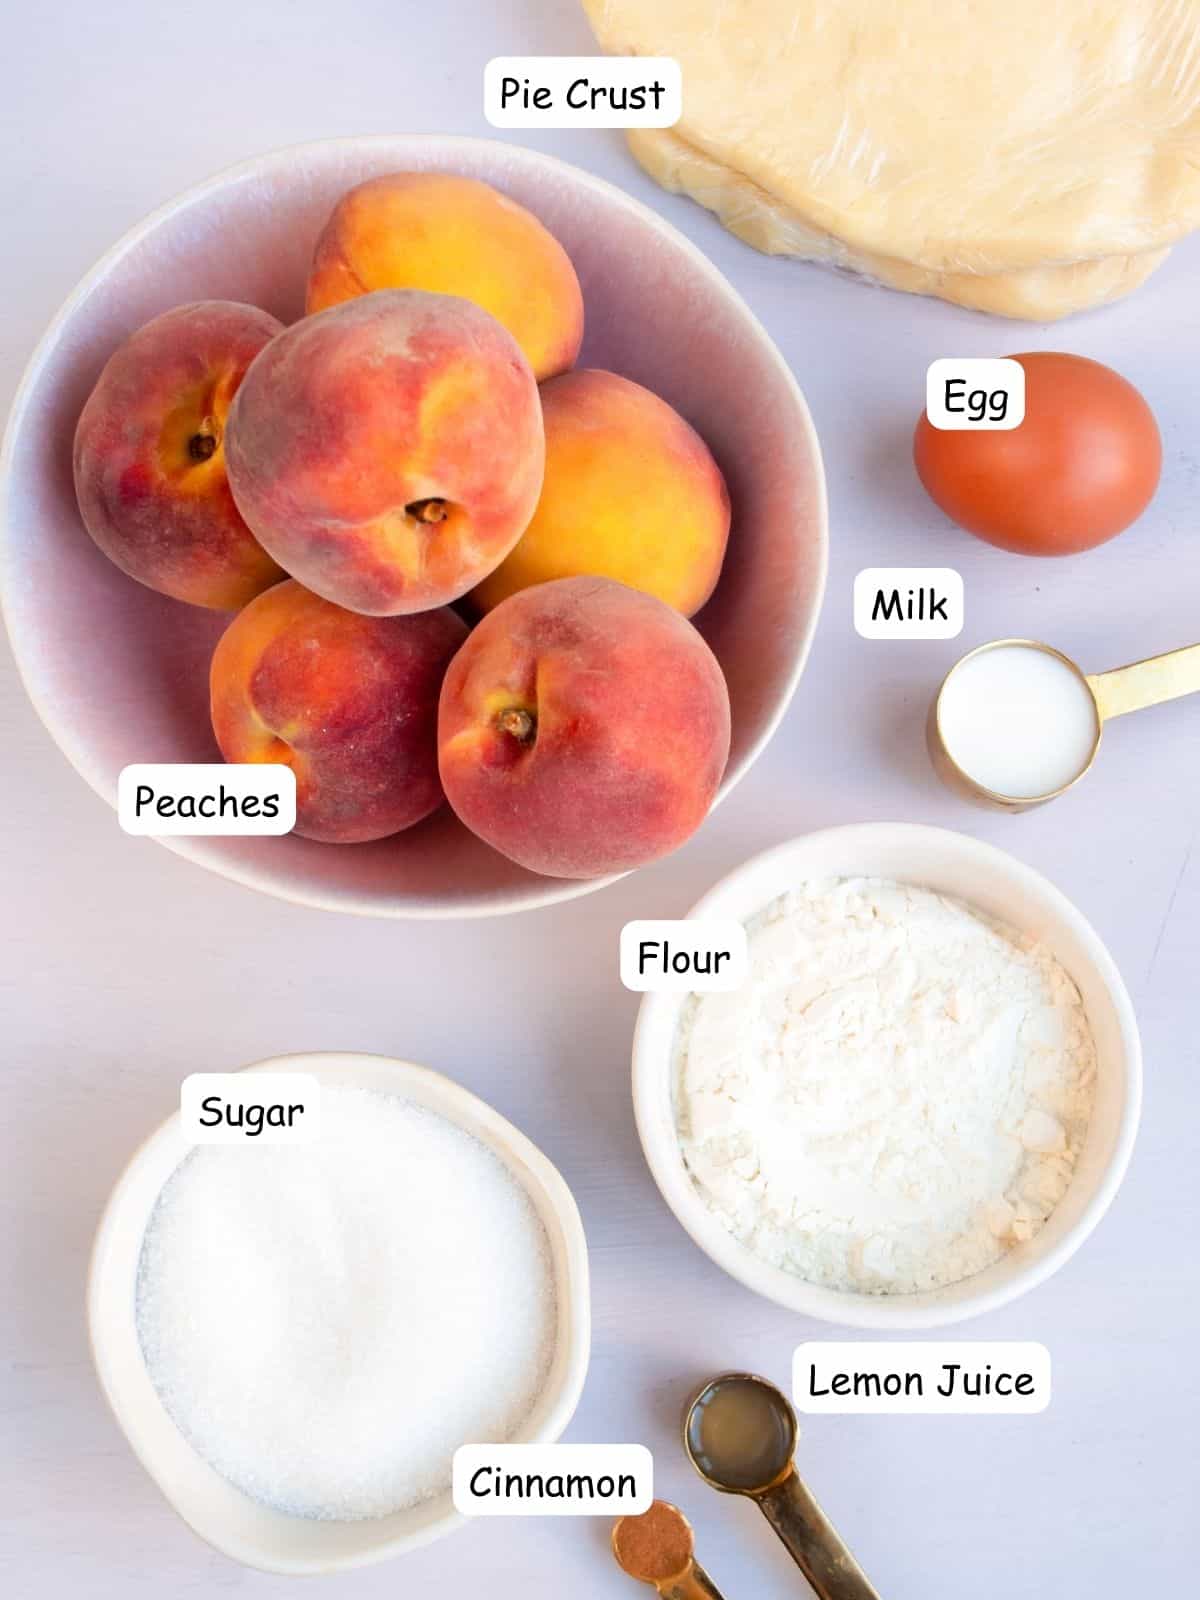
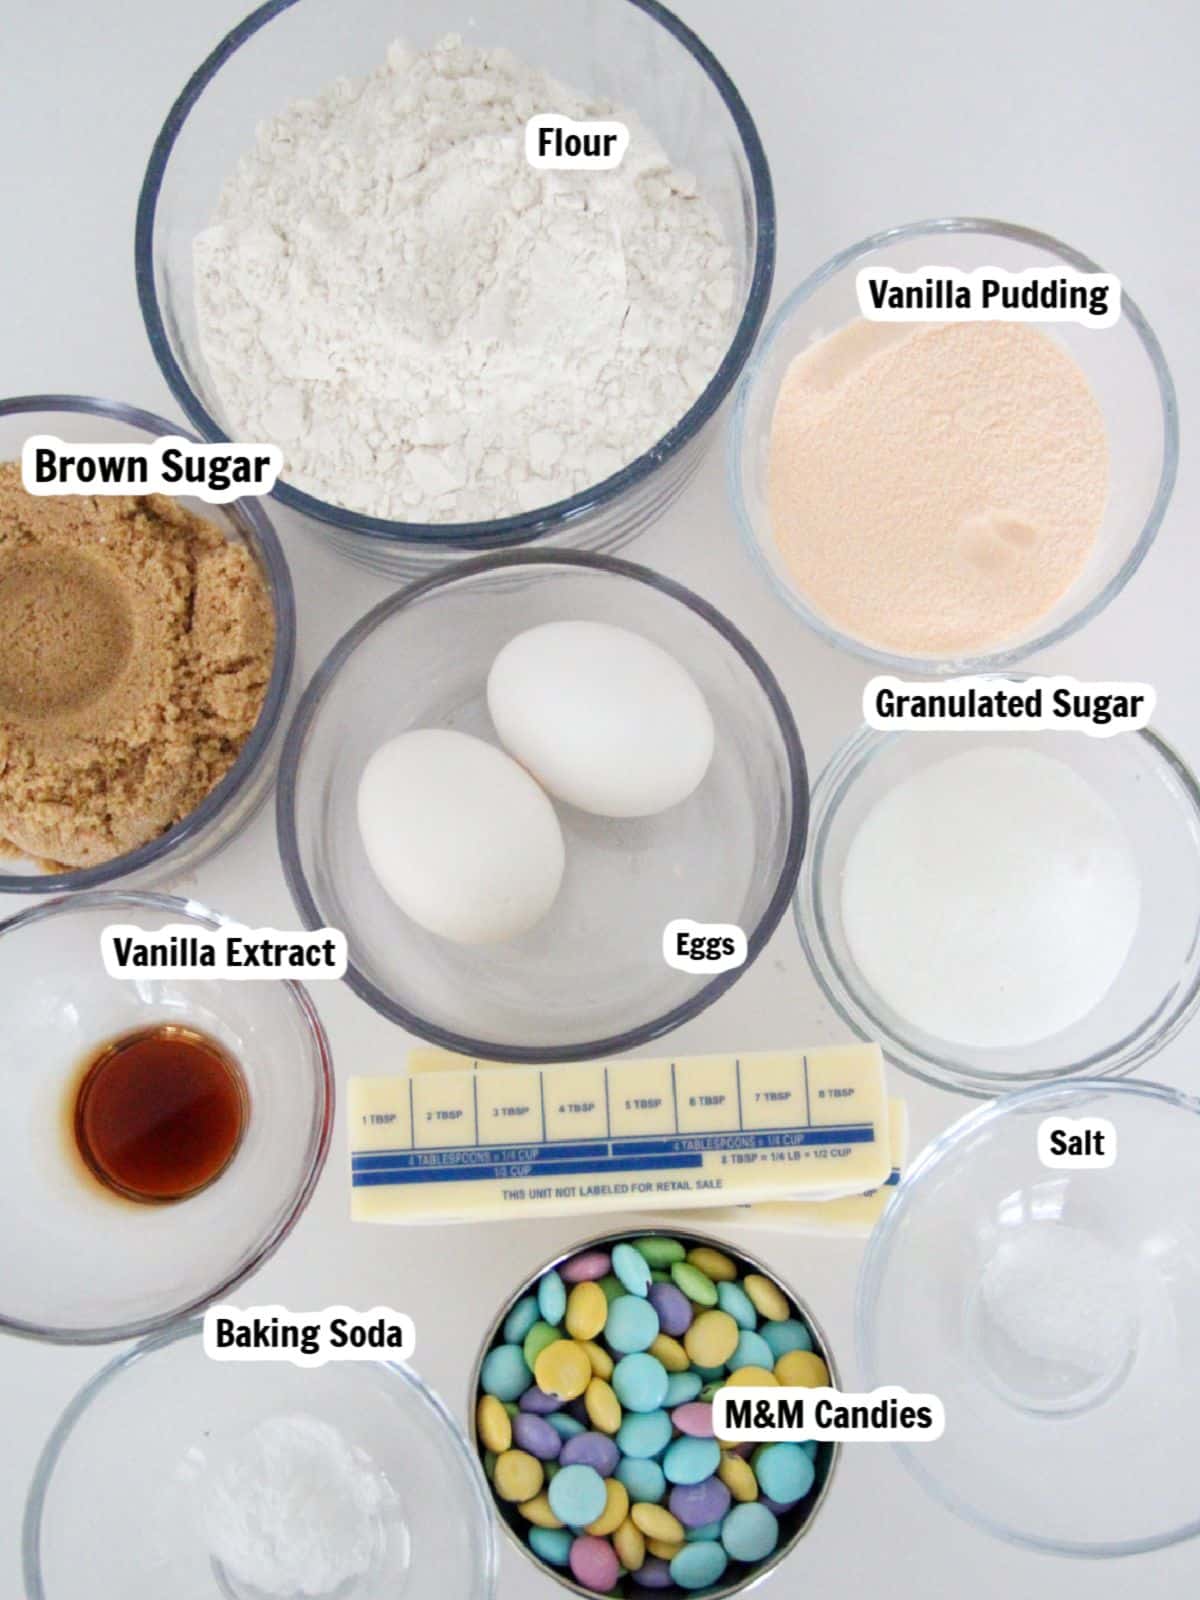
Here's a quick overview of the ingredients for this recipe. Find the exact amounts and click the Instacart button to easily add them to your cart – all in the printable recipe card below!
Lemon juice - this will keep the peaches from turning brown.
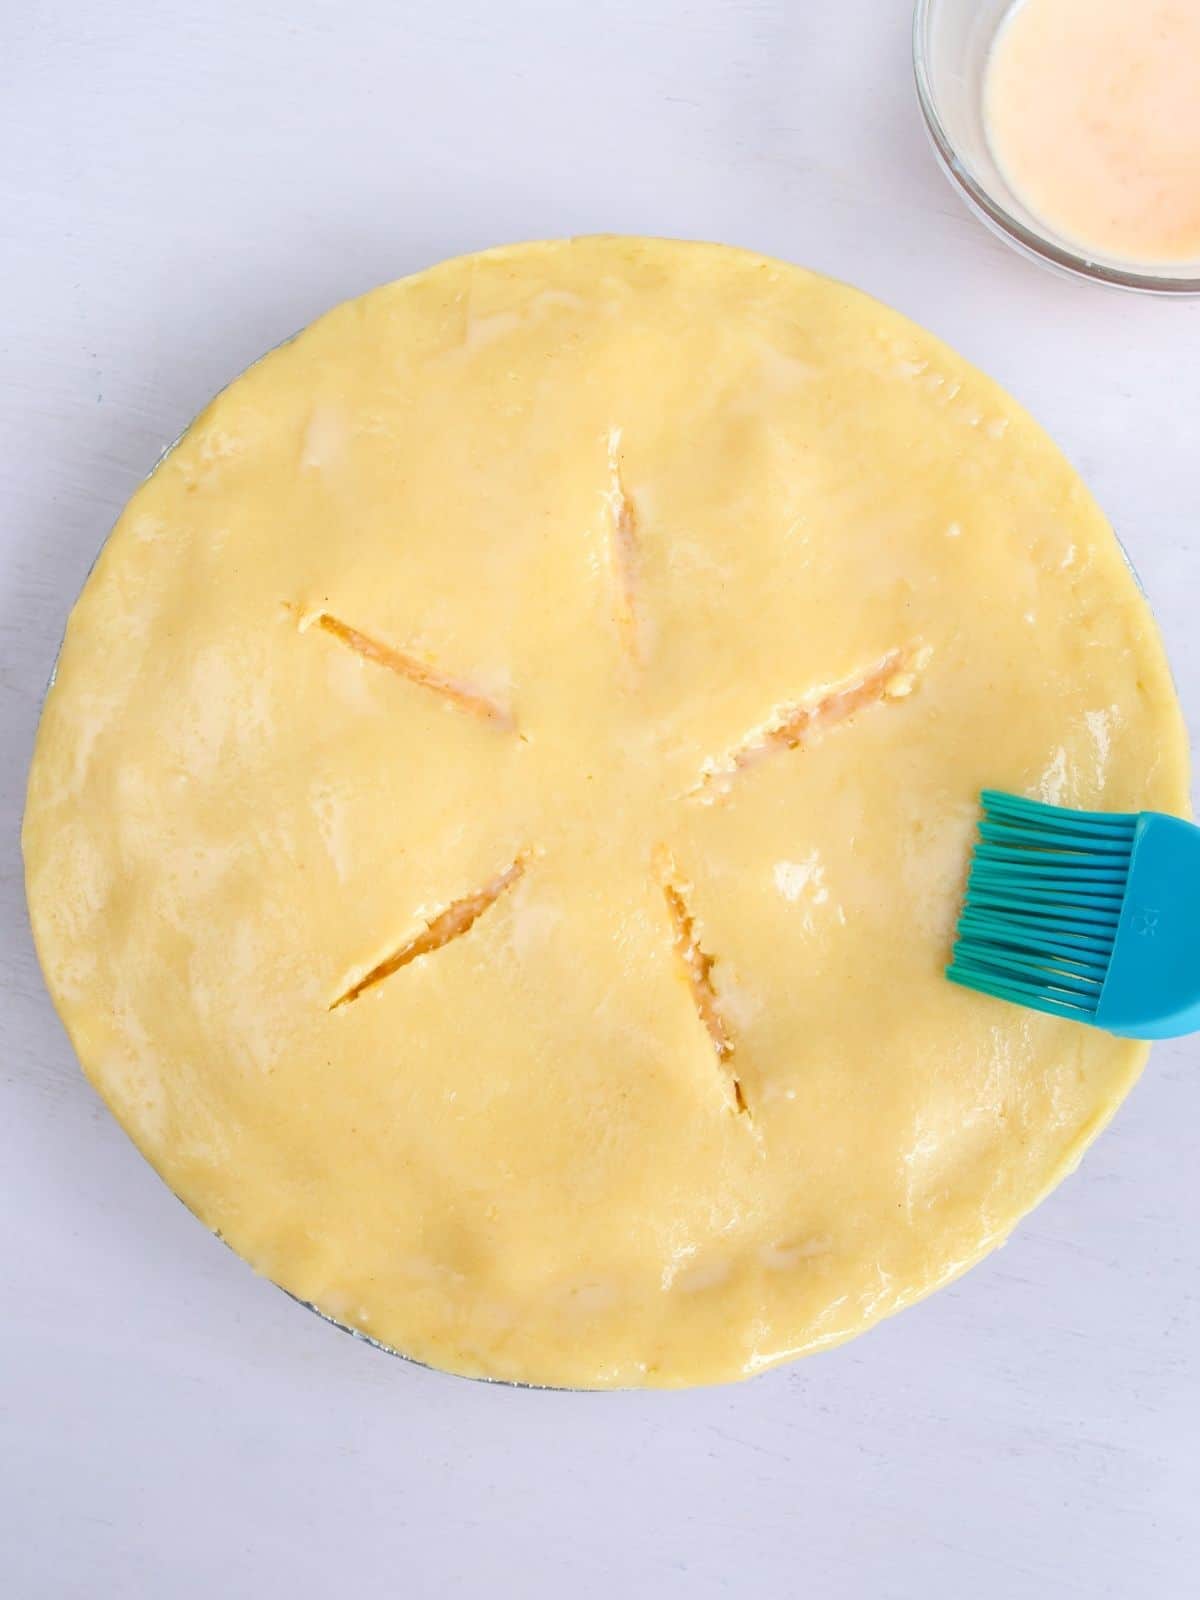
Egg wash - mixed with milk and then sprinkled with sugar for a pretty finish to the pie
Dough for double-crust pie - you could use refrigerated pie dough if you're pressed for time. Check out my easy step-by-step directions for making homemade pie dough.
Recipe Substitutions and Variations
If you don't have access to fresh peaches, you can use frozen or even canned peaches.
Make sure you drain both very well before adding them to the pie dough.
Step-by-Step Instructions
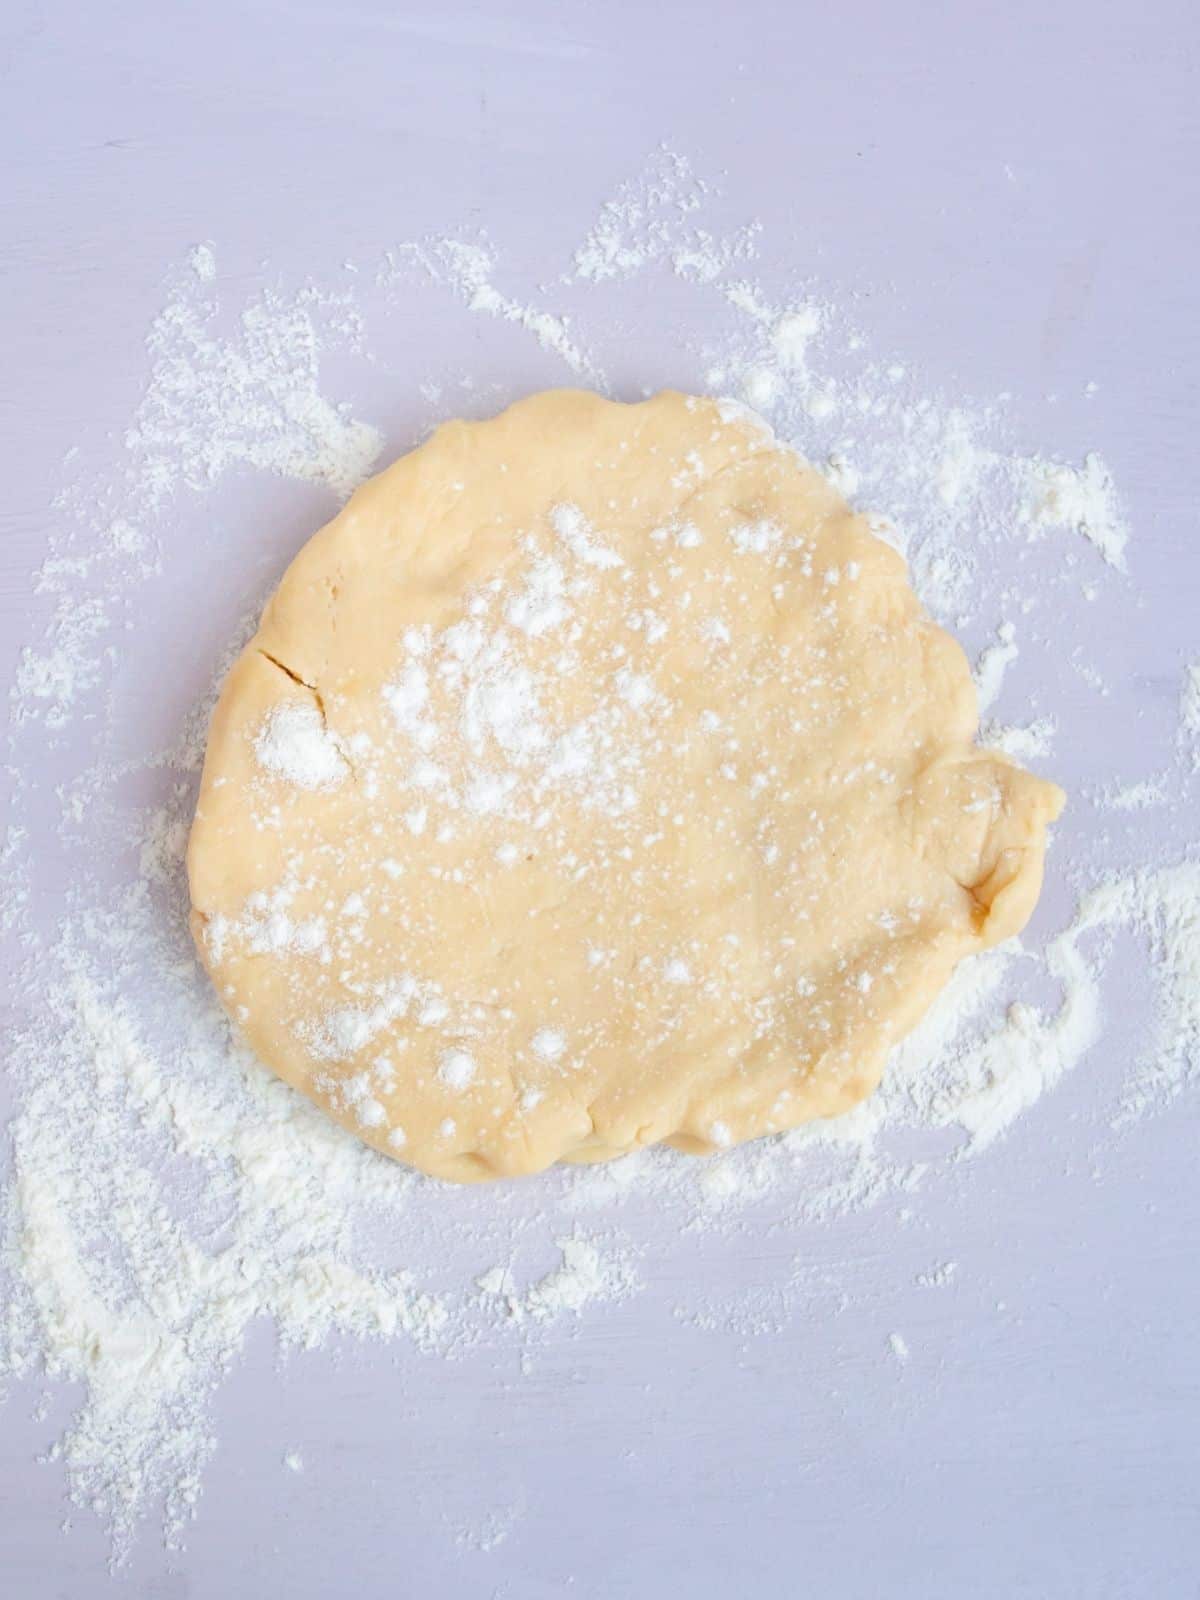
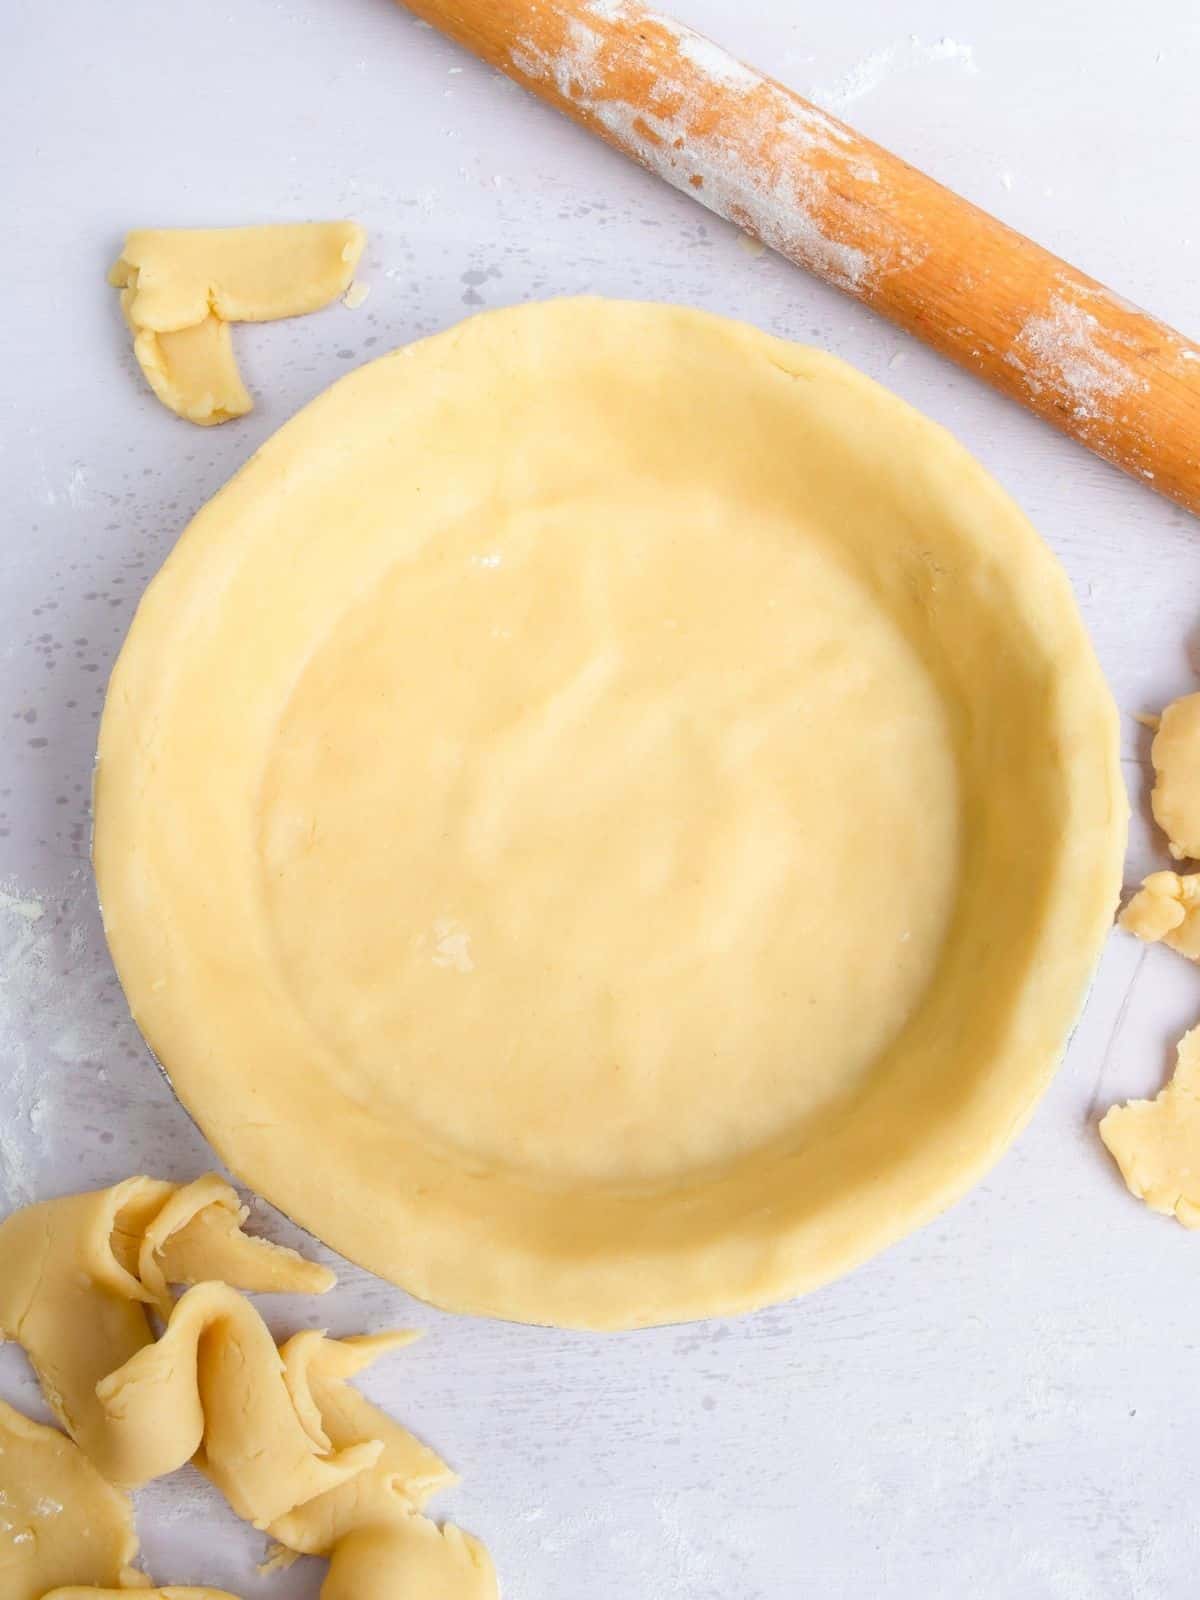
Step 1: Preheat oven to 400° F. On a lightly floured surface, roll one half of the dough into a ⅛ inch thick circle large enough to fit into the bottom of a 9 inch pie plate.
Step 2: Transfer to the pie plate. Refrigerate while you prepare the filling.
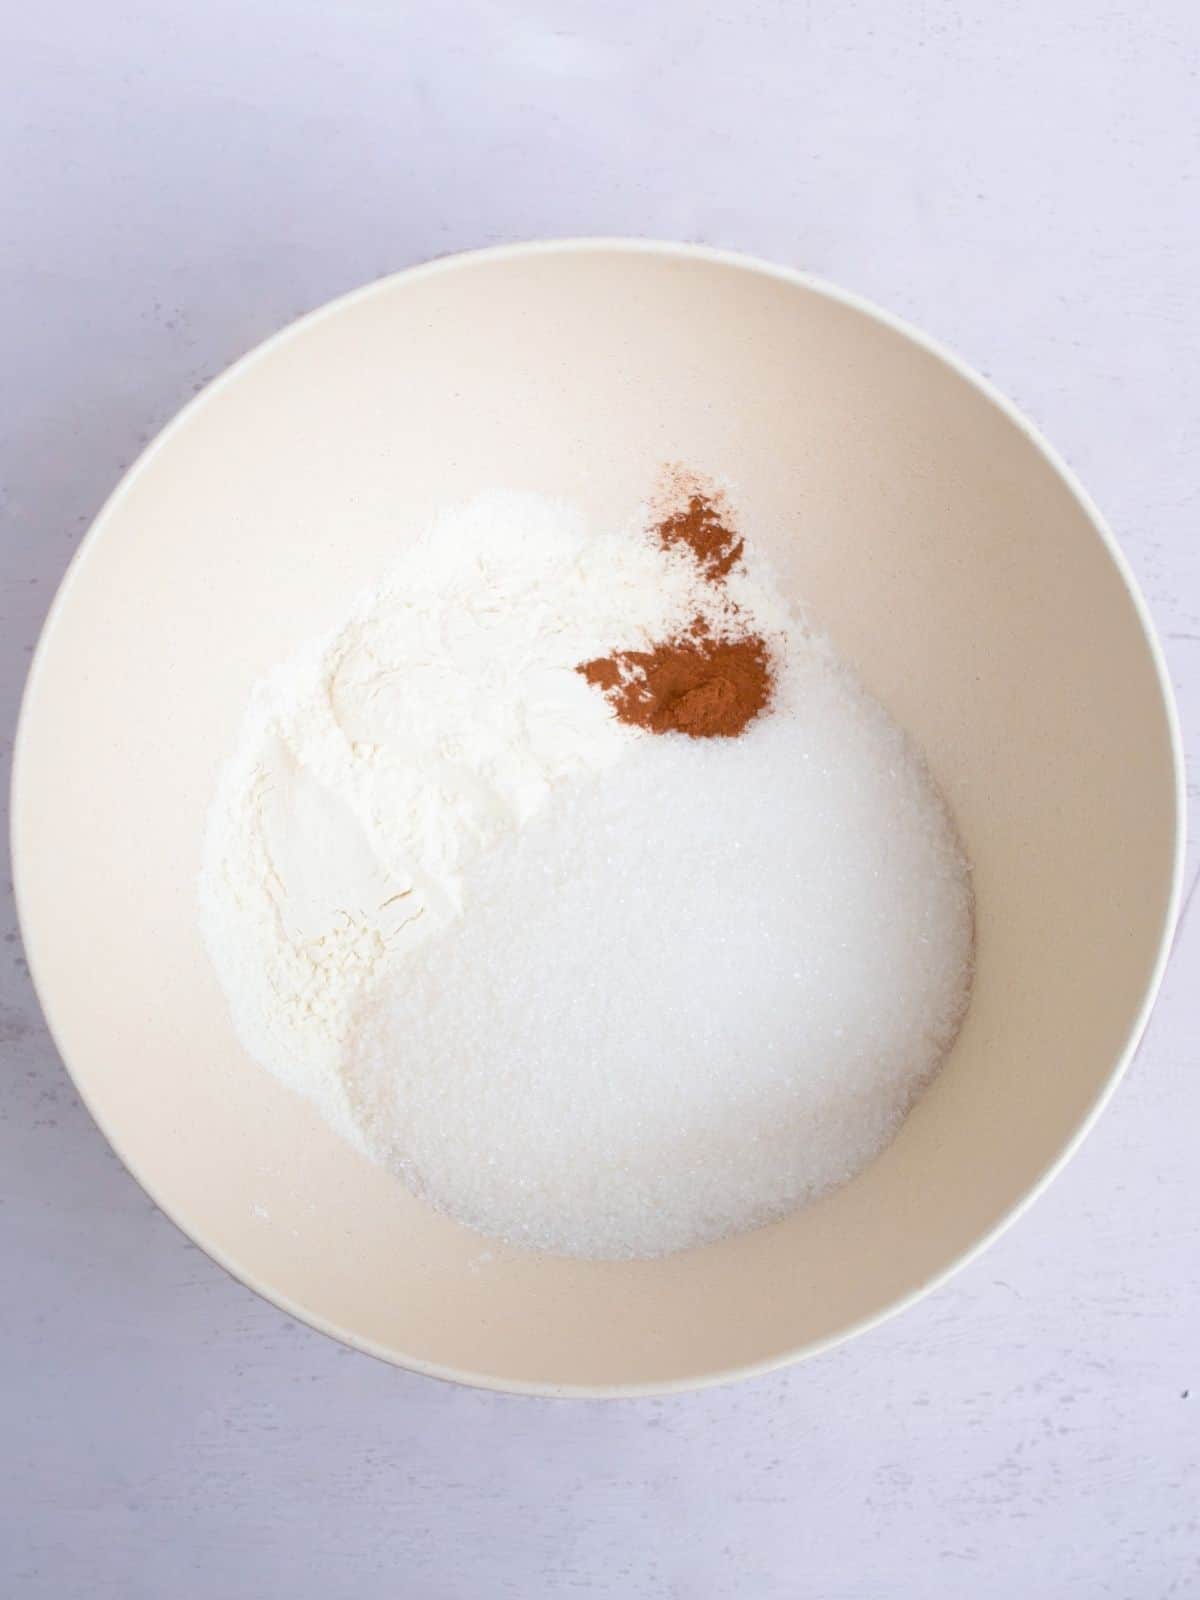
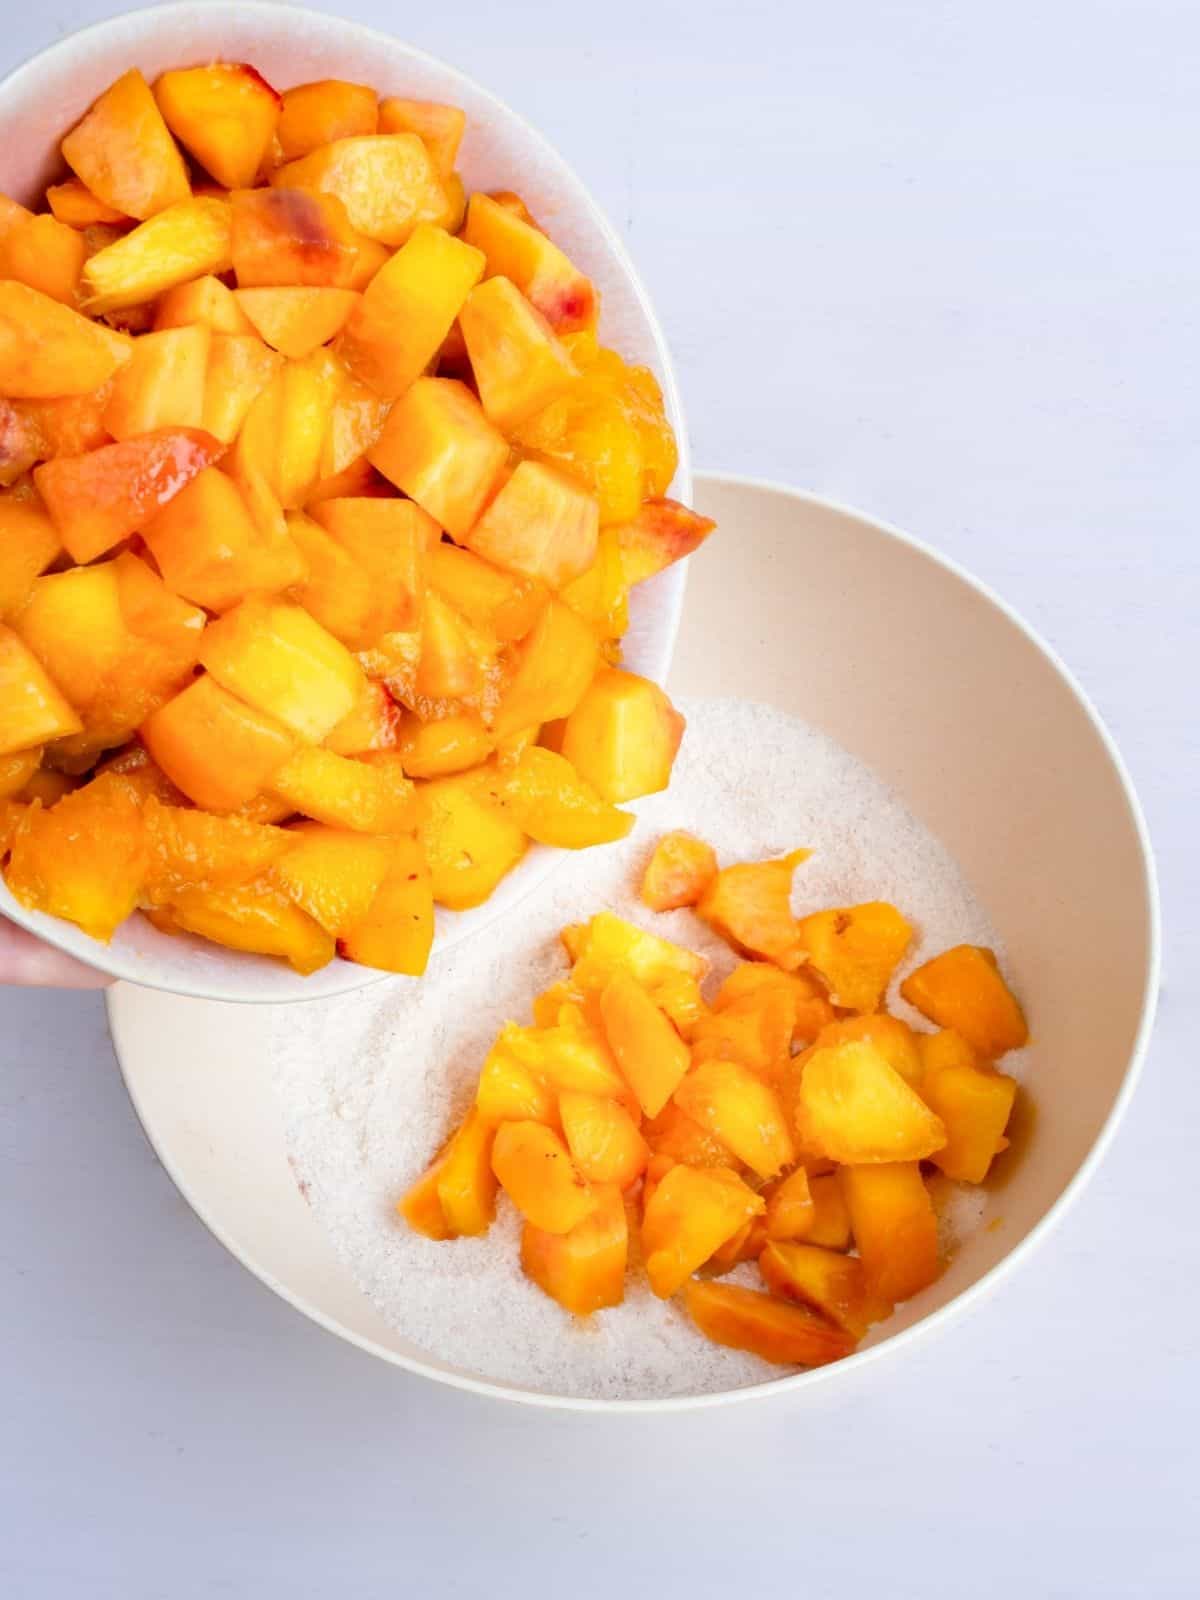
Step 3: In a large bowl, mix sugar, flour and cinnamon. Stir in the peaches and lemon juice.
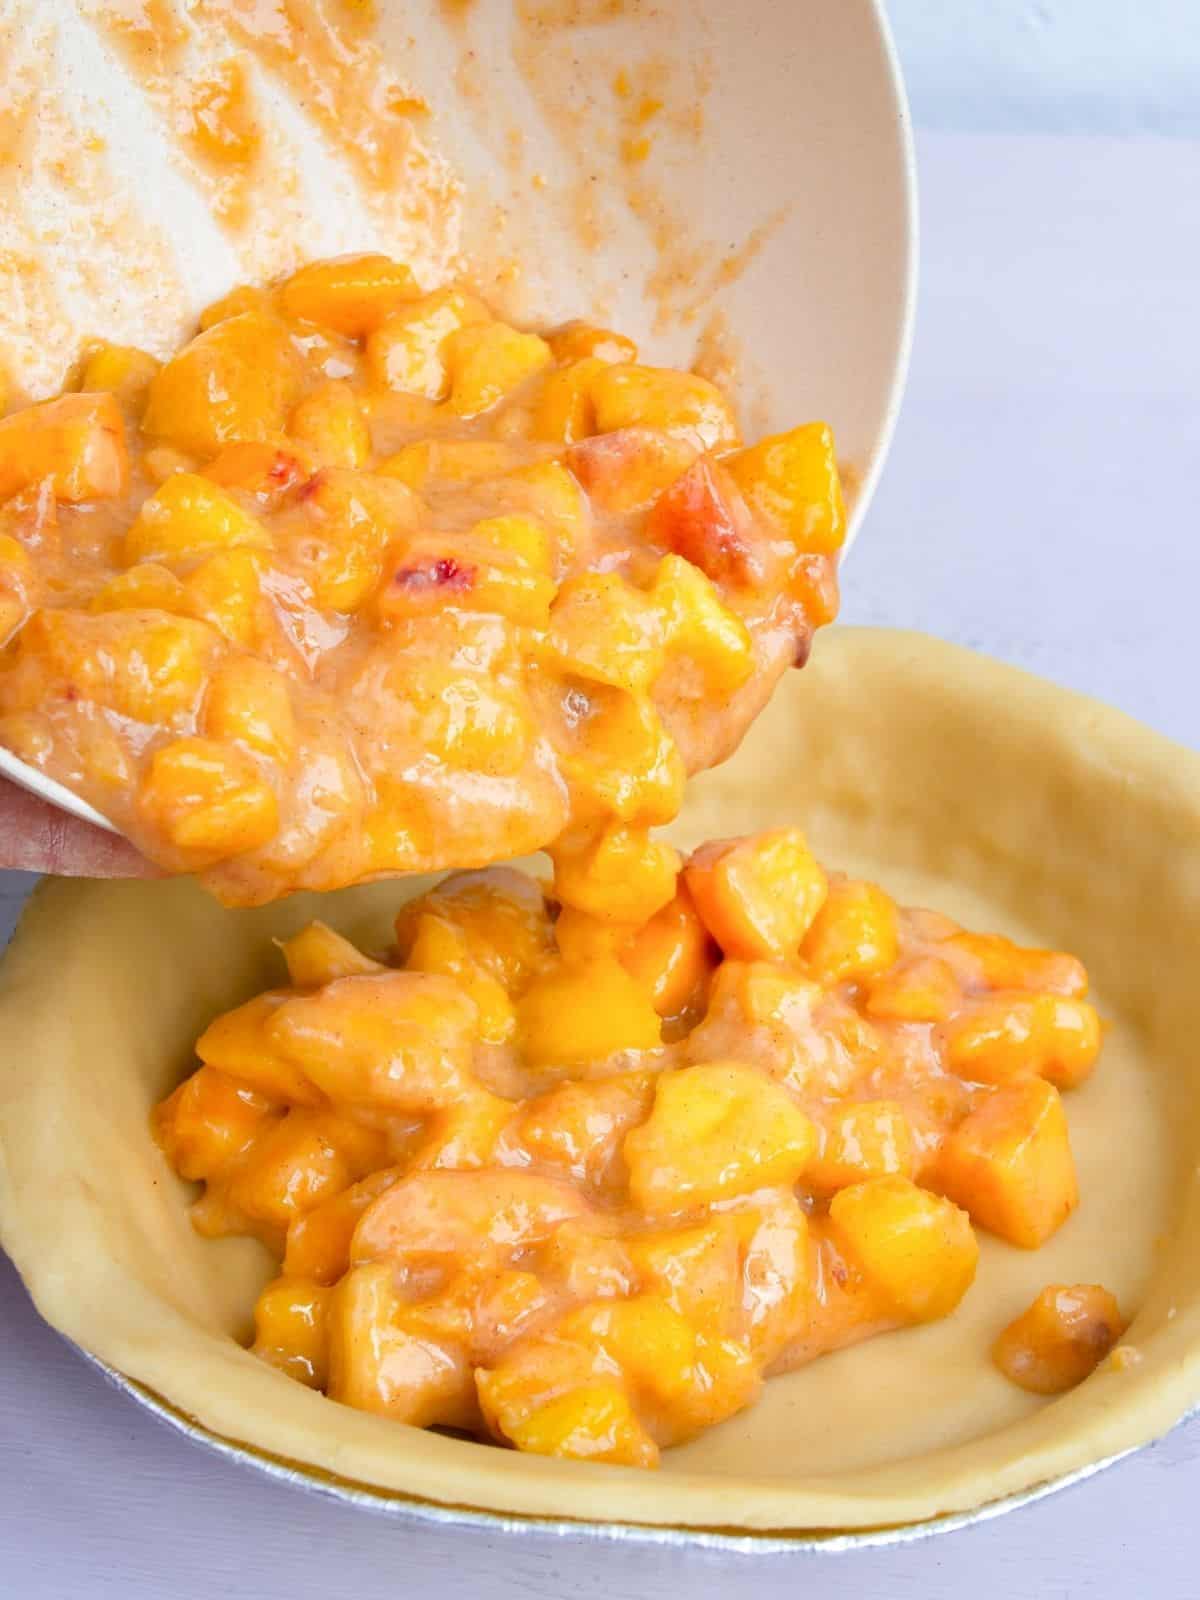
Step 4: Add the filling to the chilled pie crust and place back into the refrigerator to chill.
How to add the Top Pie Crust
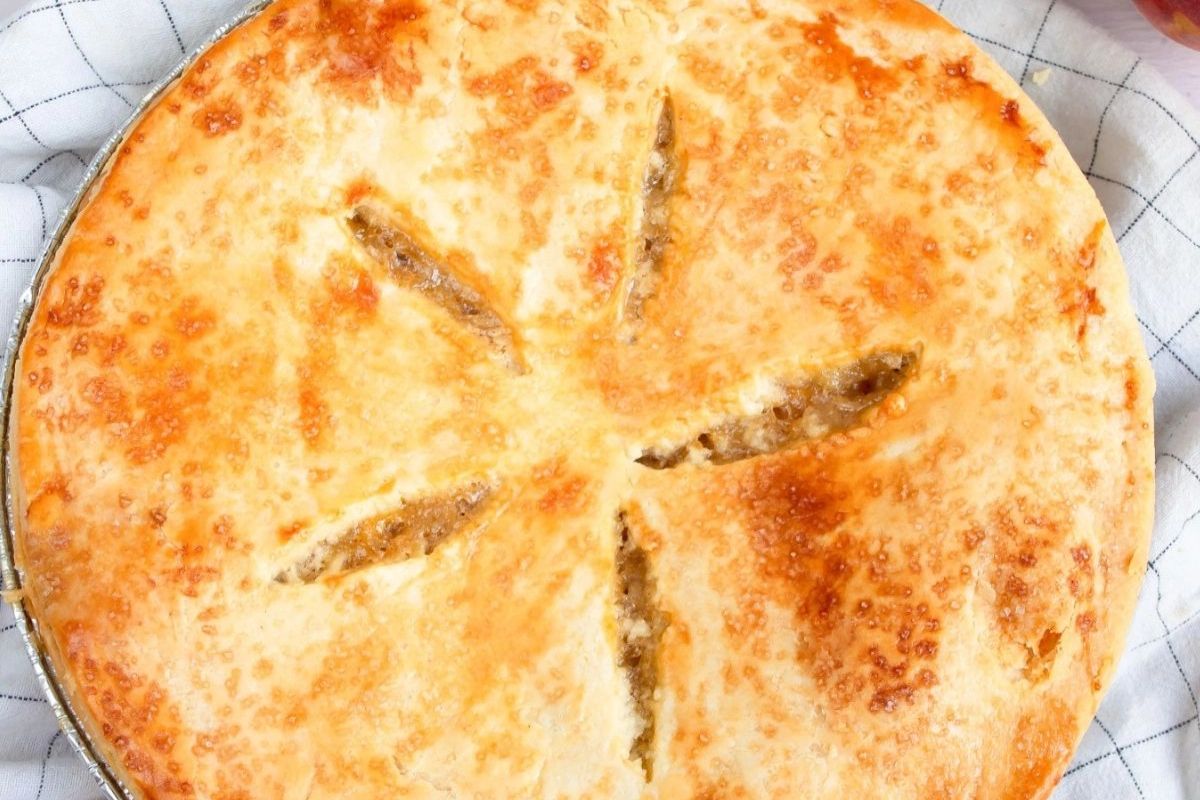
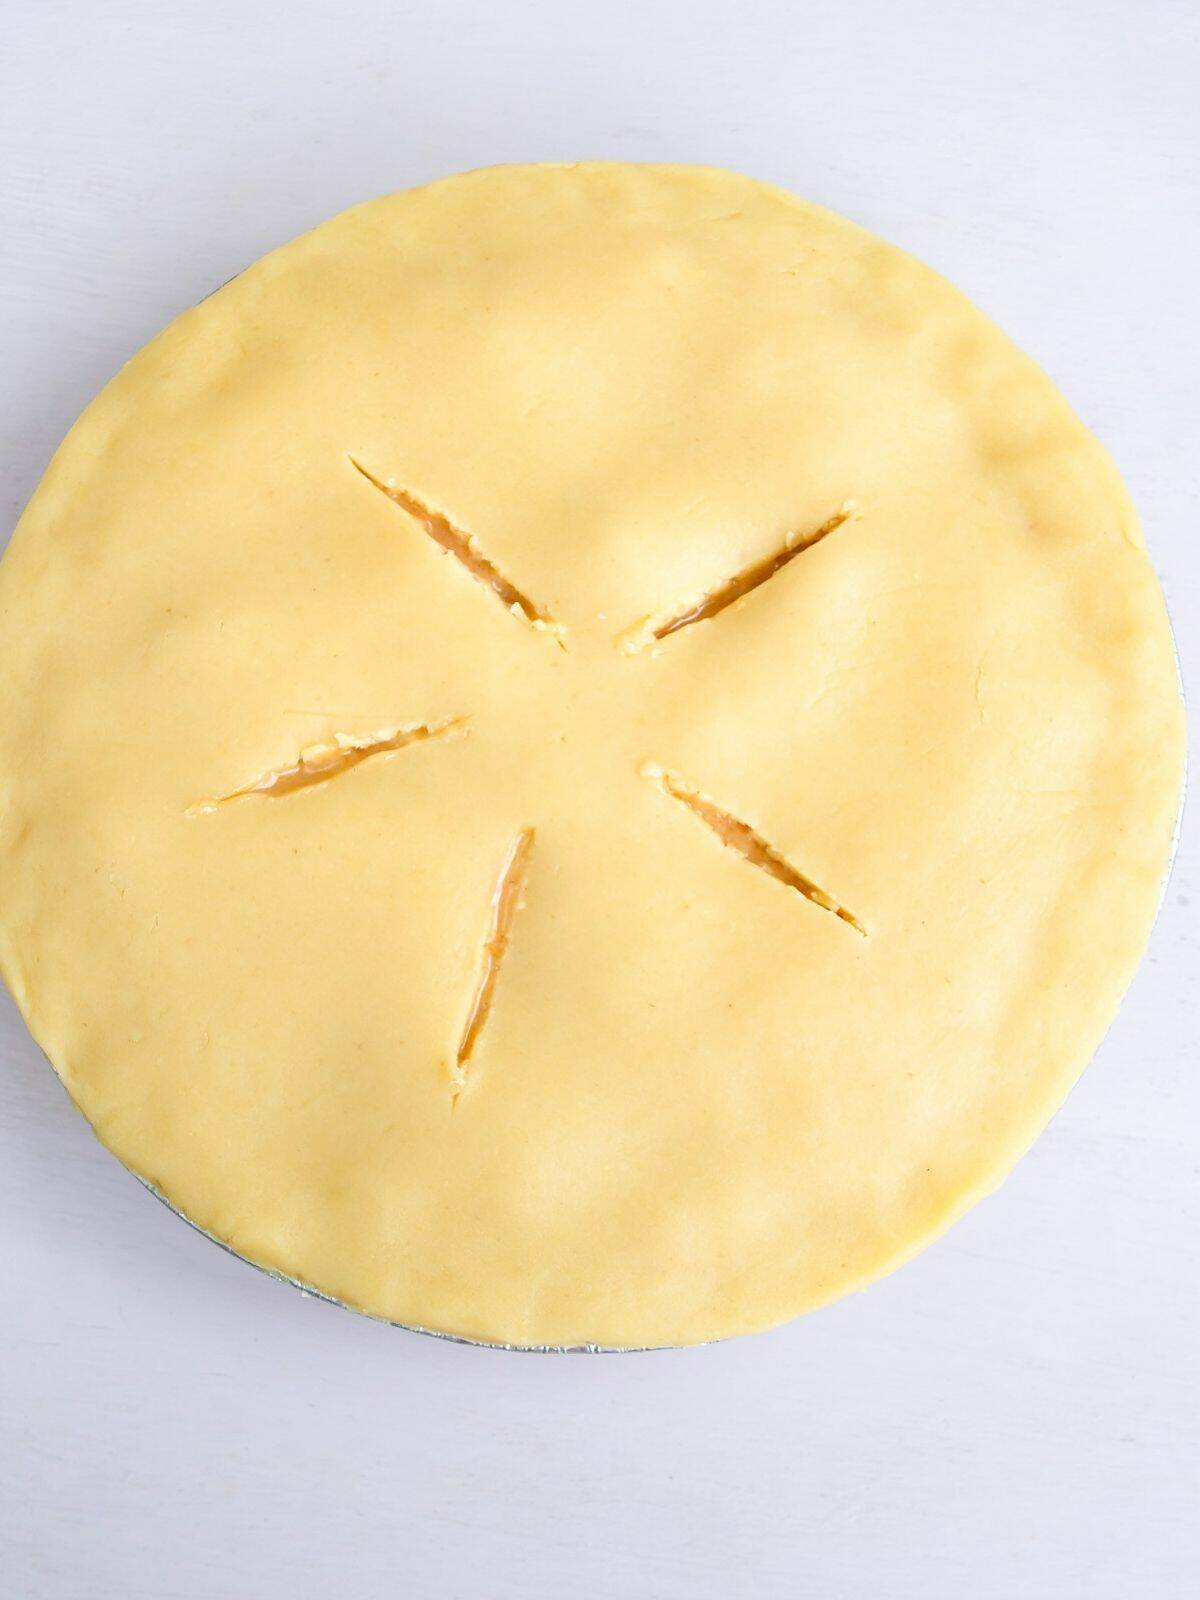
Step 5: Roll the remaining dough thinly (about ⅛ inch) and place over the chilled pie. Trim both crusts, leaving enough bottom crust to neatly fold over the top. Crimp to seal and slash a few vents with a sharp knife.
Step 6: After chilling the assembled pie for at least 30 minutes, brush the top with a mixture of egg and milk. Sprinkle with sugar and place on the prepared baking sheet.
Recipe Tip
Make sure you keep the pie dough cold before it goes into the oven.
Chilling homemade pie dough helps to solidify the fat in the dough, which will melt more slowly during baking and create a more tender, flaky and crispy crust.
Baking Instructions
Why is my peach pie runny?
A runny fruit pie is often caused by insufficient thickener, undercooked filling, or overly large fruit pieces.
To fix it, let the pie cool completely. Most of the time, fruit pies will thicken as they cool. For future pies, use enough thickener, make sure the fruit is ripe, and bake thoroughly.
If you find your fruit pies are repeatedly runny, consider pre-baking the bottom crust before adding the filling.
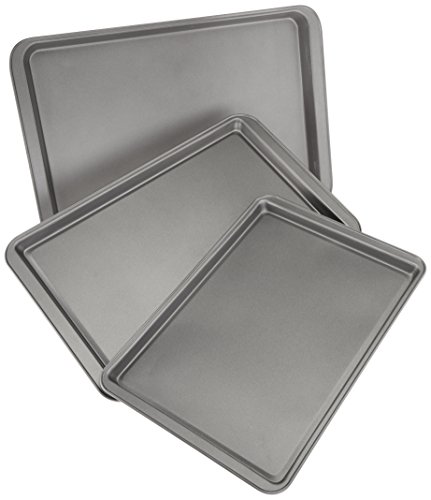
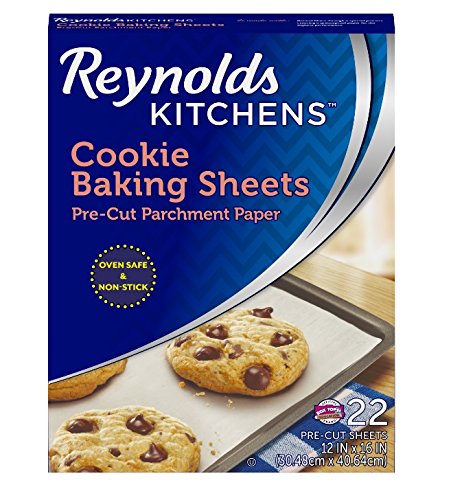
Step 7: Position the oven rack in the bottom third and line a baking sheet with parchment paper. Bake the pie for 45 minutes to an hour, or until the filling bubbles in the center. If the crust browns too quickly, loosely cover the entire pie with foil.
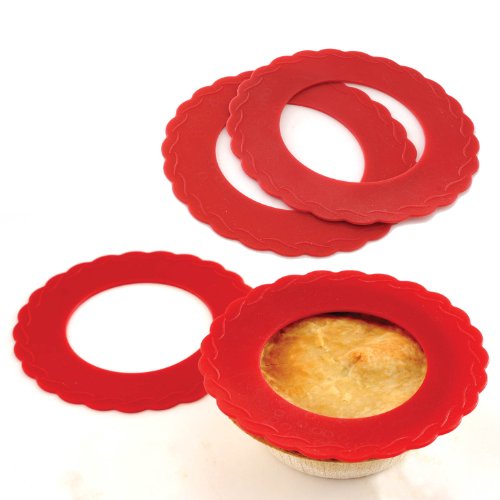
Refrigerator: Store the baked peach pie recipe in the refrigerator for up to 3 days. You can either cover it with aluminum foil but I personally love these Pie Carriers.
Freezer: Place the pie either baked or unbaked wrapped first in aluminum foil and then placed in an airtight container for up to 3 months.
Thawing: Allow the pie to thaw in the refrigerator the night before you want to serve it.
Reheating: If the pie was frozen unbaked, follow the baking instructions above. Reheat a baked defrosted pie in a preheated 350° F oven until warmed through.
5cupsslicedpeeled fresh peaches; about 5 to 6 medium sized peaches
1teaspoonlemon juice
1egg mixed with 1 tablespoon of milk for glaze
Cooking for More (or Less?)Scale this recipe up or down. Adjust the number of servings above to automatically update ingredient amounts.
Method
Preheat oven to 400 degrees F.
On a lightly floured surface, roll one half of the dough into a ⅛ inch thick circle large enough to fit into the bottom of a 9 inch pie plate. Transfer to the pie plate. Refrigerate while you prepare the filling.
In a large bowl, mix sugar, flour and cinnamon. Stir in the peaches and lemon juice.
Add the filling to the chilled pie crust and place back into the refrigerator to chill.
Roll out the remaining dough into a ⅛ inch thick circle. Transfer to the top of the chilled pie. Trim the edges of the top crust and the bottom crust, leaving enough bottom crust to cover the edge of the top crust neatly. Crimp the dough to seal the edges.
Slash vents in a few places using a sharp knife.
Chill the assembled pie in the refrigerator for at least 30 minutes.
Place the oven rack in the bottom third of the oven. Line a baking sheet with parchment paper or aluminum foil to catch any pie leakage.
Whisk together the egg and tablespoon of milk.
Remove the chilled pie from the refrigerator and brush the top with the egg-milk mixture. Sprinkle with white sugar then place the pie on the prepared baking sheet.
Bake the pie in the bottom third of the oven for about 45 minutes to an hour or until the filling is bubbling in the center.
This recipe has been updated since it first appeared in 2021 with new photos, information and a new printable recipe card that includes nutritional information. I hope you enjoy the updates as much as I enjoyed working on them!
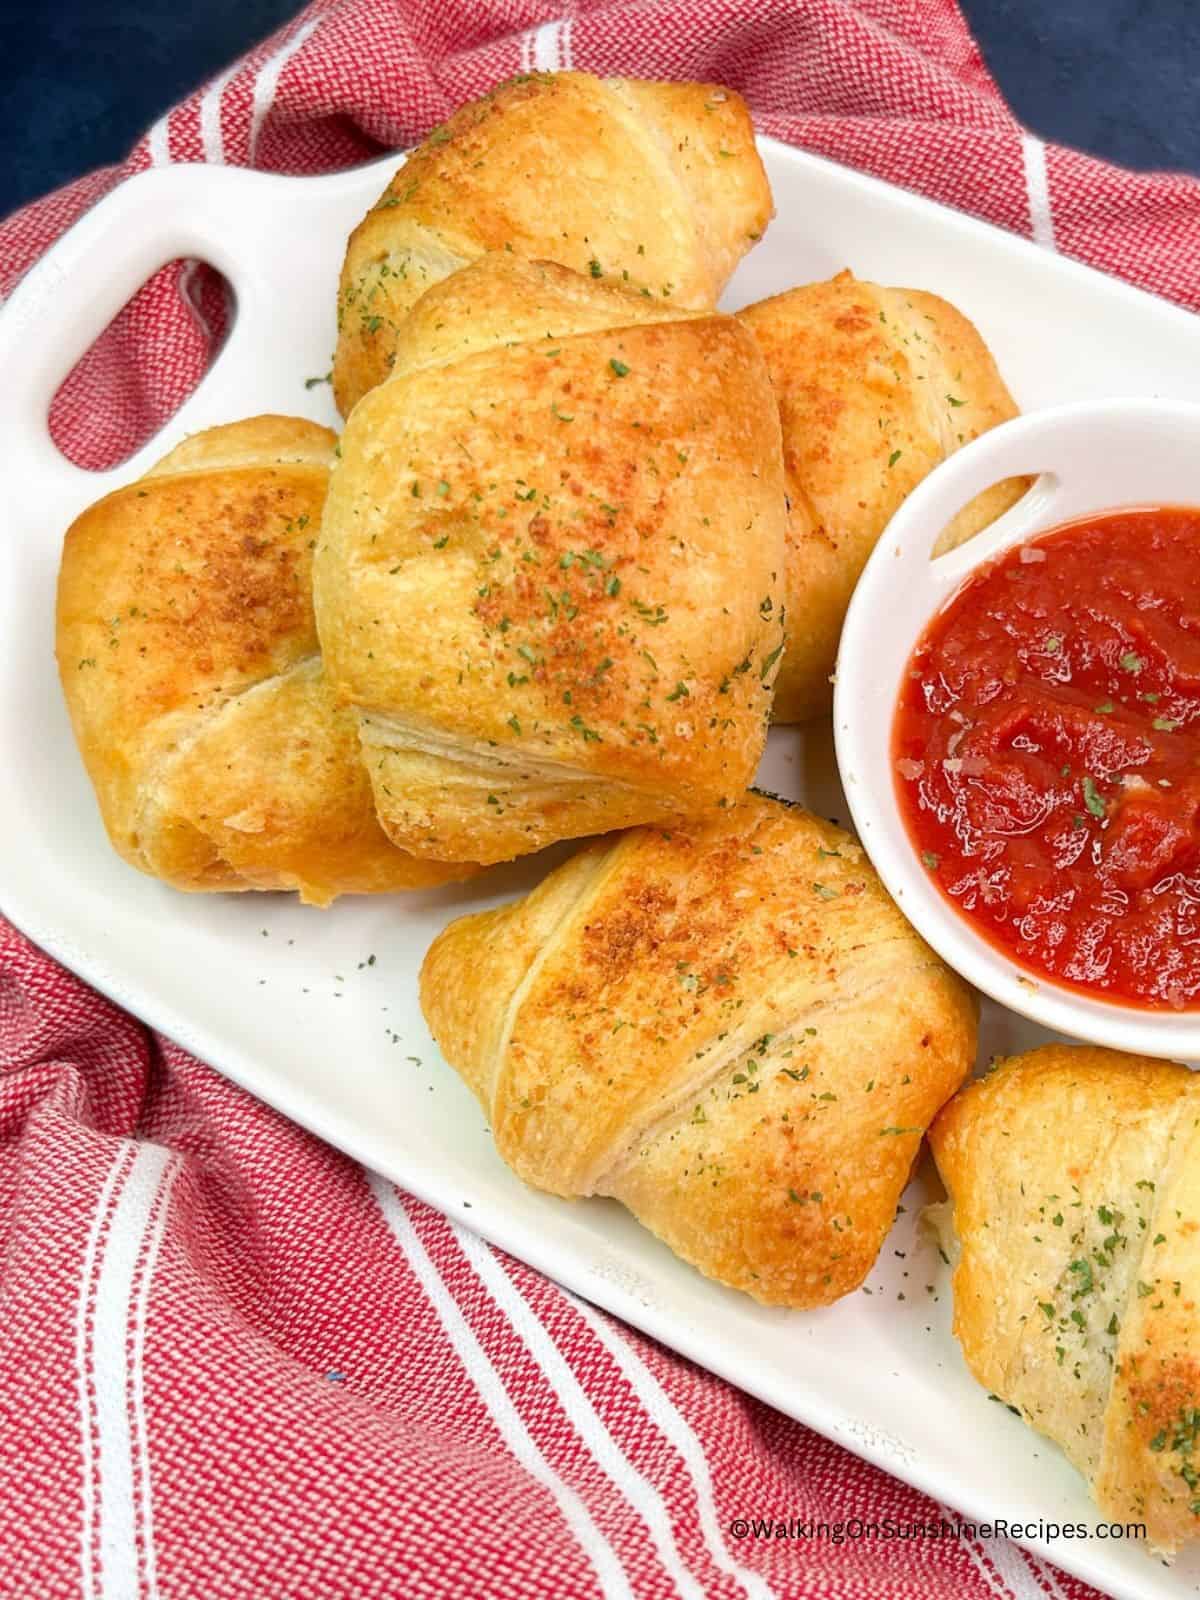
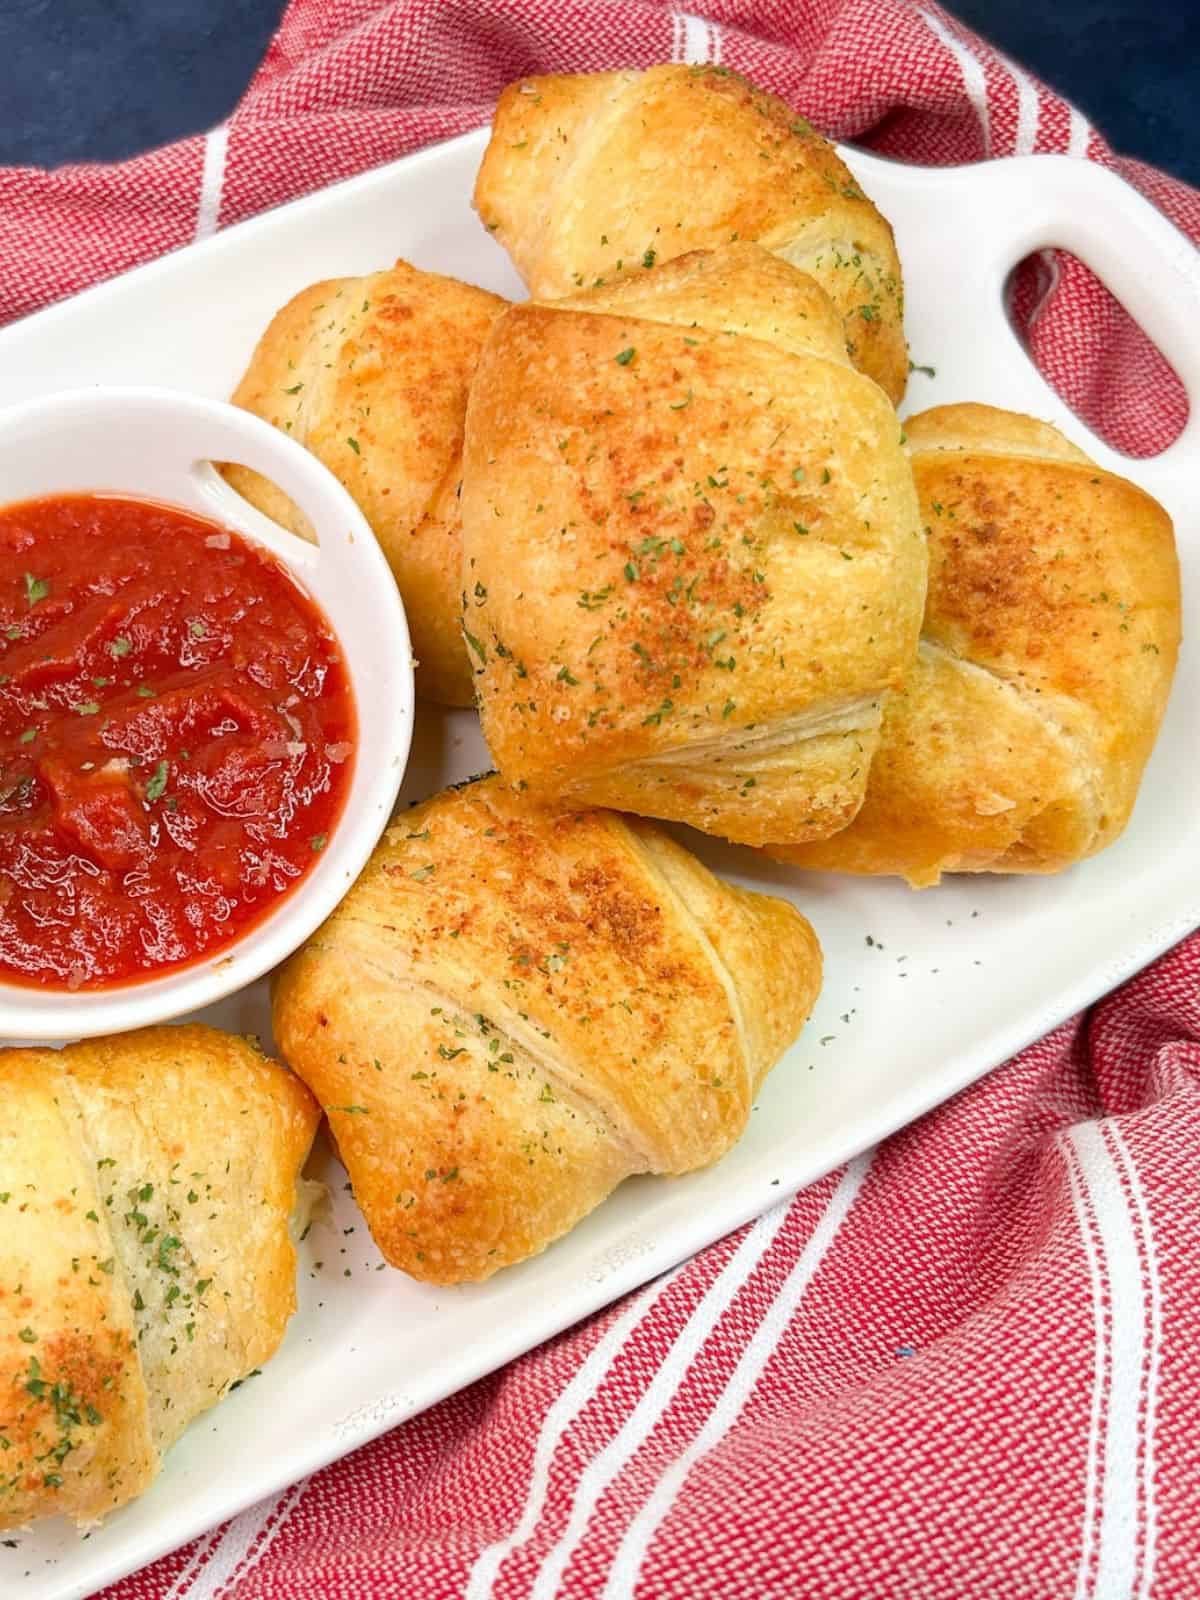
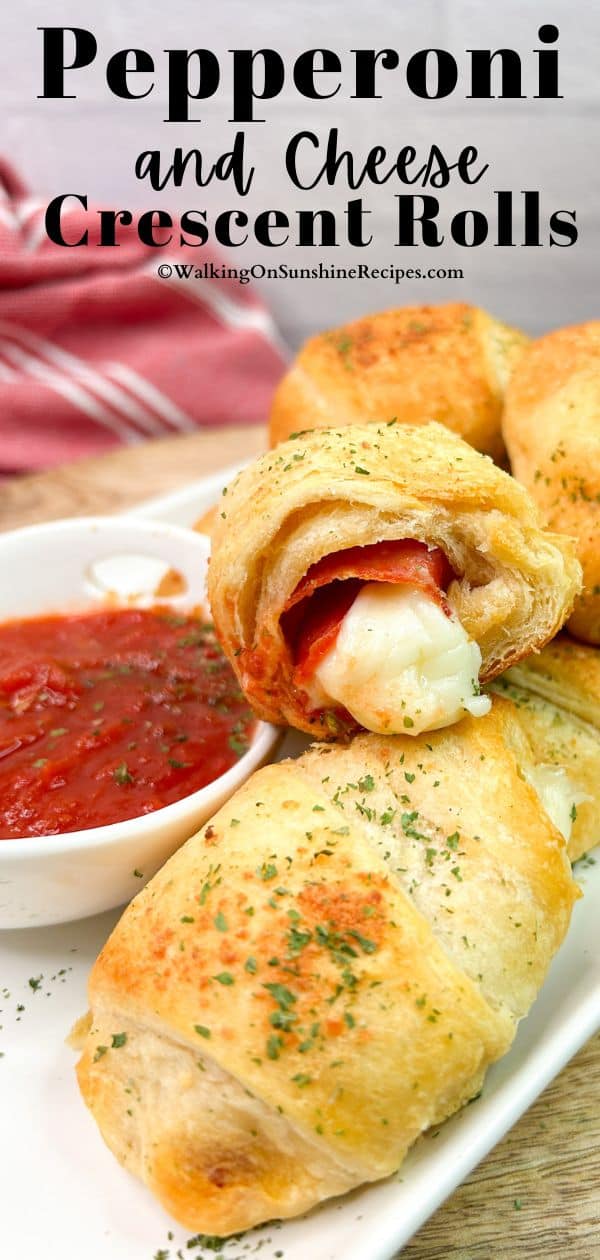
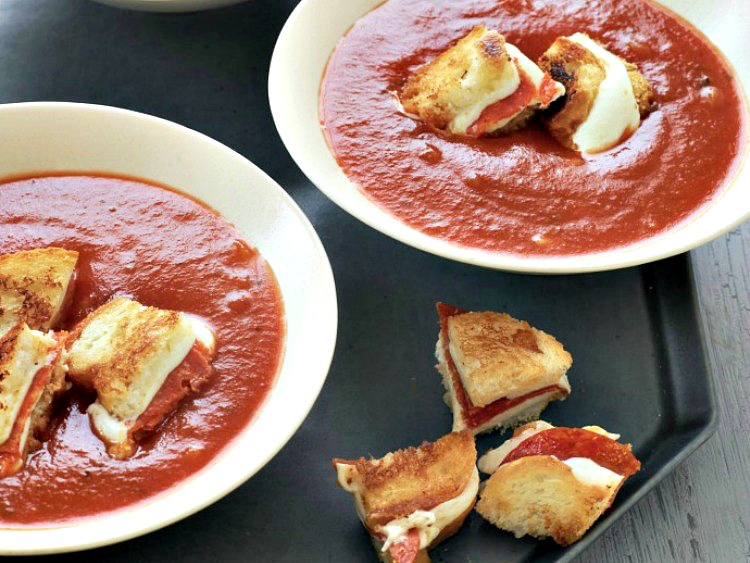
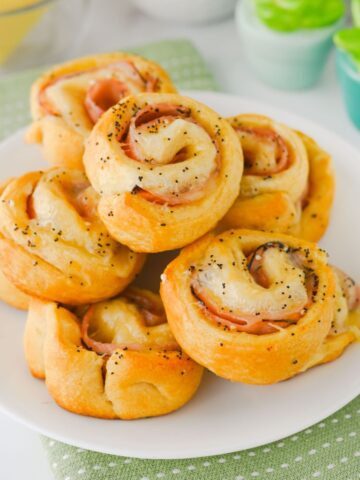
Looking for an easy yet delicious snack that everyone will love? Look no further than this easy recipe for Pepperoni Crescent Rolls!
Perfect as an appetizer, party food or afternoon snack, these yummy crescent rolls are packed with flavor and take just minutes to prepare.
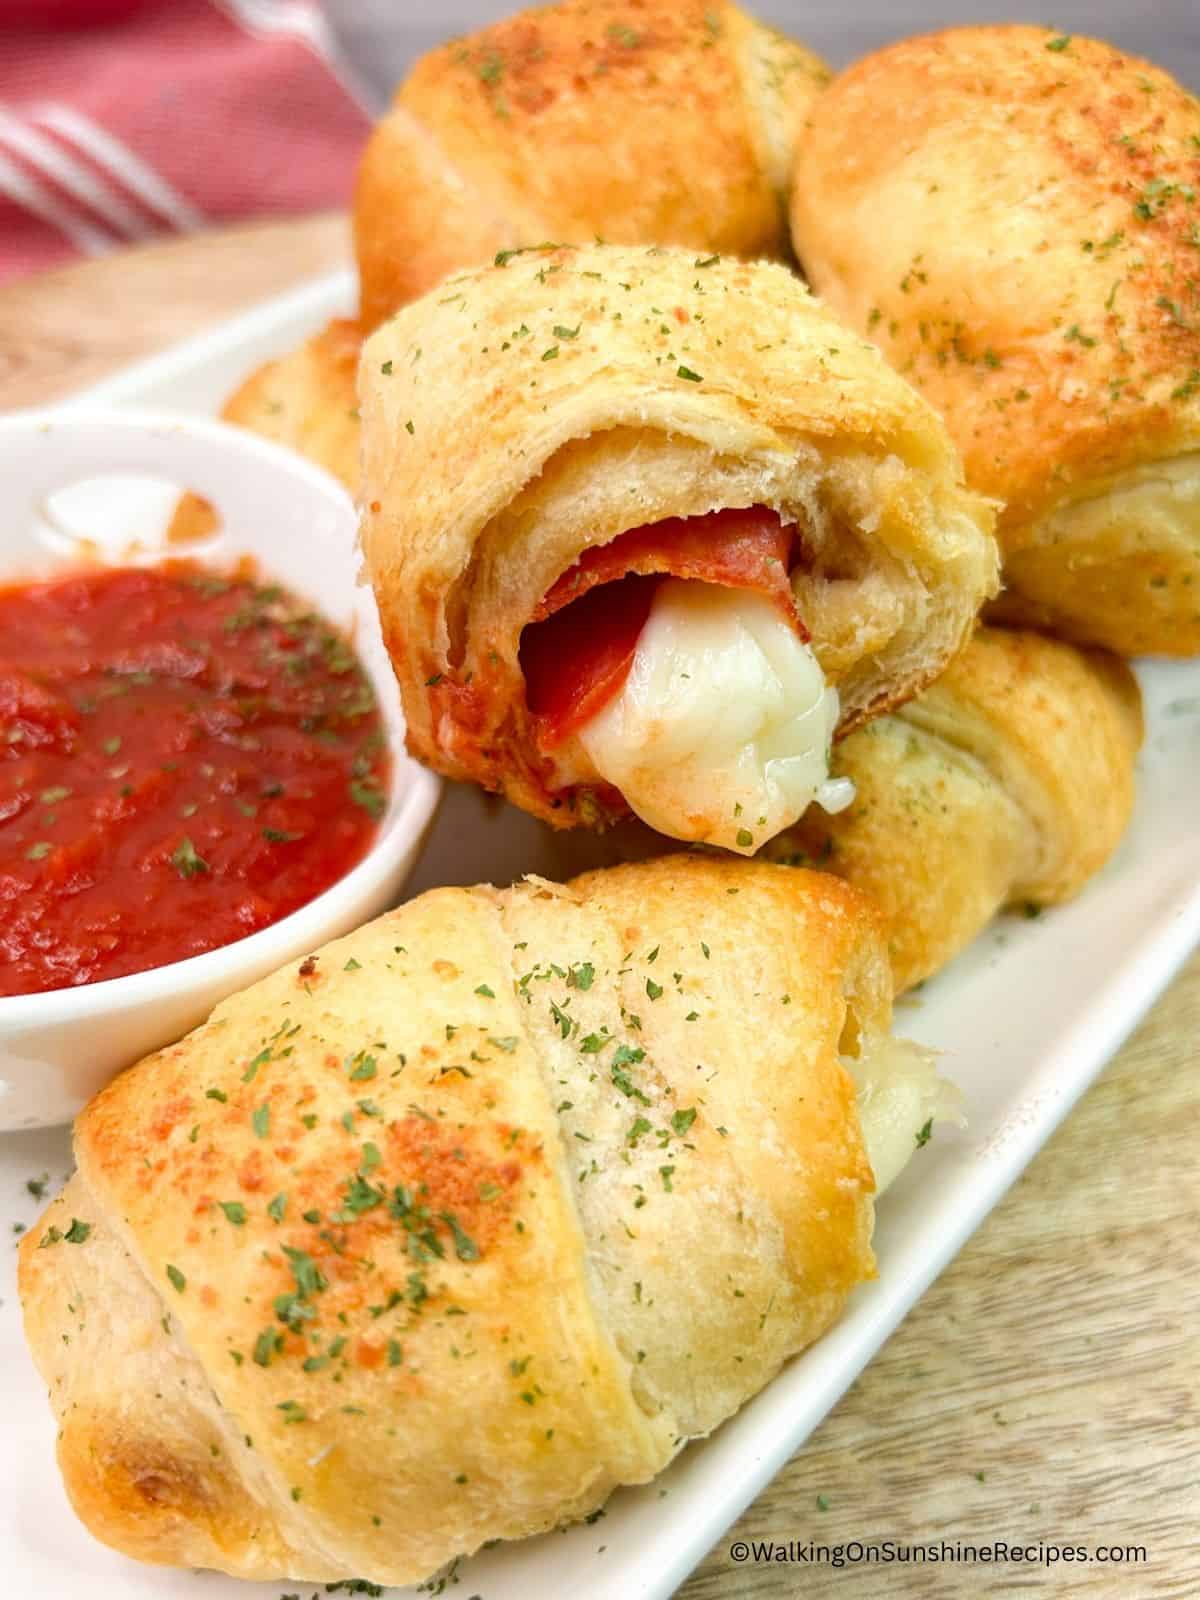
With a crispy, flaky crust, gooey melted mozzarella cheese, and zesty pepperoni, these savory rolls will quickly become a new family favorite.
Check out my list of other Crescent Roll Recipes for even more ideas of how to use this incredible refrigerated dough.
Whether you're planning a game day party or simply want a quick and easy lunch idea, Pepperoni Mozzarella Crescent Rolls are the perfect solution for busy days when you need to satisfy your cravings in a snap.
I always have a few cans of crescent roll dough in my refrigerator to use not only as a tasty side dish, but to easily make a quick snack or light meal using them.
No, crescent dough and pizza dough differ. Crescent dough, typically sold in tubes, is designed for light, flaky pastries like crescent rolls. It contains more butter or fat than pizza dough. Pizza dough, made with sugar and oil, has a sturdier structure designed for stretching and supporting toppings. While both are versatile, they're best used for their intended purposes.
Are Pillsbury crescent rolls just puff pastry?
Pillsbury crescent rolls and puff pastry aren't the same. Crescent rolls use a yeast-based dough for a softer texture. Puff pastry relies on layered butter and dough for its signature flakiness.
While they share some similarities, crescent rolls are a convenient alternative to the time-consuming process of making puff pastry from scratch.
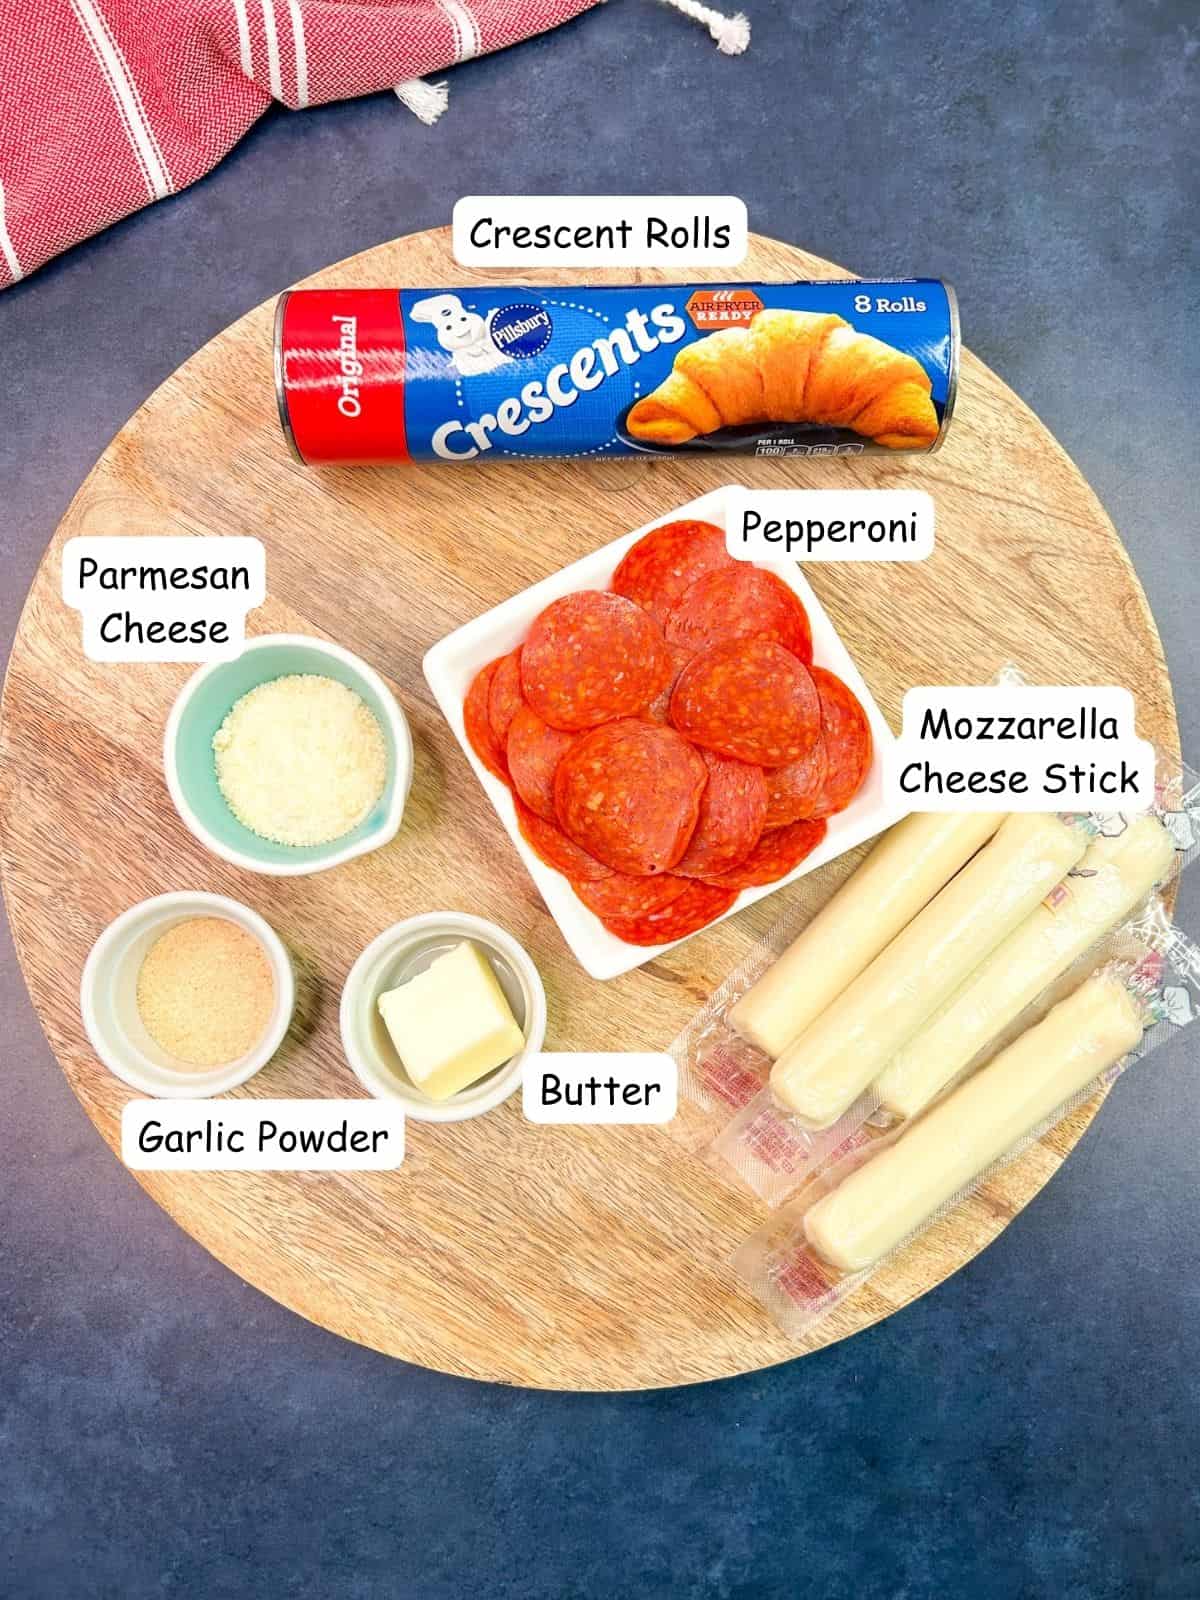
Below is a quick preview of the ingredients you’ll need. For exact amounts, check the recipe card below. You can also use the "Shopping List button" to create a printable shopping list, or the "Get Ingredients button" in the recipe card to order groceries online.
Recipe Variations
Cheese Sticks - I like to use cheese sticks because grated cheese melts faster and has a tendency to leak out of the crescent rolls as they bake.
If you want more flavor, spread a thin layer of my homemade garlic butter down first on top of the dough.
Not a fan of pepperoni? Try thin sliced ham!
If you don't want the added calories from the melted butter, you can brush an beaten egg white on top of the crescent rolls before sprinkling with the Parmesan cheese and garlic salt.
Step-by-Step Instructions
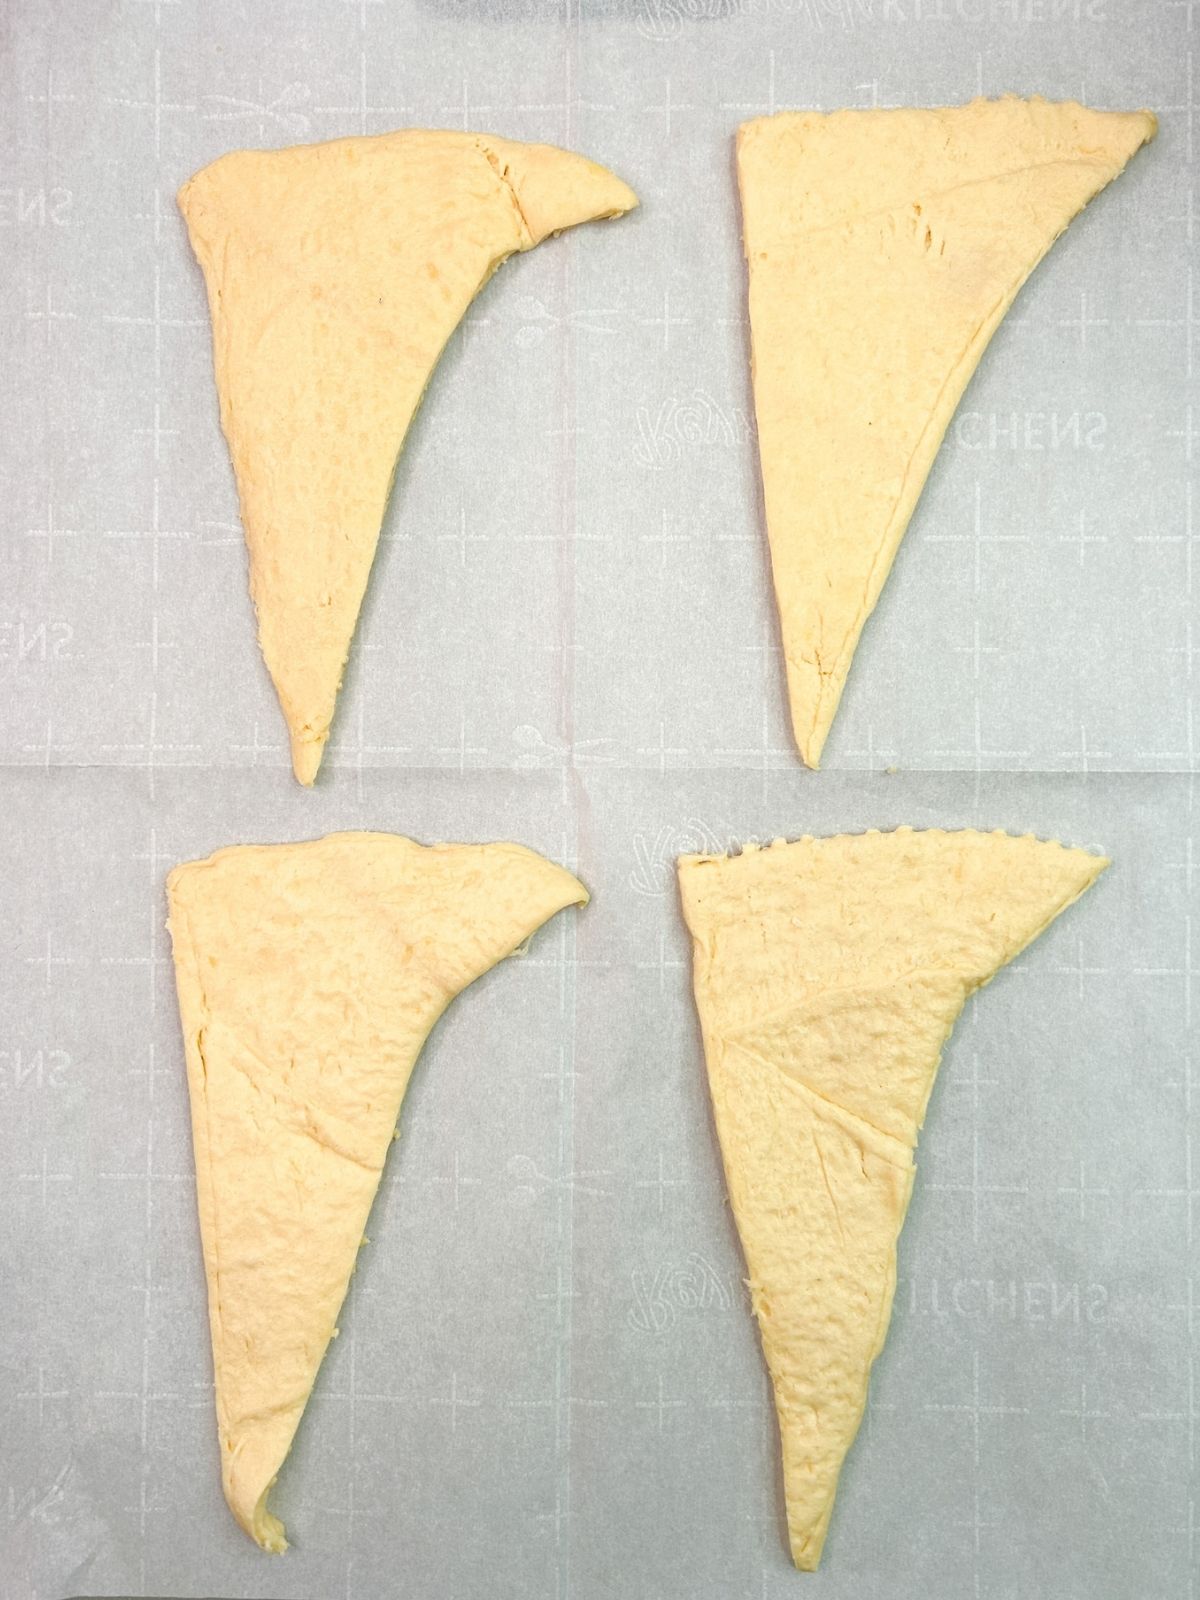
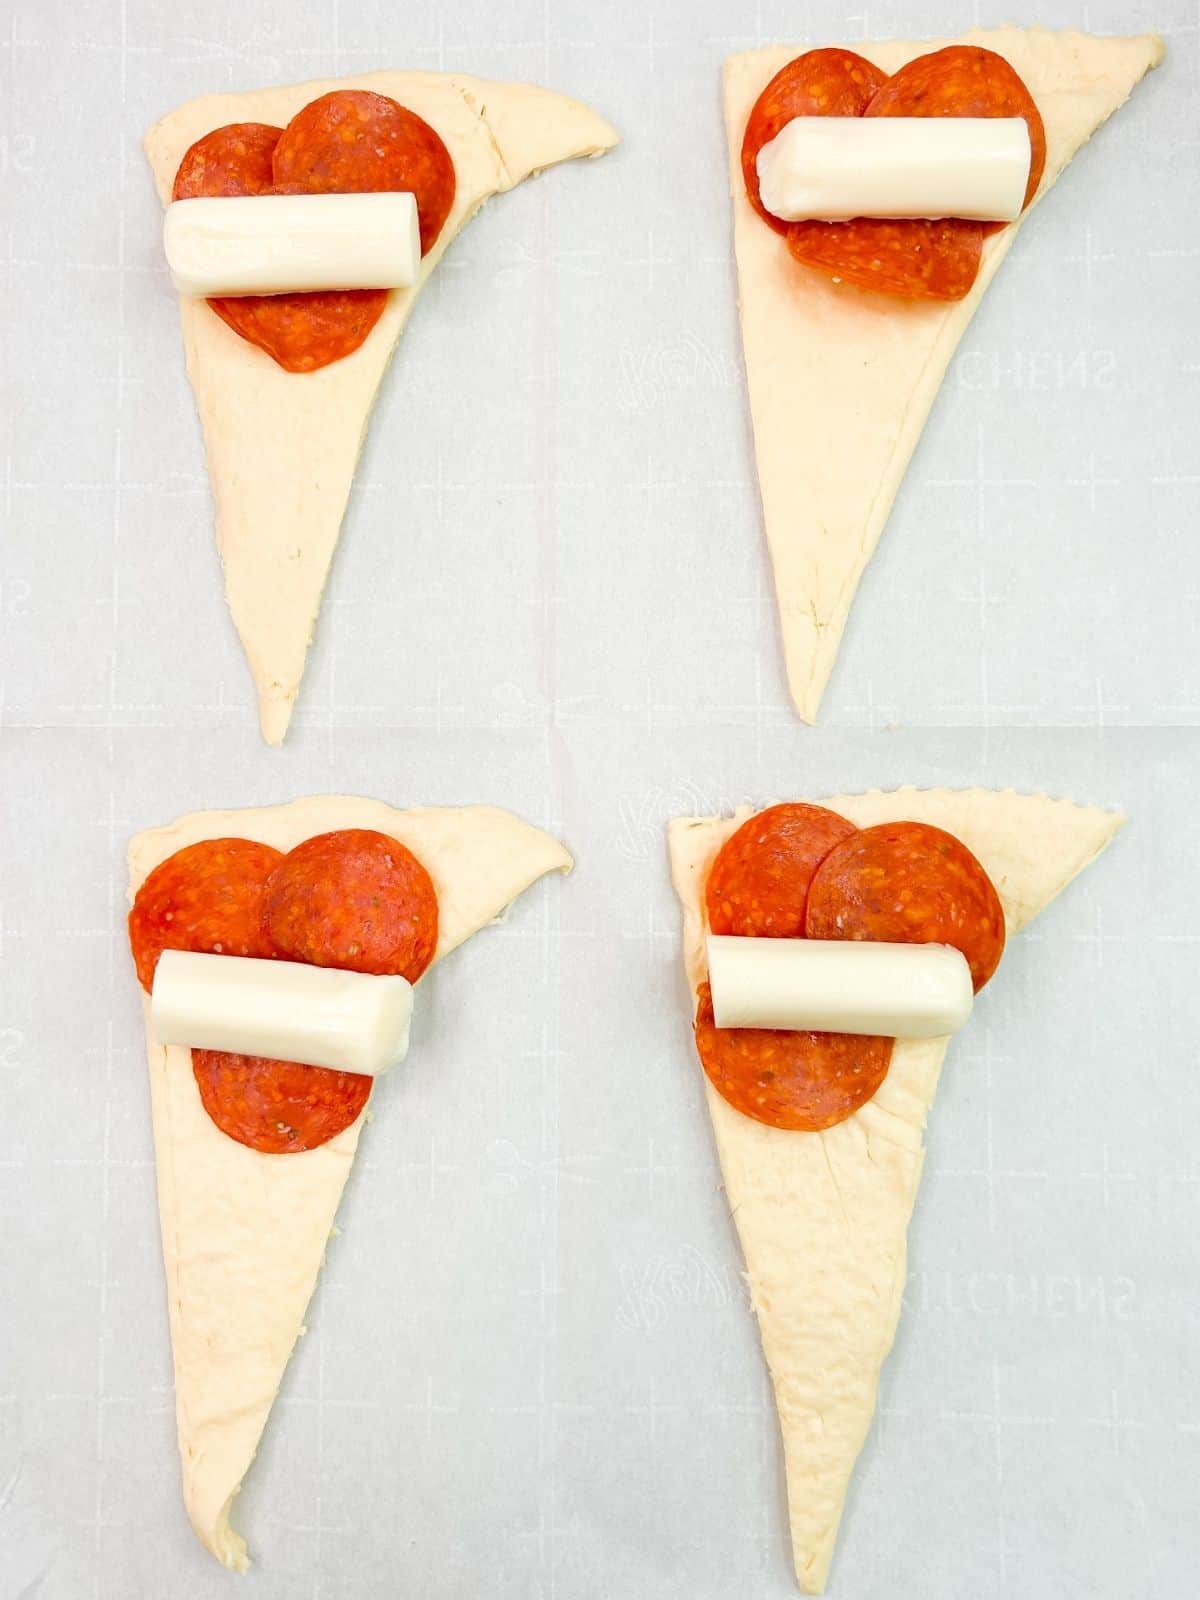
Step 1: Open the can of crescent roll dough. Carefully separate the dough into eight individual triangles.
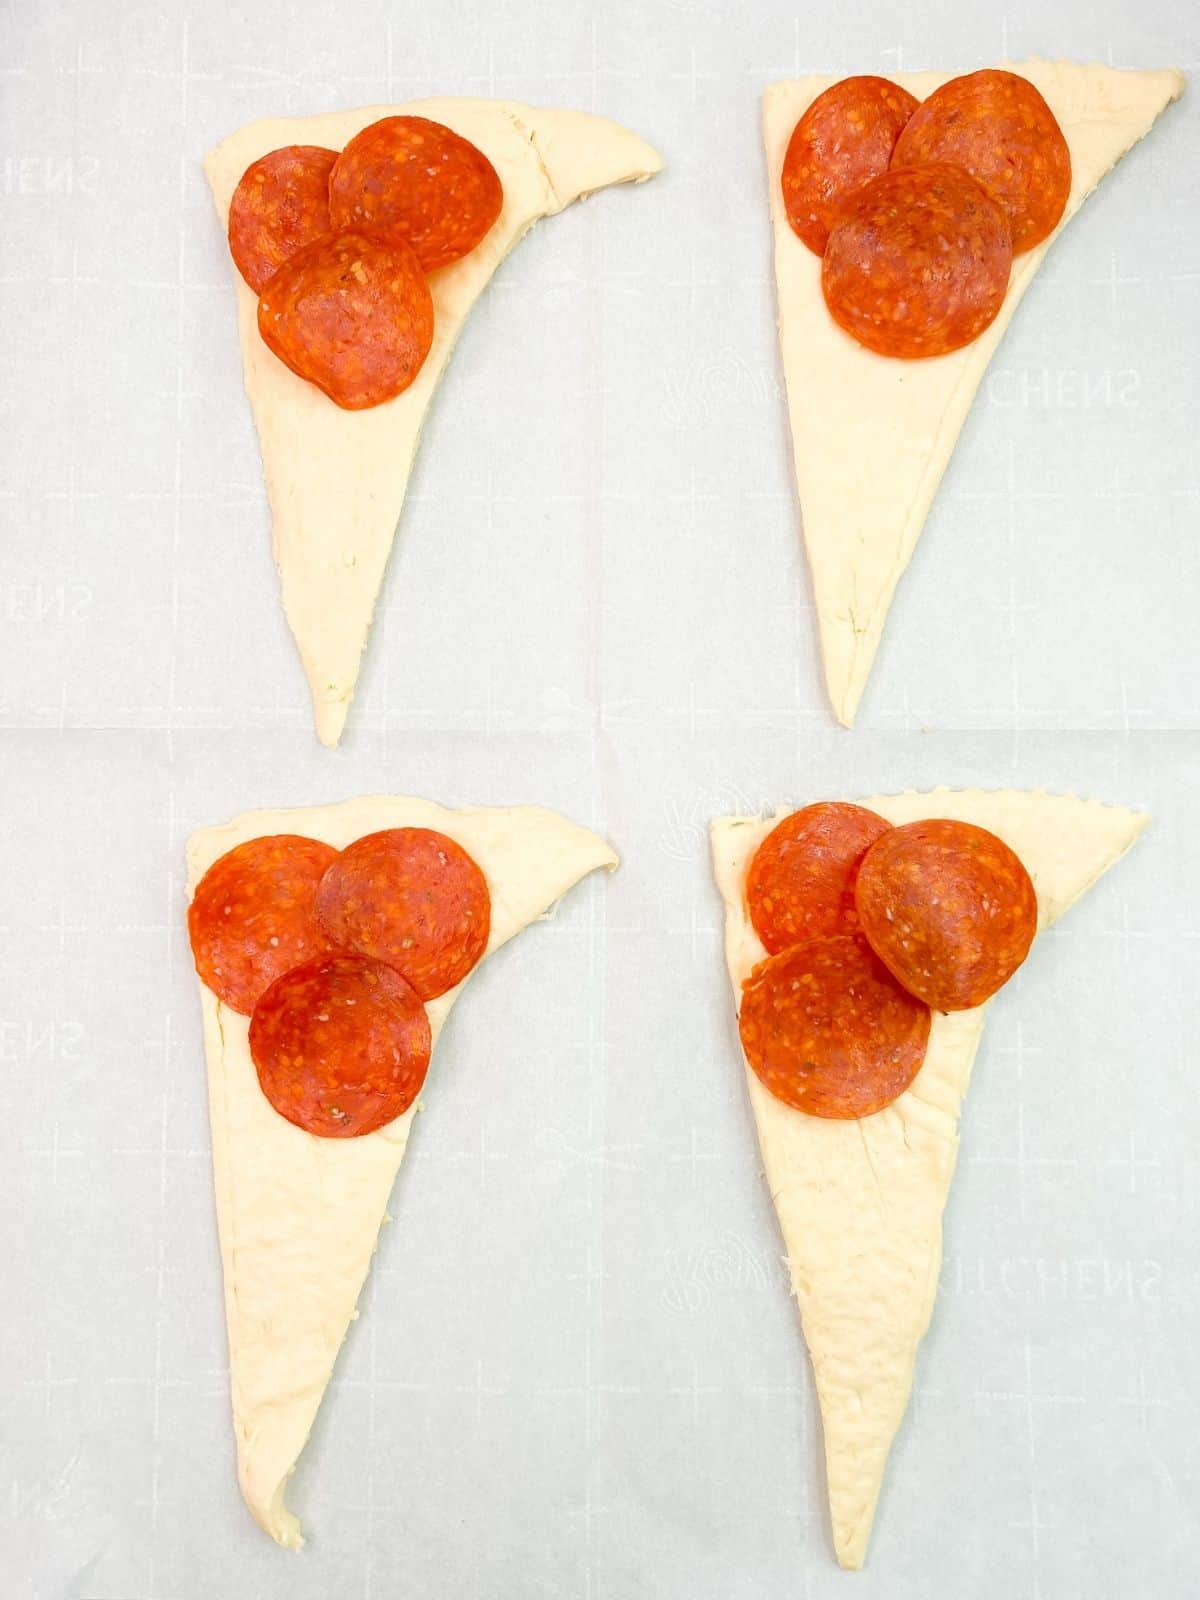
Step 2: Place the pepperoni slices over the dough, overlapping them slightly if needed.
Step 3: Break the cheese stick in half and position the pieces on top of the pepperoni. Tuck in any corners of the cheese stick or pepperoni that hang over the edge of the dough.
Quick Tip
If you find the crescent roll dough is sticking together, sprinkle a little flour on the surface before separating them.
How to Roll Up Crescent Rolls
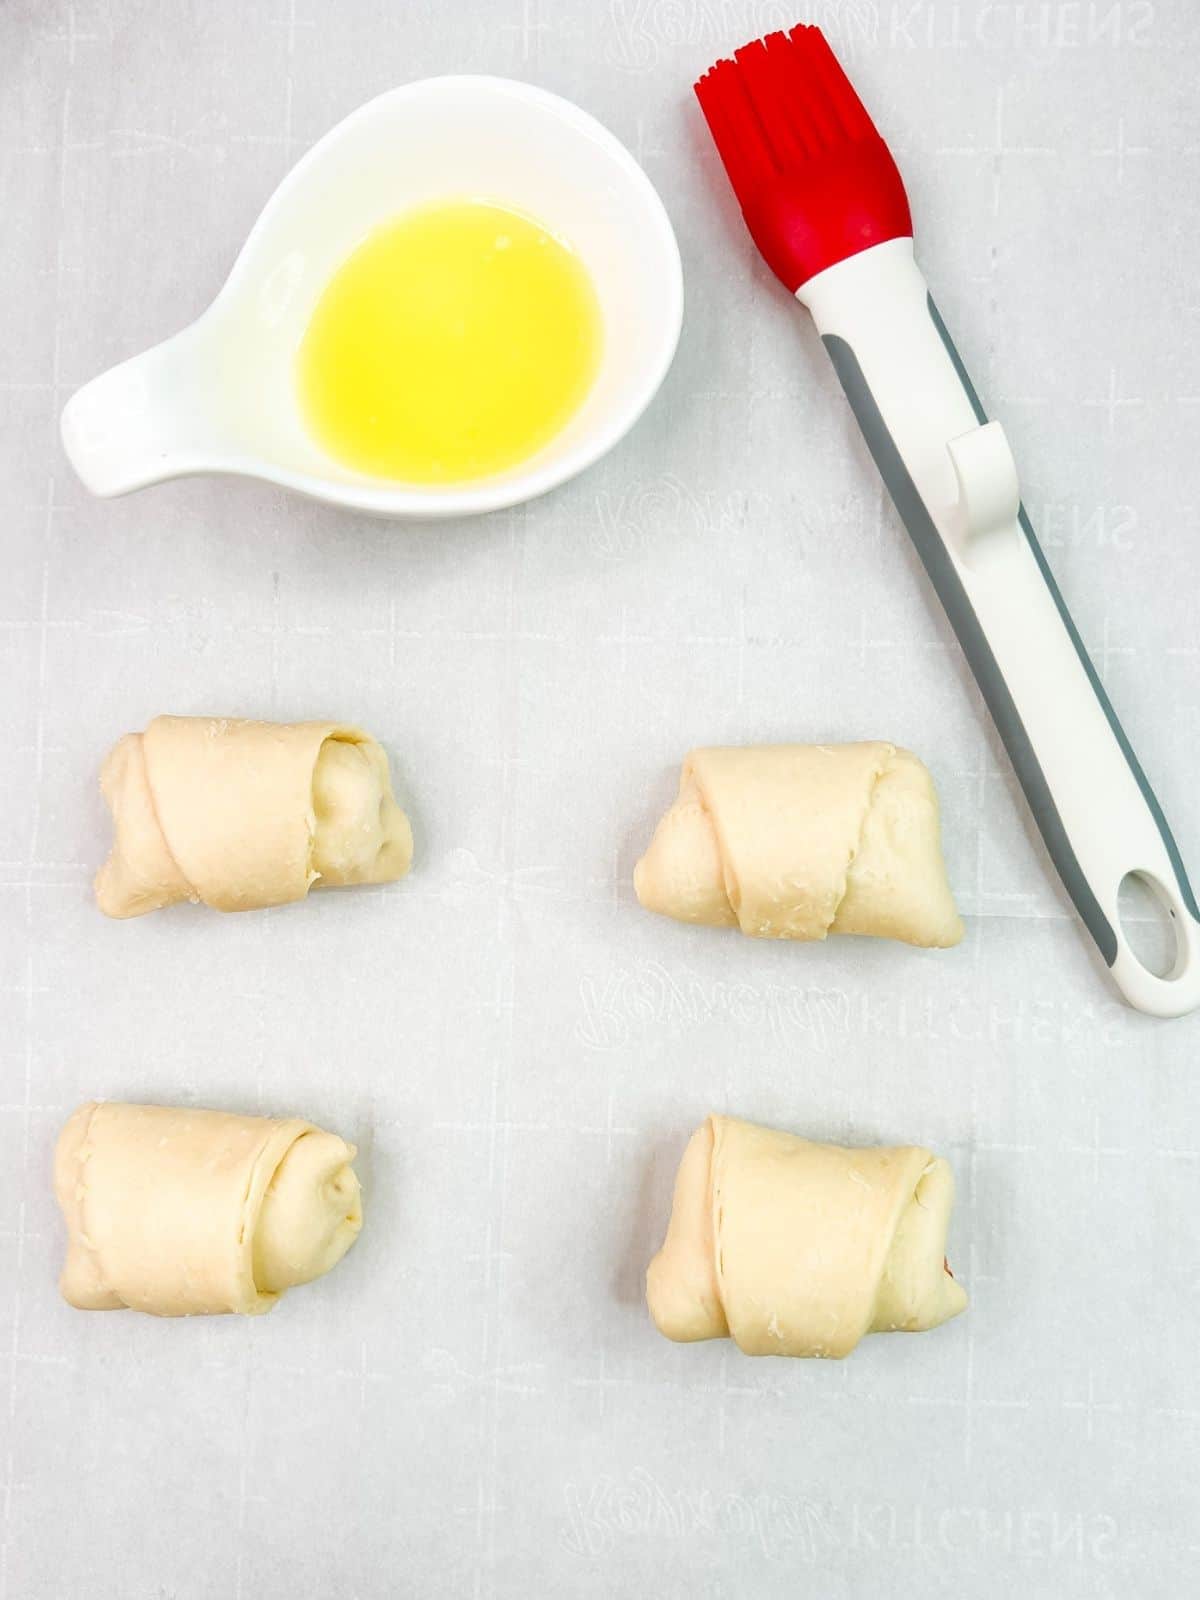
Step 4: Starting at the widest end, roll up the crescent rolls, tucking the ends under to seal. Then place them on a baking sheet that's been lined with parchment paper.
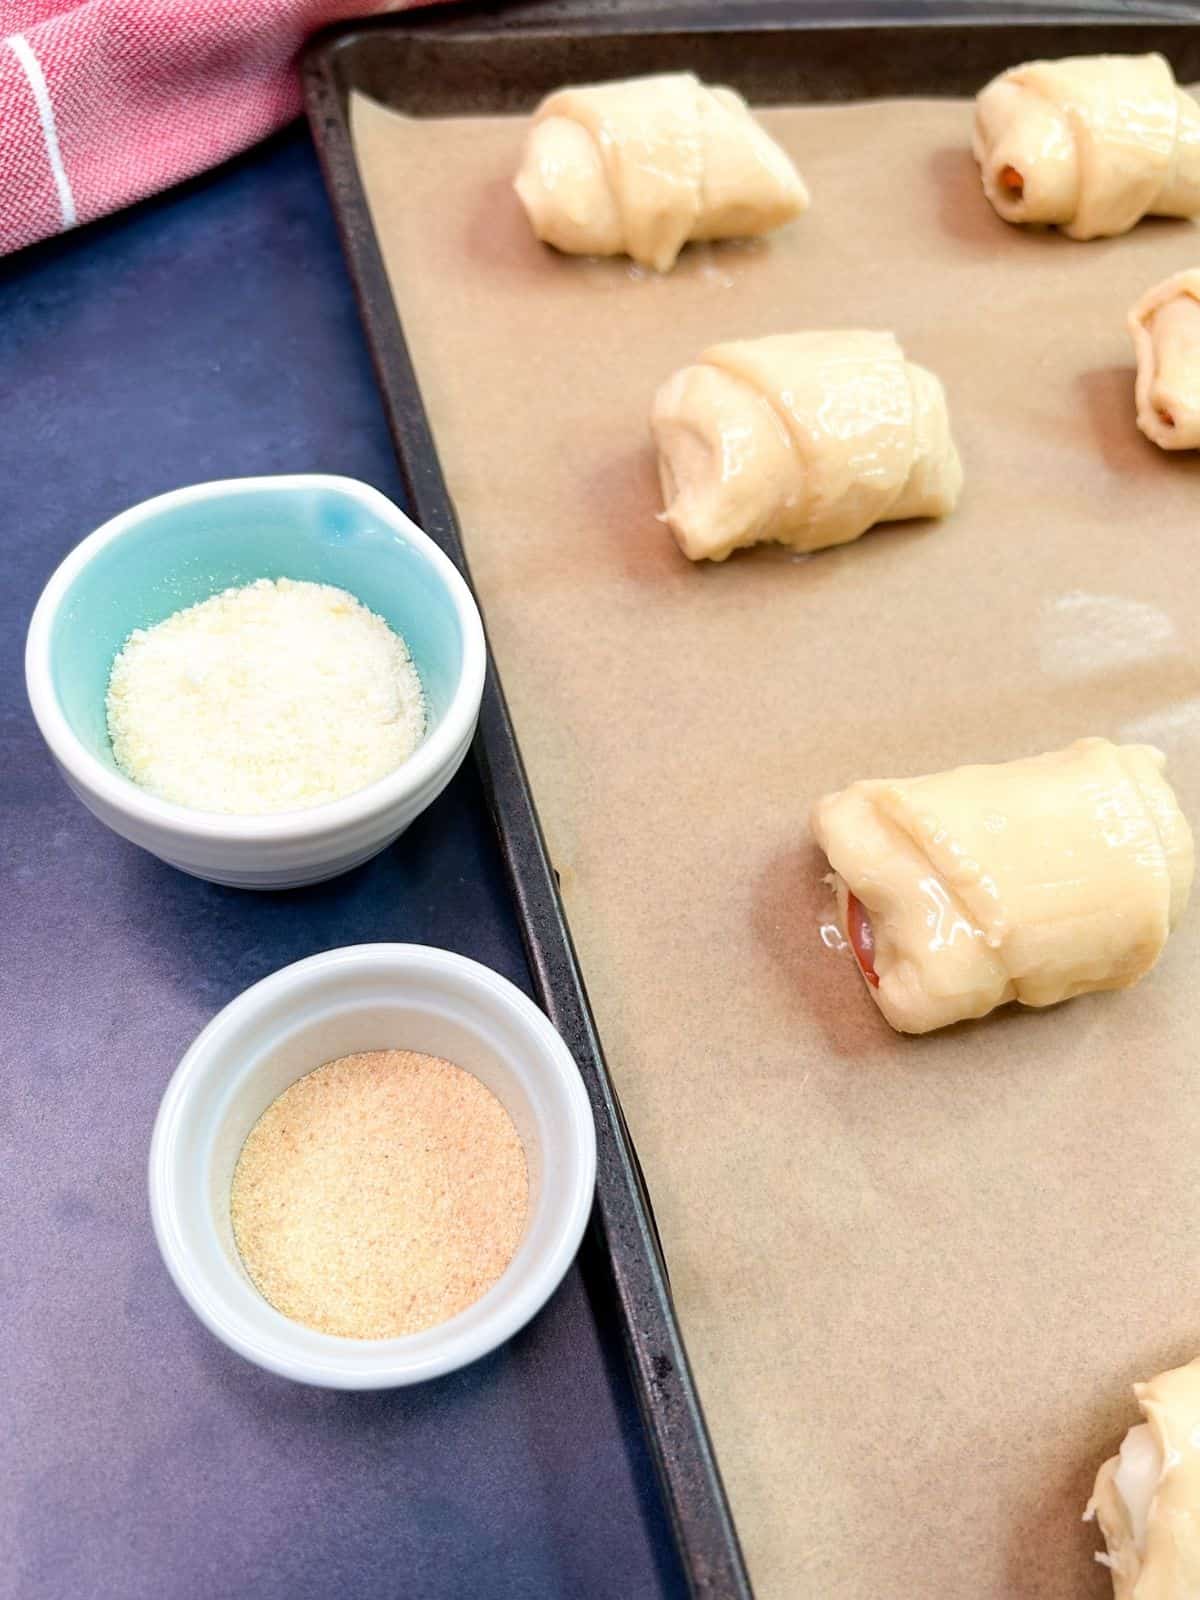
Step 5: Brush with the melted butter and sprinkle with the Parmesan cheese and garlic powder.
Baking Instructions
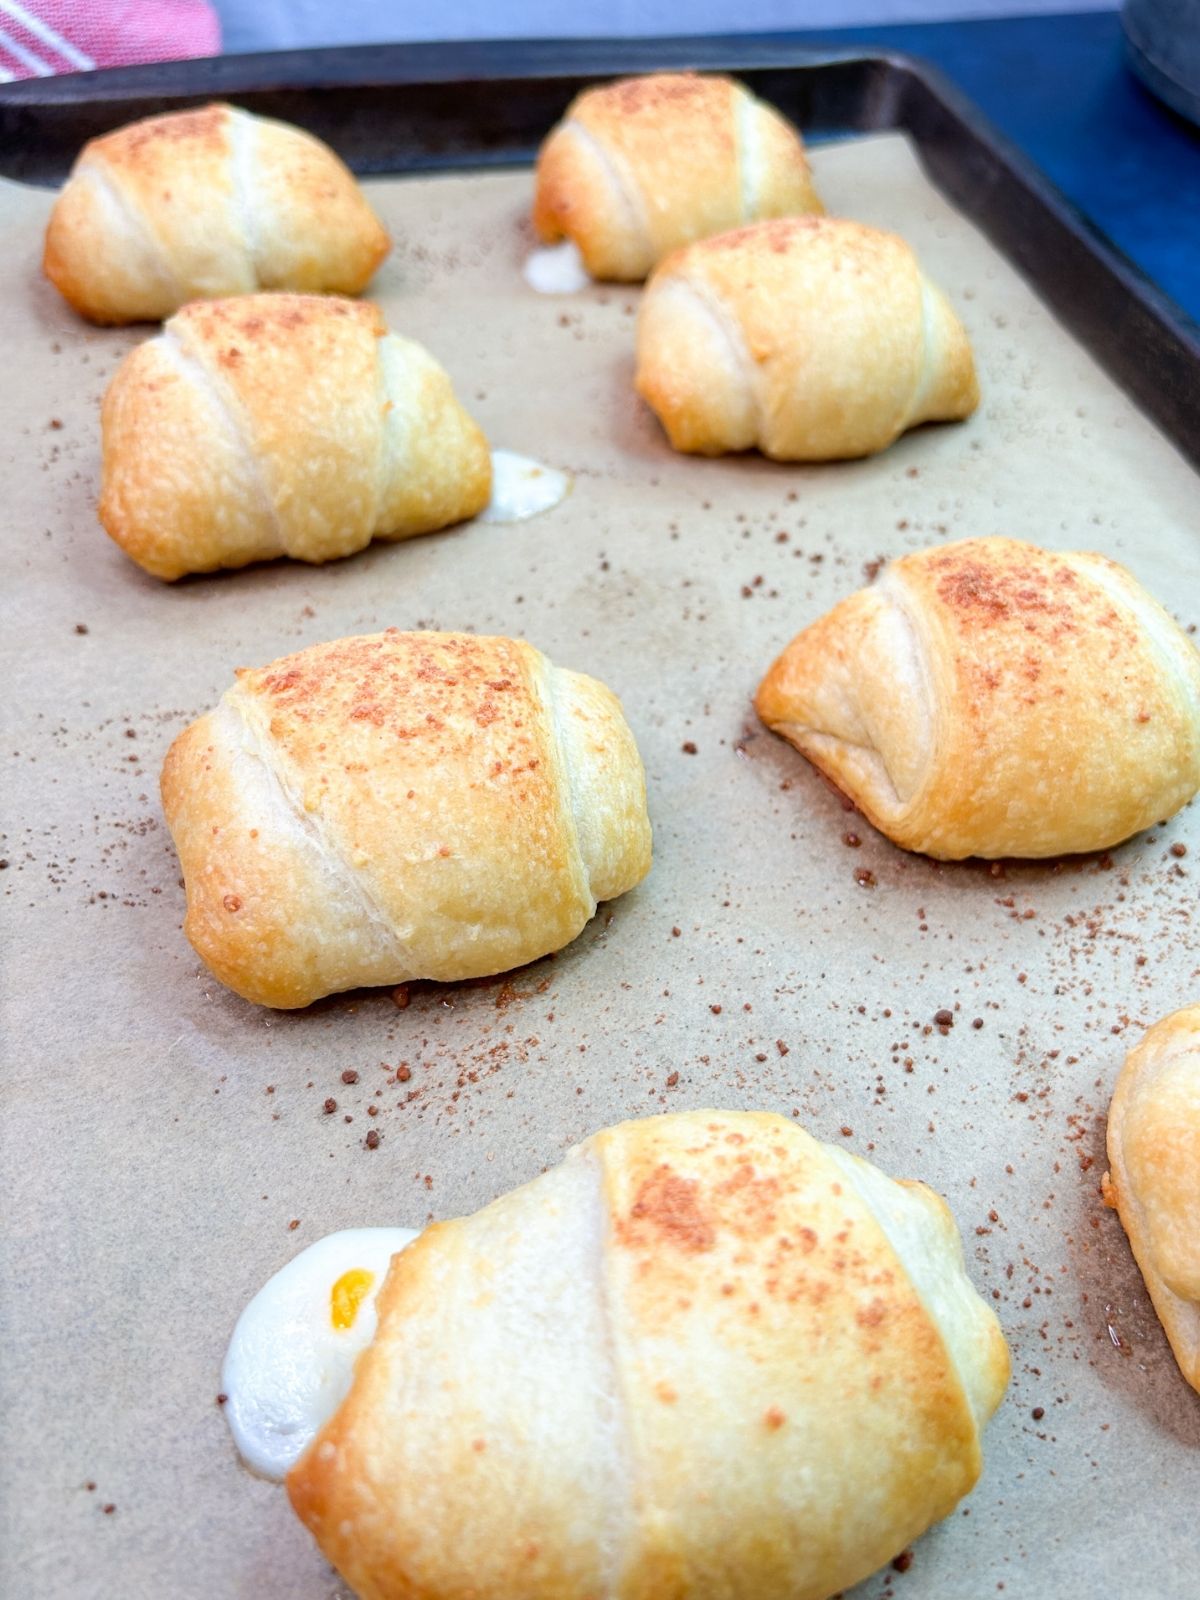
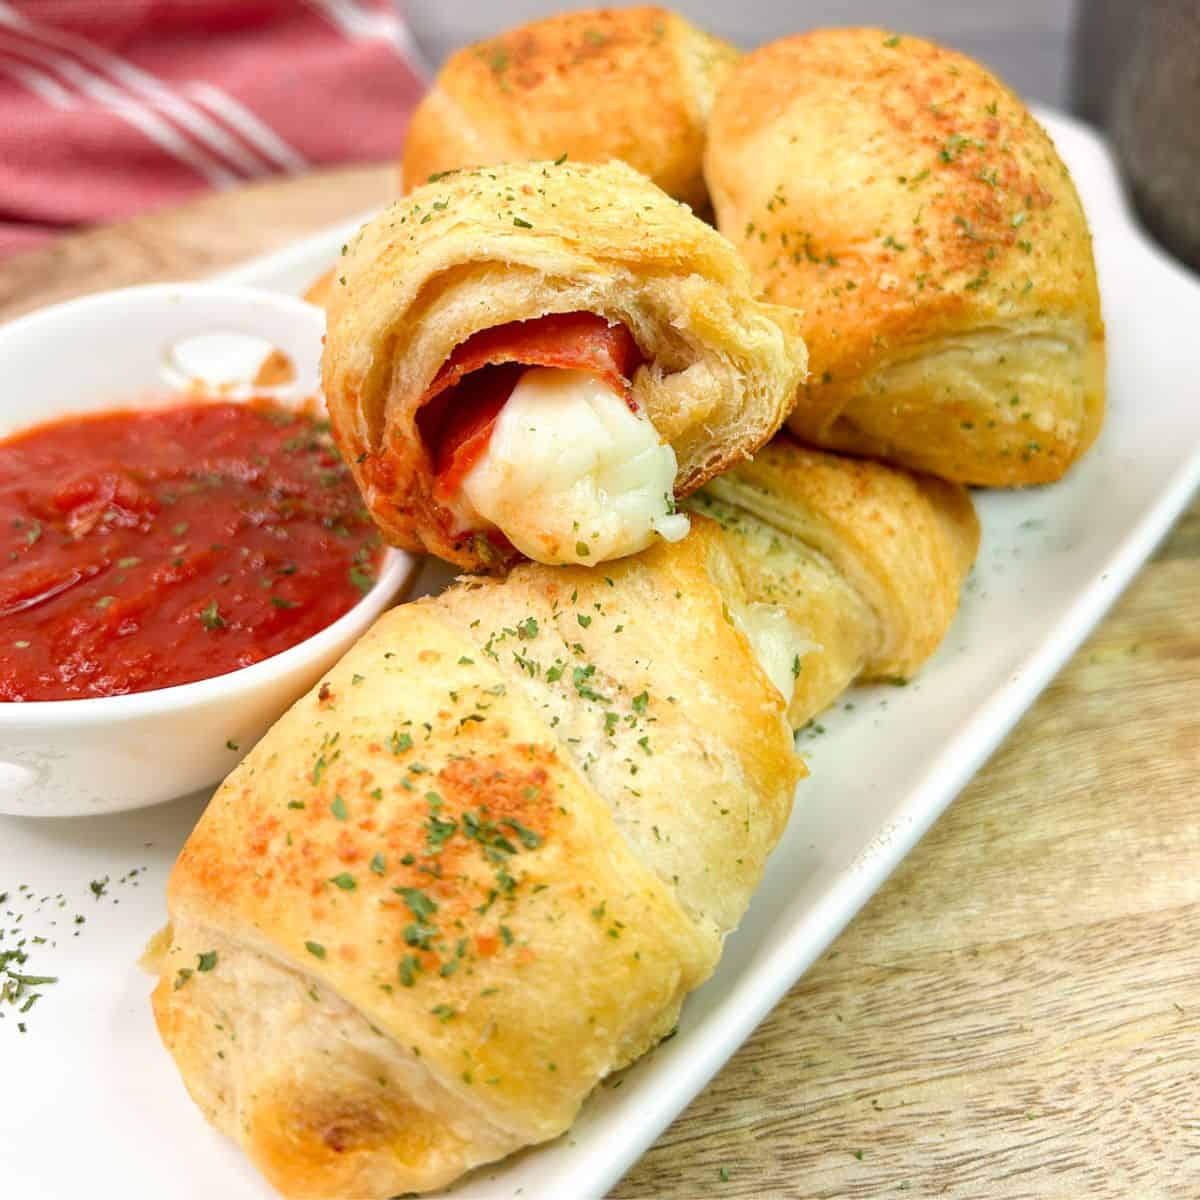
Step 6: Bake in the preheated 375°F oven for 12 - 14 minutes or until lightly golden brown.
Serving Tips
Serve these crescent rolls warm from the oven with plenty of marinara sauce on the side for dipping. Either of my Pizza Dipping Sauces would be delicious as well!
LOVE this recipe? SAVE it for Later!
❤️Tap the heart icon in the lower right corner to add the recipe to your recipe box for easy access anytime.
If you made it, leaving a star rating or quick review is always appreciated and helps other readers too.
Refrigerator: Once the rolls have cooled to room temperature, wrap them tightly in plastic wrap or aluminum foil. Store in an airtight container or resealable plastic bag and keep them in the refrigerator for up to 3 days.
Freezer: Flash freeze leftover stuffed crescent rolls first on a baking tray in the freezer. Then remove and place in either a freezer-safe plastic bag or an airtight container. Store them in the freezer for up to 1 month.
Thawing and Reheating: Easily reheat any leftover stuffed crescent rolls in the microwave by simply placing a damp paper towel over the rolls and cook on high for about 10-20 seconds, or until the rolls are warm. Remove from the microwave and let them cool for a few minutes before serving.
Air Frying Tips
You can also use the air fryer to reheat crescent rolls for 2-3 minutes or until the crescent rolls are crispy and warm. Remove from the air fryer and let them cool for a few minutes before serving.
Nutritional estimates are provided using an online calculator and is an estimate per serving. Calorie accuracy isn't guaranteed.
Tried this recipe?Leave a comment and star rating!
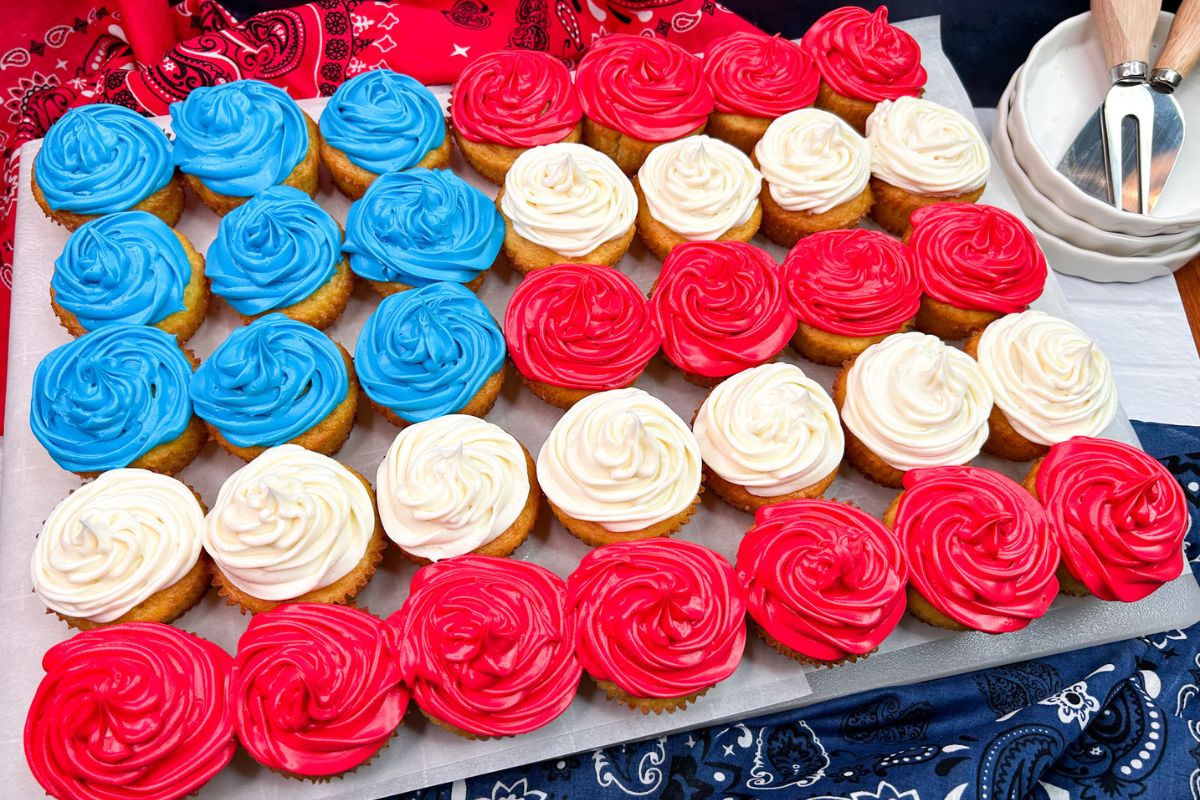
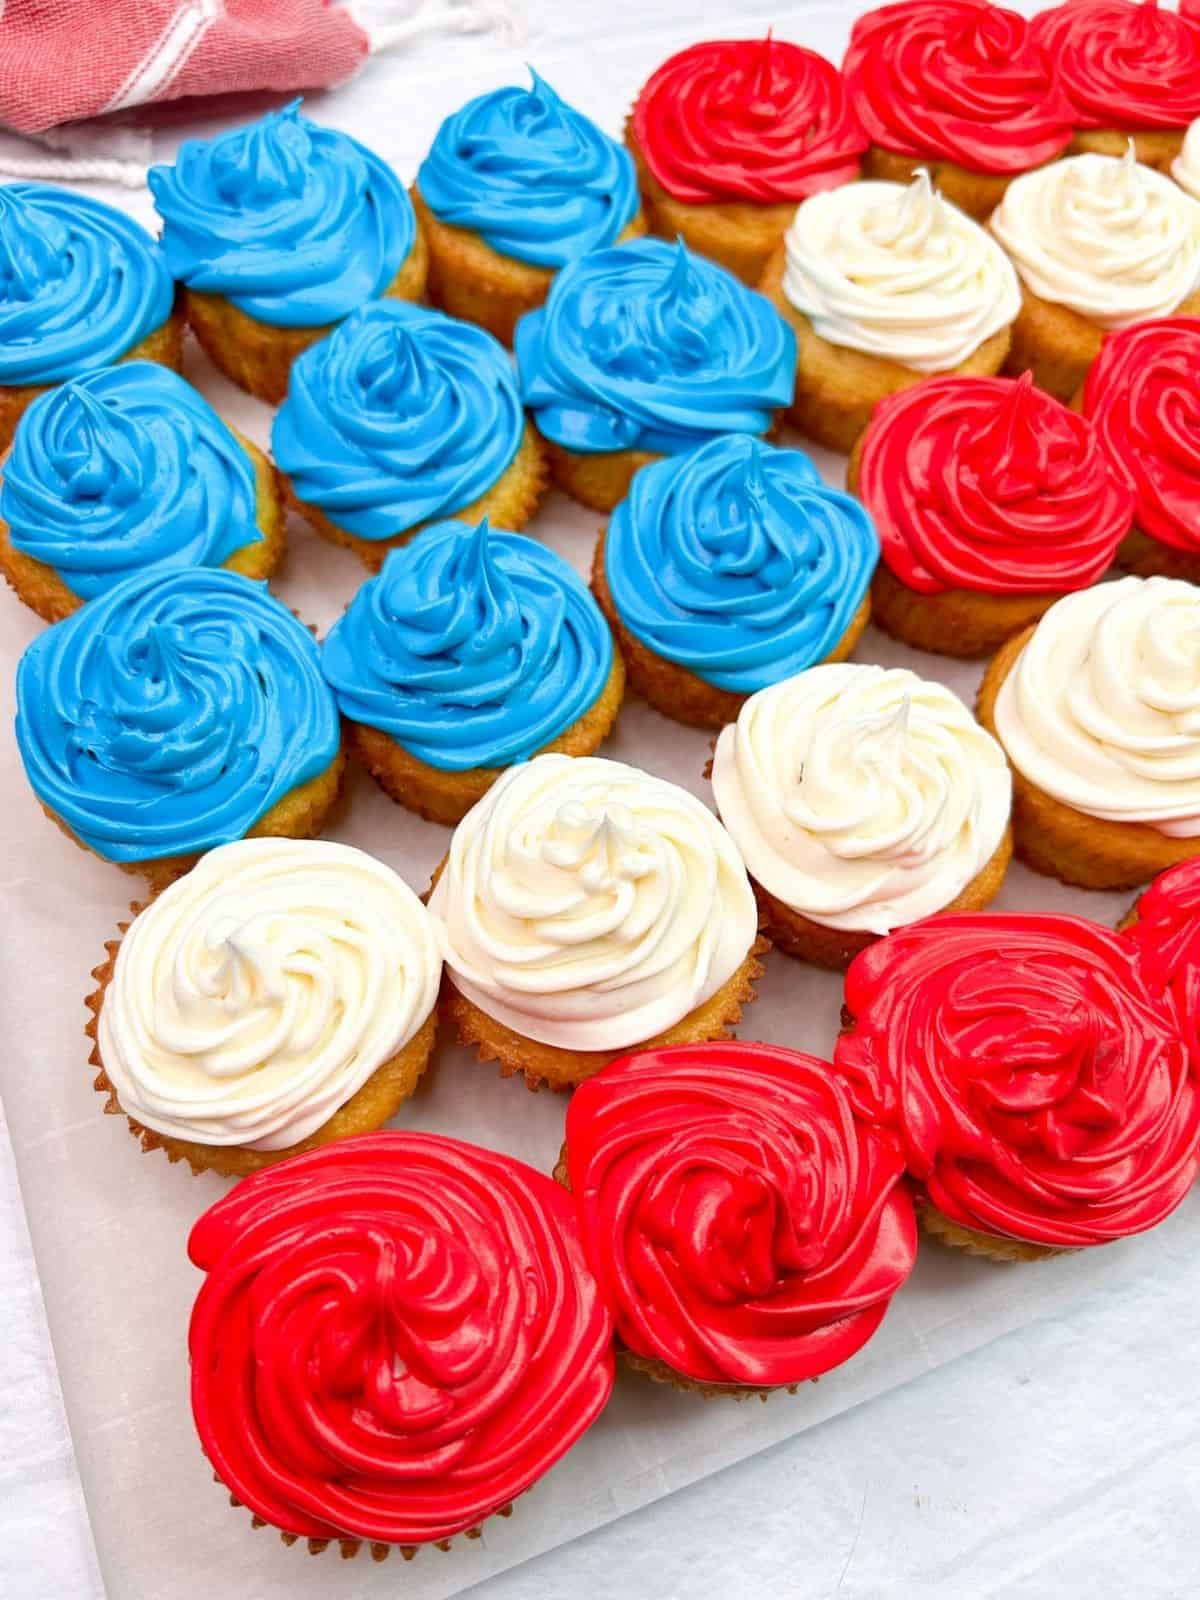
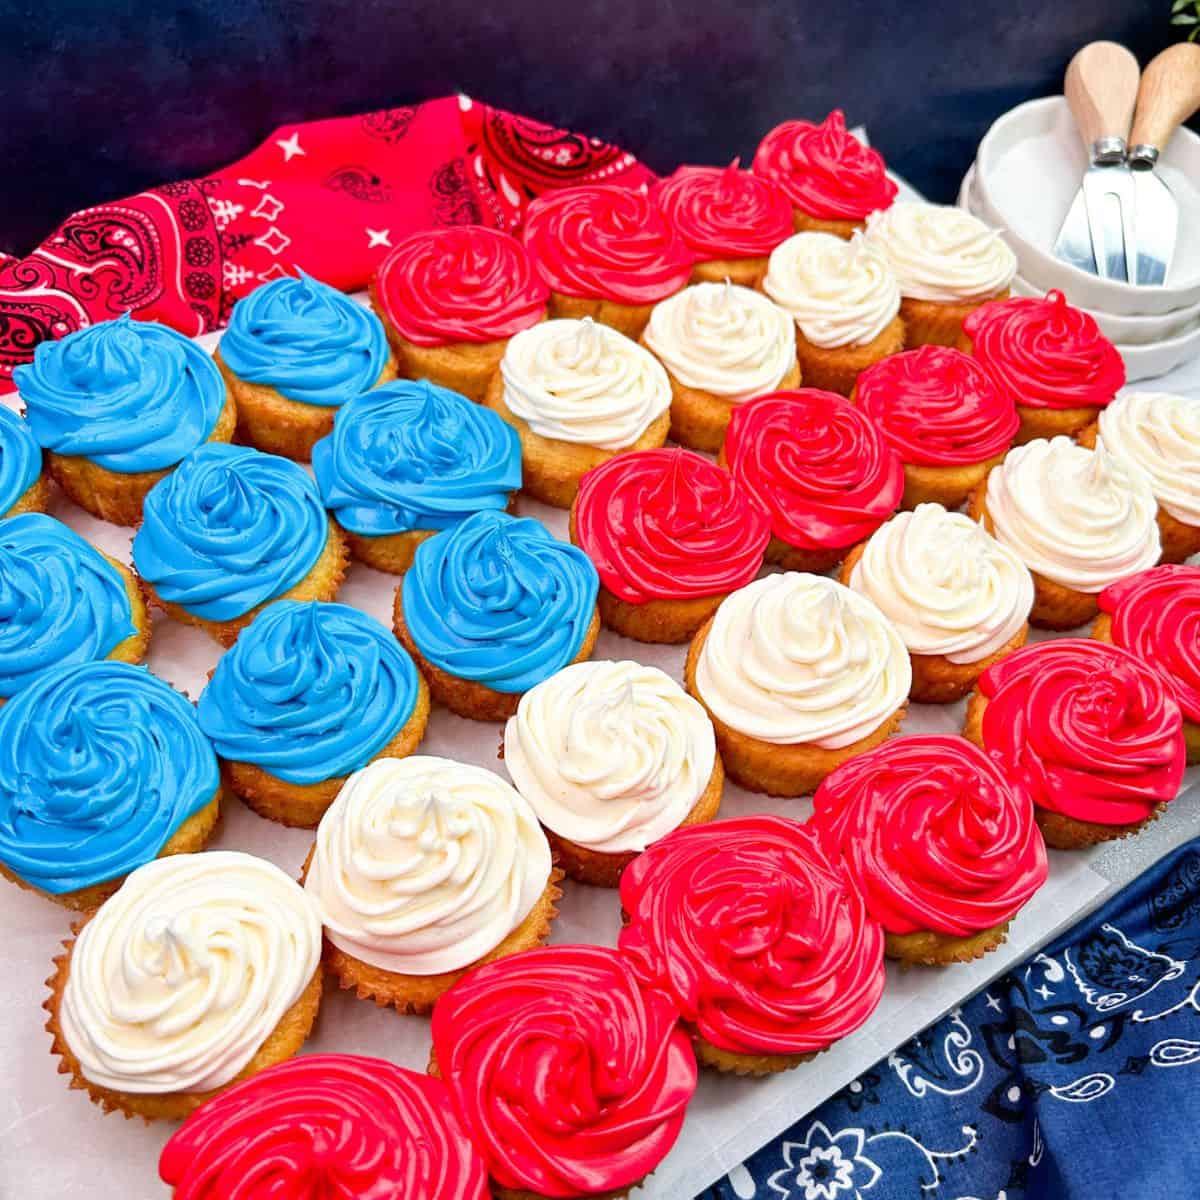
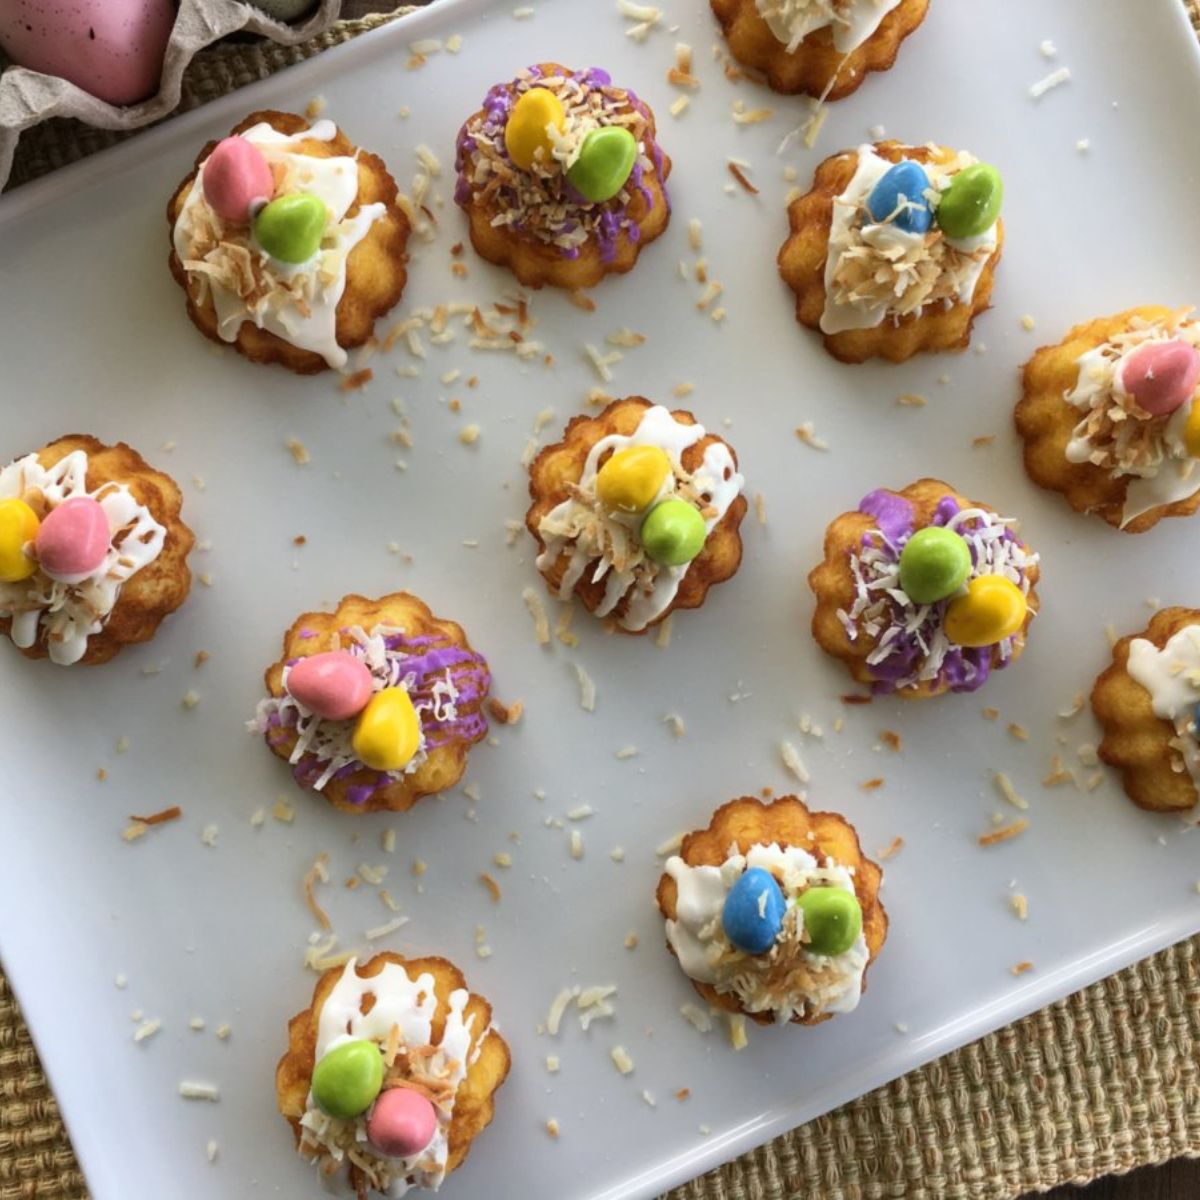
Get ready to celebrate the red, white, and blue with this AMAZING patriotic cupcake cake!
Made with a boxed cake mix and cream cheese frosting, your guests will be amazed at how easy it is to put together and how beautiful it looks - perfect for any Fourth of July celebration!
Craving even more red, white, and blue deliciousness? Check out our other festive 4th of July Foods to complete your summer celebration!
Celebrate Independence Day with a patriotic showstopper! This easy dessert is in a fun design of the American Flag and is sure to wow your family, friends, and party guests.
Tips for Baking and Decorating a Pull-Apart Cupcake Cake
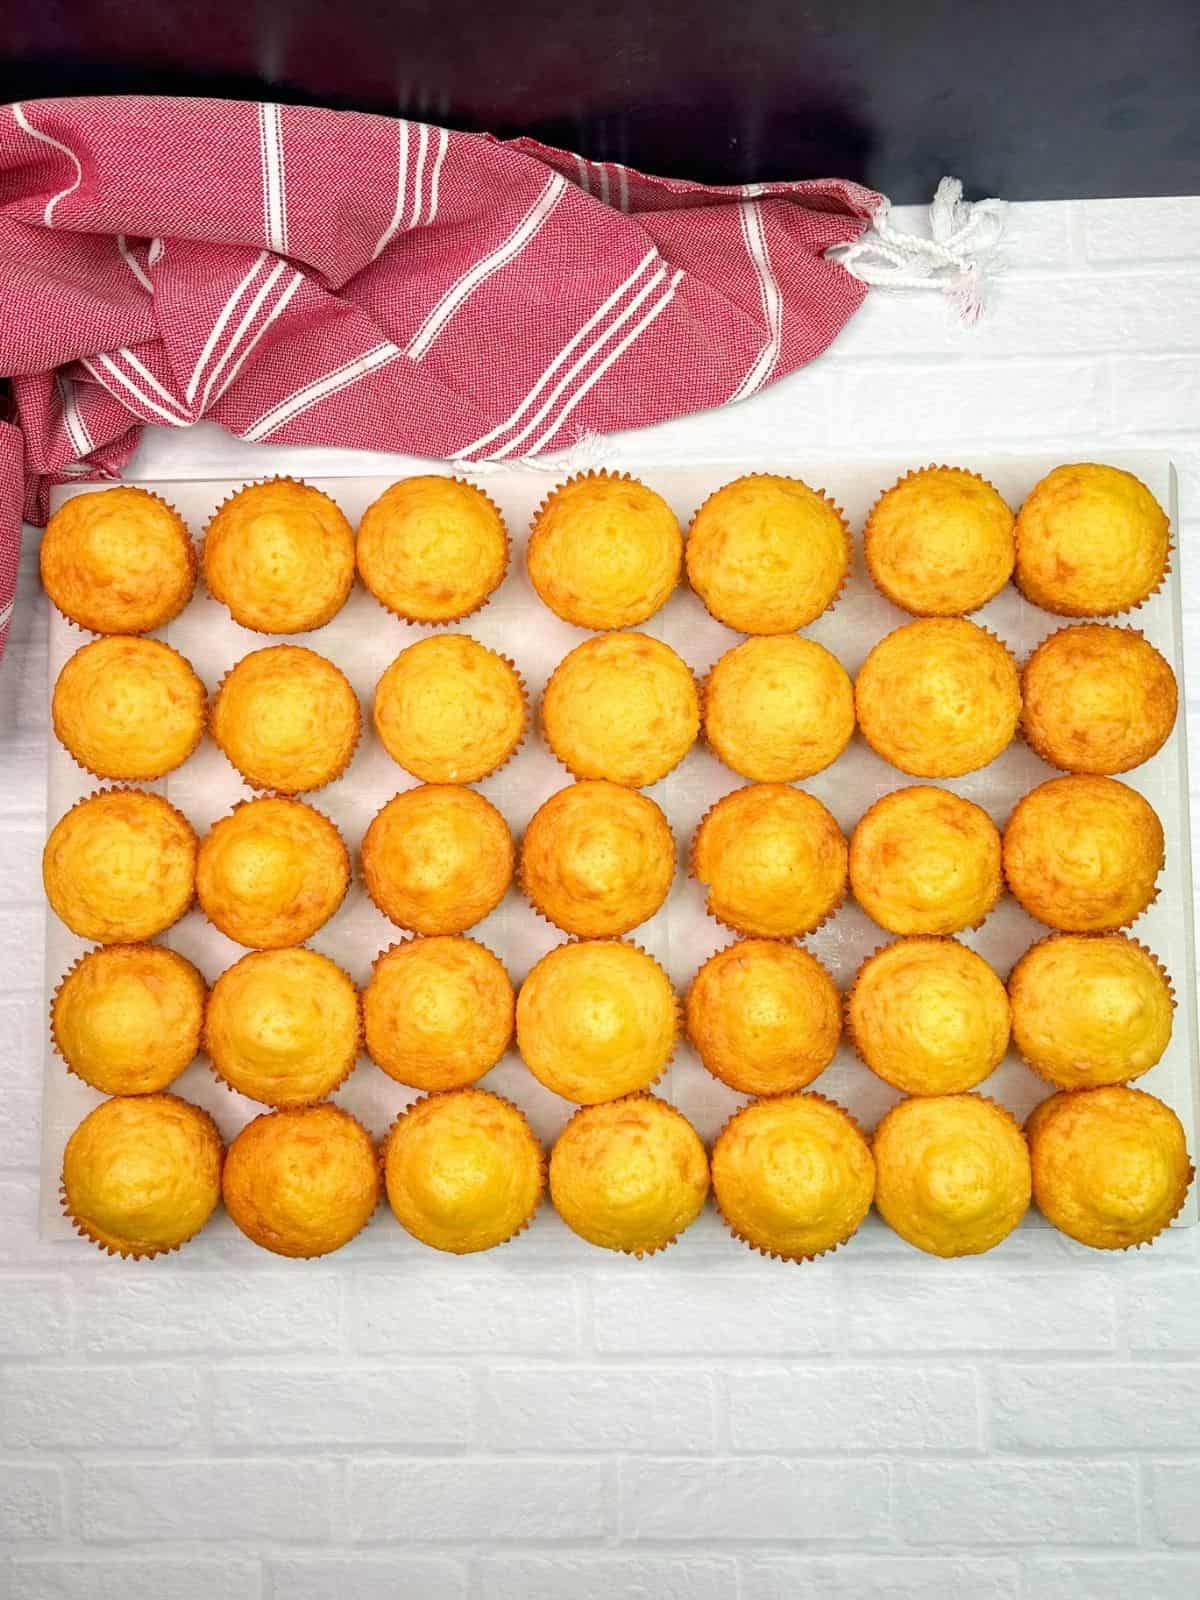
Two boxes of cake mix made 45 cupcakes; only 35 were used for the cake. Serve the extras on the side with fun patriotic picks to add to the display.
You can prepare the cupcakes up to 3 days in advance—just don’t frost them! After baking, let the cupcakes cool completely, then store in an airtight container. On the day of your celebration, bring them to room temperature for about an hour before frosting and decorating.
Gel food coloring darkens as it sits, so let your frosting rest for about 15 minutes before adding more color to achieve the perfect shade of red or blue.
If your frosting is too thin to hold its shape when piped, add powdered sugar one tablespoon at a time until it firms up.
Decorate the blue cupcakes with edible white stars for a festive finishing touch!
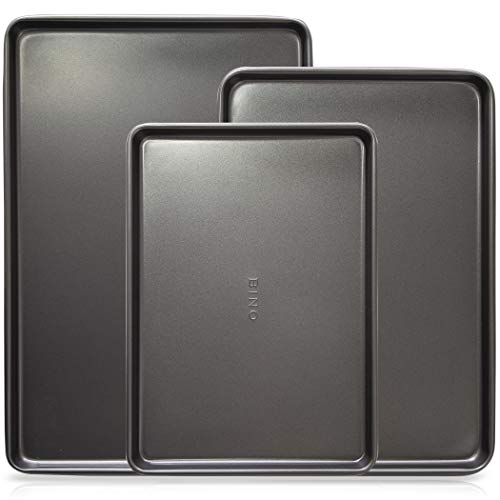
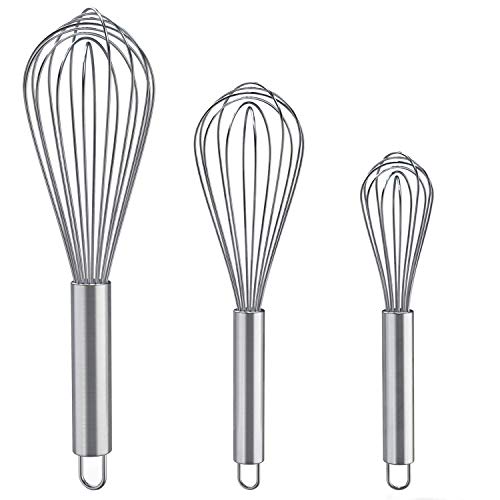
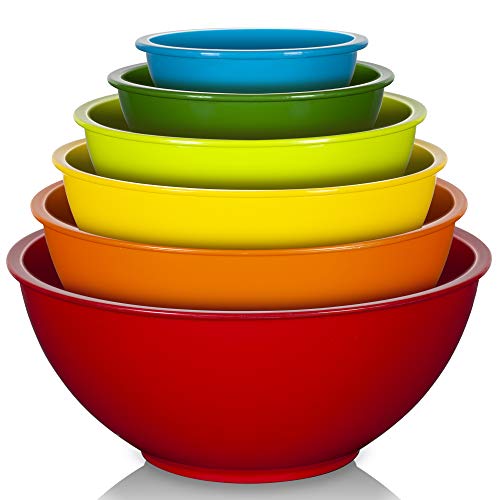
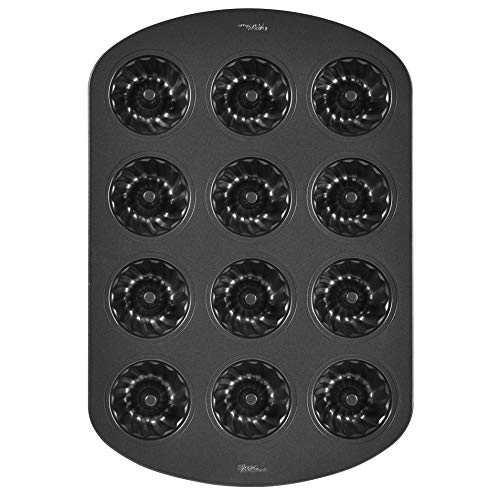
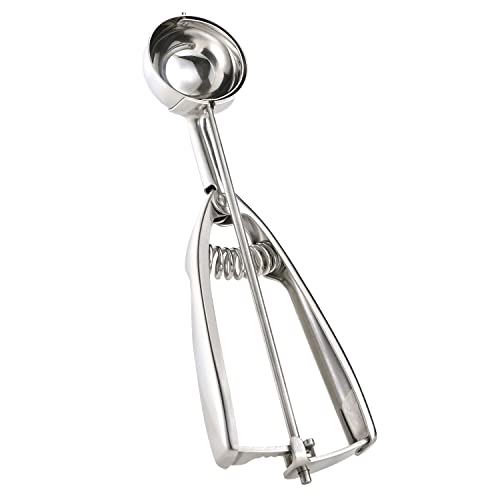
Helpful Kitchen Tools
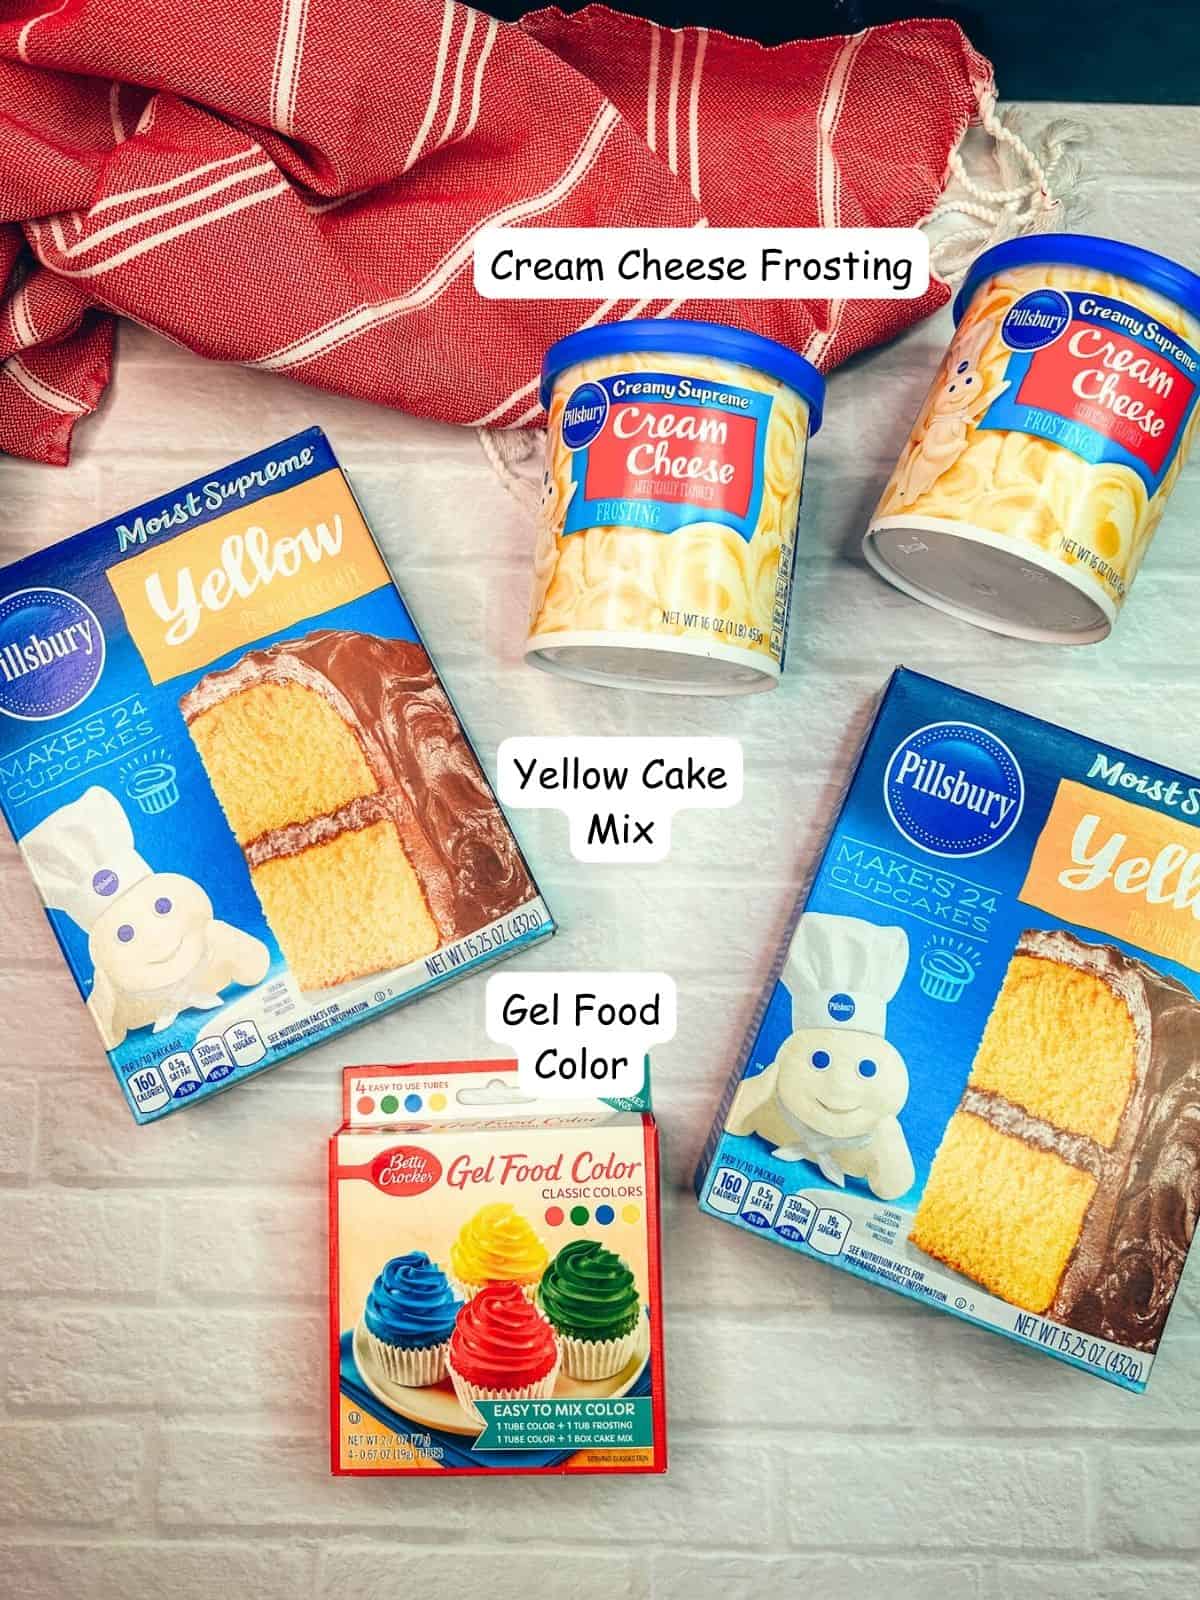
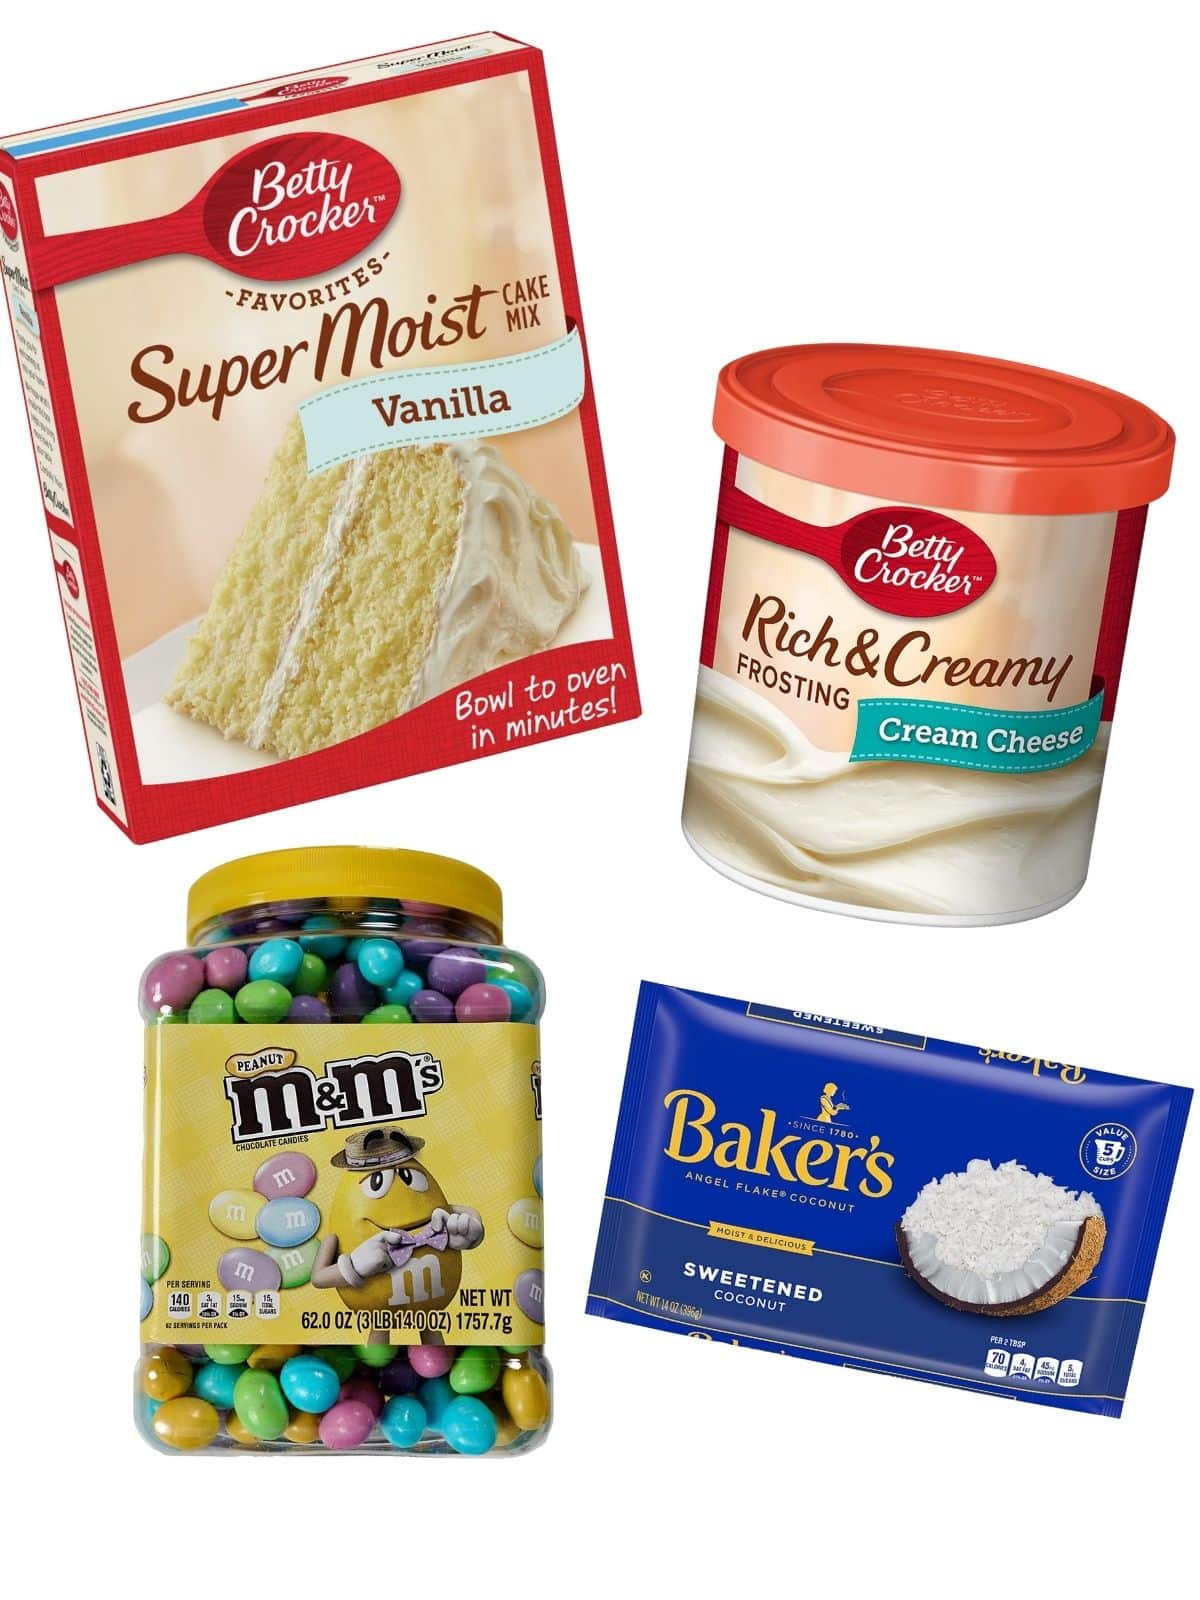
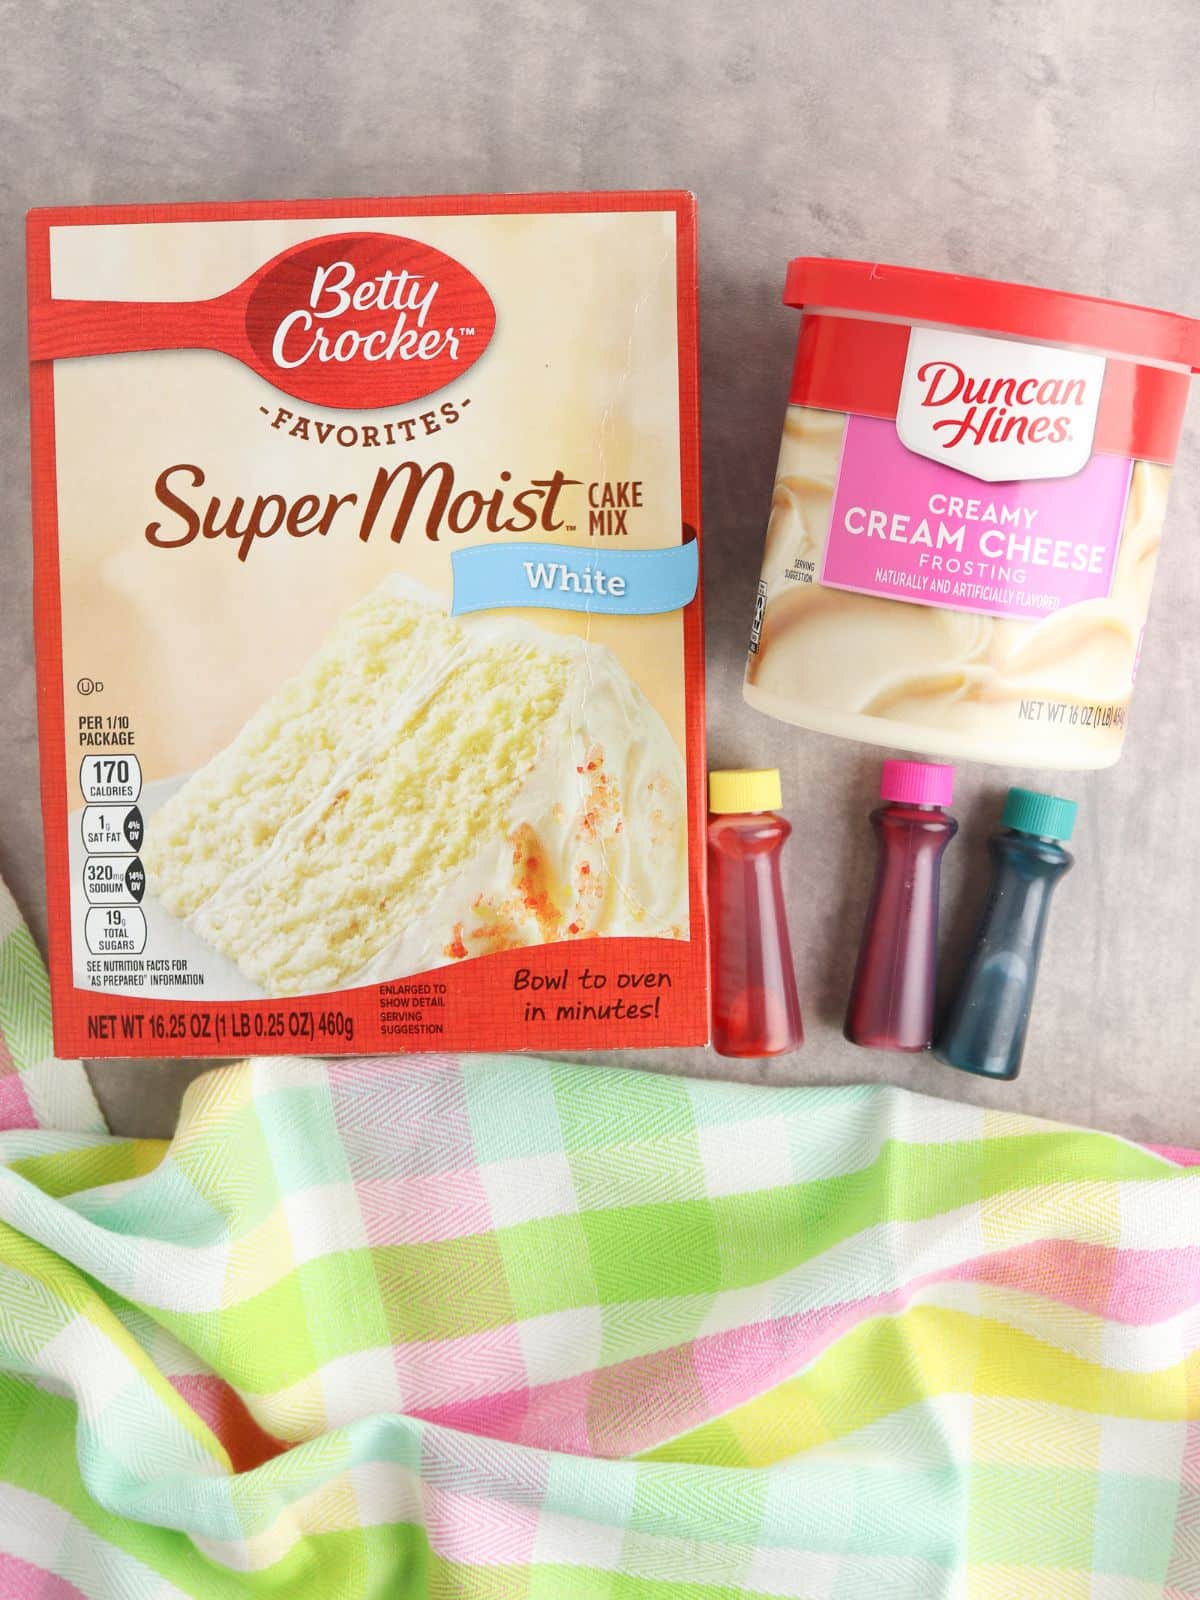
Here's a quick overview of the ingredients for this recipe. Find the exact amounts and click the Instacart button to easily add them to your cart – all in the printable recipe card below!
Recipe Substitutions and Variations
Instead of canned cream cheese frosting, you could use your favorite frosting flavors like vanilla buttercream or try my Homemade Cream Cheese Frosting.
You could also use a homemade cupcake recipe like I did with my red velvet Patriotic Cupcakes.
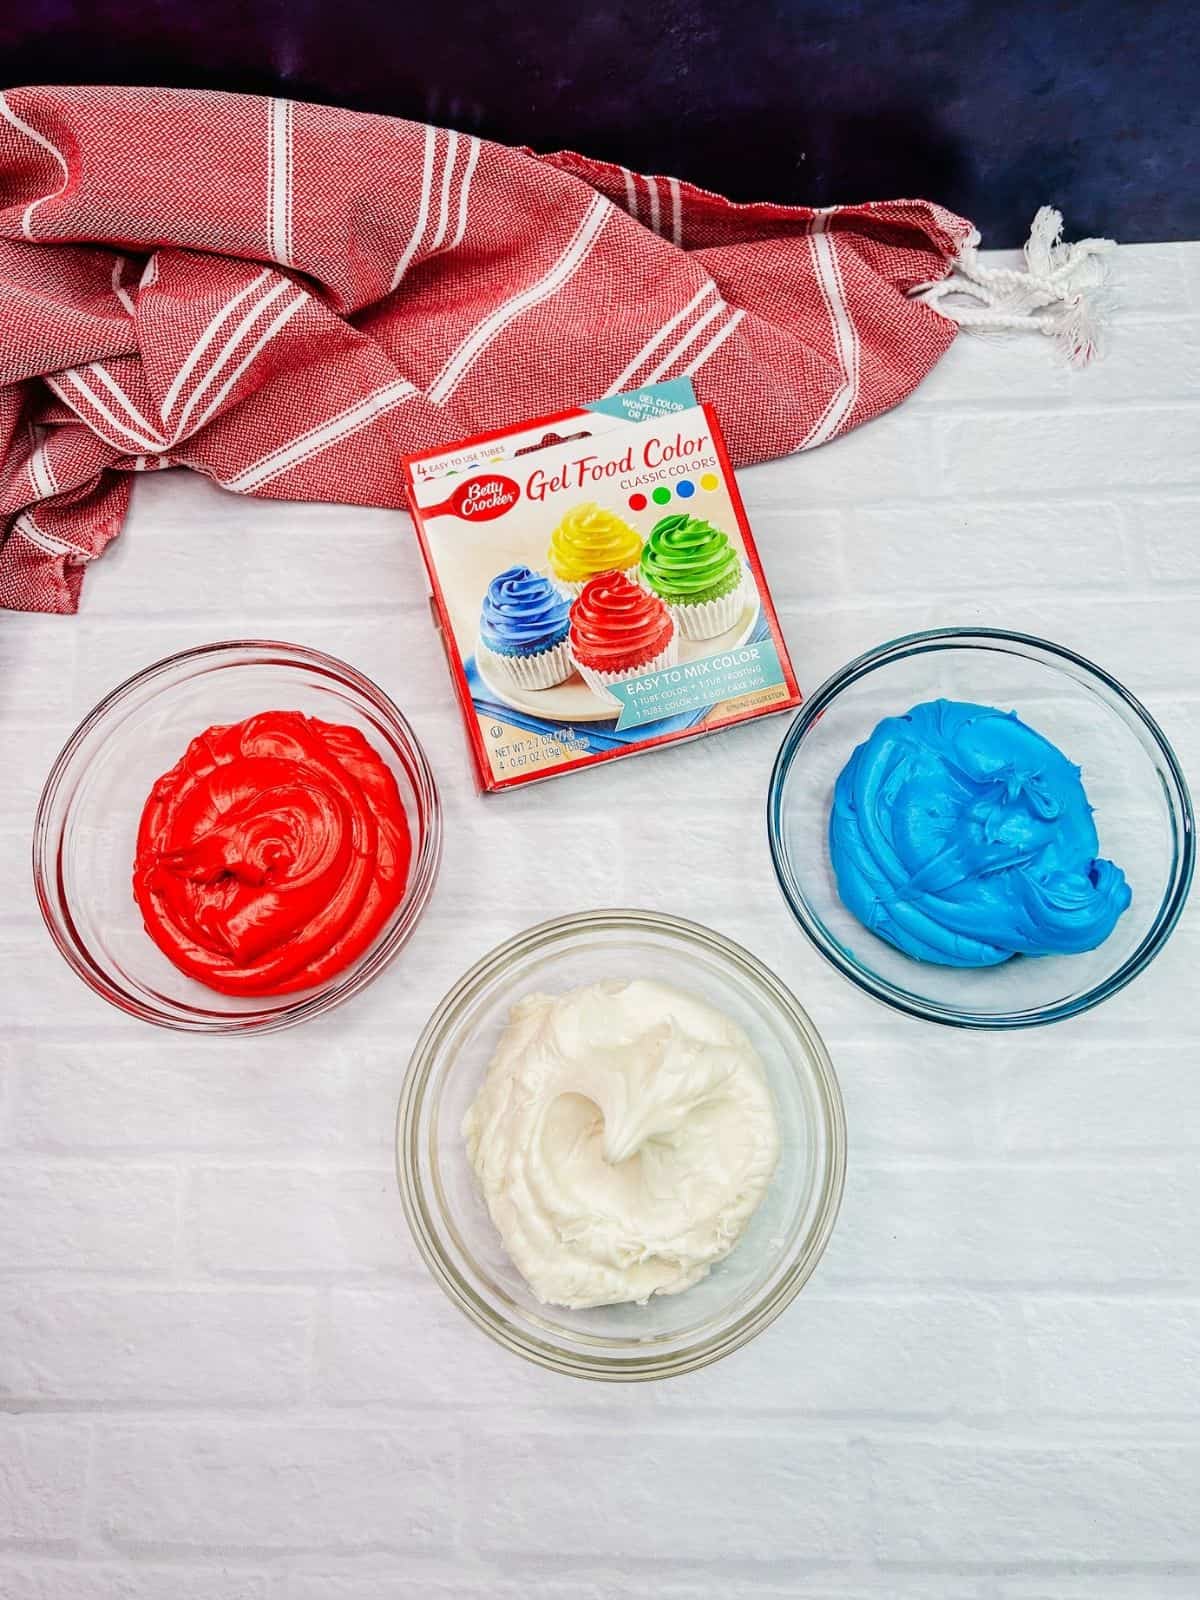
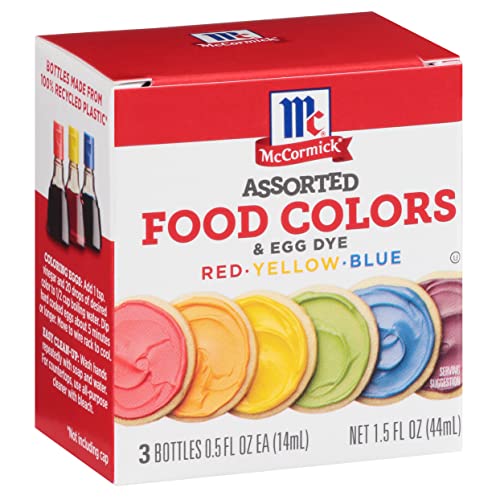
Gel Food Coloring - I recommend using gel food coloring instead of traditional food coloring. The colors are very vibrant when combined with the cream cheese frosting.
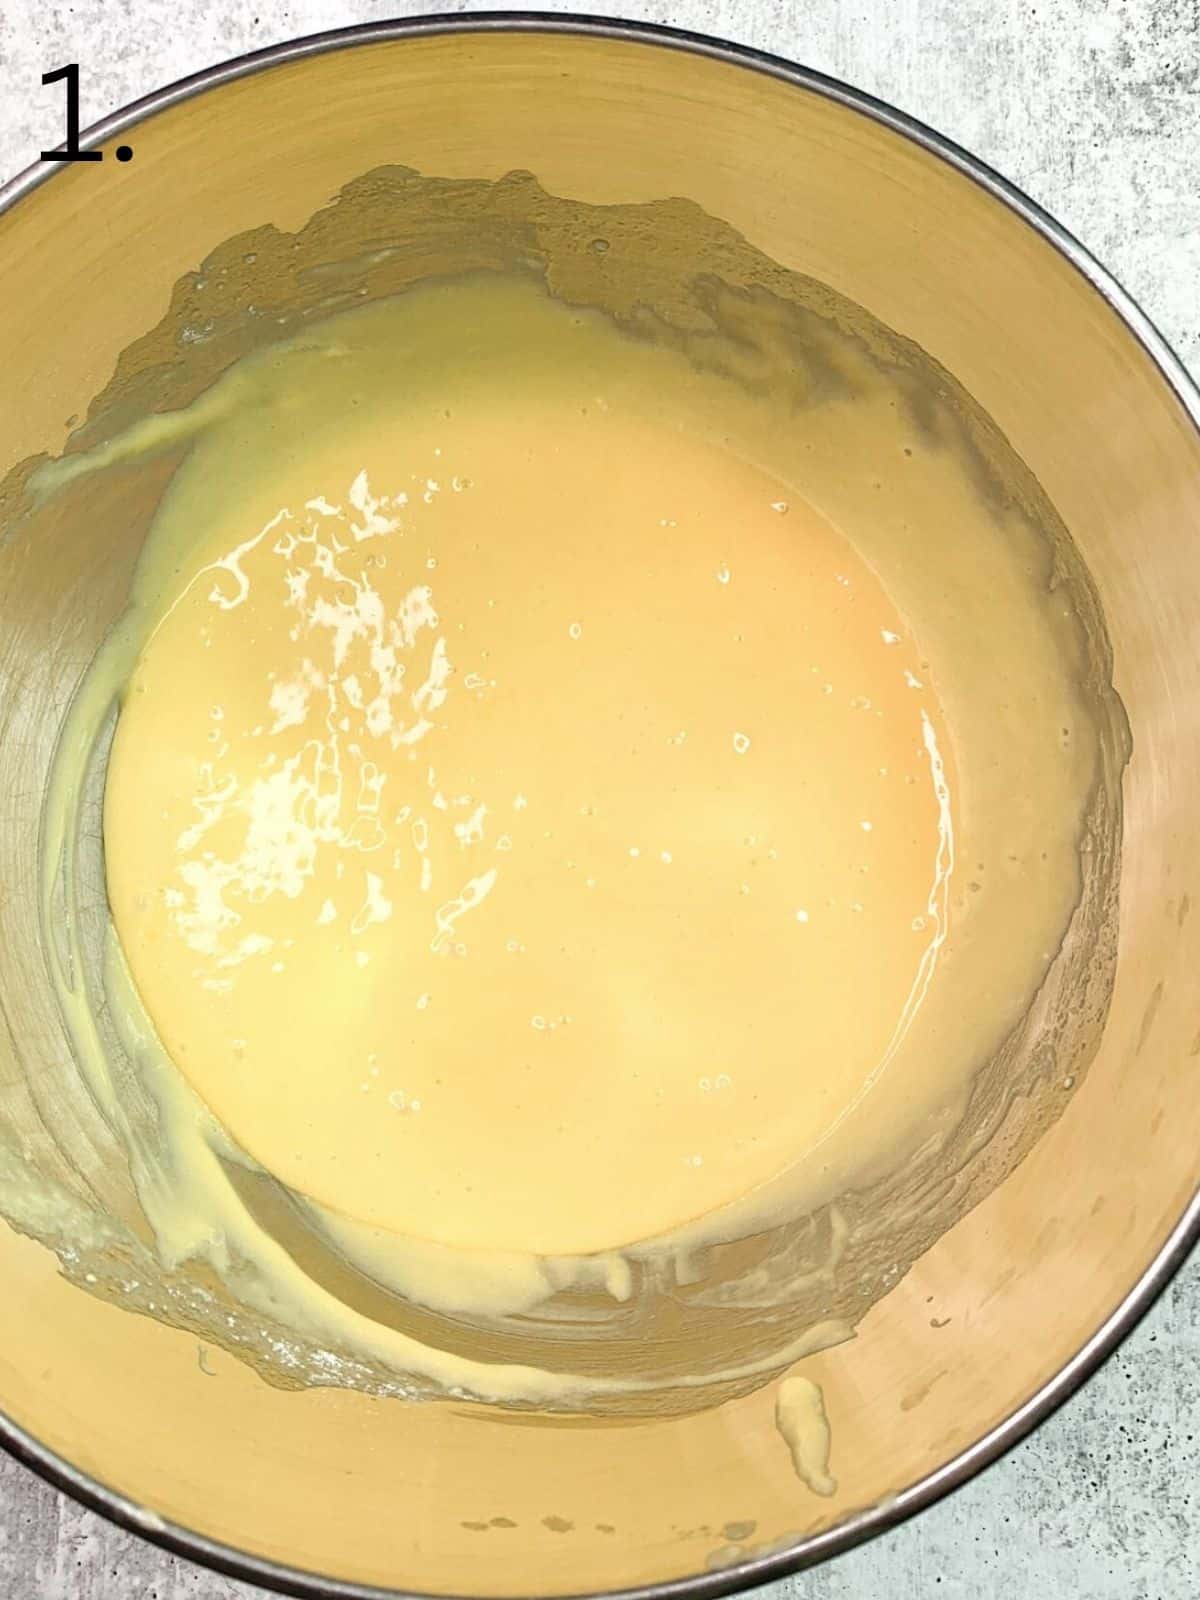
Step-by-Step Instructions
This section includes step-by-step photos and instructions to guide you through the recipe. For the complete printable version, scroll down to the recipe card below.
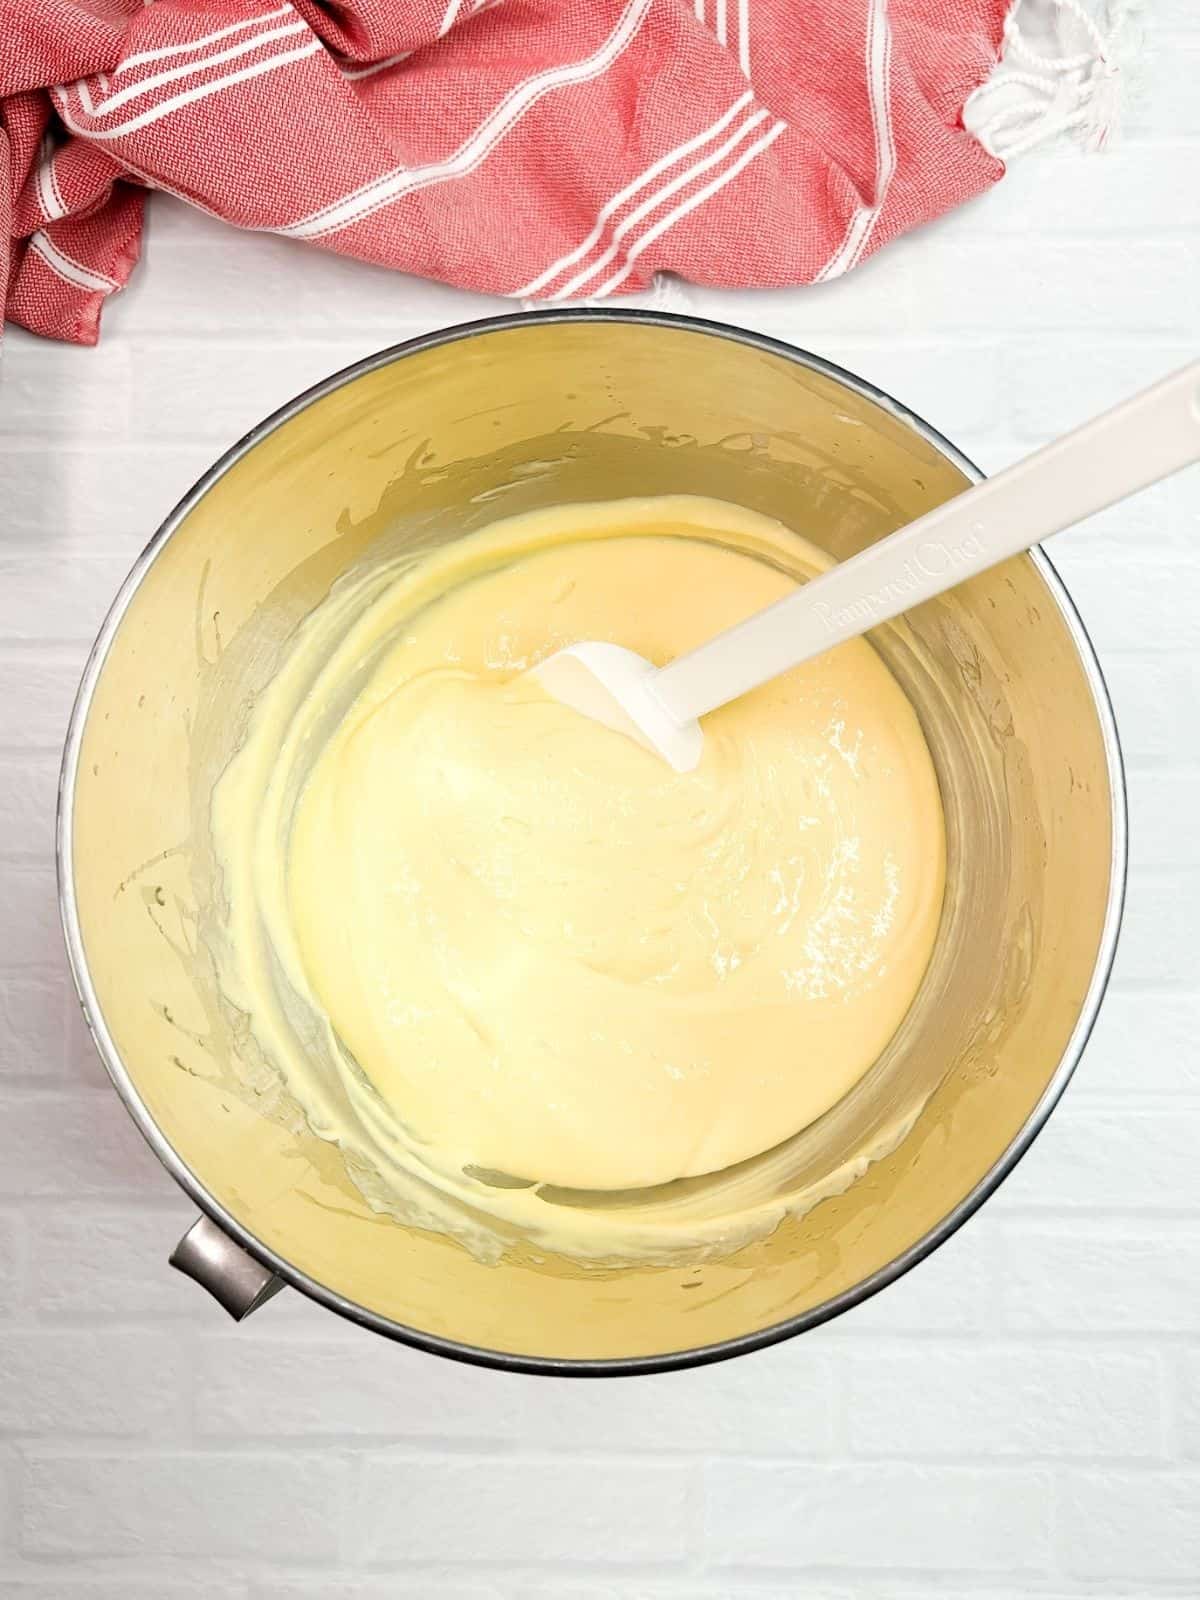
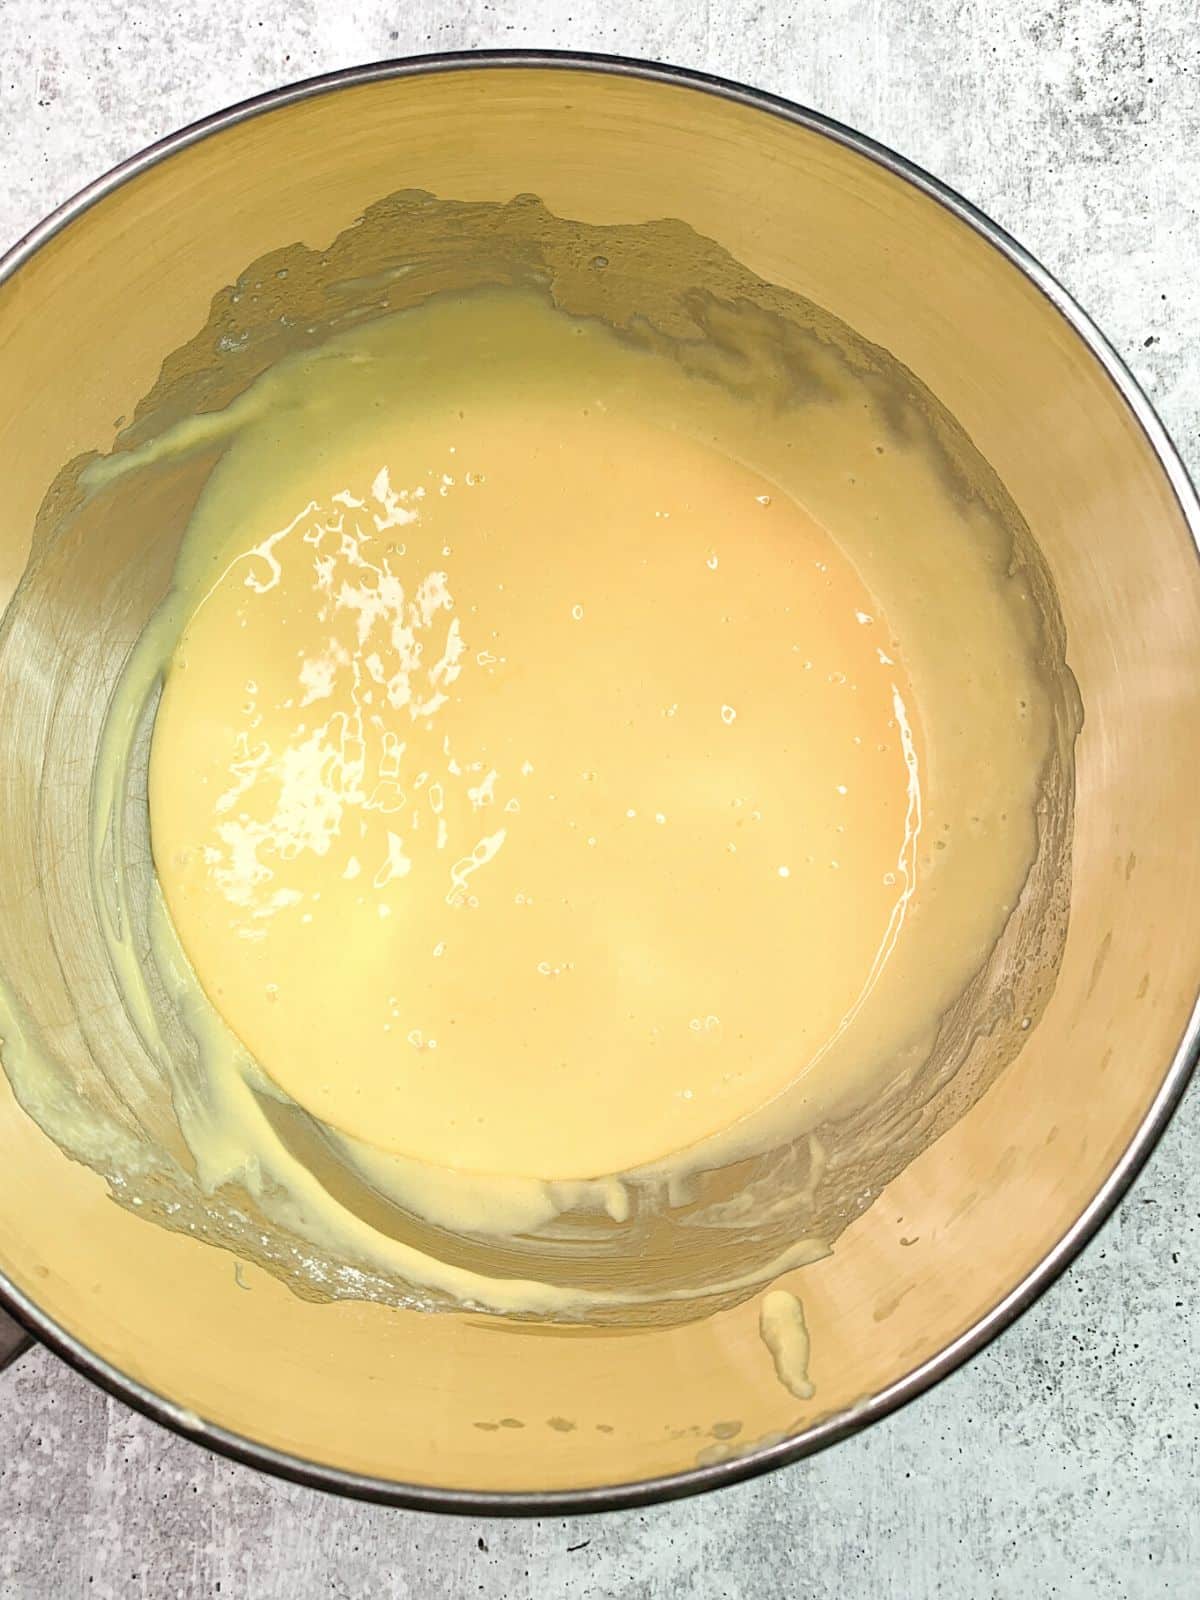
Step 1: Prepare the cupcakes according to the box directions.
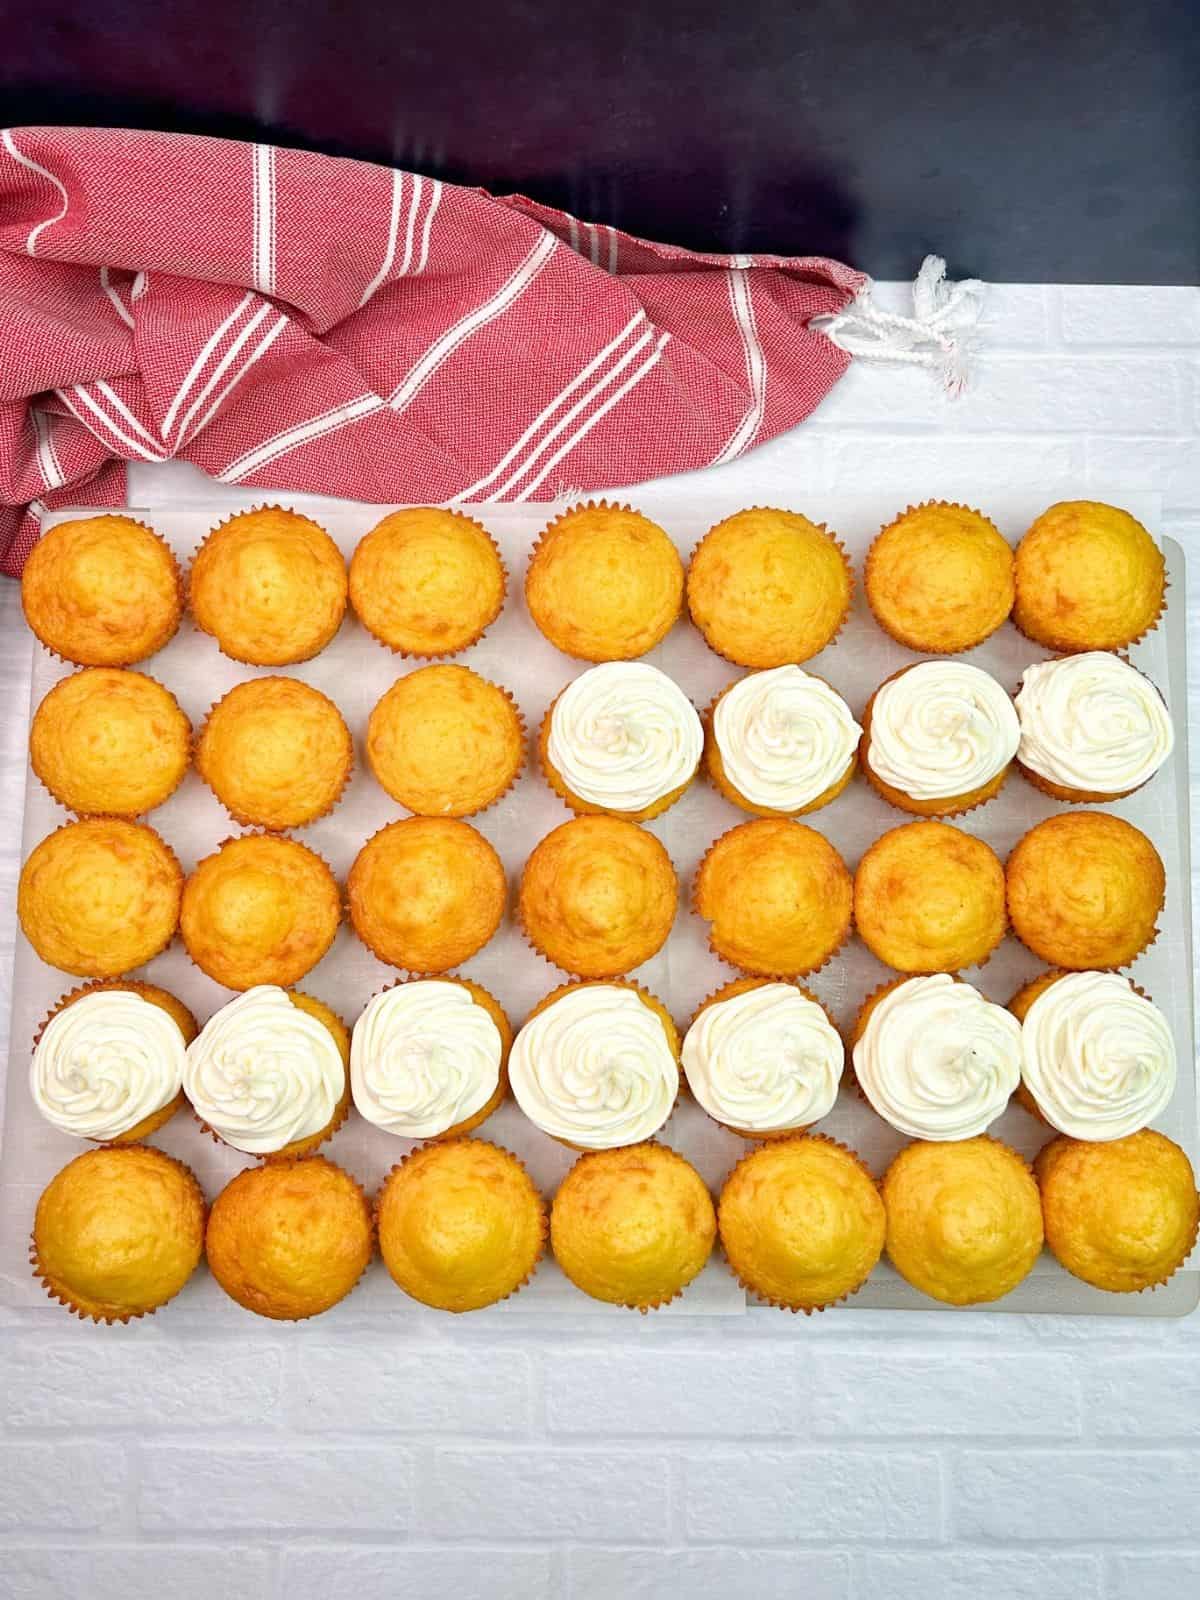
Step 2: On a tray or cake board large enough to hold 35 cupcakes, place cupcakes 5 rows high and 7 rows across.
Prepare the Frosting
Step 3: Divide the cream cheese frosting into three parts—tint one red, one blue, and leave one white. Transfer each color to a pastry bag fitted with a 1M star tip.
Frost the Flag Cupcakes
Step 4: Leave the top 9 cupcakes unfrosted to start your design layout.
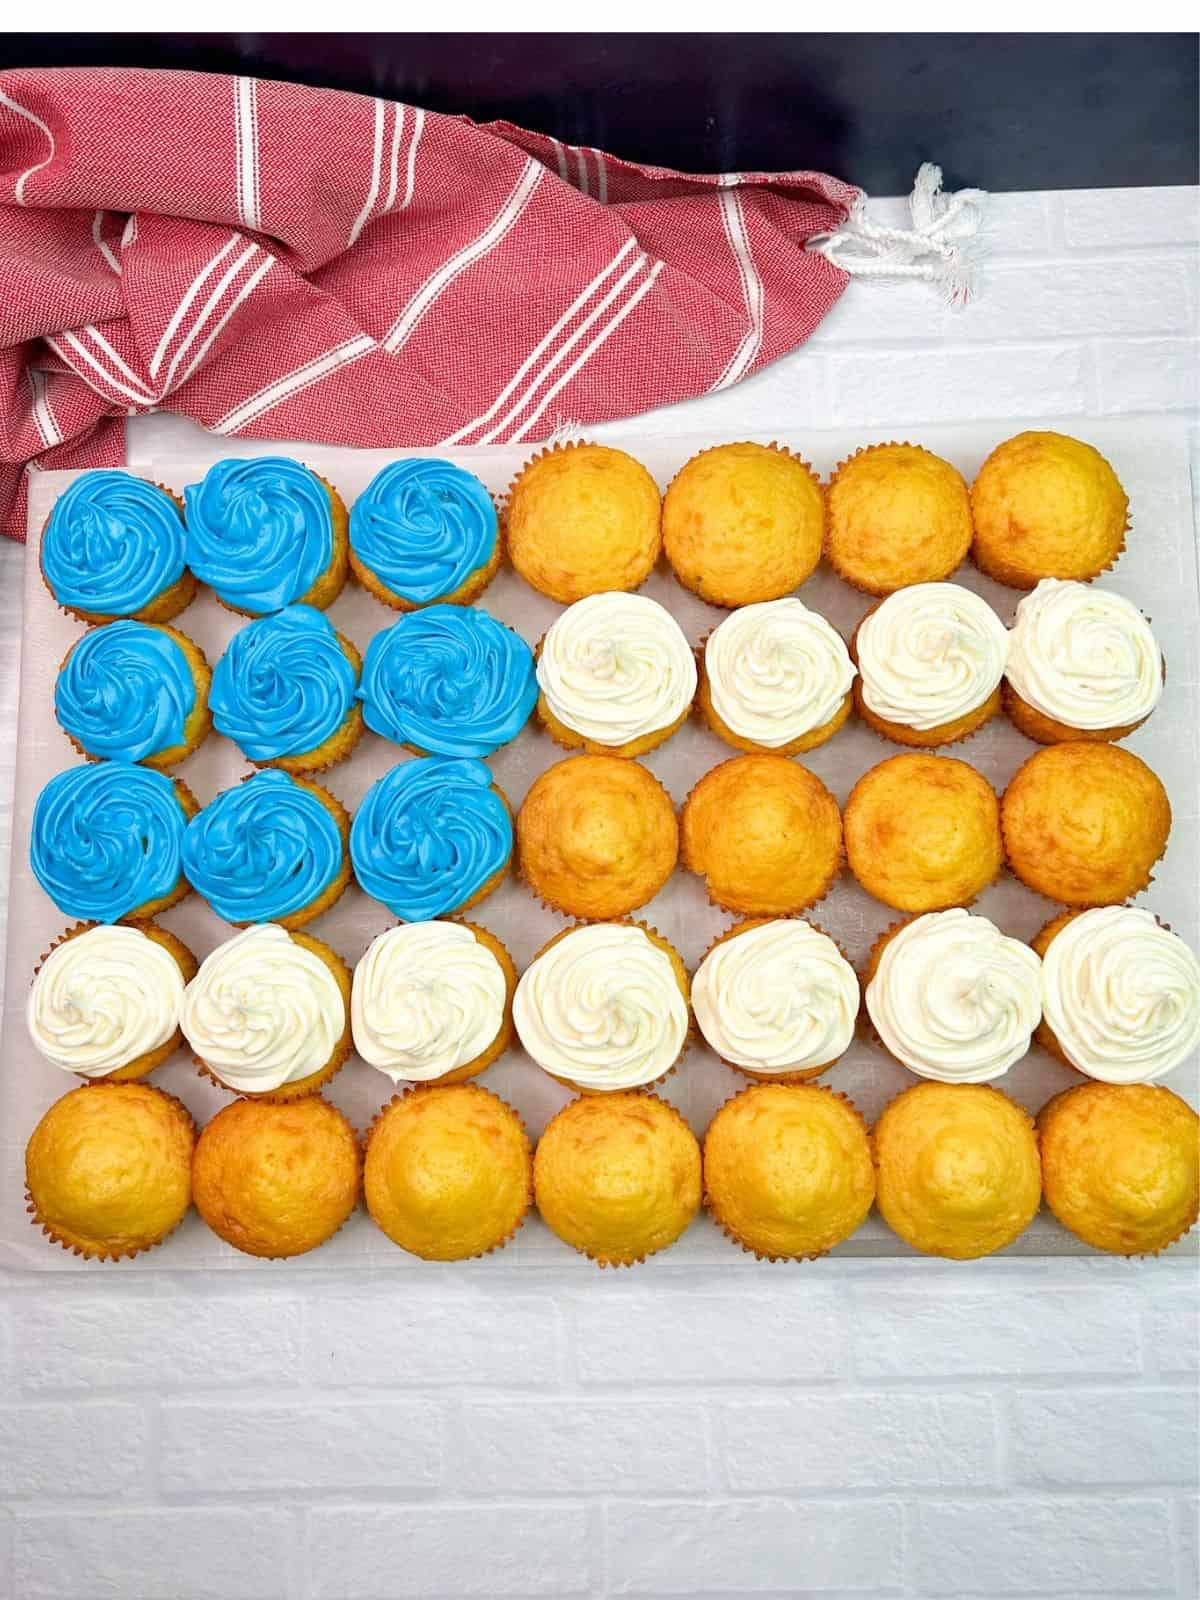
Step 5: Frost the second row by adding white frosting to the 4 rightmost cupcakes. Then, frost the entire fourth row white as well.
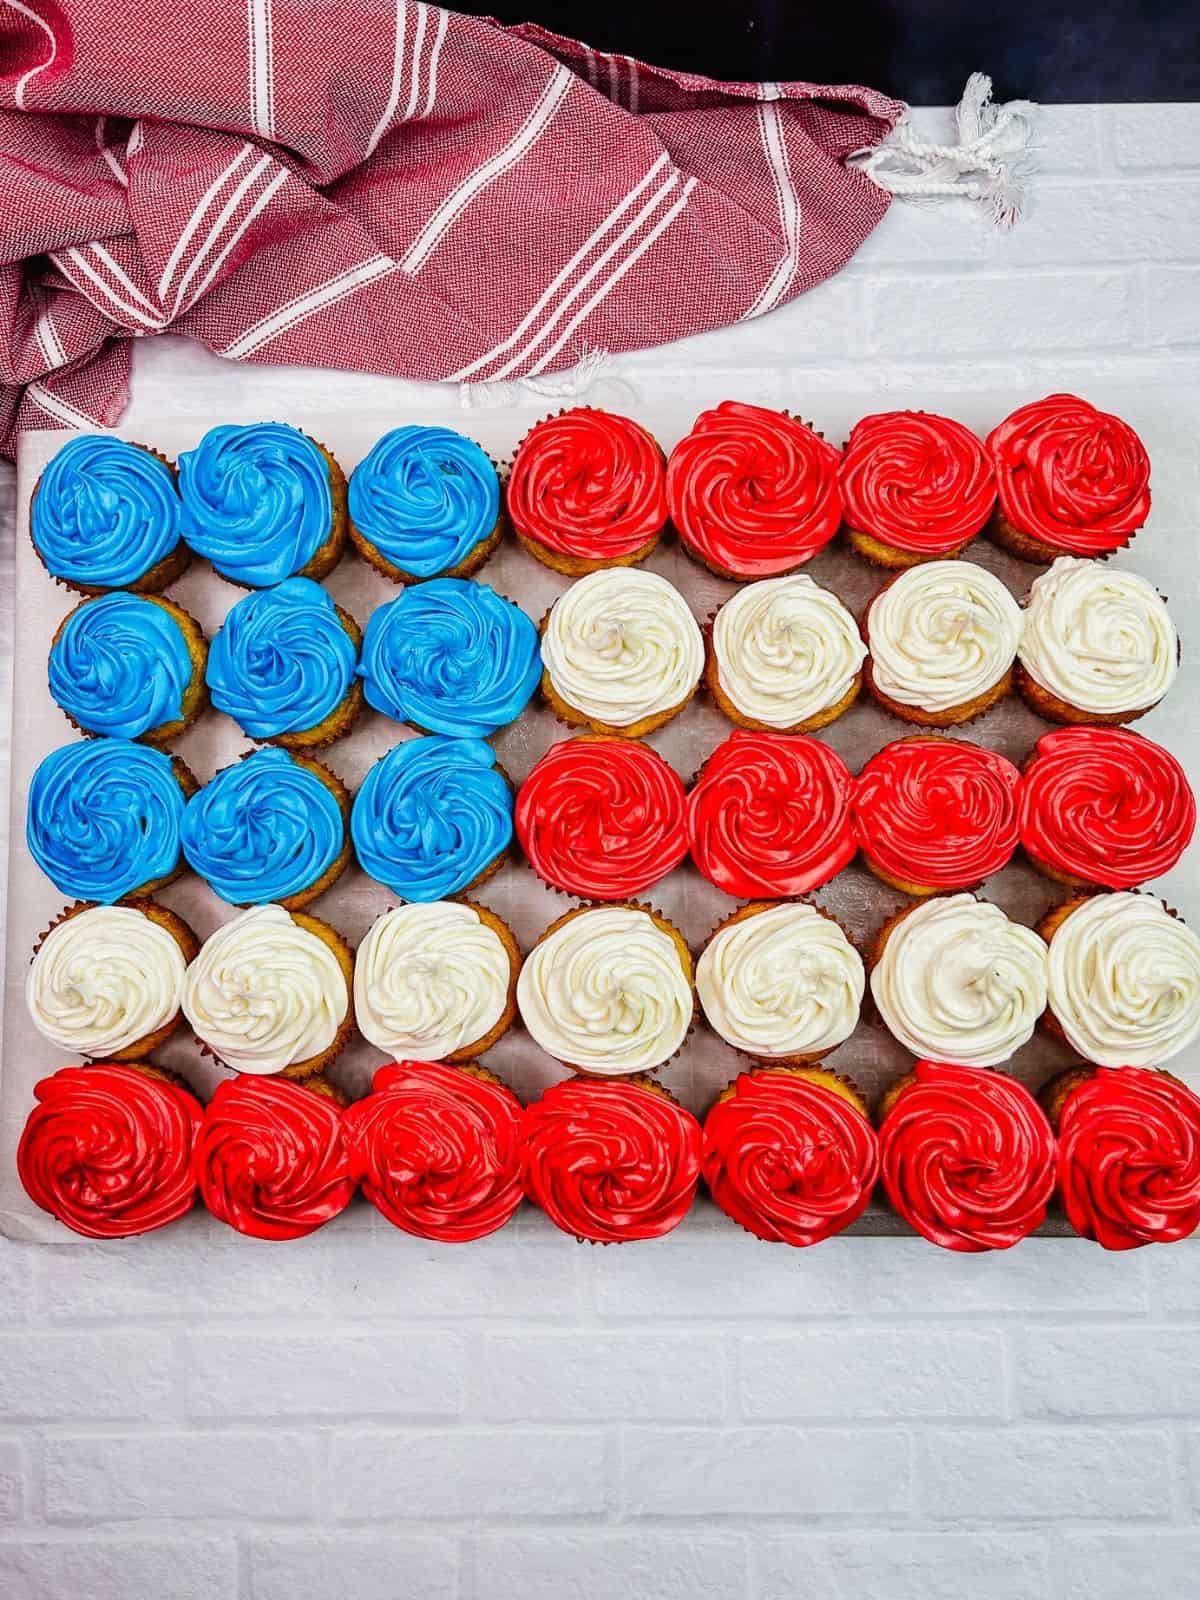
Step 6: Frost the 9 cupcakes in the top left corner blue to create the flag’s star section.
Step 7: Add red frosting to the 4 rightmost cupcakes in both the first and third rows, and frost the entire fifth row red to complete the stripes.
Quick Tip: Try adding edible white stars on top of the blue frosted cupcakes!
LOVE this recipe? SAVE it for Later!
❤️Tap the heart icon in the lower right corner to add the recipe to your recipe box for easy access anytime.
If you made it, leaving a star rating or quick review is always appreciated and helps other readers too.
To view the answers, simply click on the down arrow (⬇) next to each question. If you have any other questions not answered here, please leave a comment!
How can I make store bought frosting better?
Add a pinch of salt to balance the sweetness, or whip the frosting using a whisk attachment to make it lighter and fluffier. For extra flavor, mix in a splash of vanilla or almond extract. You can also blend in 4 ounces of softened cream cheese to one container of frosting for a richer, homemade taste.
Storage Tips
Refrigerator: Store cupcakes frosted with cream cheese frosting in the refrigerator in an airtight container for about 3-5 days.
Freezer: If freezing with the frosting, flash freeze the cupcakes, then wrap in plastic wrap before placing in an airtight container. I like to freeze cupcakes without the frosting, then add the frosting once they've thawed.
Thawing tips: To defrost frozen cupcakes, remove any wrapping and let them sit at room temperature for 1–2 hours.
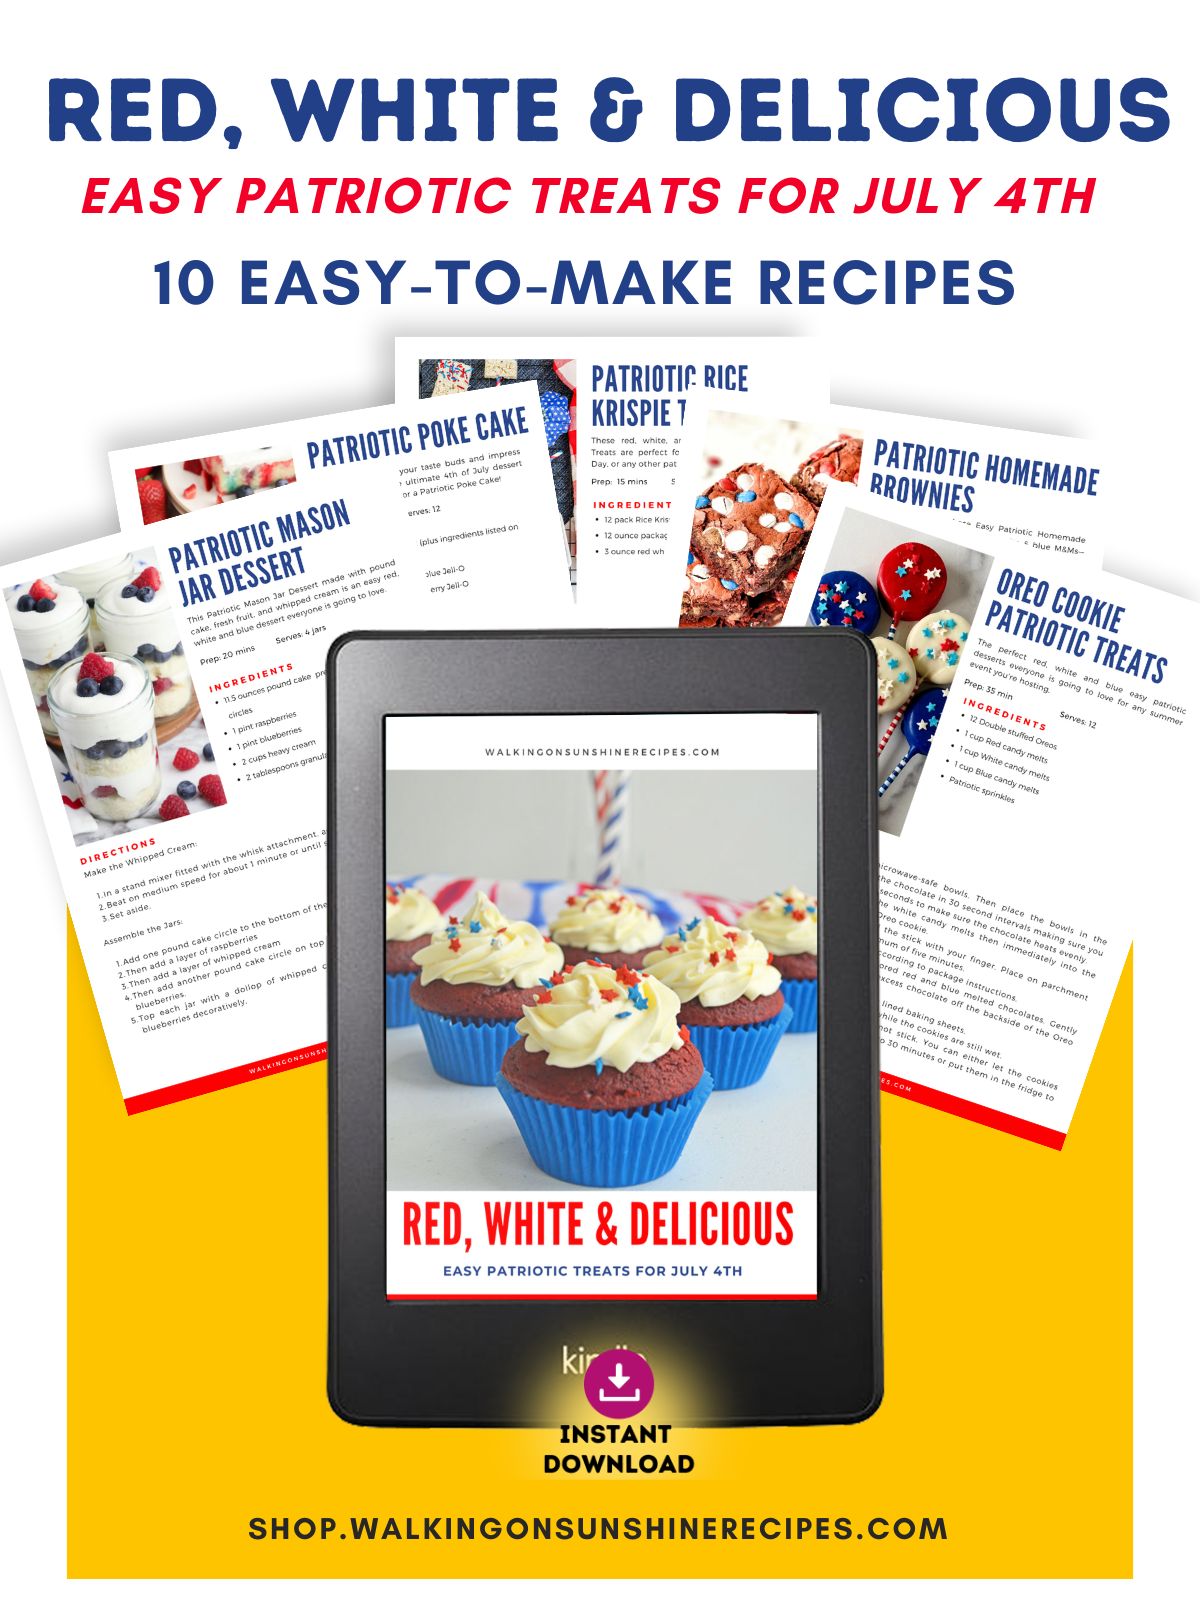
Celebrate Summer with the Red, White & Delicious Recipes eBook!
This beautifully designed digital cookbook features 10 fun and festive dessert recipes perfect for the 4th of July, Memorial Day, or any red, white, and blue celebration.
Get ready to celebrate the red, white, and blue with this AMAZING patriotic cupcake cake! Using the American Flag as my inspiration, this is a fun, creative and EASY dessert that will definitely make all your summer entertaining fun.
215.25 ounce boxes yellow cake mix, plus the ingredients listed on the back of the box.
2containers cream cheese frosting
red gel food coloring
blue gel food coloring
Cooking for More (or Less?)Scale this recipe up or down. Adjust the number of servings above to automatically update ingredient amounts.
Method
Preheat the oven to 350°F.
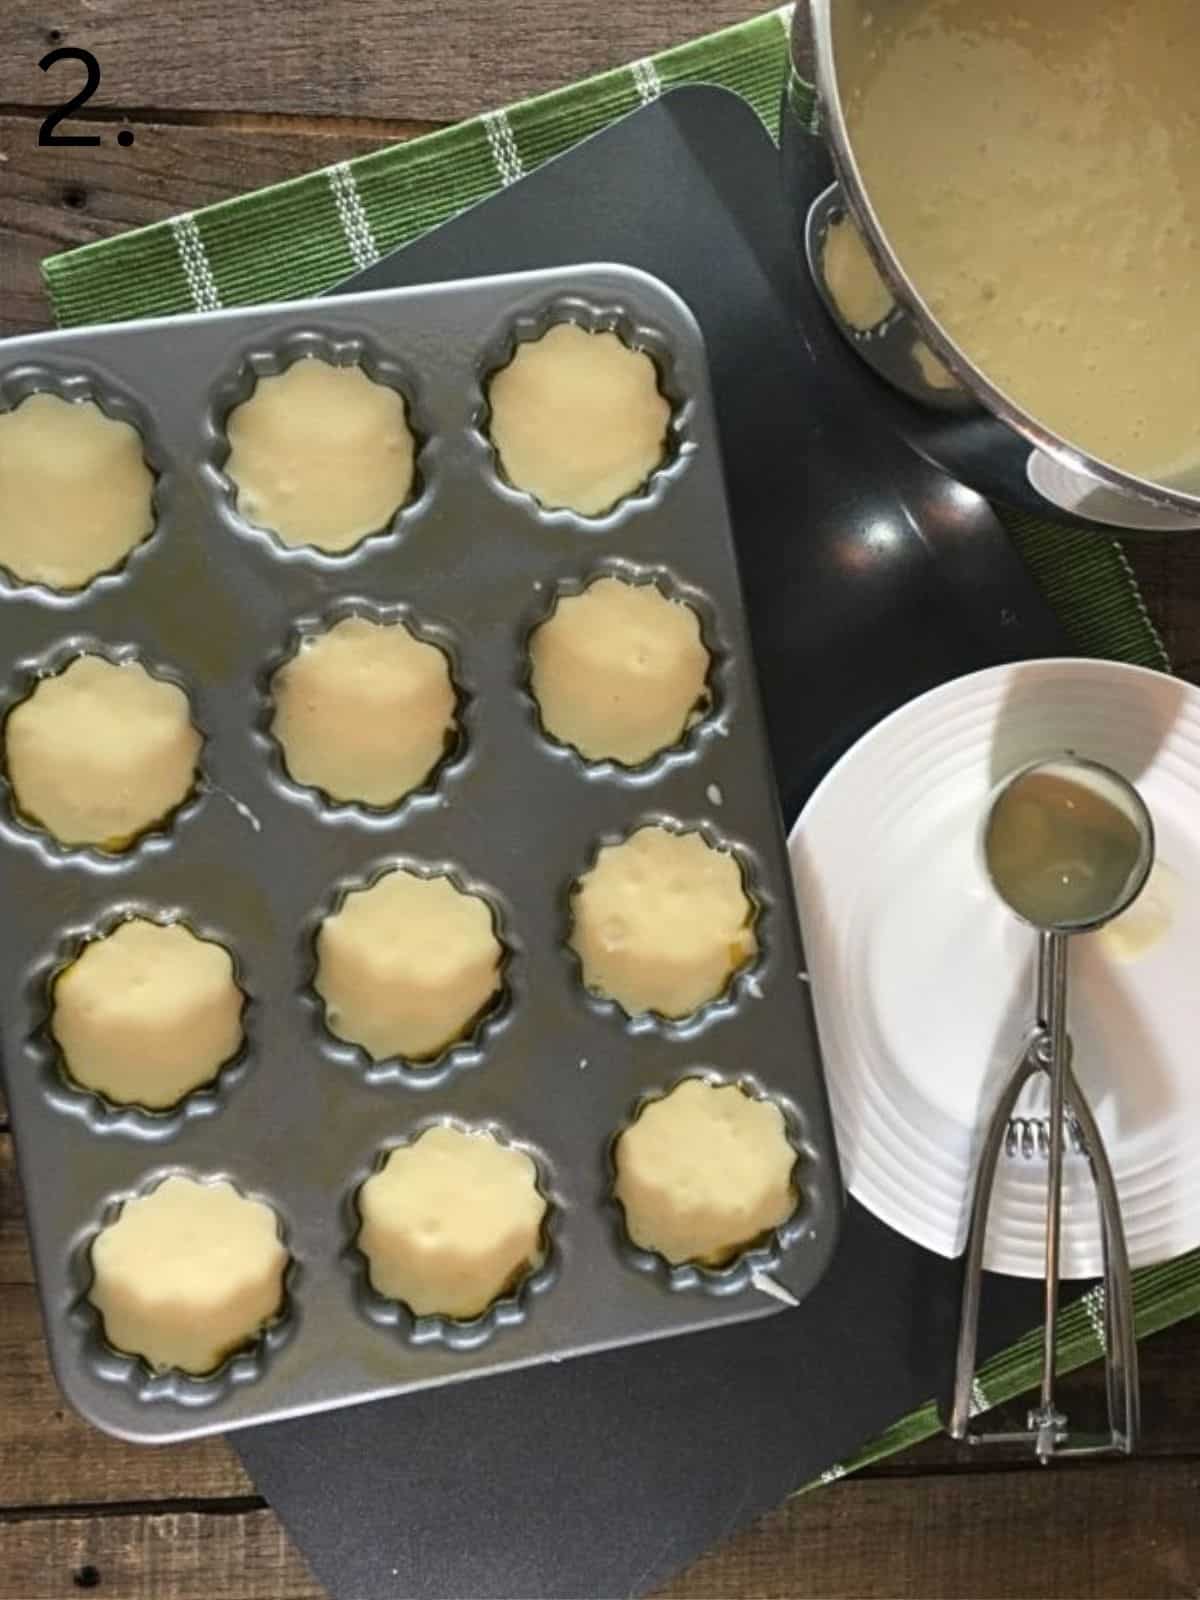
Place paper baking cups in each of the 12 regular-size muffin cups.
Prepare one box of cake mix at a time according to the directions with the ingredients listed on the back of the box.
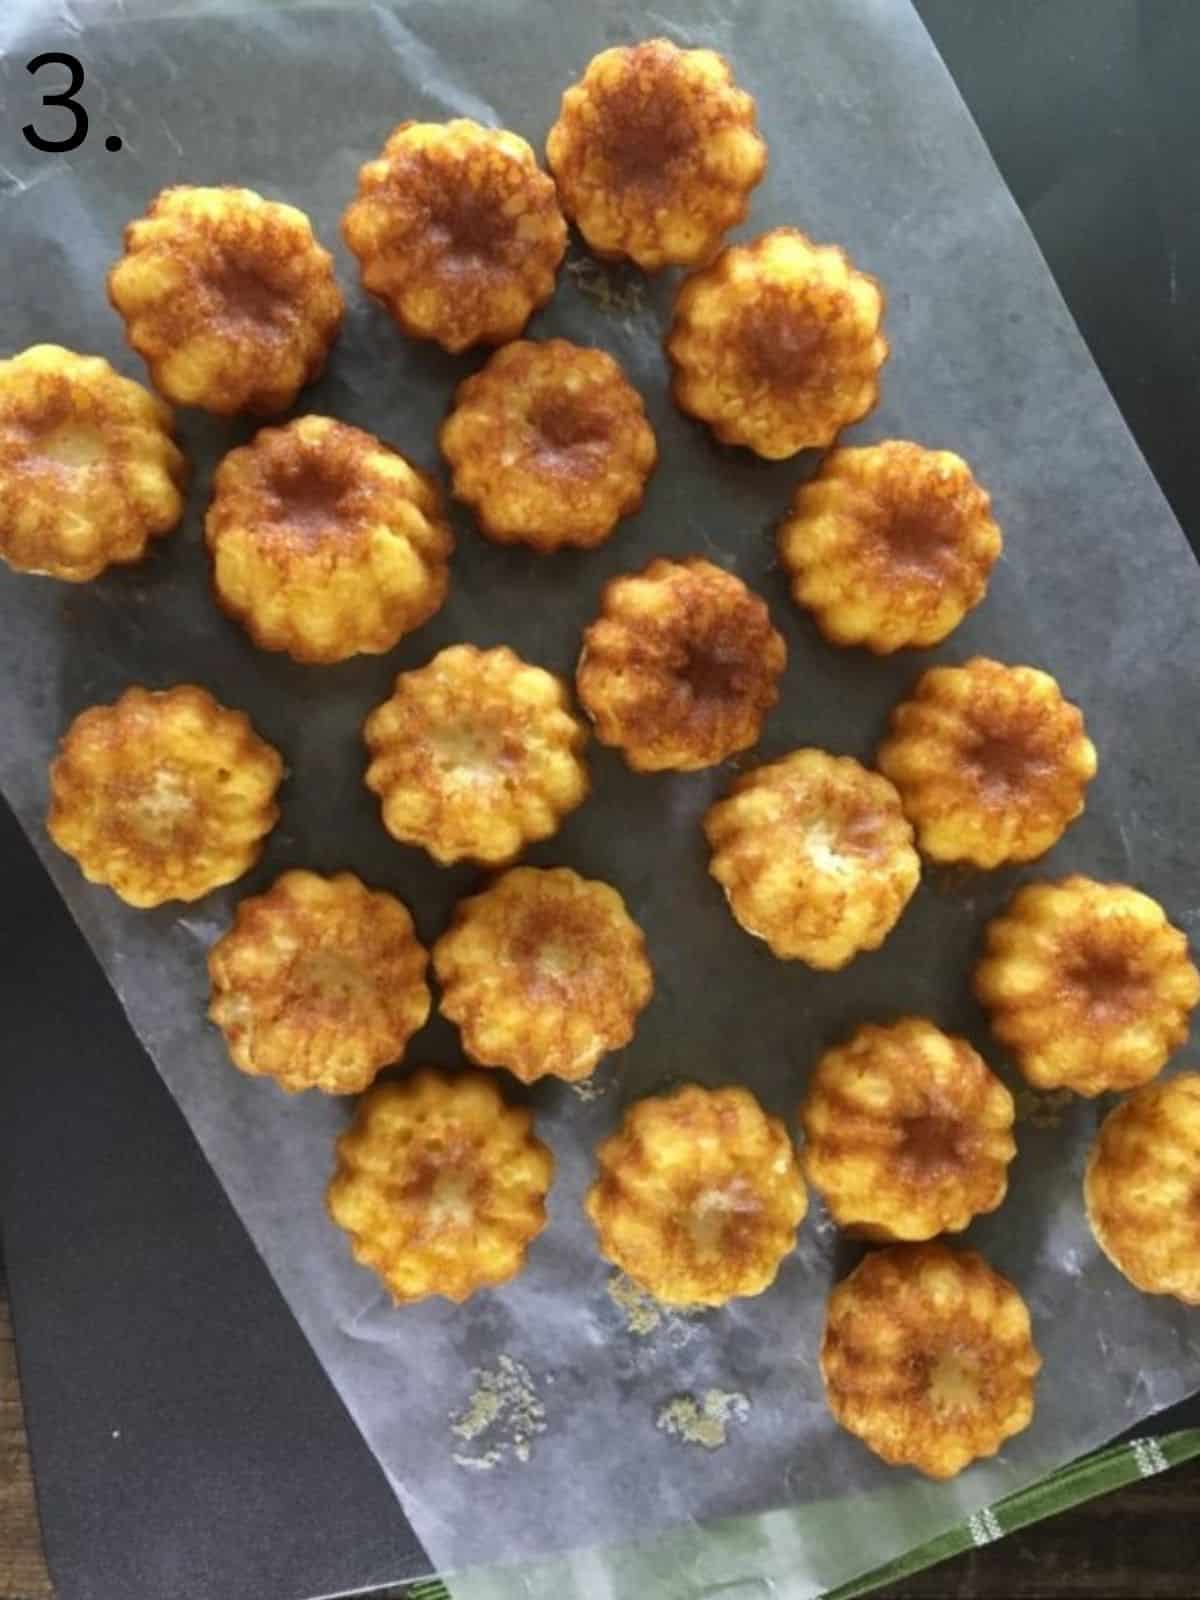
Bake according to the box instructions.
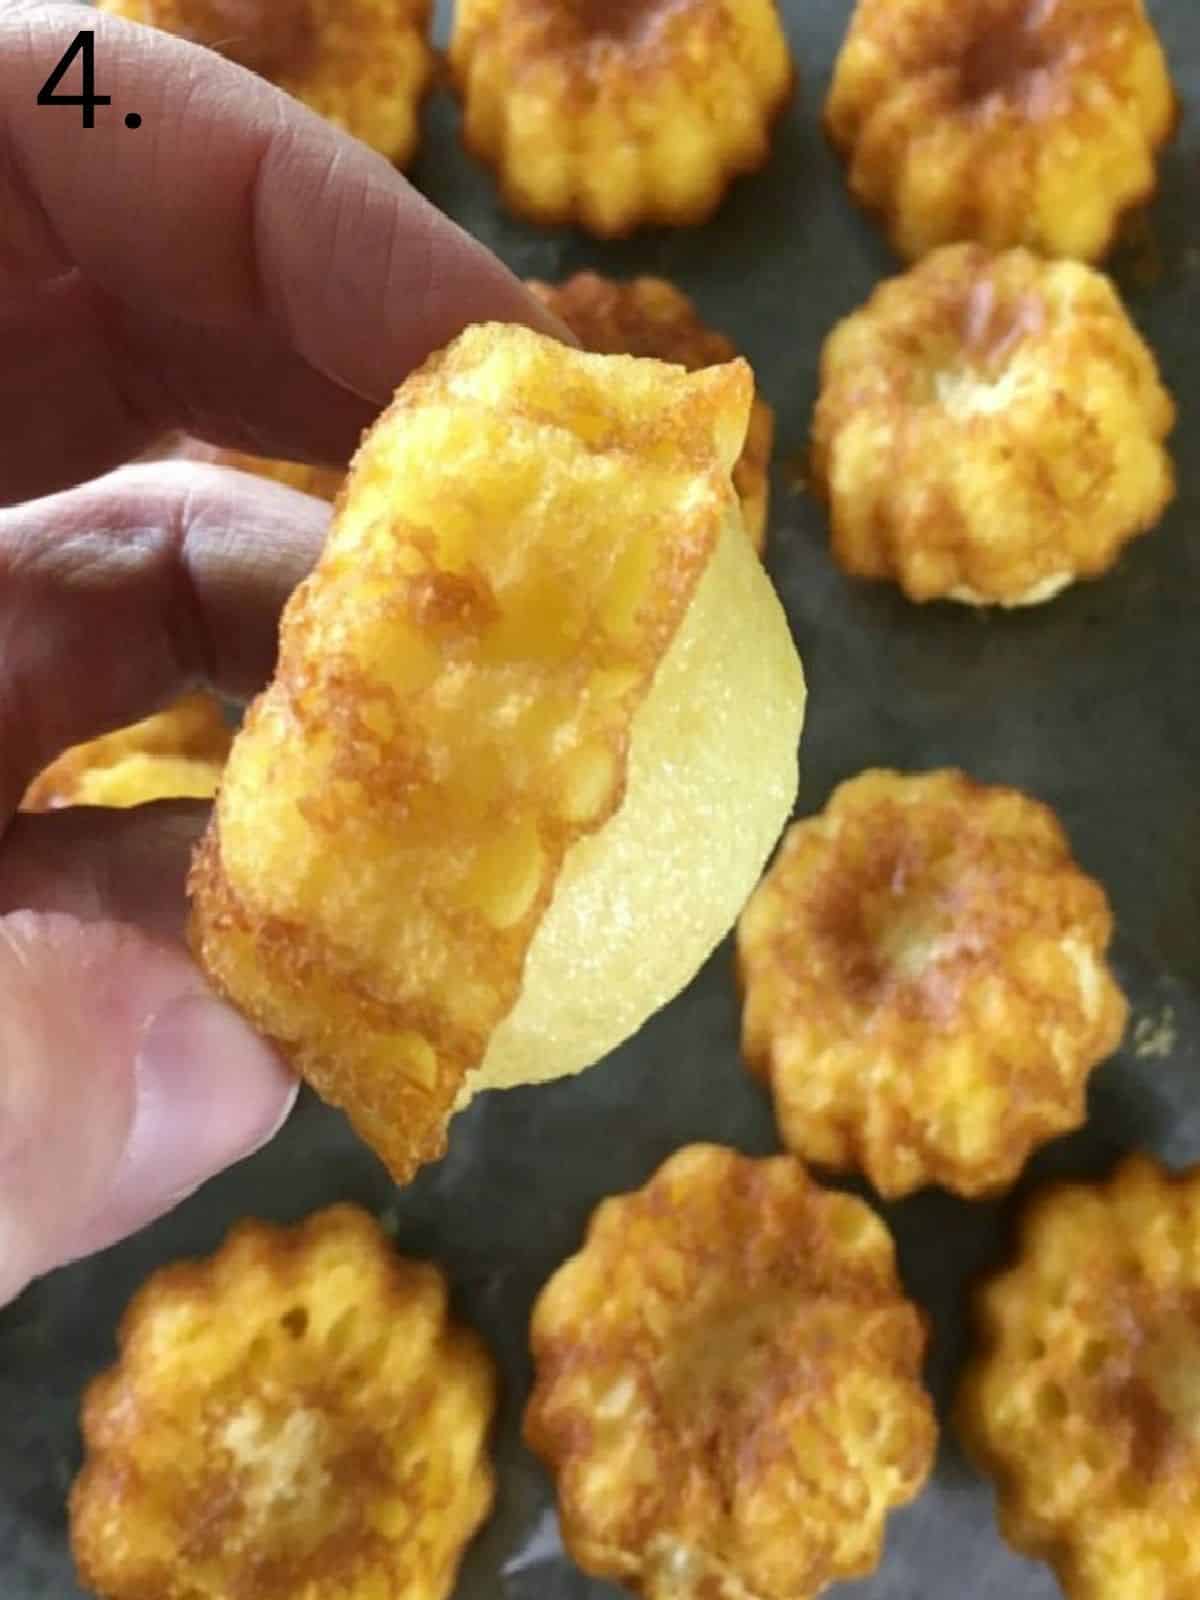
Allow the cupcakes to cool completely before frosting.
Place the cupcakes on a tray or cake board large enough to form the shape of the American flag. You will need a total of 35 cupcakes. Place 7 rows of cupcakes across the width of the board and 5 rows high.
Frost the Cupcakes:
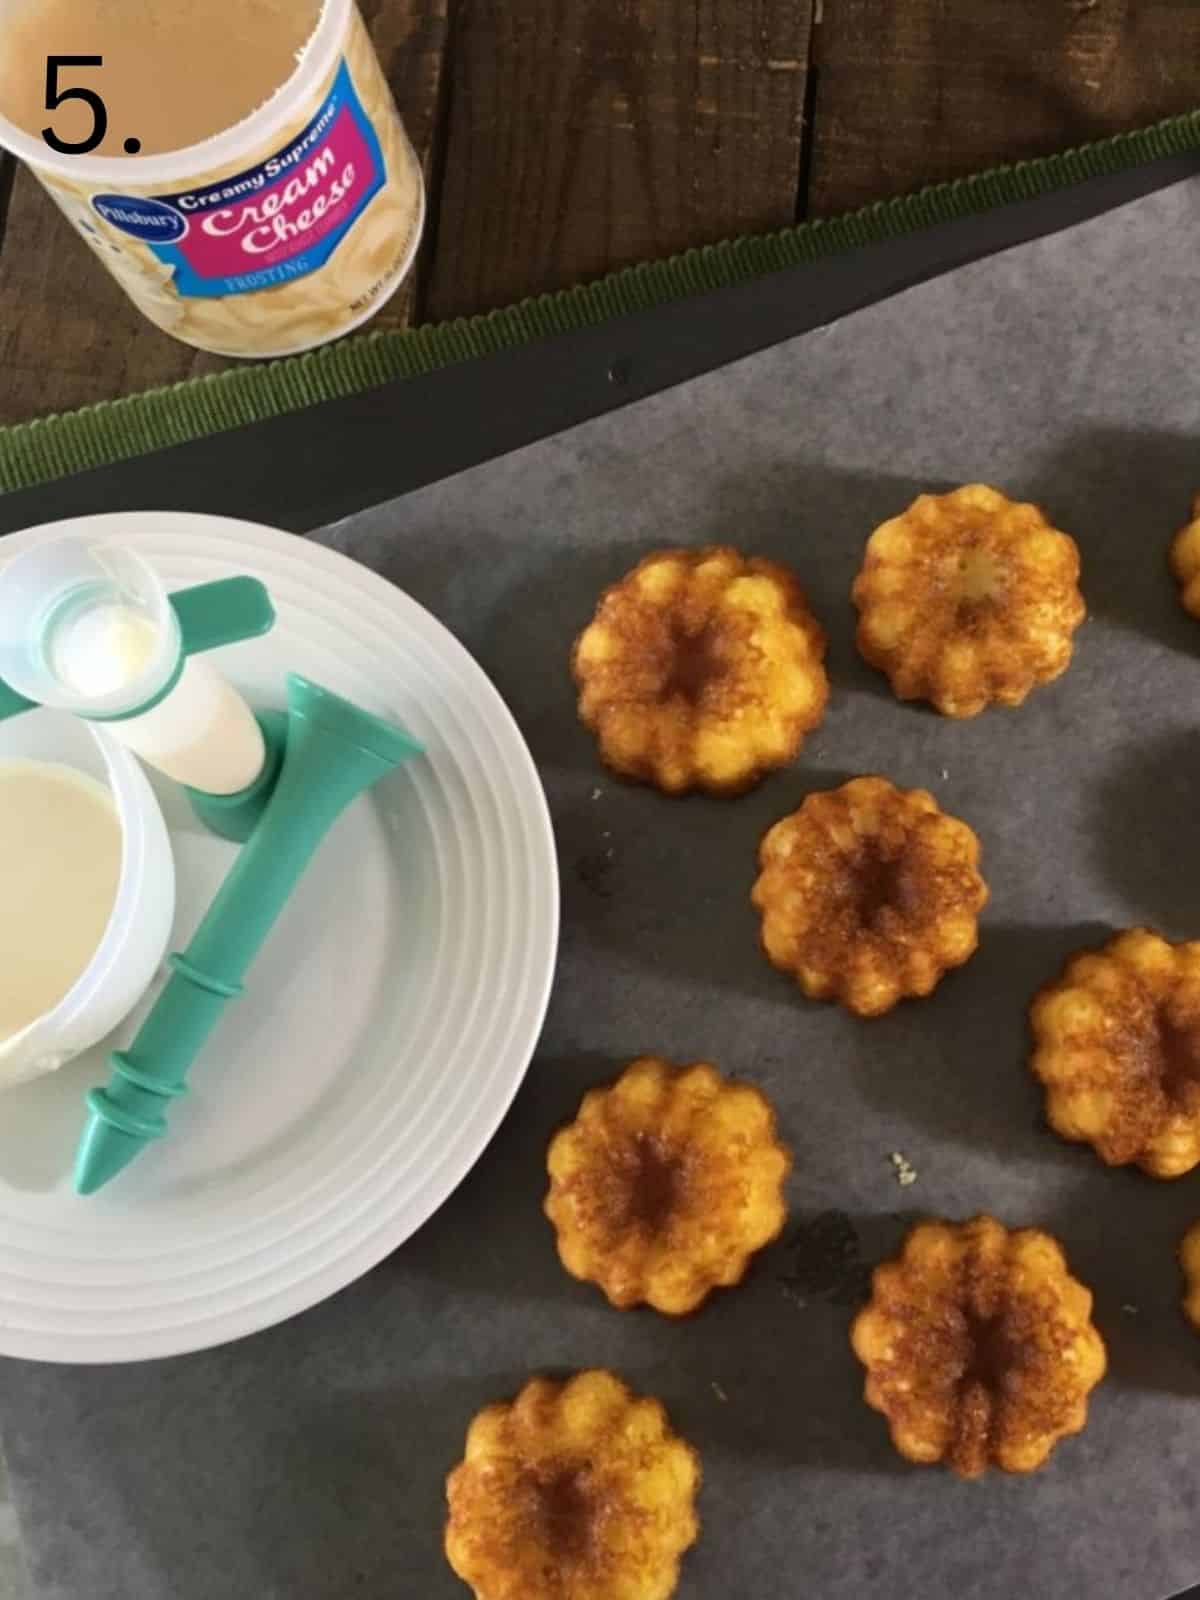
Add 1 cup of frosting to a bowl and add blue gel food coloring until you reach your desired shade.
Add about 2 cups of frosting to a bowl and add red gel food coloring until you reach your desired shade.
Add about 1 ½ cups of white frosting to a pastry bag with a 1M piping tip attached. Do the same for the blue and red frostings.
On rows 1-3, add blue frosting to the first 3 cupcakes on the far left. These 9 cupcakes in the left corner represent the stars.
Frost the remaining cupcakes on rows 1, 3, and 5 red.
Frost the remaining cupcakes on rows 2 and 4 white.
Both boxes of cake mix gave me 45 cupcakes total. I only used 35 for the cupcake cake because of the size tray I used. I frosted the remaining cupcakes and served them on the side. You can add fun patriotic picks to them to help decorate around the cupcake cake if you want.
Frosting colored with gel food coloring darkens the longer it sits, so allow it to rest about 15 minutes before adding more and more food coloring to get the right shade of red or blue.
If your frosting seems a bit thin to hold its shaped when piped, add a tablespoon of powdered sugar at a time until it reaches the perfect consistency.
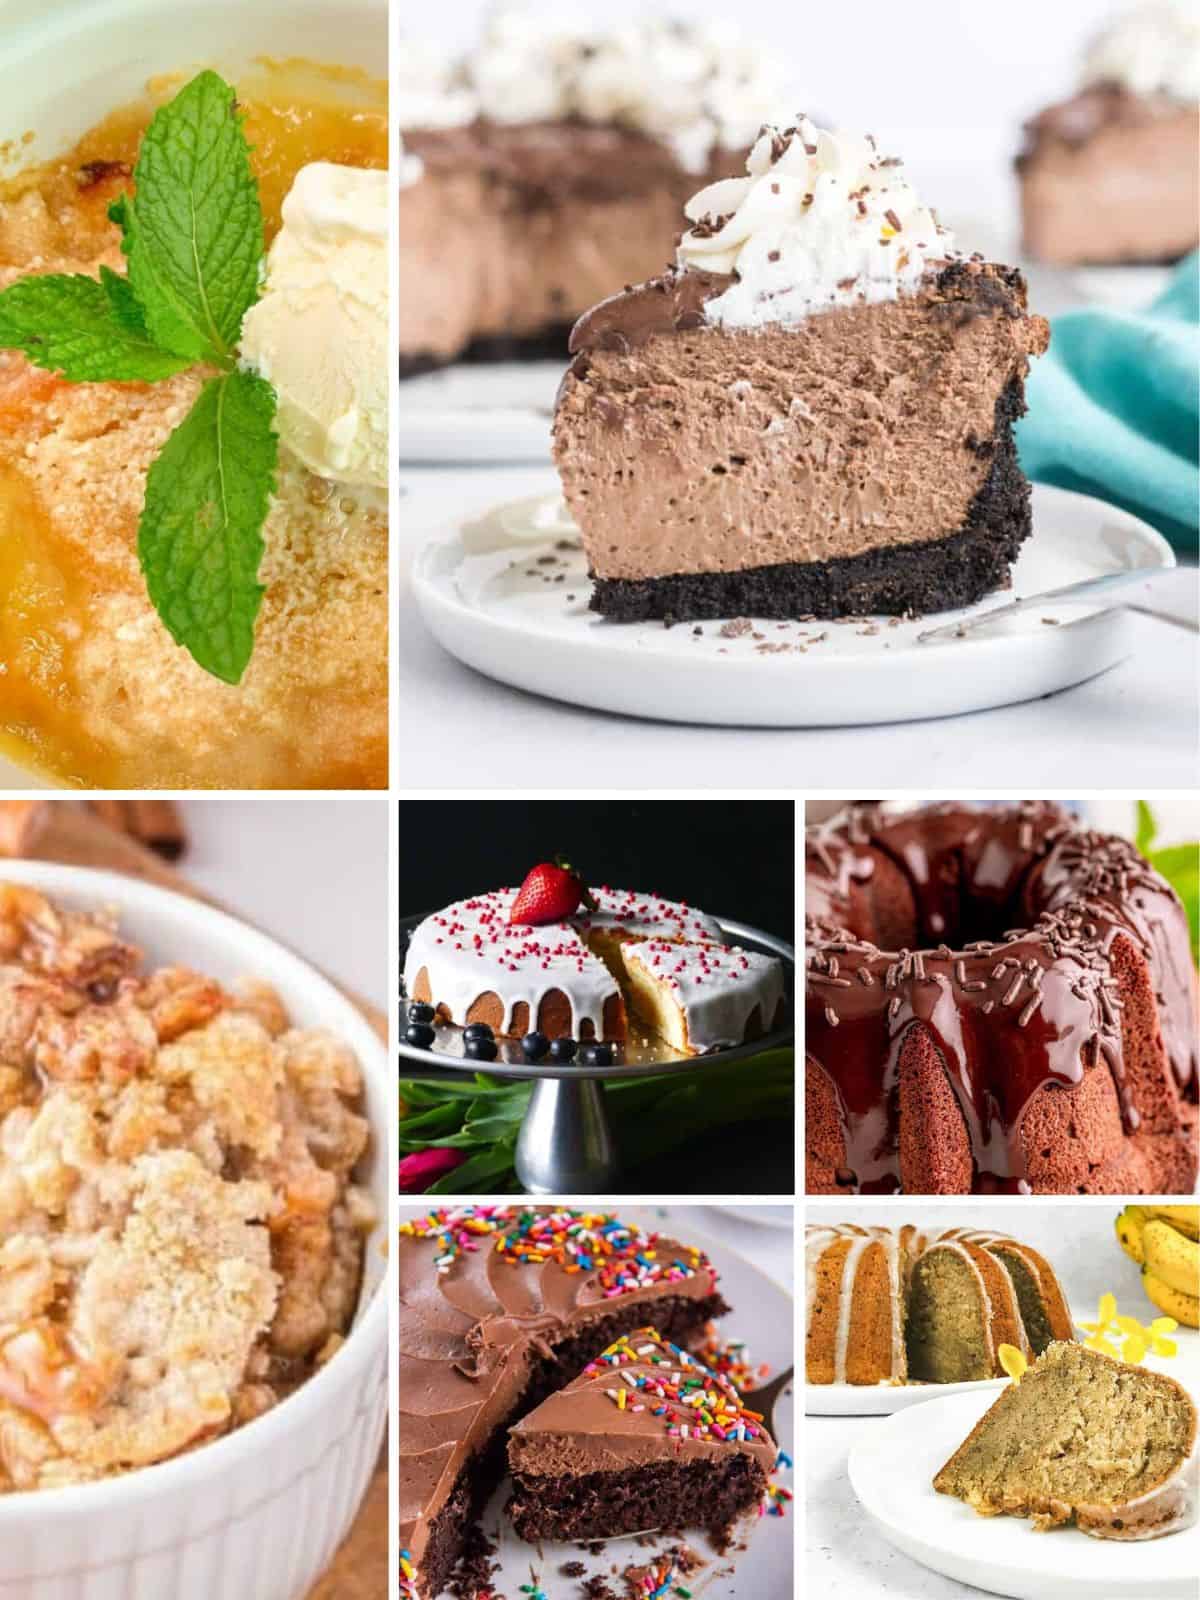
Baking a cake is easier than ever before, thanks to the modern magic of the air fryer. Included in this collection of 12 Air Fryer Cake Recipes are cheesecakes, fruit filled cakes and traditional cake mix recipes.
From prepping your batter to perfecting your technique, we'll show you everything you need to know to create delicious cakes that will impress your family and friends.
Get ready to dive headfirst into the world of air fryer cake baking and discover a new way to make your favorite desserts!
Check out all the other Air Fryer Desserts for even more delicious recipes.
Using an air fryer to bake a cake has become increasingly popular because of several advantages it offers. Air fryers use hot, circulating air to evenly distribute heat, creating a crispy exterior on the cake while keeping the inside moist and fluffy.
Air fryers are significantly faster than traditional ovens, which means that baking a cake in an air fryer requires less time and energy, making it more efficient.
Since air fryers are compact and portable, it makes them ideal for small kitchens or cooking areas with limited space. Using an air fryer to bake a cake is convenient, energy-efficient, and produces great results every time; not to mention a delicious way to create dessert!
Don't let its small size fool you! This handy kitchen gadget can be a game-changer when it comes to making tasty cakes that are perfectly cooked every time.
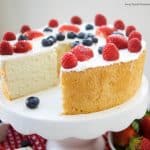
Sponge cakes or angel food cakes work best in air fryers compared to dense cakes such as chocolate or pound cakes. The light batter of sponge cakes or angel food cakes works better with the hot, circulating air in the air fryer, resulting in a delicate and fluffy cake.
Denser cakes may not rise as well or cook evenly. However, with a bit of experimentation, you can adapt different cake recipes to work in an air fryer.
🌟What are some tips for ensuring even cooking in an air fryer?
Ensuring even cooking in an air fryer is crucial to getting the best results possible. Here are some tips to help you achieve this:
Don't overload the air fryer basket: Be sure to leave enough space for the hot air to circulate around the food. Overcrowding it can lead to uneven cooking.
Use a baking pan or basket that fits properly: Make sure that the pan or basket you are using is the appropriate size for the air fryer. Using one that's too small or too big can result in uneven cooking.
Preheat the air fryer: Preheating the air fryer can help ensure even cooking by getting it up to temperature before you add your food.
Monitor the cooking time: Check on your food periodically while it cooks to make sure it's cooking evenly. Depending on the food, you may need to adjust the temperature or cooking time.
📌Quick Tip: An important tip to keep in mind when baking cakes in the air fryer is to avoid opening the air fryer basket too frequently while the cake is cooking. Opening the basket frequently can lead to inconsistent temperatures and uneven baking.
🥣What are some common problems that I could encounter when baking cakes in an air fryer?
There are problems that anyone can encounter when using the air fryer to bake a cake. You should make sure you select the right recipe. Try not to overload the air fryer basket. And lastly check the cake frequently while it is baking!
Also keep in mind the following:
The size of the air fryer basket may limit the size of the cake you can bake.
Secondly, the hot circulating air can cause the cake to rise and then collapse due to pressure changes.
The texture can become uneven if there are hot spots or if the cake is not cooked long enough.
Without proper greasing, the cake may stick to the air fryer basket or have a greasy bottom.
Can you bake a cake in an air fryer?
Yes, you can definitely bake a cake in an air fryer! It might sound unconventional, but air fryers are actually great for baking small cakes. The hot, circulating air in the air fryer cooks the cake evenly, creating a crispy outside and a moist and fluffy inside.
What's the suggested baking time for cakes in an air fryer?
The suggested baking time for cakes in an air fryer depends on the recipe, the size of the air fryer, and the wattage of the appliance. As a general rule, baking a cake in an air fryer takes about 15-25 minutes at 320-350°F. You should keep an eye on the cake as it bakes. A cake is done when a toothpick inserted into the center comes out clean.
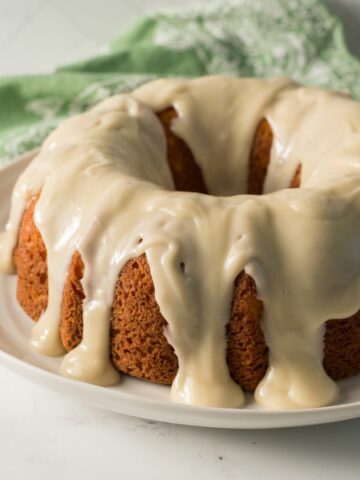
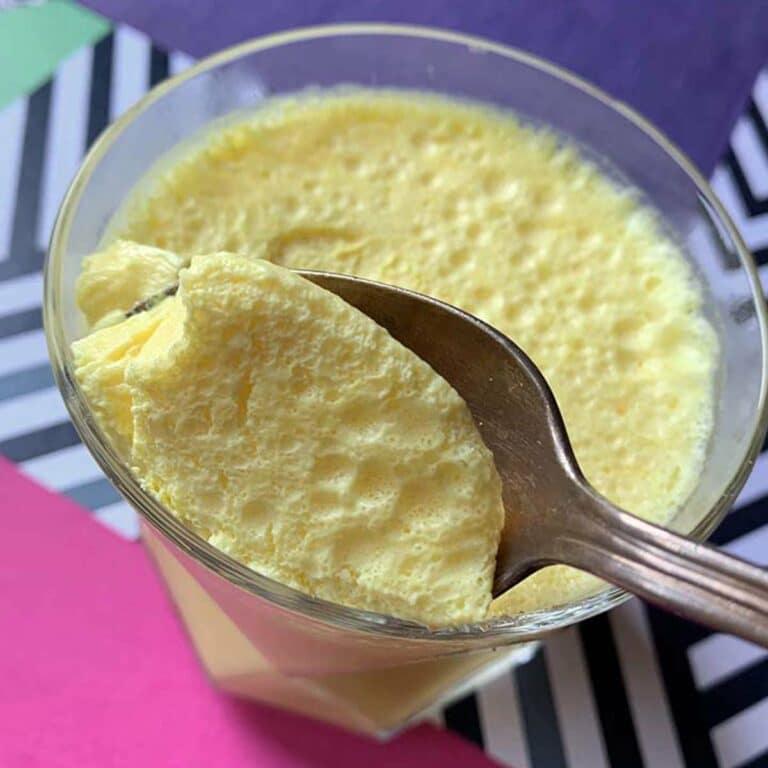
Satisfyingly moist and flavorful, our Air Fryer Pound Cake rivals its oven-baked counterpart. Impressively, you can craft a smaller cake without turning on the oven, a definite summertime win. Whip up this delectable cake in no time with the convenient and straightforward air fryer method.
Make a classic Air Fryer Peach Dump Cake with only three ingredients! This time, we're baking it in the air fryer for a fast, easy, and delicious dessert. Don't worry about complicated steps - just "dump" the ingredients together and you're good to go!
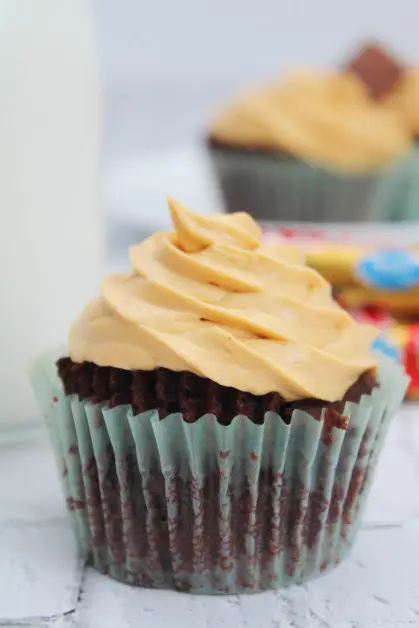
Indulge in the irresistible taste of our air fryer cupcakes! Filled with decadent Twix pieces and crowned with velvety homemade caramel buttercream frosting, these treats are guaranteed to satisfy your sweet cravings. Don't miss out on this delectable dessert experience!
Prepare to Fall in Love with Air Fryer Dulce de Leche Cheesecake! You won't be able to resist this divine dulce de leche cheesecake recipe, specially crafted for your air fryer. If you don't already have an air fryer, get ready to be convinced why you need one ASAP. Get the recipe now!
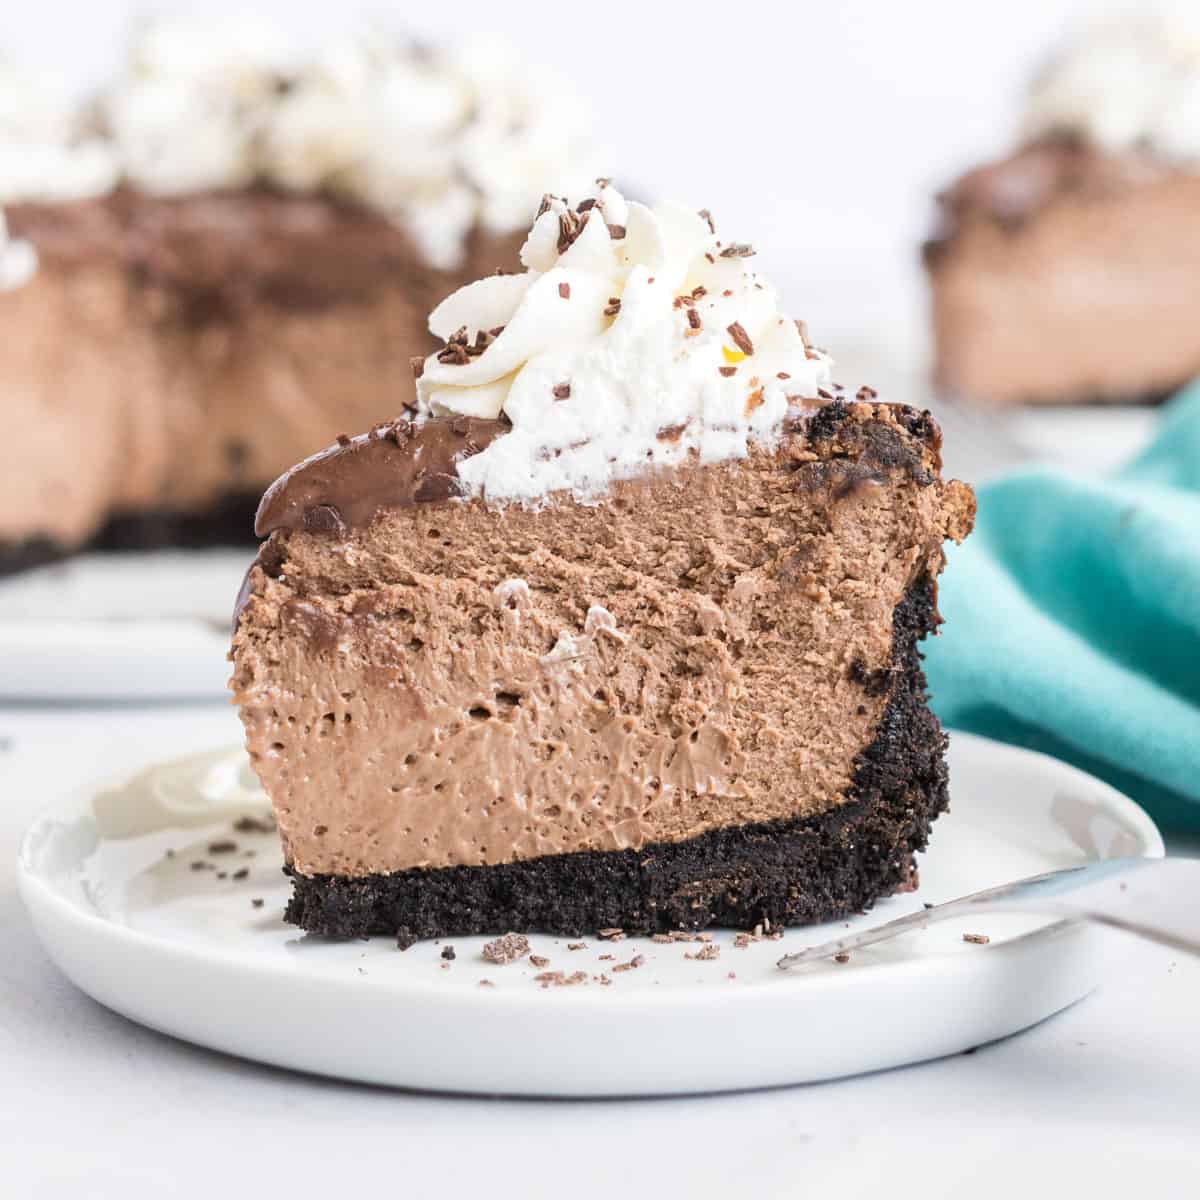
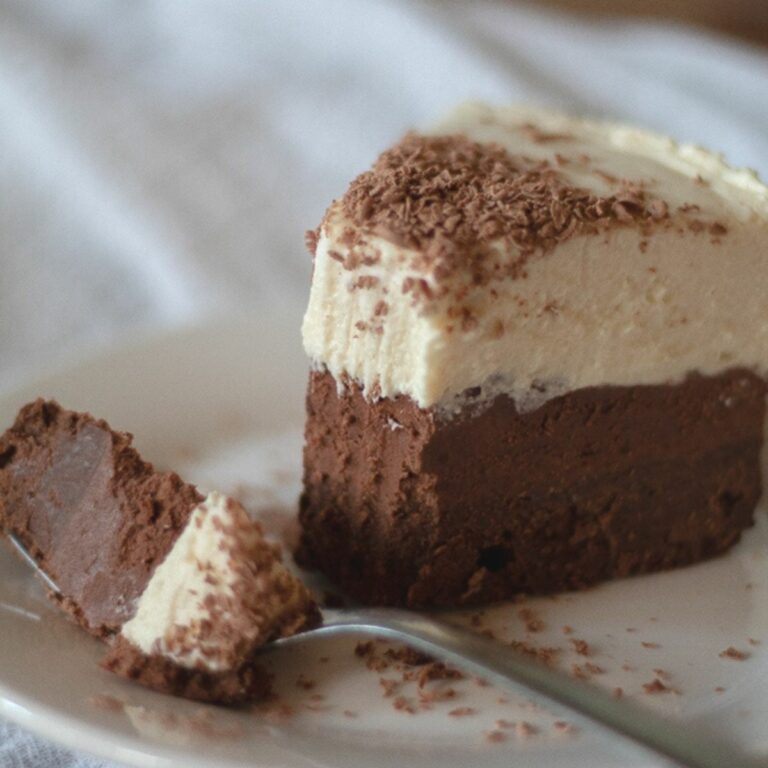
Impress your loved ones with a decadent triple chocolate cheesecake! Baked to perfection in the air fryer, this indulgent dessert boasts a rich chocolate cheesecake filling, nestled on a chocolate cookie crust, and crowned with a heavenly chocolate ganache. Treat yourself to the ultimate chocolate lover's treat!
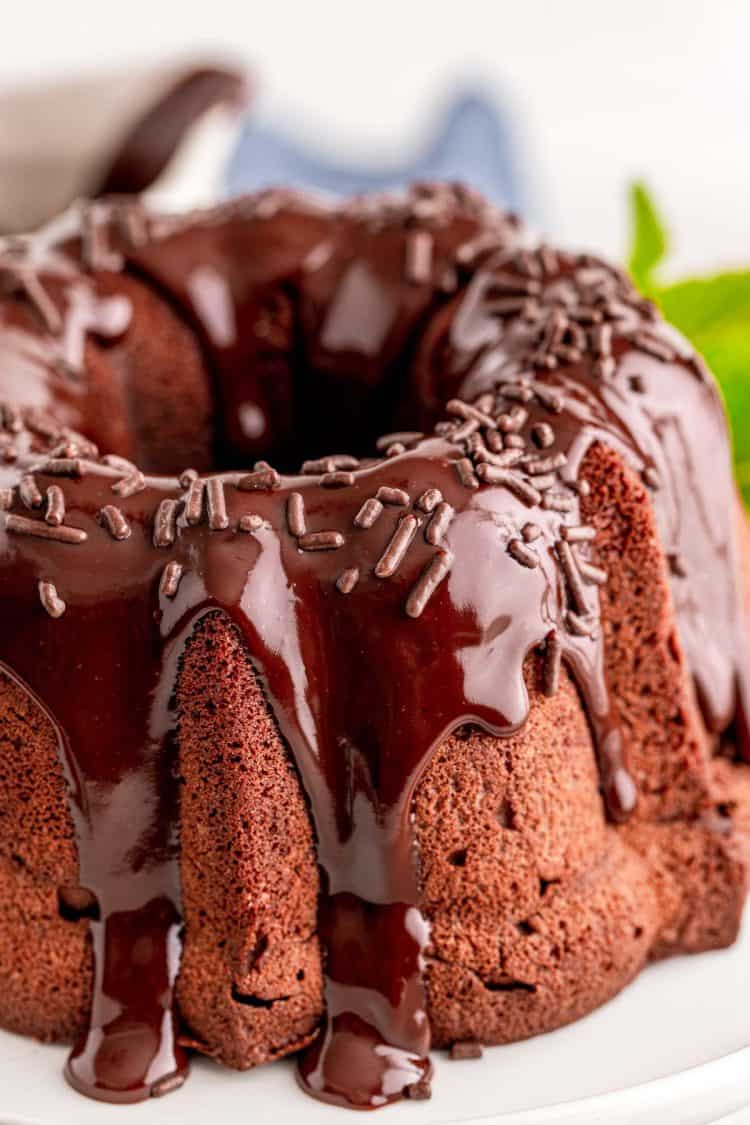
Indulge in the heavenly taste of our Air Fryer Chocolate Bundt Cake - an ultra-moist and rich dessert that's ready in just 30 minutes! To add to the decadence, we drizzle it with an irresistible chocolate ganache. Satisfy your sweet tooth in no time with this delectable treat.
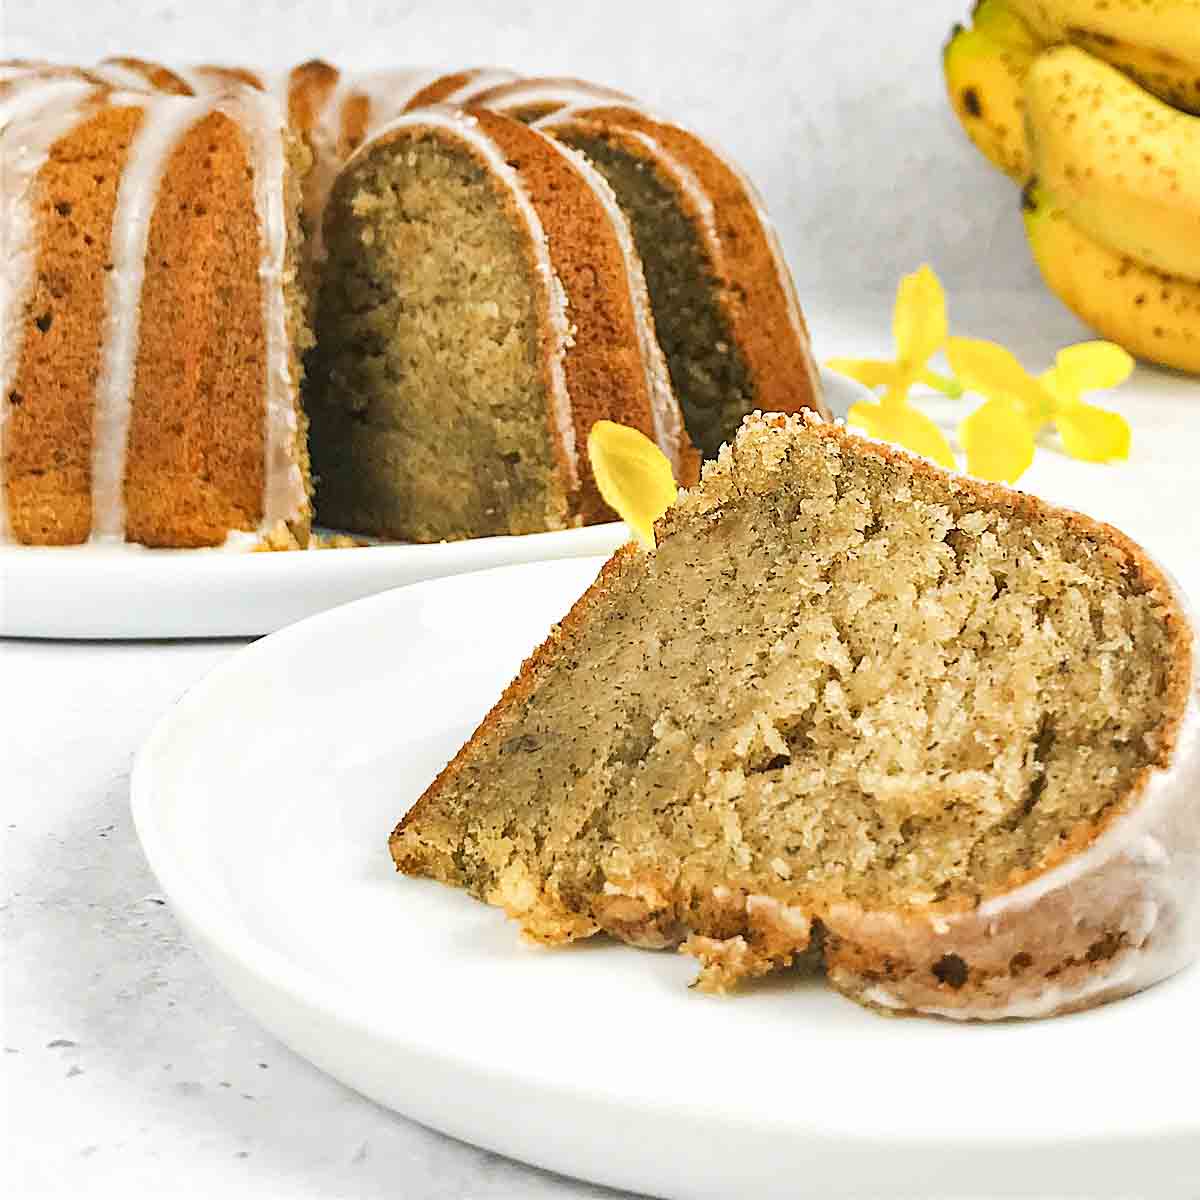
Indulge in the perfect dessert with a Banana Bread Bundt Cake, made easily in the Air Fryer with minimal ingredients. This delicious treat is one of our preferred Air Fryer baked goods, alongside our popular Banana Muffins, Chocolate Muffins, and Mini Breads. Give in to your cravings and savor the delectable flavor of our Banana Bread Bundt Cake, perfect for any occasion.
Creating an Air Fryer Cake for a sweet and satisfying dessert has never been easier! Simply grab a boxed cake mix of your choice, and follow the simple steps for this effortless recipe.
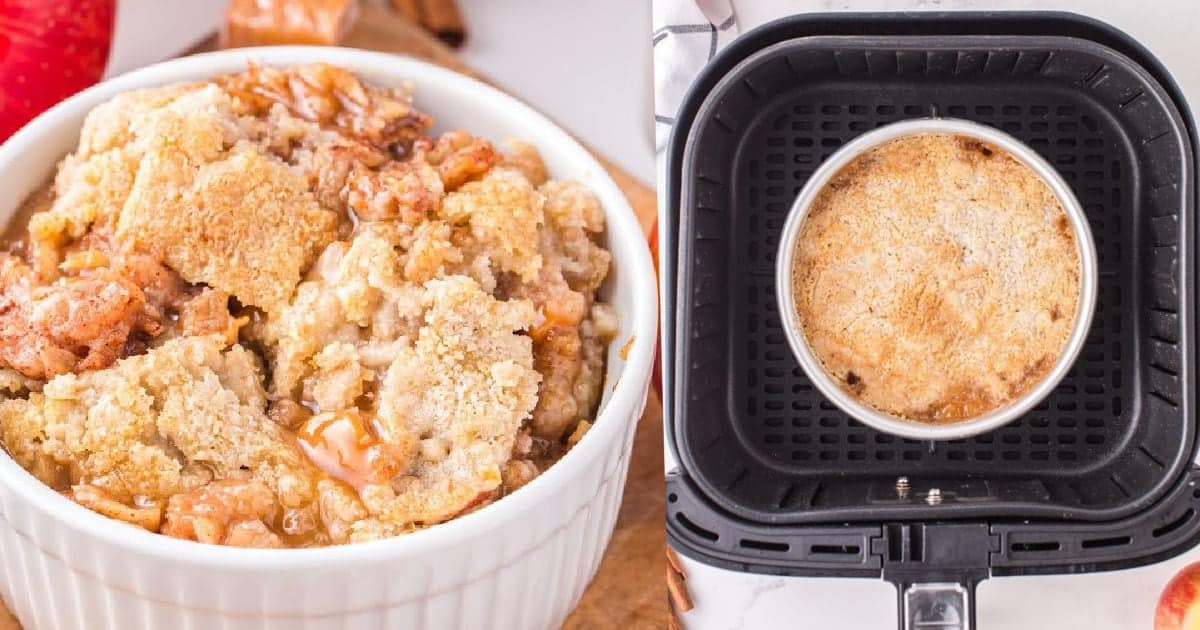
Indulge in the luxurious taste of Caramel Apple Dump Cake, an easy yet decadent dessert that can be whipped up in minutes. This recipe features sweet, fresh apples with a gooey caramel swirl, all topped off with a pecan cake mix. Simply dump the ingredients and bake for a moist and tender cake that will leave a lasting impression.
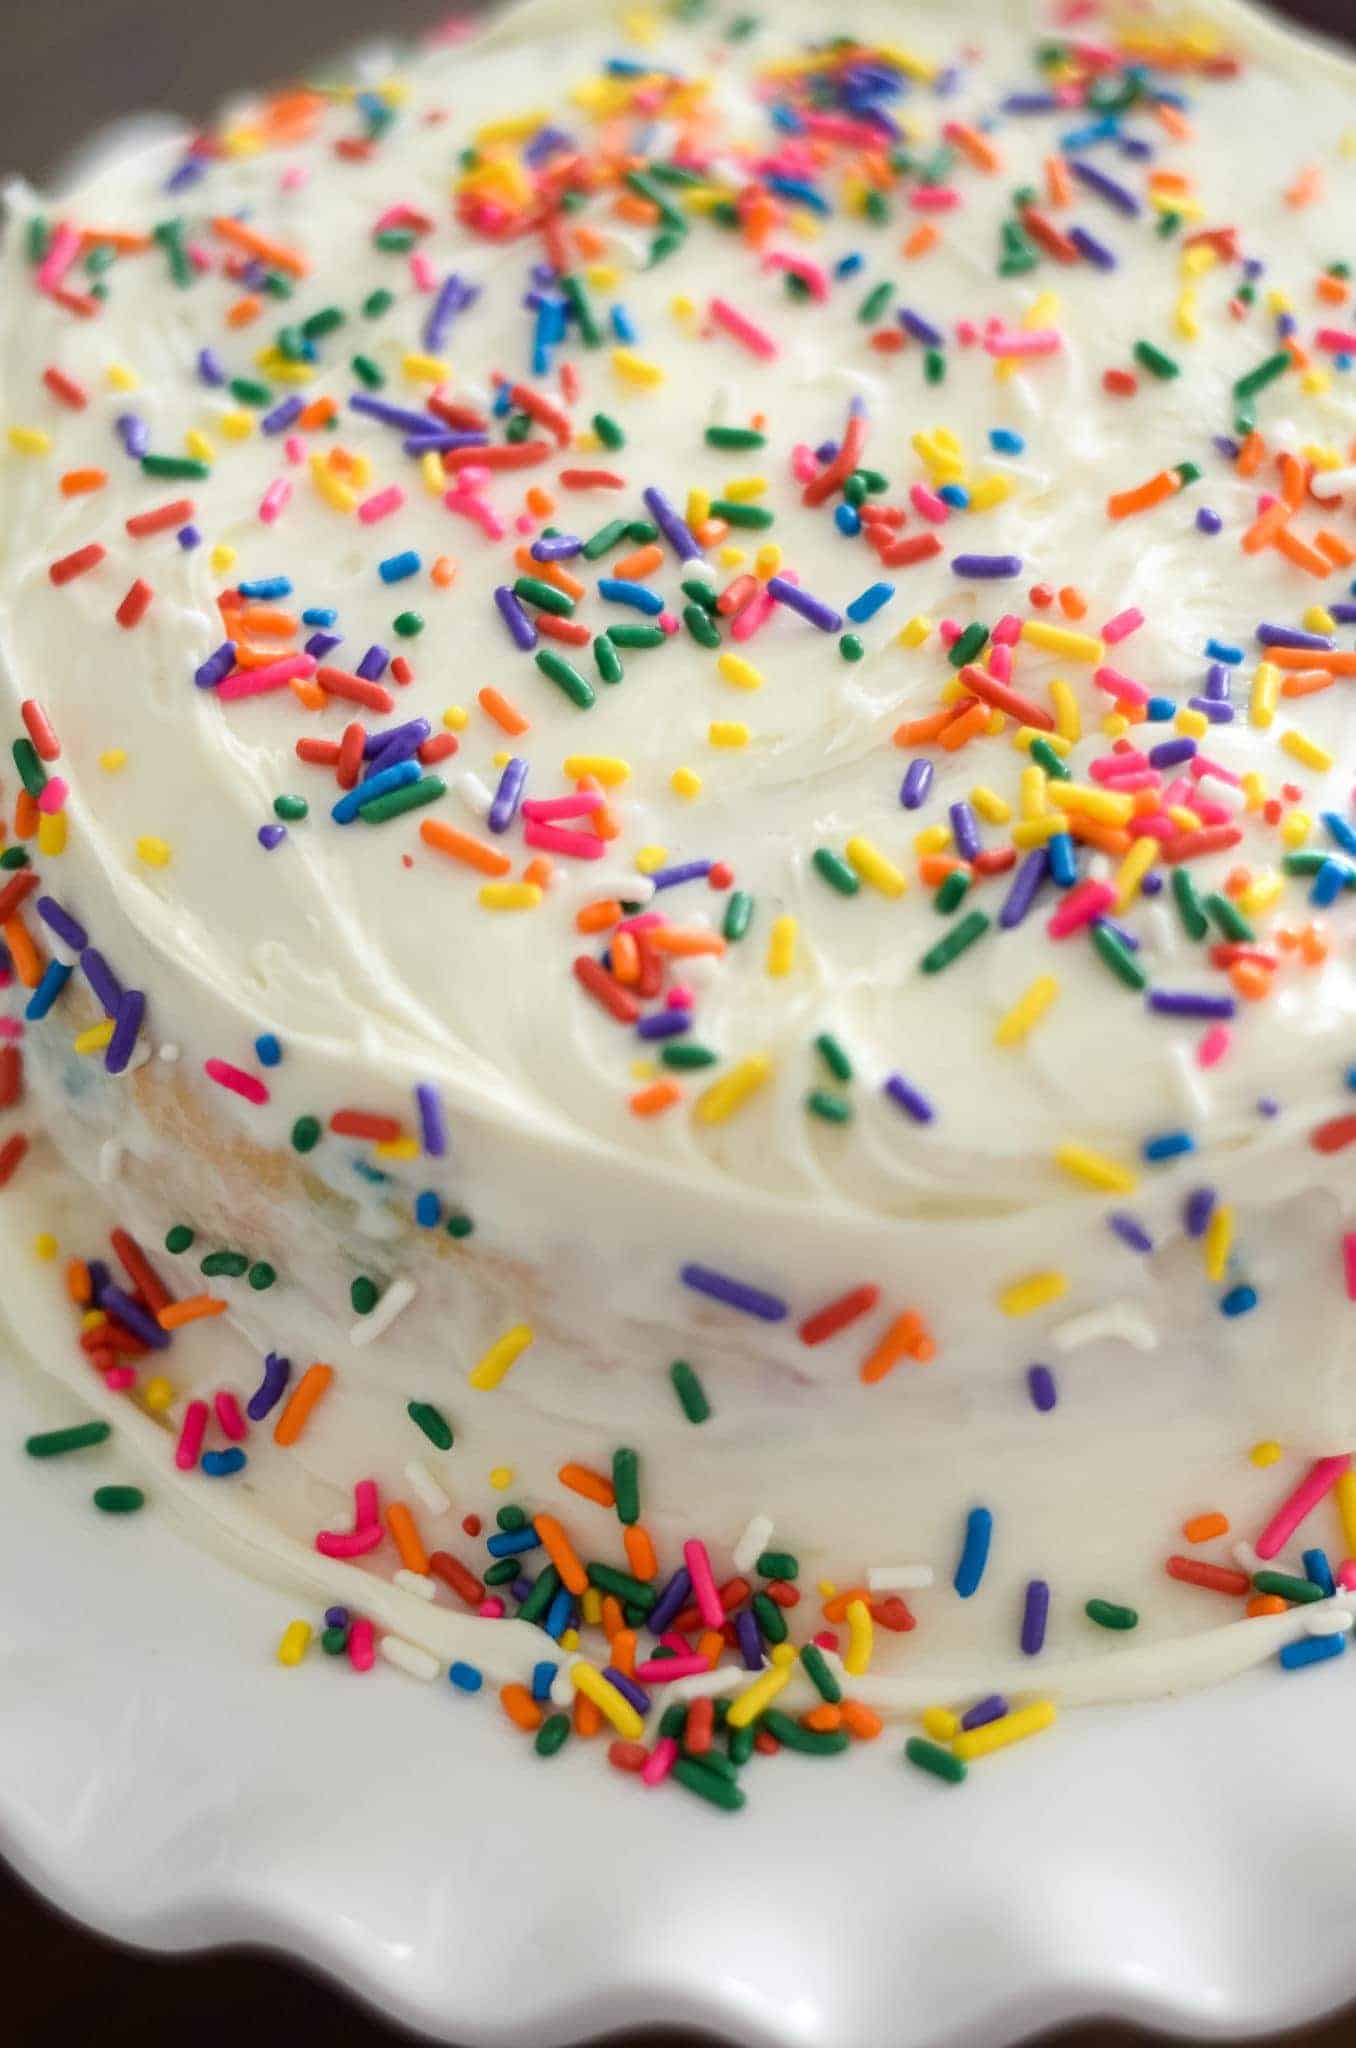
Get ready for a mouthwatering dessert! This air fryer cake recipe will give you a perfectly moist and delicious cake, faster than baking it in the oven. Top it off with your choice of frosting and savor every slice.
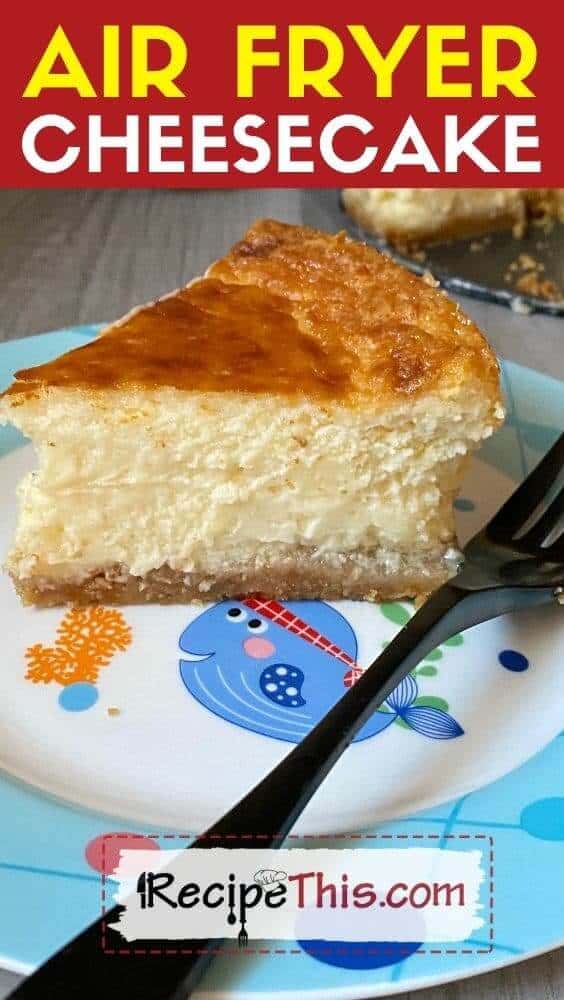
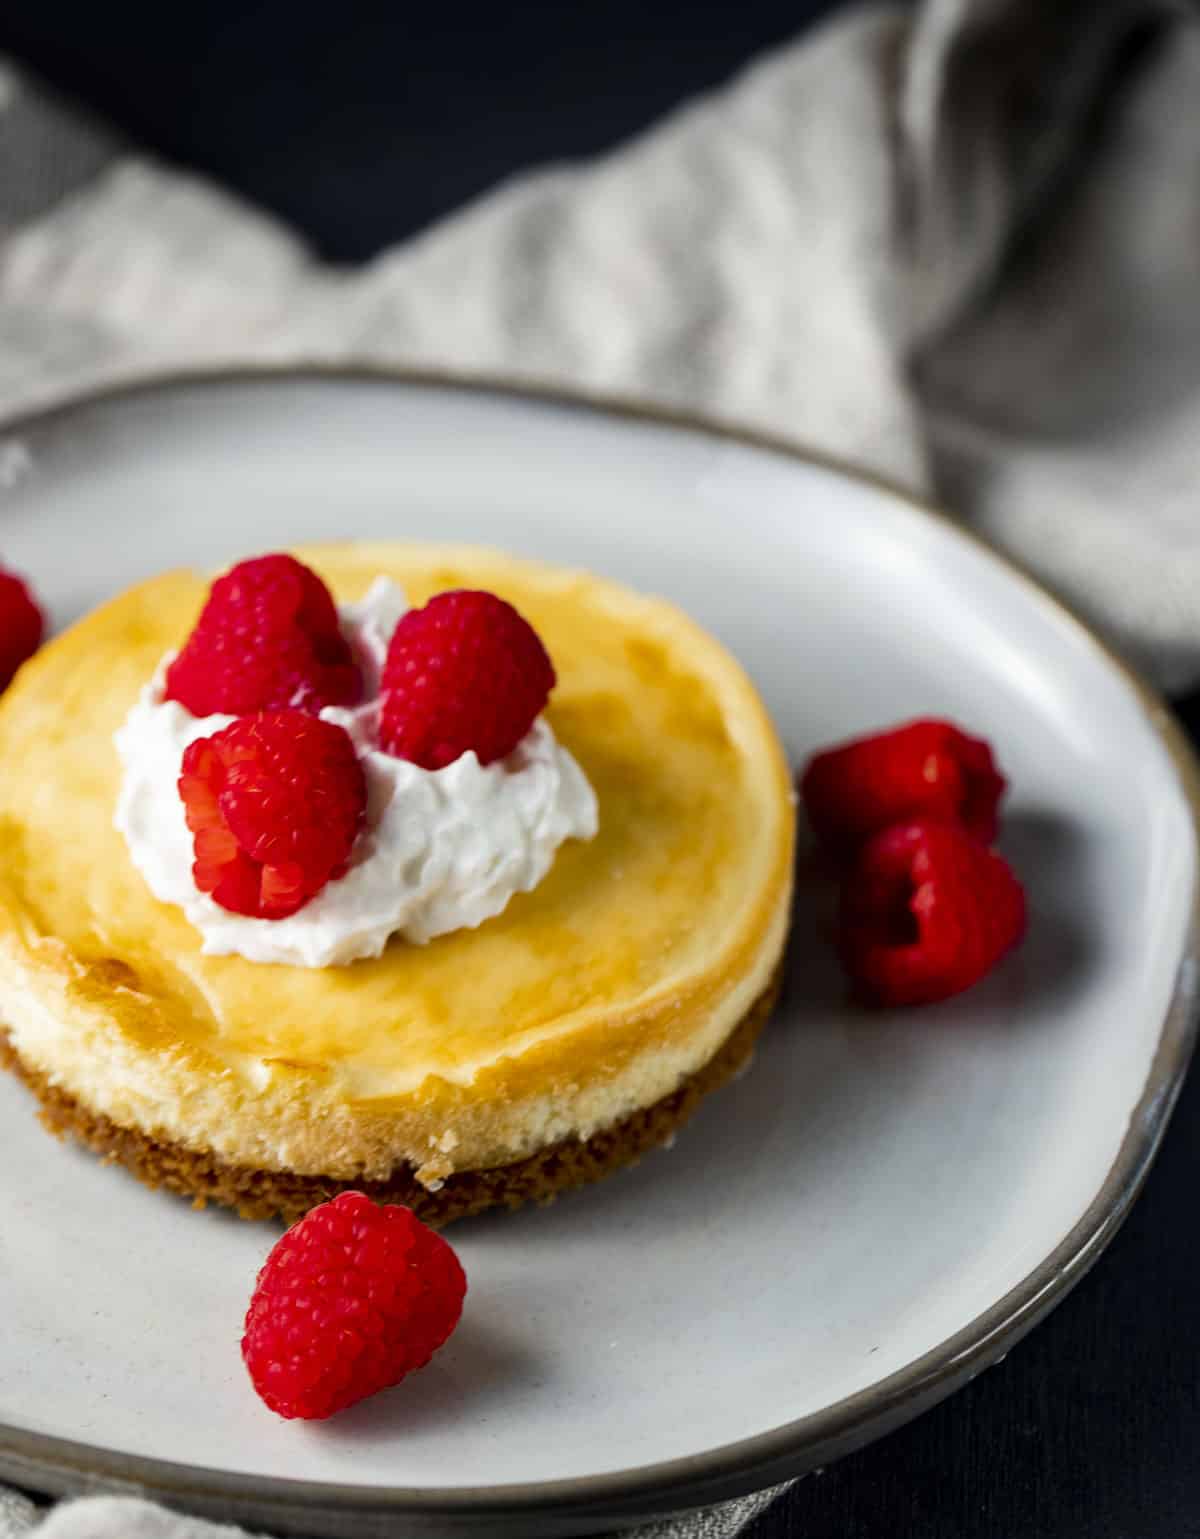
Indulge in a rich and velvety Air Fryer Cheesecake, perfectly balanced with a touch of sweetness to balance the tang. The recipe is amazingly fast and easy to prepare - a classic cream cheese filling sits atop a crispy graham cracker crust. You'll relish how uncomplicated it is to whip up this delightful treat.
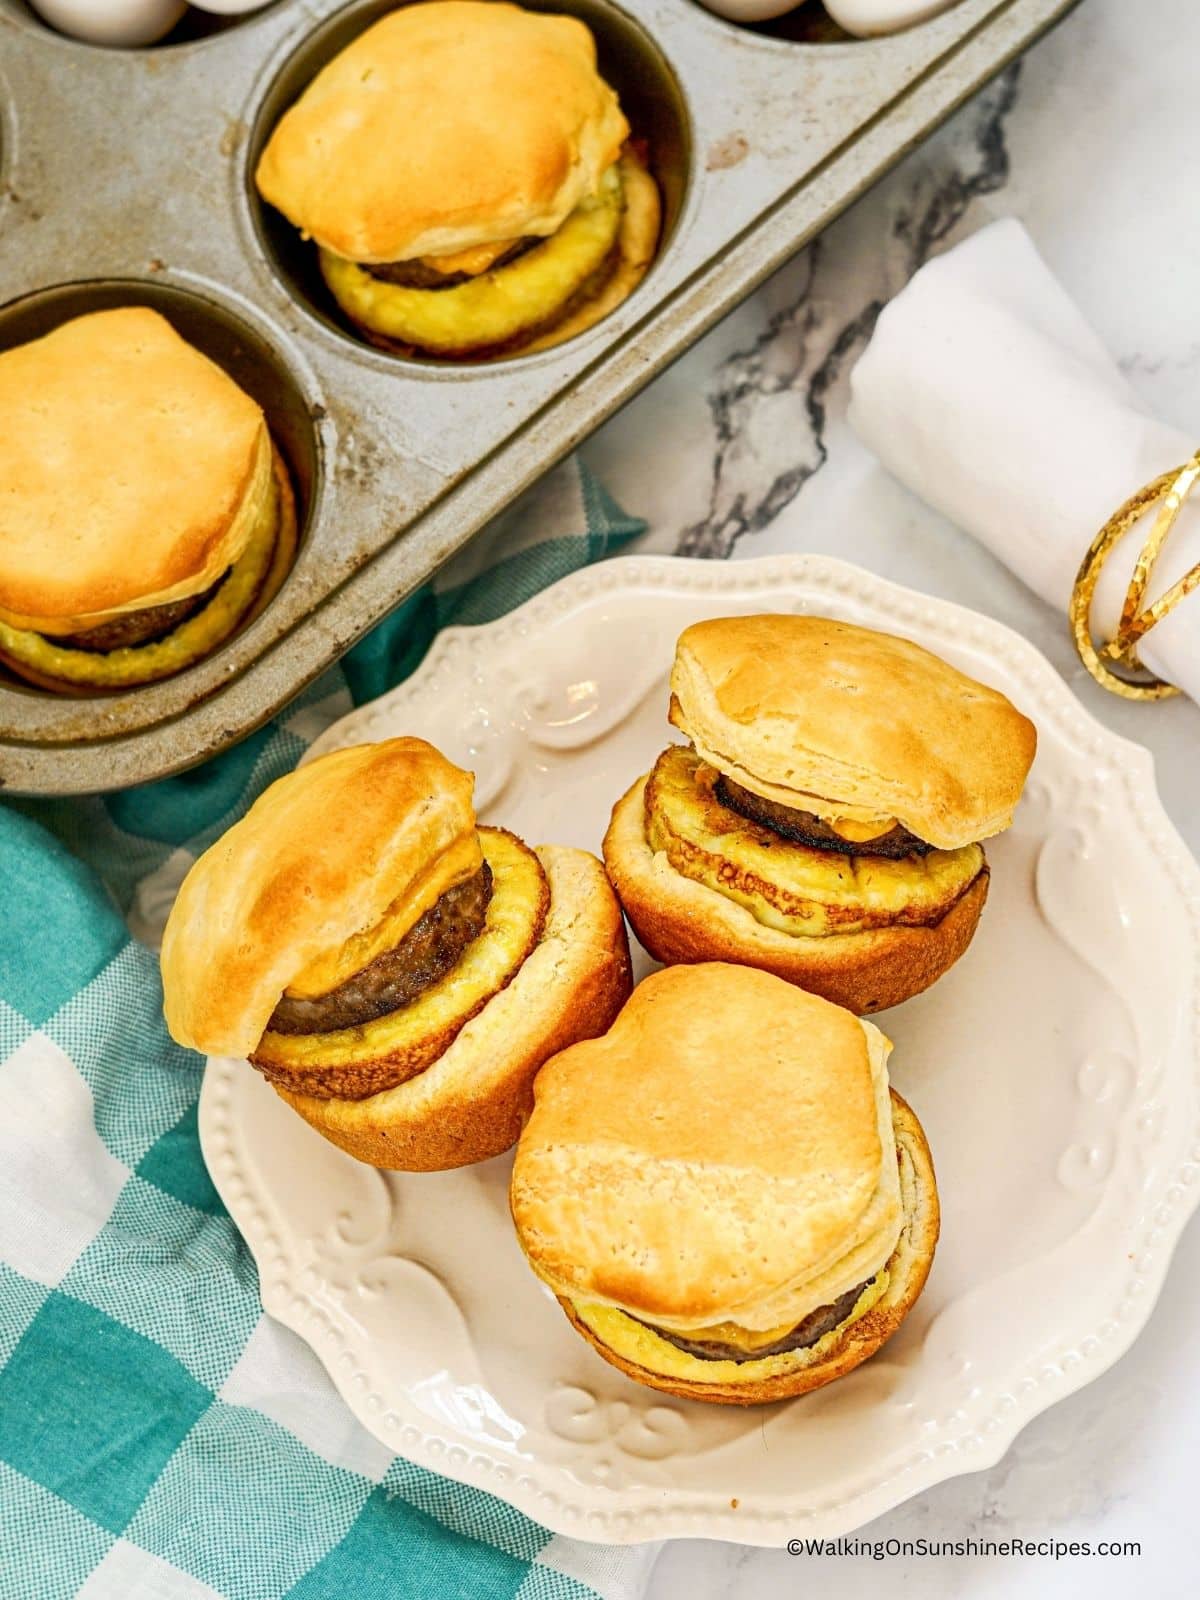
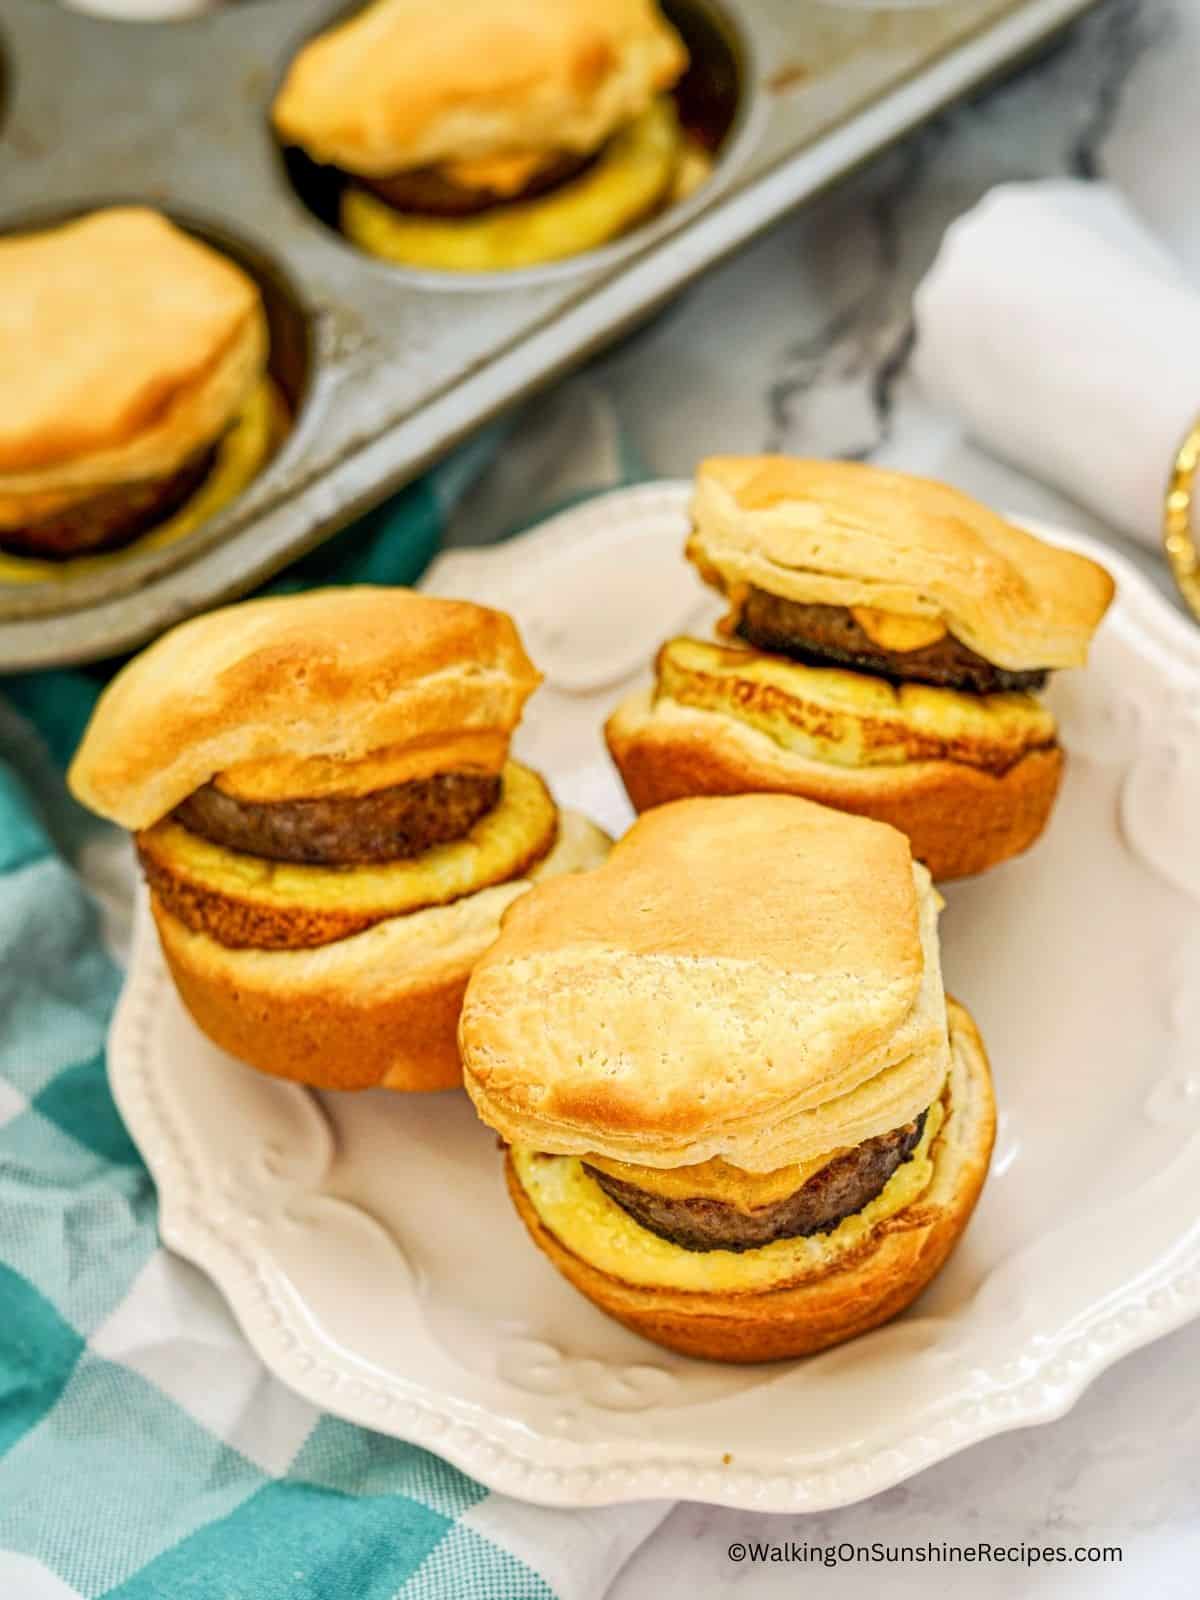
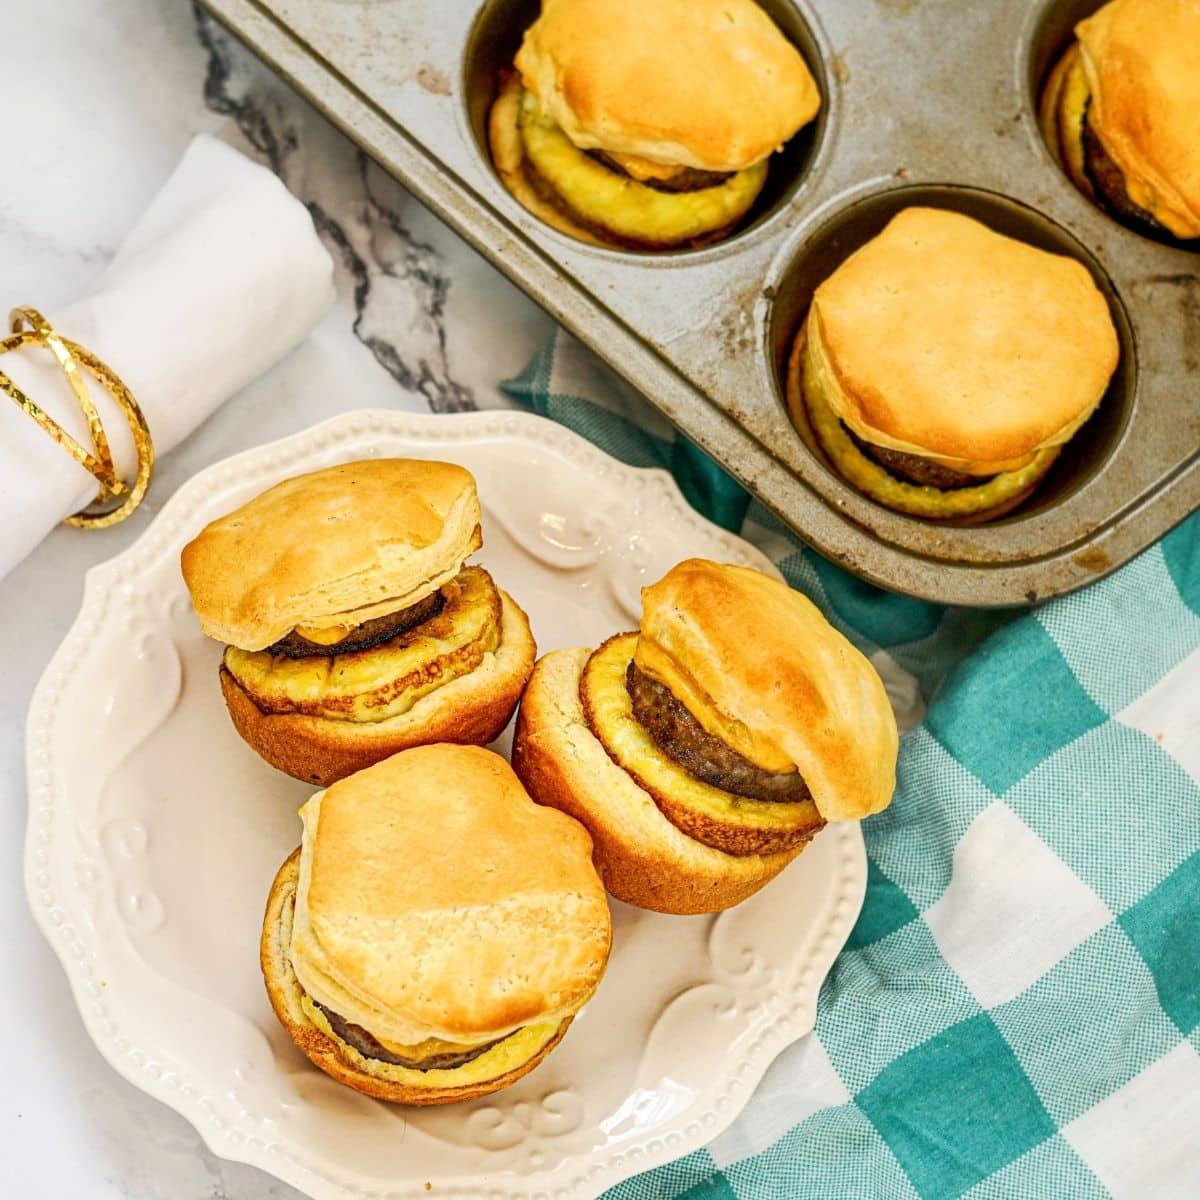
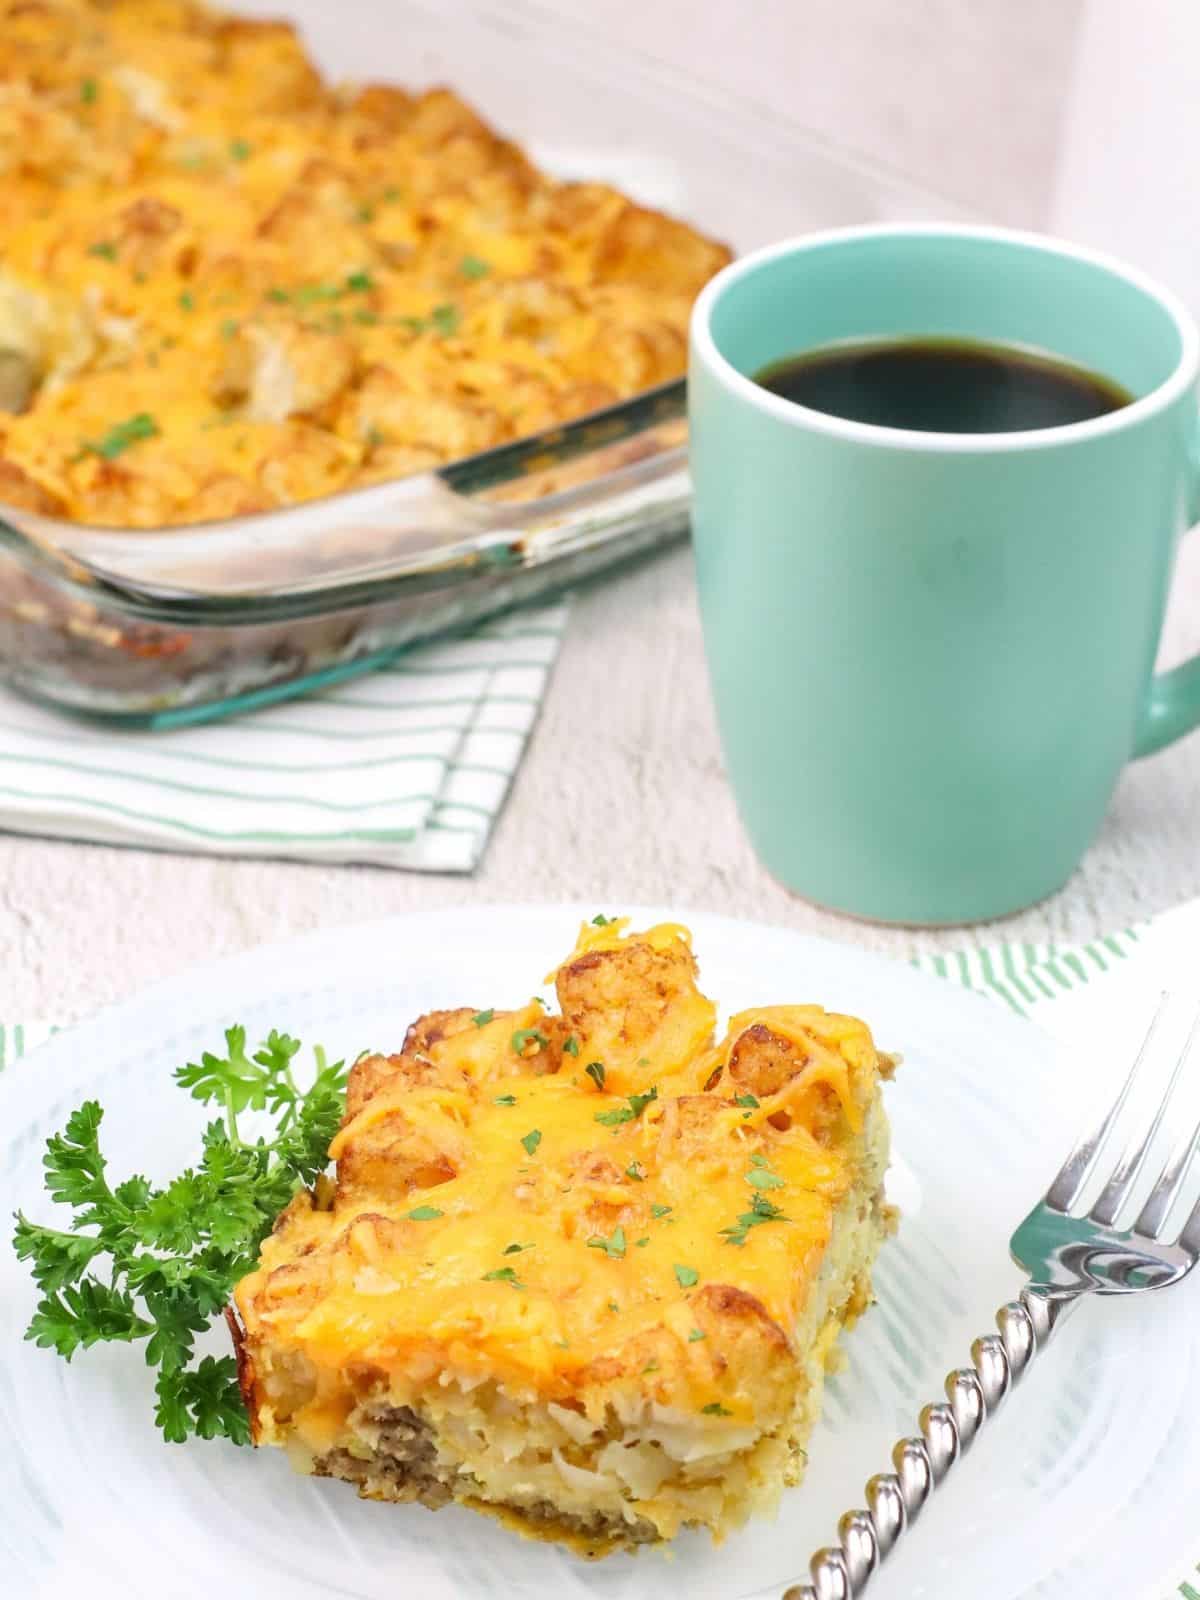
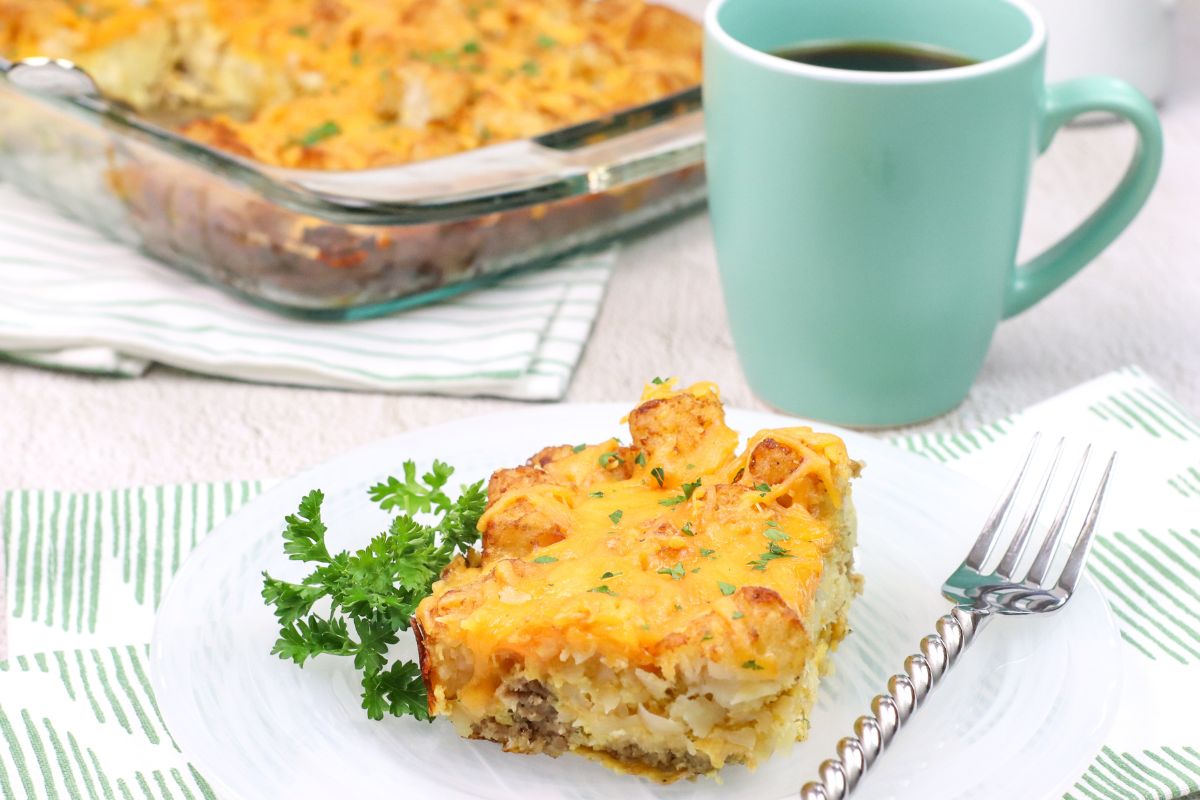
You won't have to rush out of the house in the mornings without eating when you have Breakfast using Canned Biscuits with Sausage and Eggs ready to take with you on the go!
Prep-ahead and freezing tips included so you can really grab breakfast and go in the mornings!
Discover more delicious ways to use refrigerated biscuit dough in your everyday cooking! These recipes will transform your pantry staple into quick and satisfying meals.
Waking up to the aroma of sizzling sausages, scrambled eggs and homemade biscuits right out of your refrigerator is something many of us can only dream about.
By using store-bought biscuit dough, you can your very own "Egg, Sausage and Biscuit" meal without visiting a drive-thru restaurant!
Quick and Easy: Made with refrigerated biscuit dough for a fast, no-fuss breakfast that’s ready in minutes—perfect for busy mornings.
Grab-and-Go Friendly: Individually portioned and handheld, making it ideal for commuters, students, or anyone needing breakfast on the run.
Customizable: Easily swap out the sausage for bacon, ham, or plant-based options. Add cheese, veggies, or your favorite seasonings to make it your own.
Freezer-Friendly: Prepare a batch ahead of time and freeze. Just reheat and enjoy for a homemade breakfast anytime.
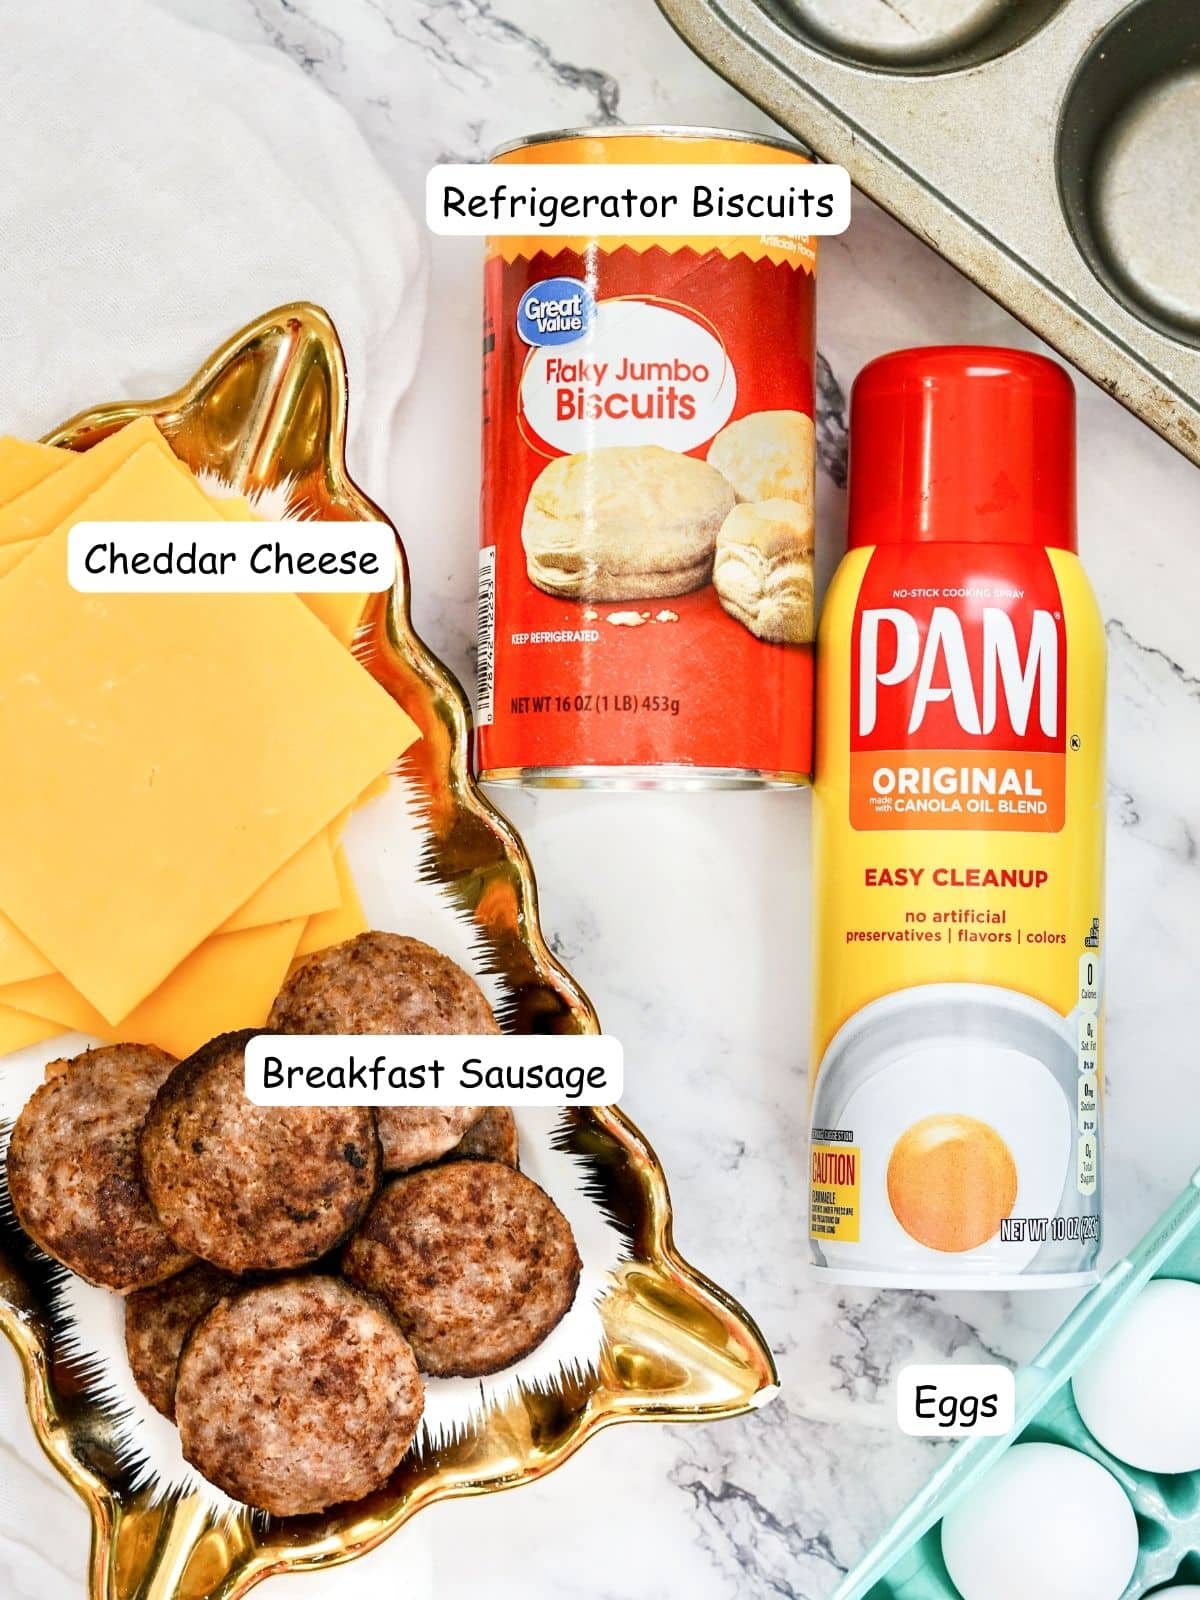
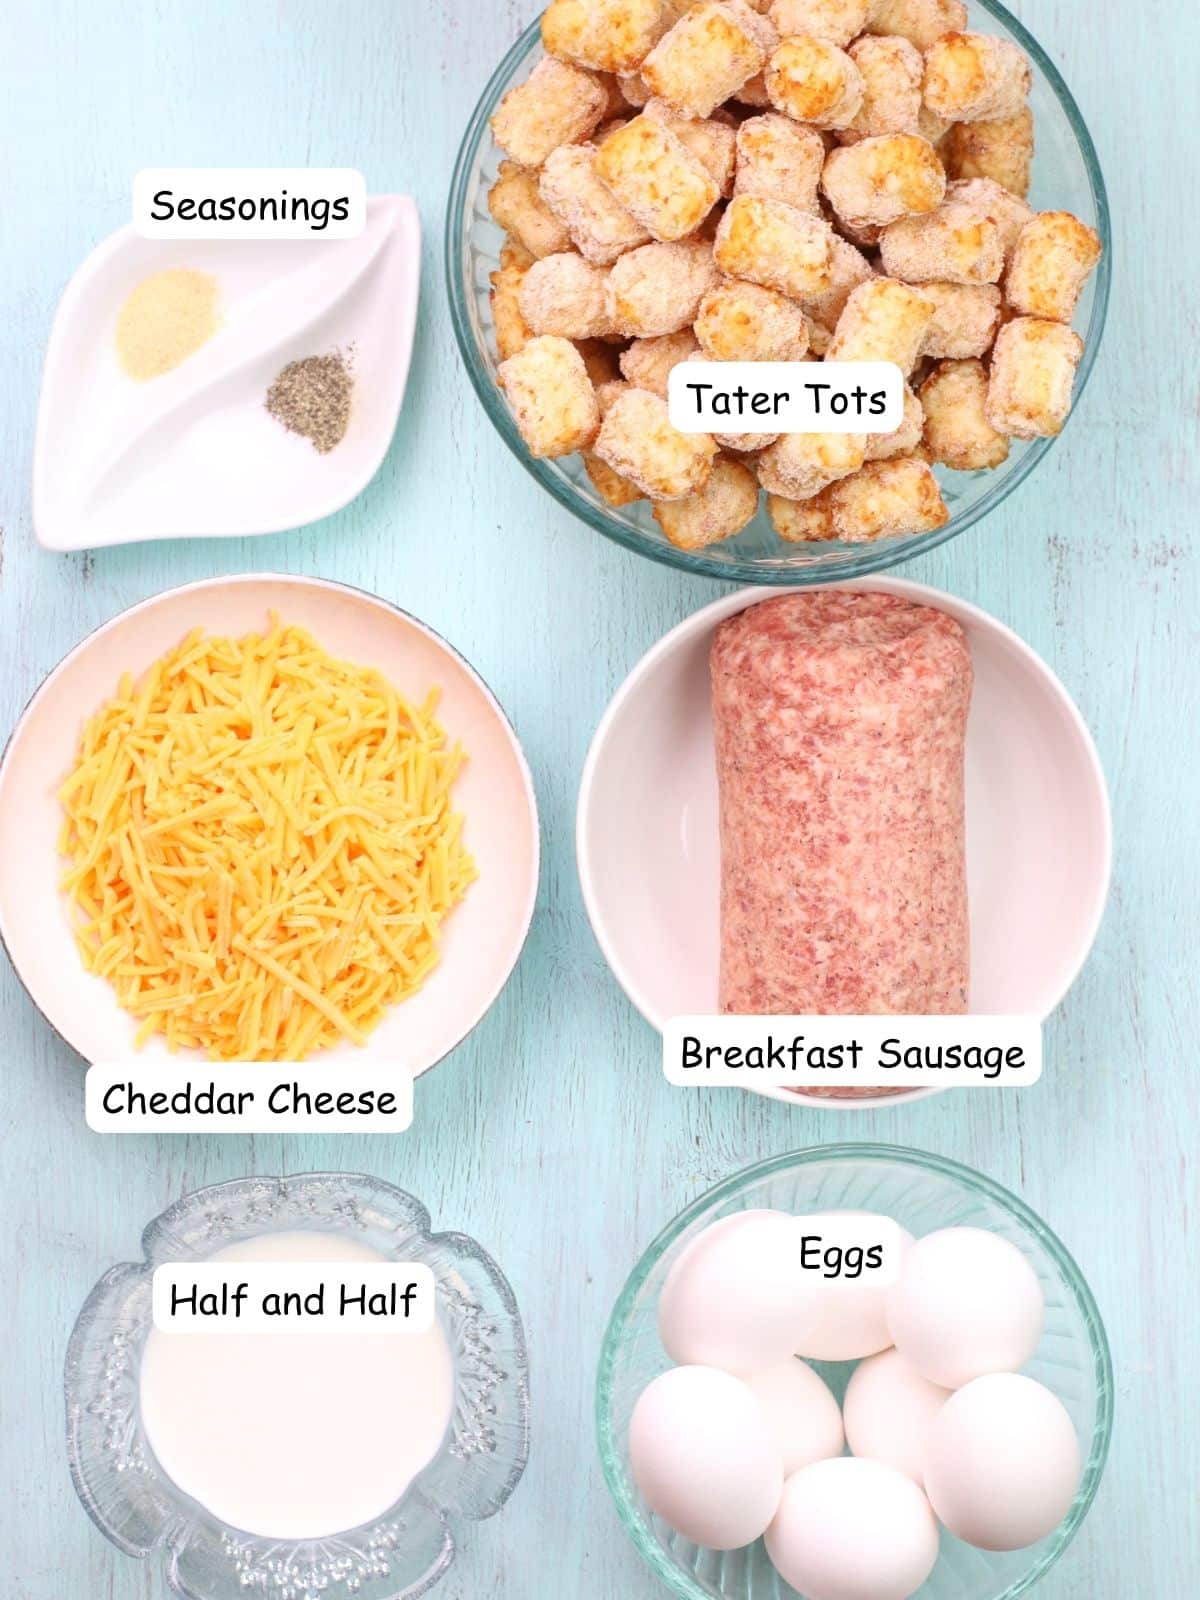
Here's a quick overview of the ingredients for this recipe. Find the exact amounts and click the Instacart button to easily add them to your cart – all in the printable recipe card below!
Recipe Substitutions and Variations
Cheese - for this recipe I used sliced American cheese but you can substitute your favorite flavor.
Try with cooked bacon, cooked sausage links, or sliced ham.
Use your favorite cheese! White Cheddar Cheese would be delicious!
Breakfast Sausage - make sure you use pre-cooked sausage patties.
Step-by-Step Instructions
This section includes step-by-step photos and instructions to guide you through the recipe. For the complete printable version, scroll down to the recipe card below.
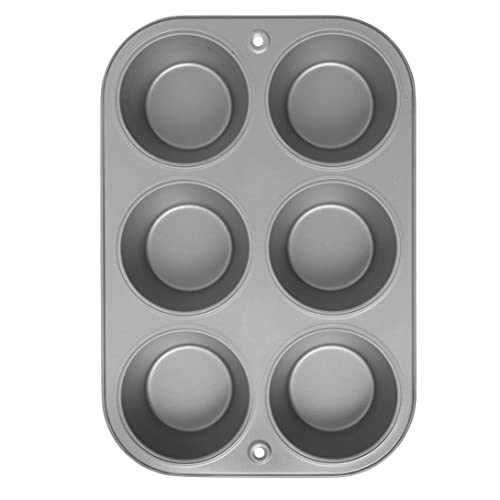
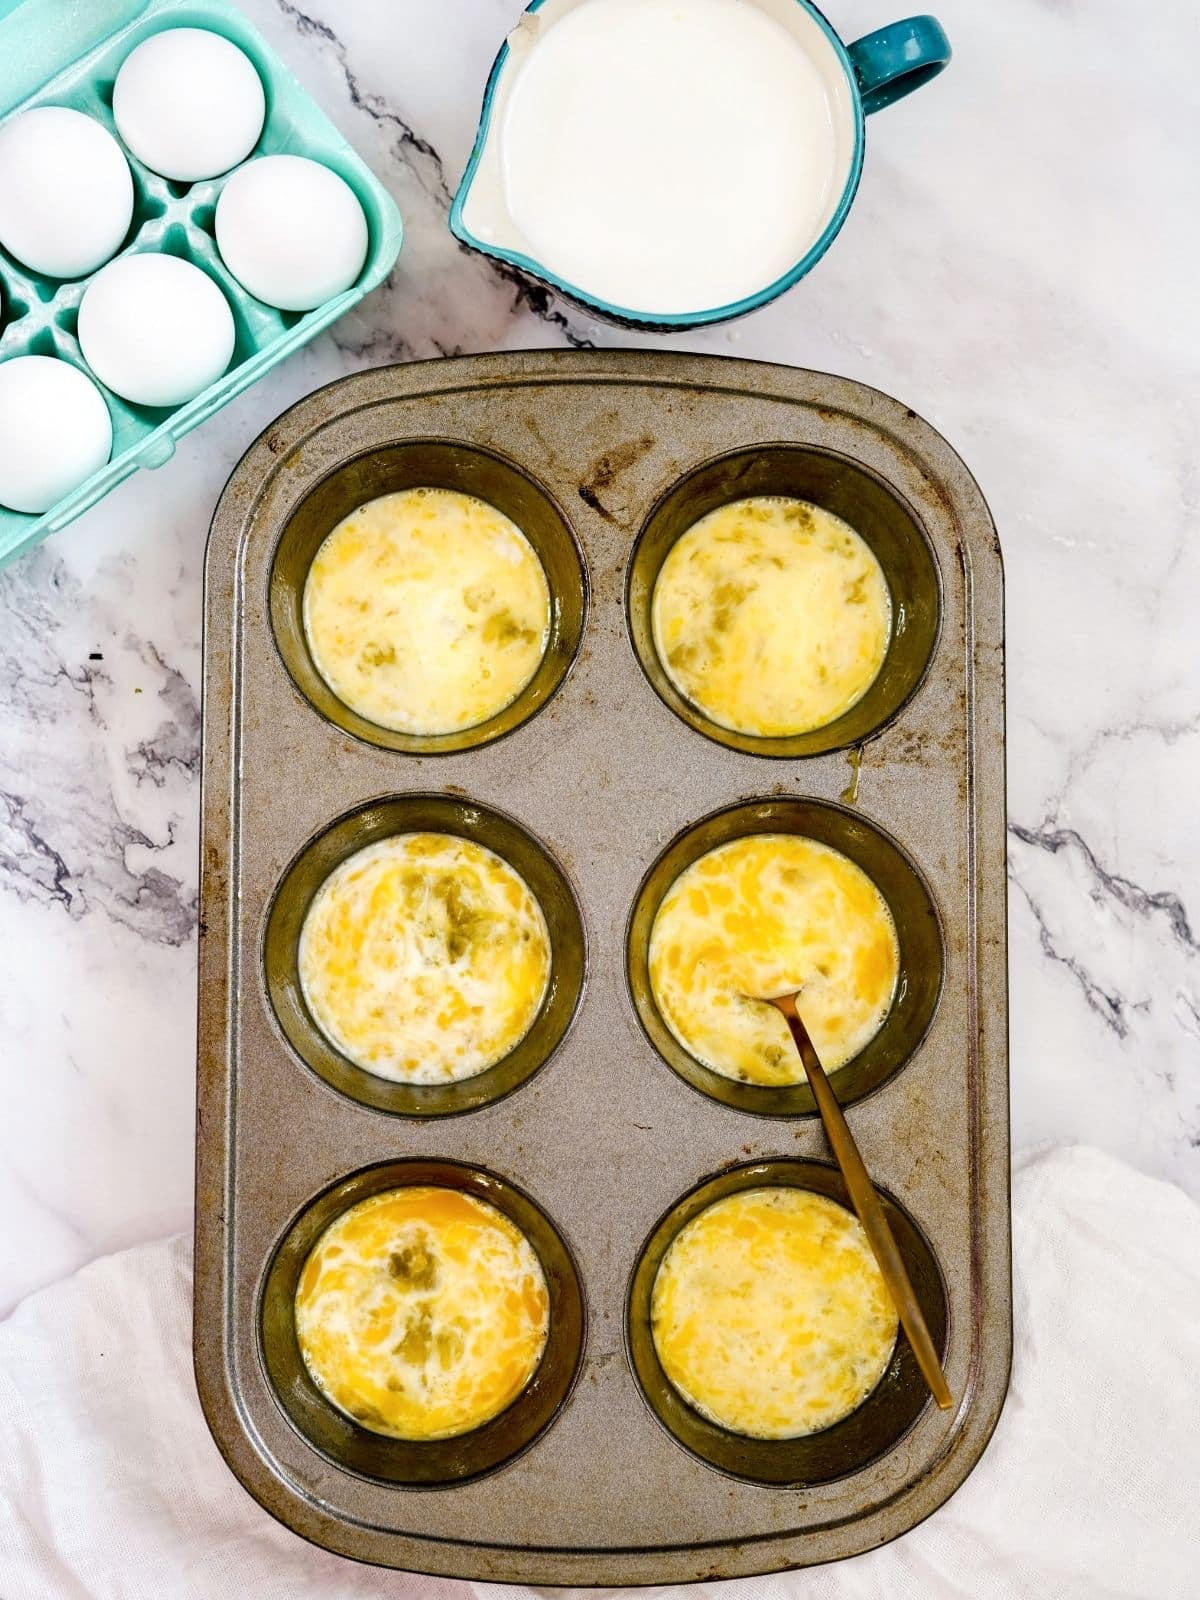
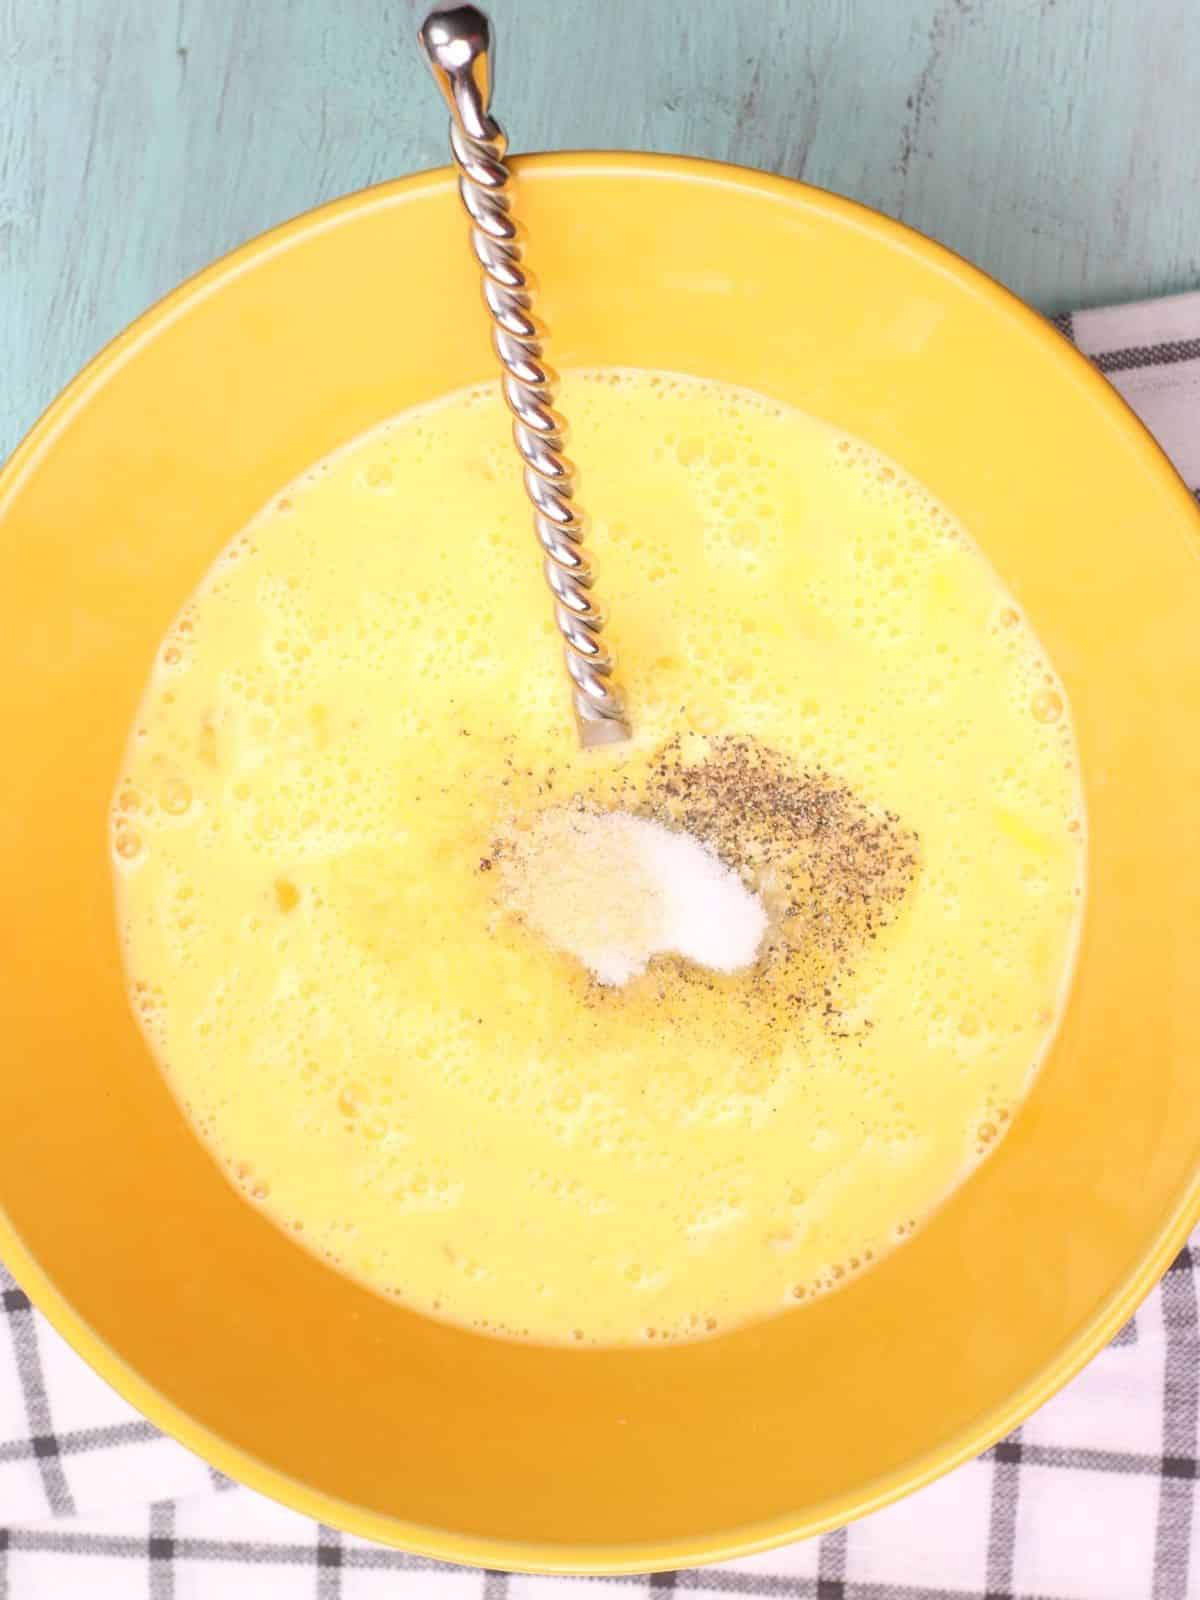
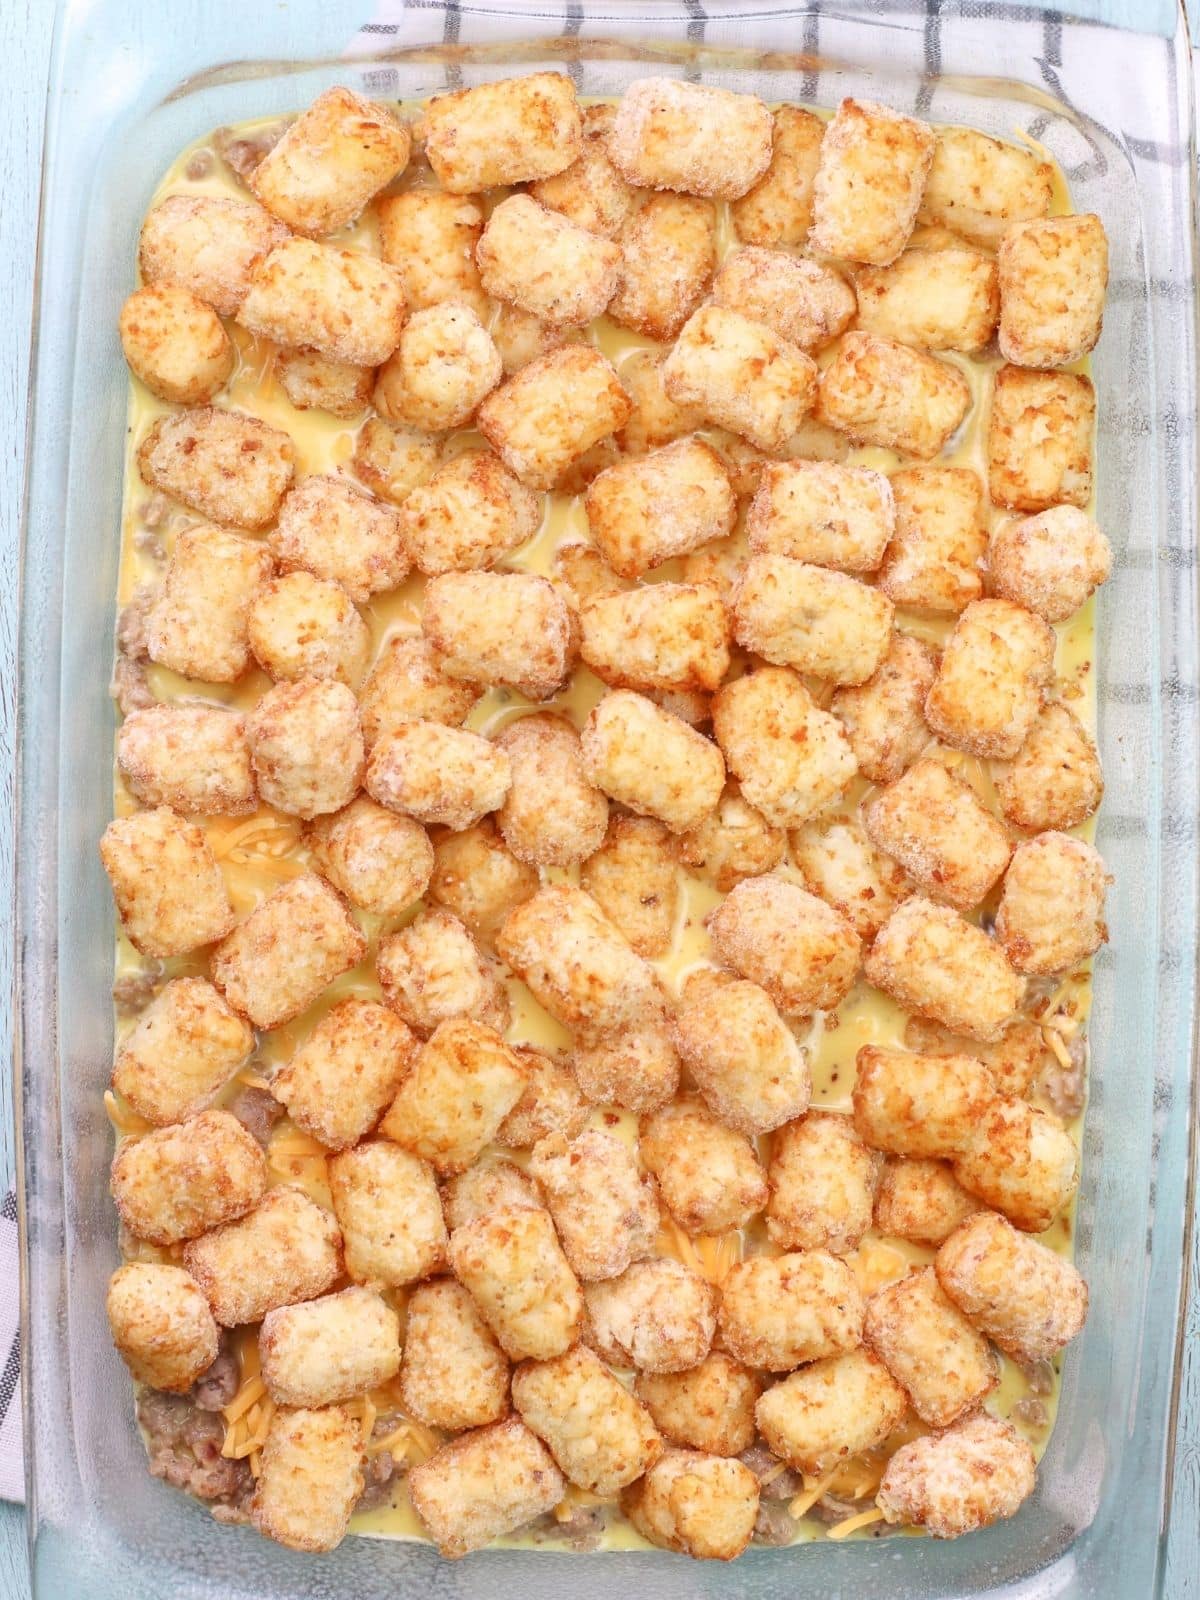
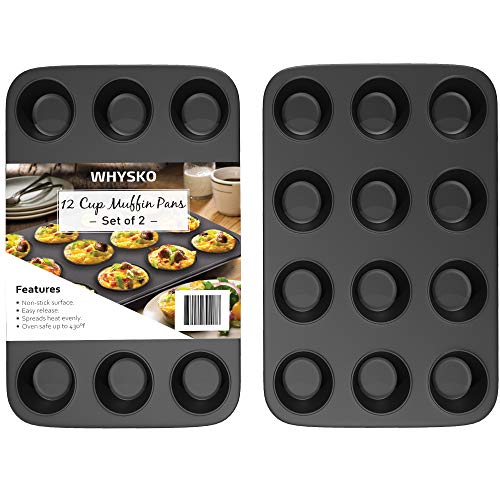
Step 1: Prepare a 6-count jumbo muffin pan with non-stick baking spray. Whisk the eggs and milk together in a bowl. Divide the eggs between the muffin pan.
Recipe Note
For this recipe, you'll need to use a 6-count muffin pan. The ingredients will not fit in a 12-count traditional muffin pan.
If you only have one jumbo muffin pan to bake with at a time, you'll need to reserve some eggs to bake once the first batch is done to make all 8 breakfast sandwiches. (As you can see from the photos, I only have one muffin pan!)
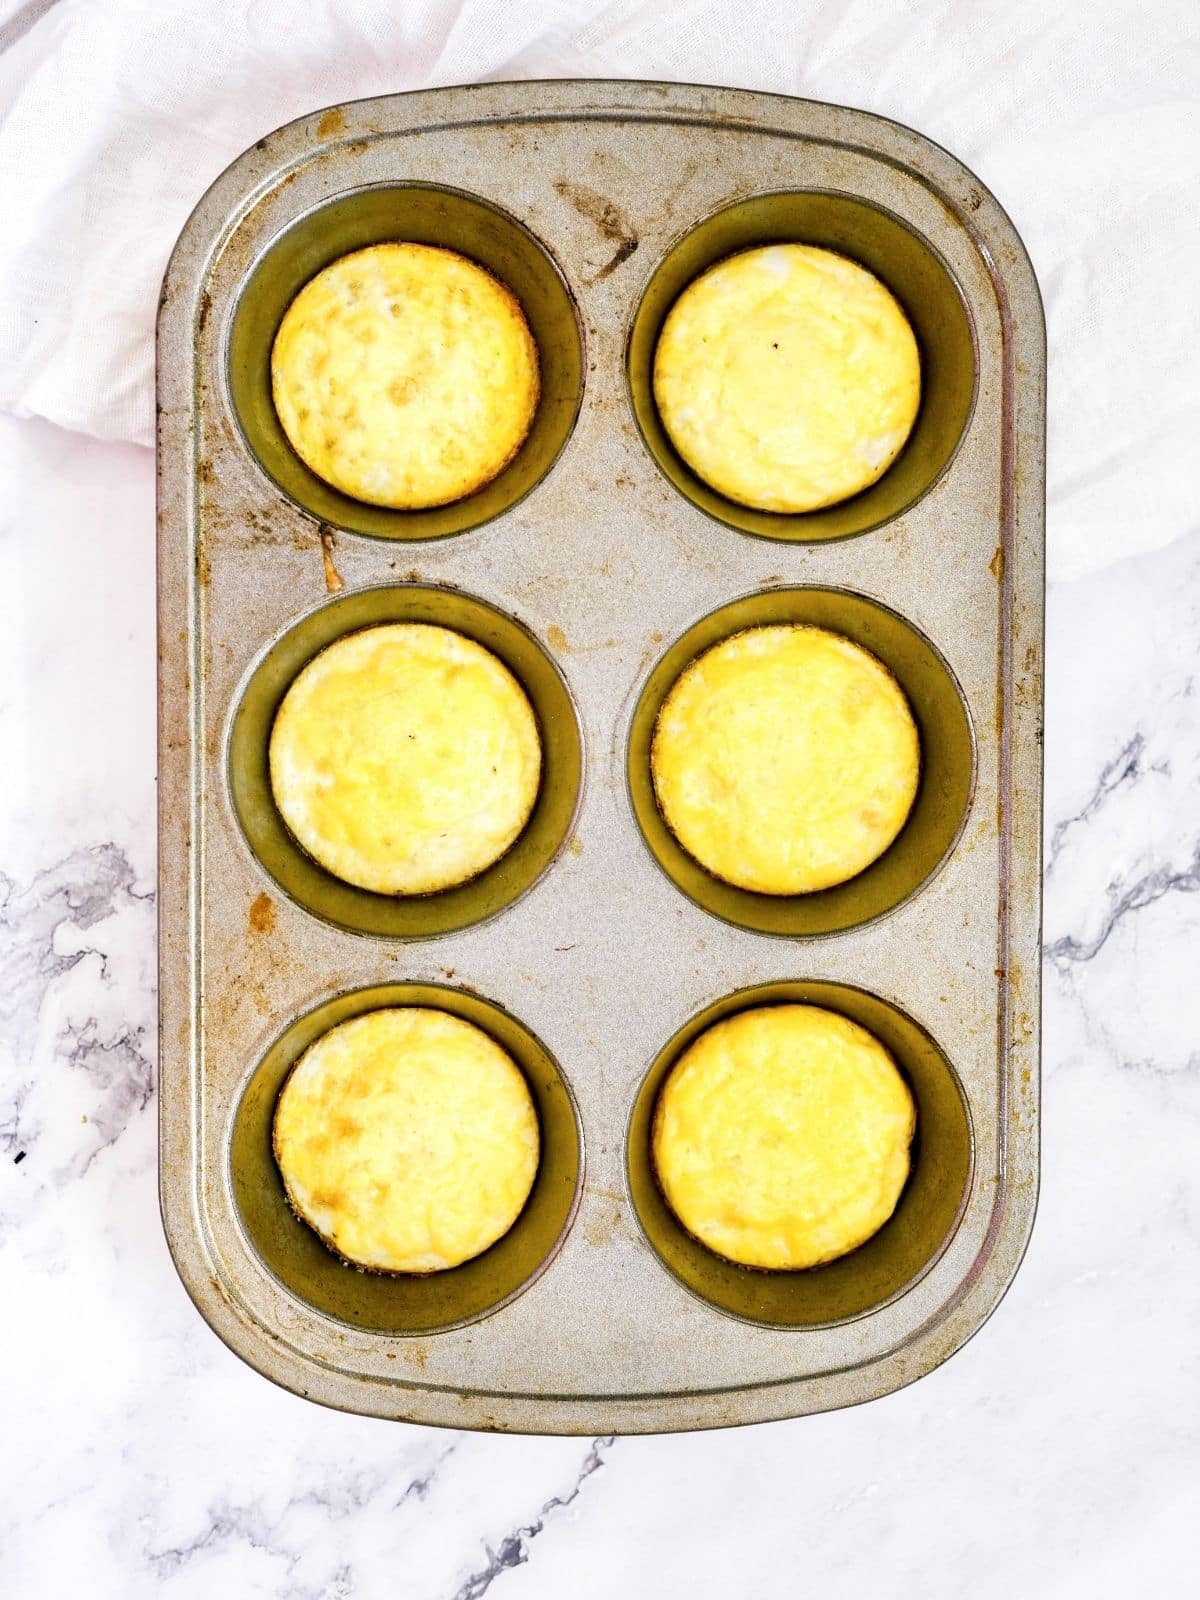
Step 2: Bake the eggs in a preheated oven until set. Remove the baked eggs from the pan and set aside.
Step 3: Separate the canned biscuits in half so there's 16 pieces.
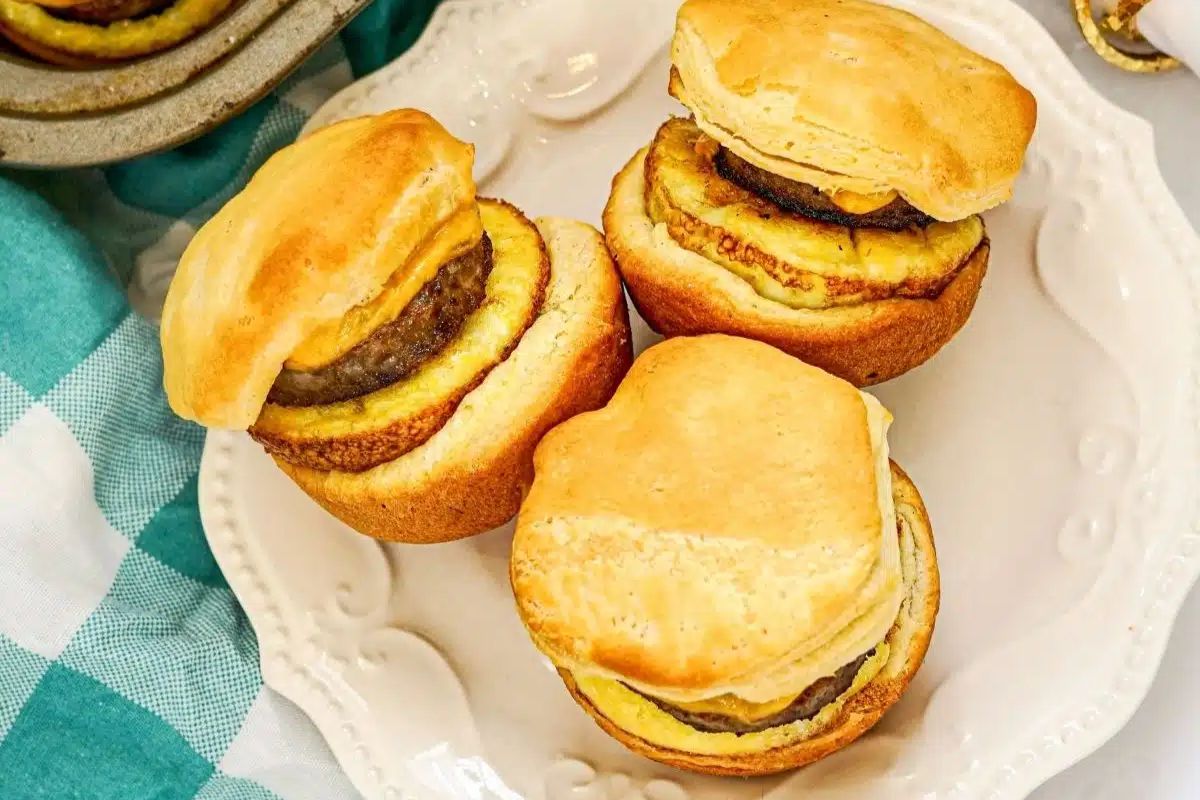
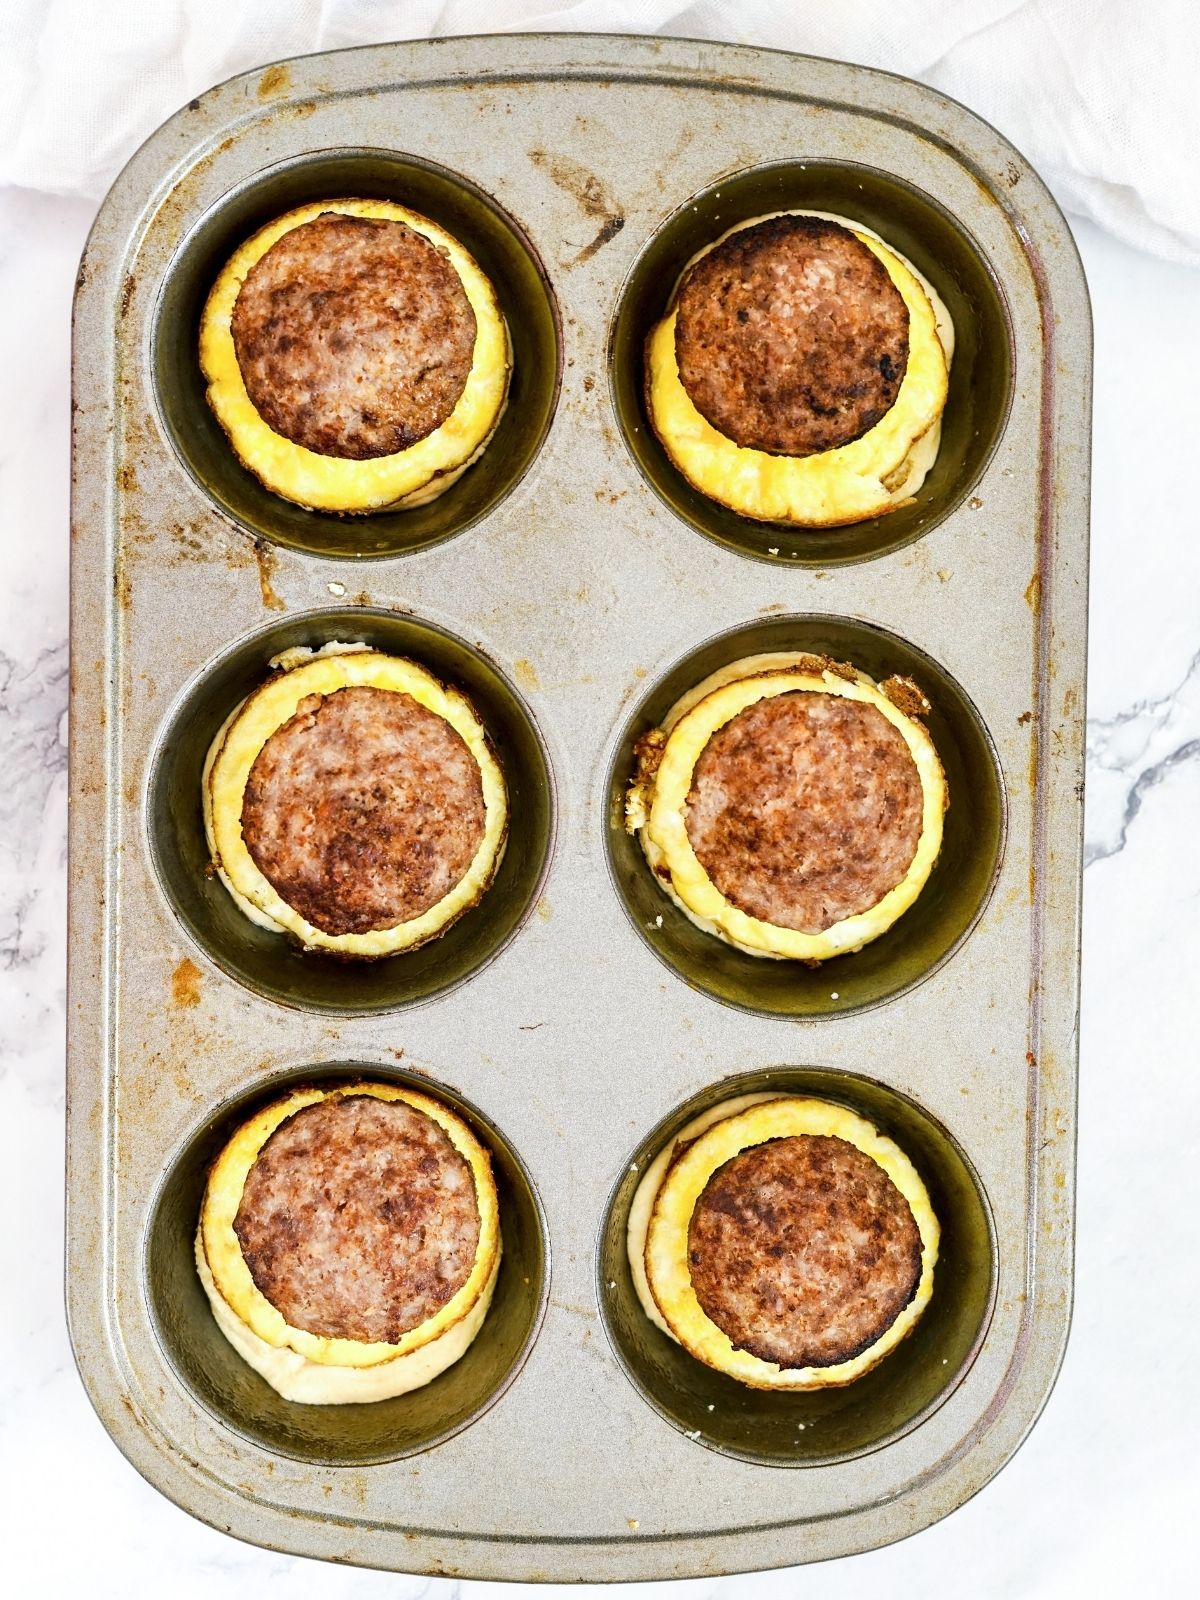
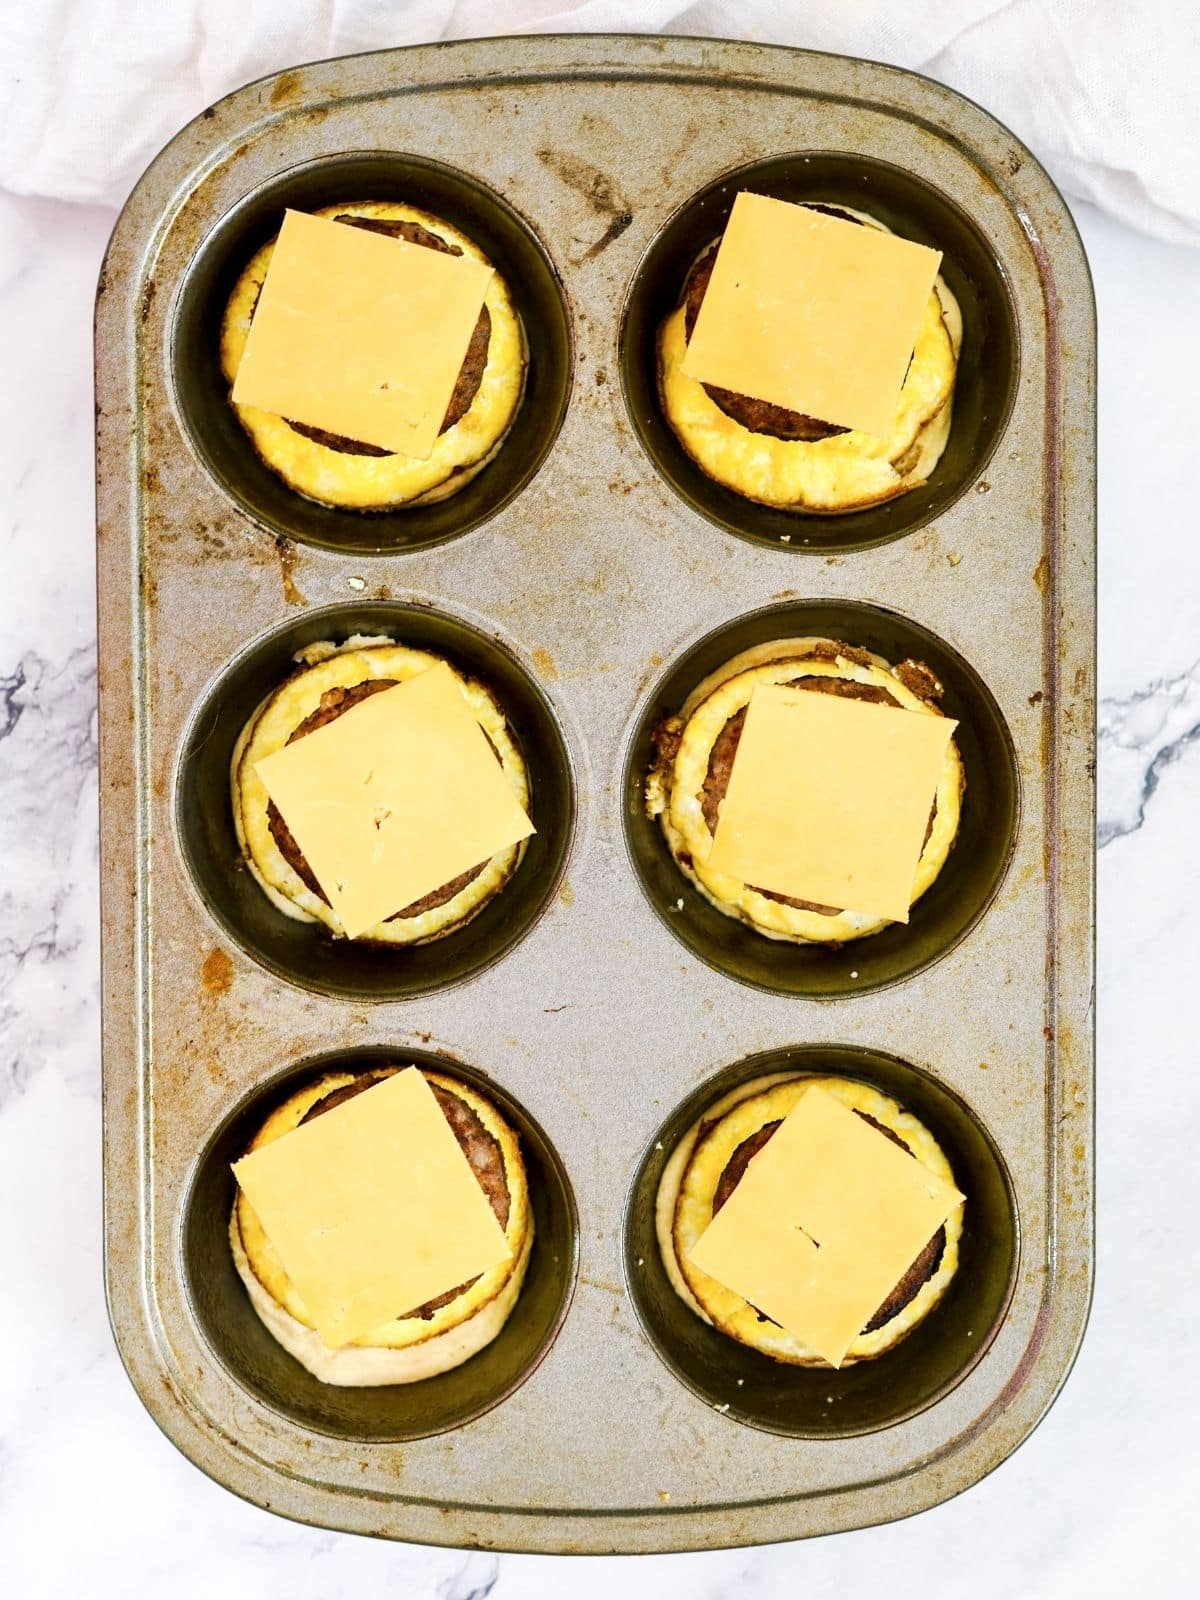
Step 4: Spray the muffin pan with non-stick baking spray. Place a biscuit half in each muffin pan well. Top each biscuit half with a baked egg, sausage patty, and slice of cheese.
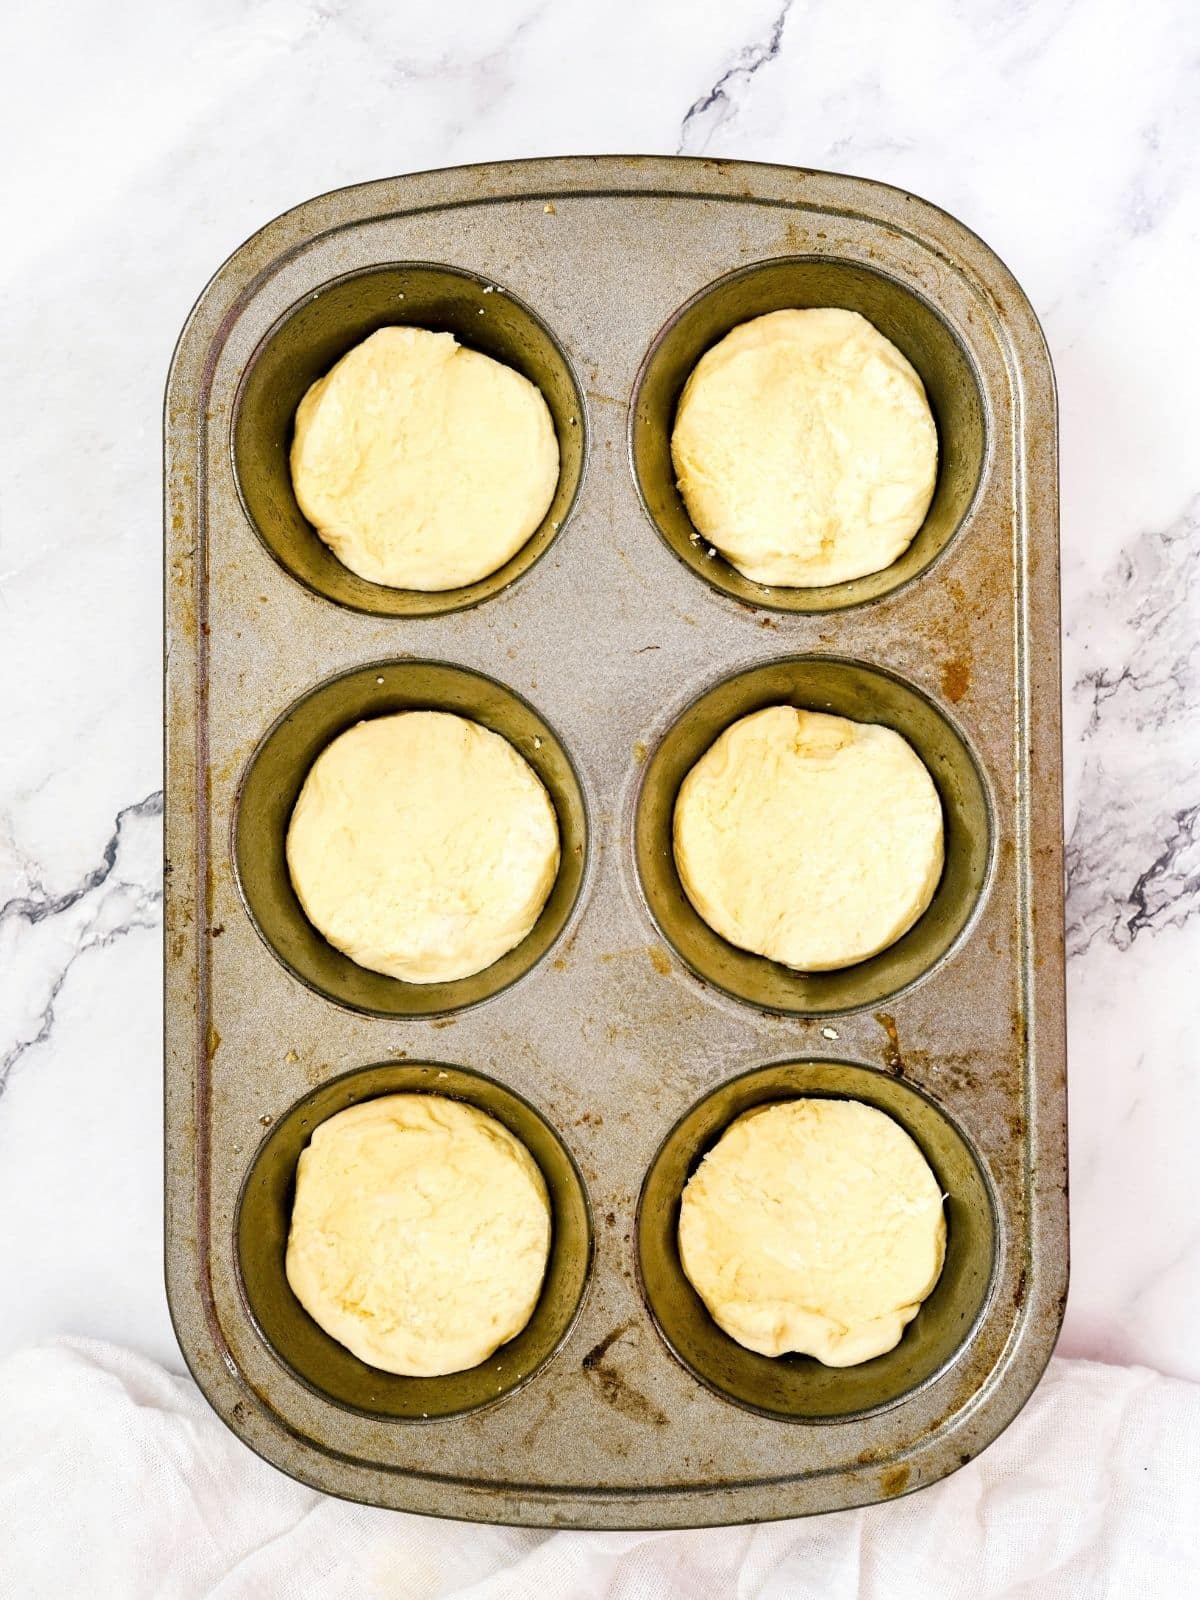
Step 5: Place the remaining biscuit halves on top.
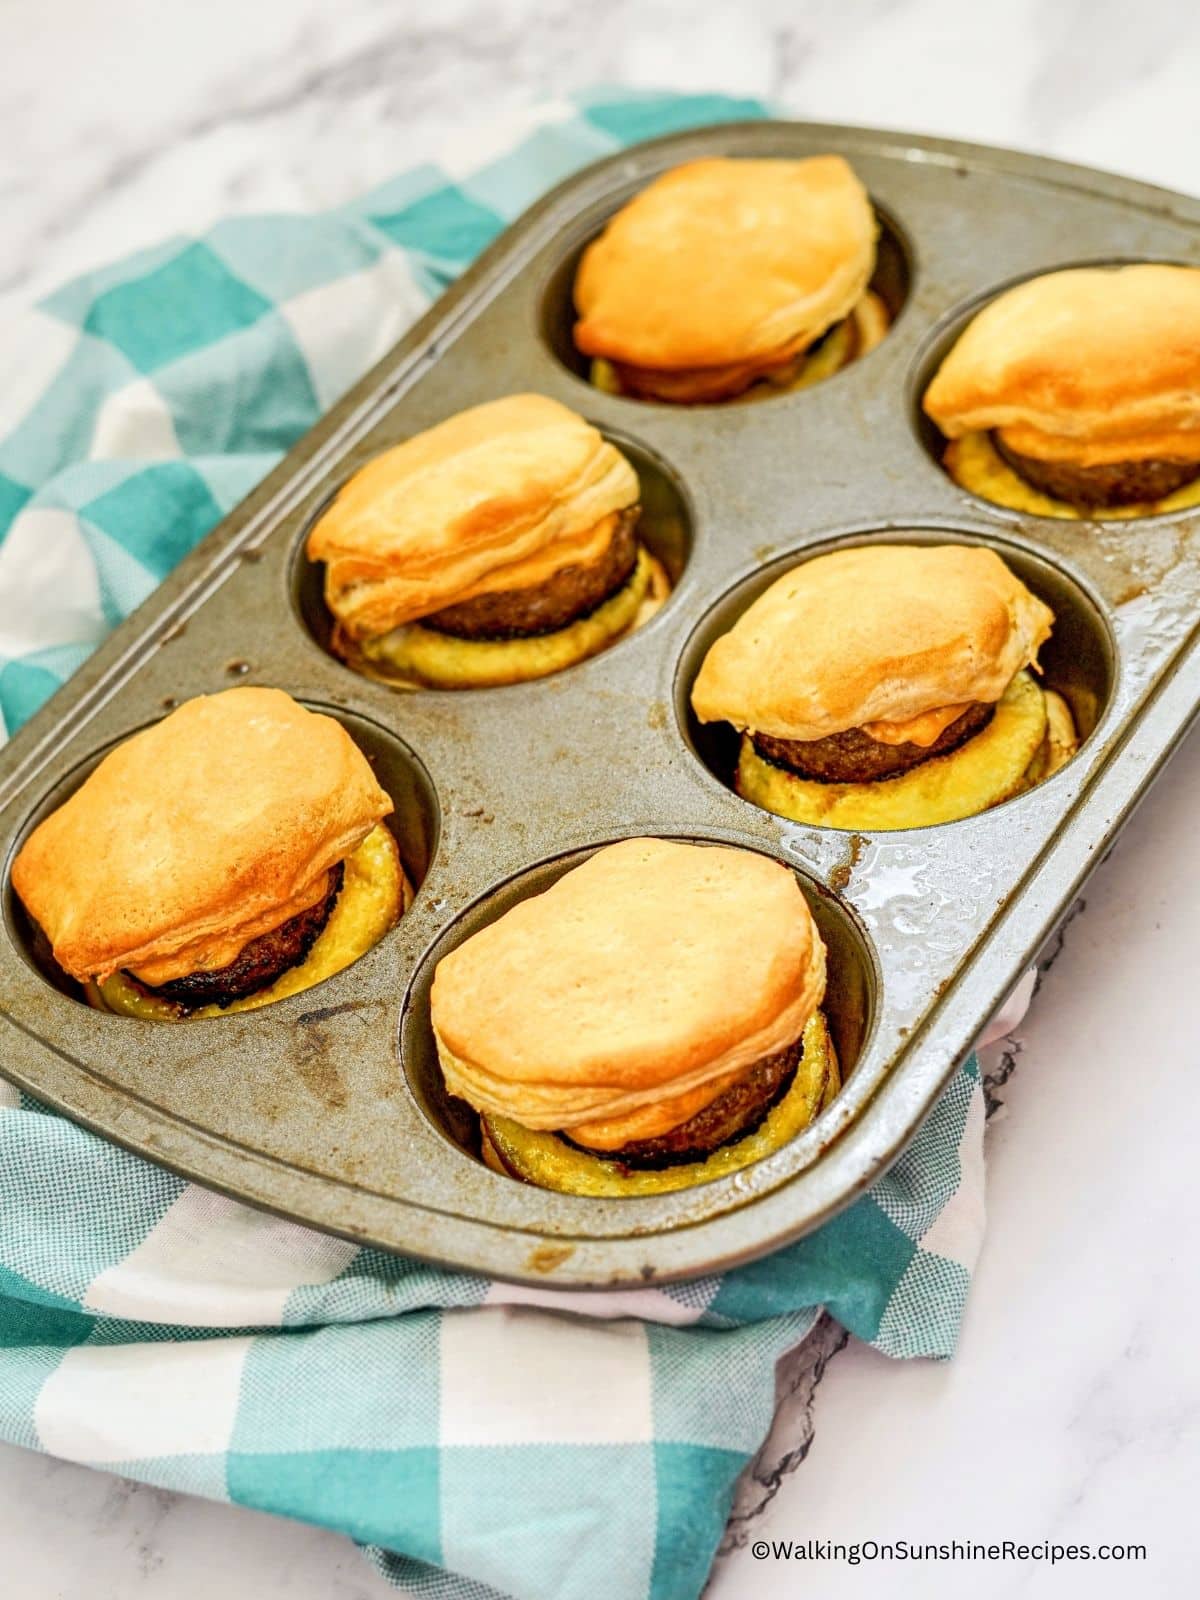
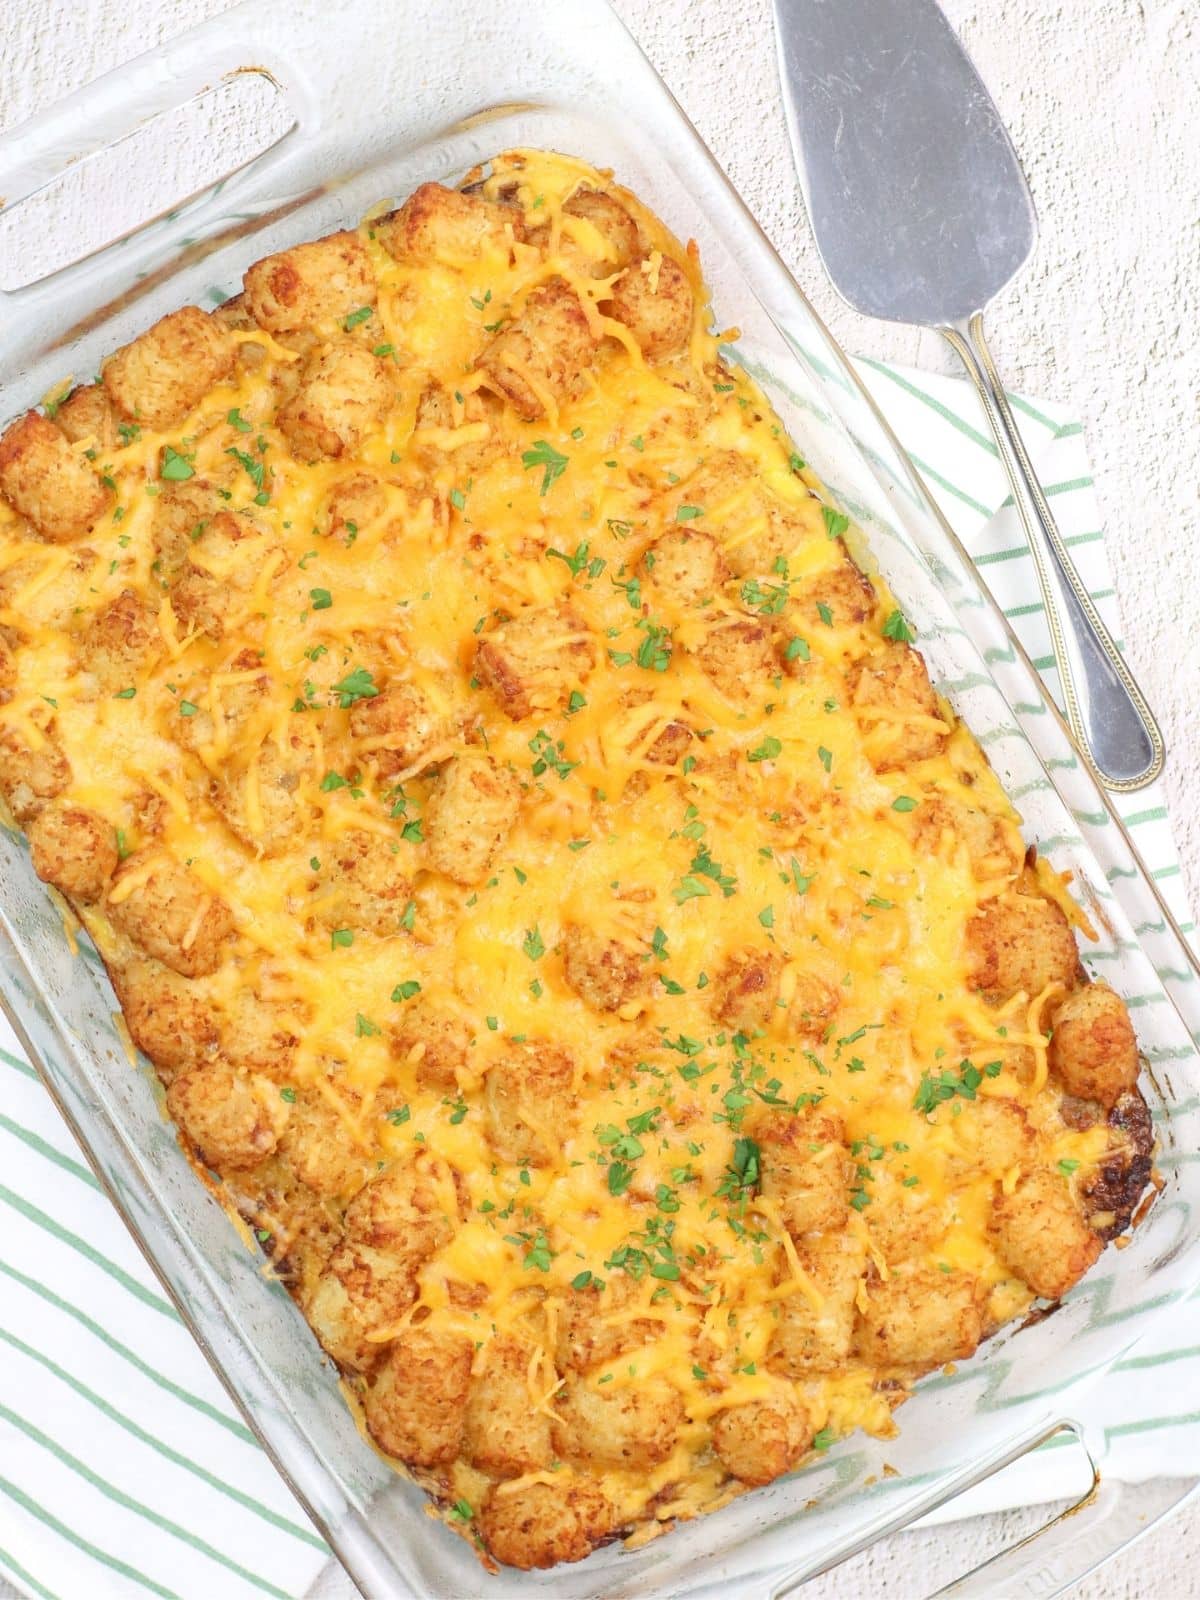
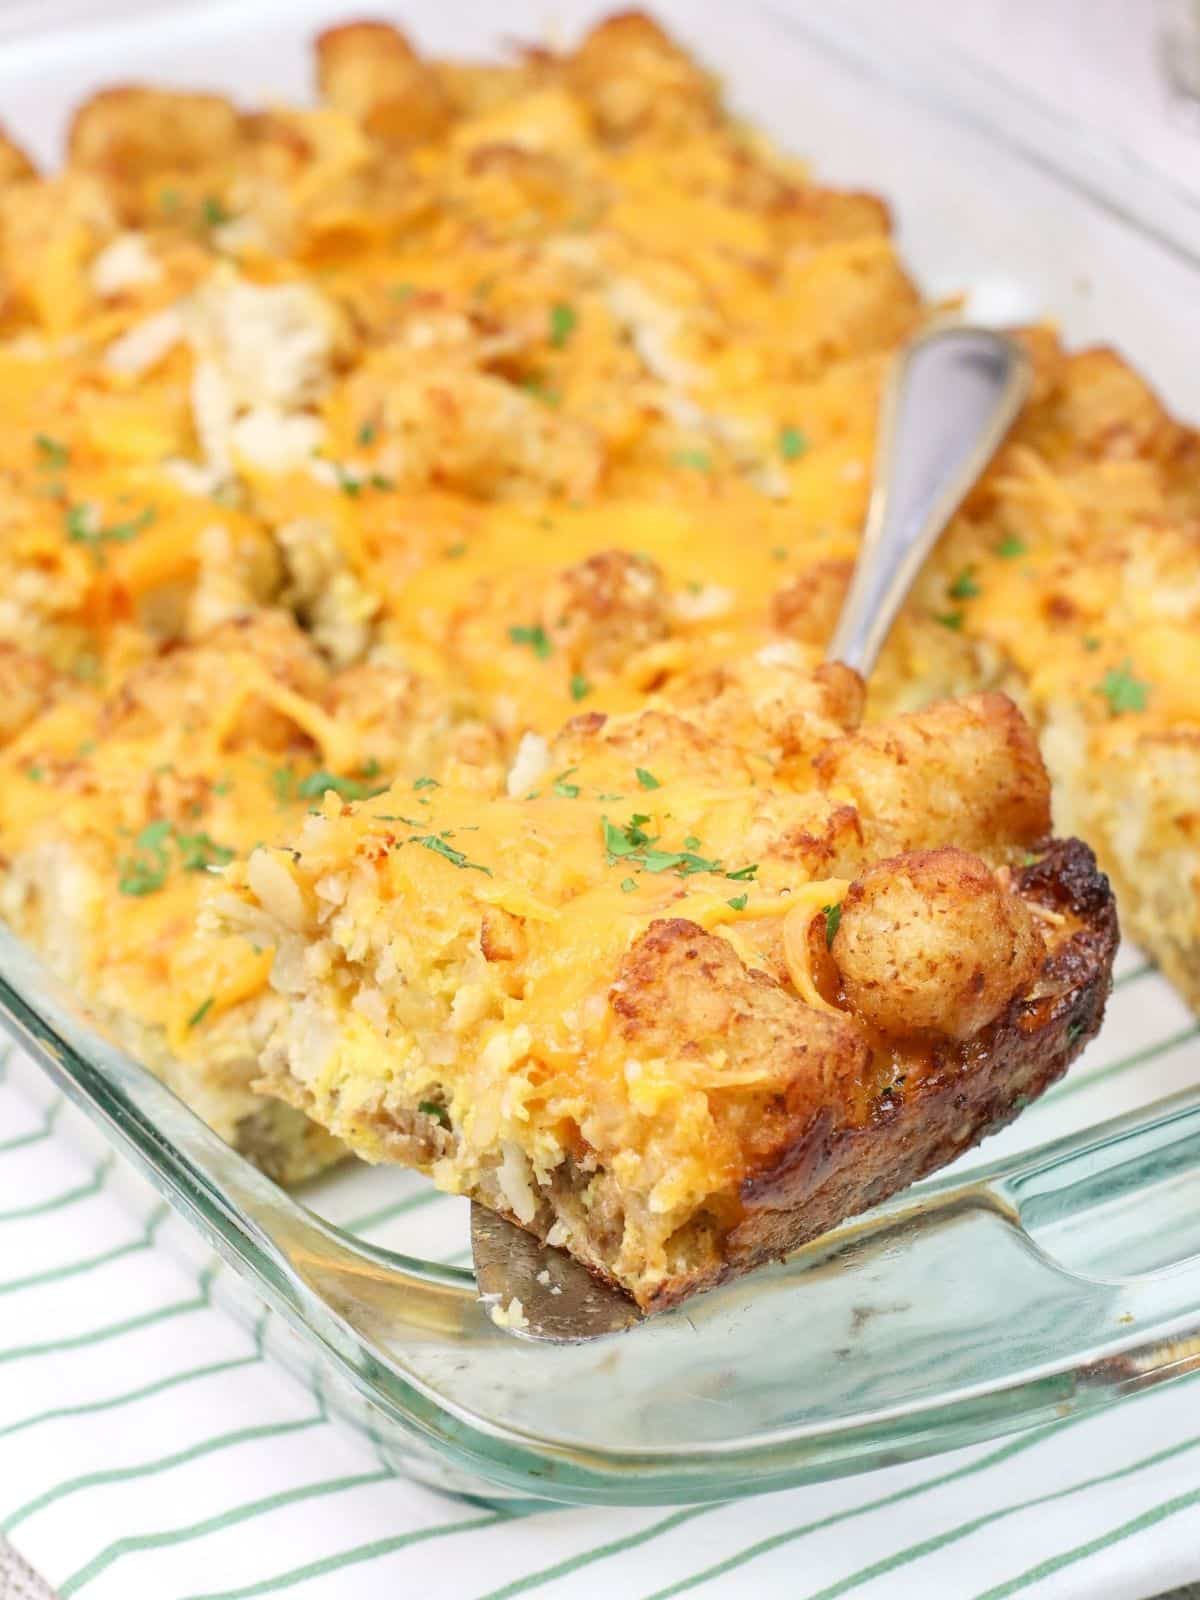
Step 6: Bake the breakfast sandwiches for 10 minutes or until the biscuits are golden brown. Remove the biscuit sandwiches and repeat the steps with the remaining ingredients.
LOVE this recipe? SAVE it for Later!
❤️Tap the heart icon in the lower right corner to add the recipe to your recipe box for easy access anytime.
If you made it, leaving a star rating or quick review is always appreciated and helps other readers too.
Recipe Tips for Making Breakfast with Canned Biscuits
Flatten the Biscuits: Use your hands or the bottom of a glass to gently flatten each biscuit before pressing it into the muffin tin. This helps create more room for the filling and keeps everything contained.
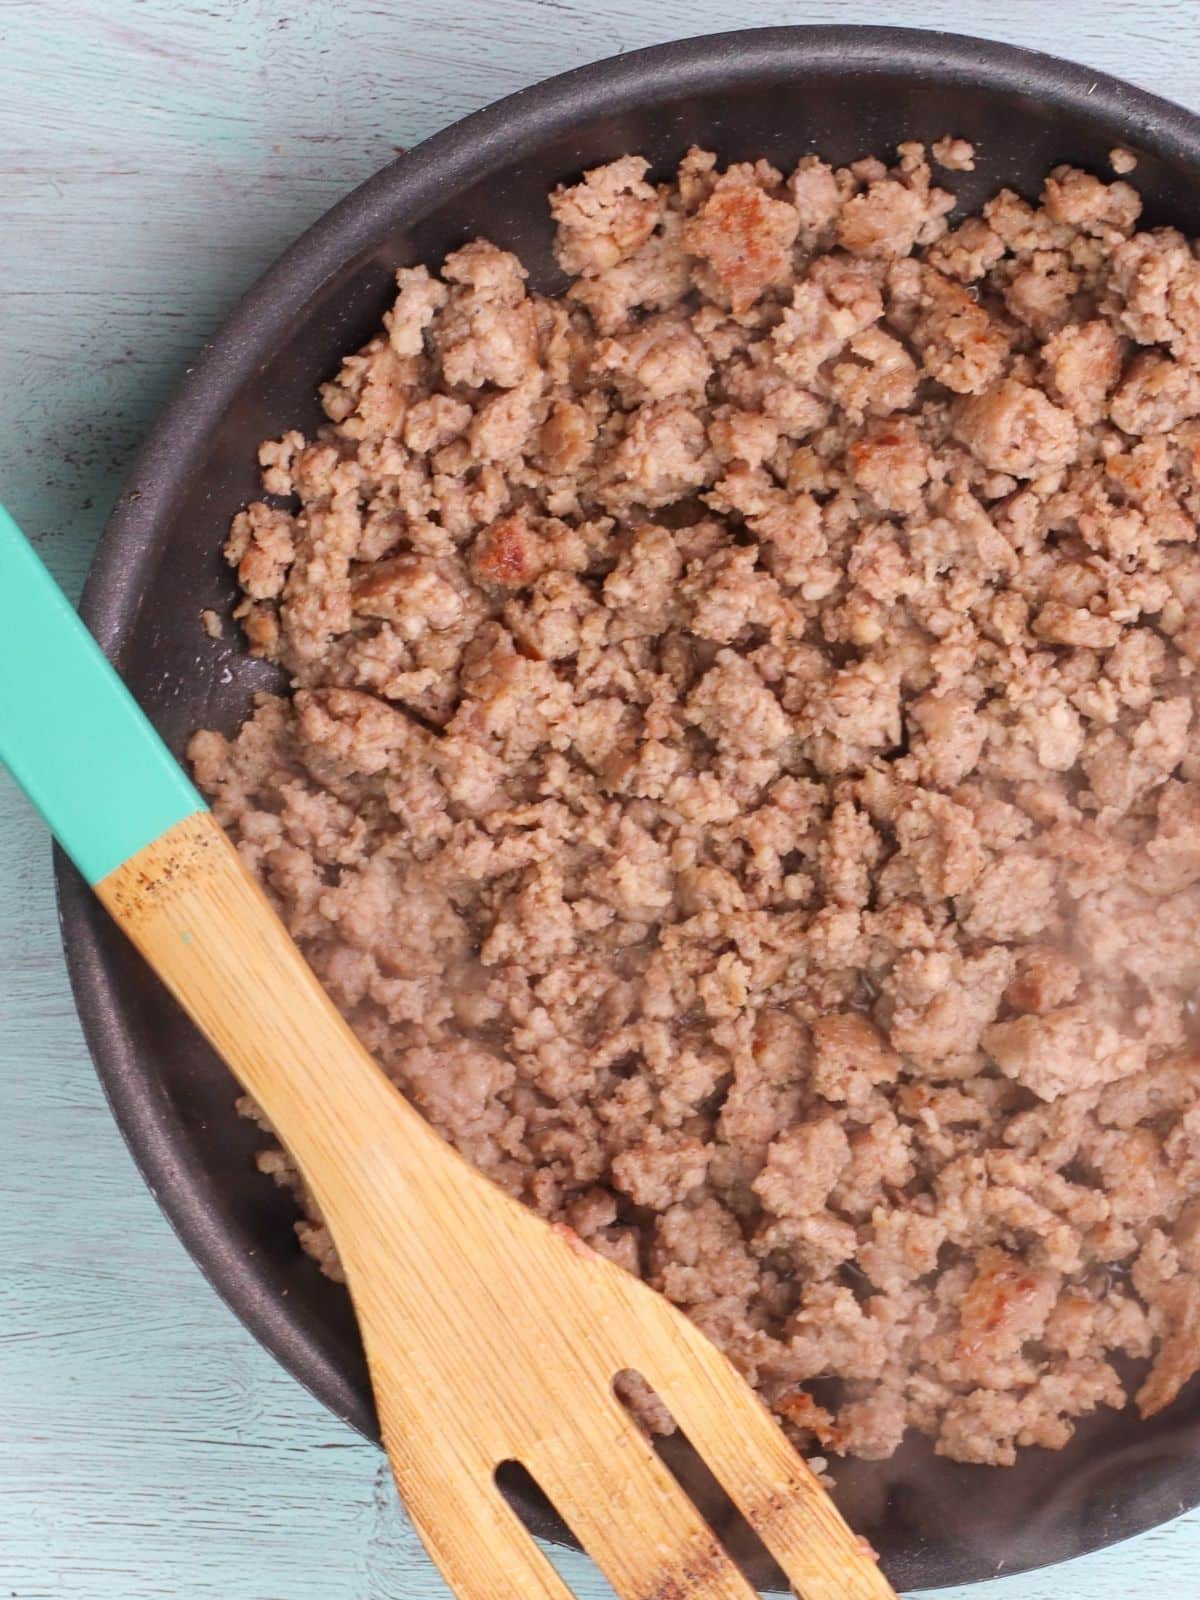
Cook the Sausage First: Make sure the sausage is fully cooked and crumbled before adding it to the biscuits. This ensures it's safe to eat and doesn’t release extra grease during baking.
Grease the Muffin Tin Well: Even if you're using non-stick spray, be generous—especially around the edges—so the biscuit cups release easily.
Let Them Rest: After baking, let the biscuit cups cool for a few minutes before removing from the pan. This helps them firm up and hold their shape better.
Storage, Freezing and Reheating Tips
Refrigerator: Wrap leftover sandwiches in plastic wrap or place in an airtight container and refrigerate for up to 4 days.
Freezer: Wrap each sandwich individually in plastic wrap before placing in a freezer bag or airtight container for up to 3 months.
Thawing and Reheating Tips: To reheat, replace the plastic wrap with a paper towel and microwave for about 30 seconds to warm through. If the biscuit sandwich was frozen, increase time to 2 minutes.
Recipe FAQ's
To view the answers, simply click on the down arrow (⬇) next to each question. If you have any other questions not answered here, please leave a comment!
How do you cook eggs in a muffin pan without them sticking?
Spray the muffin pan generously with non-stick baking spray to help prevent sticking. You can also grease the pan using a solid fat like coconut oil or bacon grease for added flavor and easy release. For even better results, consider using silicone liners or a silicone muffin pan—both make cleanup a breeze and help the eggs pop out effortlessly.
How to store uncooked biscuits?
Store uncooked refrigerated biscuits in an airtight container in the fridge for up to 2 days, or freeze them individually on a baking sheet, then transfer to a freezer bag for up to 3 months. Bake from frozen with a few extra minutes or thaw in the fridge overnight before baking.
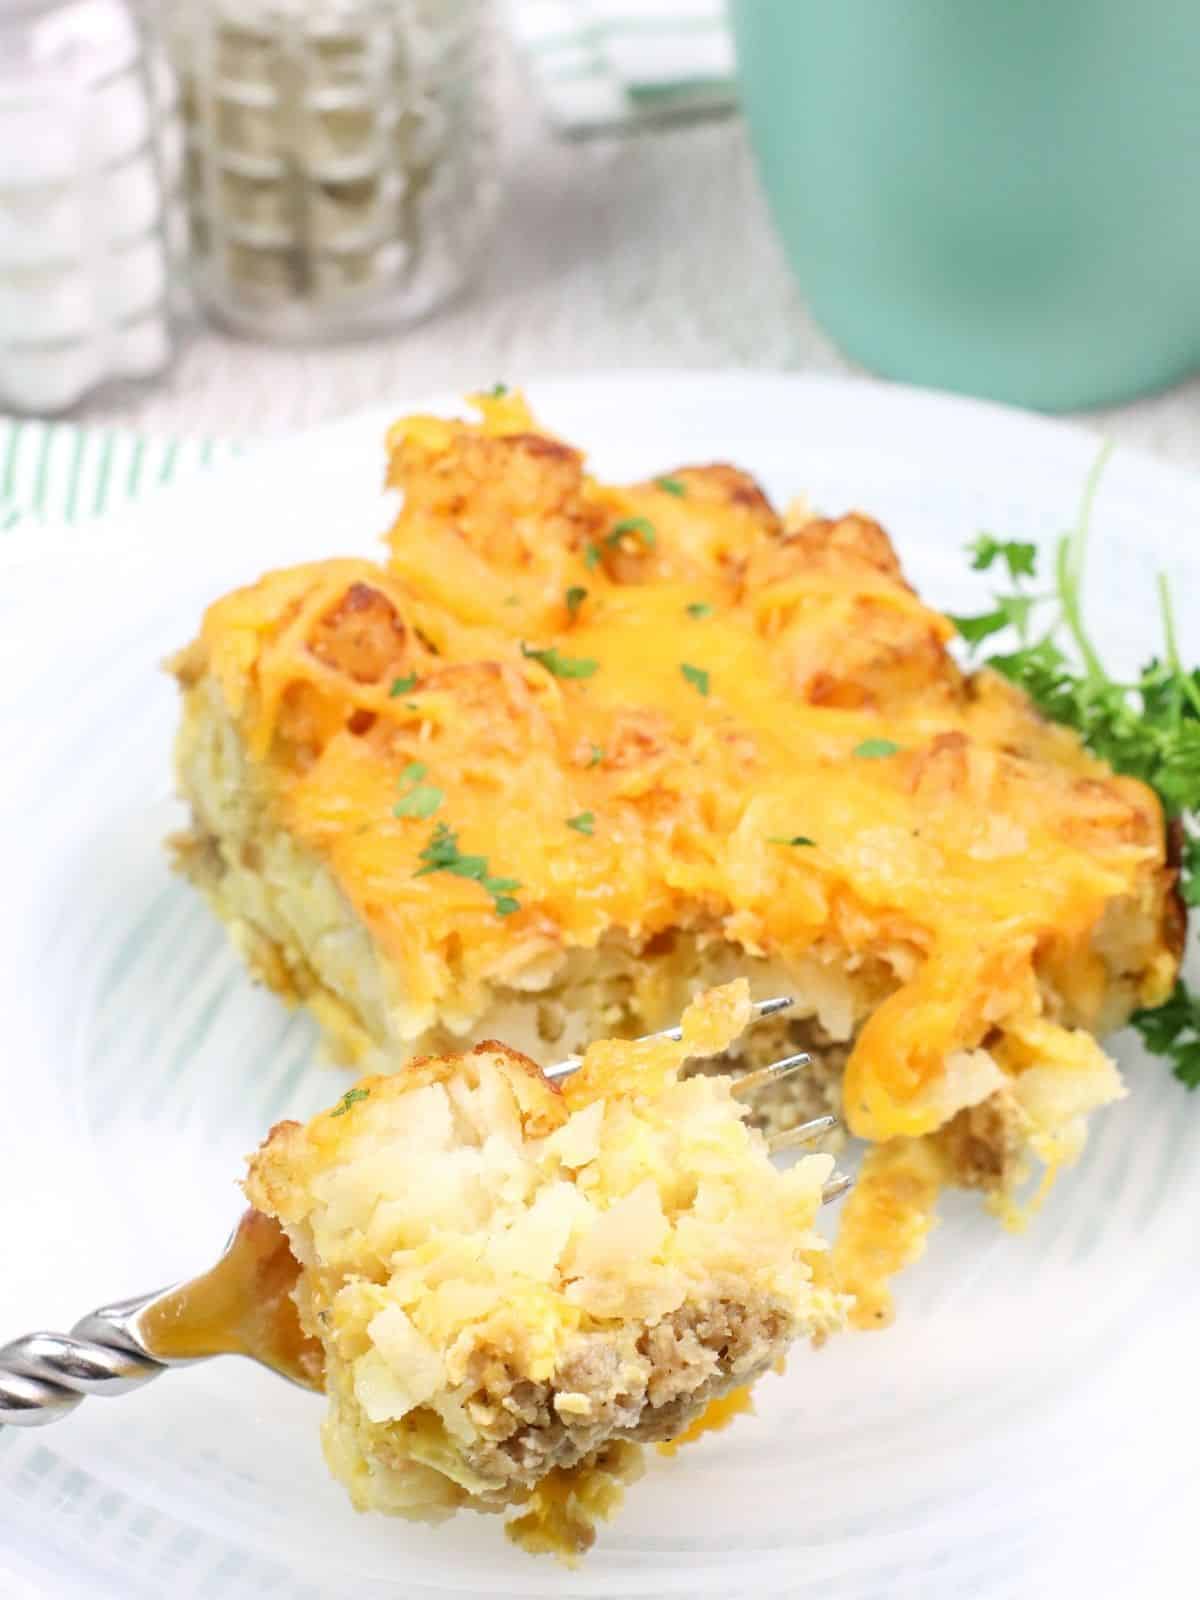
Made with refrigerator biscuits, eggs, cheese and sausage patties this fast, easy, all-in-one dish will become your favorite breakfast to start the morning off right!
For this recipe, you'll need to use a 6-count muffin pan. The ingredients will not fit in a 12-count traditional muffin pan.
Freezing Tips: Wrap each sandwich individually in plastic wrap, then place them all into one resealable freezer bag or airtight container.
When you're ready to enjoy a sandwich, remove from the freezer, unwrap from the plastic wrap and replace with a paper towel. Reheat in the microwave for 2 minutes or until defrosted and warmed through.
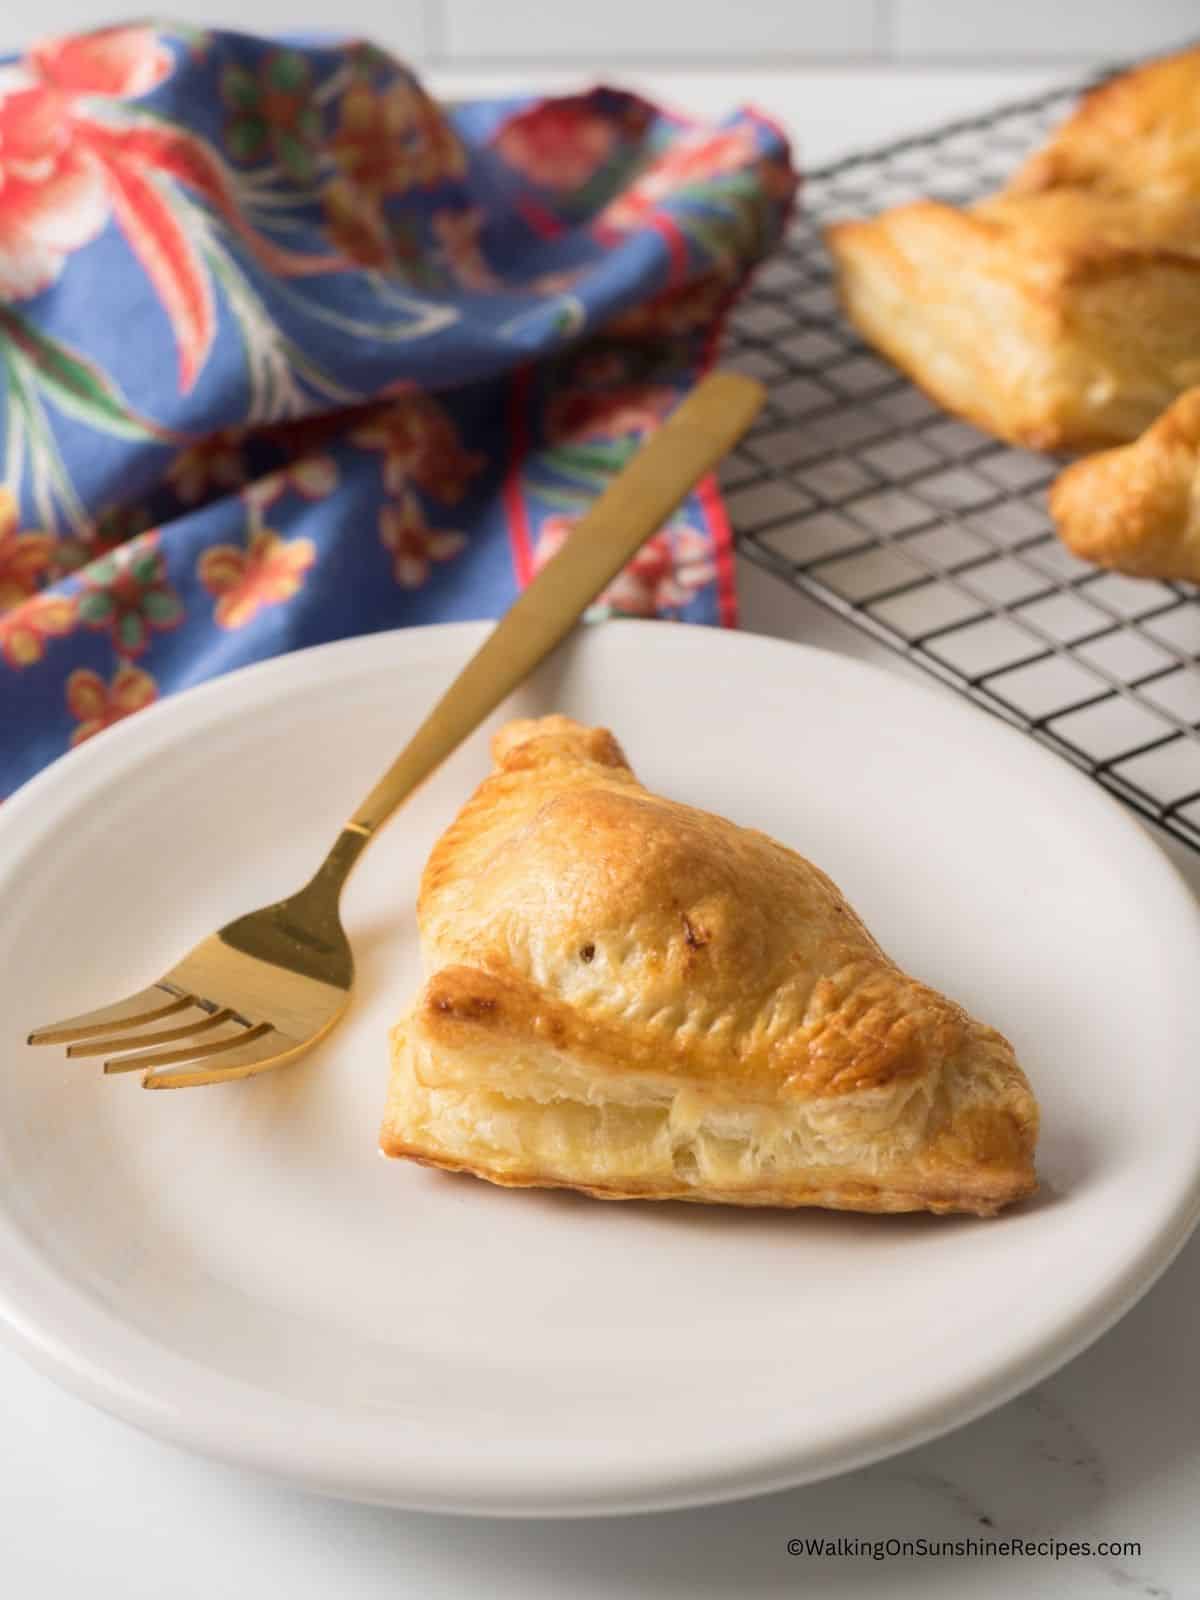
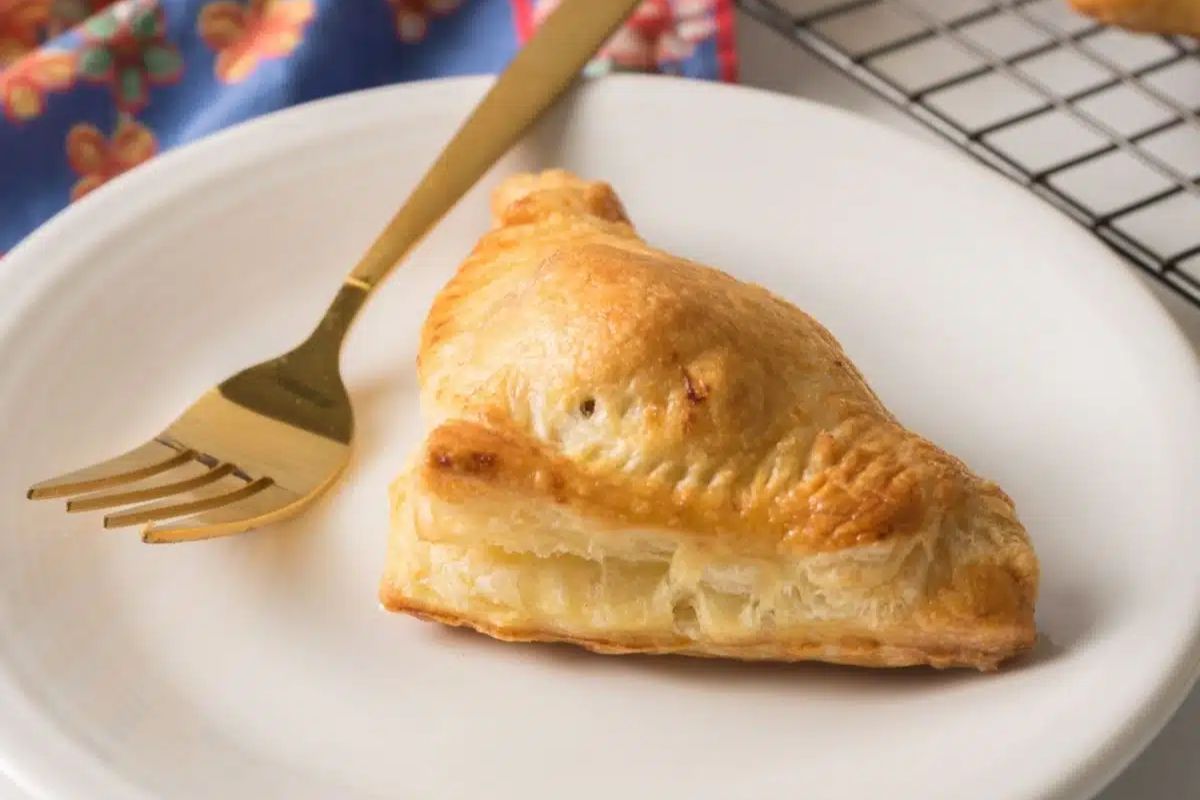
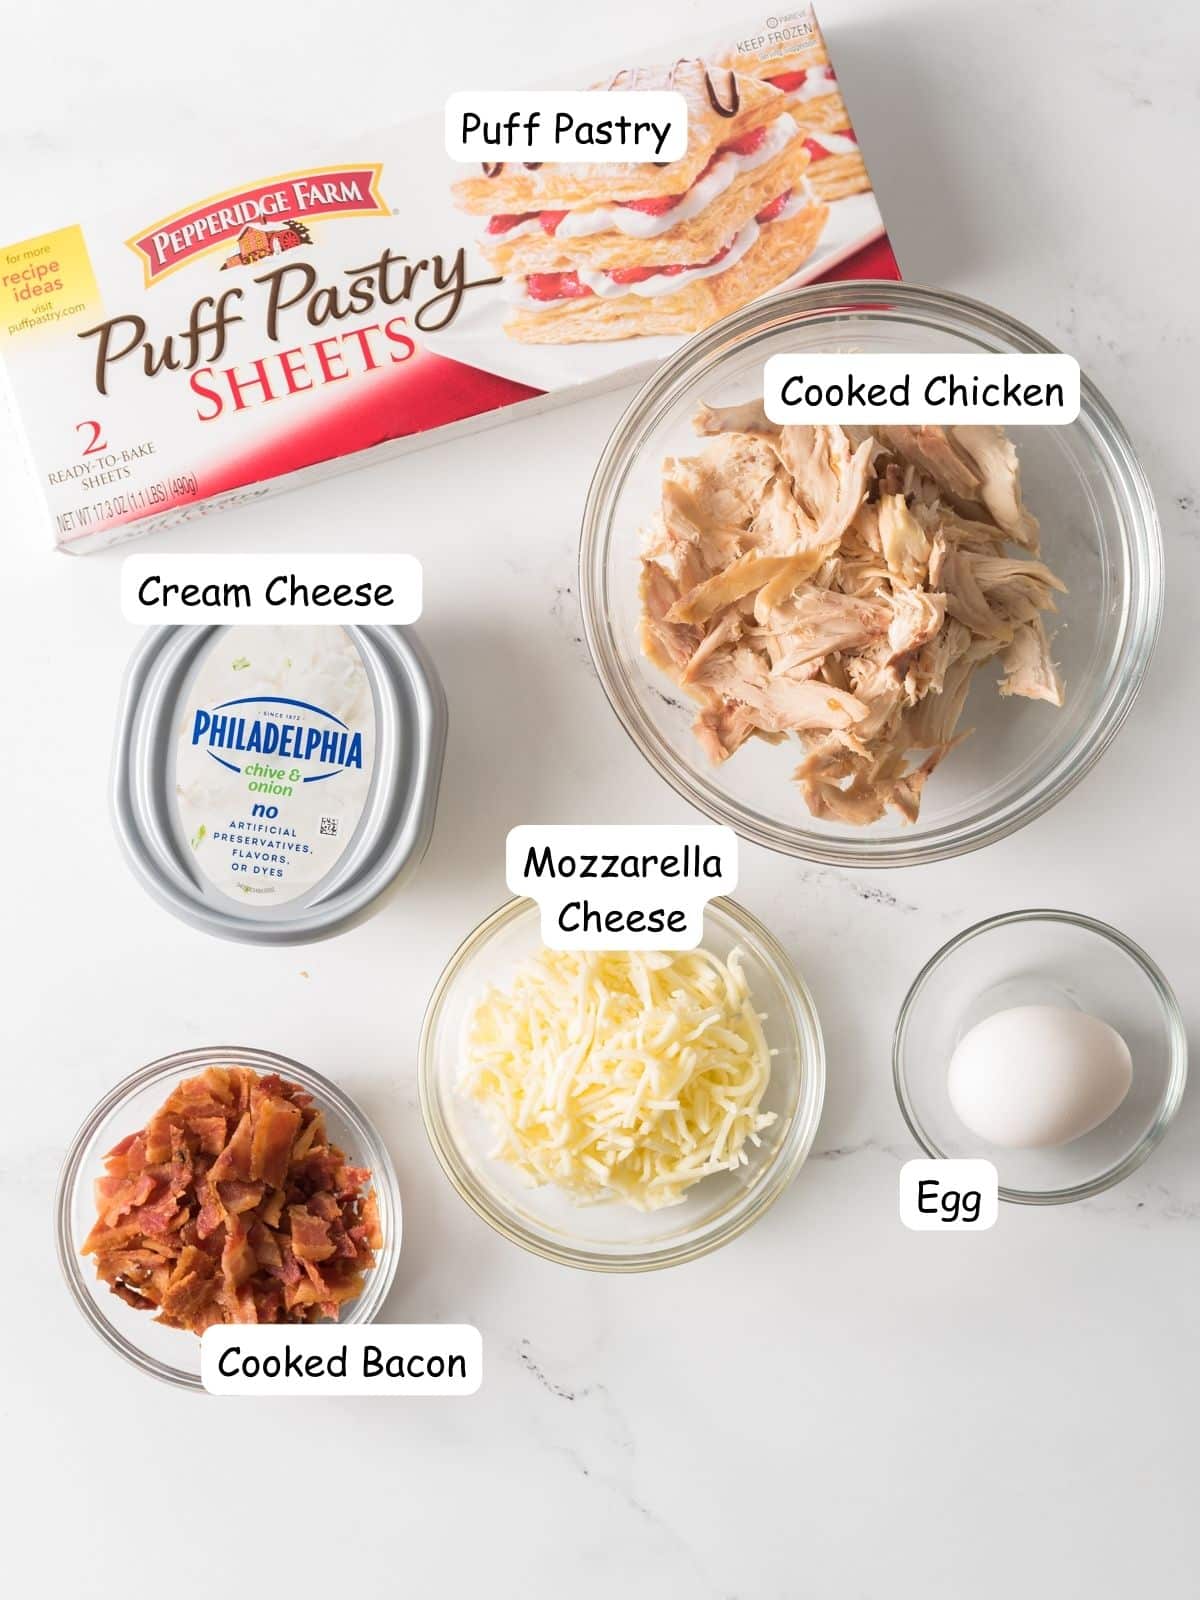
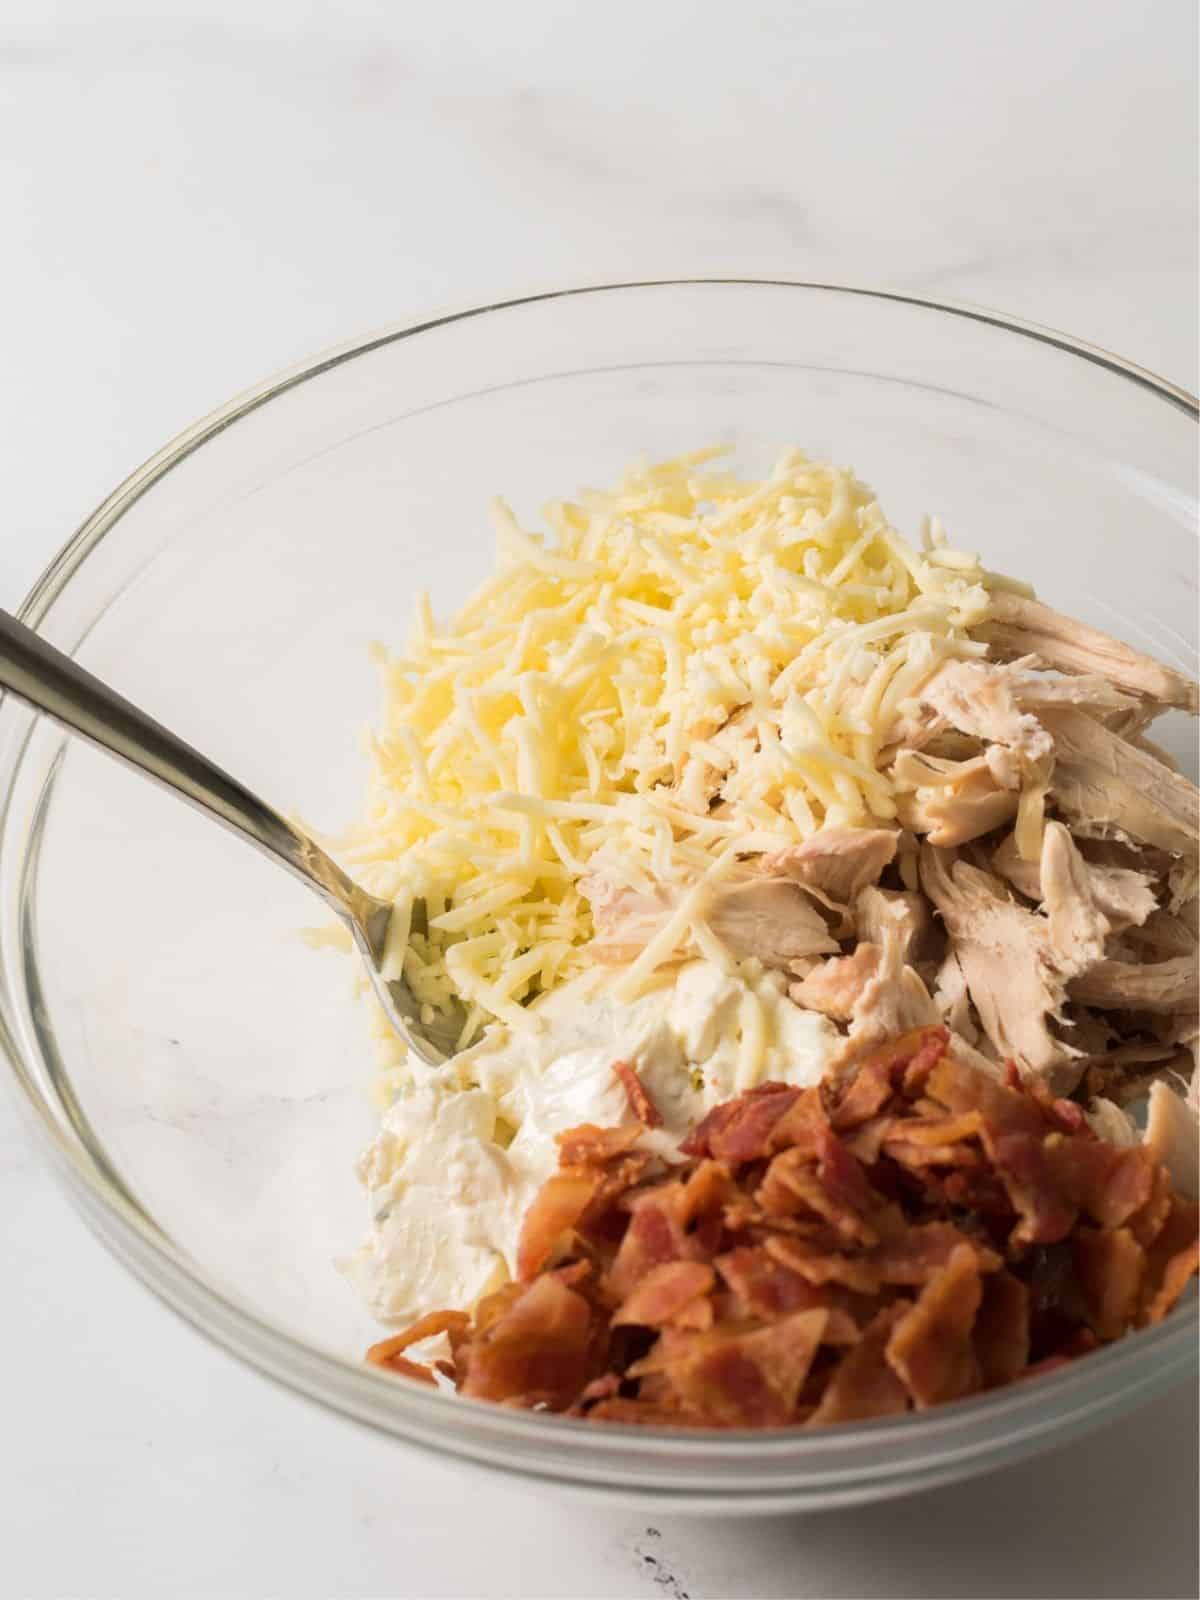
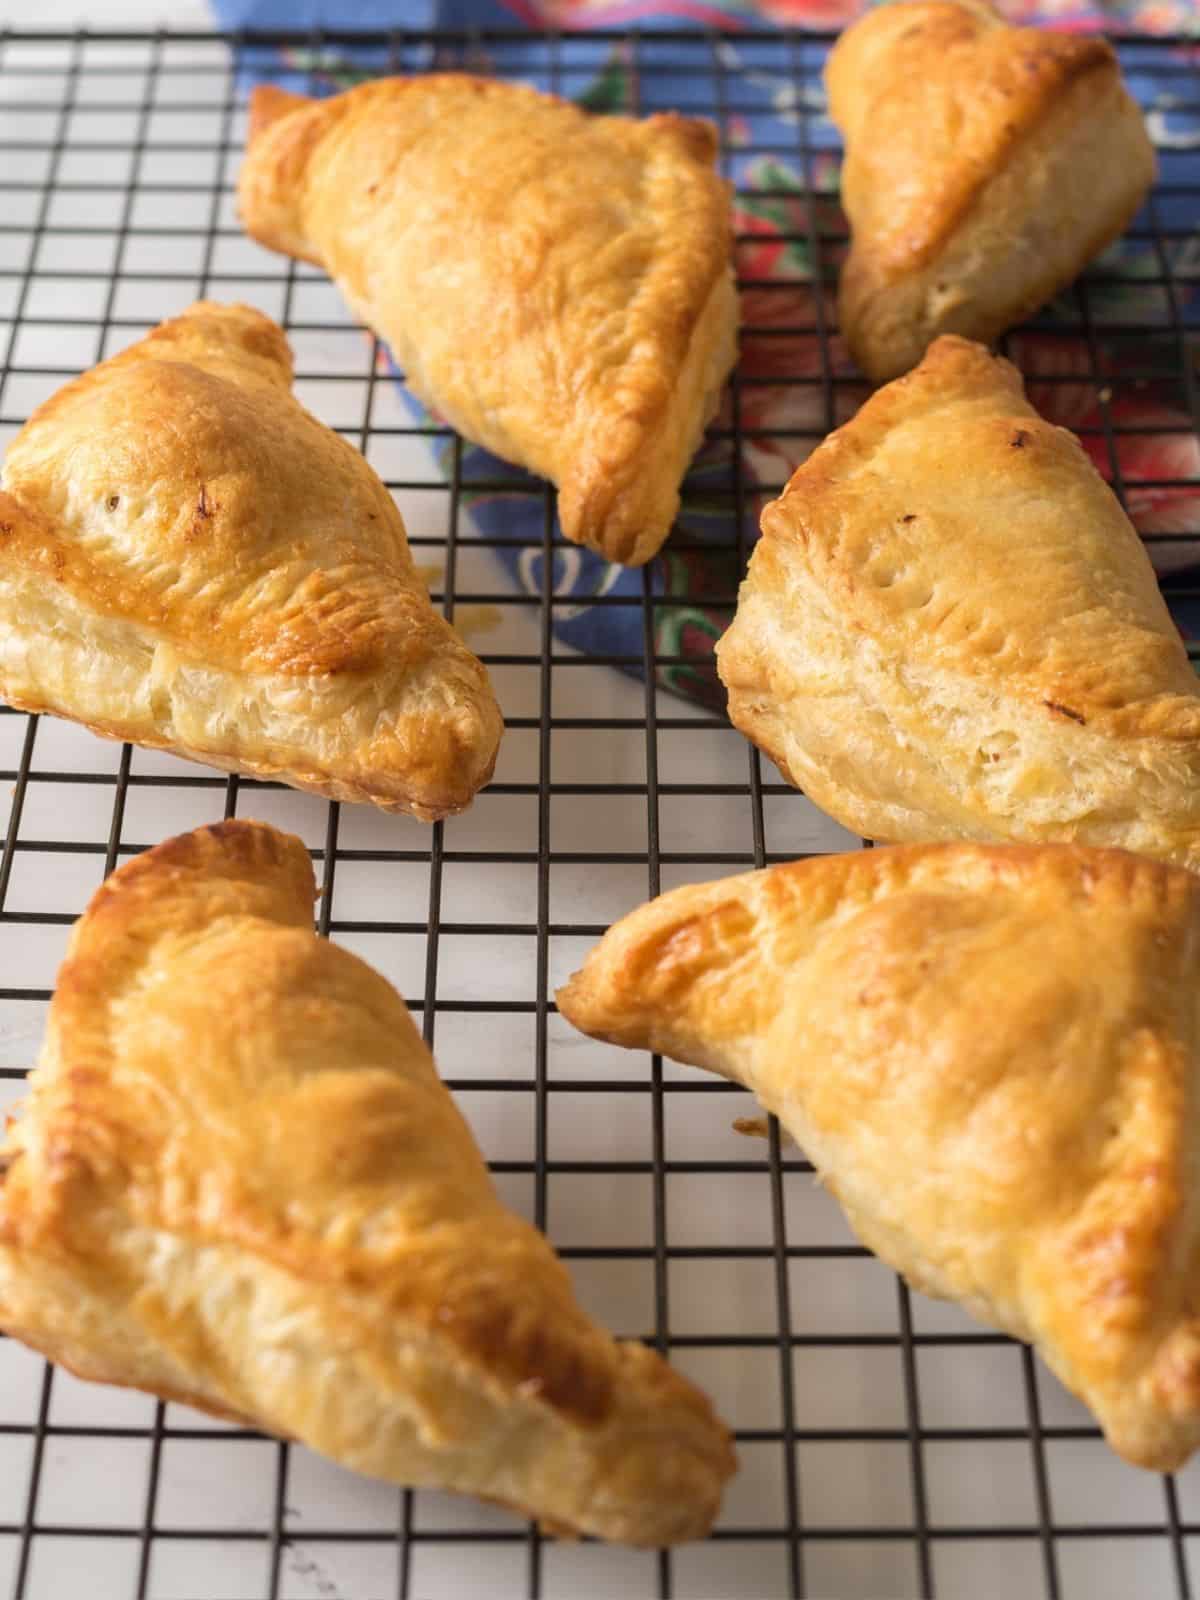
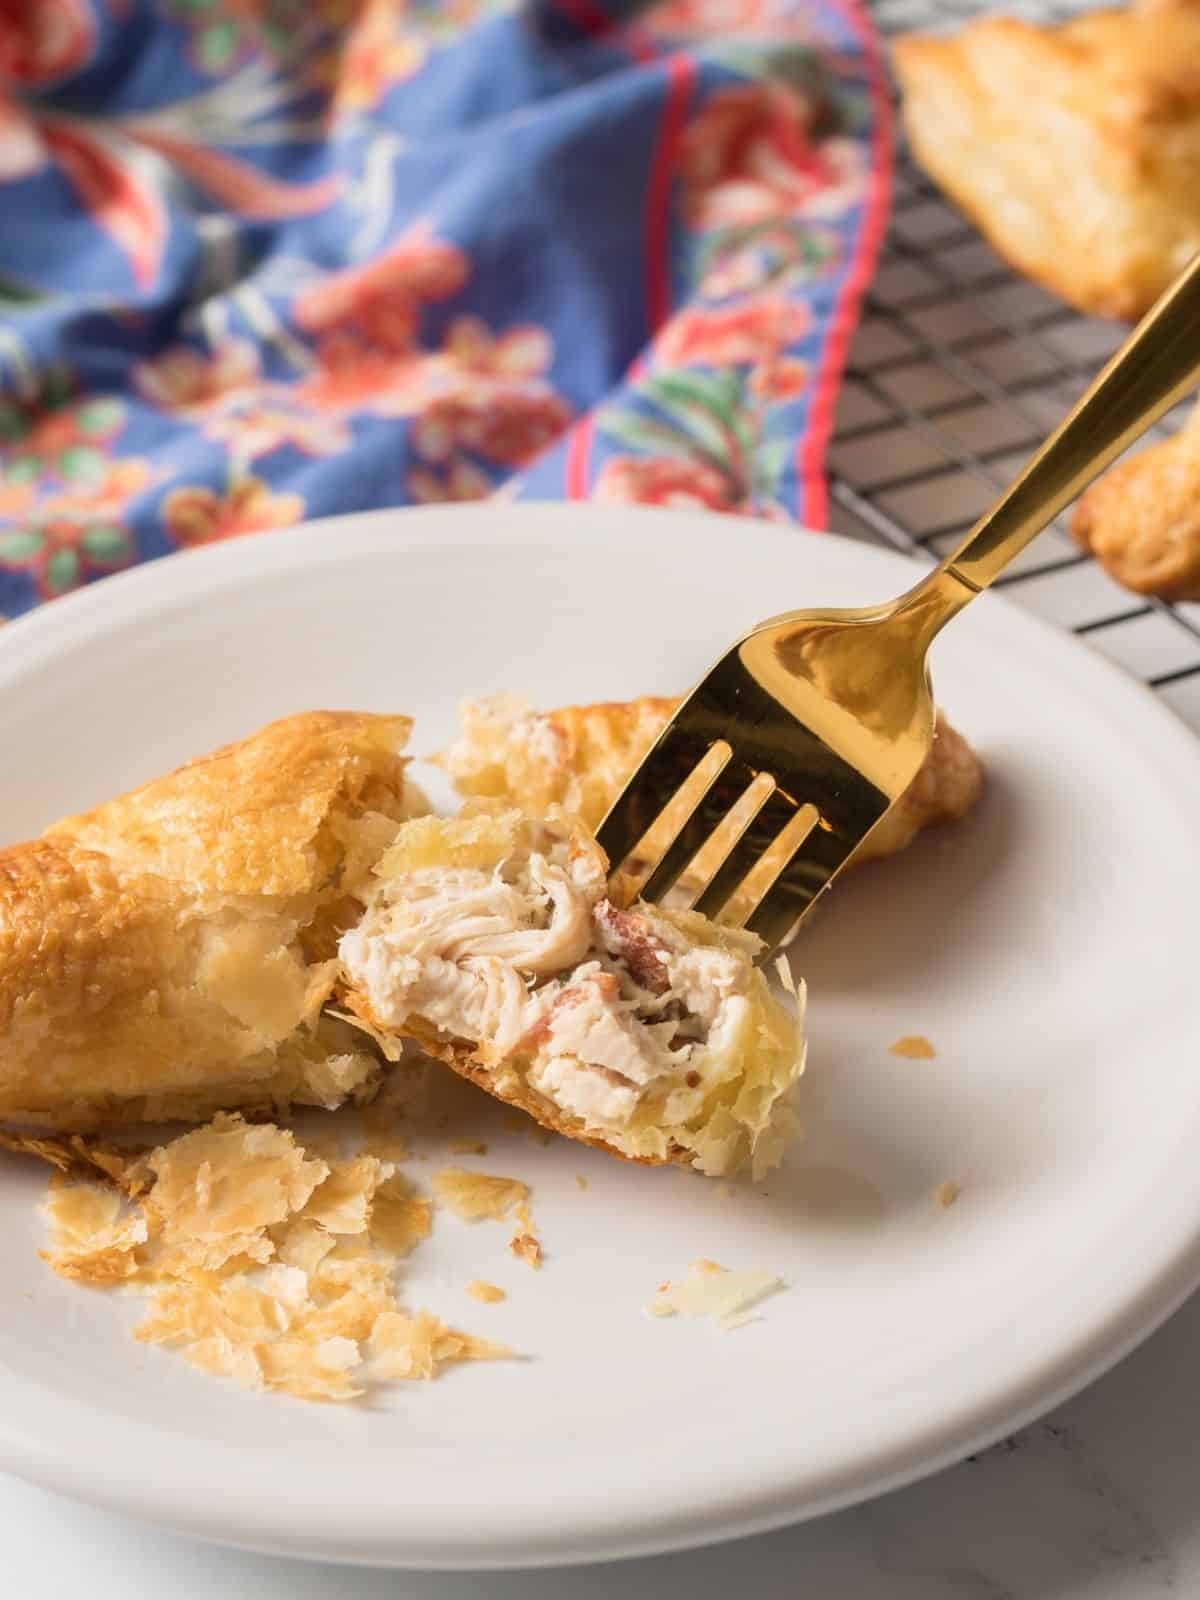
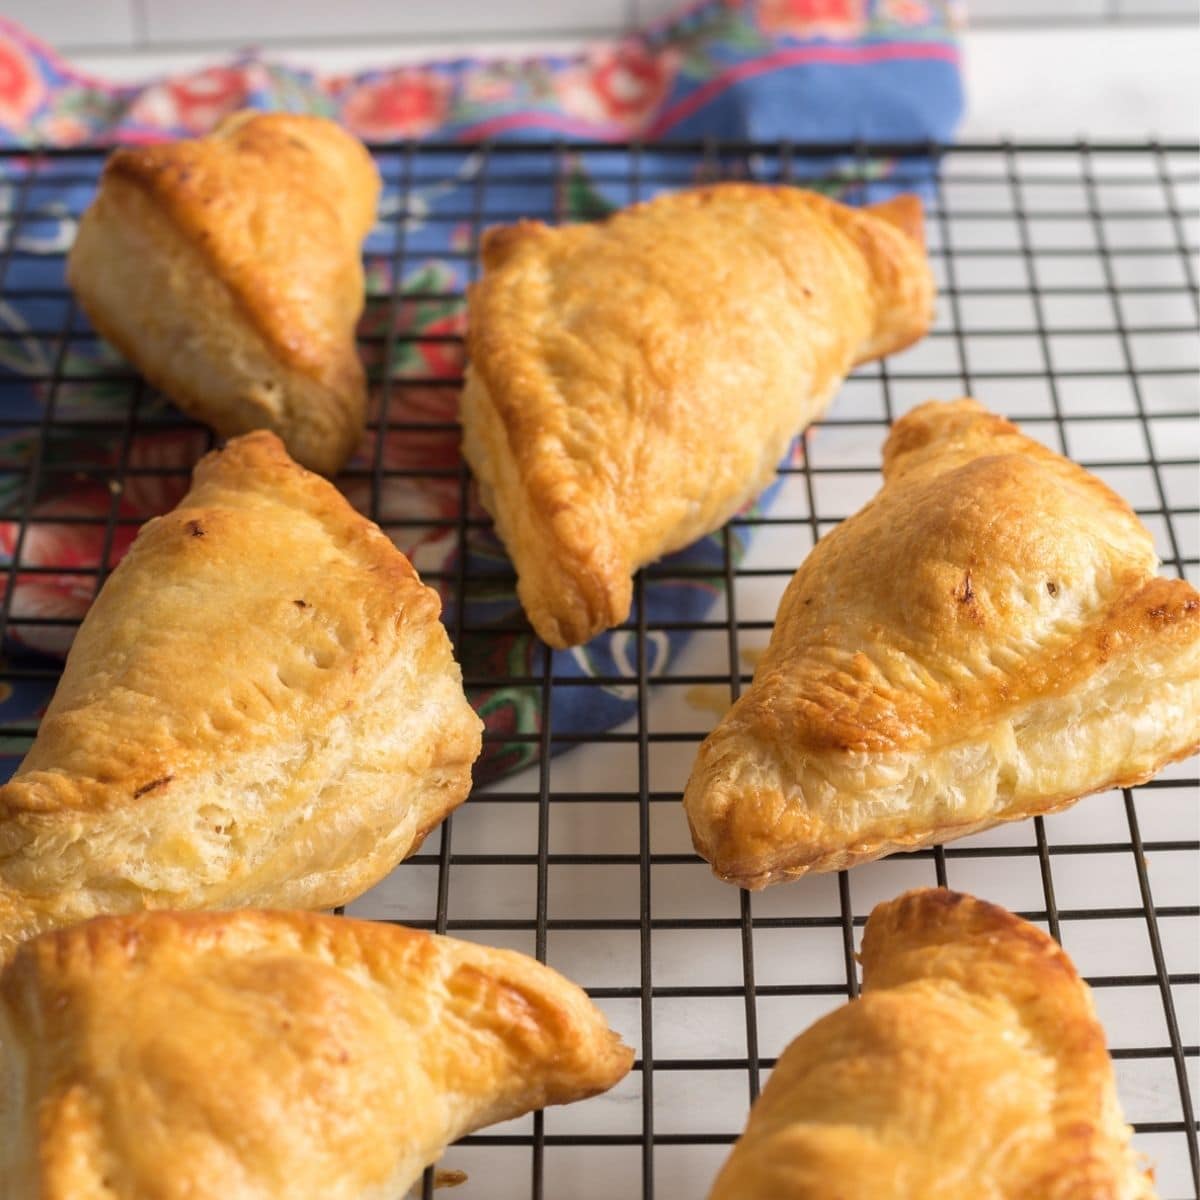
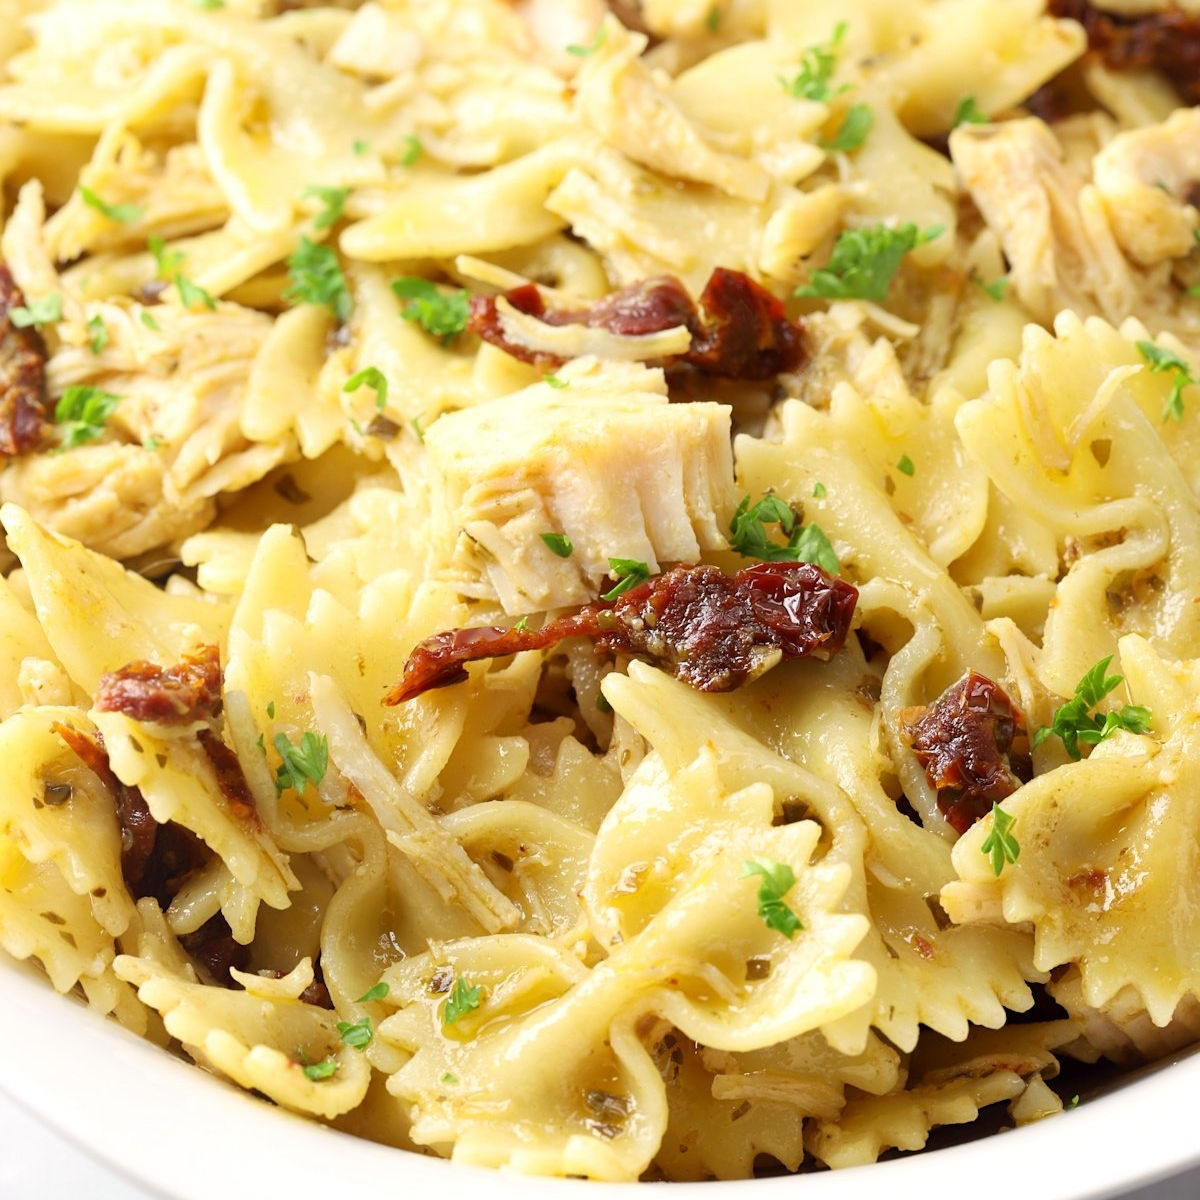
Filled with shredded chicken, cream cheese, mozzarella cheese, and bacon, these Chicken Puff Pastry Pockets are perfect for a quick dinner recipe.
These "homemade hot pockets" are a simple recipe yet they're full of flavor! The ingredients are wrapped in flaky, buttery sheets of puff pastry.
This clever recipe is a great way to get dinner on the table without slaving away in the kitchen for hours. Add a tossed salad and dinner is served!
Another savory puff pastry recipe that will taste like you spent all day in the kitchen cooking!
My son loved Hot Pockets when he was in high school. So I knew he would really enjoy this homemade version I created a few years ago.
Using puff pastry instead of traditional pie crust dough is key to making this recipe work! Puff pastry is very versatile and easy to work with!
It creates a light, buttery and flaky dough that's crispy when you bite into. I've never tried to make it on my own though. I always use store-bought frozen puff pastry dough...and you should too!
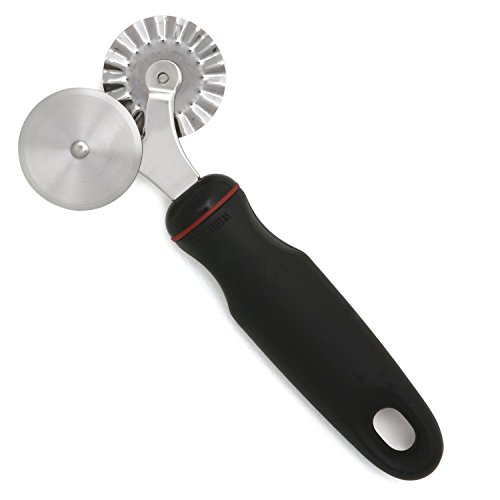
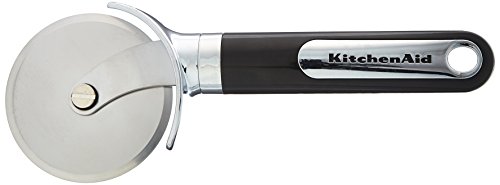
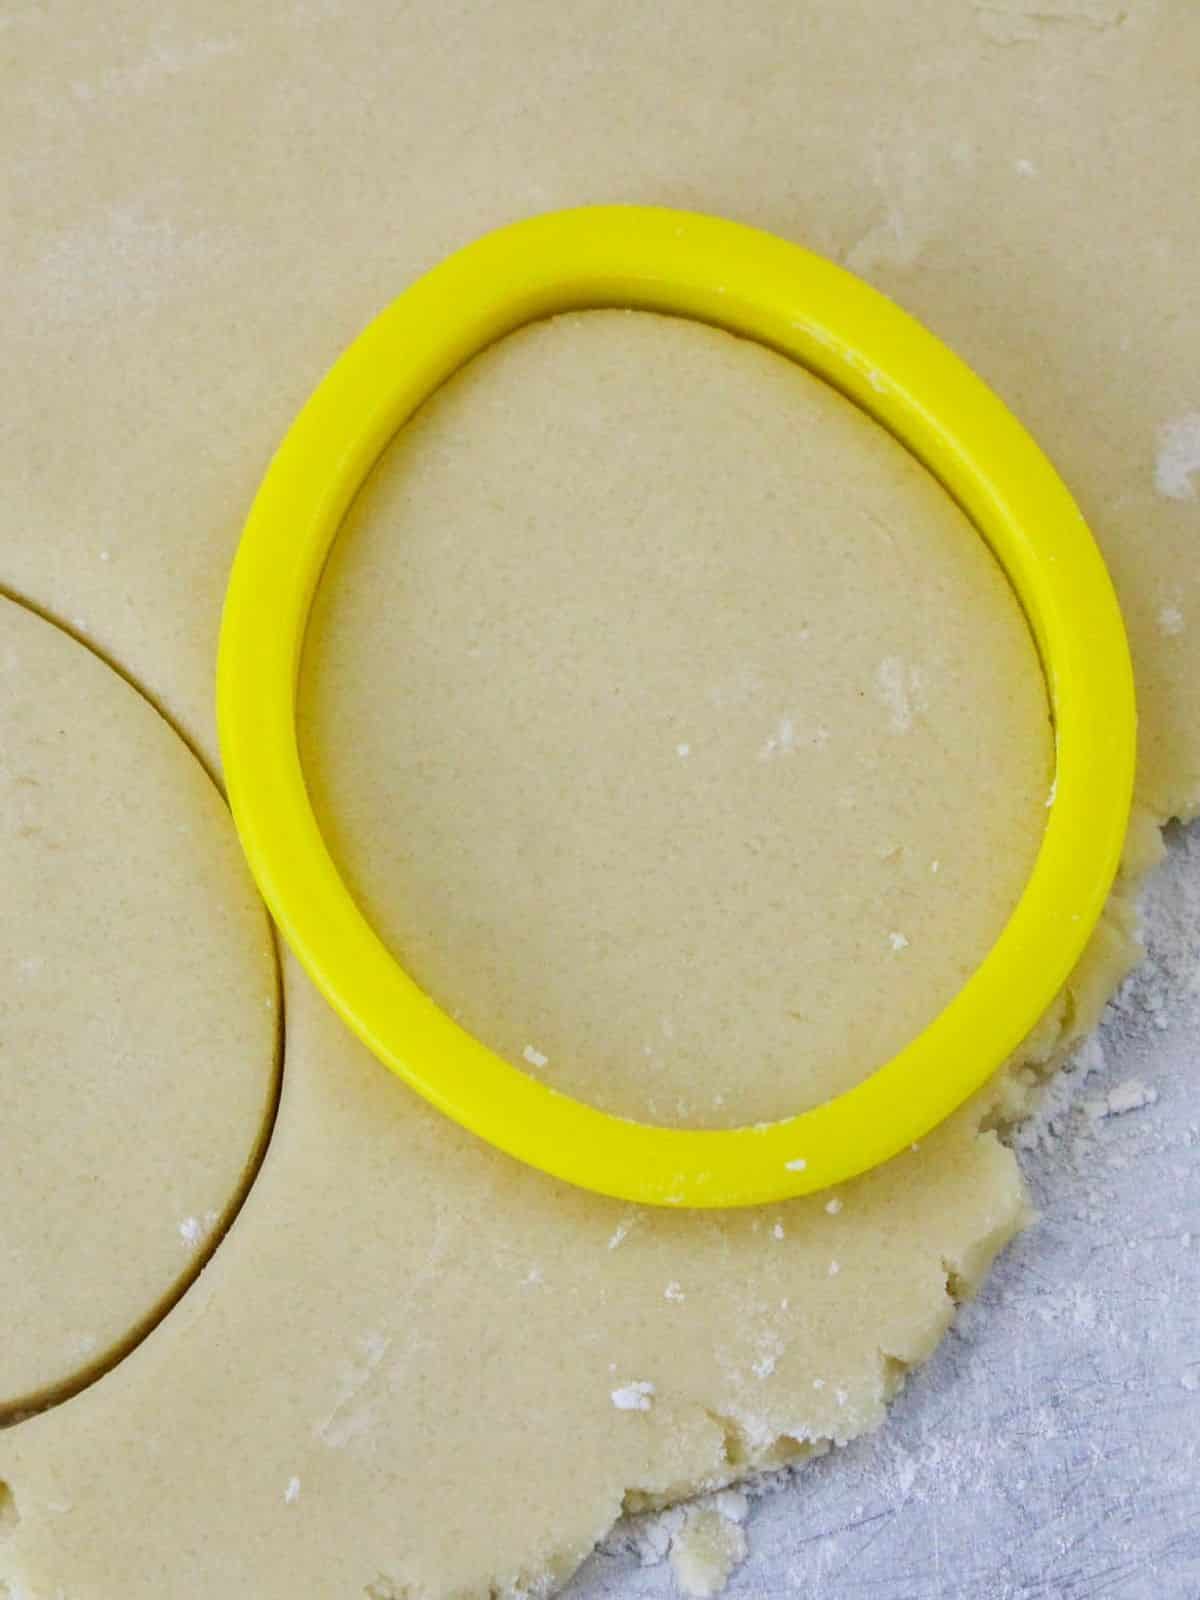
The best way to cut puff pastry is with a sharp knife. pastry cutter or a pizza cutter. Using a dull blade will result in uneven edges and misshapen pieces.
Gently roll the puff pastry out onto a lightly floured surface.
Place your chosen shape onto the pastry and then use your knife to carefully trace around the shape, making sure not to press too hard.
Then, carefully lift off the excess pastry away from the desired shape, place it on another piece of parchment paper, and bake according to recipe instructions.
Here's a quick overview of the ingredients for this recipe. Find the exact amounts and click the Instacart button to easily add them to your cart – all in the printable recipe card below!
Recipe Substitutions and Variations
There are so many ways you can make this recipe your own!
Make your own pizza pockets by using your favorite tomato sauce and pizza toppings.
Try making a chicken pot pie version! Place a spoonful of my homemade chicken pot pie filling into the puff pastry and continue with the recipe as directed.
Cooked Chicken - You can use leftover roast chicken, which is what I usually do. Or you can poach chicken on the stove or cook a larger batch in the instant pot. Another easy way is to use a pre-cooked rotisserie chicken, simply remove the skin and bones from the chicken before shredding.
Chive and Onion Cream Cheese - For this recipe I used a flavored cream cheese. You can use plain cream cheese if you prefer or even a different flavor. The chive and onion flavor is very mild, but adds a really nice taste to the recipe.
🥣Step-by-Step Instructions
Step 1: Place the cream cheese in a microwave-safe bowl and microwave on high for 15-30 seconds. This will soften the cream cheese, making it easier to mix with other ingredients.
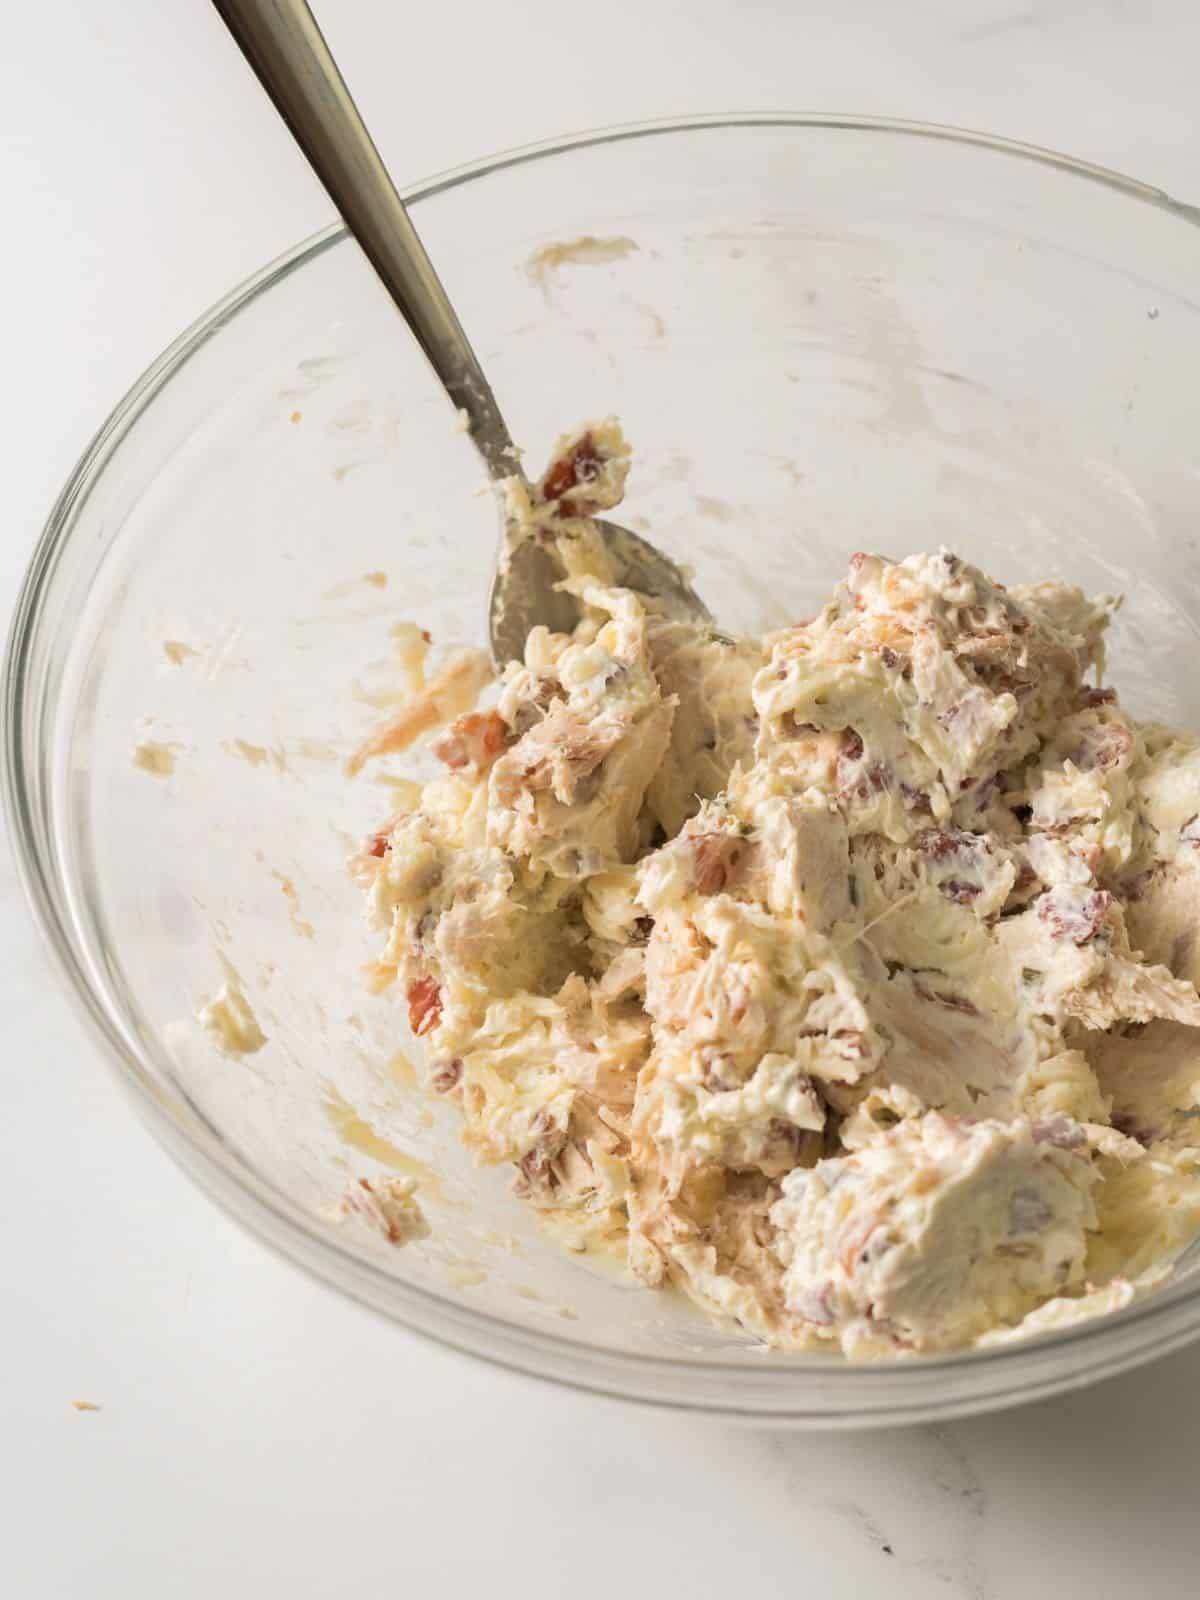
Step 2: Mix the shredded chicken, bacon, and mozzarella cheese into the cream cheese. Set aside while you prepare the puff pastry.
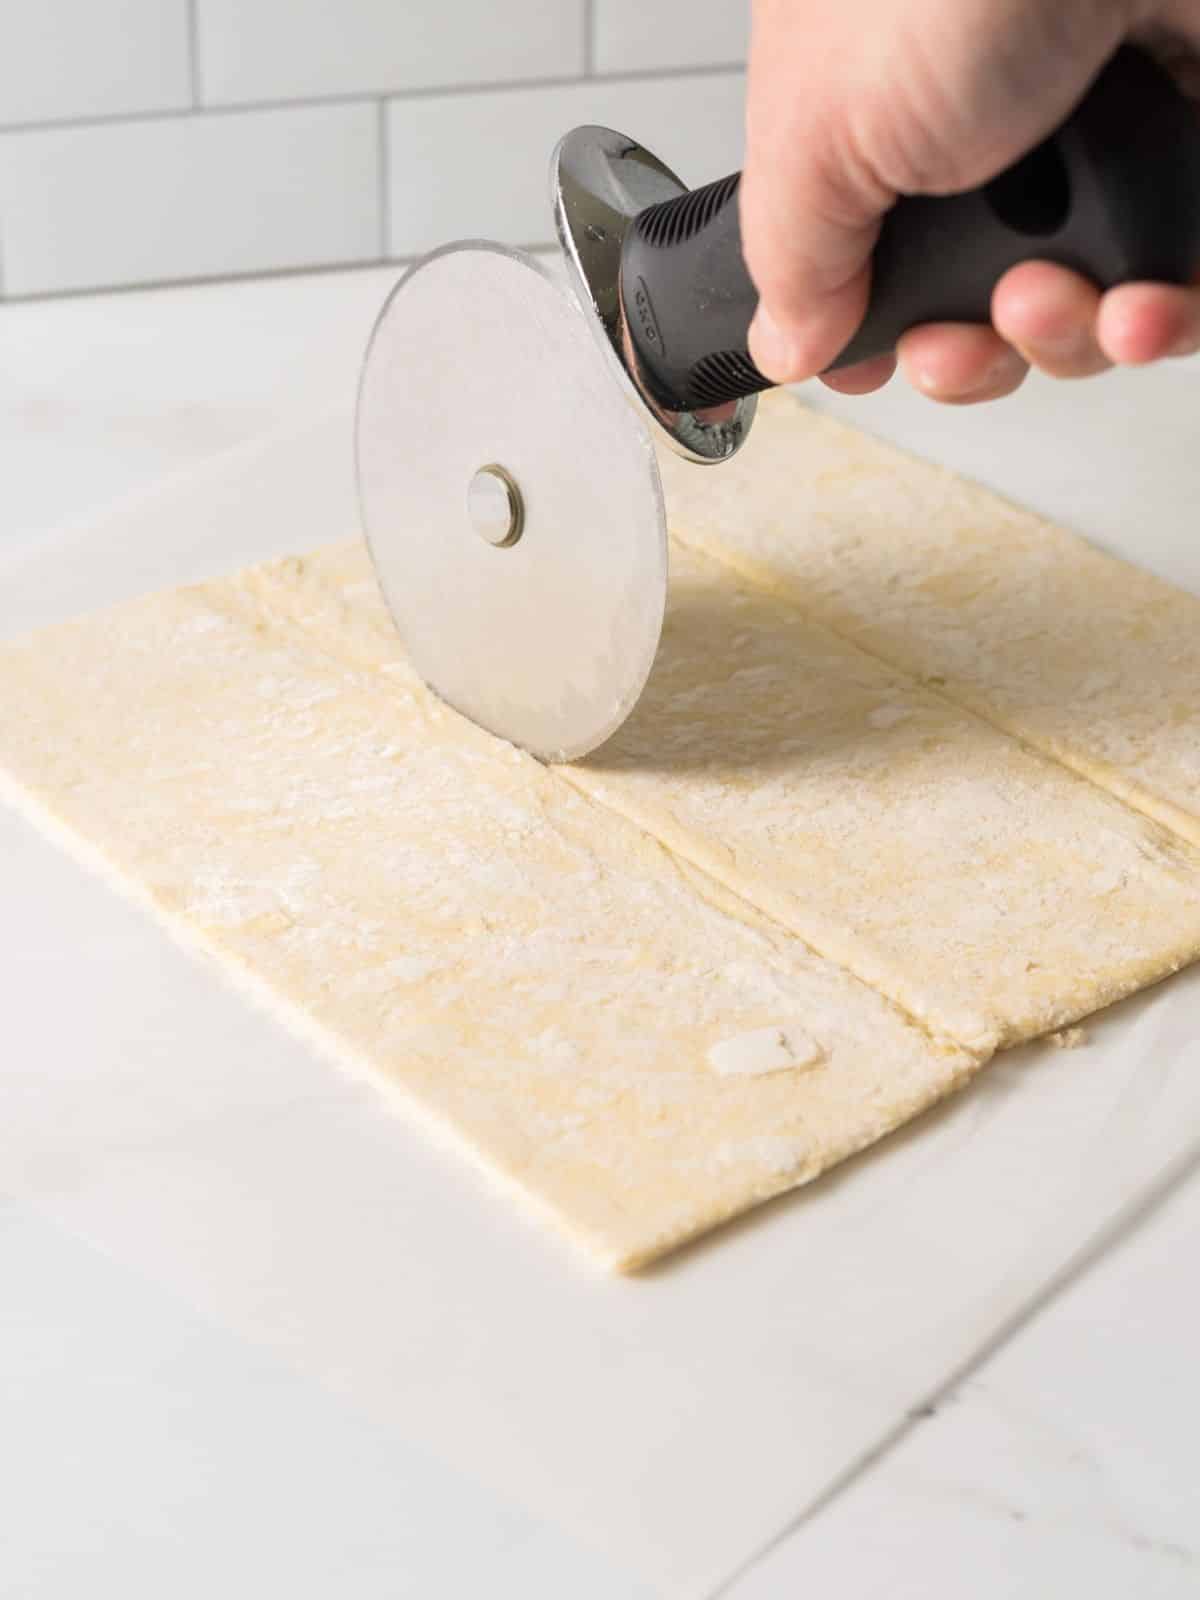
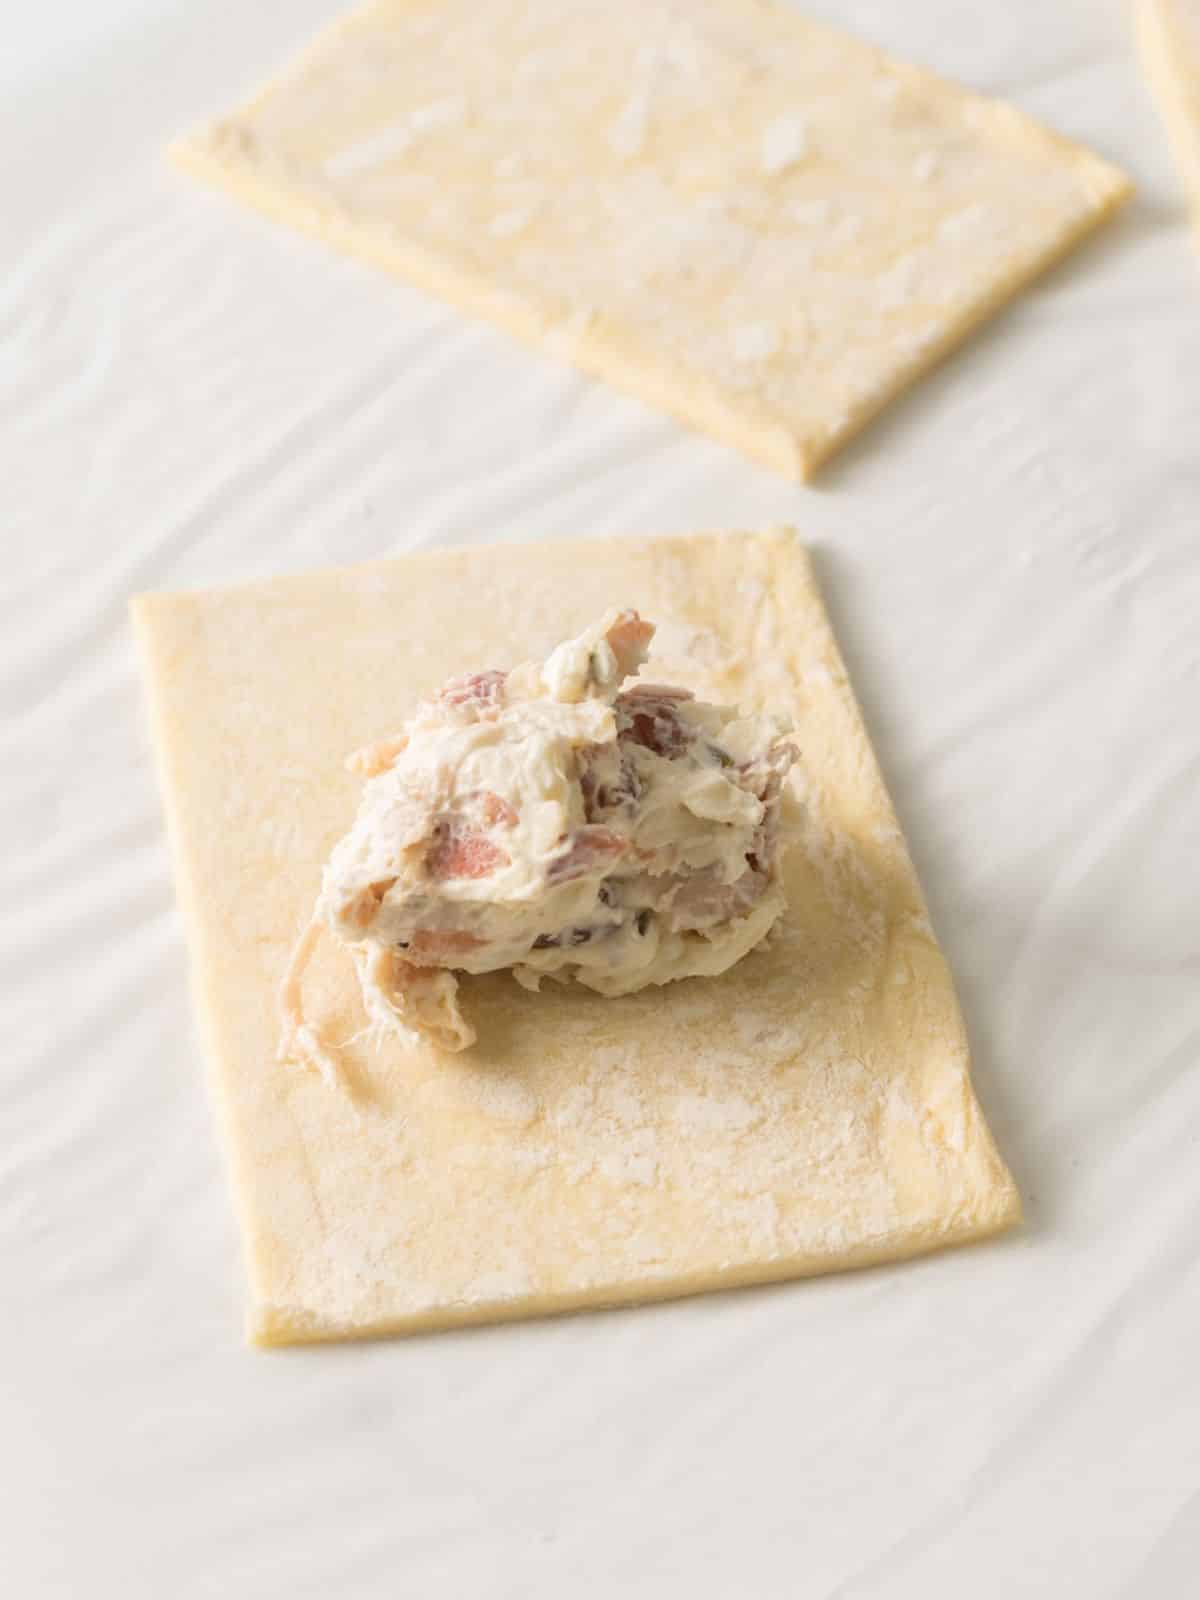
Step 3: Lightly dust your work area with flour. Roll out one sheet of puff pastry until it forms a 12x12 square.
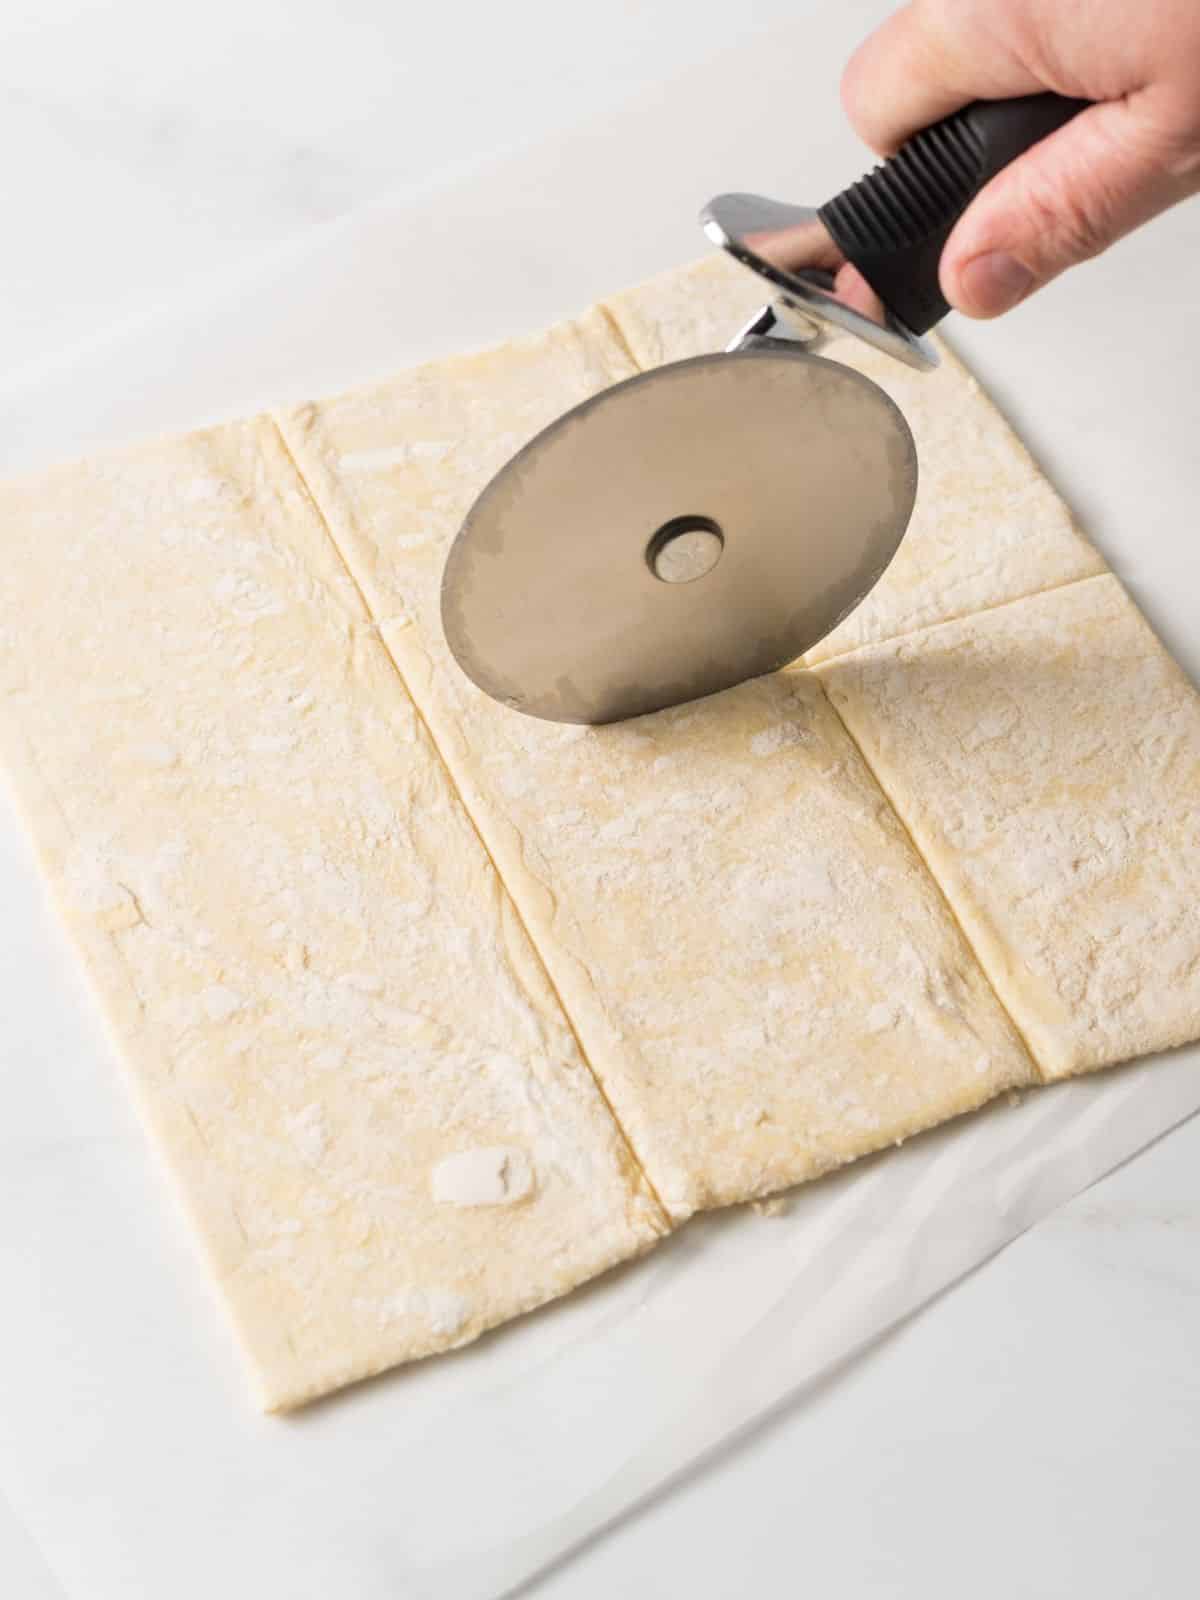
Step 4: Using a sharp knife or a pizza cutter. Carefully cut the puff pastry square into six squares of equal size.
How to Form the Puff Pastry Pockets
Step 5: Place about 2 tablespoons of the chicken and cheese mixture in the center of each square. Aim for a generous amount, but avoid overfilling to help with sealing later.
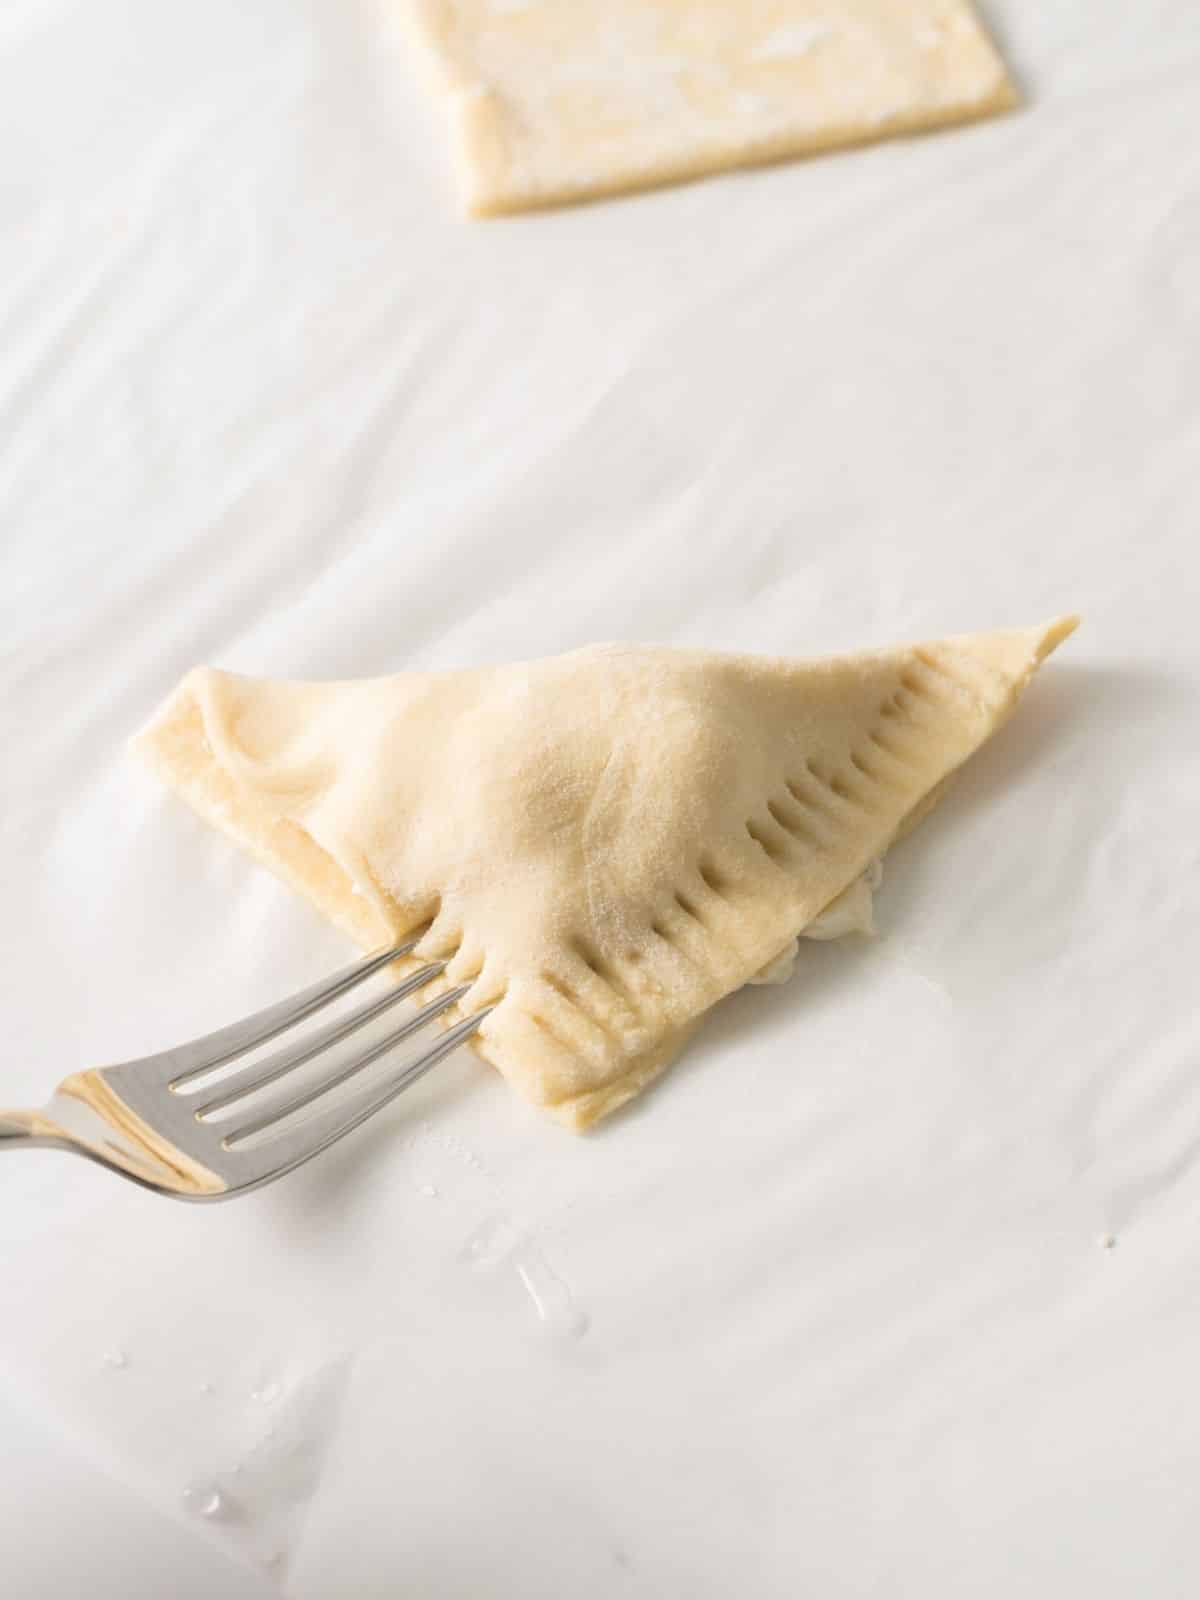
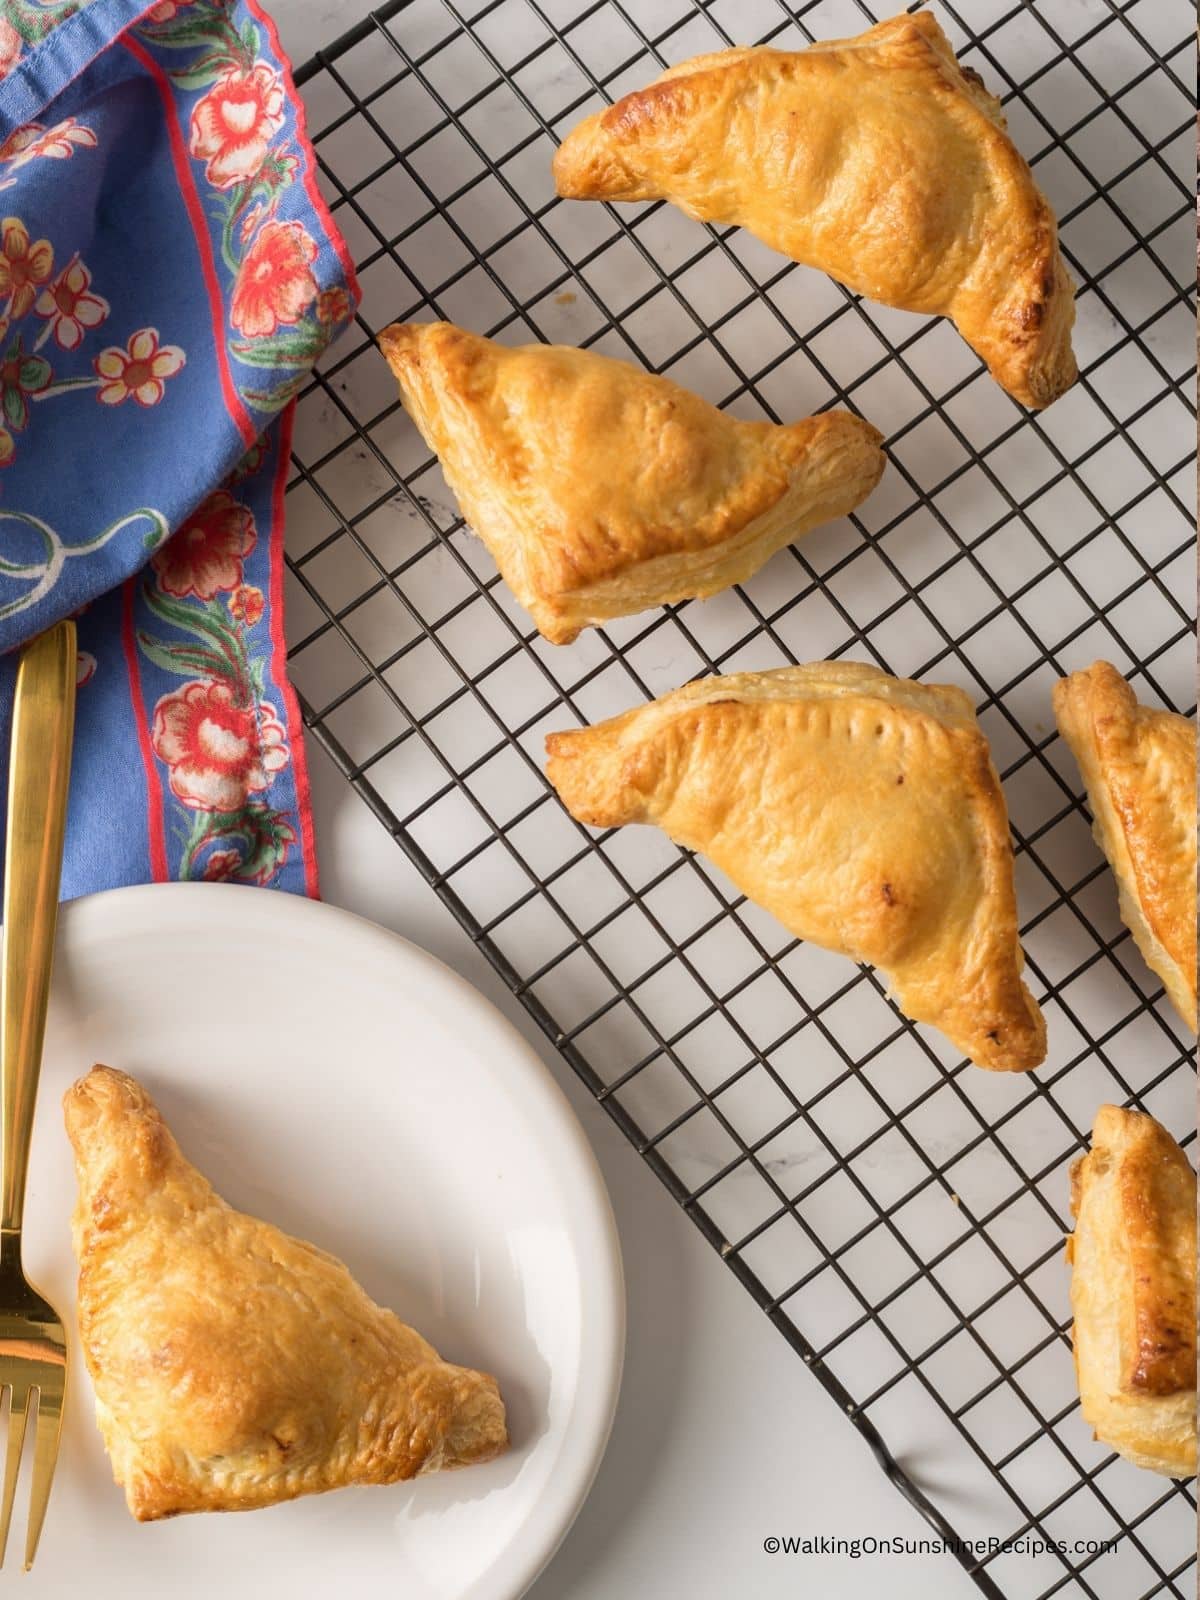
Step 6: Dip a pastry brush in water and lightly brush the edges of two sides on each square. Fold those sides together to make triangles. Use a fork to pinch the edges shut.
Expert Tip
Placing the baking tray in the refrigerator or even freezer to chill the puff pastry one more time before placing it in the hot oven will help chill the butter in the layers and give the recipe a better "puff" as it bakes.
Brush with Egg Wash
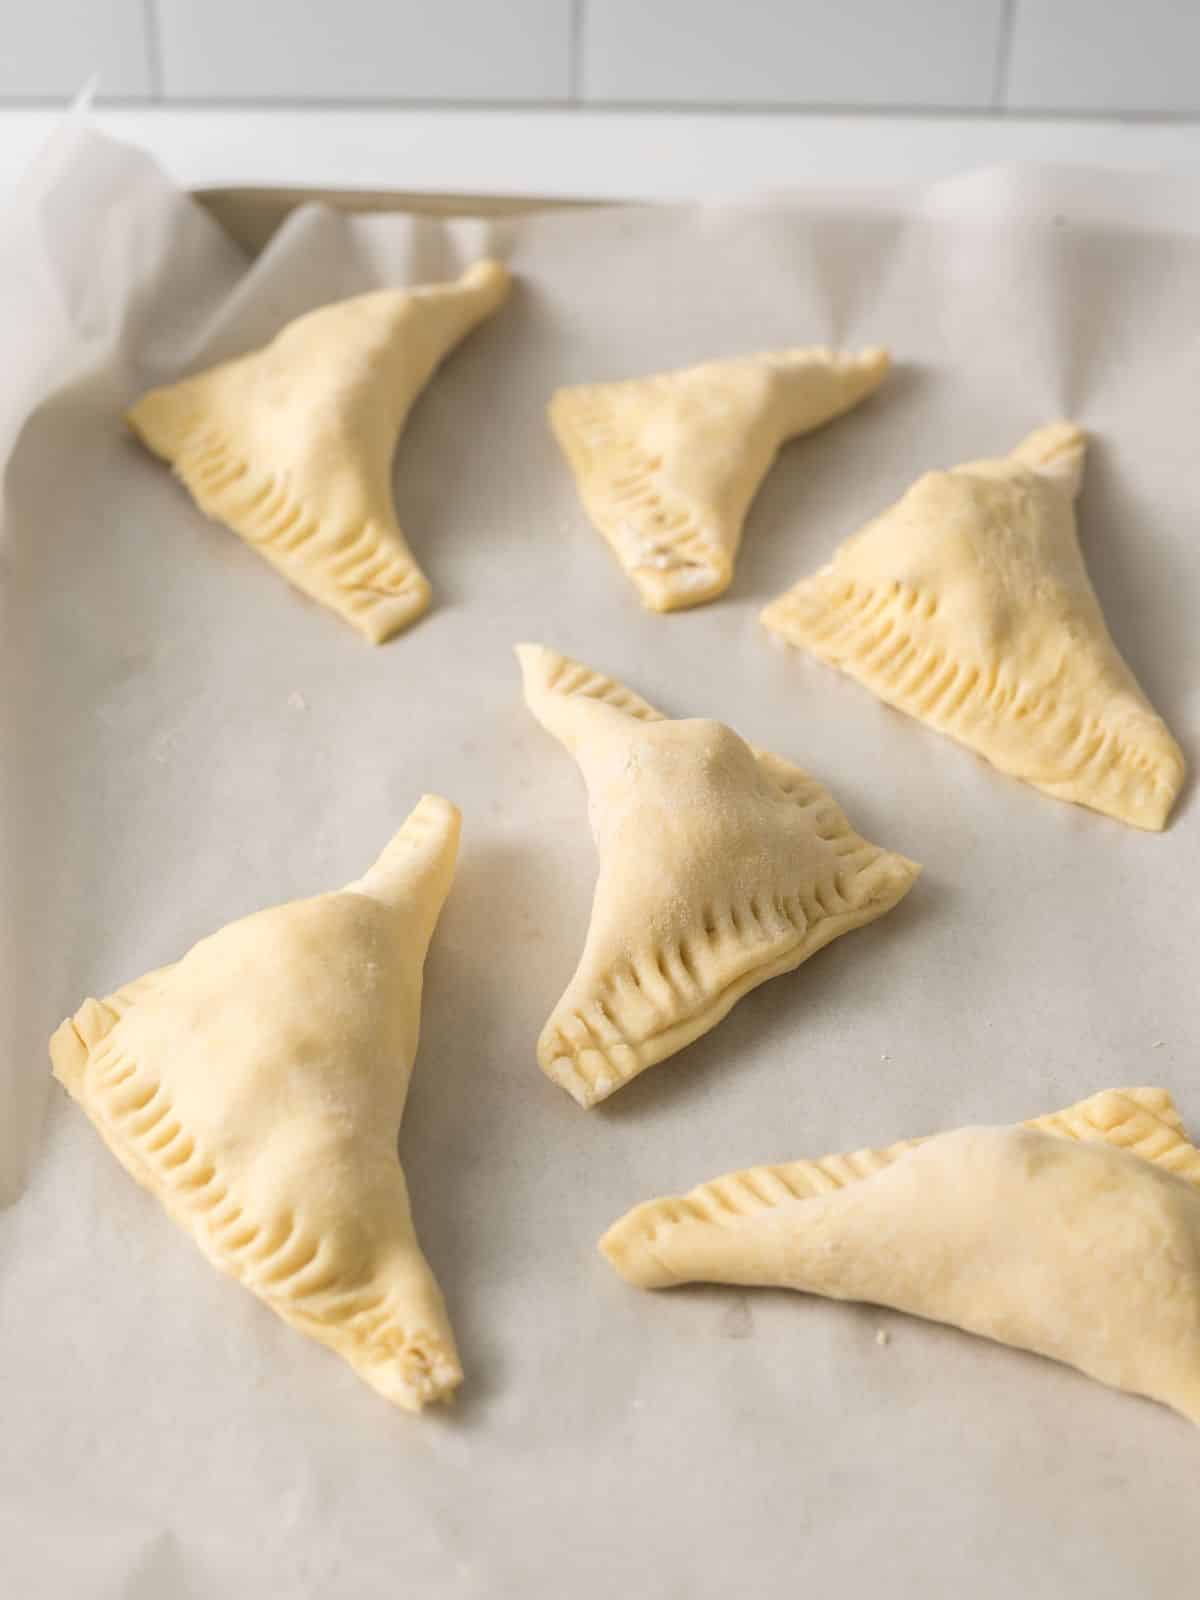
Step 7: Line a baking sheet with parchment paper. Arrange the puff pastry pockets on the prepared baking sheet.
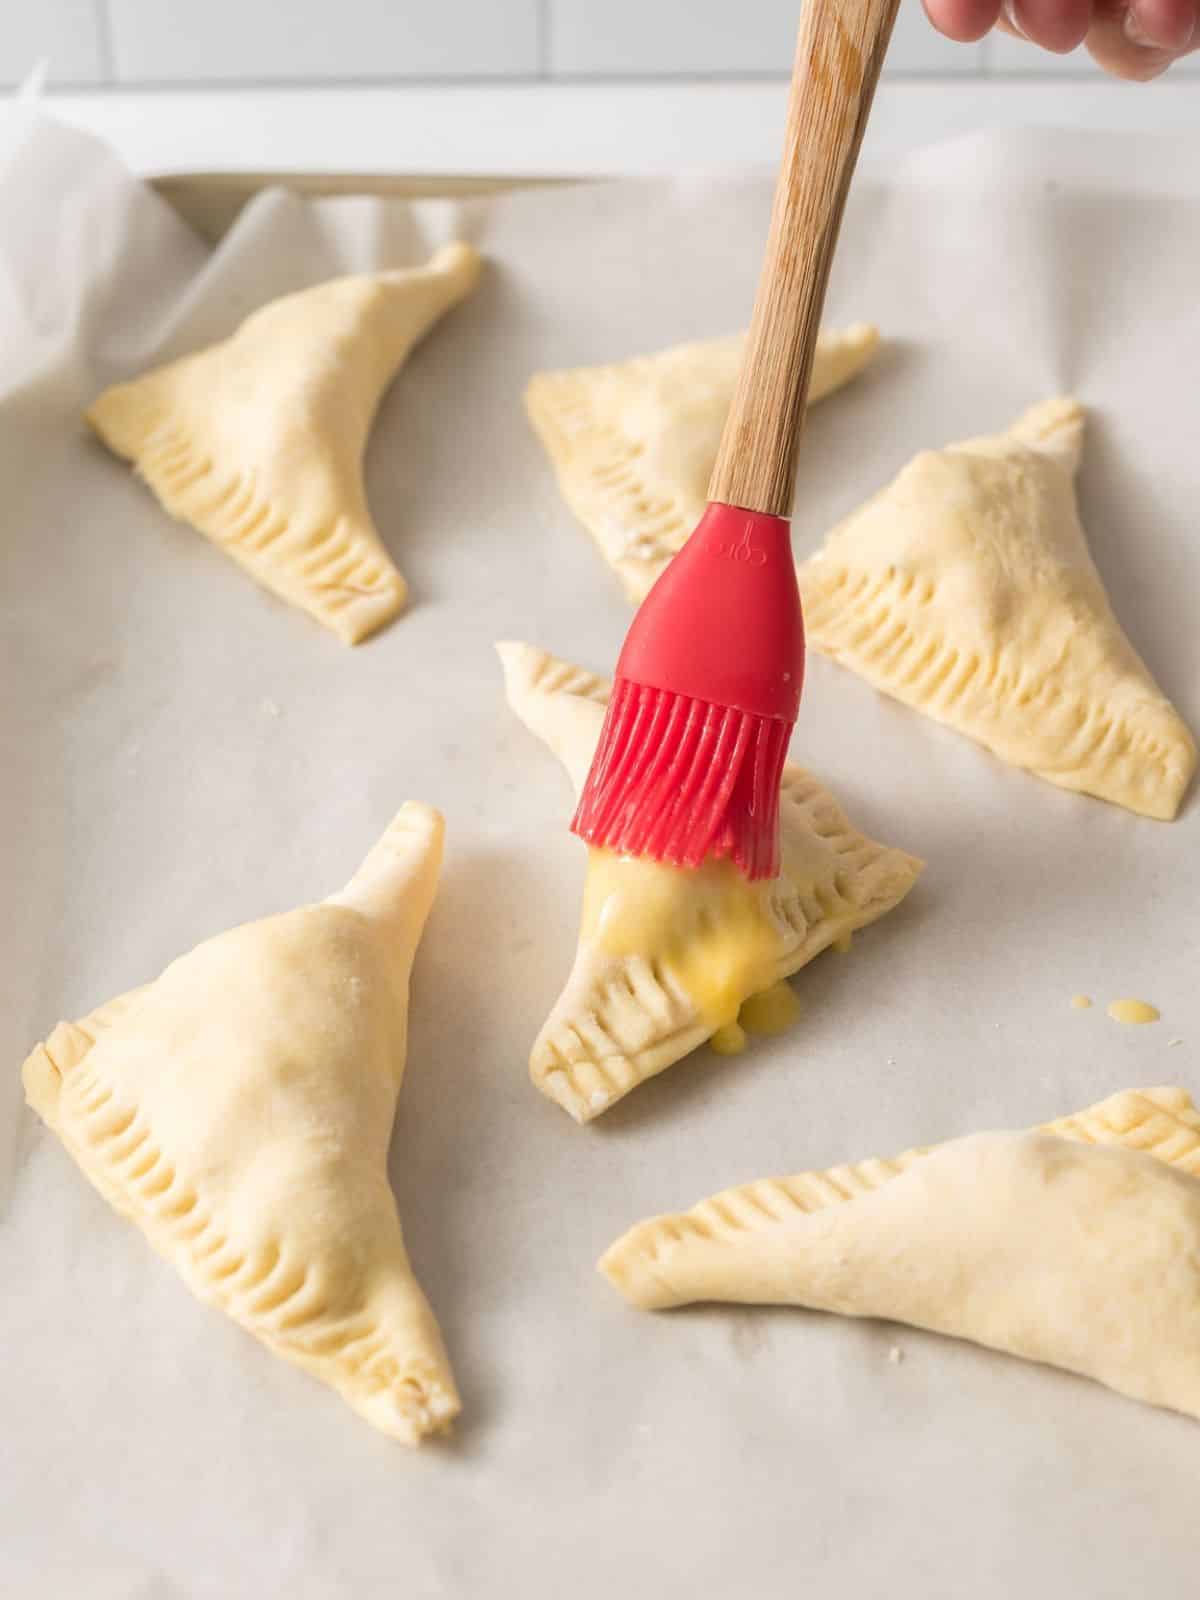
Step 8: Then place the tray in the refrigerator to chill for 30 minutes. Remove the tray and brush each pocket with the egg wash.
Baking Instructions
Step 9: Place the baking sheet with your puff pastry pockets into your preheated 400°F oven. Bake for 20 to 25 minutes, or until the pastry is a deep golden brown and looks delicious!
Step 10: Once they're out of the oven, carefully transfer the pockets to a wire rack. Let them cool for a few minutes before serving – this helps them firm up a bit and makes them easier to enjoy.
LOVE this recipe? SAVE it for Later!
❤️Tap the heart icon in the lower right corner to add the recipe to your recipe box for easy access anytime.
If you made it, leaving a star rating or quick review is always appreciated and helps other readers too.
Try making my Creamy Pasta Salad to serve with these homemade hot pockets.
Check out my recipe for Fresh Tomato Salad which makes a nice side dish.
Prep Ahead Tips
Follow the directions for putting the puff pastry pockets together.
Place the pockets on the baking tray and cover with plastic wrap and place the tray in the refrigerator.
You can refrigerate them overnight and bake the next day according to the directions.
You can also flash freeze them to bake at a later time. See the Freezing Tips section below.
Storage Tips
Any leftovers should be stored in airtight containers in the refrigerator for up to 5 days.
Freezing Tips
You can freeze the puff pastry pockets before baking by simply flash freezing them on a sheet pan in the freezer for a few hours.
Then place them in a freezer safe bag and keep in the freezer for up to 3 months.
Thawing and Reheating Tips
Allow the frozen homemade puff pastry pockets to defrost in the refrigerator overnight.
Reheating leftover frozen homemade puff pastry chicken pockets in a preheated 350°F oven for about 10 minutes or until they are warmed.
You can also reheat them in an air fryer for 5 - 8 minutes set at 350°F., but not the microwave as that will make the dough soggy.
They can be reheated while frozen as well; but it will take a longer!
Make sure to check that the internal temperature of the chicken is 165 degrees Fahrenheit before serving.
Recipe FAQ's
How to defrost puff pastry fast?
The quickest way to defrost puff pastry is to place the frozen sheets on a lightly floured work surface and let thaw at room temperature which would take around 30 minutes. If you need to use the puff pastry sooner, you could use the defrost setting in the microwave oven. Make sure that the pastry stays cool while it’s being defrosted, or else it may start to become overly soft and difficult to handle. Once defrosted, use immediately as needed for recipes.
Can I re-freeze thawed puff pastry?
While you can re-freeze puff pastry that has previously been thawed, I do not recommend it. The butter will break down, resulting in a less flaky product. If you have thawed puff pastry that you no longer need, store it in the refrigerator and use within 24 hours.
2sheets frozen puff pastrydefrosted according to package directions.
8ouncecontainer Philadelphia Chive and Onion Flavored Cream Cheese
½cupshredded mozzarella cheese
1 ½cupcooked shredded chicken breast
⅓cupcooked crumbled bacon
1egg mixed with 1 tablespoon water
1tablespoonadditional water
Toggle on to prevent your screen from going dark
Cooking for More (or Less!)Scale this recipe up or down! Adjust the number of servings above to automatically update ingredient amounts.
Instructions
Preheat the oven to 400°F.
Empty the cream cheese into a microwave-safe bowl. Warm the cream cheese in the microwave for 15 – 30 seconds. This will help soften the cream cheese which will make it easier to combine the other ingredients together.
Add the shredded chicken, crumbled bacon, and shredded mozzarella to the same bowl as the cream cheese and stir to combine. Set it aside while you prepare the puff pastry.
Defrost the puff pastry sheets according to the package directions on the back of the box. See notes below for tips on how to defrost puff pastry.
On a lightly floured area, roll one sheet at a time into a 12x12 square. Using a sharp knife or a pizza cutter, cut one puff pastry dough into three equal pieces. Cut each of the three pieces in half so you have six square pieces of dough.
Repeat with the other sheet of puff pastry dough. You should now have 12 pieces of dough.
Add about 2 tablespoons of the chicken and cheese mixture to the center of each square. Try not to overfill.
Use a pastry brush and add a little water to the edge of two sides of the dough.
Fold the dough into a triangle. Then using a fork, crimp the edges.
Place all the triangle pockets on a baking sheet lined with parchment paper.
Place the tray in the refrigerator to chill the dough for 30 minutes.
Remove the tray and brush the triangle pockets with the egg wash.
Bake in the preheated 400°F oven for 20 to 25 minutes or until the pastry is a deep golden brown.
Remove the pockets to a wire rack and let cool for 5 minutes before serving.
Video
Notes
Be sure to re-chill the puff pastry dough after assembling the pockets so that the butter layers can chill again and then puff up while baking in the hot oven.
Nutritional estimates are provided using an online calculator and is an estimate per serving. Calorie accuracy isn't guaranteed.
Tried this recipe?Leave a comment and star rating!
This recipe has been updated since it first appeared in 2012 with new photos, information and a new printable recipe card that includes nutritional information. I hope you enjoy the updates as much as I enjoyed working on them!
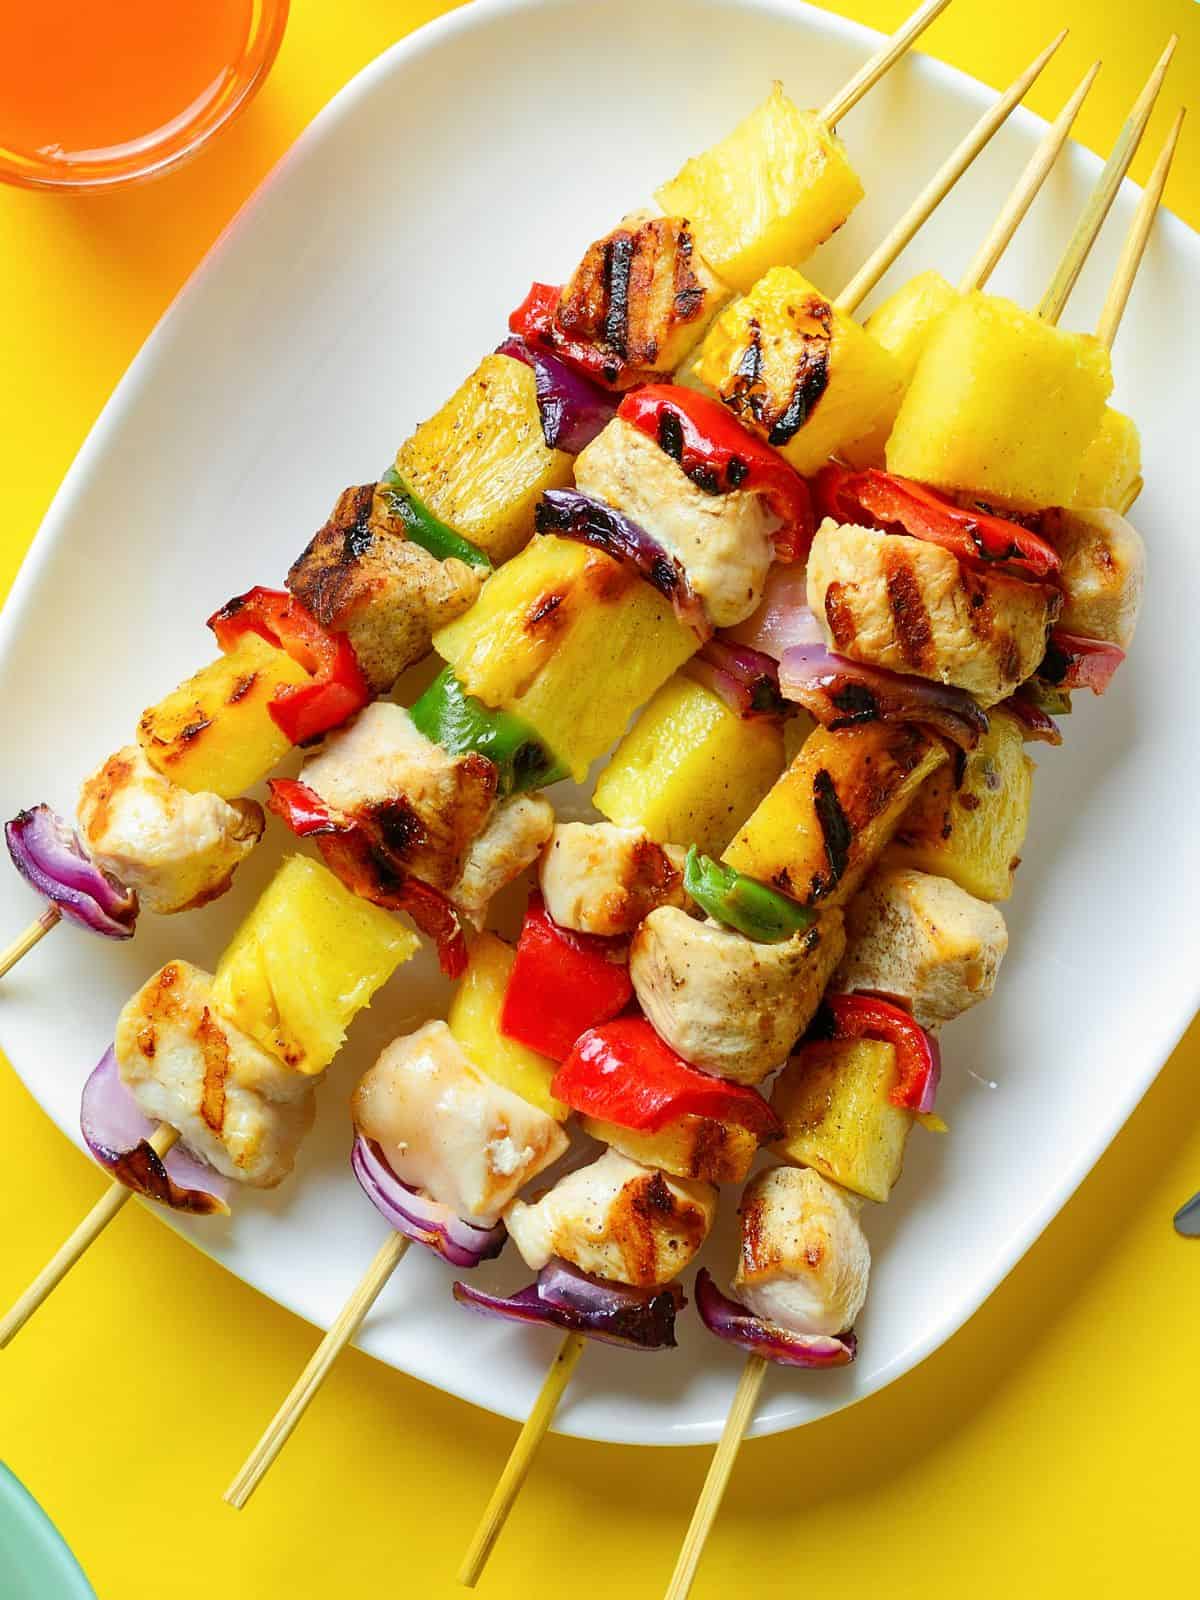
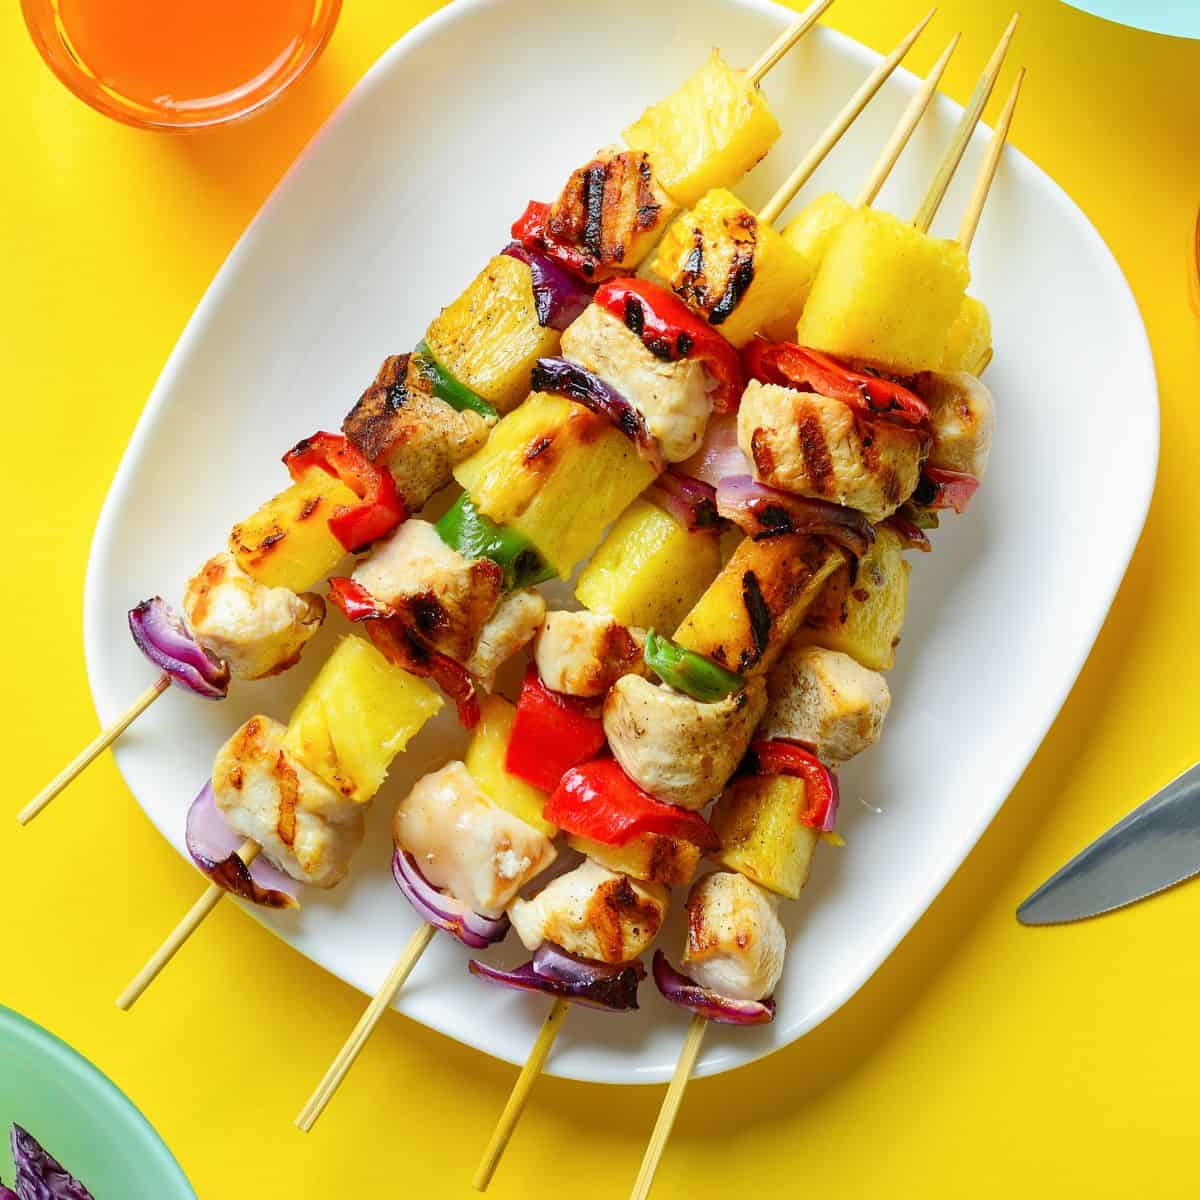
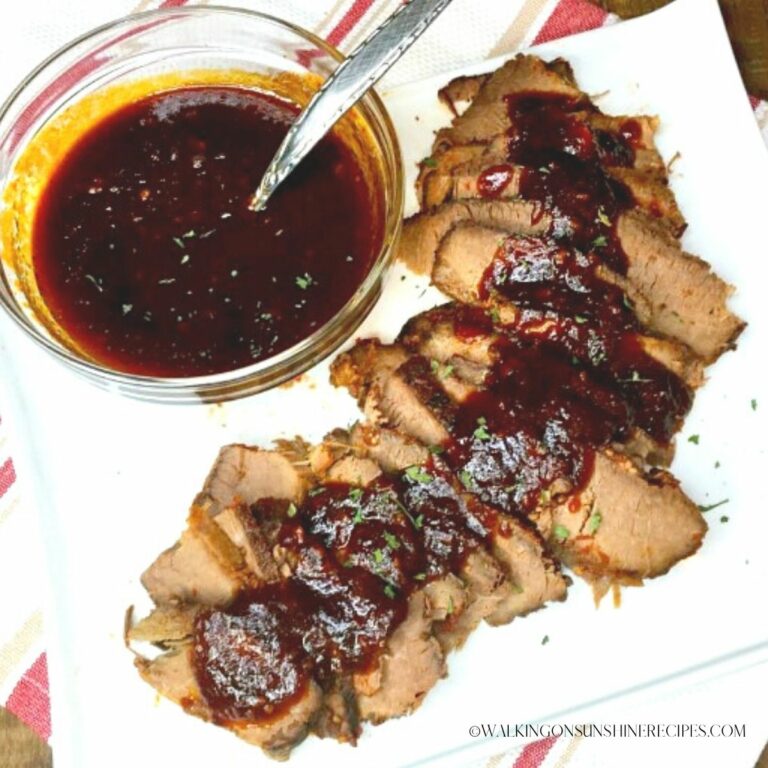
Get ready to savor the ultimate flavor explosion with our Grilled Chicken Kabobs with Pineapple! These chicken skewers are marinated in an irresistible blend of tangy pineapple juice, garlic, and sweet brown sugar.
It's a mouth-watering sauce, that's paired with fresh pineapple for added sweetness and color. Serve these kabobs over some fluffy white rice for a delicious Asian-inspired meal that will have everyone wanting more!
Light up the grill and get ready, we're having barbecue for dinner tonight!
This easy-to-make recipe is grilled to perfection with chicken and your favorite summer vegetables!
It's always a hit when you're having guests over for a backyard party or summer barbecue.
I love to marinate the chicken early in the morning and then put everything together just before heading out to the grill. See more easy tips in the Prep Ahead Tips section below!
The pineapple juice adds a sweetness to the chicken and as well as help tenderize the chicken pieces as they soak up all the goodness!
I like to double the marinade recipe and use half for the chicken and the other half to drizzle on top of the chicken and vegetables after they've cooked.
Top Tip
Never reuse a marinade that had raw chicken in it. This is due to the risk of salmonella and other food-borne illnesses that can occur when bacteria from the raw chicken makes contact with the marinade.
Mouth-Watering Recipes Ready in 30 Minutes for Busy Weeknights
10 mouth-watering recipes that are ready in just 30 minutes, this e-cookbook is the perfect solution for busy weeknight dinners.
Here's a quick overview of the ingredients for this recipe. Find the exact amounts and click the Instacart button to easily add them to your cart – all in the printable recipe card below!
Pineapple Juice - you'll need a 6 ounce can or about ¾ cup.
Cilantro - if you don't like cilantro, you can substitute parsley.
Minced red onion
Teriyaki sauce
Honey
Olive oil
Brown sugar
Chopped garlic
Salt and pepper to taste
2 boneless skinless chicken breasts
Chopped vegetables
Best Vegetables for Chicken Kabobs?
Sturdy veggies are usually the best vegetables for chicken kabobs. Some vegetables just don't like being on a skewer and will fall off right away making things a mess on the grill.
Cherry Tomatoes - grape tomatoes would be too small.
Peppers - an assortment of colors make for a beautiful kabob. Remember, we eat with our eyes first.
Zucchini - as well as yellow squash.
Eggplant - peeled and cut into chunks.
Onions - make sure you cut the onions into chunks.
Mushrooms - again, go for the bigger sized mushrooms and leave them whole. Larger button mushrooms would be delicious.
🥣Step-by-Step Instructions
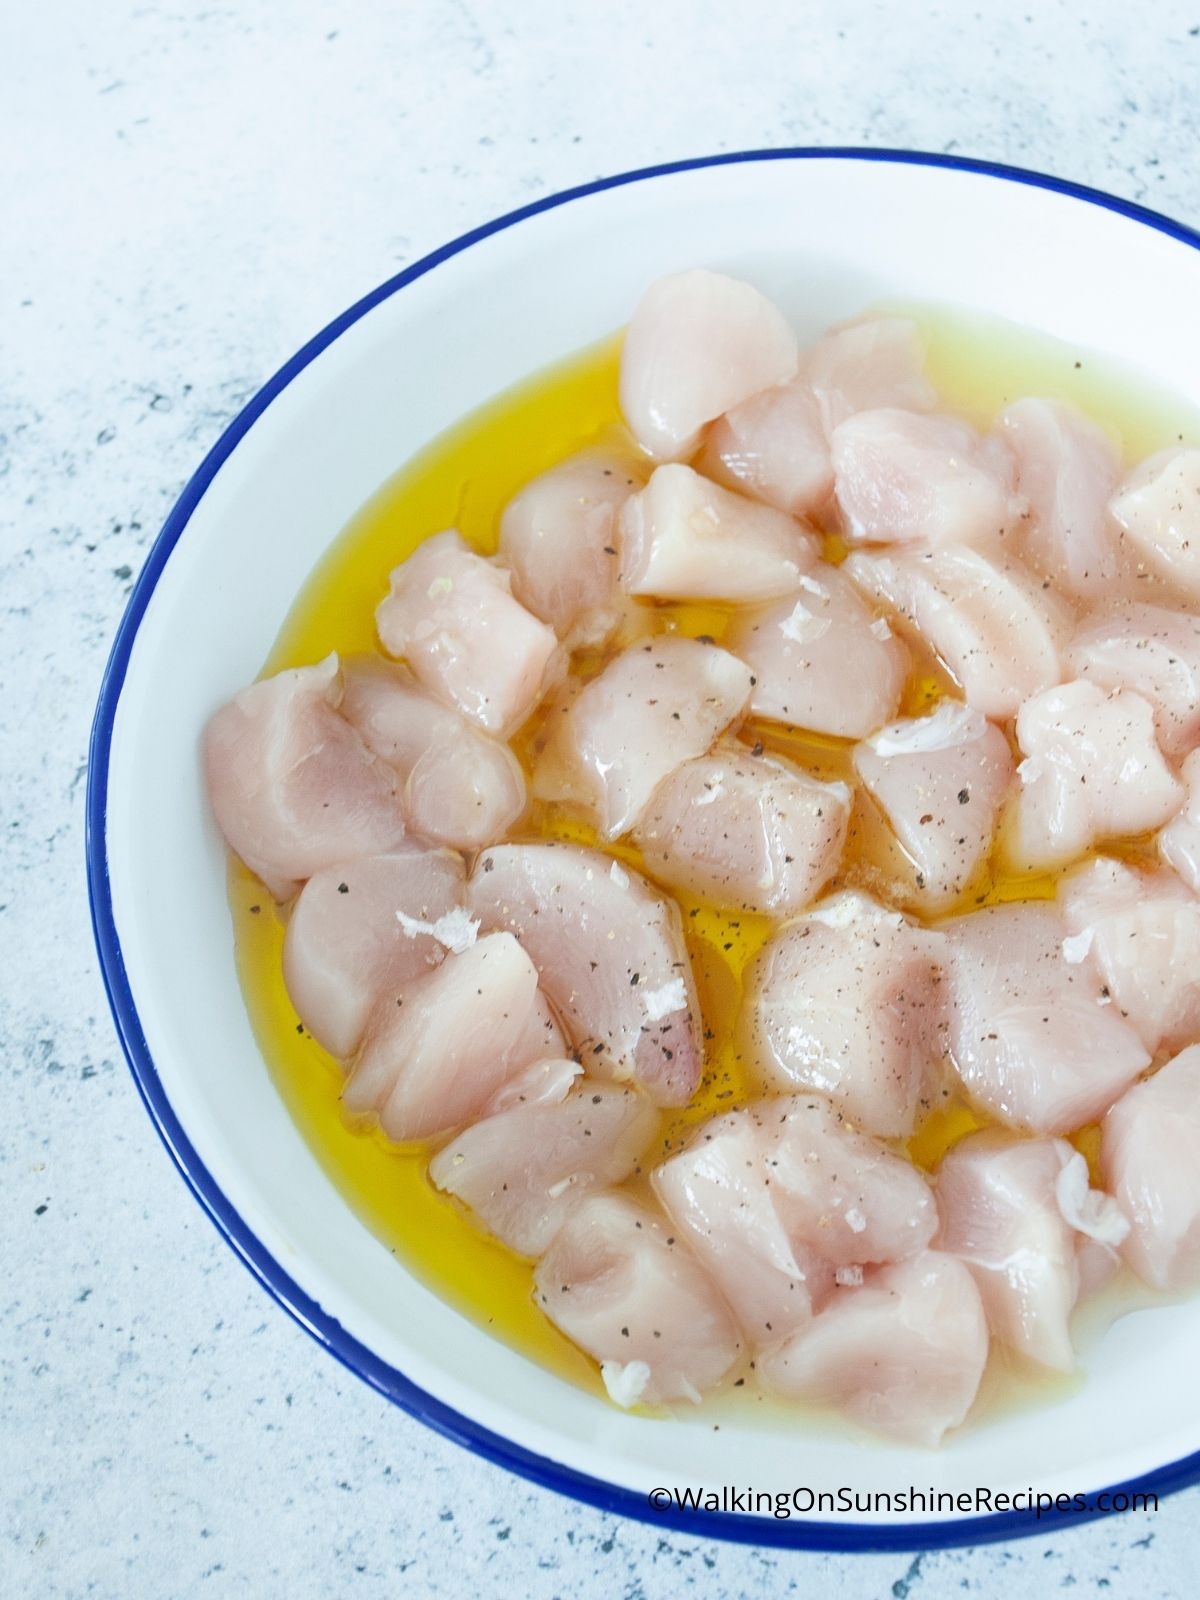
Step 1: Combine the first nine ingredients above together in a plastic container. This is the marinade. Cut the chicken into bite sized pieces and place inside the plastic container with the marinade. Refrigerate for a few hours or overnight.
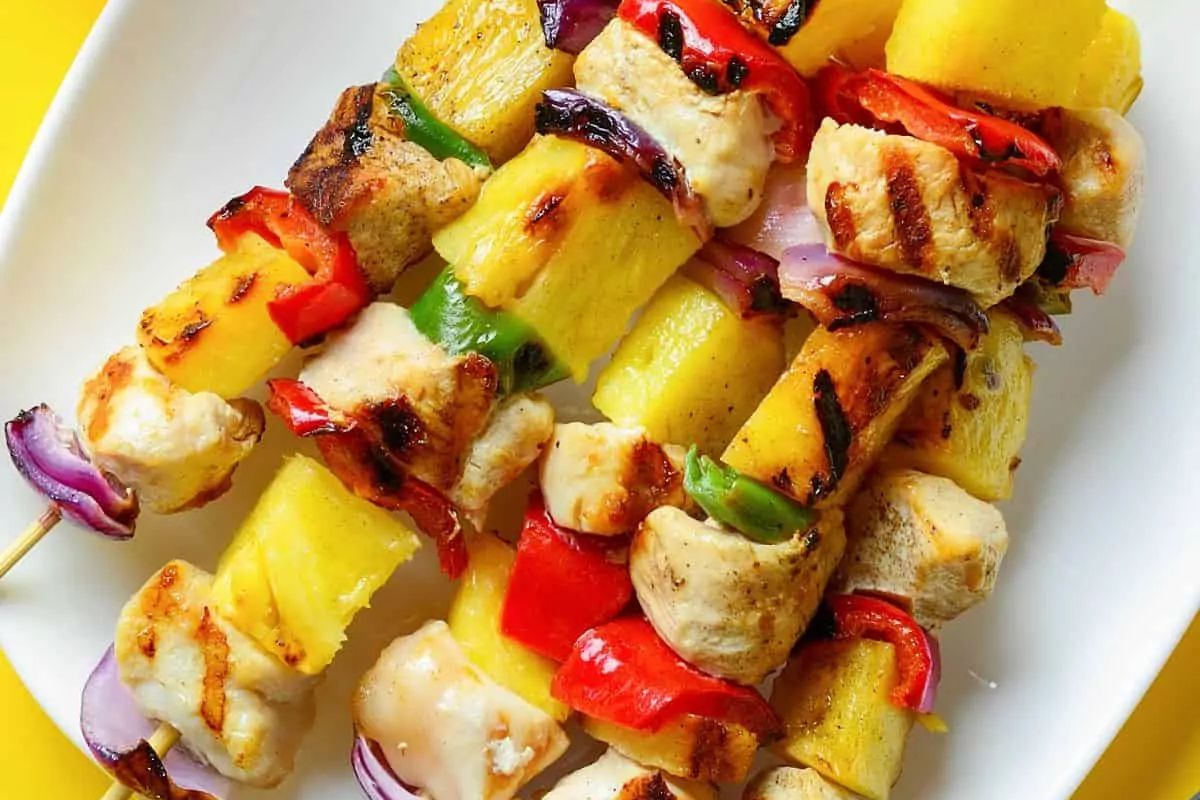
Step 2: Choose your favorite assortment of vegetables and cut them into chunks. I chose to use red peppers, green peppers and red onion.
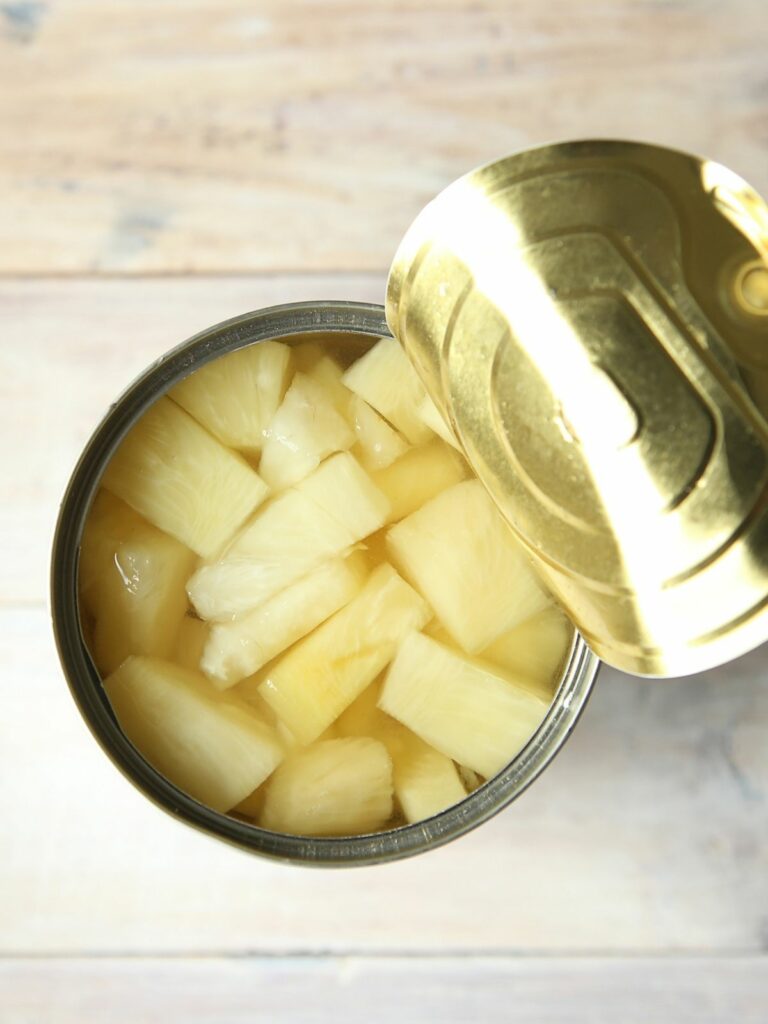
Step 3: Now, this is something you don't always find on grilled chicken kabobs, but since the marinade has pineapple juice I decided to add canned pineapple chunks to the skewers.
Top Tip
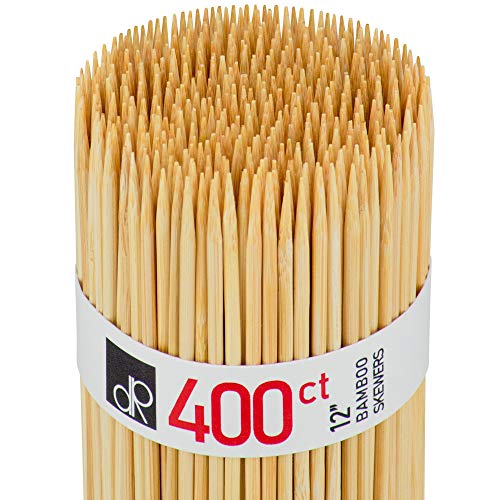
Make sure you soak the bamboo skewers in water for about 30 minutes before assembling the kabobs and placing them on the grill.
How to Assemble Chicken Kabobs
Step 4: Soak the bamboo skewers for at least 30 minutes before assembling the kabobs. You could always use metal skewers and that would prevent any flare-ups from occurring while grilling. Start adding the chicken, pineapple chunks and vegetables in an alternating pattern. Place on a baking tray that's been lined with aluminum foil.
Grilling Instructions
Step 5: Place the kabobs on a preheated 375° grill and cook about 5 to 7 minutes each side or until the chicken reaches an internal temperature of 165 degree. Make sure you rotate the kabobs a few times while grilling so every piece of chicken and vegetable has grill marks.
LOVE this recipe? SAVE it for Later!
❤️Tap the heart icon in the lower right corner to add the recipe to your recipe box for easy access anytime.
If you made it, leaving a star rating or quick review is always appreciated and helps other readers too.
How do you grill kabobs without burning vegetables?
Try to have the chicken and the vegetables all the same size so everything cooks evenly.
How long is it safe to marinate chicken?
Chicken should be marinated in the refrigerator for at least 2 hours, but no longer than 24 hours. If left to marinate for too long, the chicken will become overly saturated in the marinade and can become tough or chewy.
Start by chopping your favorite vegetables, such as bell peppers and onions, into bite-size pieces.
Once everything is prepped, place the vegetables into an airtight container or in a resealable bag and refrigerate them until ready to cook.
Cut up the chicken into bite-sized pieces and store in an airtight container until you're ready to marinate the chicken.
When it's time to grill your kabobs, simply thread the ingredients onto skewers and follow the grilling steps in the recipe.
Storage Tips
Leftover grilled chicken kabobs can be stored in airtight containers or Ziploc bags.
These will help keep the kabobs from drying out and prevent any odors from permeating through your refrigerator.
Freezing Tips
For longer-term storage, wrapping the leftover chicken and vegetables in aluminum foil and store in the freezer.
Leftover chicken kabobs can remain safely stored in a freezer for up to four months.
Thawing and Reheating Tips
To thaw leftover grilled chicken kabobs, it is best to use the refrigerator rather than the microwave.
Microwave heating can dry out chicken kabobs, making them tough and chewy. Plus, it is more difficult to evenly reheat food in a microwave since the heat waves concentrate on certain parts of the food.
First, place the frozen or chilled kabobs in a bowl or dish and cover them with plastic wrap. Place this bowl in the refrigerator and allow the chicken to thaw overnight.
When ready, simply preheat your oven or grill to 350°F. Place the thawed kabobs on a greased baking sheet or onto a wire rack over foil paper and cook for 8-12 minutes until heated through.
Place the cut up chicken into a container with a lid. Set aside while you prepare the marinade.
Combine the ingredients for the marinade together in a small bowl.
Pour the marinade over the chicken, cover and allow to marinade for at least 30 minutes to one hour in the refrigerator.
Soak the wooden bamboo skewers for at least 30 minutes while the chicken marinades.
Assemble the kabobs by adding the chicken pieces, pineapple chunks and vegetables to the bamboo skewers.
Place the skewers on a preheated outdoor grill and cook for 5-7 minutes on each side or until chicken is cooked through and reaches an internal temperature of 165°
Remove the chicken and vegetables from the skewers before serving.
You can marinade the chicken for up to 8 hours if you have the time. The longer you leave the chicken in the marinade, the stronger the flavors become.
It is important to never reuse a marinade that had raw chicken in it. This is due to the risk of salmonella and other food-borne illnesses that can occur when bacteria from the raw chicken makes contact with the marinade. I
This recipe has been updated since it first appeared in 2017 with new photos, information and a new printable recipe card that includes nutritional information. I hope you enjoy the updates as much as I enjoyed working on them!
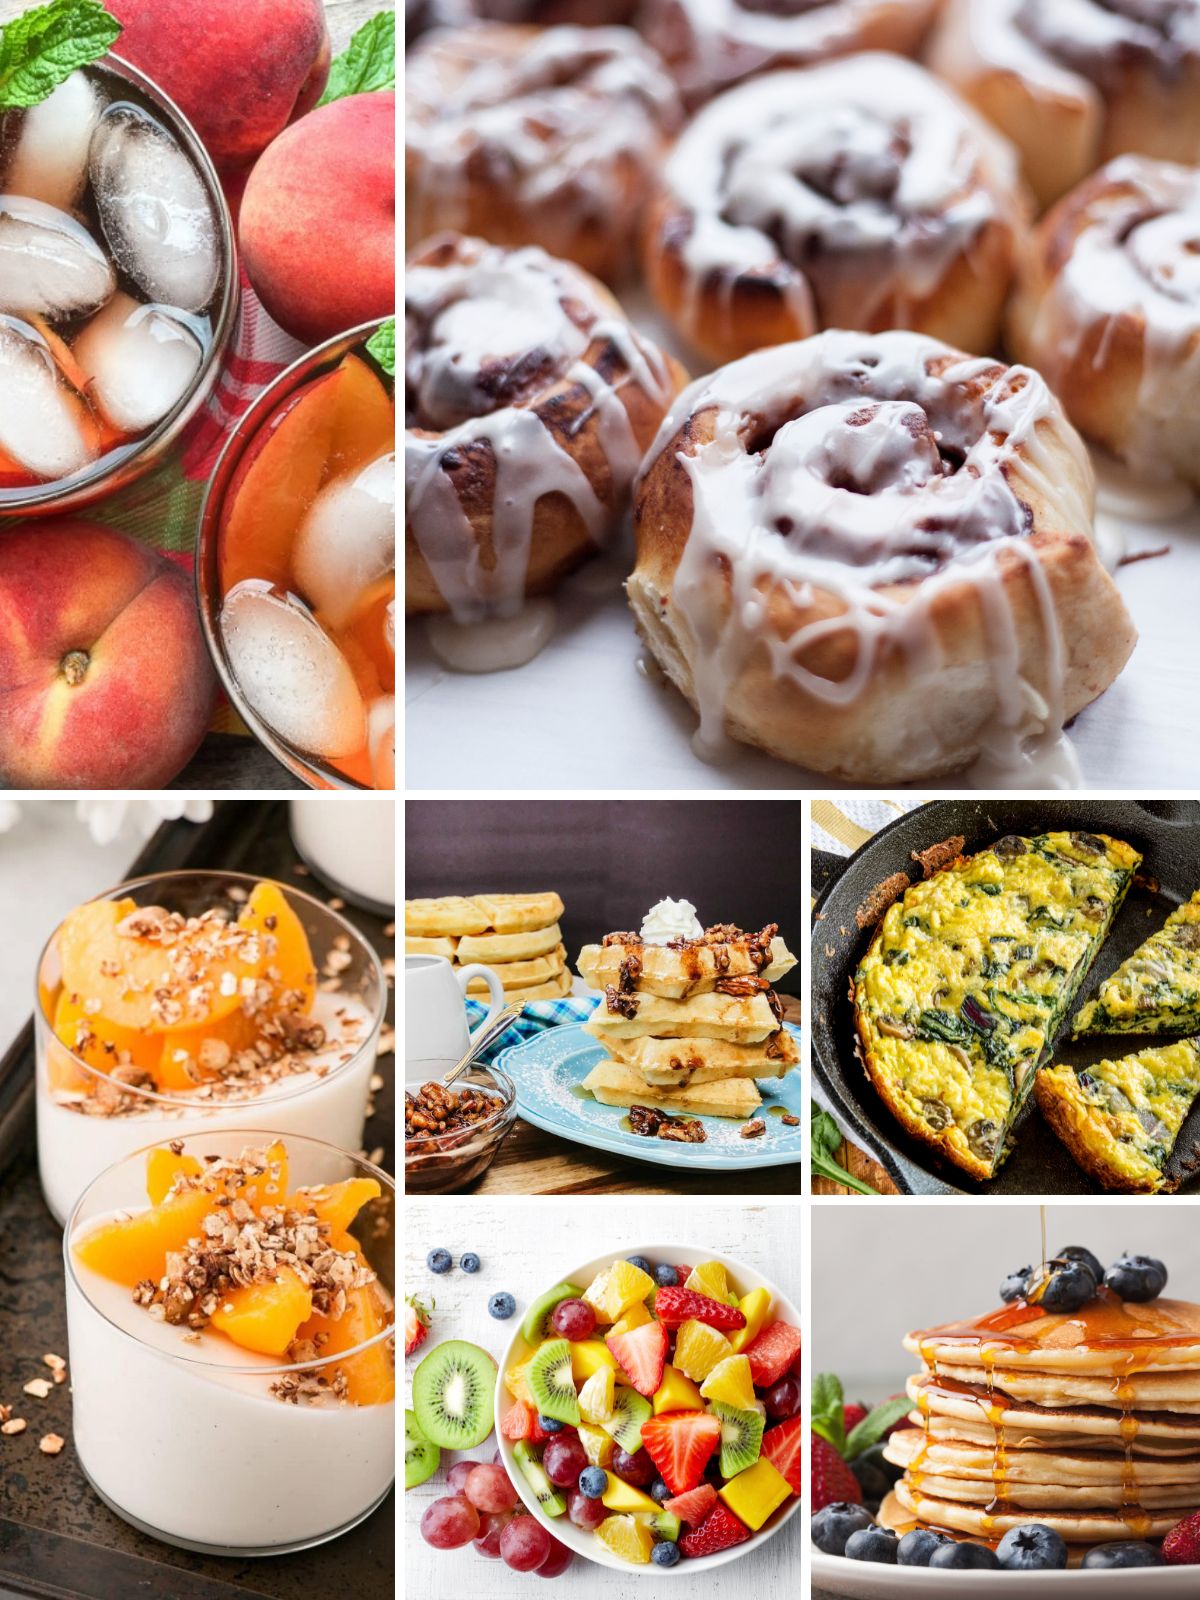
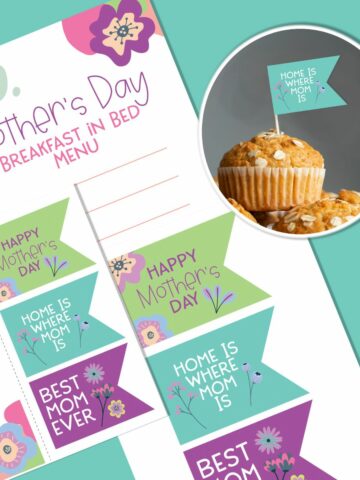
Get ready to impress your mom and show her how much you appreciate her by treating her to an unforgettable meal.
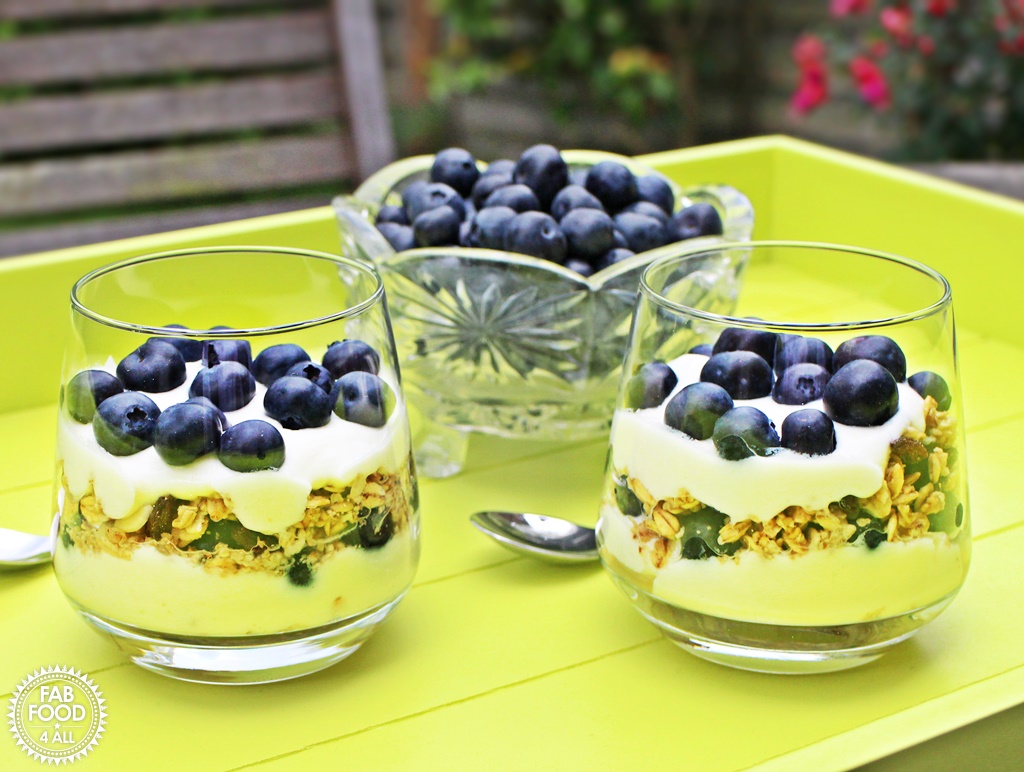
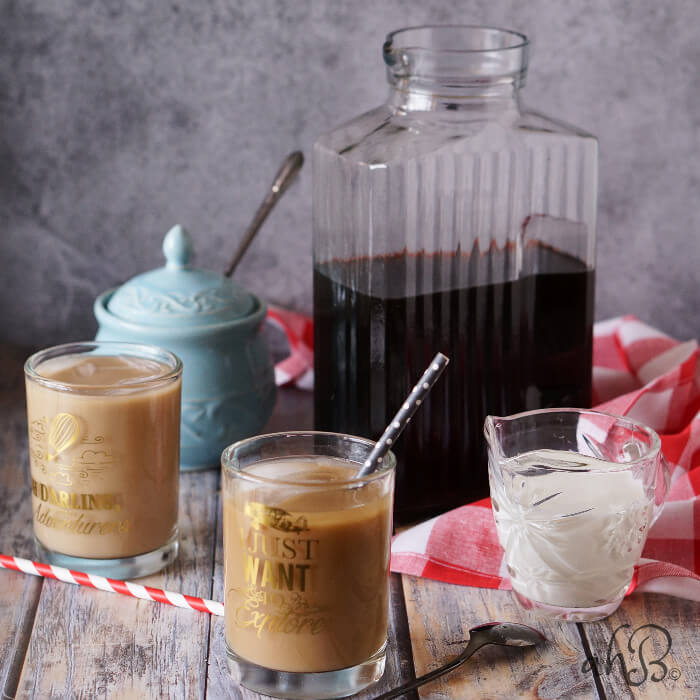
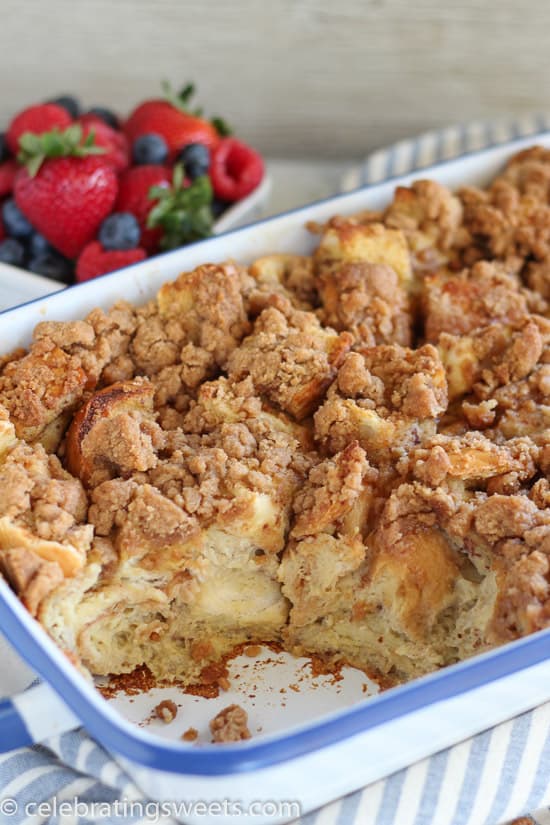
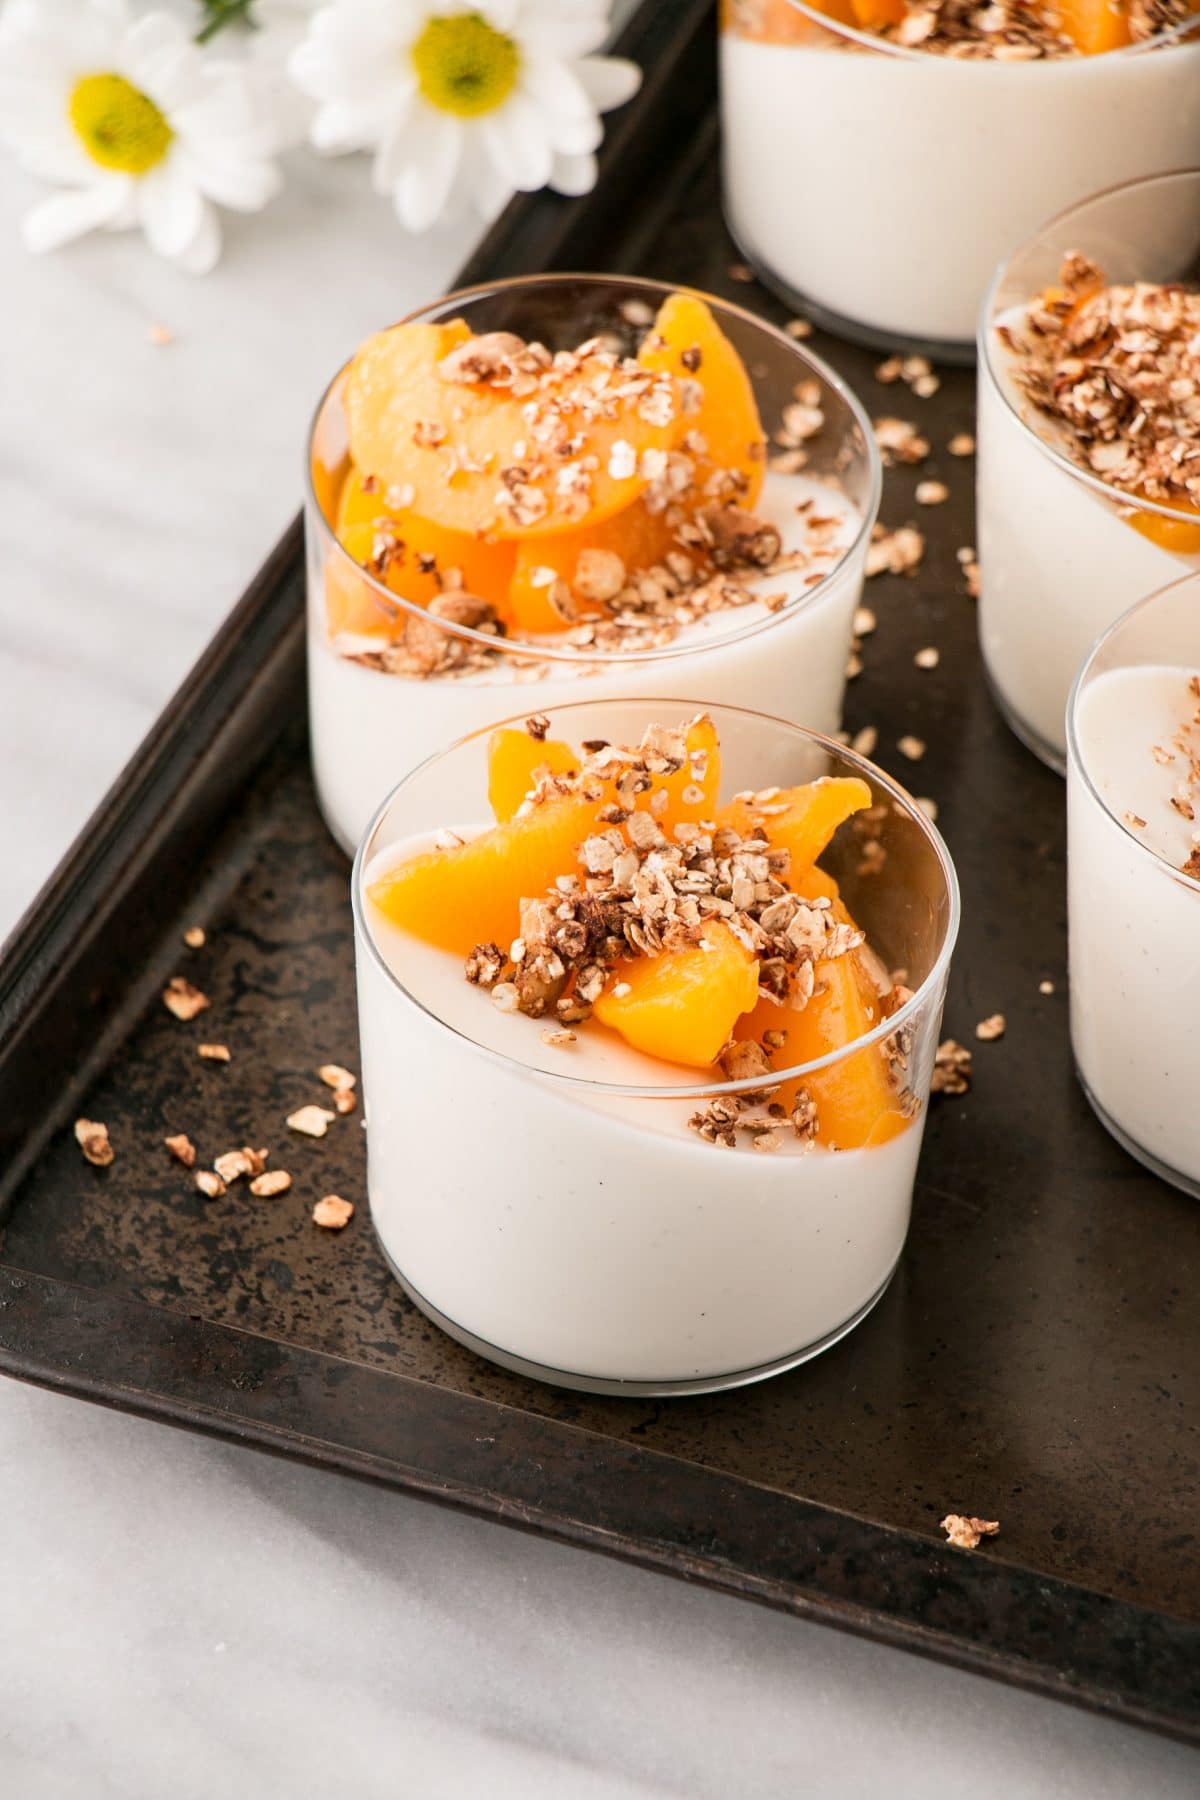
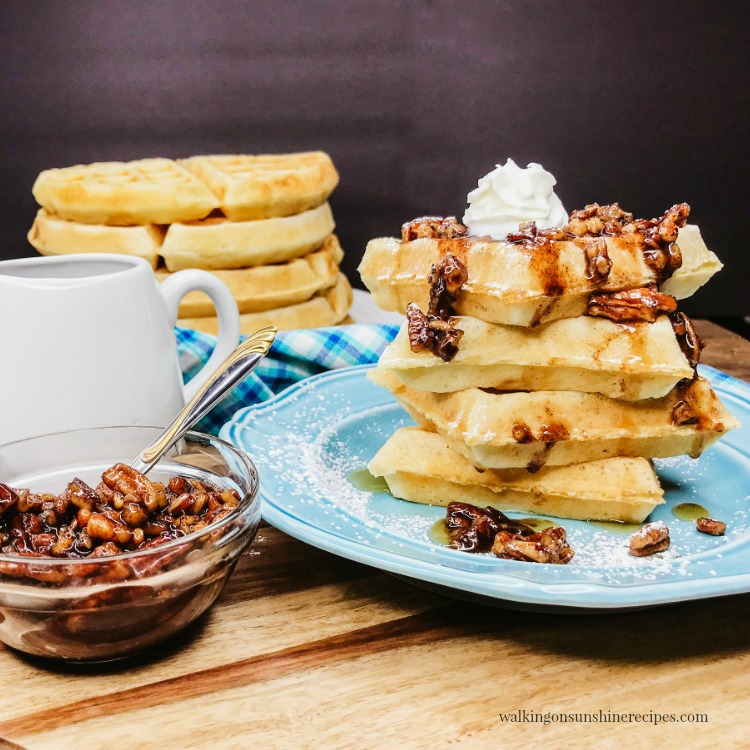
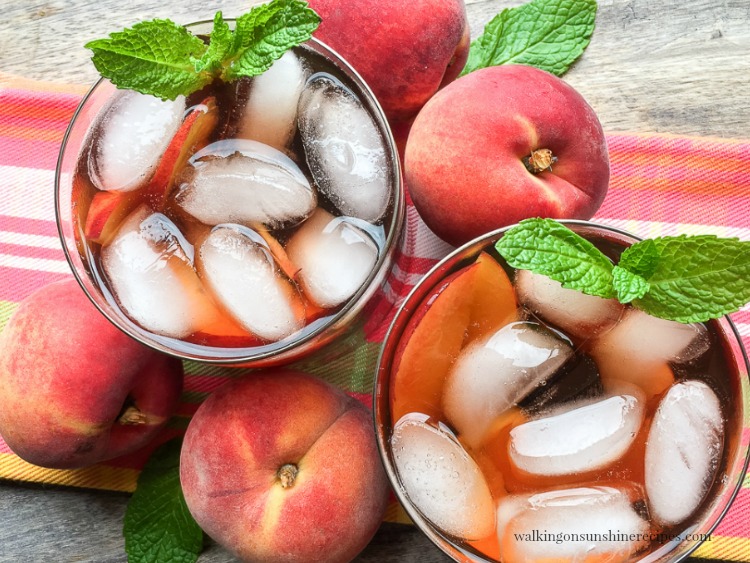
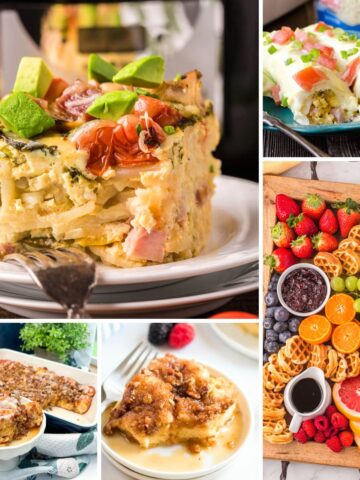
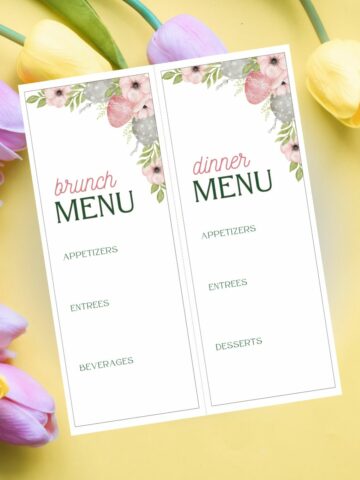
Included in this collection of Mother's Day Brunch recipes are breakfast parfaits, cinnamon rolls, waffles and even a sweet peach tea recipe!
Make Mother's Day nothing short of extraordinary this year by planning a delicious brunch in honor of all the wonderful things she does for you!
Check out all the other breakfast ideas for even more delicious ways to help you prepare a delicious celebration!
Mother's Day is almost here and what better way to show the moms in your life how much they mean to you than by treating them to a delicious brunch.
Whether you're celebrating with just your mom or you've invited the whole family over for a gathering, serving a delicious meal is a wonderful way to celebrate MOM!
I love to enjoy brunch with my family after going to church on Mother's Day. Everyone loves breakfast food and having a celebration around noon still gives everyone time to get out and enjoy the beautiful weather later in the day.
There are plenty of exciting options for making a special Mother's Day brunch that everyone will enjoy.
When deciding what to cook for Mother’s Day, consider your guests first. Choose dishes that suit their tastes and dietary needs to ensure everyone enjoys the meal.
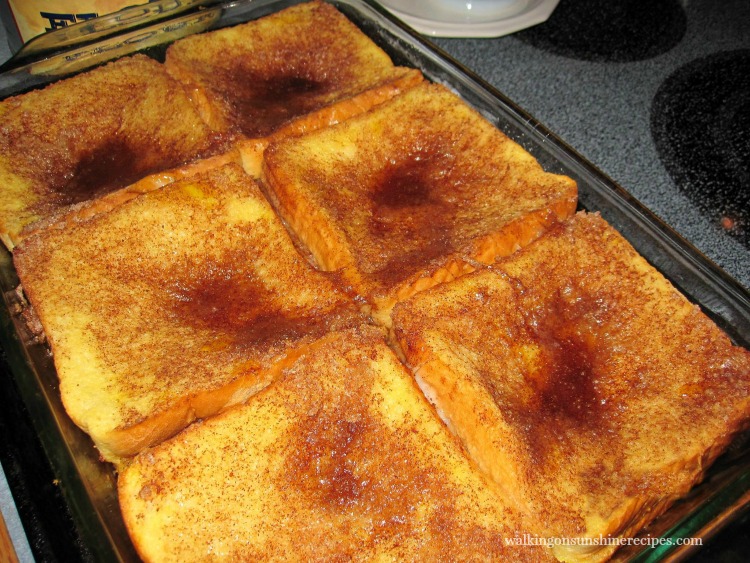
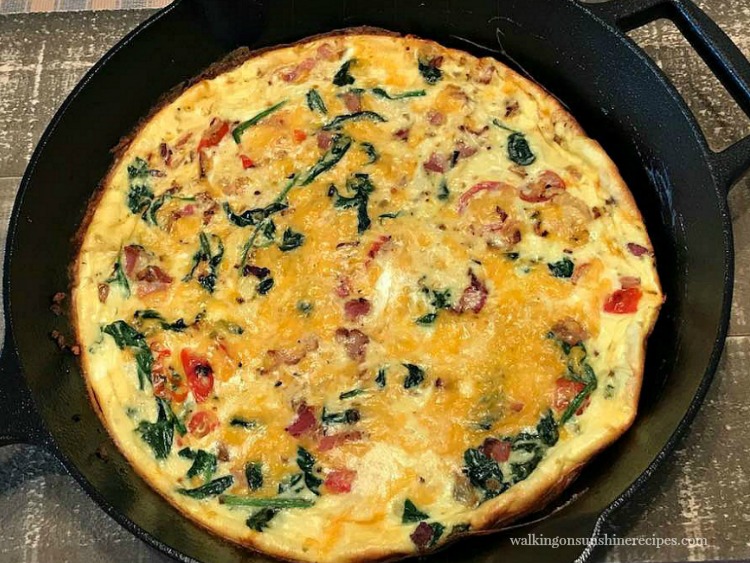
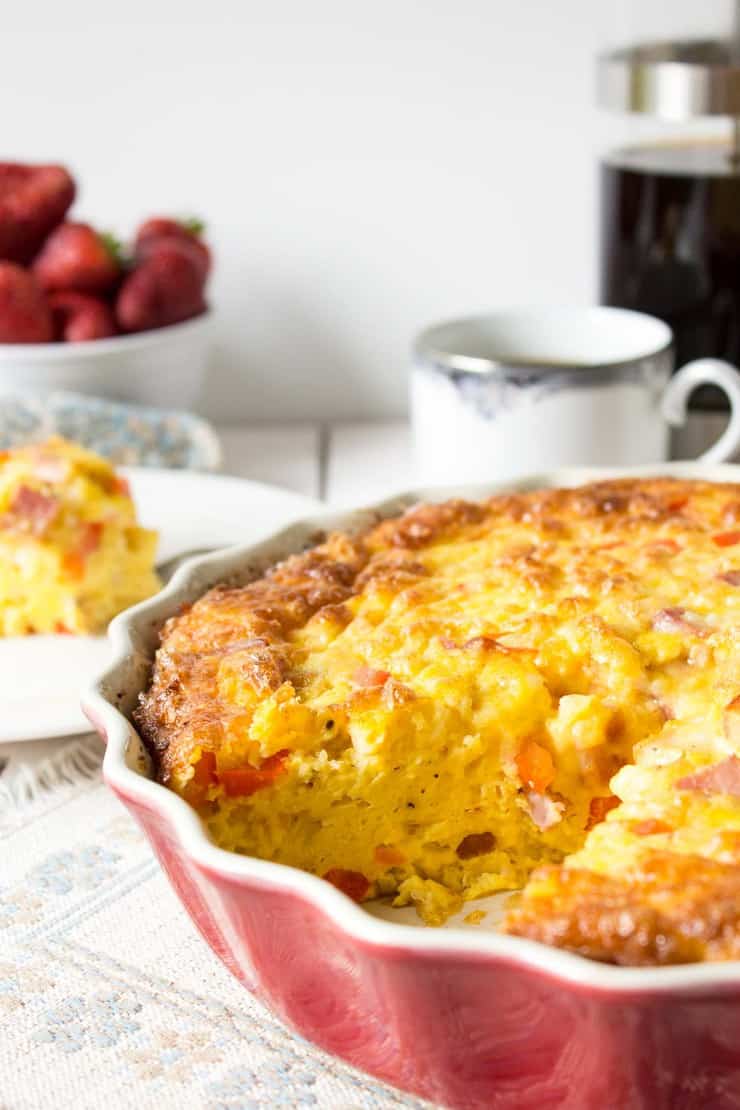
Brunch menus are different than just breakfast in that you can serve sweet recipes as well as savory recipes. Consider adding a selection of different egg dishes like a frittata or even quiche.
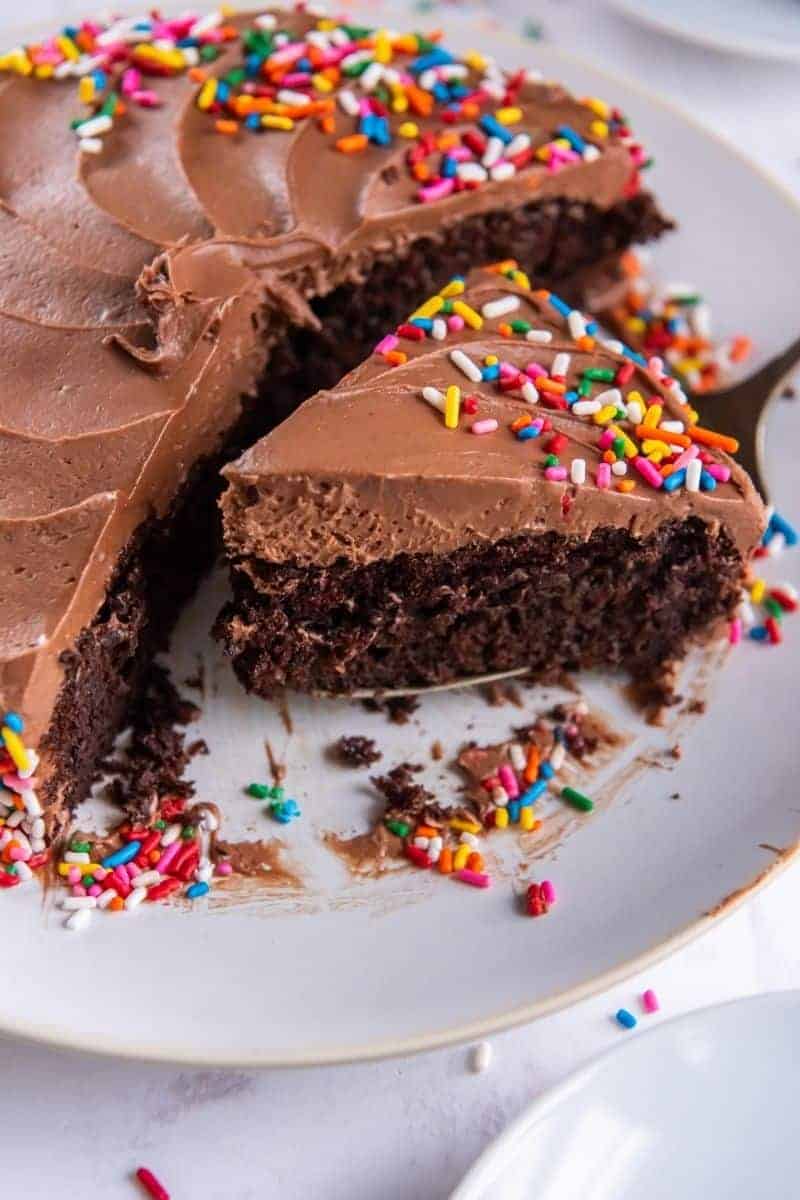
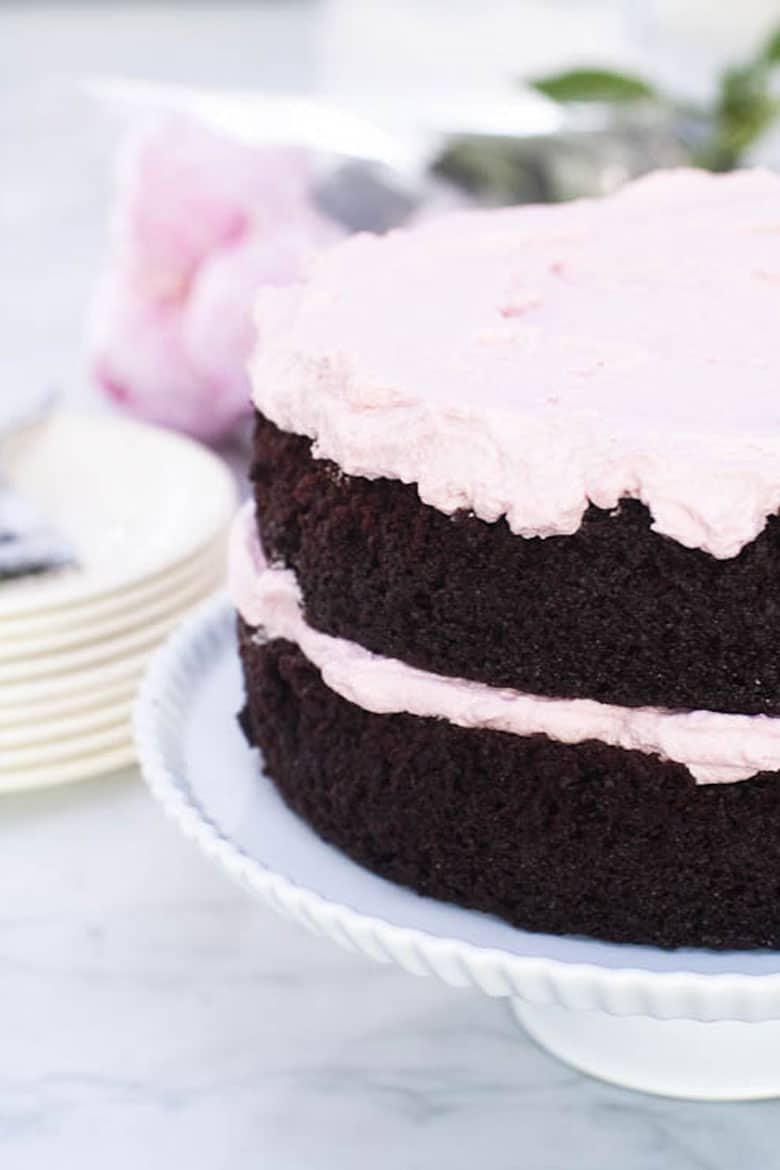
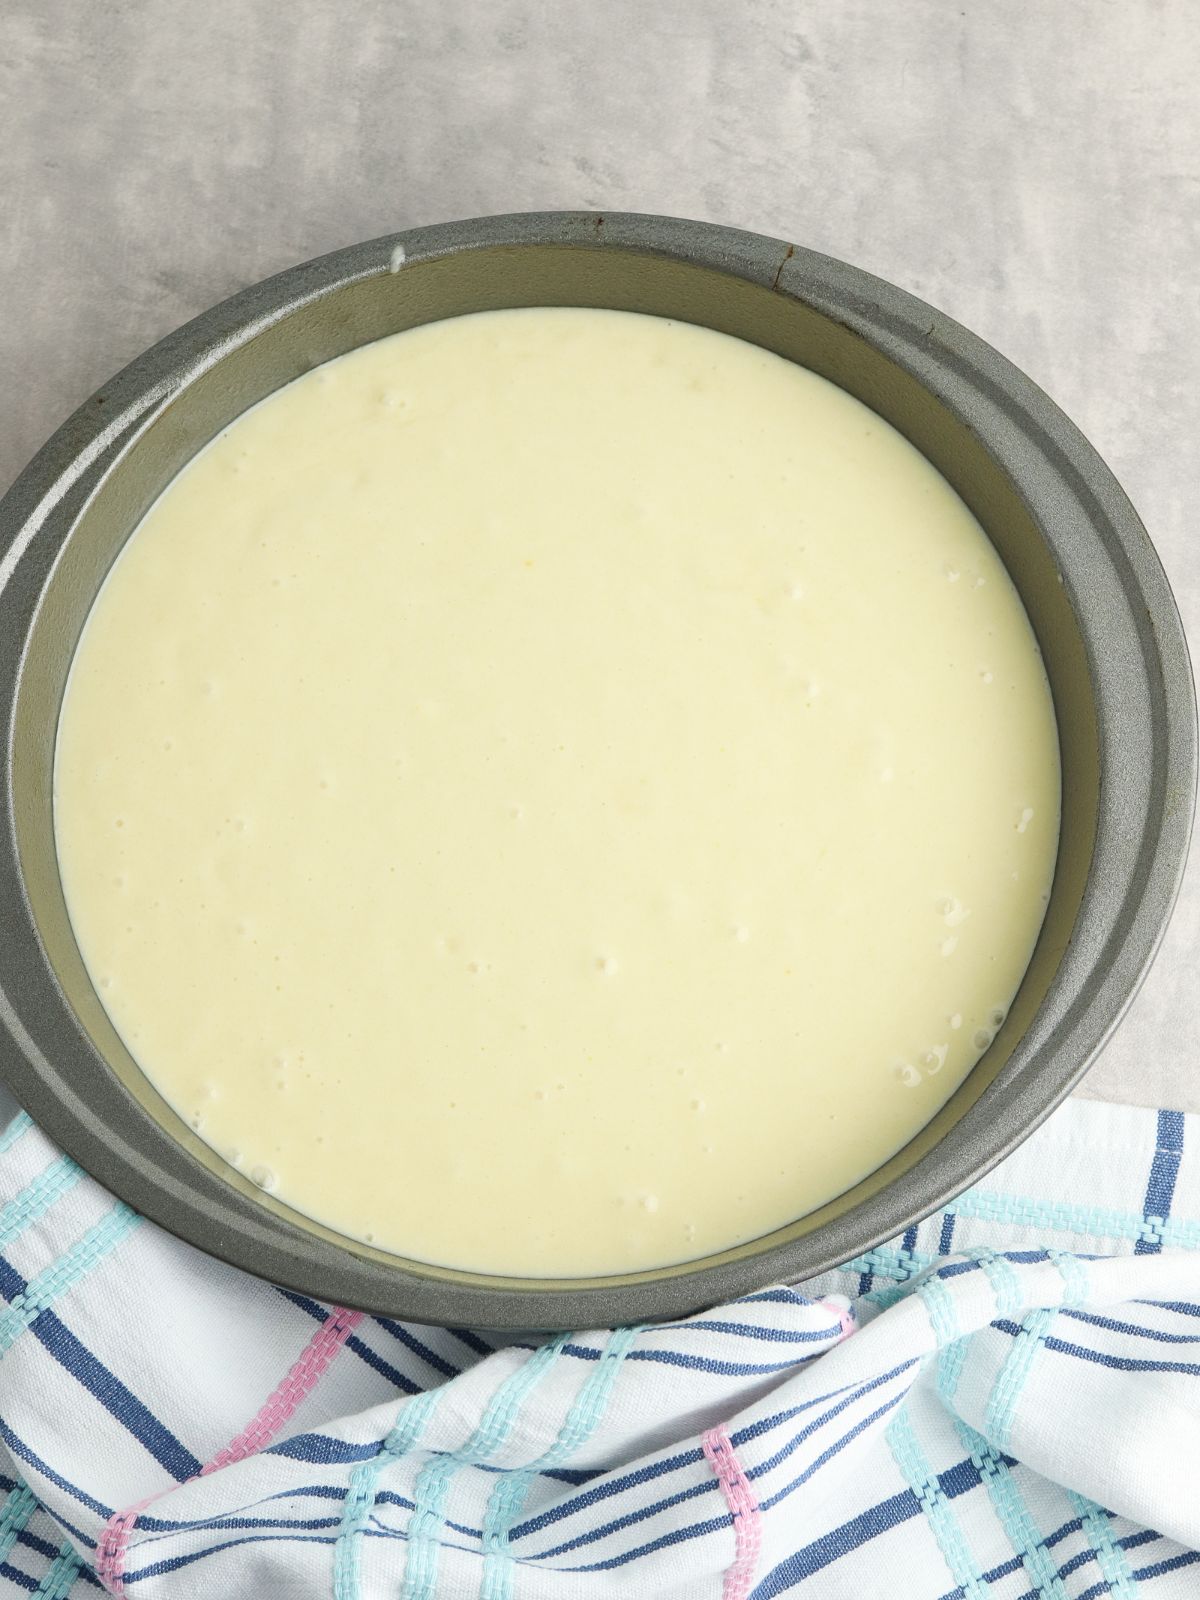
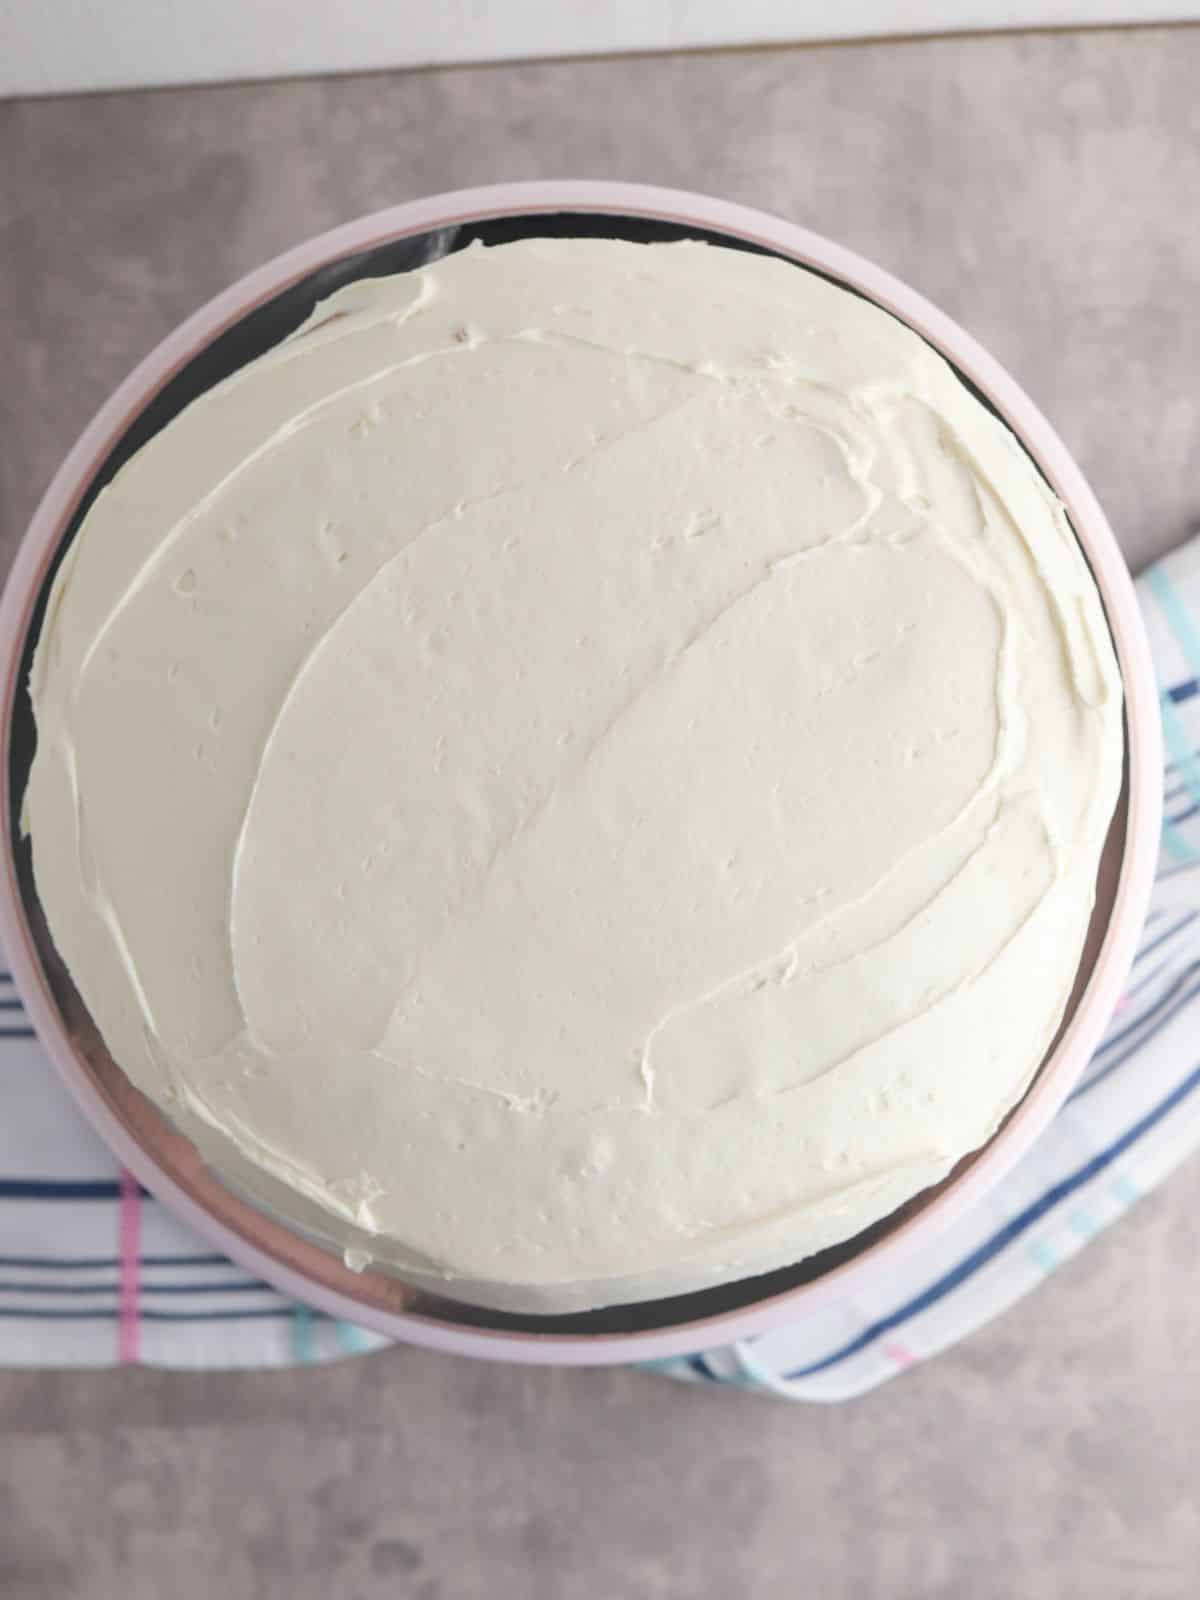
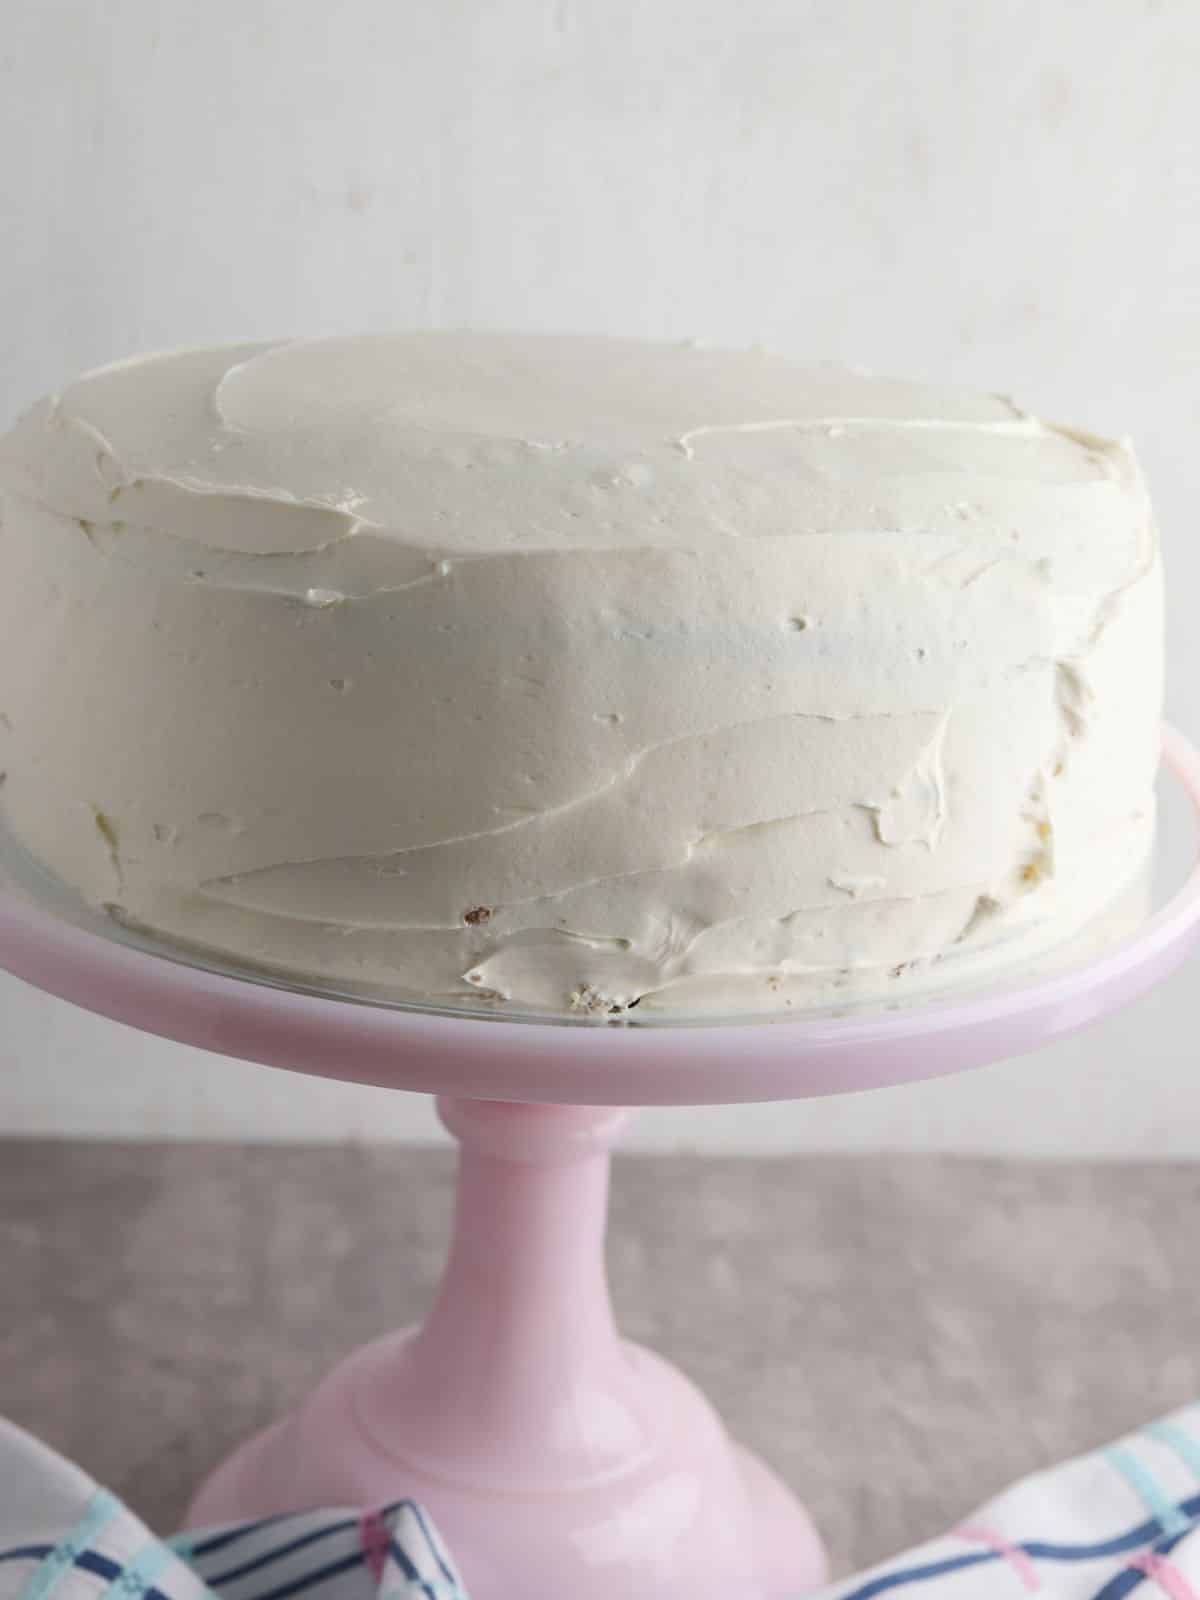
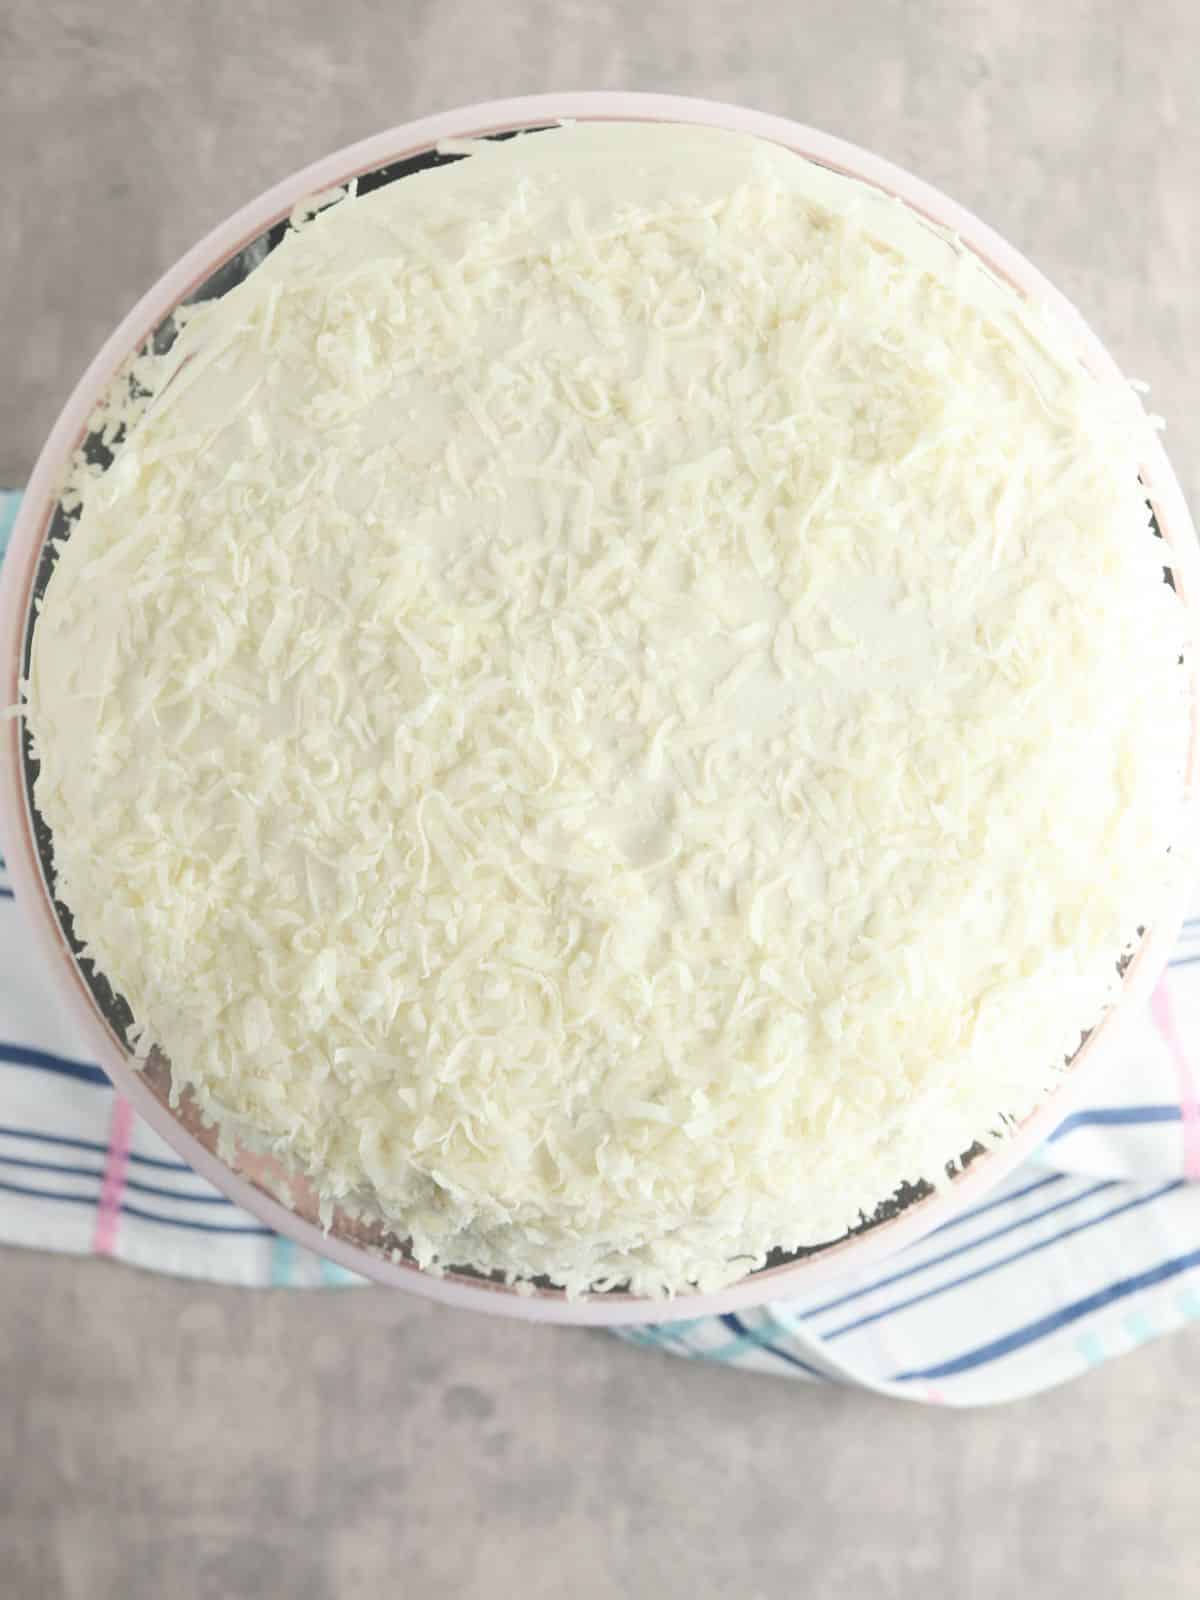
This chocolate cake recipe is the only one you'll need. It makes a large, satisfying, very chocolaty cake with just the right amount of sweetness and the perfect way to end Mother's Day brunch.
This recipe has been updated since it first appeared in 2019 with new photos,andinformation. I hope you enjoy the updates as much as I enjoyed working on them!
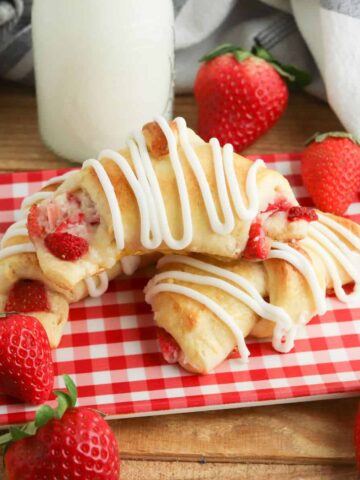
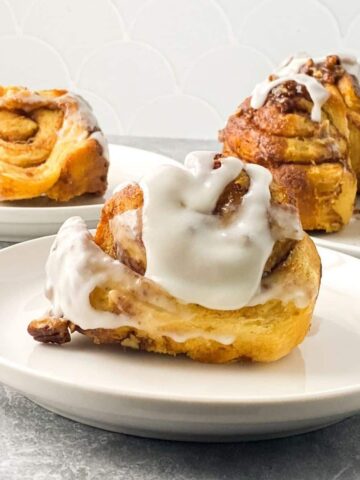
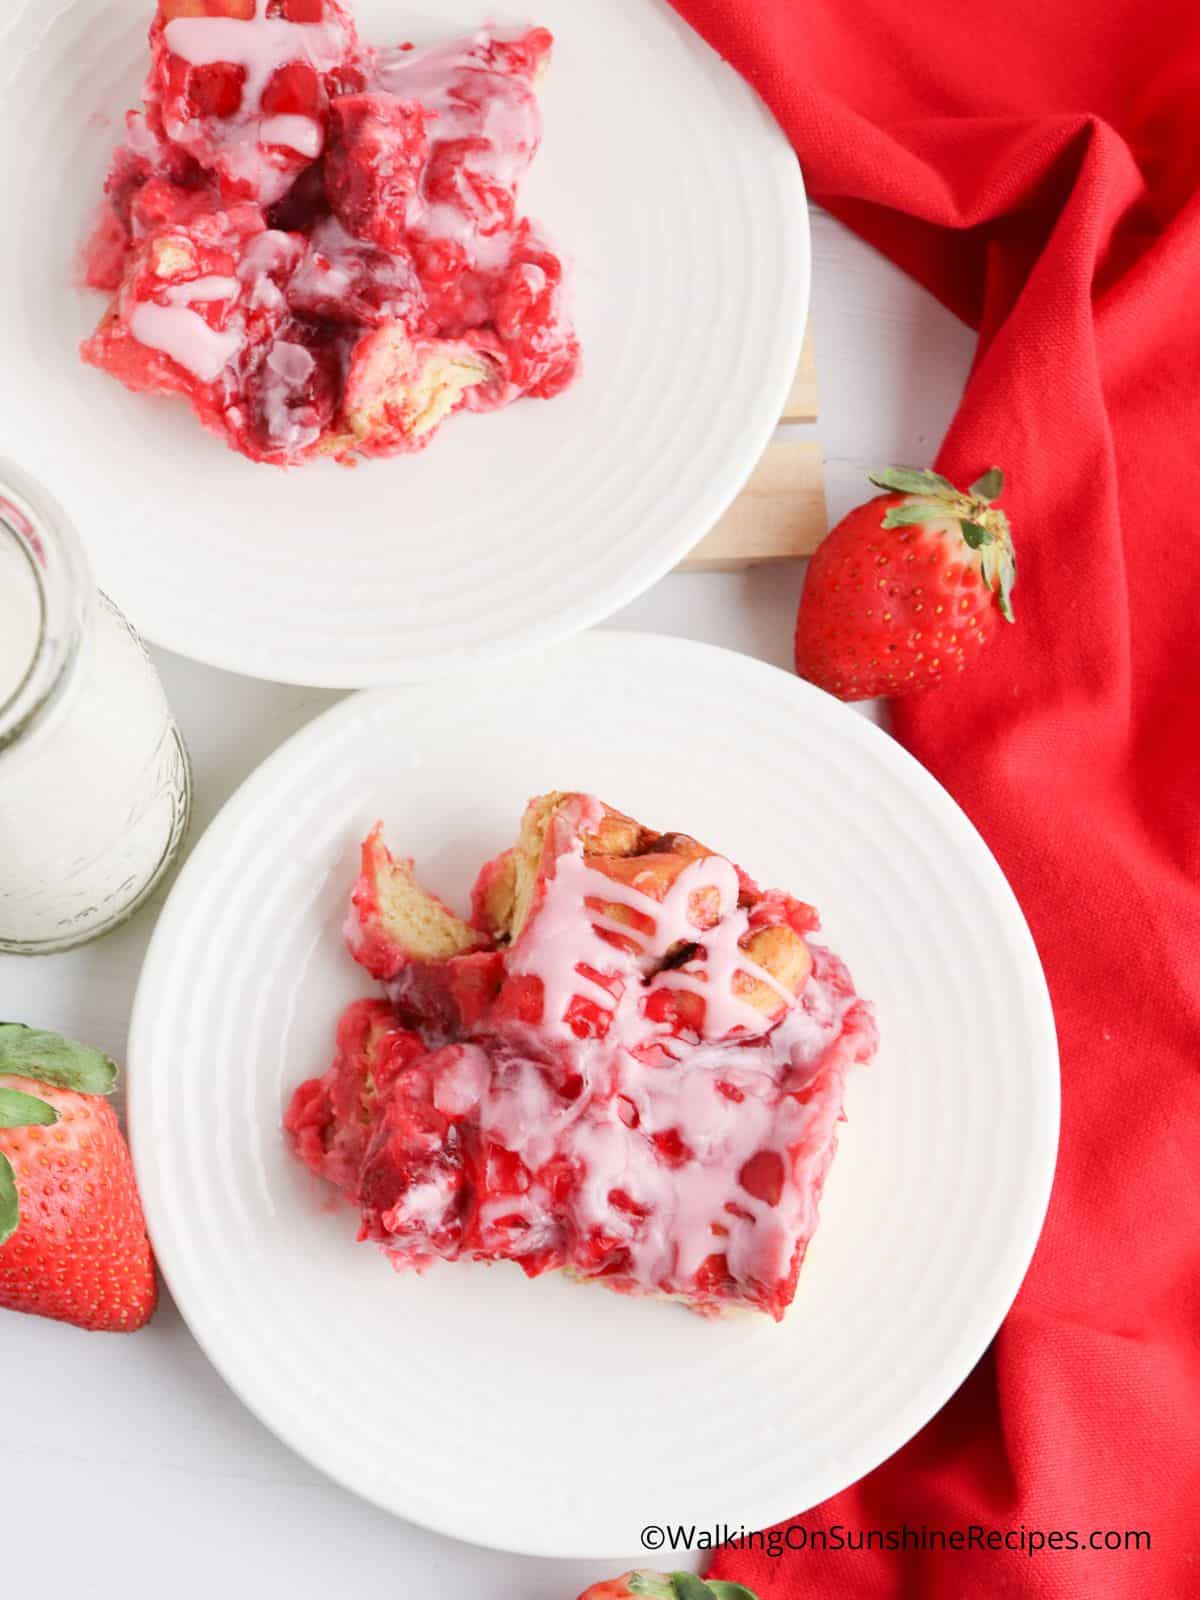
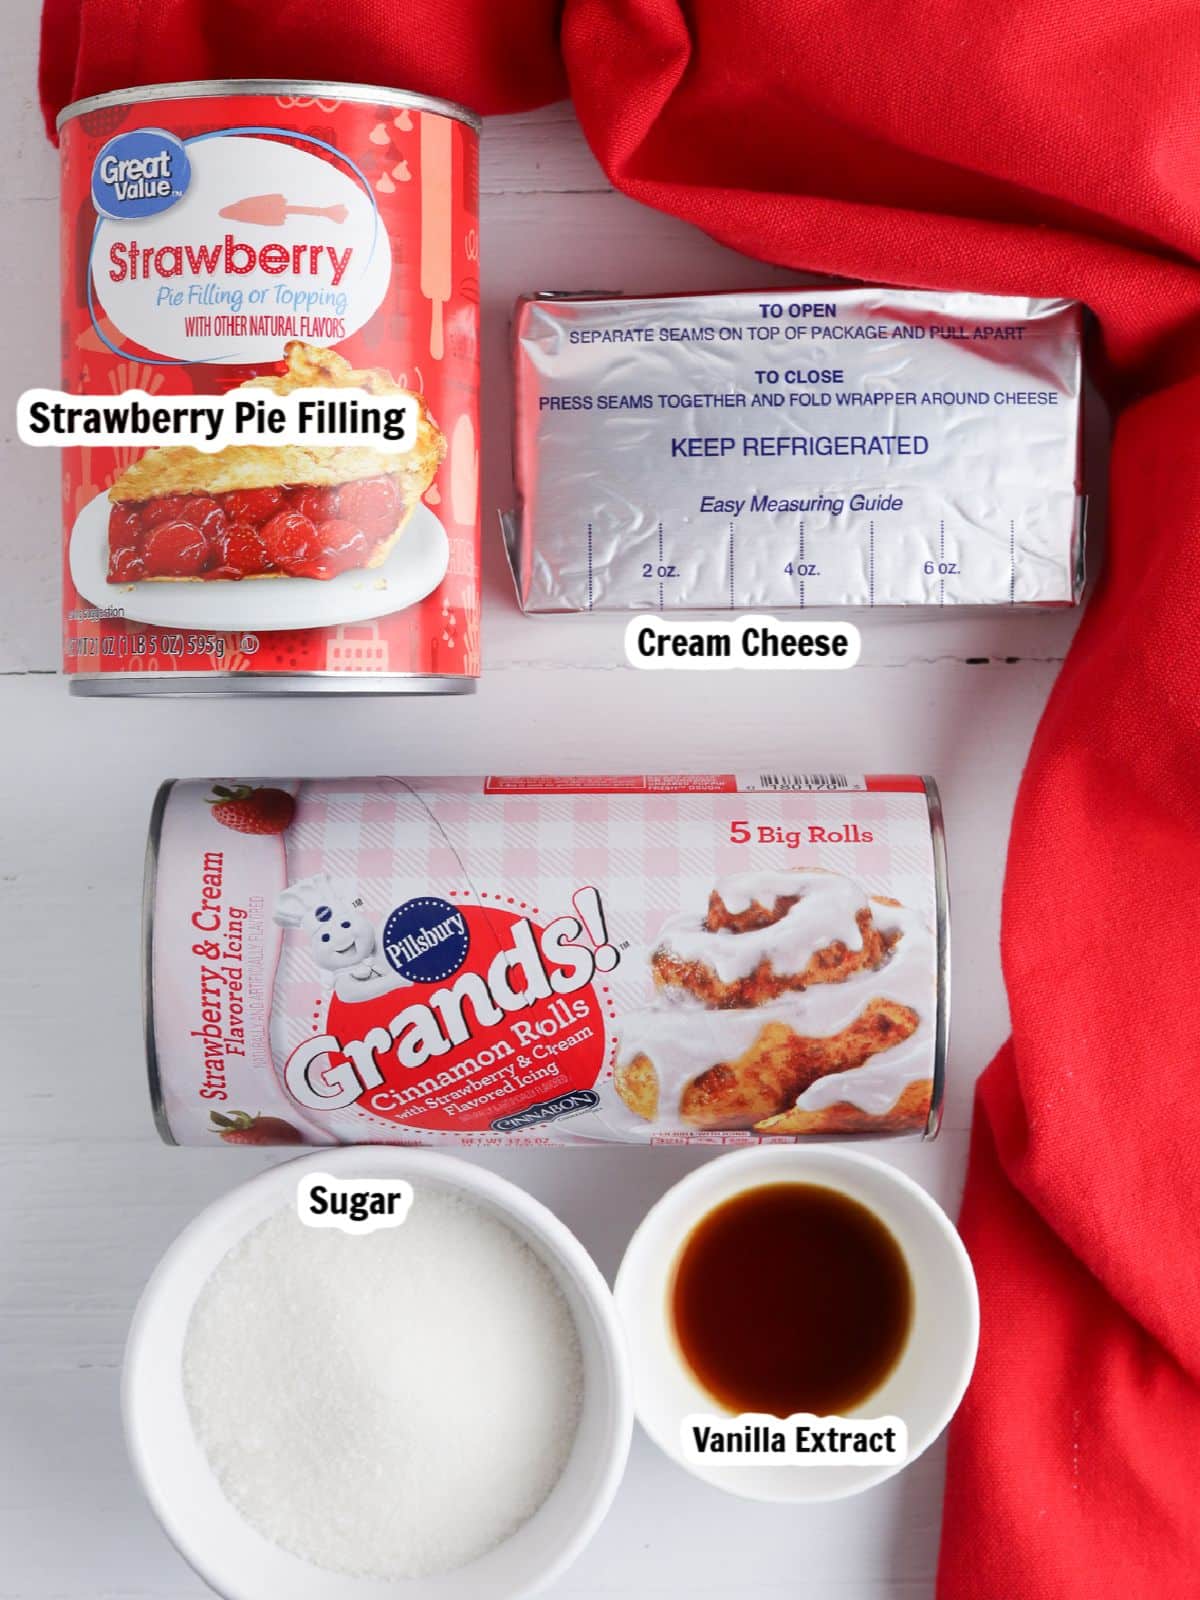
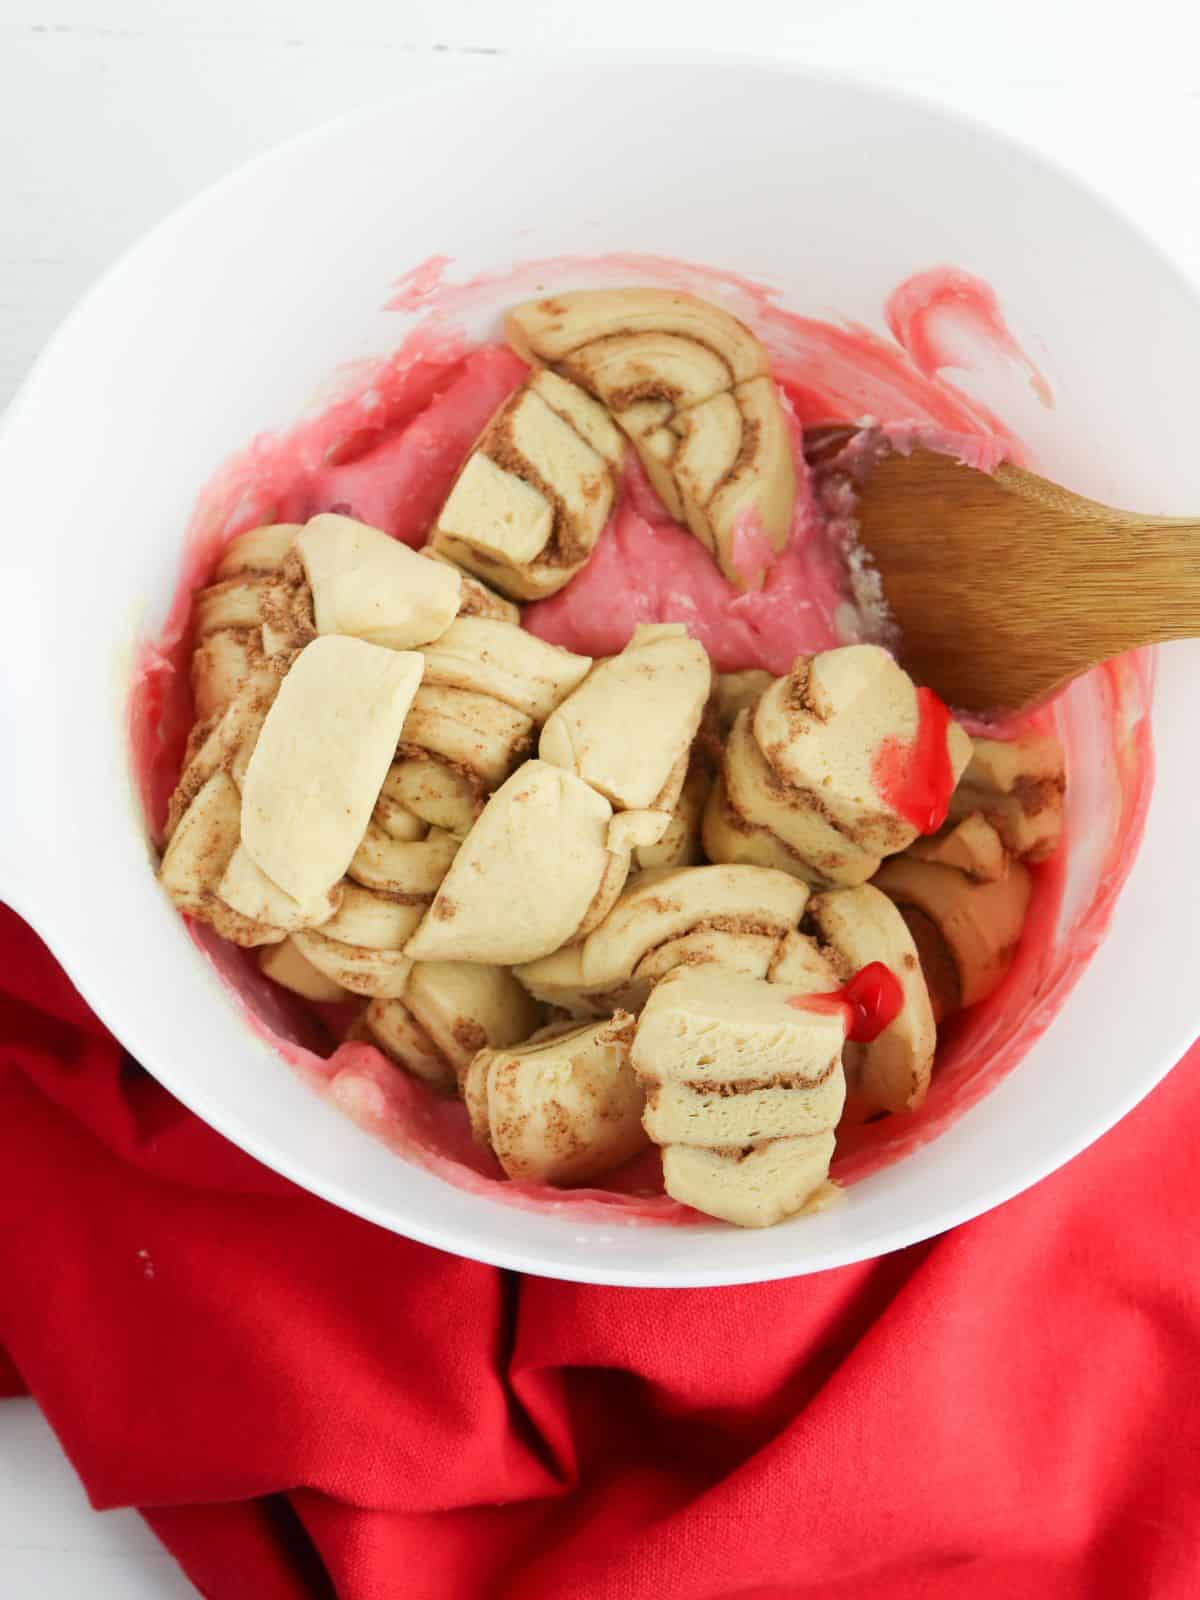
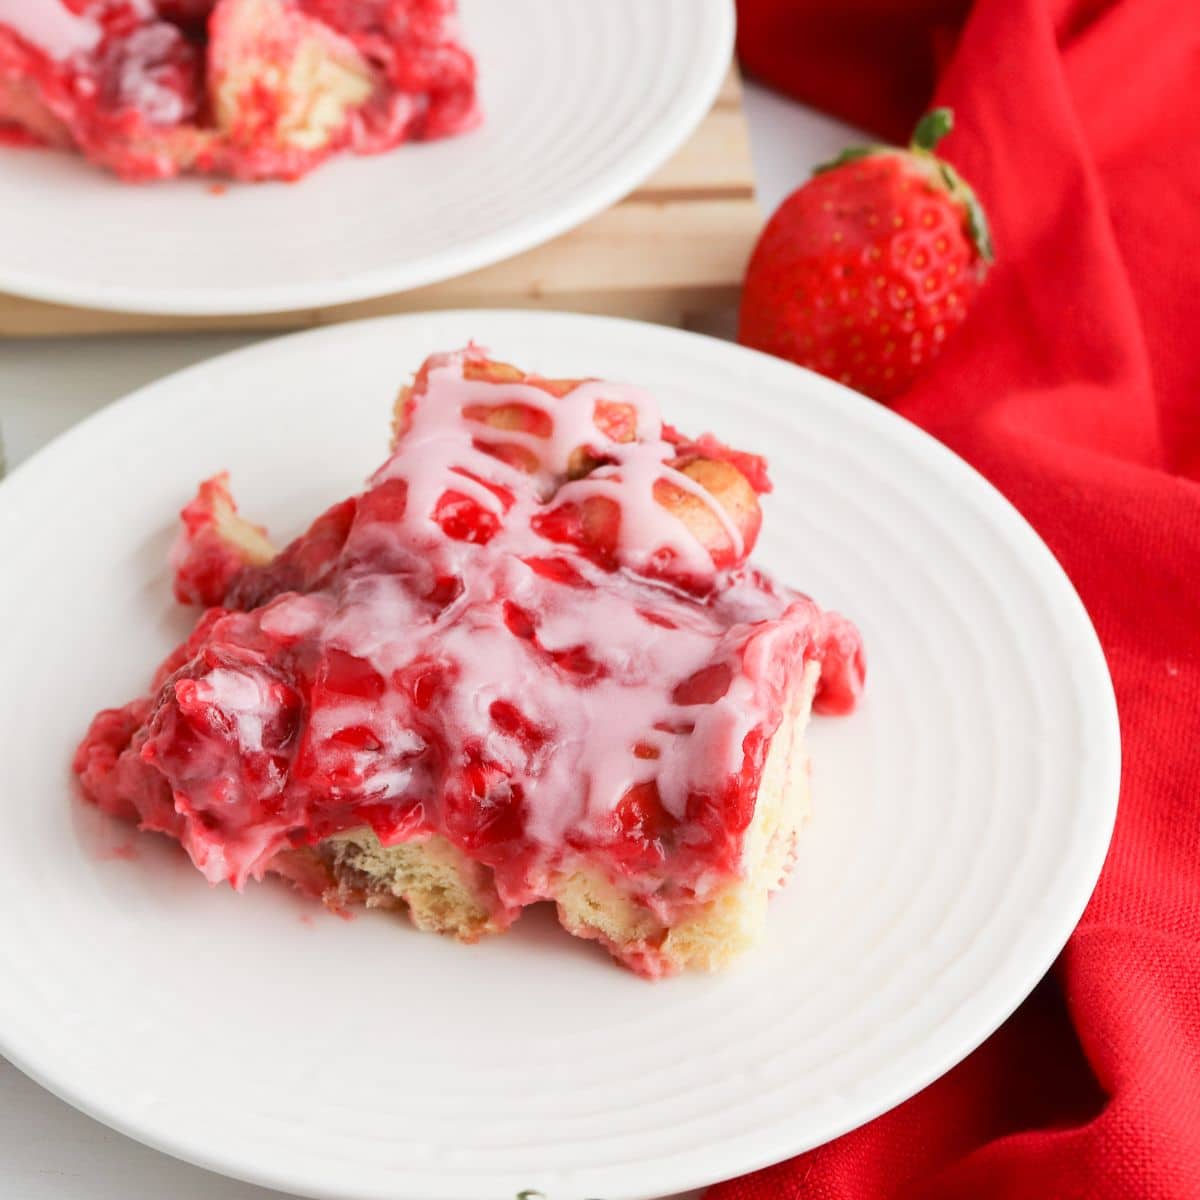
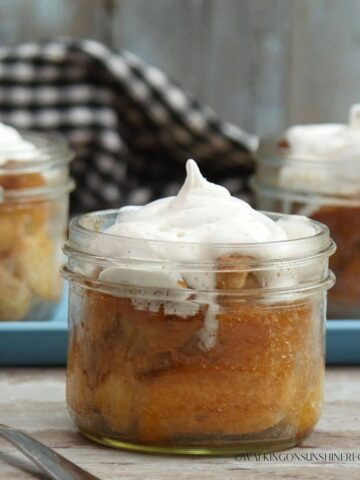
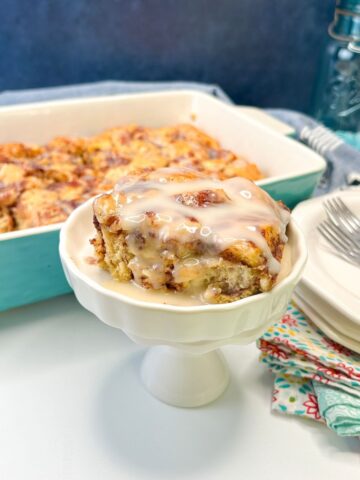
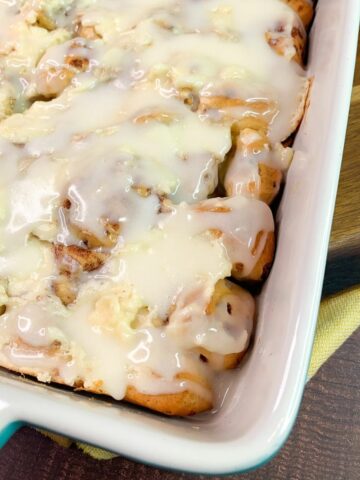
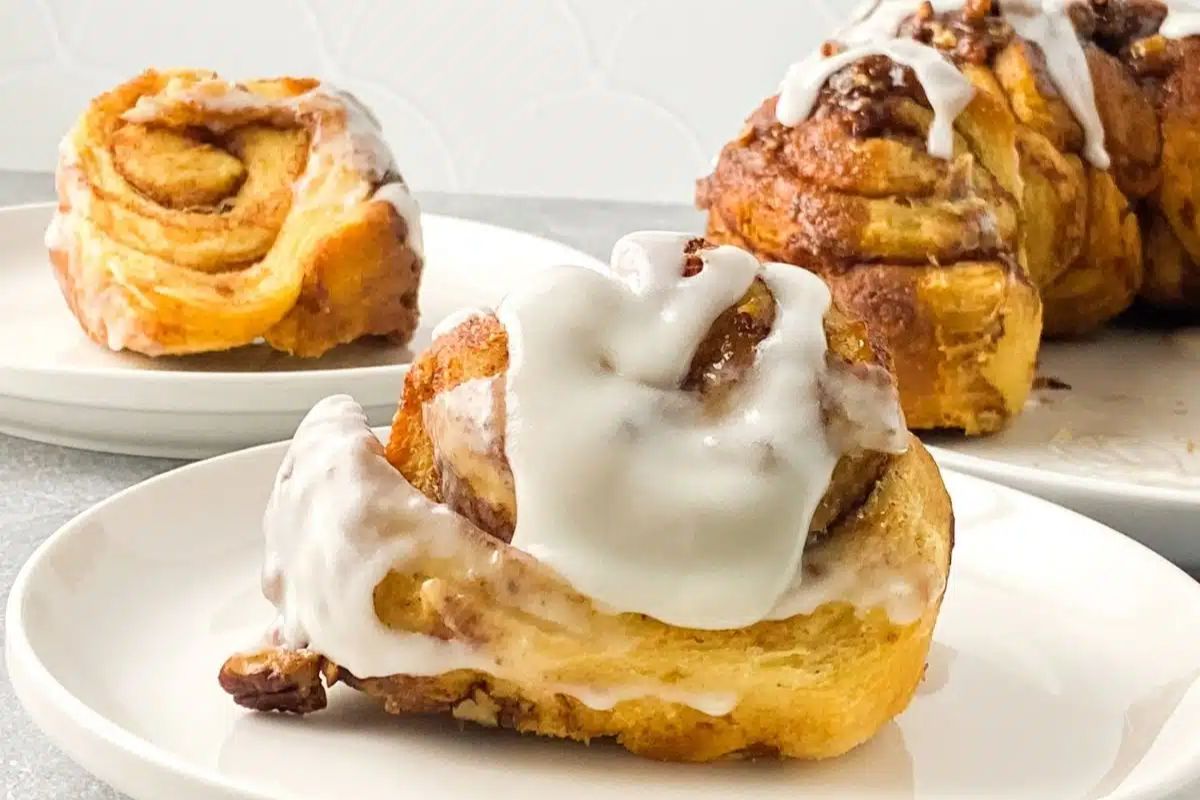
Another easy breakfast idea that's bursting with flavor is this Strawberry Cinnamon Roll Casserole recipe. It's made with refrigerated cinnamon rolls, canned strawberry pie filling and then topped with an easy semi-homemade strawberry flavored cream cheese icing!
The recipe takes minutes to prepare because it uses premade cinnamon roll dough. You can be in and out of the kitchen fast which is perfect when you're preparing breakfast for a hungry family or entertaining overnight guests.
If you’re short on time and don’t want to bother with kneading and rising yeasted dough, using canned cinnamon rolls is a fantastic shortcut to make a breakfast casserole everyone is going to love.
This recipe was inspired by original Cinnamon Roll Casserole recipe from a few years ago, only this recipe adds a delicious strawberry flavor to not only the casserole, but the cream cheese frosting!
You can easily serve a crowd with this recipe by quickly making two casseroles at the same time.
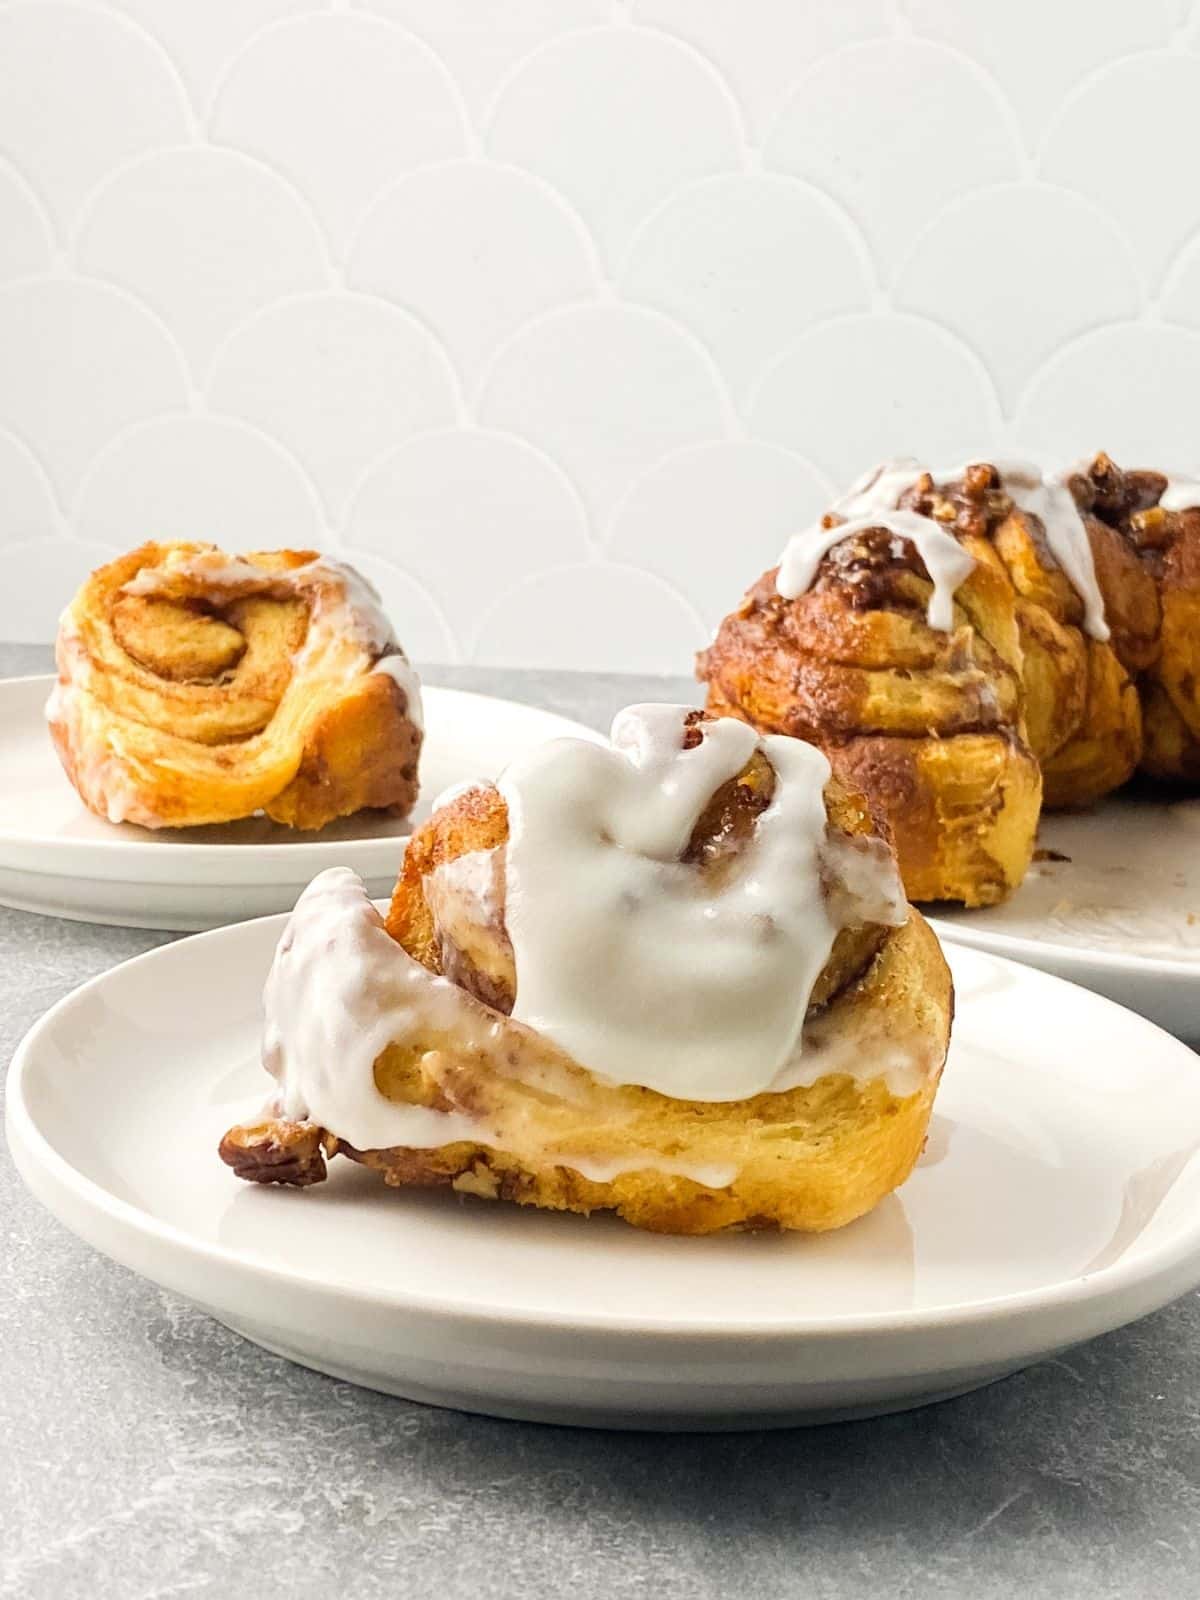
Canned cinnamon rolls on their own are really good. They're a fast, easy breakfast that everyone enjoys. But what if you wanted to make canned cinnamon rolls better?
One way would be to add extra ingredients such as pouring heavy cream on top of the rolls right before baking. I do this with my Cinnamon Rolls with Heavy Cream. The end result is a very rich, tender cinnamon roll.
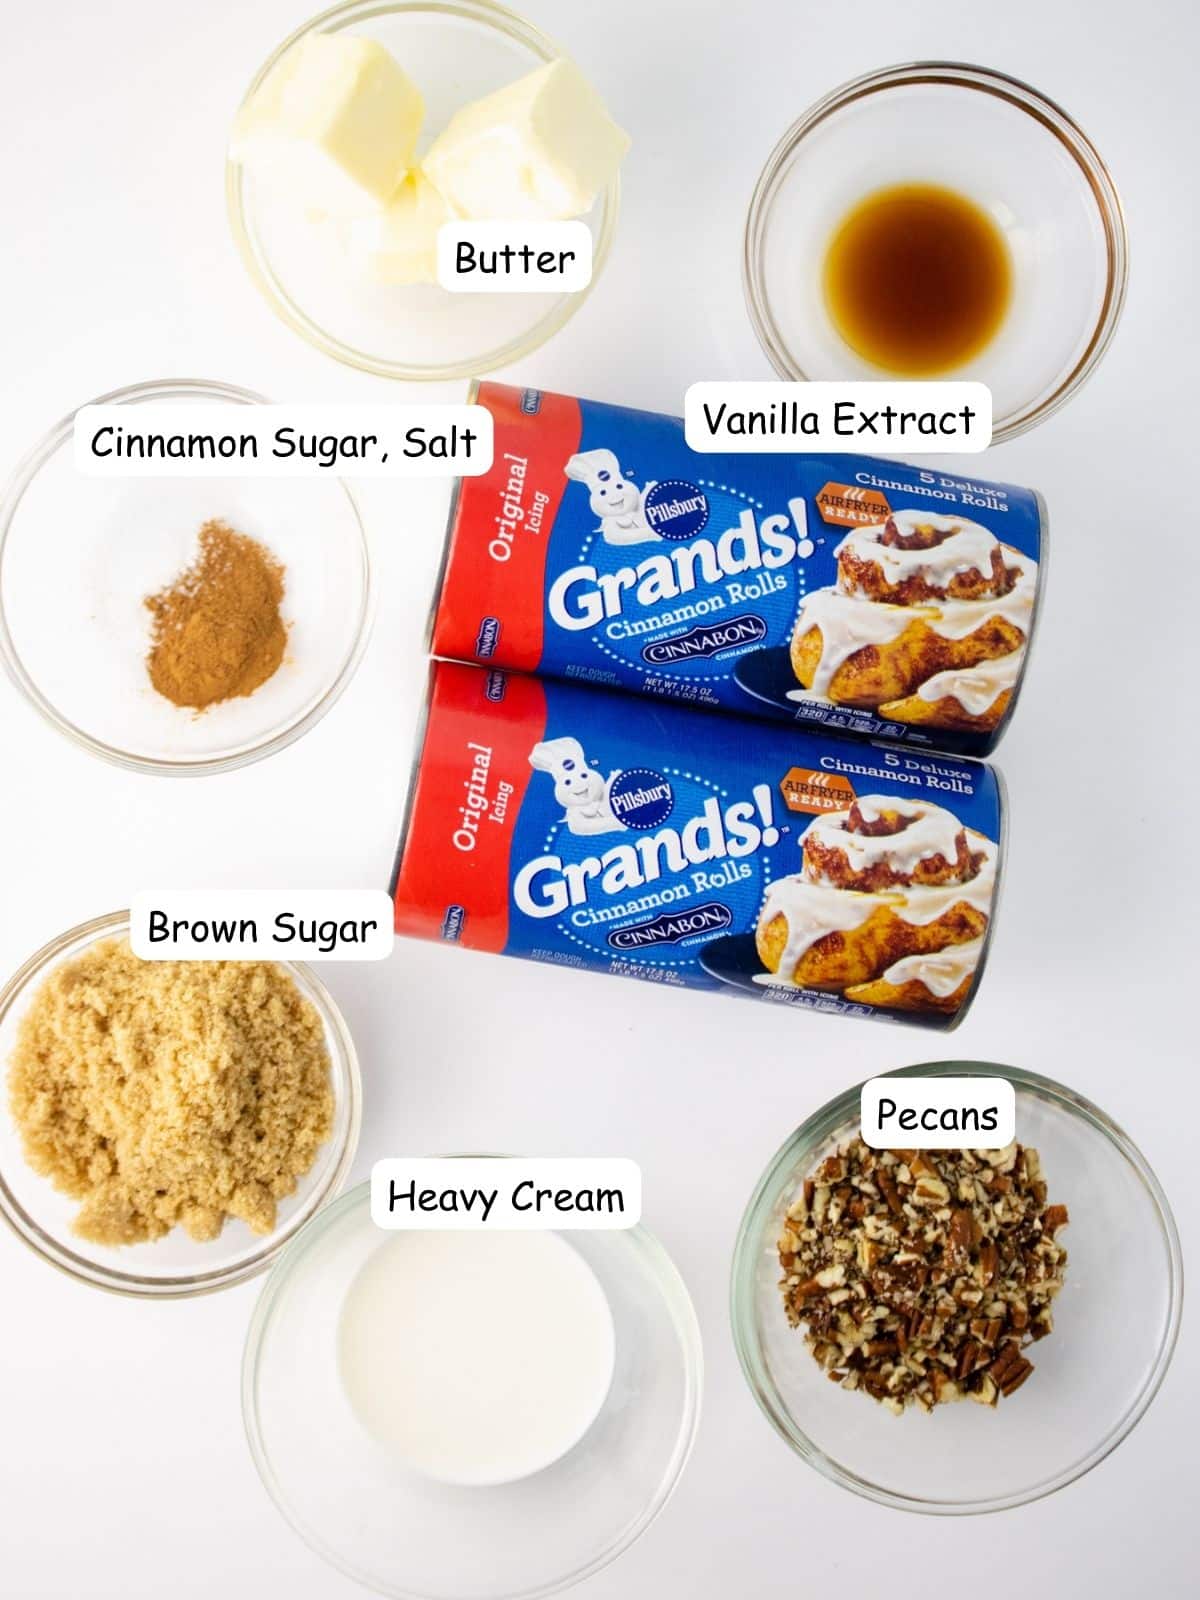
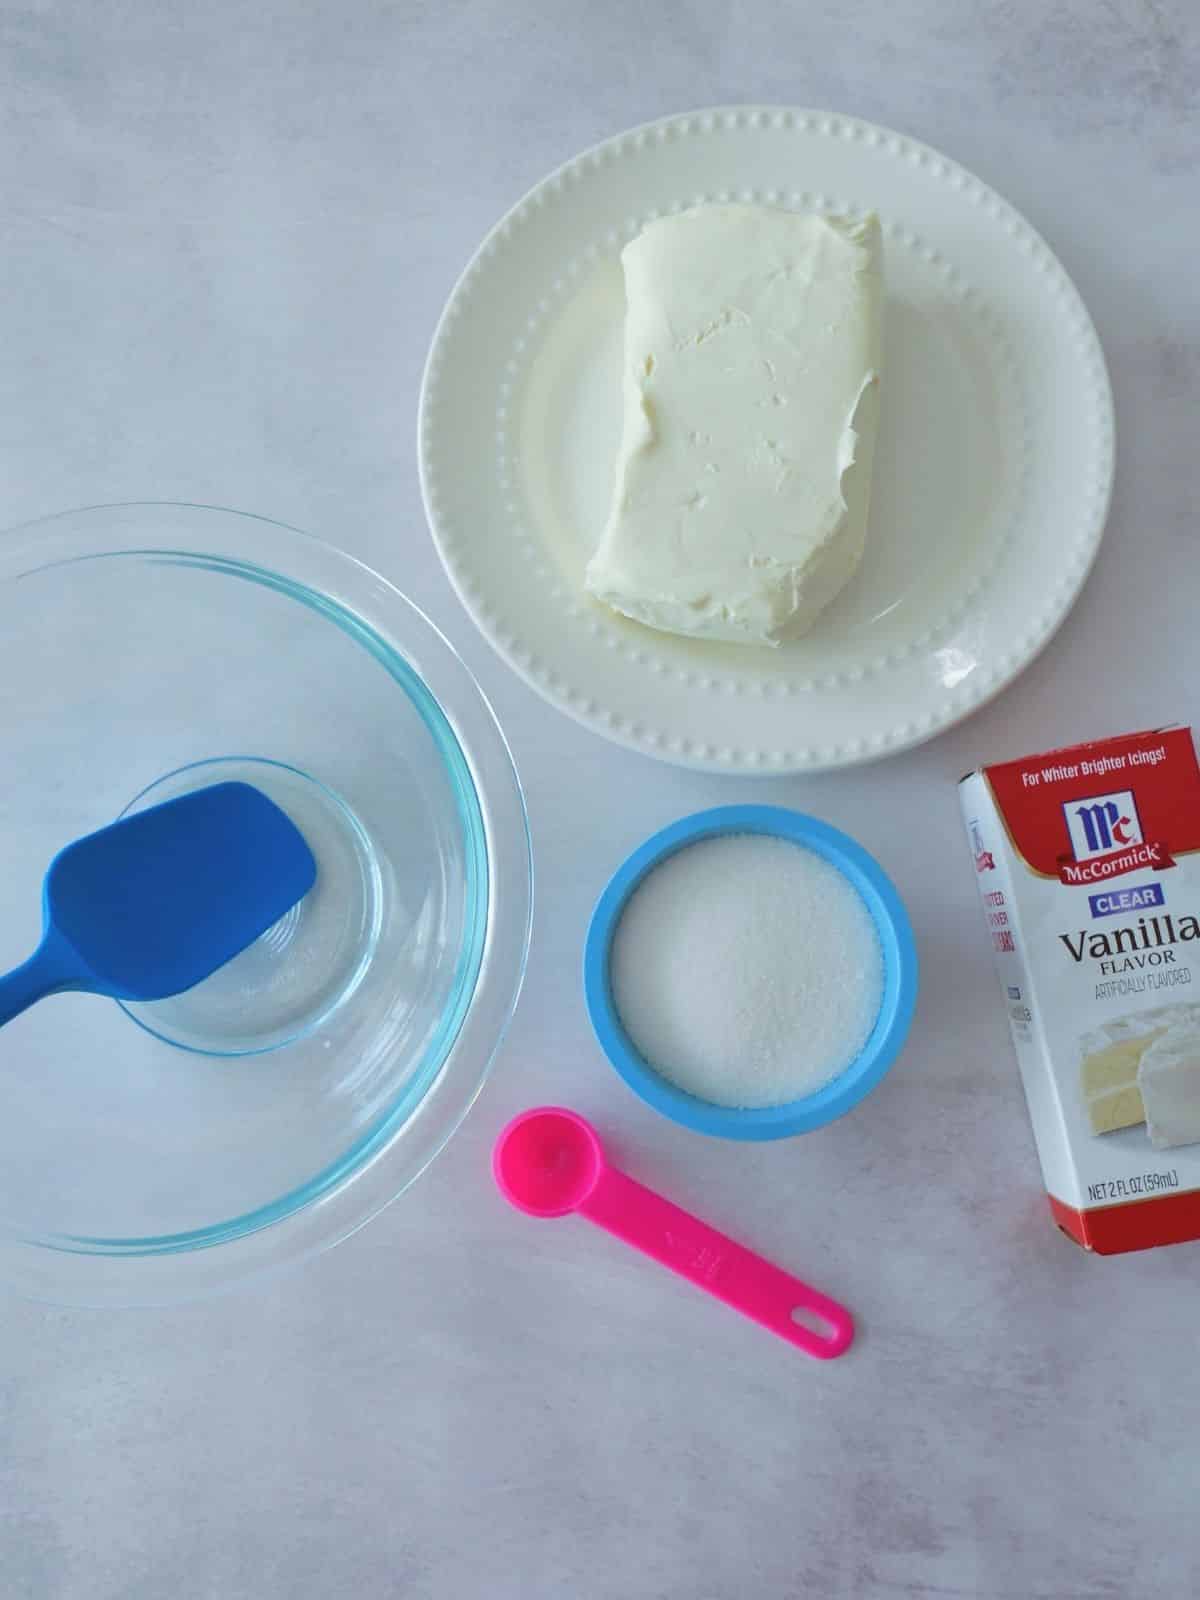
Here's a quick overview of the ingredients for this recipe. Find the exact amounts and click the Instacart button to easily add them to your cart – all in the printable recipe card below!
Recipe Substitutions and Variations
Grands Cinnamon Rolls with Cream Cheese Icing are a great substitute if you can't find the cinnamon rolls with strawberry & cream icing.
Use a different pie filling like apple, cherry, or blueberry.
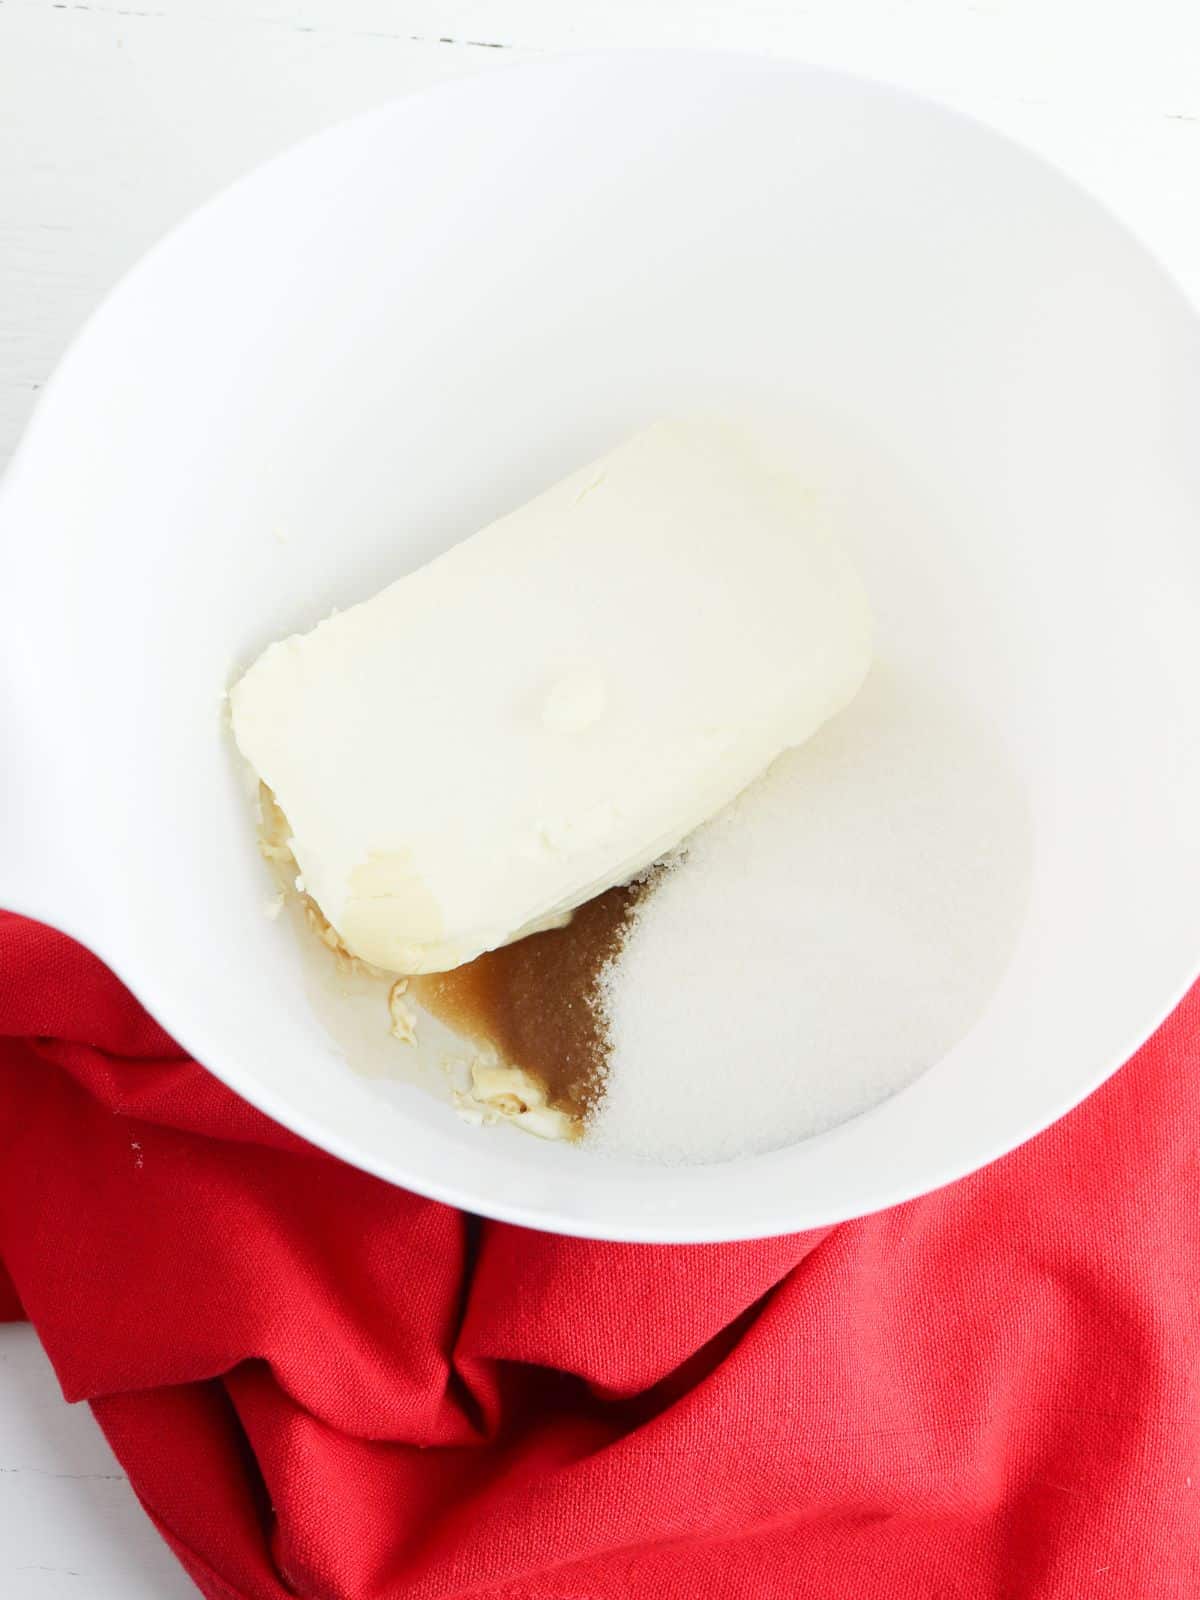
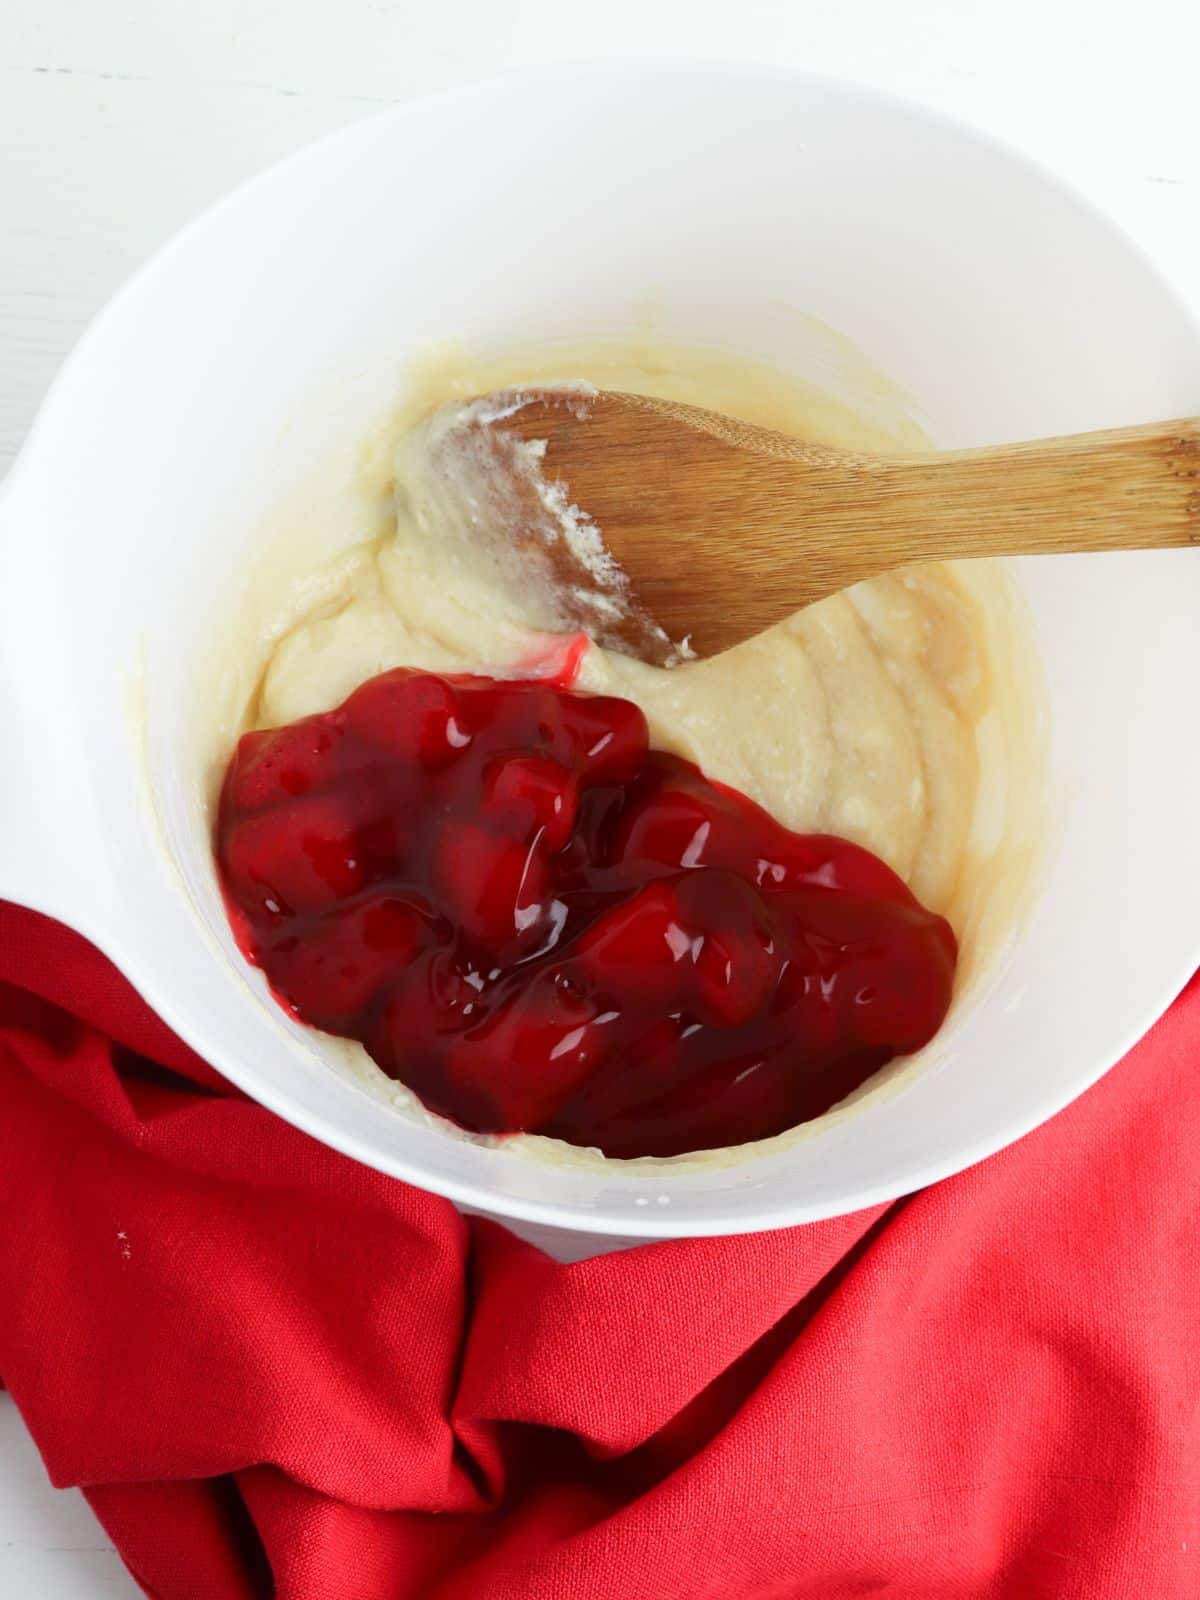
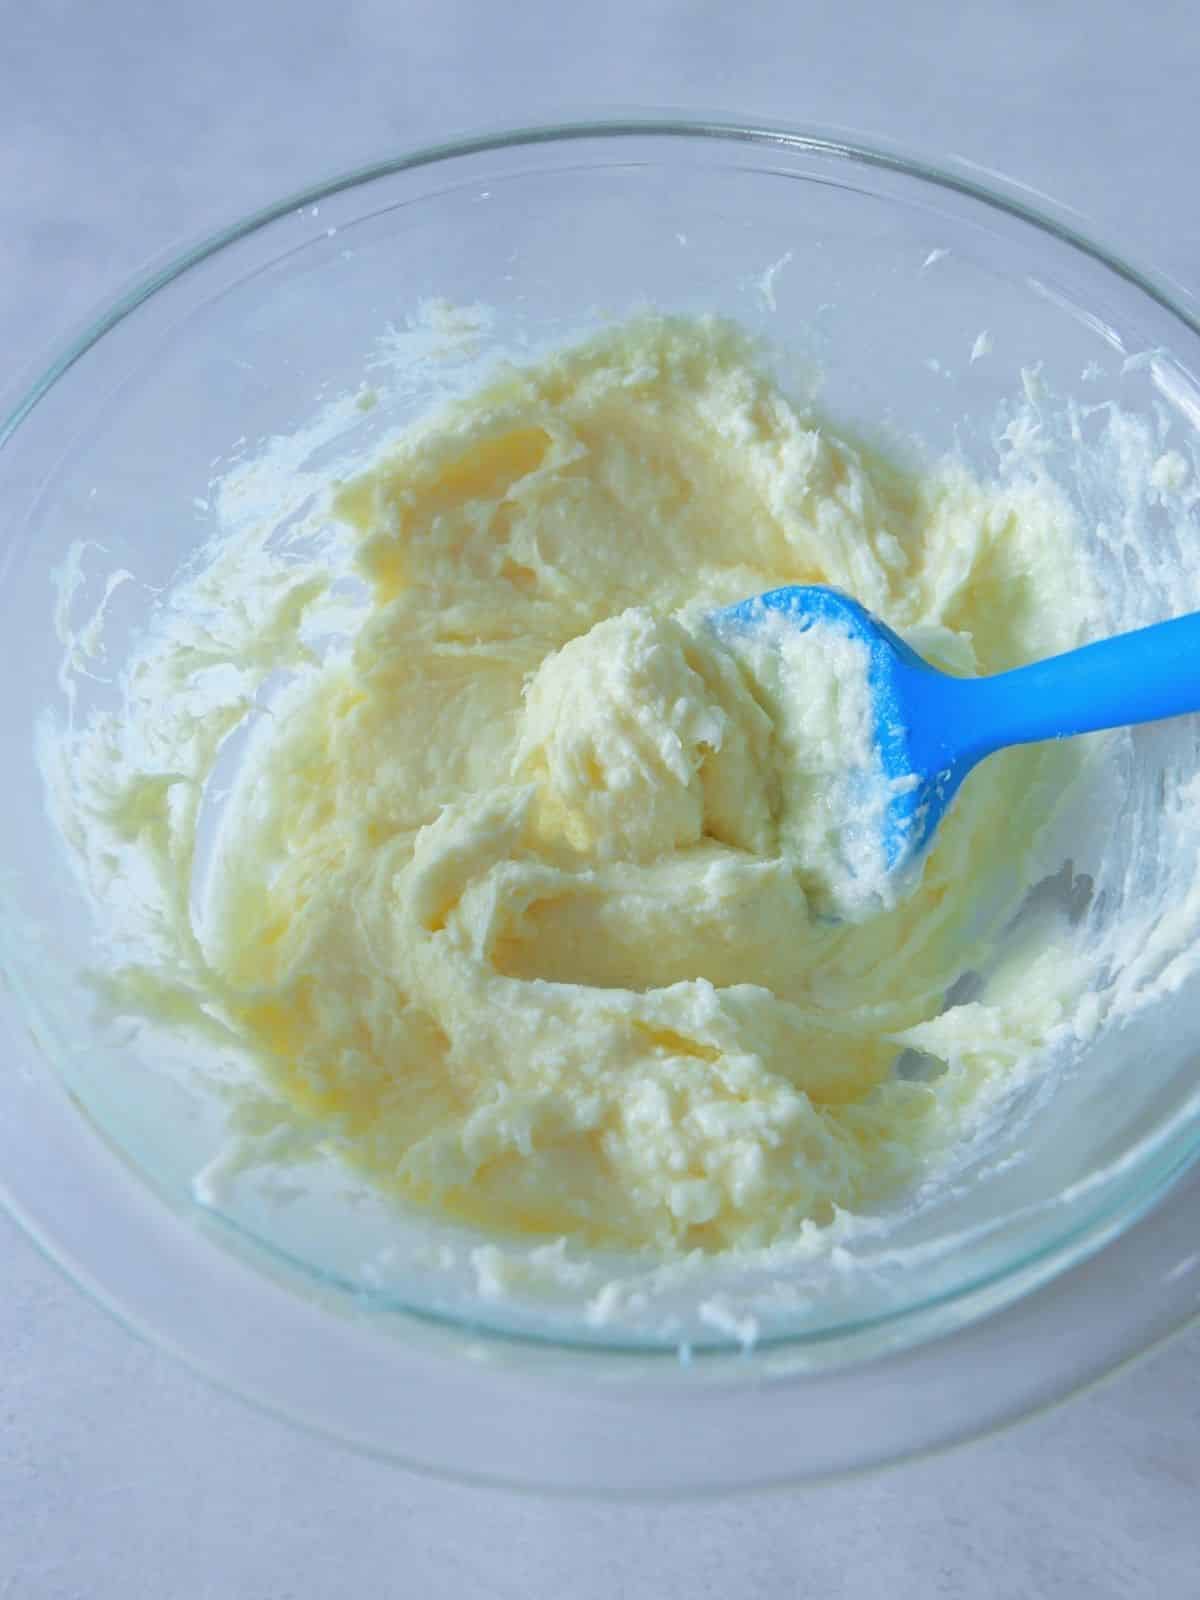
Step 1: Beat the cream cheese, sugar, and vanilla extra in a large bowl. Stir in half the strawberry pie filling.
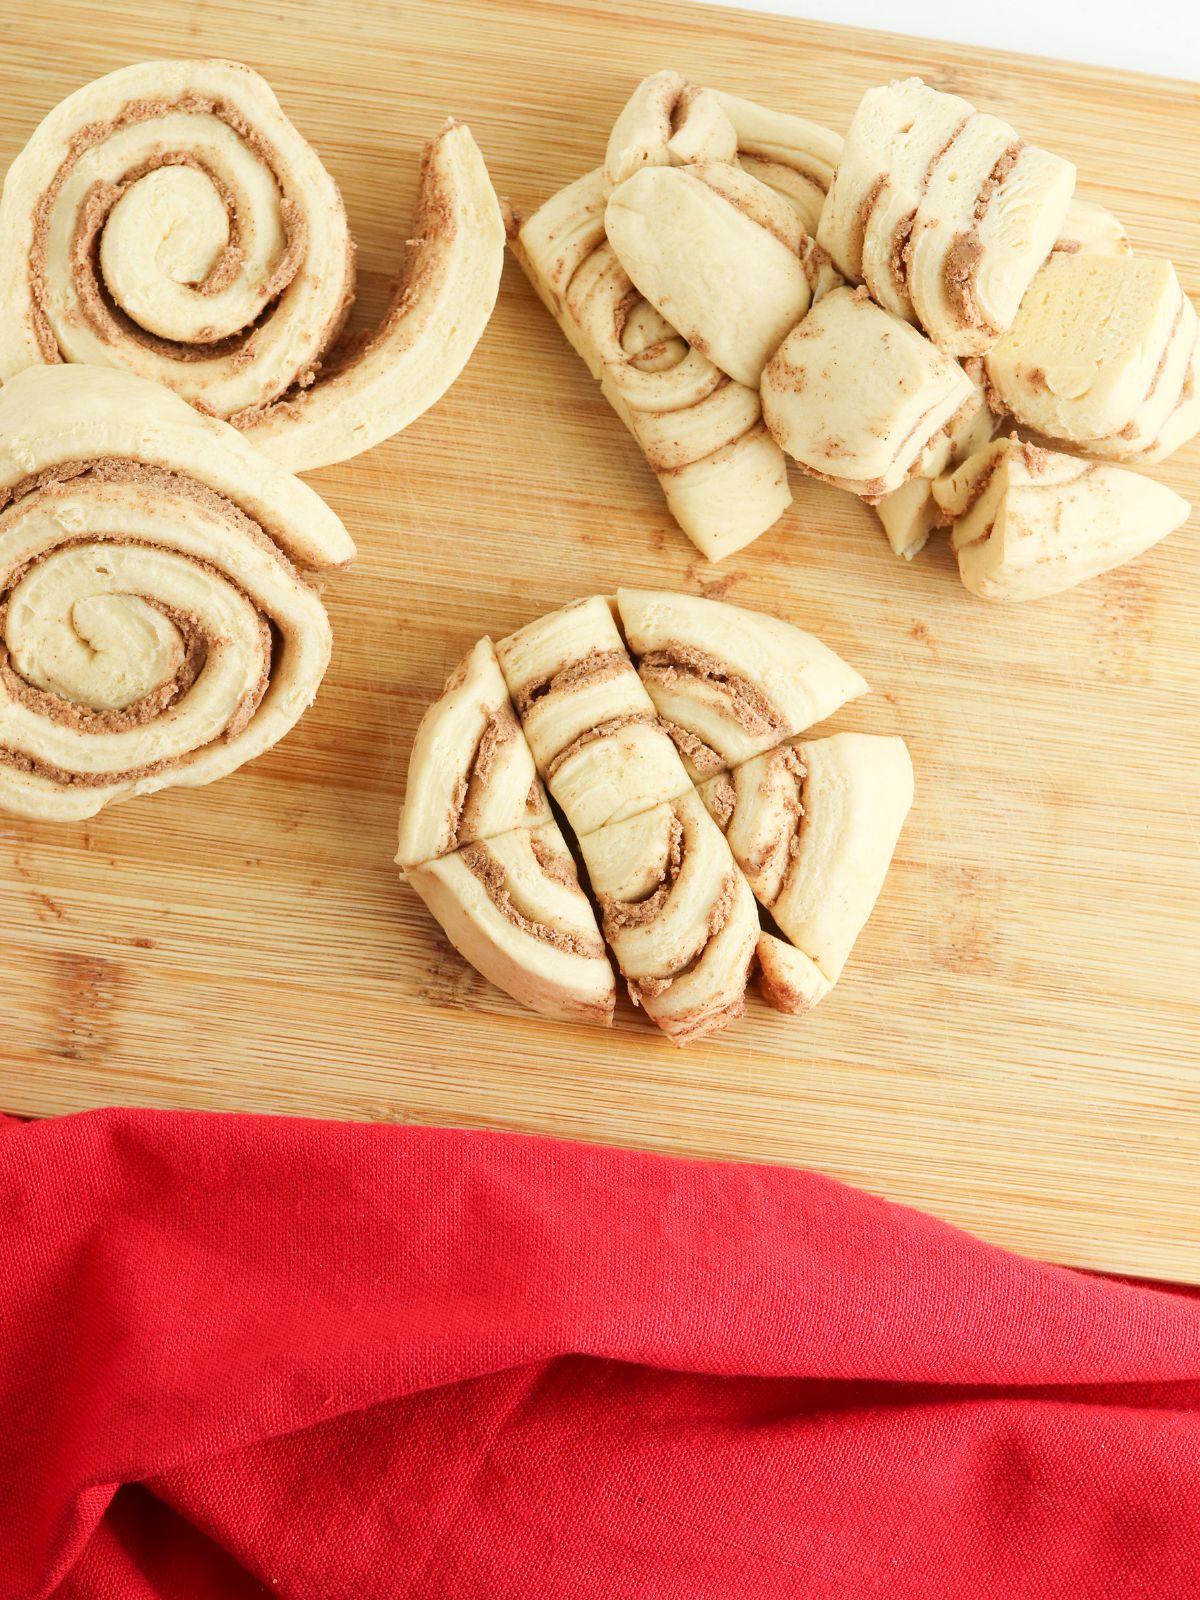
Step 2: Cut each cinnamon roll into 6 pieces. Add the cinnamon roll pieces to the cream cheese mixture and stir to combine.
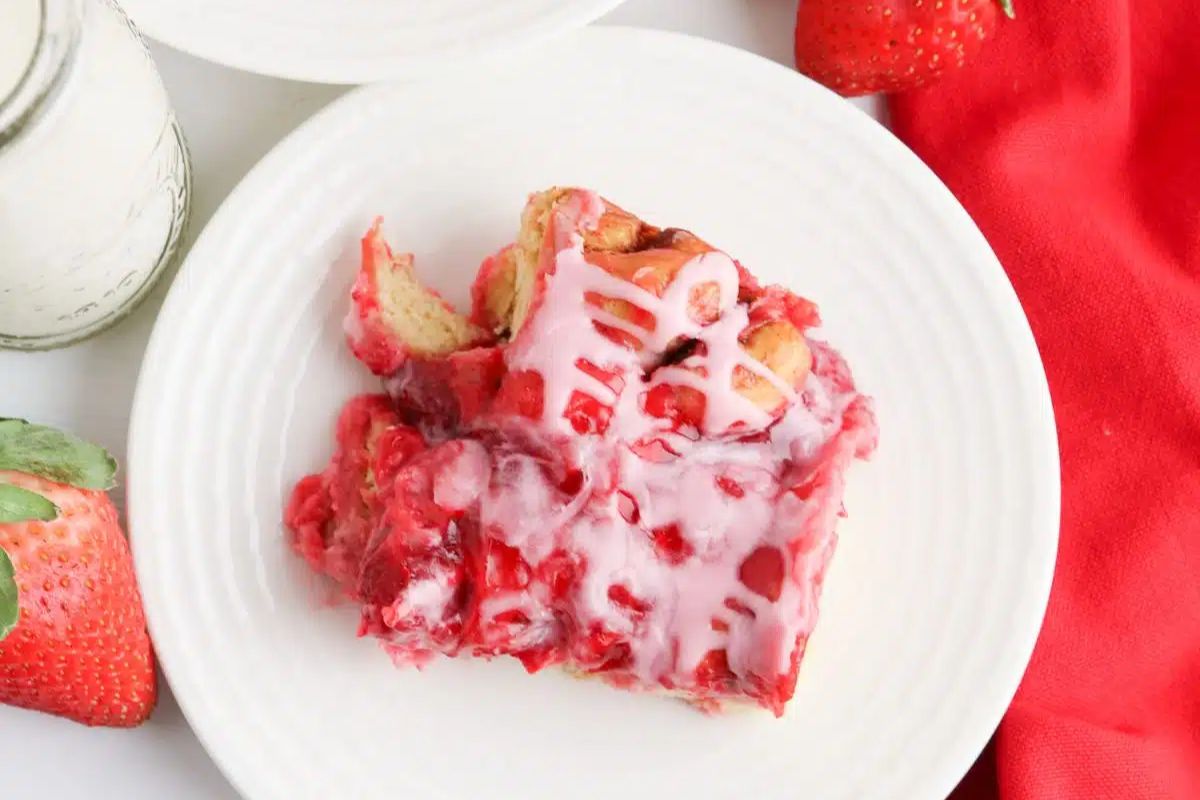
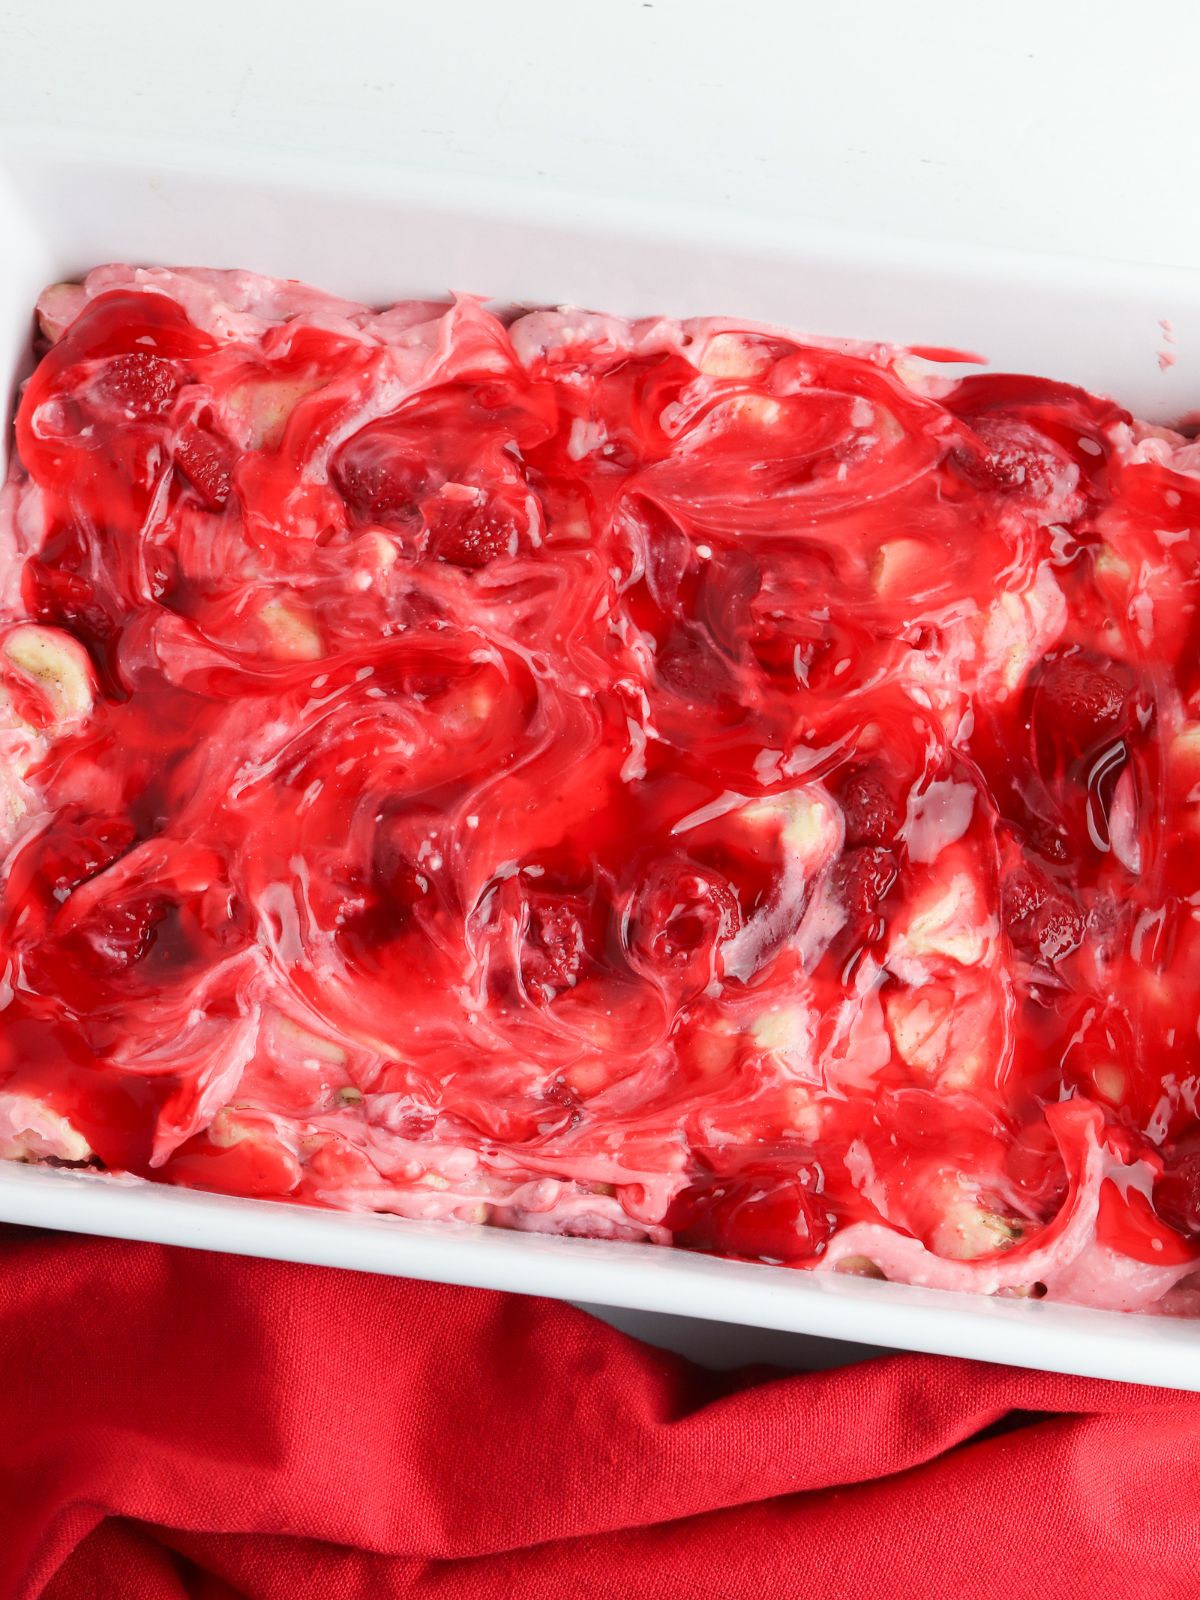
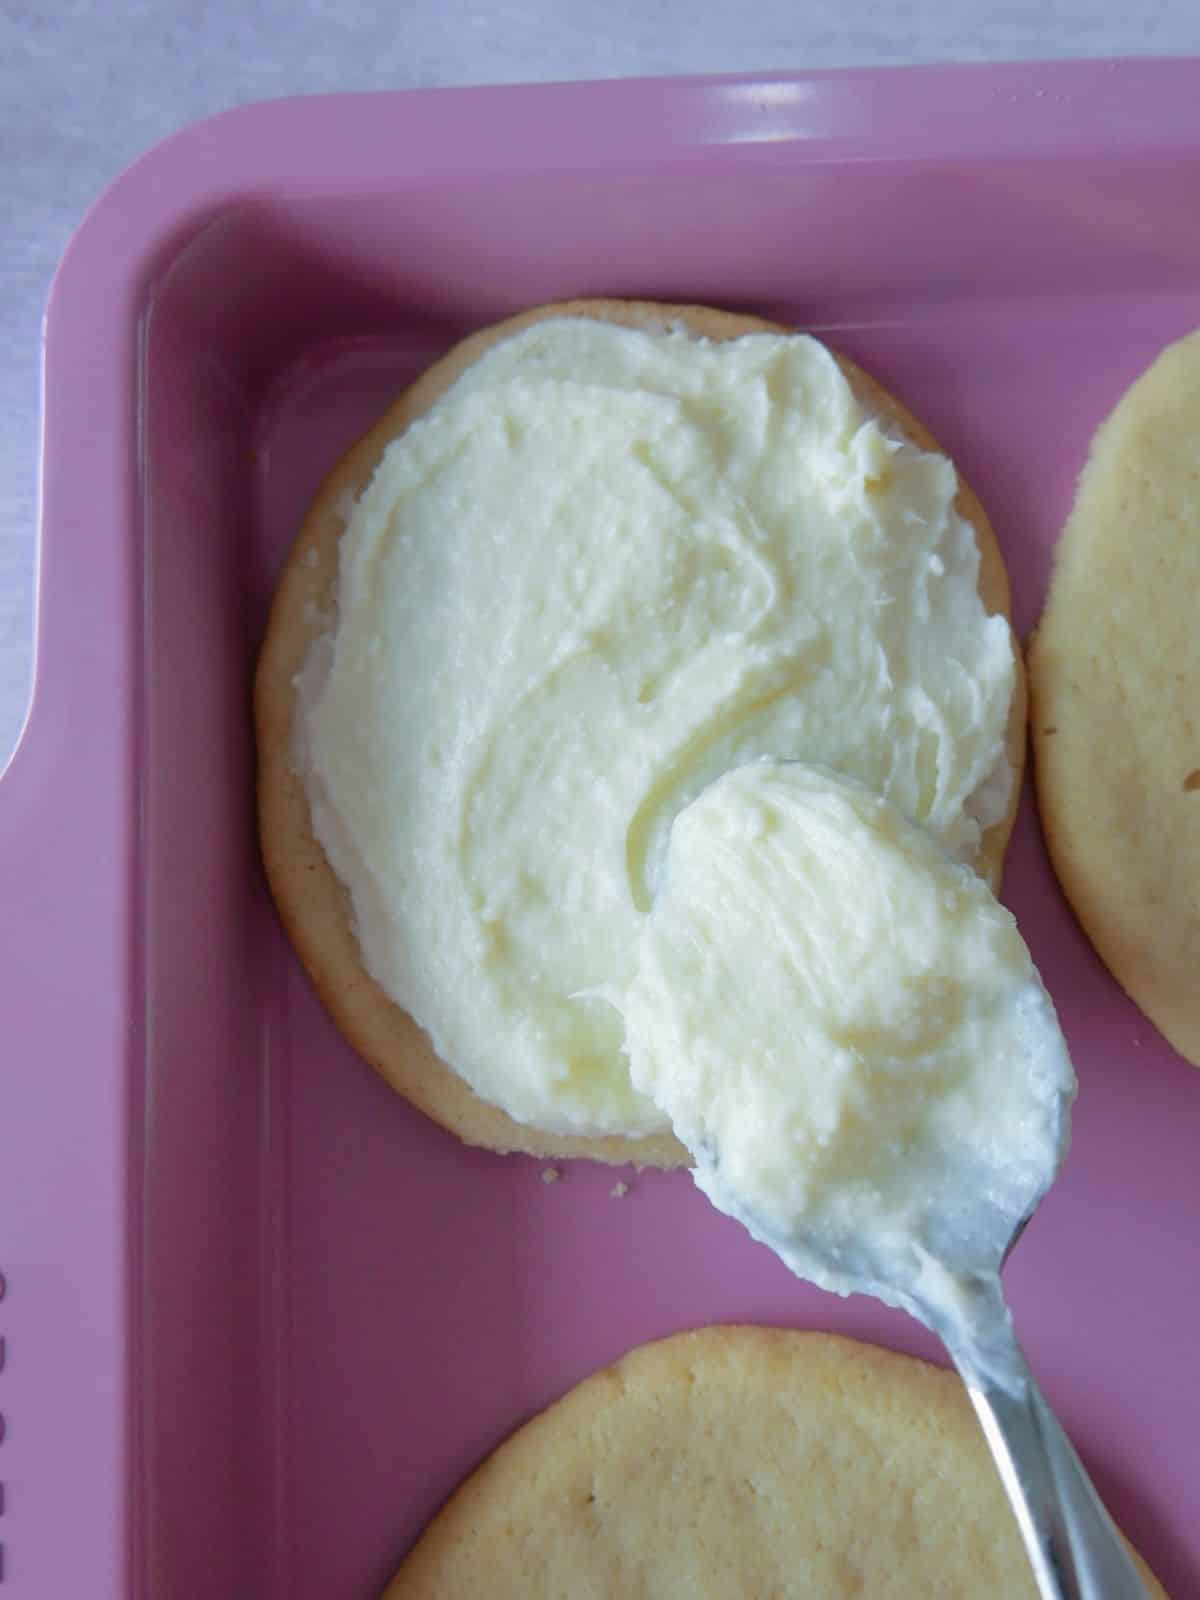
Step 3: Add the mixture to a prepared baking dish and top with the remaining pie filling.
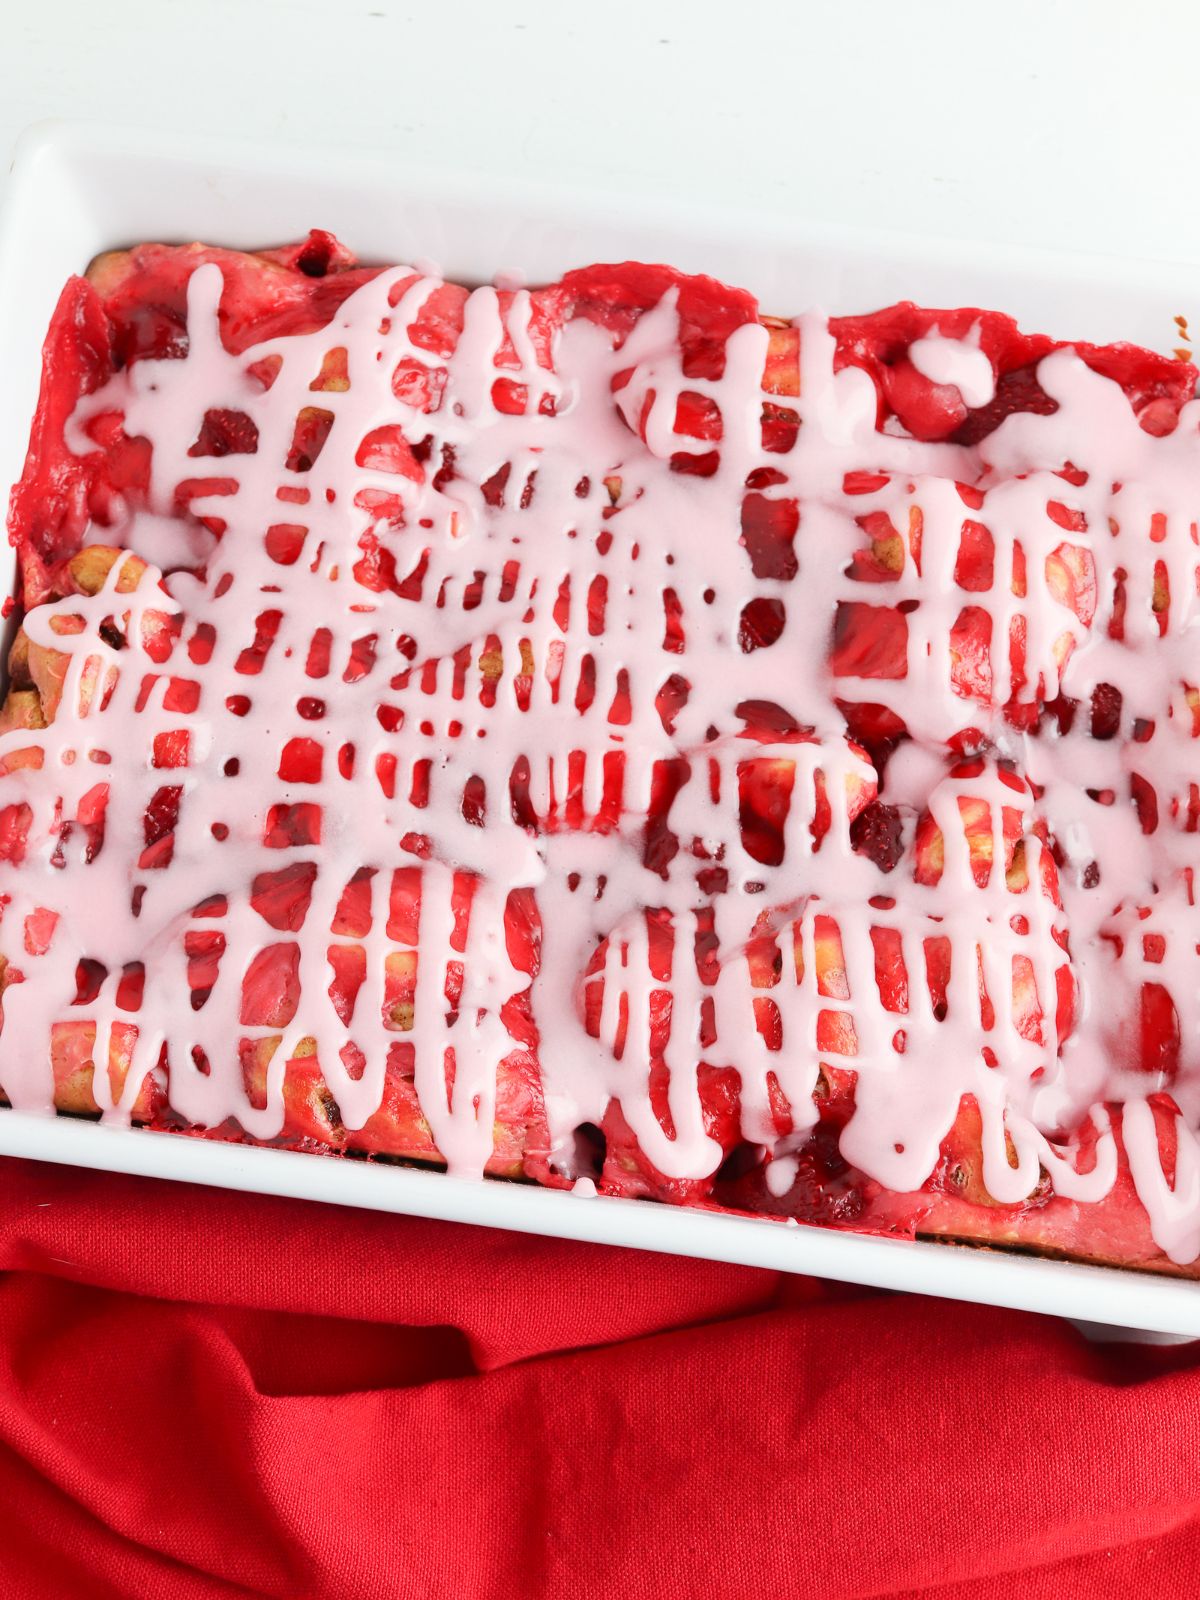
Baking Instructions
Step 4: Bake in an oven preheated to 350°F for 35-40 minutes. Let the casserole cool for 10 minutes then top with the icing that came with the cinnamon rolls.
LOVE this recipe? SAVE it for Later!
❤️Tap the heart icon in the lower right corner to add the recipe to your recipe box for easy access anytime.
If you made it, leaving a star rating or quick review is always appreciated and helps other readers too.
Refrigerator: Store any leftovers in an airtight container. Refrigerate up to 3-4 days.
Freezer: Add leftovers to an airtight container and freeze up to 2 months.
Thawing: Thaw overnight in the refrigerator and reheat in the oven at 350°F for 15 minutes or in the microwave for individual servings for 30-45 seconds.
Reheating: To reheat the entire dish, cover with foil and bake at 350°F for about 15 minutes or until heated through. Reheat individual pieces in the microwave for 30-45 seconds.
Top Tip
Make sure the cream cheese is at room temperature before creaming it with the sugar.
Another easy breakfast idea that's bursting with flavor is this Strawberry Cinnamon Roll Casserole recipe. It's made with refrigerated cinnamon rolls, canned strawberry pie filling and then topped with an easy semi-homemade strawberry flavored cream cheese icing!
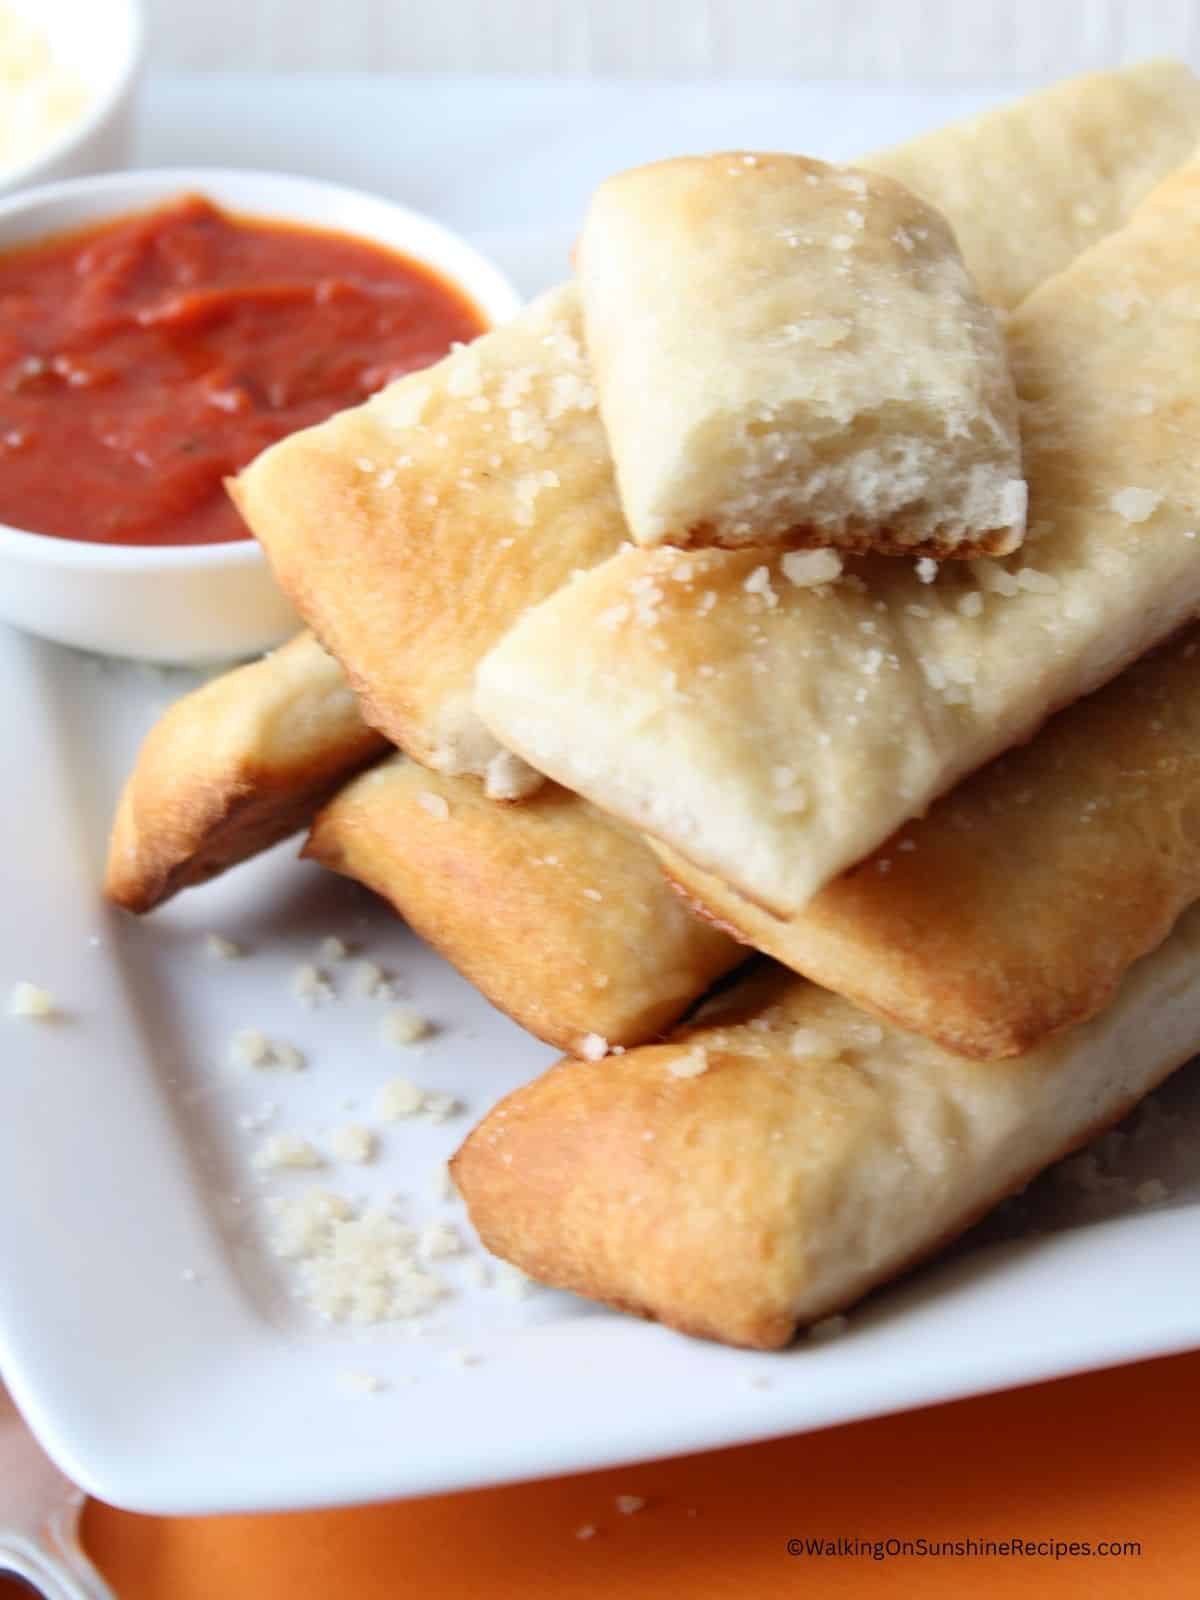
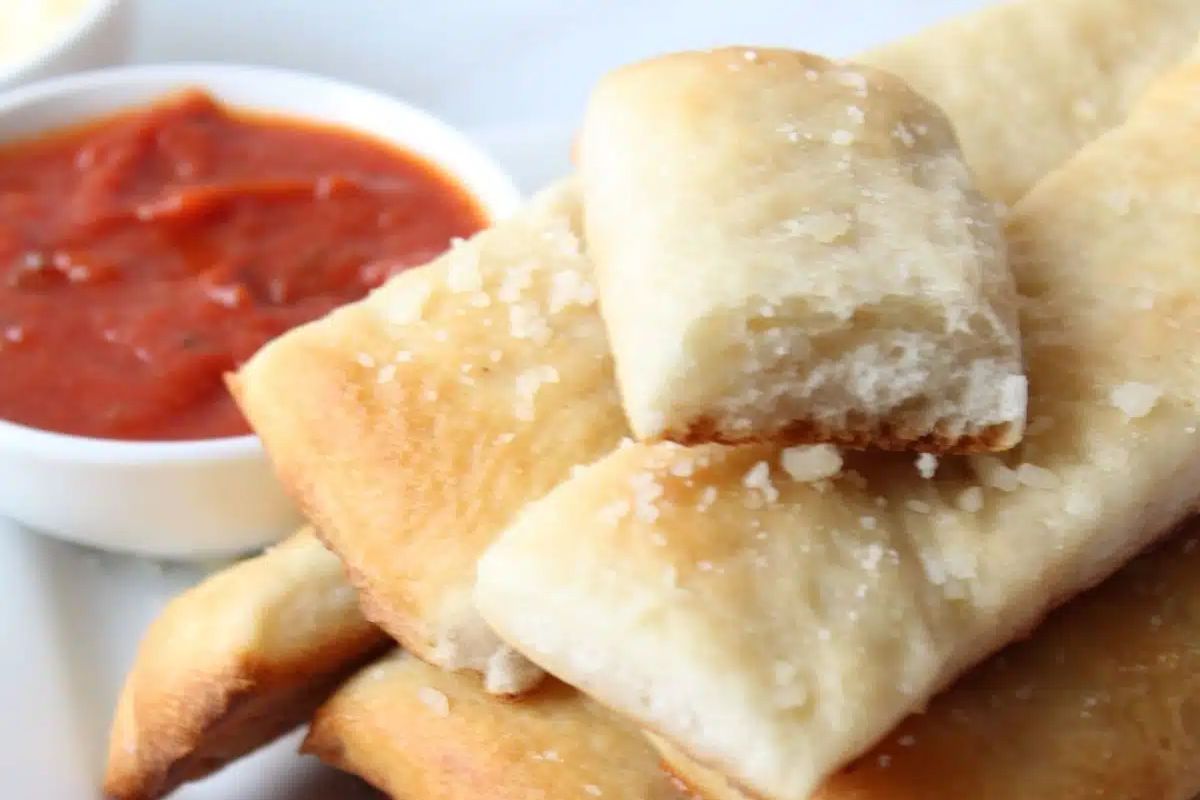
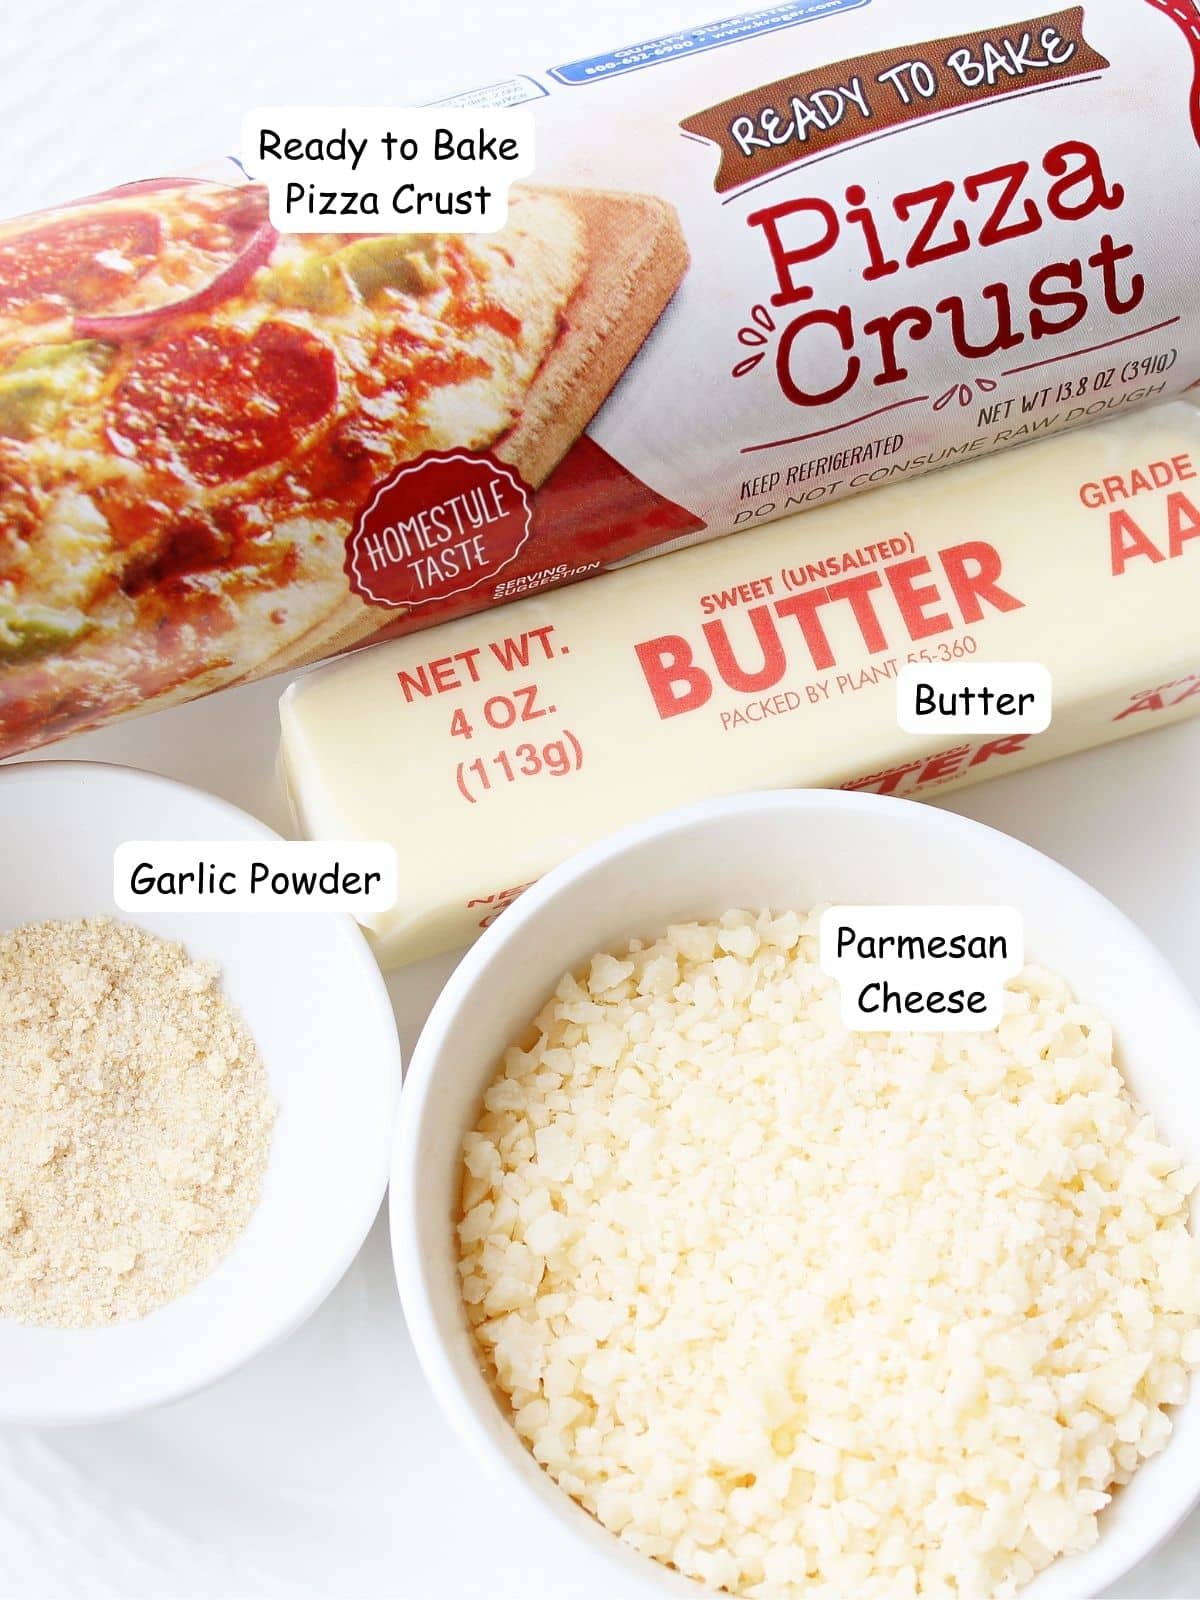
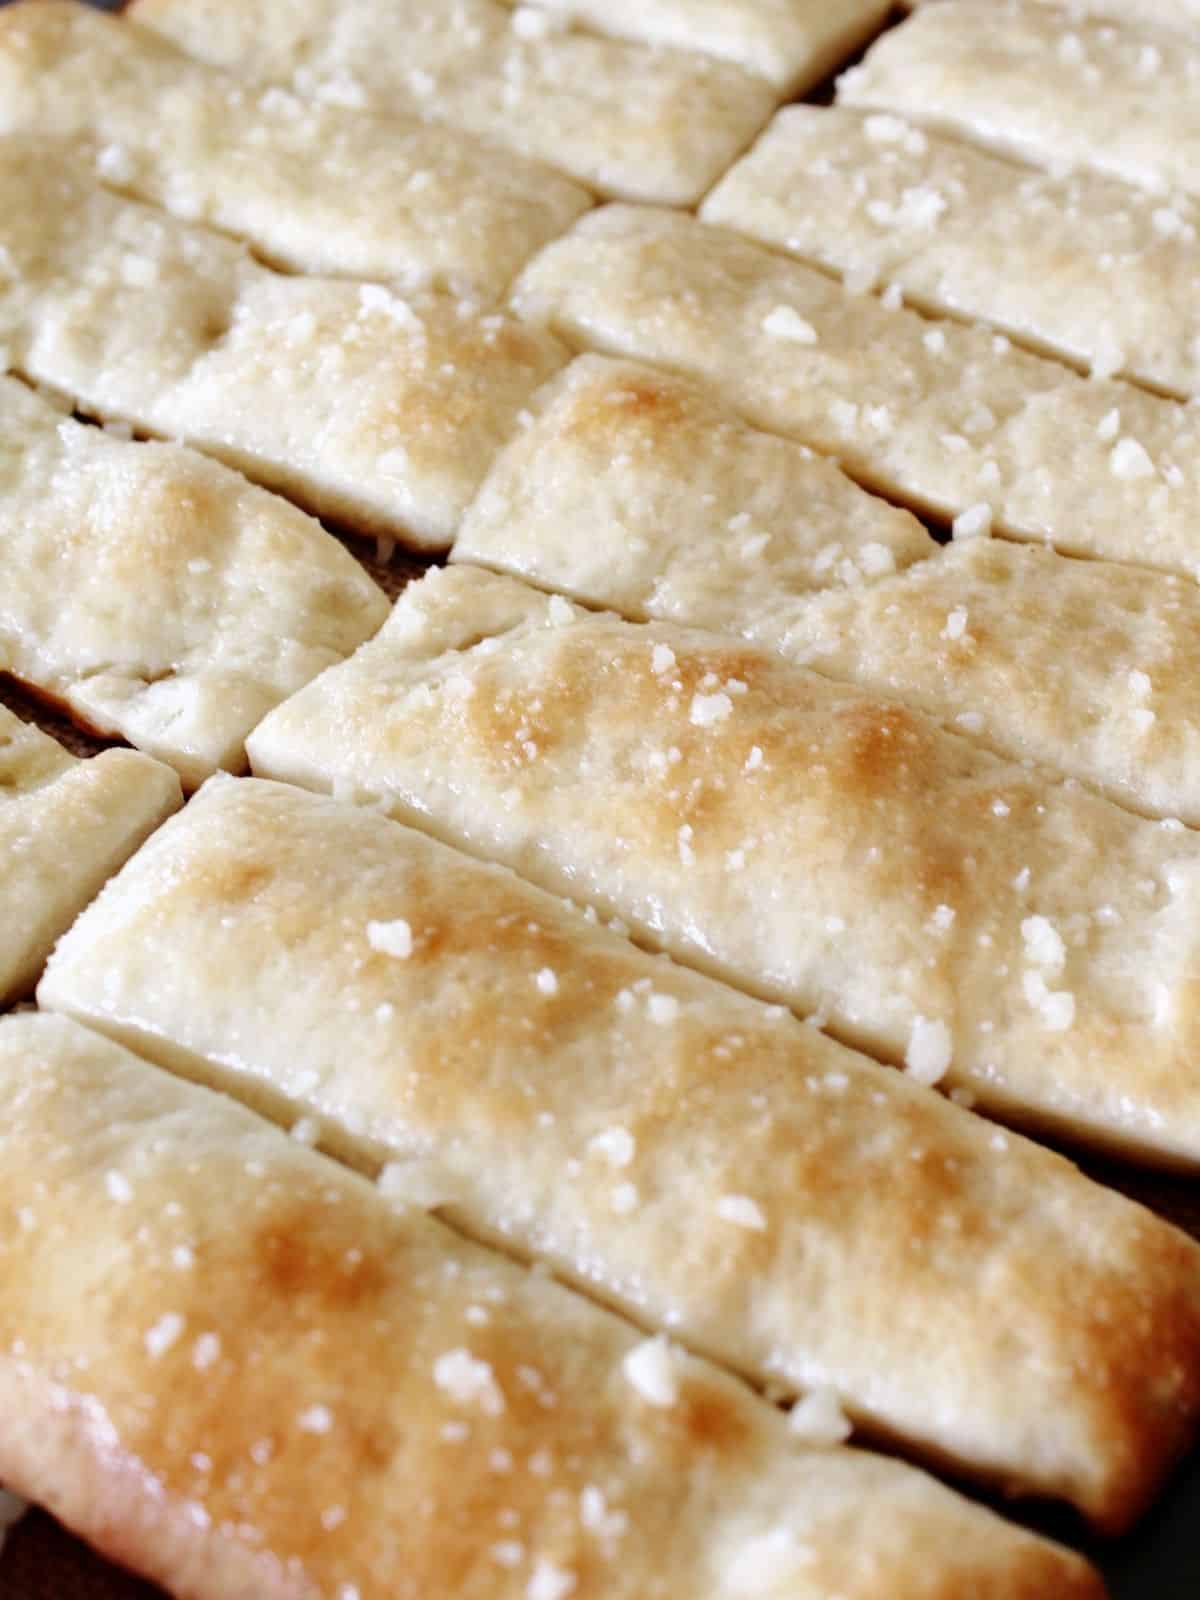
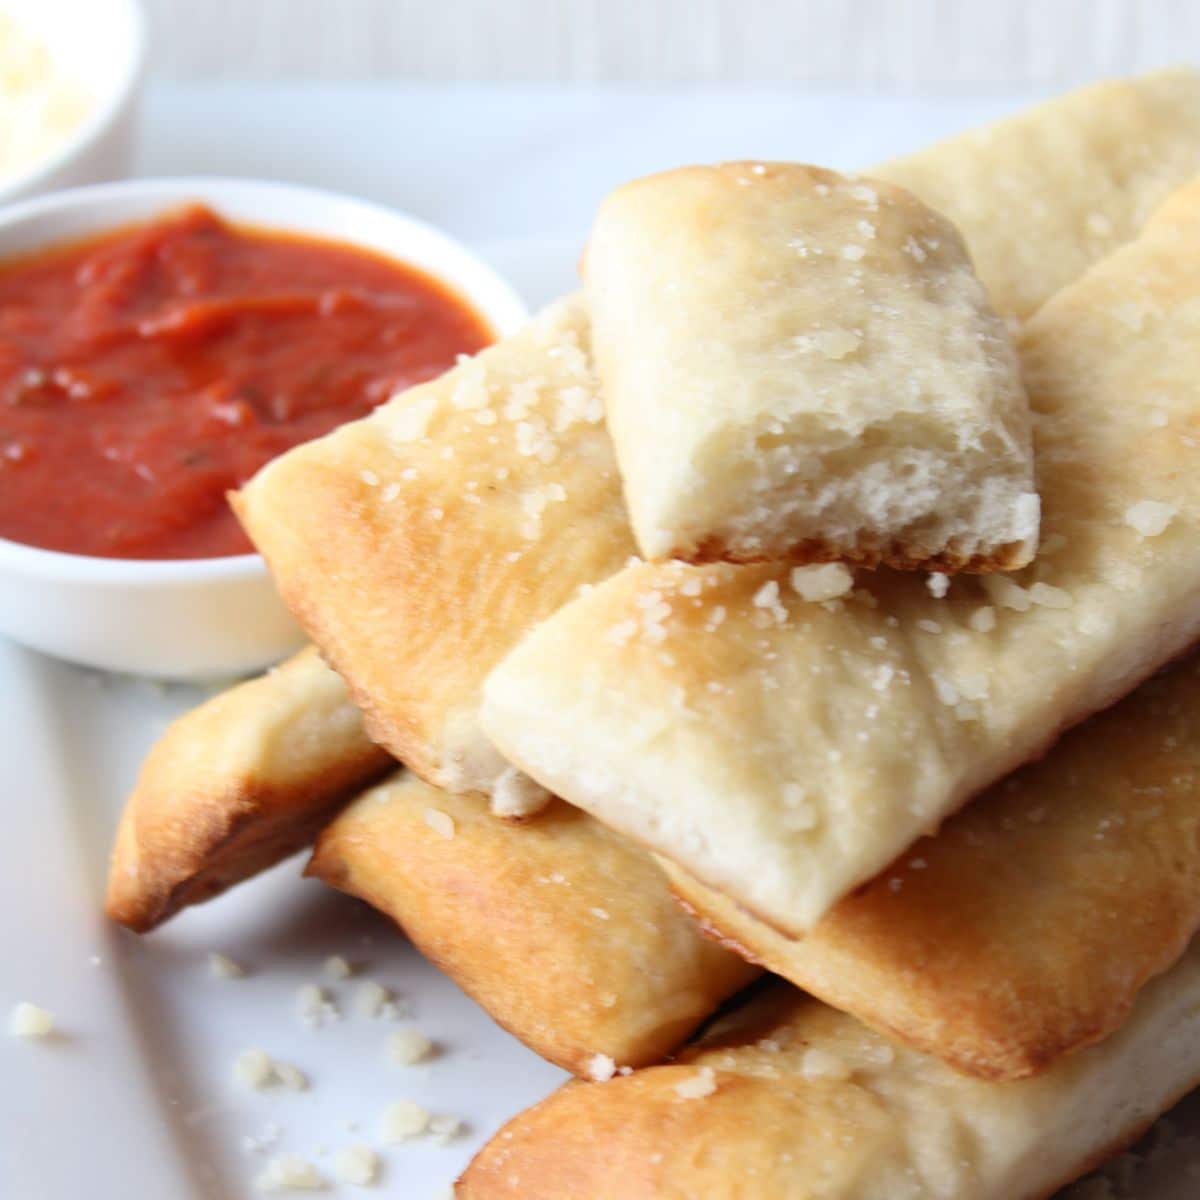
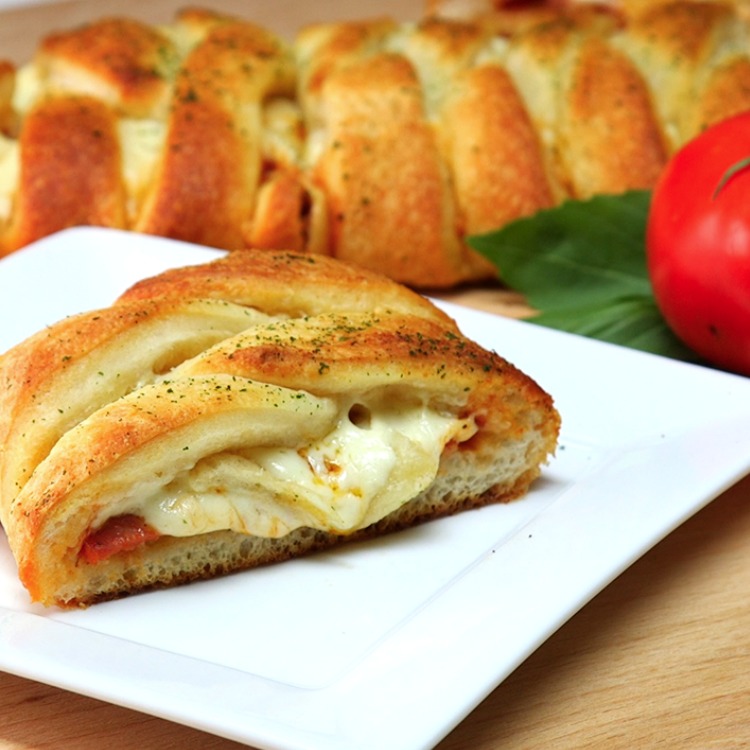
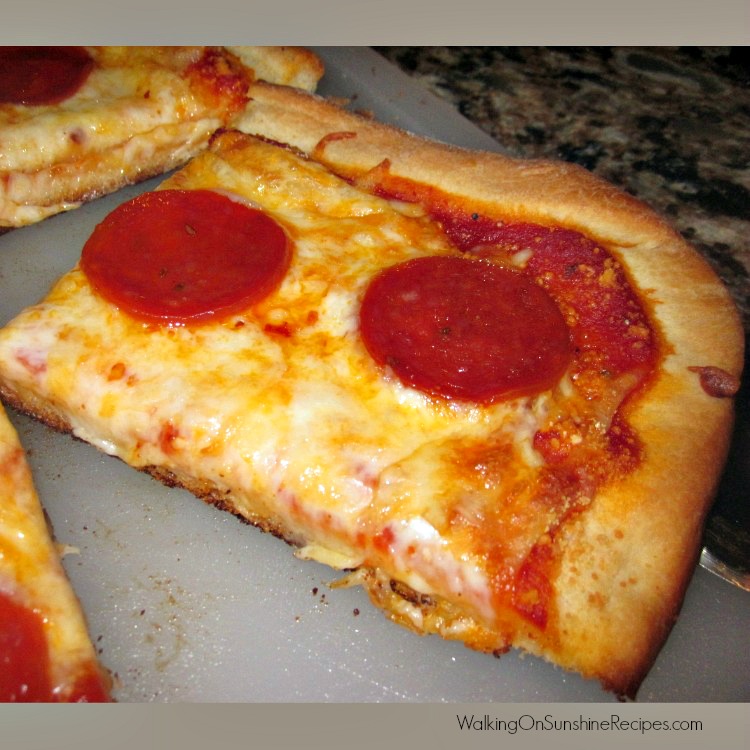
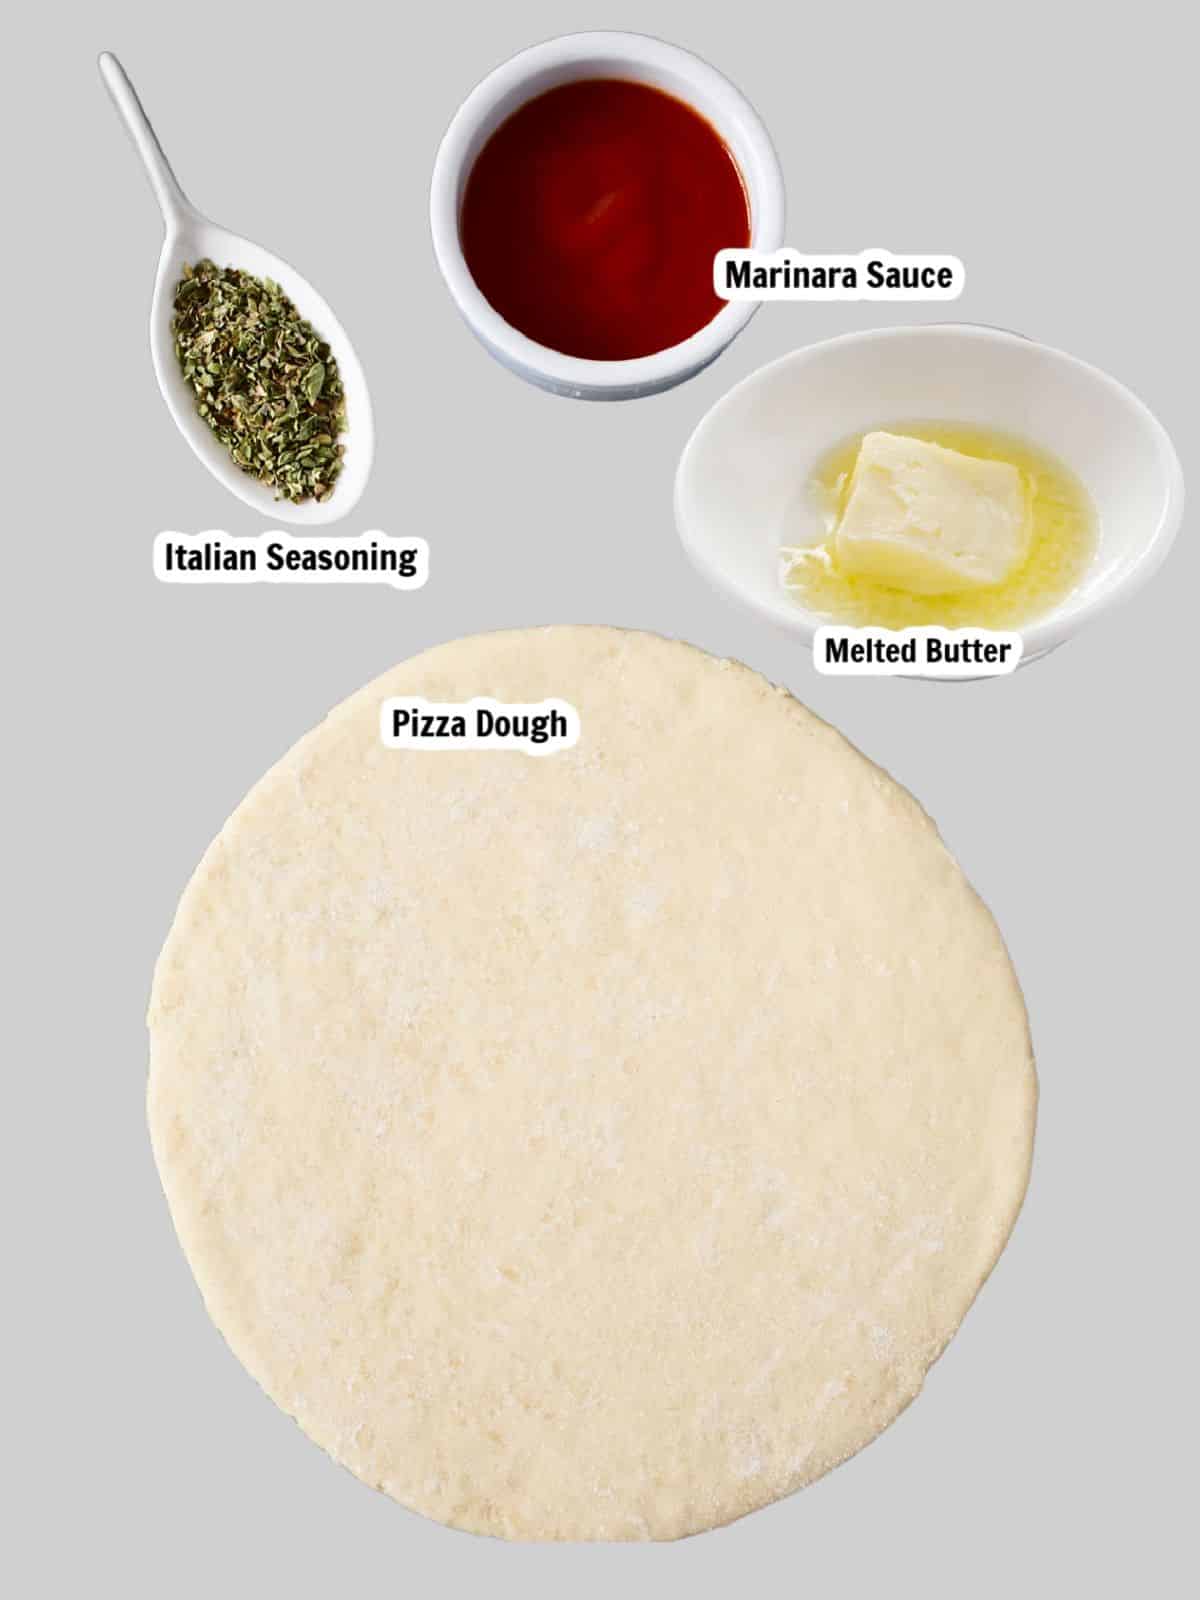
Warm from the oven, these Garlic and Parmesan Cheese Breadsticks are made using refrigerator pizza dough, butter, garlic and freshly grated Parmesan cheese.
The perfect side dish served with pasta or serve these breadsticks as a snack with plenty of pizza dipping sauce, only don’t plan on any leftovers because I’m pretty sure there won’t be any!
This is an easy-to-make side dish to go along with any of our Family Dinner Ideas as well as a side dish to one of our Weekly Meal Plans.
If you're looking for an easy, delicious way to upgrade your weeknight dinner, look no further than these irresistible garlic parmesan breadsticks!
This recipe uses pizza dough cut into strips and then baked till golden brown, sprinkled with melted butter, Parmesan cheese and garlic powder, these breadsticks are ready fast!
You probably have everything in your pantry to put this recipe together, so check out the recipe notes and variations following the step-by-step photos for any possible substitutions or tips on making the recipe your own.
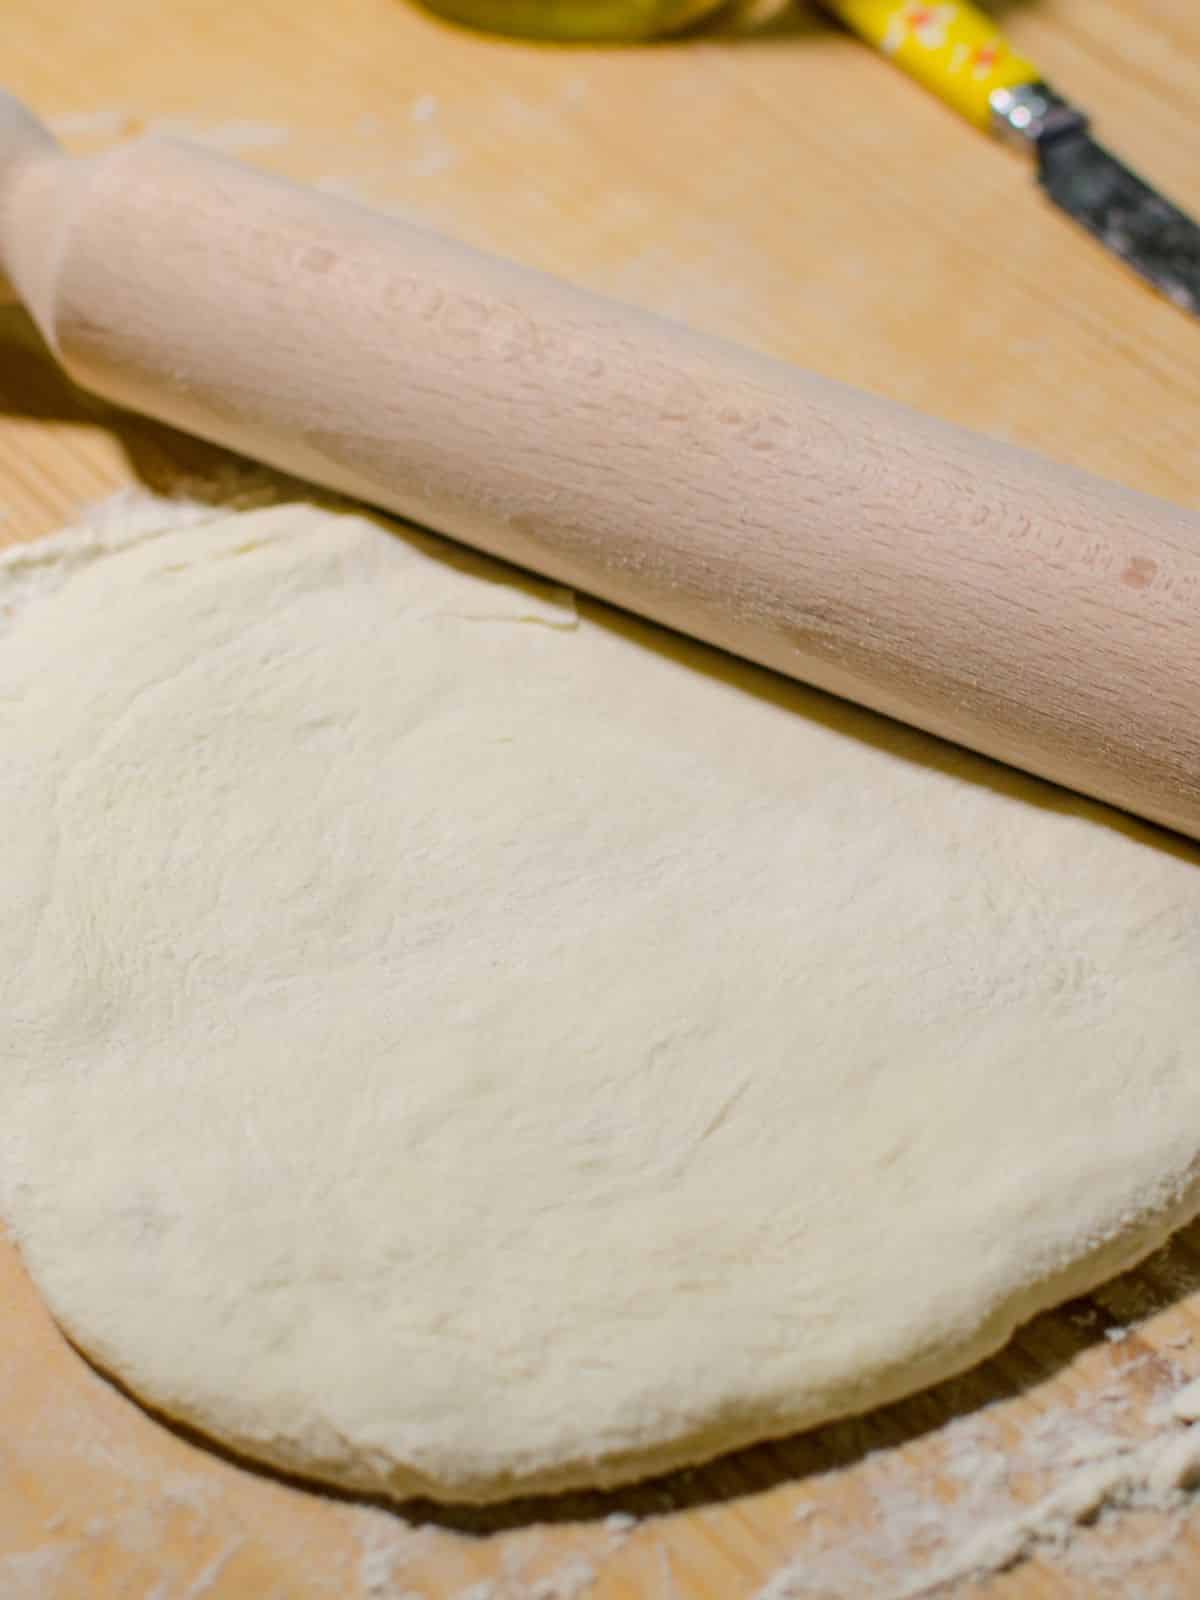
To stretch Pillsbury pizza dough, lightly flour your work surface and roll out the dough into a circle. Lift and rotate the dough as you roll, using plenty of flour to prevent sticking.
Once it is stretched to about 11-12 inches in diameter, carefully transfer it to a greased pizza pan or baking sheet. Then top with desired sauce, cheese and toppings before baking according to package instructions.
Here's a quick overview of the ingredients for this recipe. Find the exact amounts and click the Instacart button to easily add them to your cart – all in the printable recipe card below!
Recipe Variations
Parmesan Cheese - try to use freshly grated cheese in place of what you find on the grocery store shelves. It really makes a huge difference in flavor.
Garlic Powder - garlic powder works better for this recipe than fresh garlic in this recipe since we don't add the toppings until after the breadsticks have baked.
Love a little heat? Try stirring ½ teaspoon of red pepper flakes into the butter and garlic powder mixture.
Not only can you make this recipe with refrigerator pizza dough, but you could use crescent roll sheet dough as well.
Step-by-Step Instructions
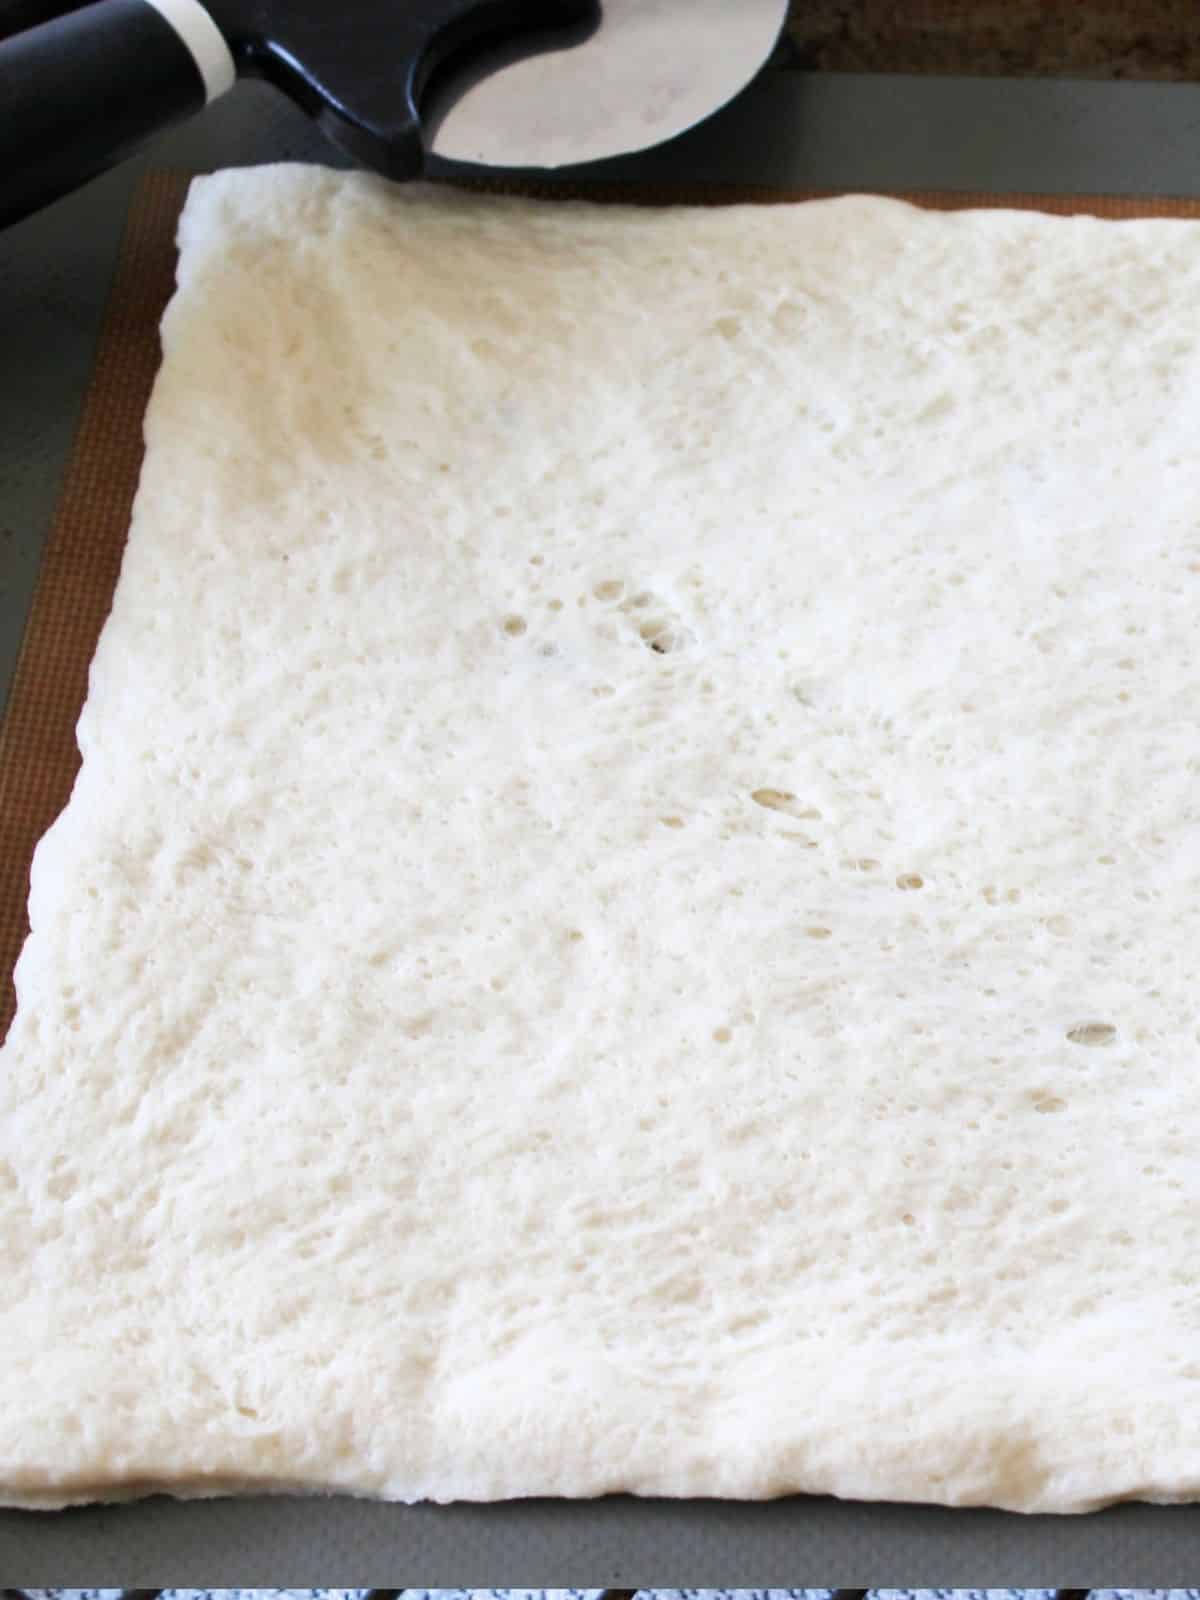
Step 1: Open the can of pizza dough. Spread it out gently on a piece of parchment paper.
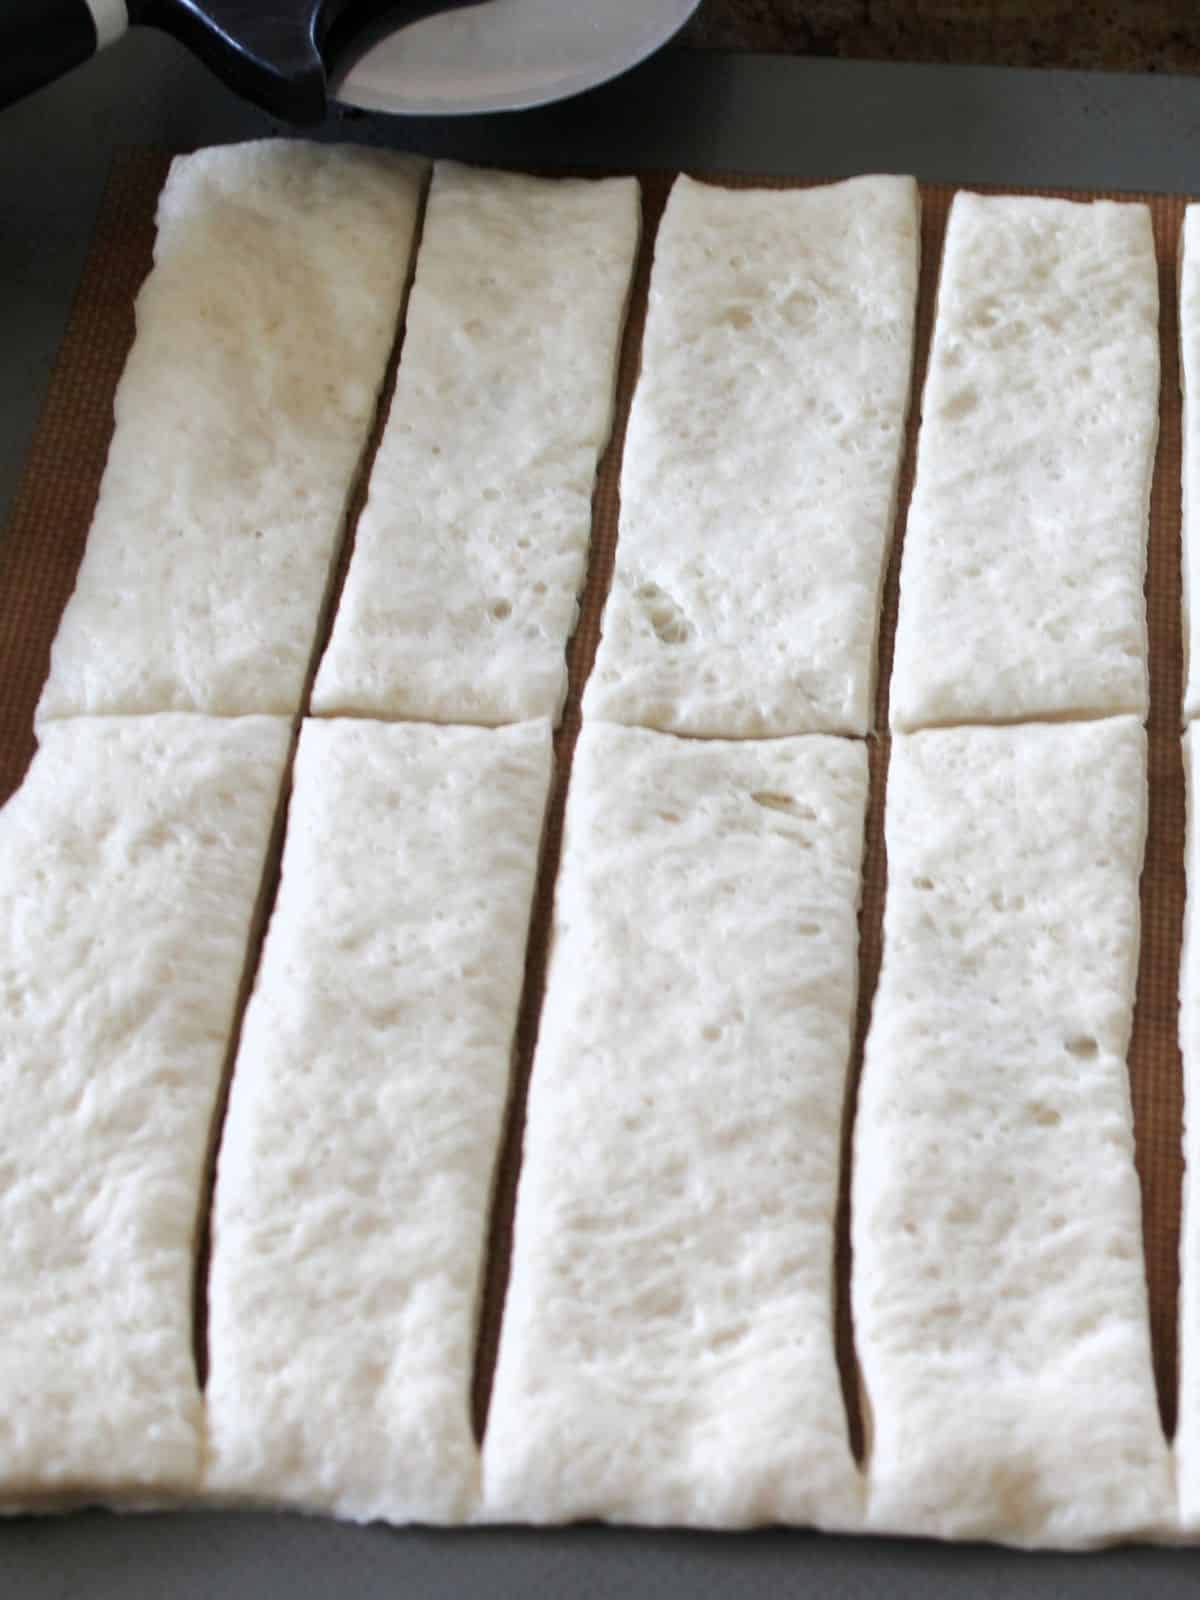
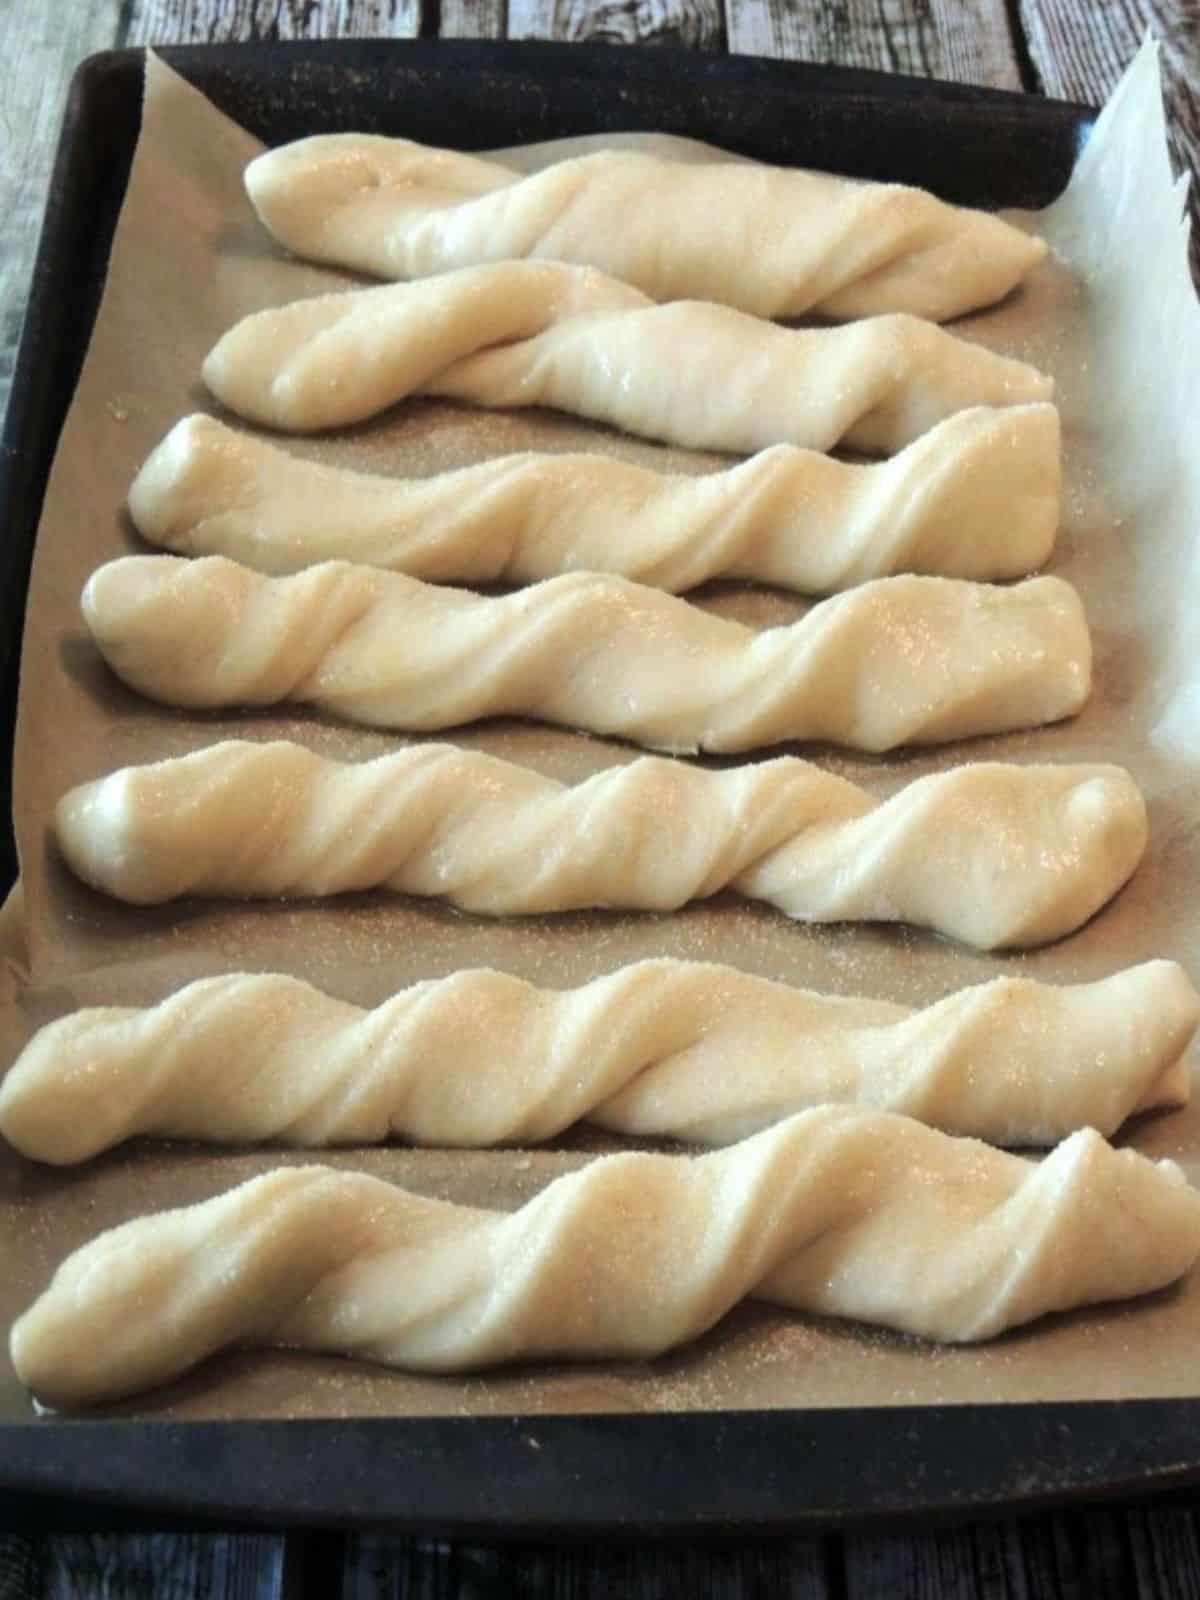
Step 2: Using a pizza cutter and carefully slice the dough into 16 even strips. Try to keep the strips as equal in size as possible.
Quick Tip
Try twisting each pizza dough strip for a fun look! Then try dipping them in my Pizza Dipping Sauce.
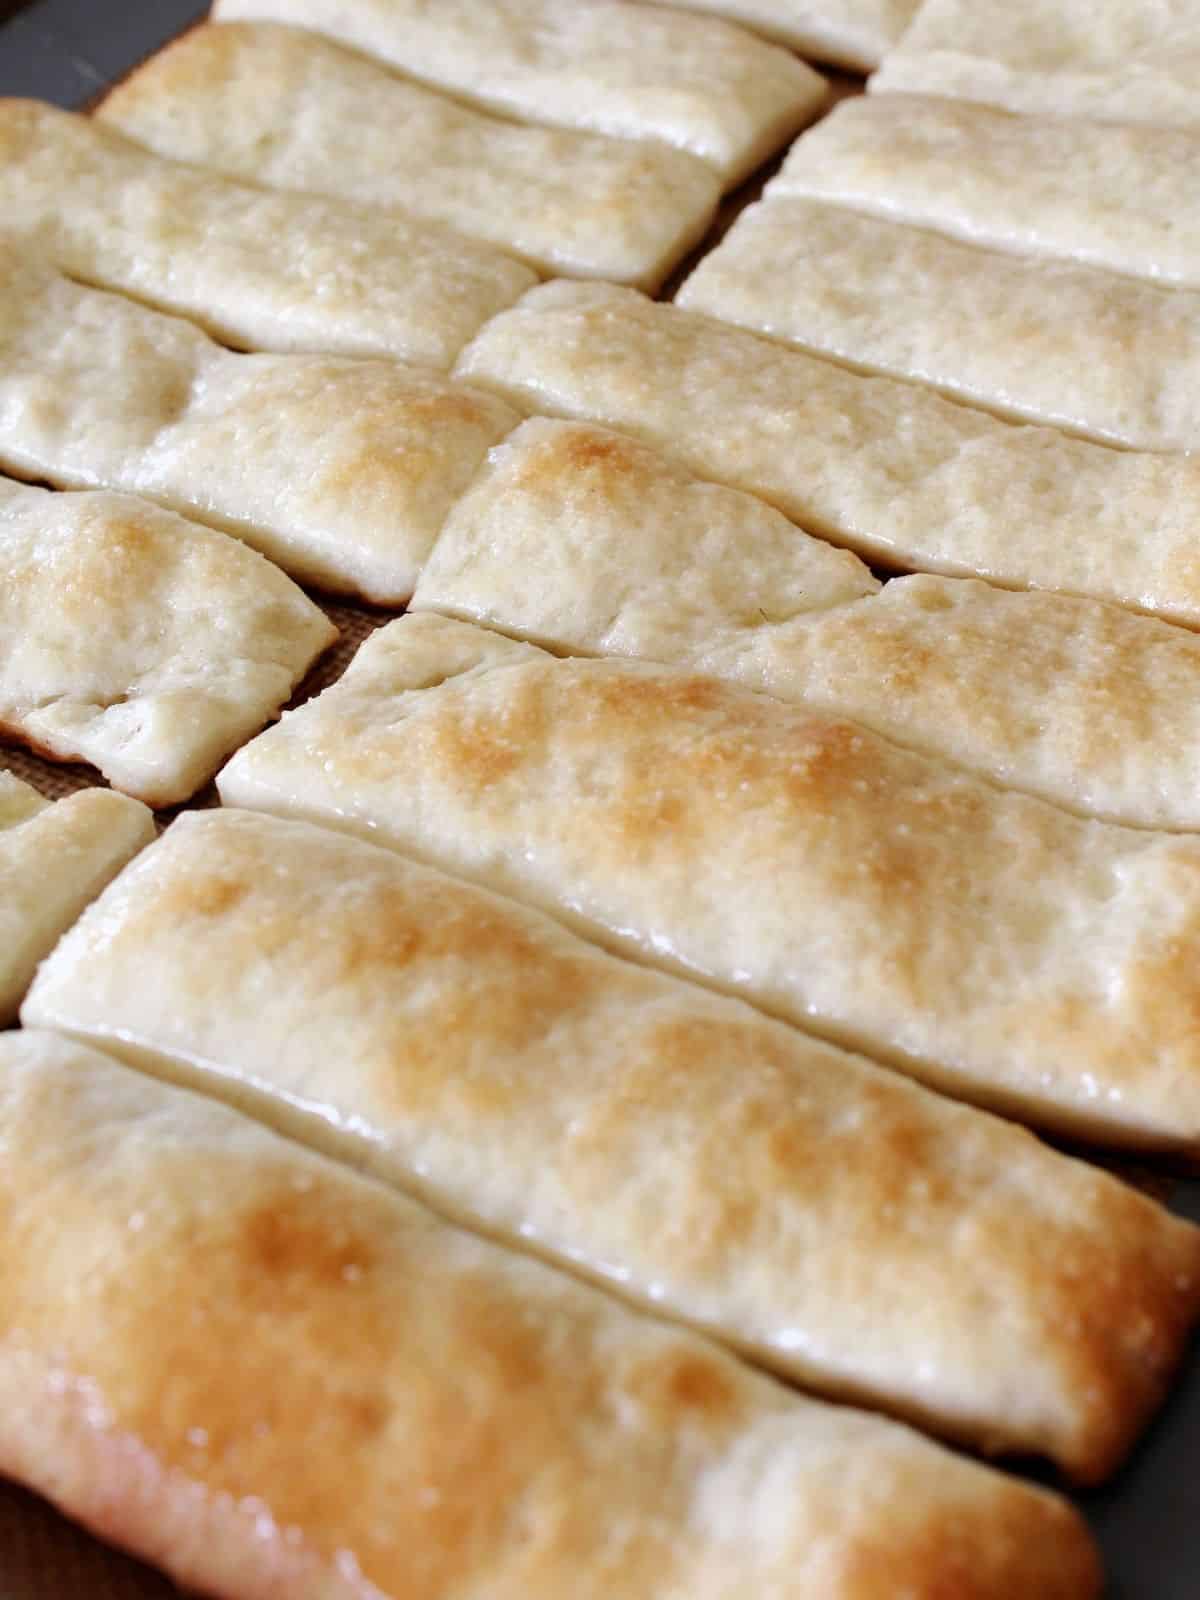
Step 3: Bake the breadsticks in your preheated 425°F oven and bake for 12-16 minutes. Keep an eye on them, and remove them when they're cooked through and have a light golden brown color.
Step 4: Melt the butter in the microwave and the stir in the garlic powder. Brush the garlic butter on top of the baked breadsticks.Top with the freshly grated Parmesan cheese.
LOVE this recipe? SAVE it for Later!
❤️Tap the heart icon in the lower right corner to add the recipe to your recipe box for easy access anytime.
If you made it, leaving a star rating or quick review is always appreciated and helps other readers too.
Warm from the oven, these Garlic and Parmesan Cheese Breadsticks are made using refrigerator pizza dough, butter, garlic and freshly grated Parmesan cheese.
Nutritional estimates are provided using an online calculator and is an estimate per serving. Calorie accuracy isn't guaranteed.
Tried this recipe?Leave a comment and star rating!
This recipe has been updated since it first appeared in 2013 with new photos, information and a new printable recipe card that includes nutritional information. I hope you enjoy the updates as much as I enjoyed working on them!
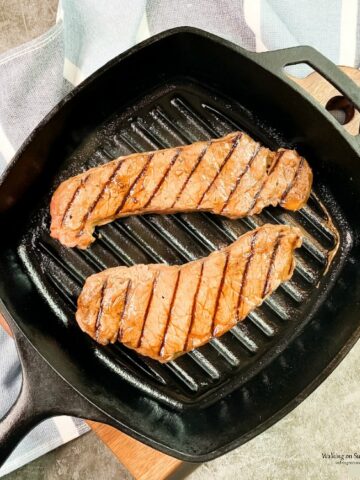
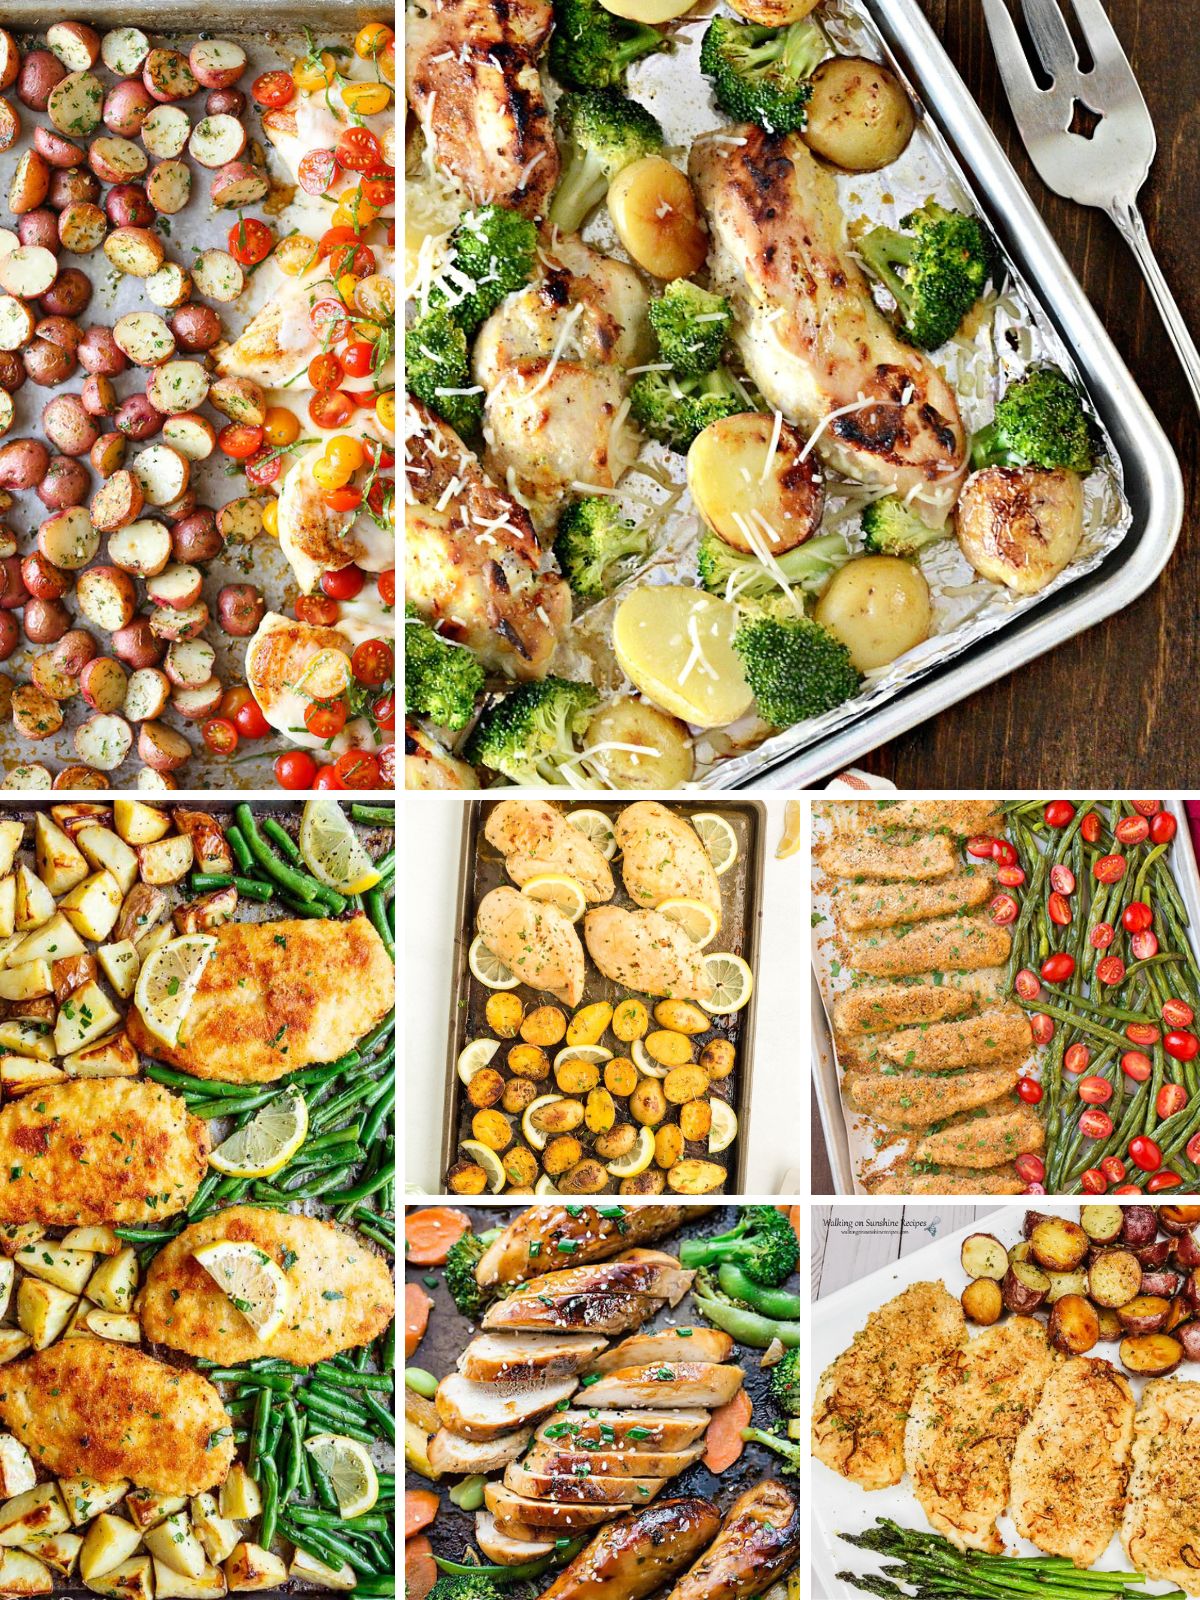
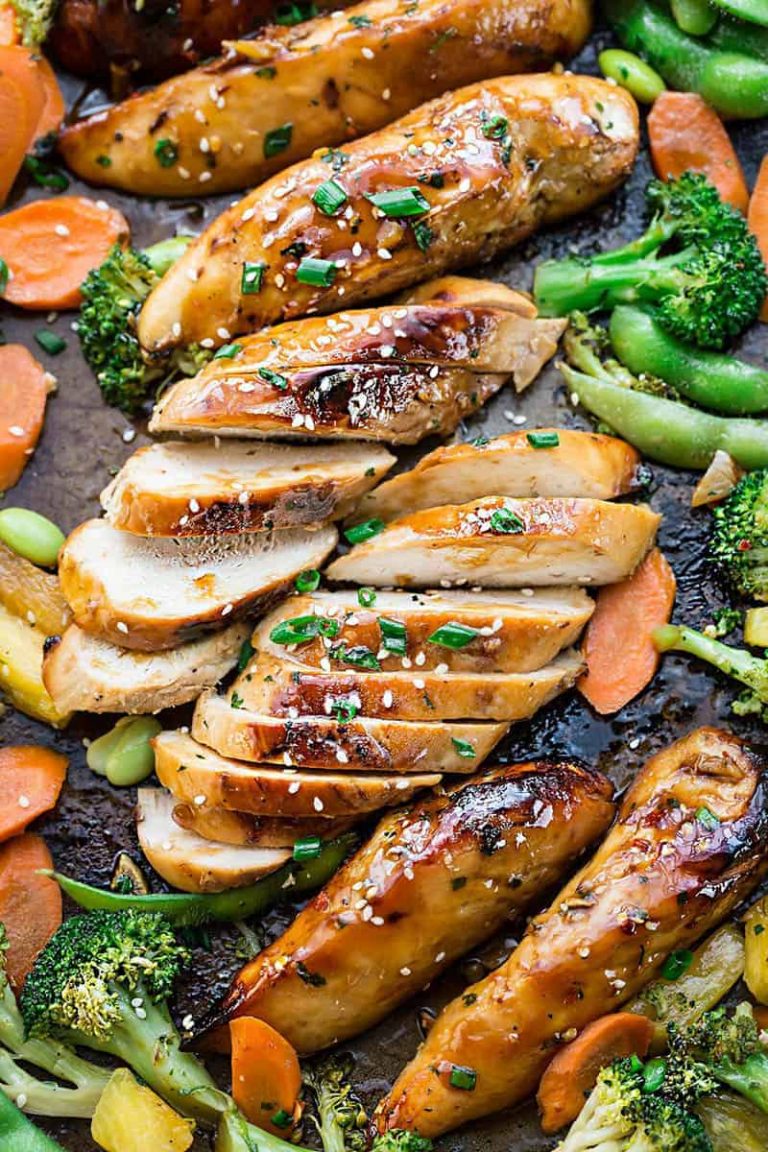
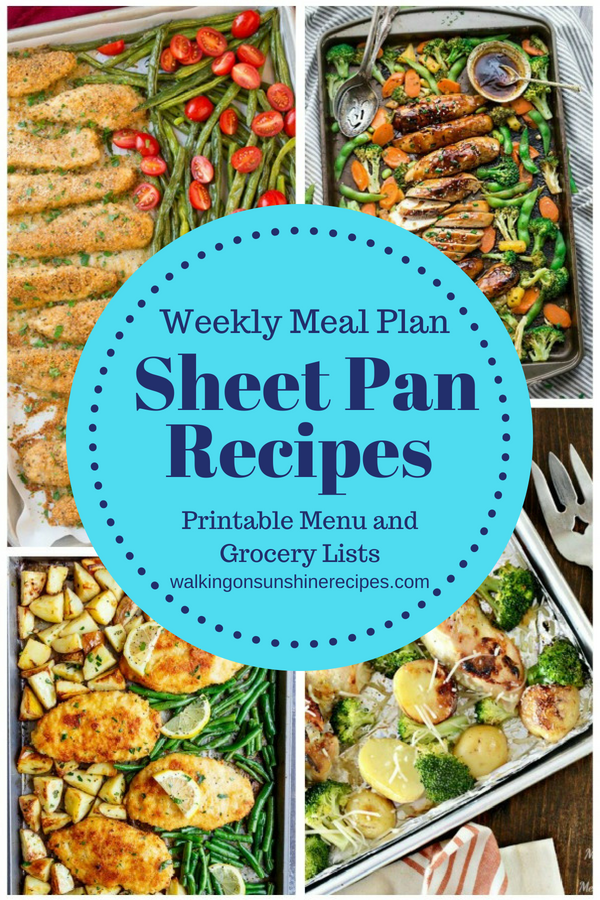
Whether you're feeding yourself or your whole family, these sheet pan dinners will give you a fresh and flavorful meal that everyone will enjoy! Plus, cleanup is quick and simple!
There won't be a ton of pots and pans needed for these recipes featured so all you need to do is toss your one-pan in the dishwasher!
Check out the other Weekly Meal Plans available for you and grab the FREE Pantry List Essentials Printable below!
Gone are the days of slaving over a hot stove using multiple pots and pans to cook dinner. Sheet pan recipes make it easy to create tasty meals without any guesswork or complicated instructions.
All you need is one pan, your favorite protein like steak or chicken, potatoes, and your favorite vegetables and dinner is almost ready!
Make sure you add the softer vegetables in stages, like I did with the asparagus. Add them about halfway through the cooking.
At halfway through the cooking, you should always flip the protein to ensure even cooking.
Most of the time you can cook everything on one pan, but sometimes two pans is better.
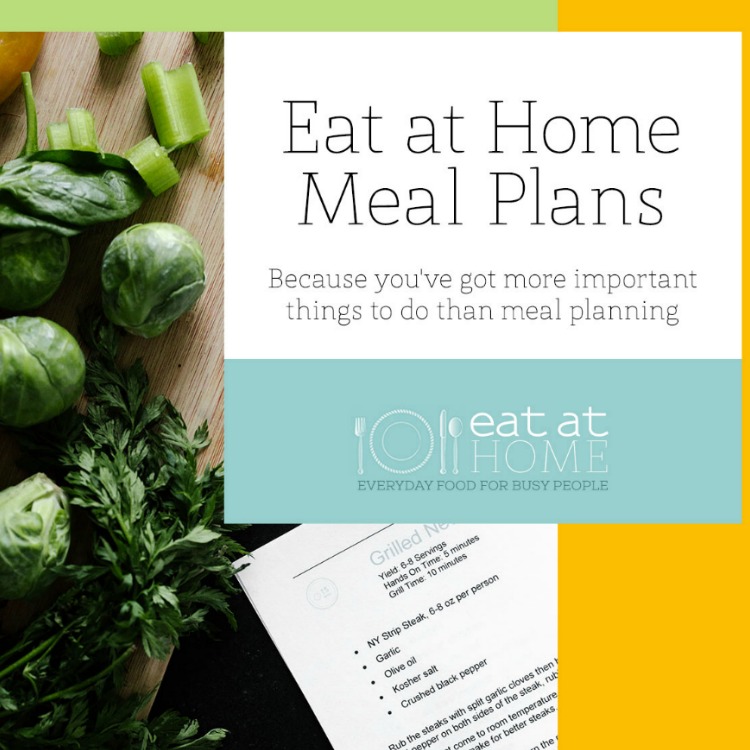
Become a Member - 25% Off Meal Plans!
This post contains affiliate links, your cost is the same, but I earn a commission when you shop through them. For more information, click here.
If you're looking for more detailed meal plans with grocery lists, you're going to love Eat at Home Menu Plans. The Eat at Home Menu Planning does all the work for you. For only a few dollars per week and you get four different menu plans for every week.
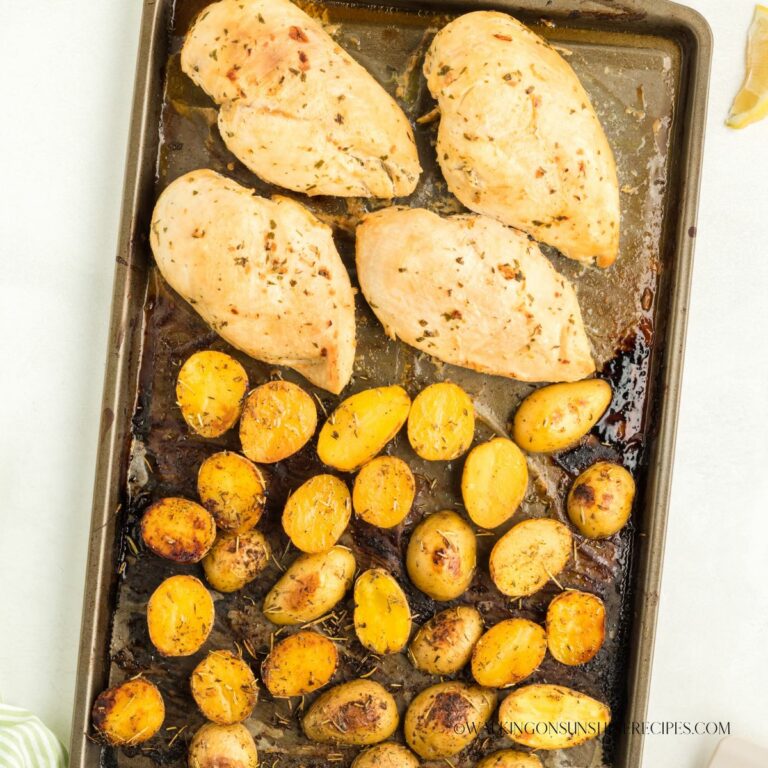
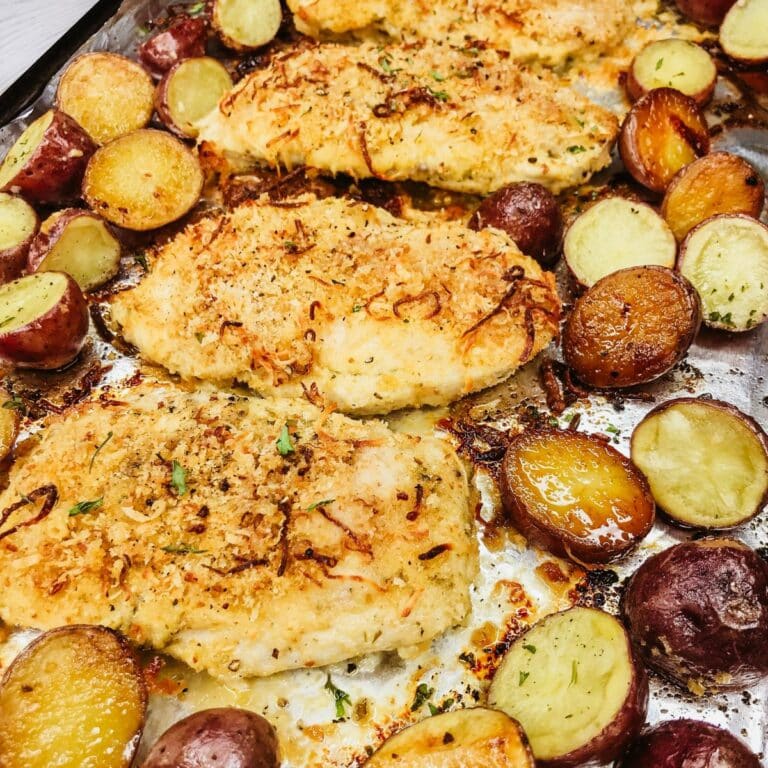
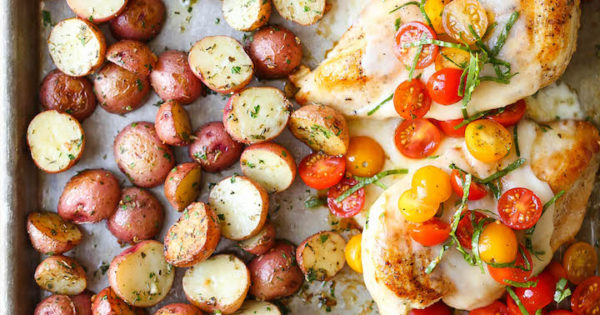
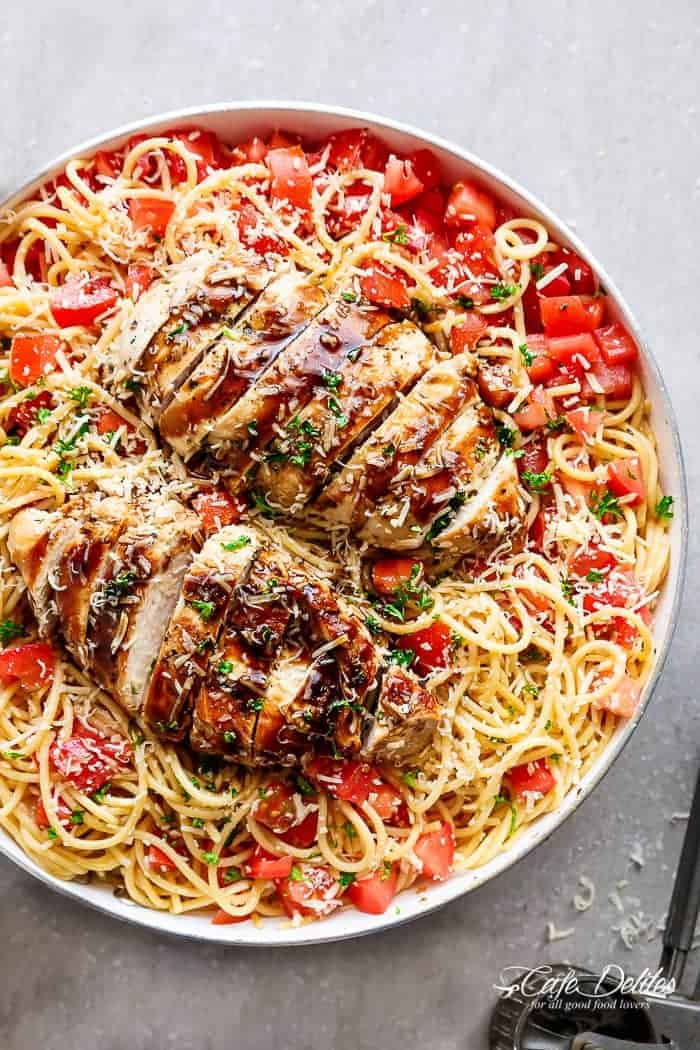
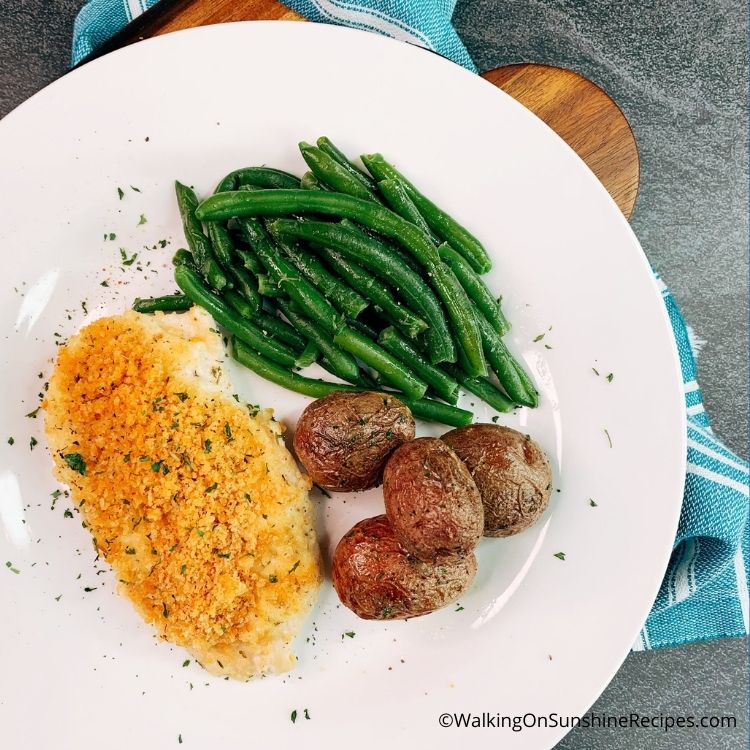
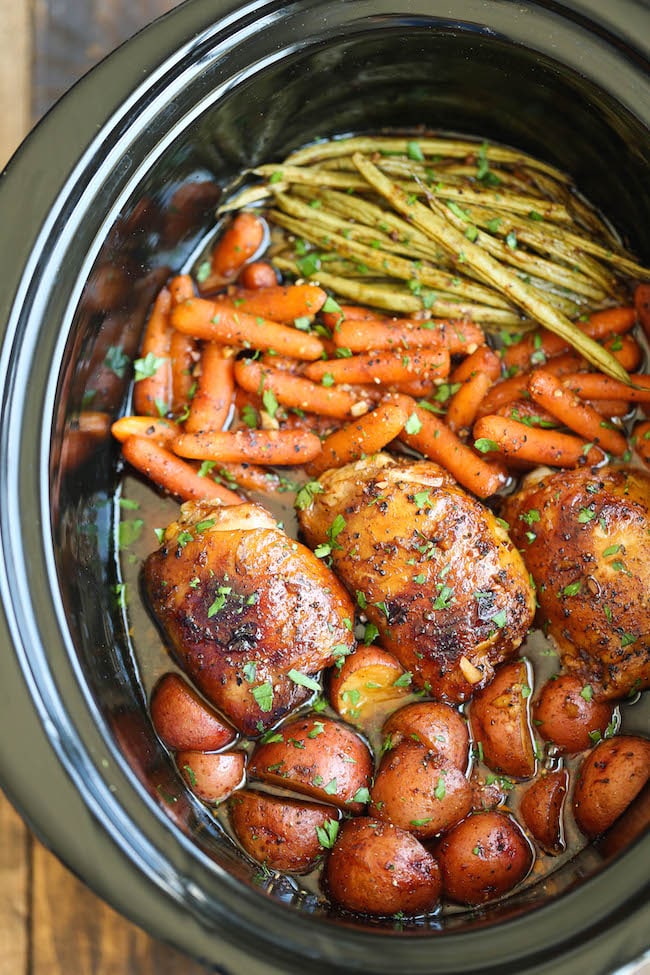
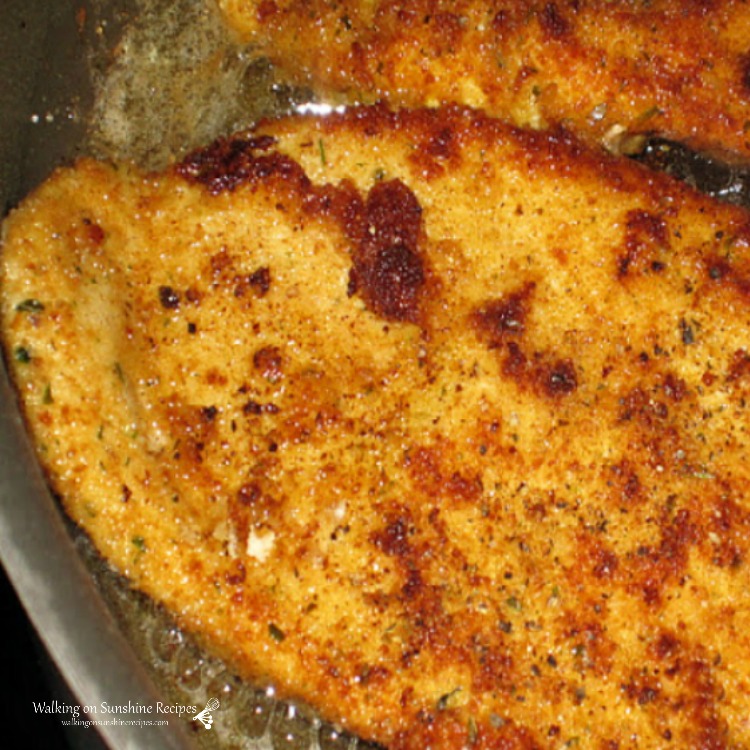
Enjoy a flavorful, fuss-free dinner with this delicious sheet pan chicken and potato meal! A simple marinade adds mouthwatering flavor to the tender cutlet paired nicely with roasted potatoes. With minimal prep time and effortless clean up, you can have your weeknight supper on the table in no time flat!
This chicken is packed with flavor and it goes perfectly with the roasted green beans and fresh tomatoes. It’s simple enough for a weeknight meal yet elegant enough to serve to friends over the weekend. Plus it’s a meal the whole family can agree on. Even the kids will love it!
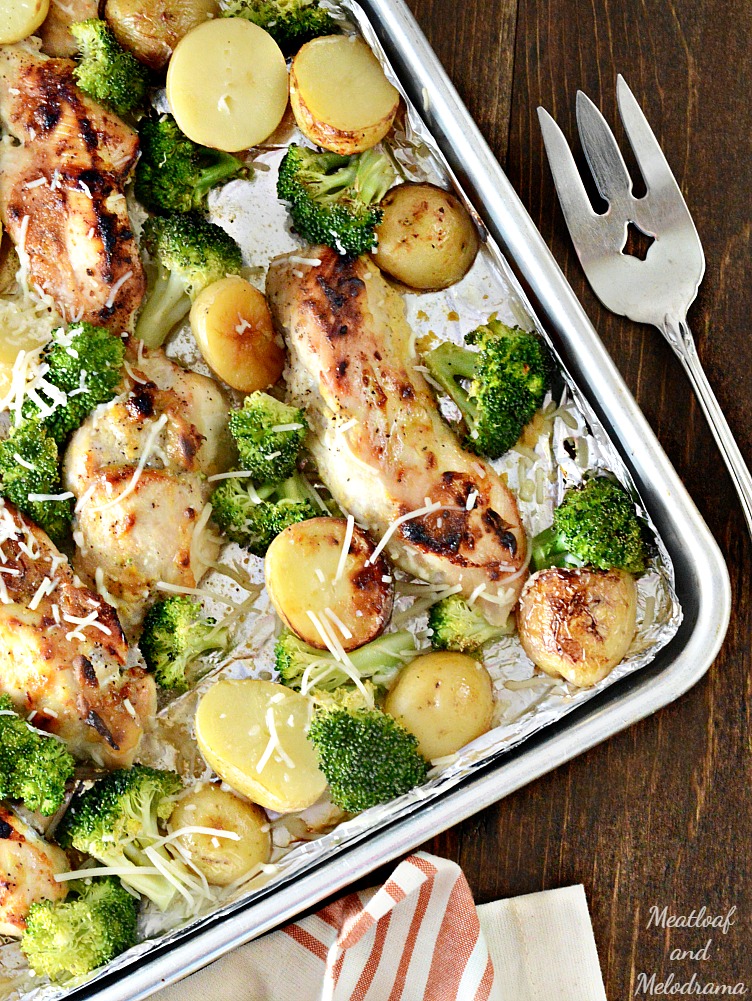
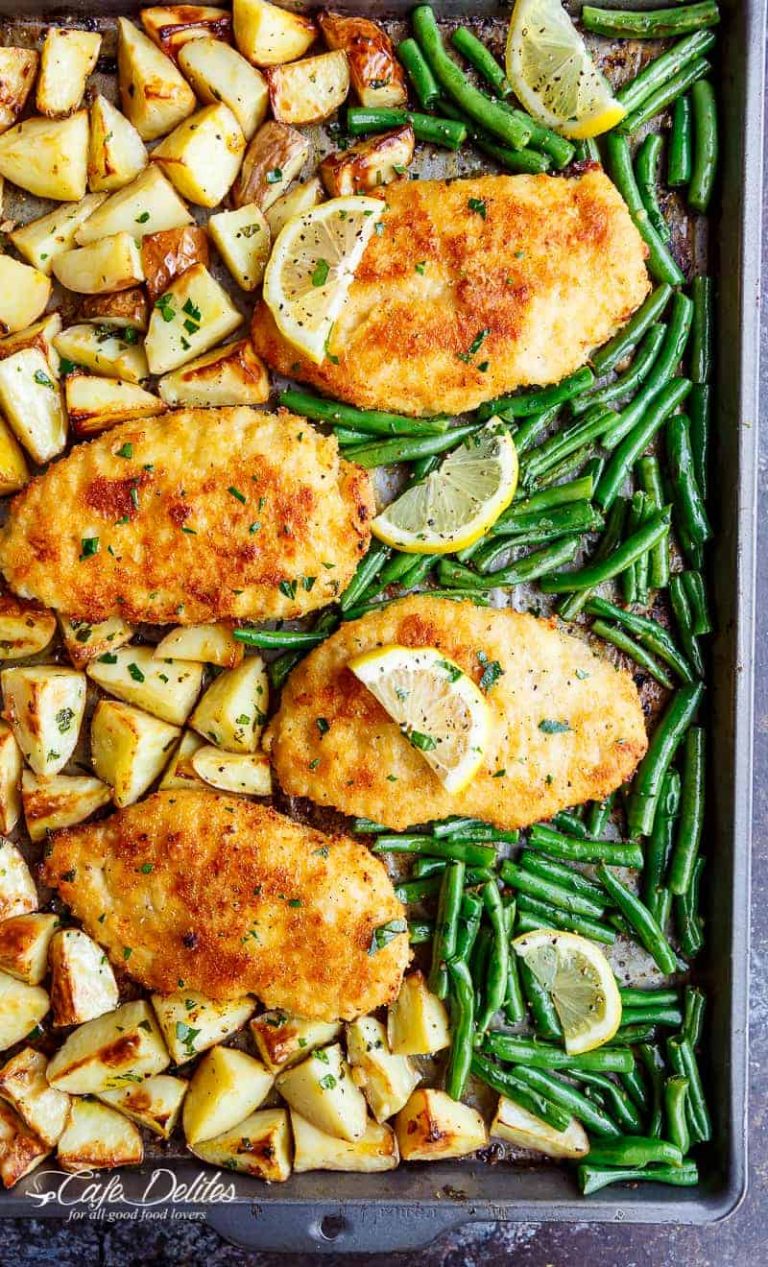
Oven baked and crispy sheet pan lemon Parmesan garlic chicken & veggies is a complete dinner, with potatoes and green beans smothered in a garlic butter sauce!
This recipe has been updated since it first appeared in 2019 with new photos, and information. I hope you enjoy the updates as much as I enjoyed working on them!
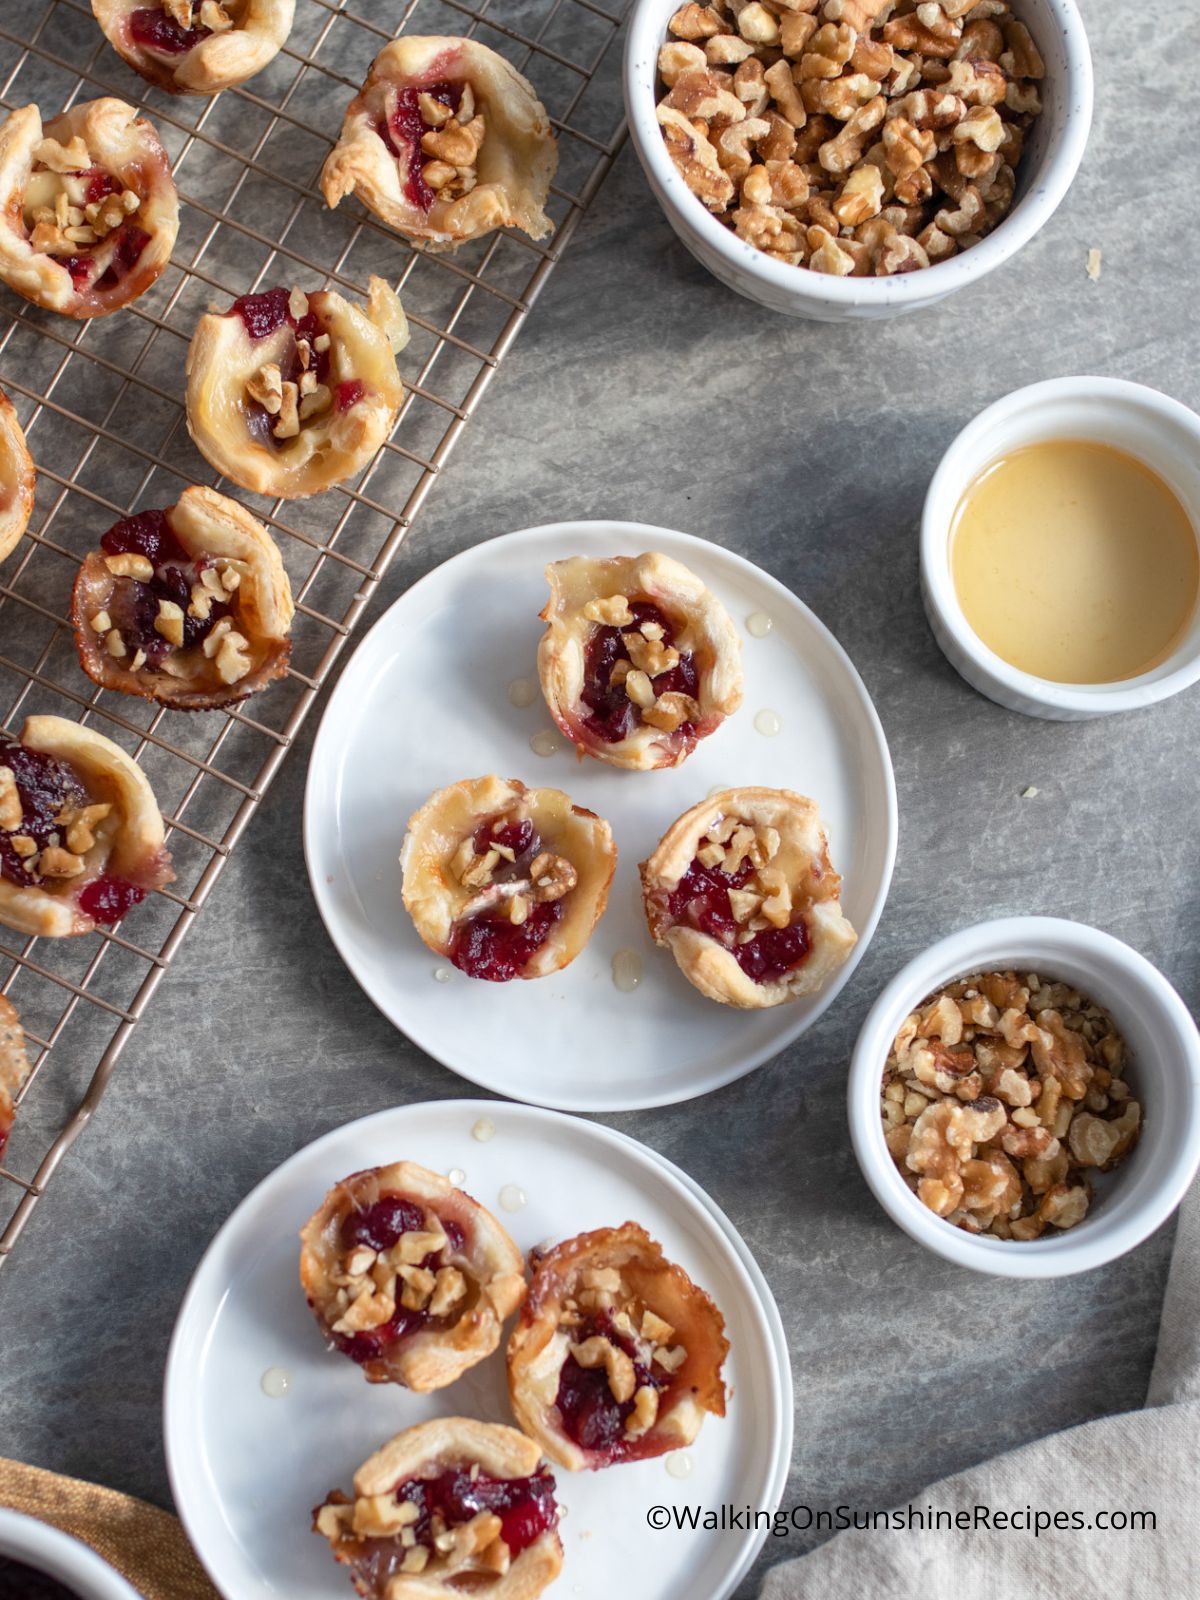
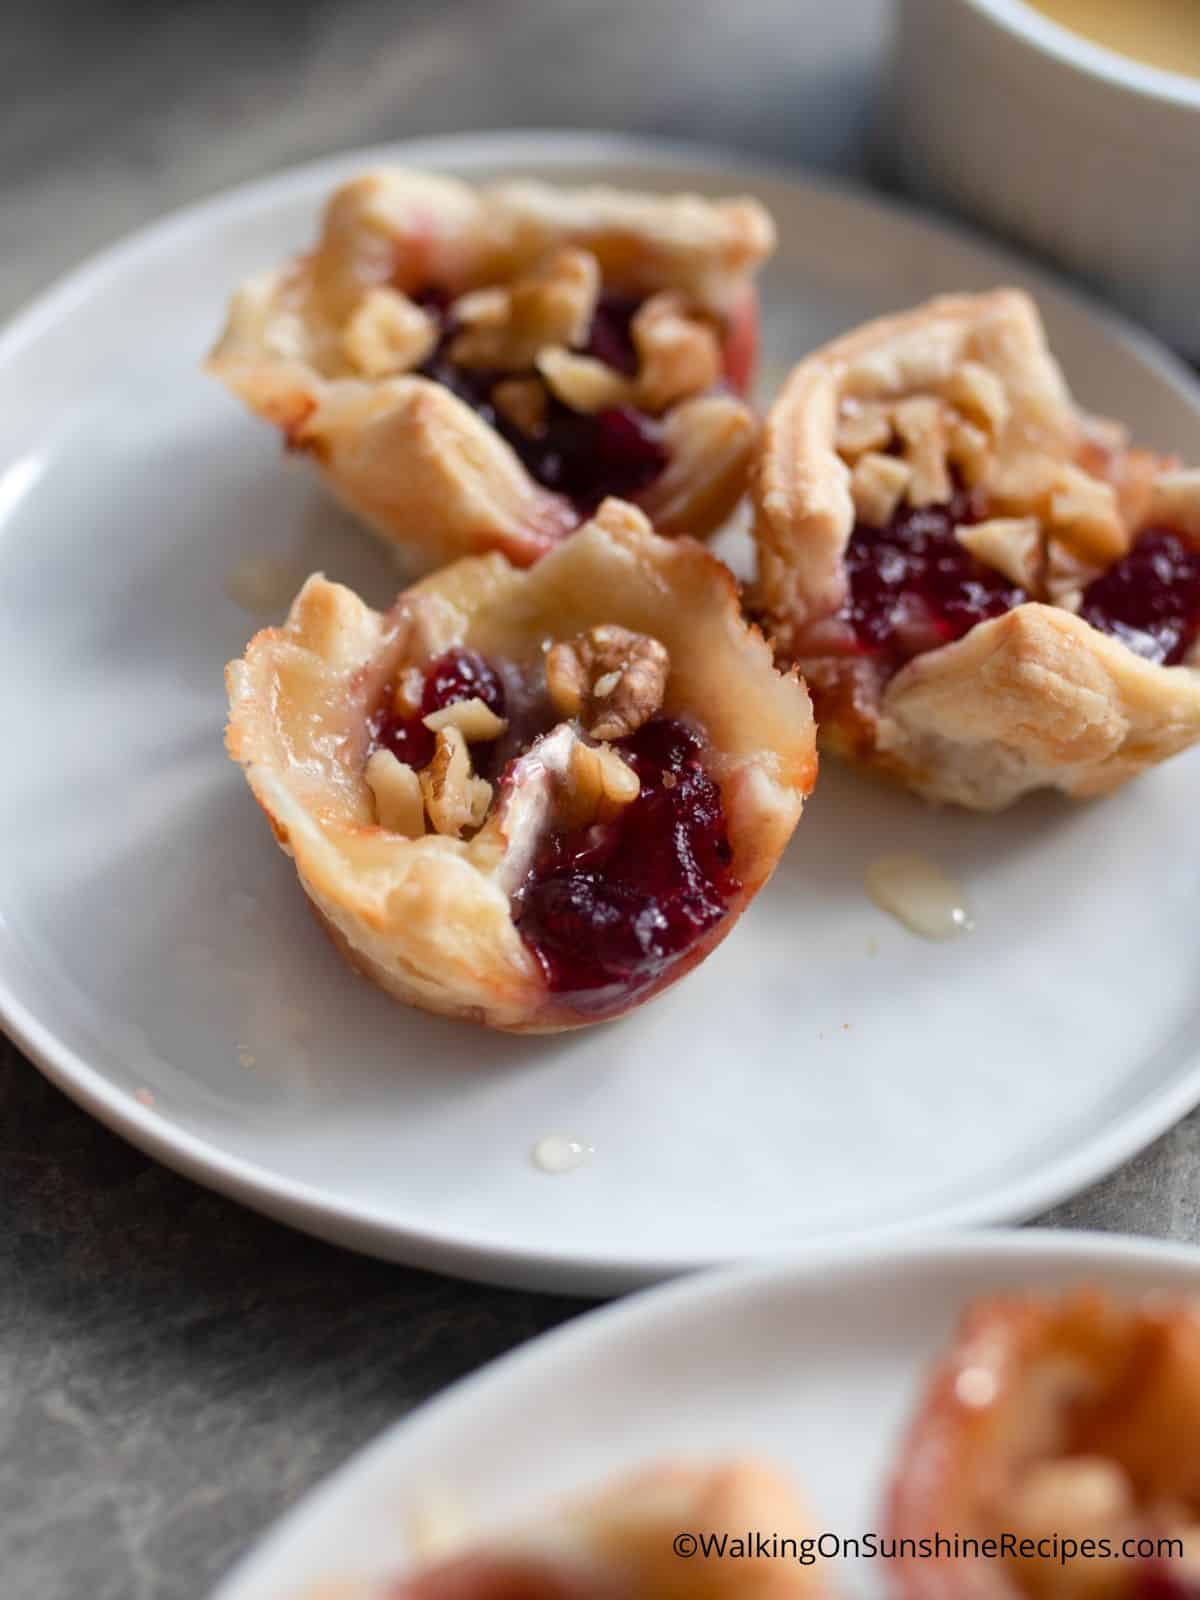
Whether you're hosting a casual dinner party or an family an extravagant holiday affair, these Puff Pastry Bites Appetizer will certainly delight your friends and family!
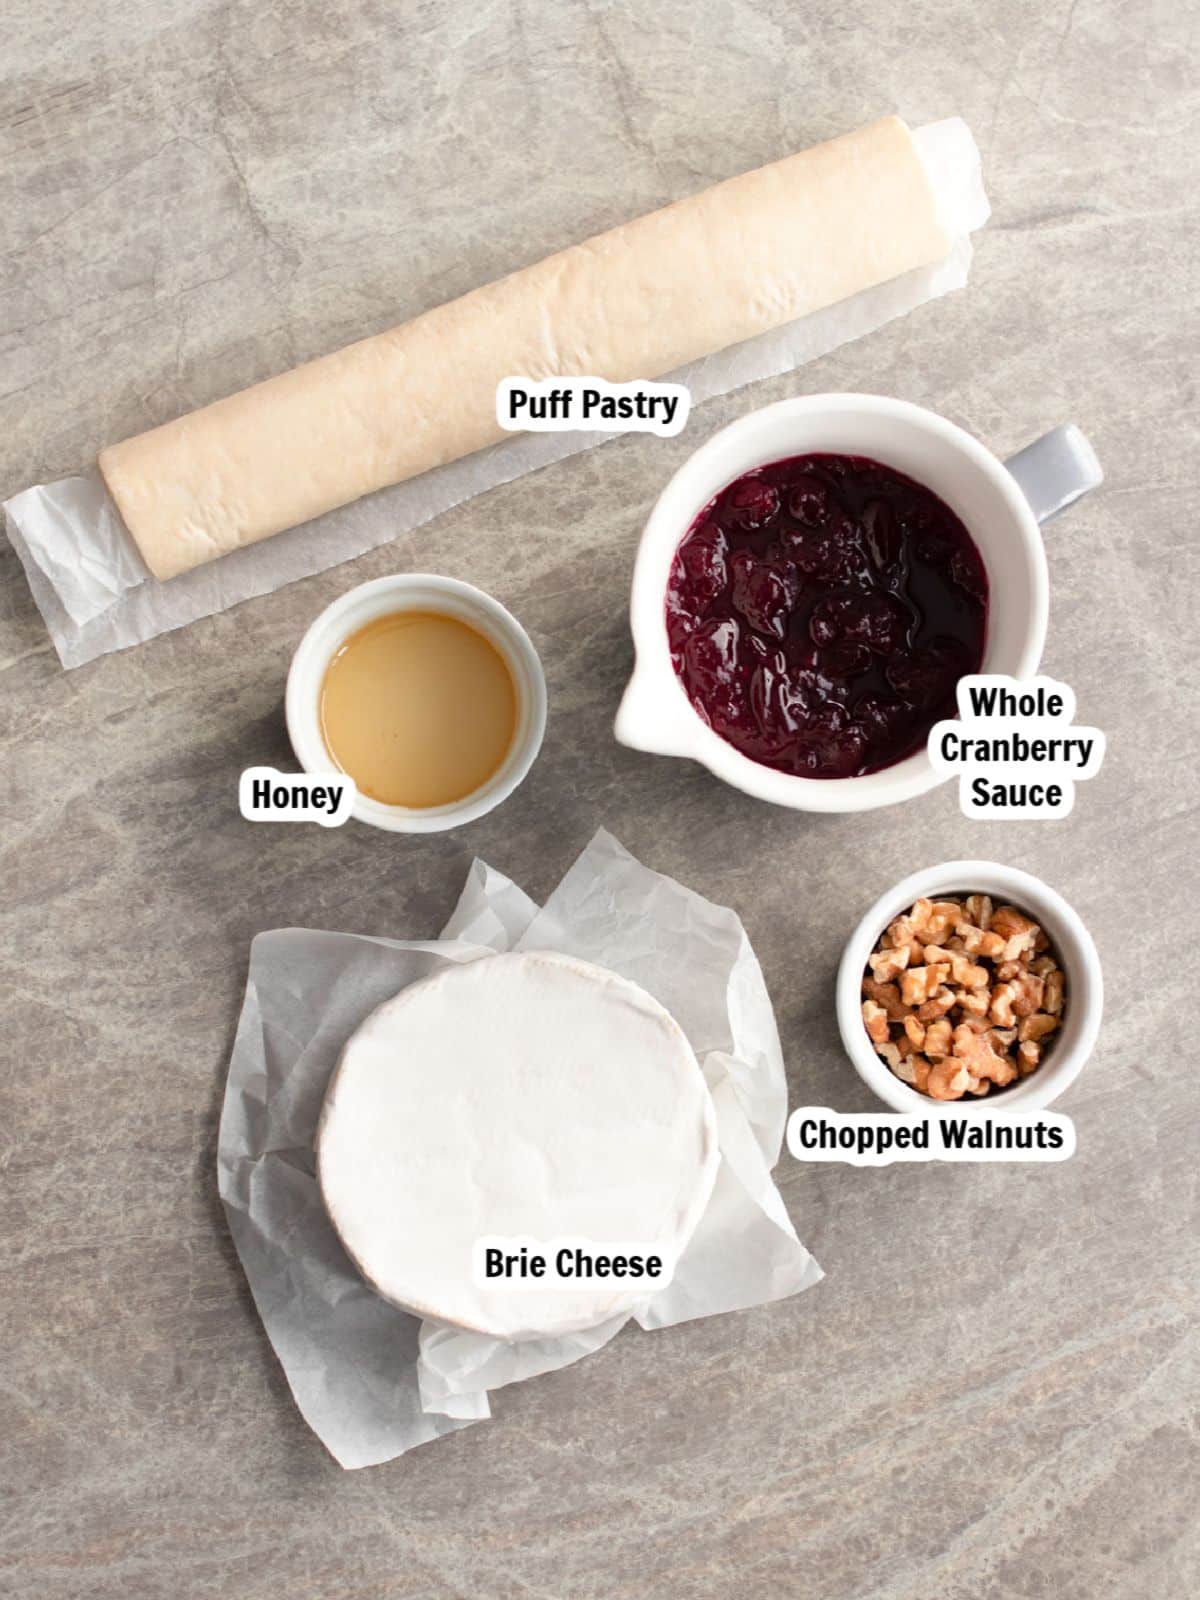
The combination of whole berry cranberry sauce and creamy brie cheese nestled in a flaky pastry will have everyone asking for seconds! Plus, you can easily prepare ahead of time for an effortless entertaining experience.
So get ready for some serious compliments because this is one holiday dish that will definitely hit the spot!
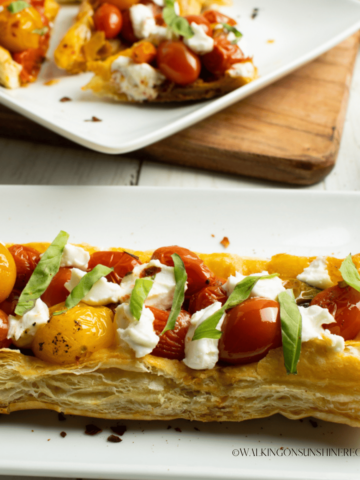
Check out all my other puff pastry recipes for even more easy recipes to make for entertaining!
The next time you're entertaining, why not whip up a delicious puff pastry appetizer made with brie cheese and cranberries? They're easy to make and look great with other appetizers.
This easy-to-make appetizer is the perfect finger food for any gathering. It's a savory, melt-in-your-mouth treat that is sure to impress everyone.
This is the perfect combination of texture and flavor that will have everyone coming back for more. Plus, you can prep ahead of time so there's no need to stress over last minute cooking when your guests arrive.
Using puff pastry for any recipe requires a little bit of planning. The best way to defrost puff pastry is in the refrigerator overnight.
Simply thaw according to package instructions and roll out following the directions below.
If you are short on time, you can use the microwave. Place the pastry on a plate and heat it on low power for 10-second intervals, flipping it over after each interval until it is soft enough to roll out or press into shape.
If you do choose to use the microwave method, make sure not to heat for too long or it will become brittle and difficult to work with.
Here's a quick overview of the ingredients for this recipe. Find the exact amounts and click the Instacart button to easily add them to your cart – all in the printable recipe card below!
Recipe Variations and Substitutions
Try with strawberry or raspberry jam instead of cranberry sauce.
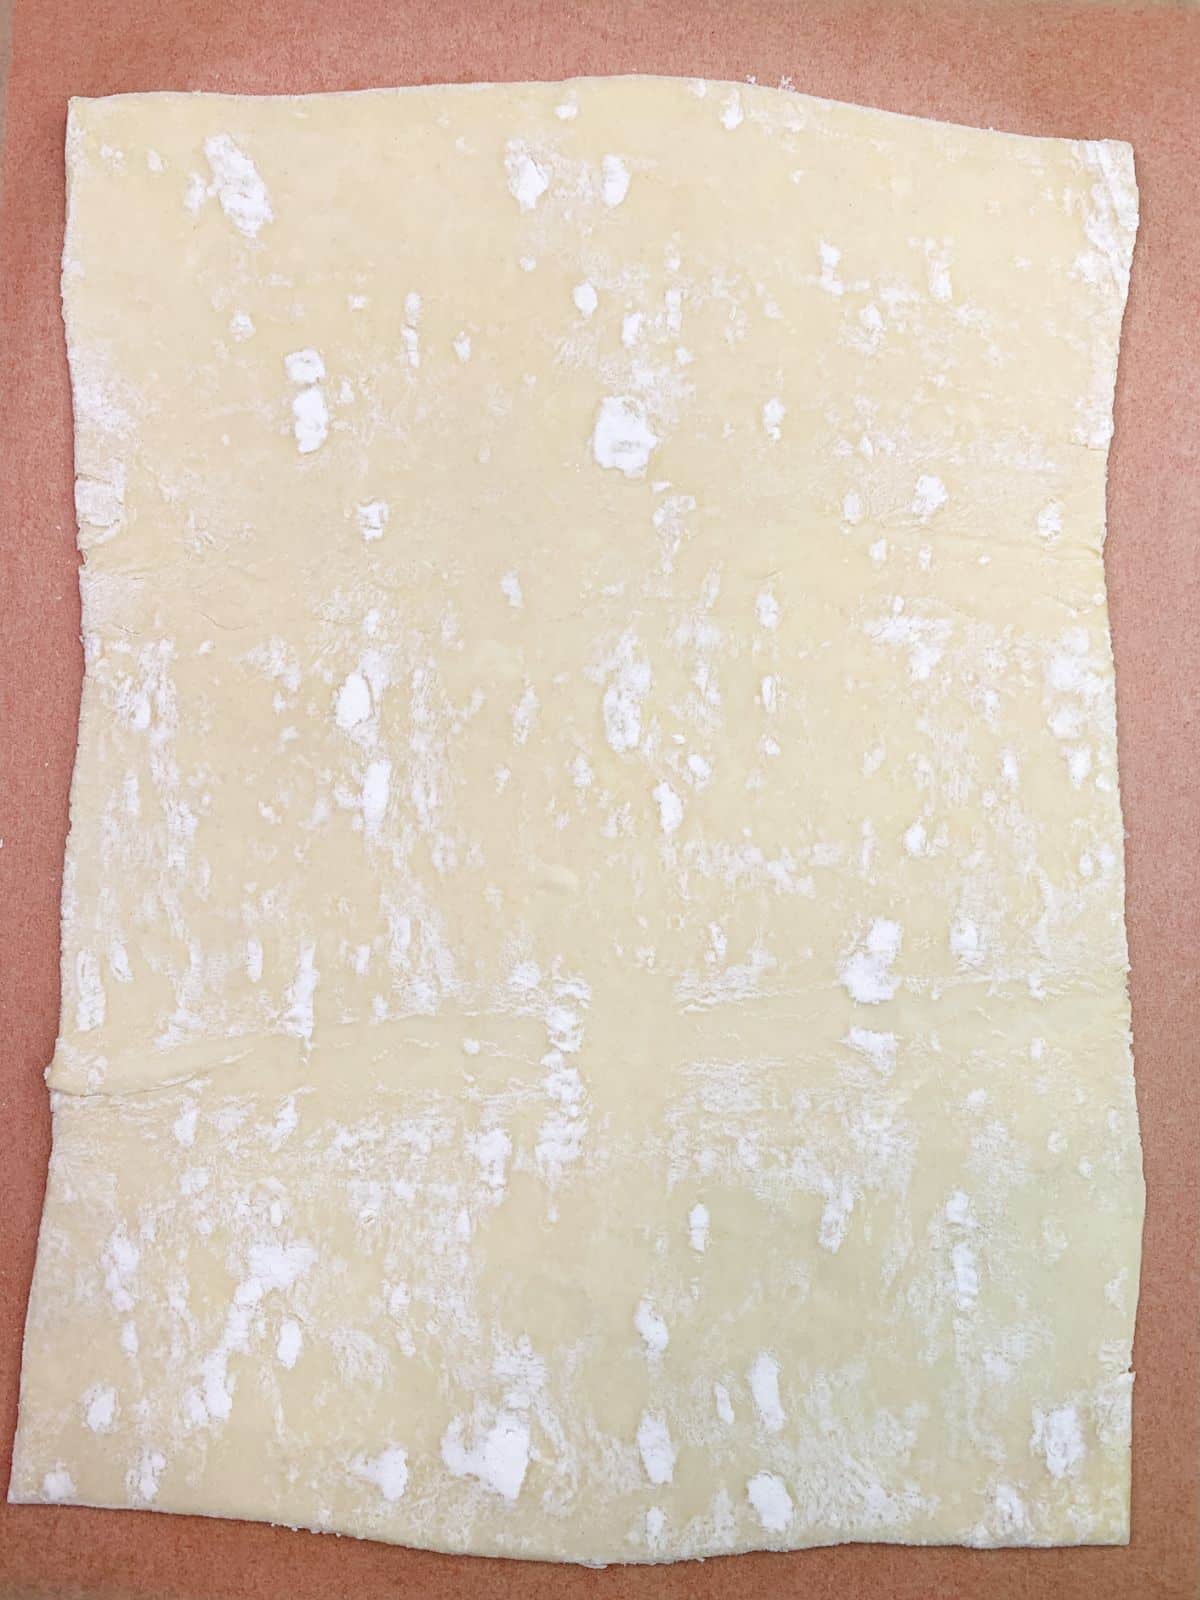
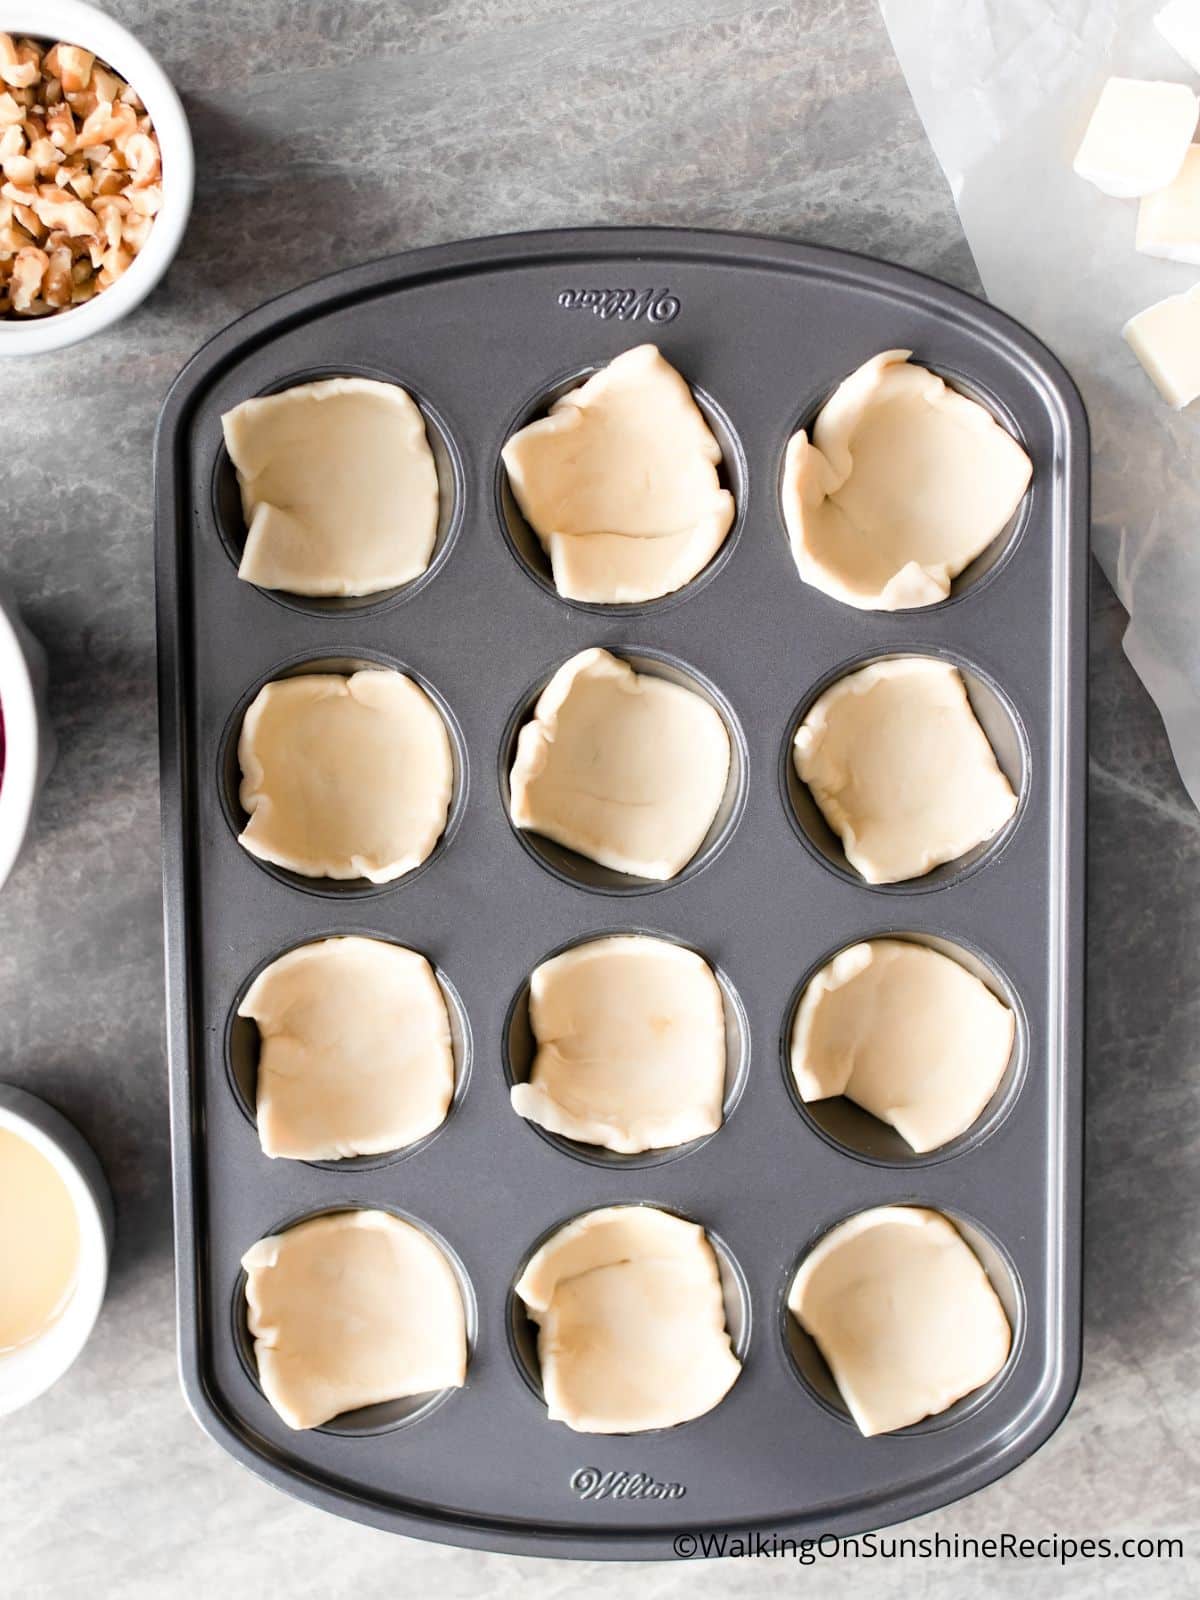
Step 1: Gently roll out the creases of the puff pastry on a sheet of parchment or a lightly floured surface. Cut the puff pastry in half both ways so you have four pieces.
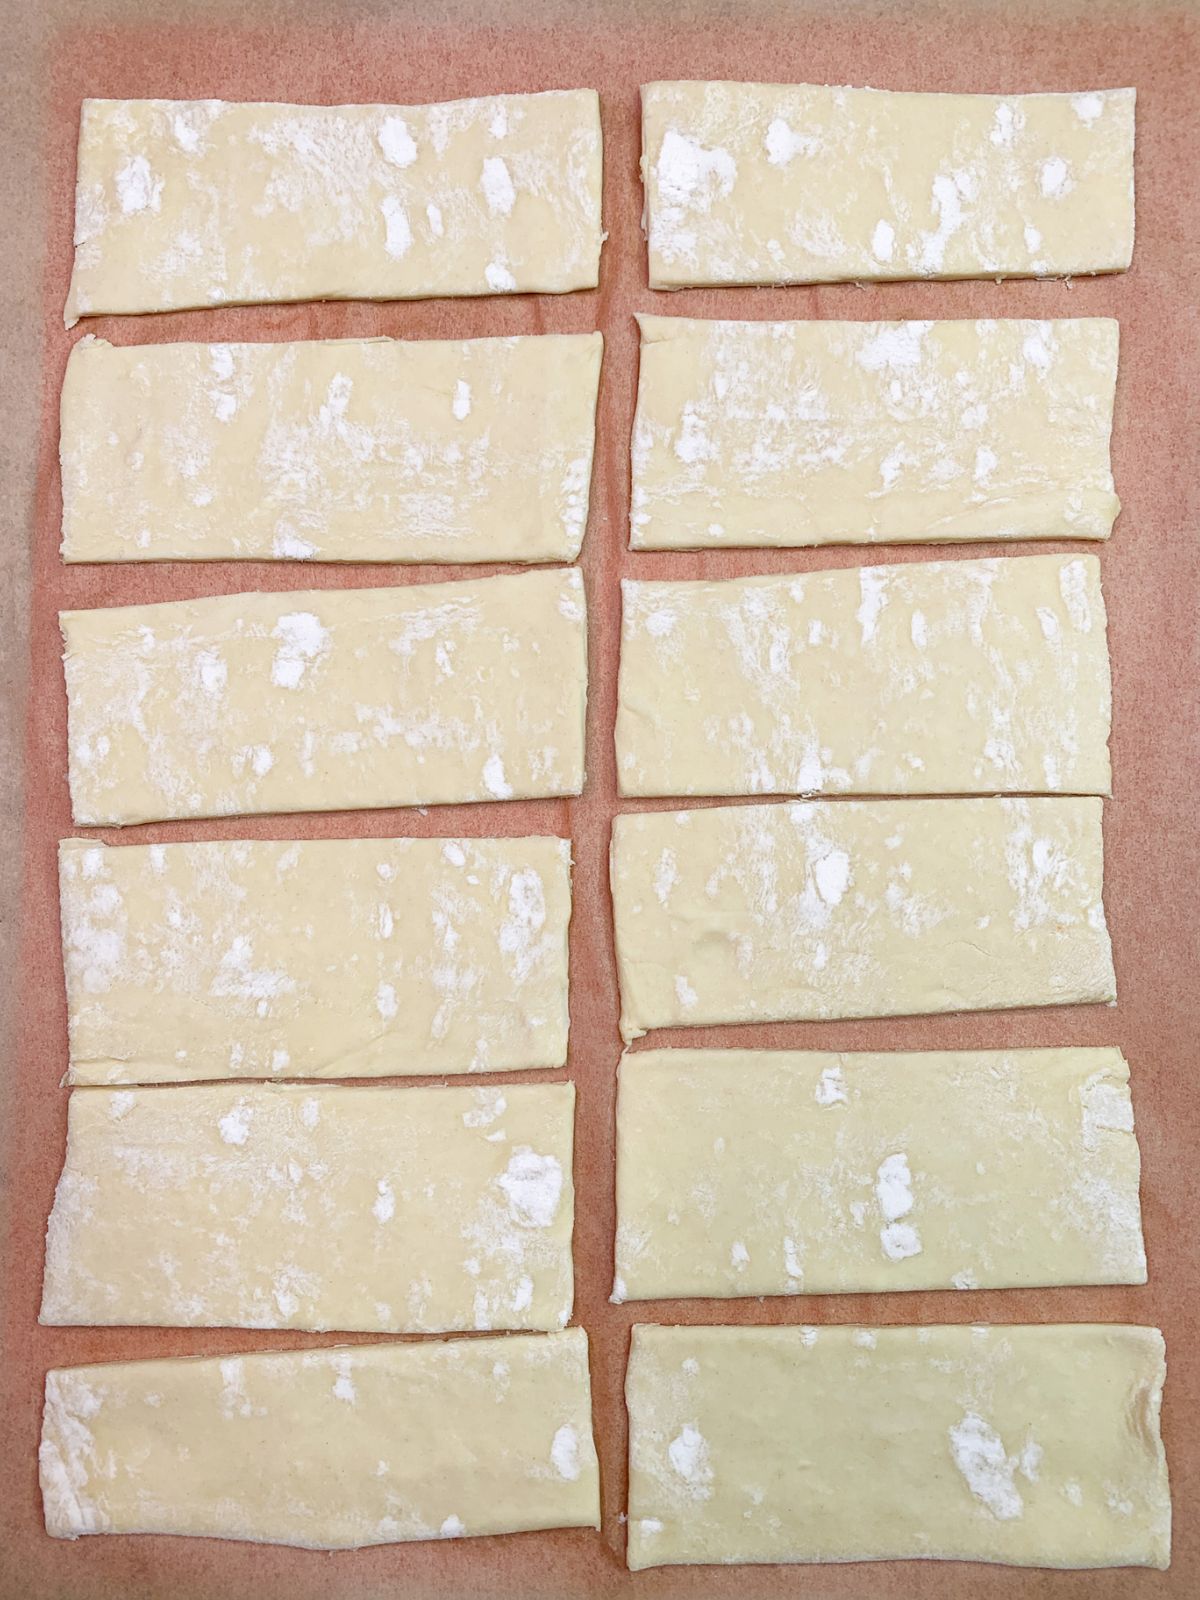
Step 2: Cut each of the quarters into 3 pieces, so that you now have 12 pieces. Now cut each of those 12 pieces in half for a total of 24 pieces.
Step 3: Spray your muffin pan with non-stick baking spray and press a square of puff pastry into each well. Use a tart tamper to gently press the pastry into the well of the pan.
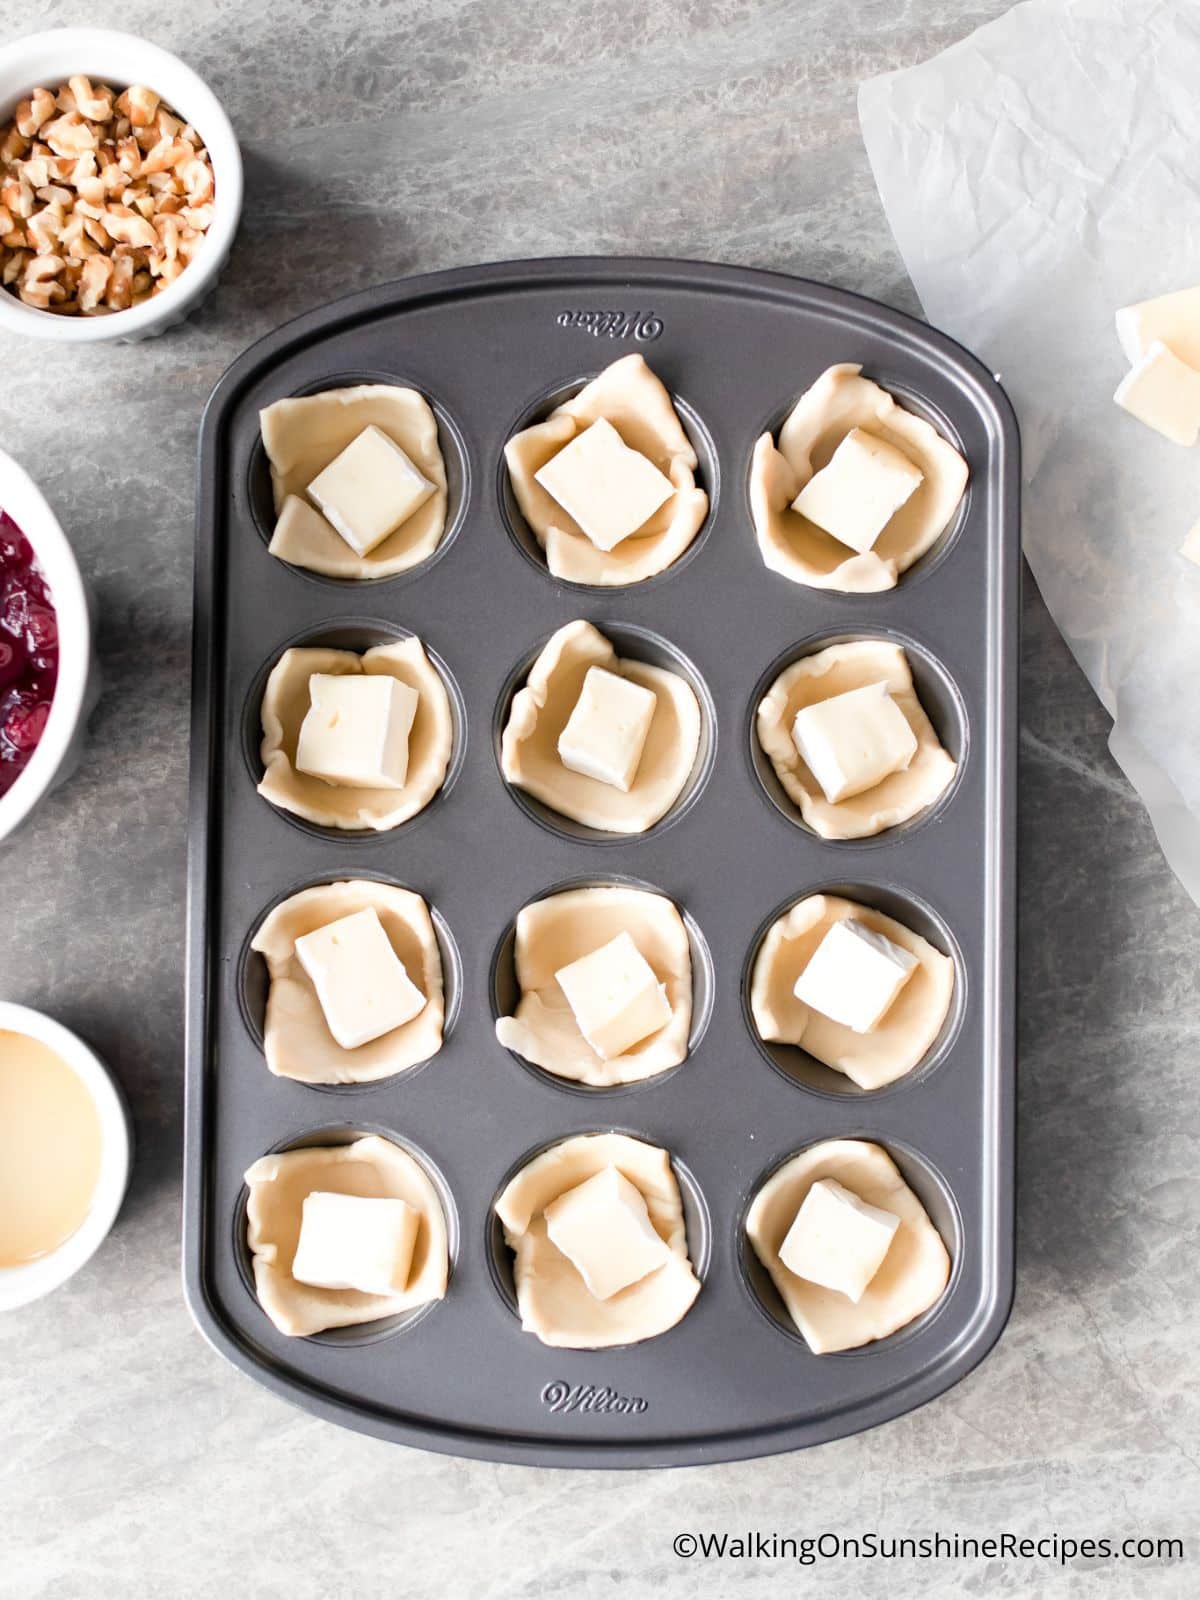
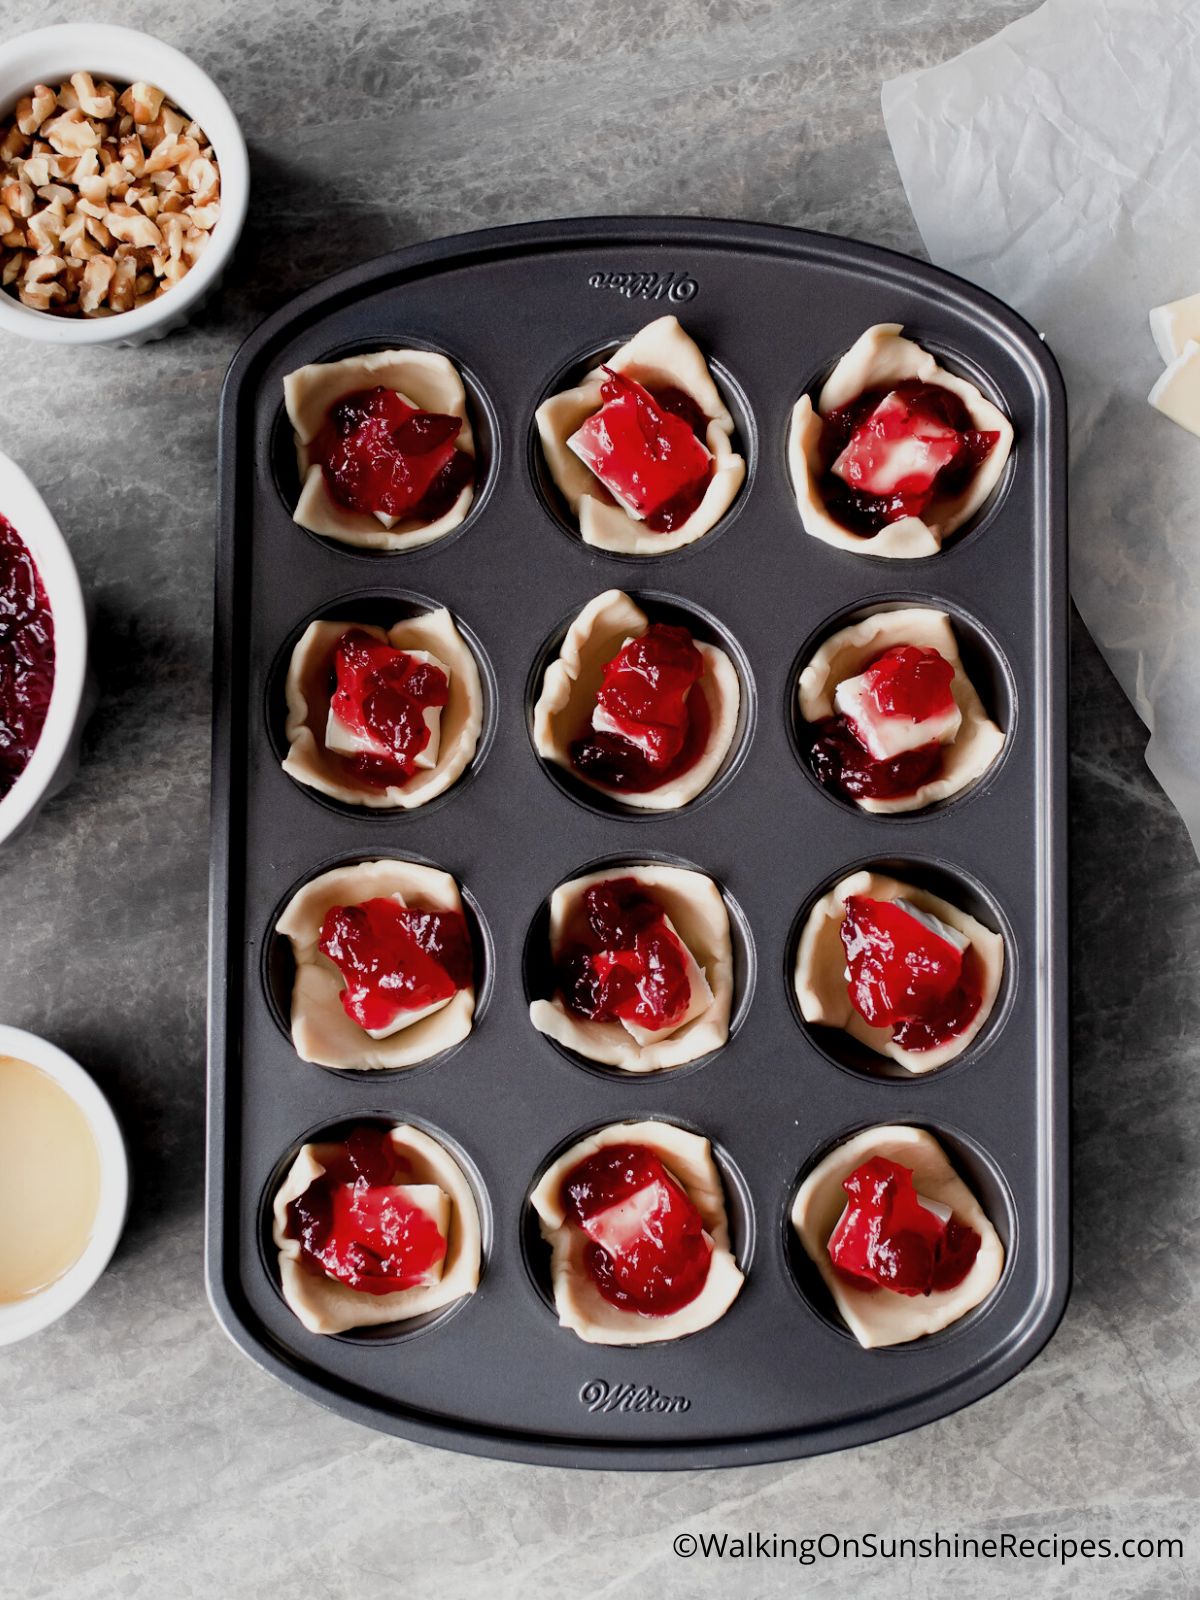
Step 4: Cut the brie into cubes and place a piece in each cup. Add some cranberry sauce on top.
Baking Instructions
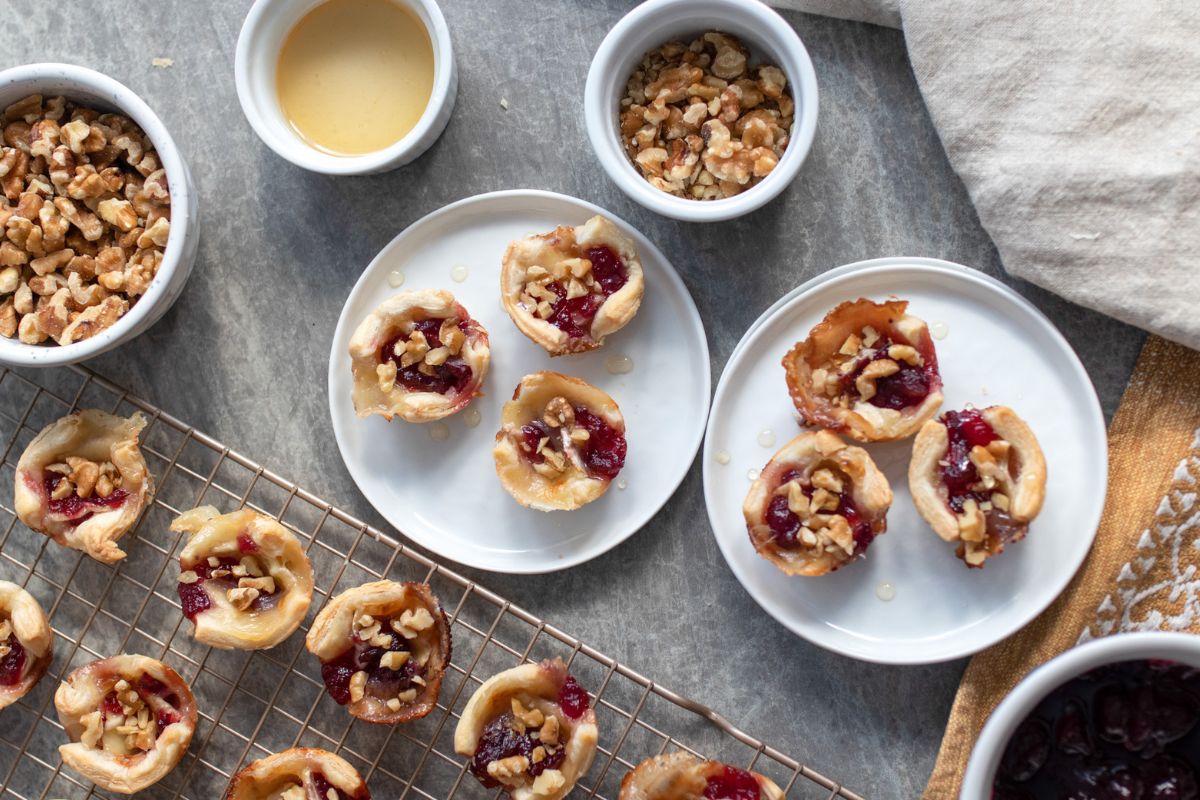
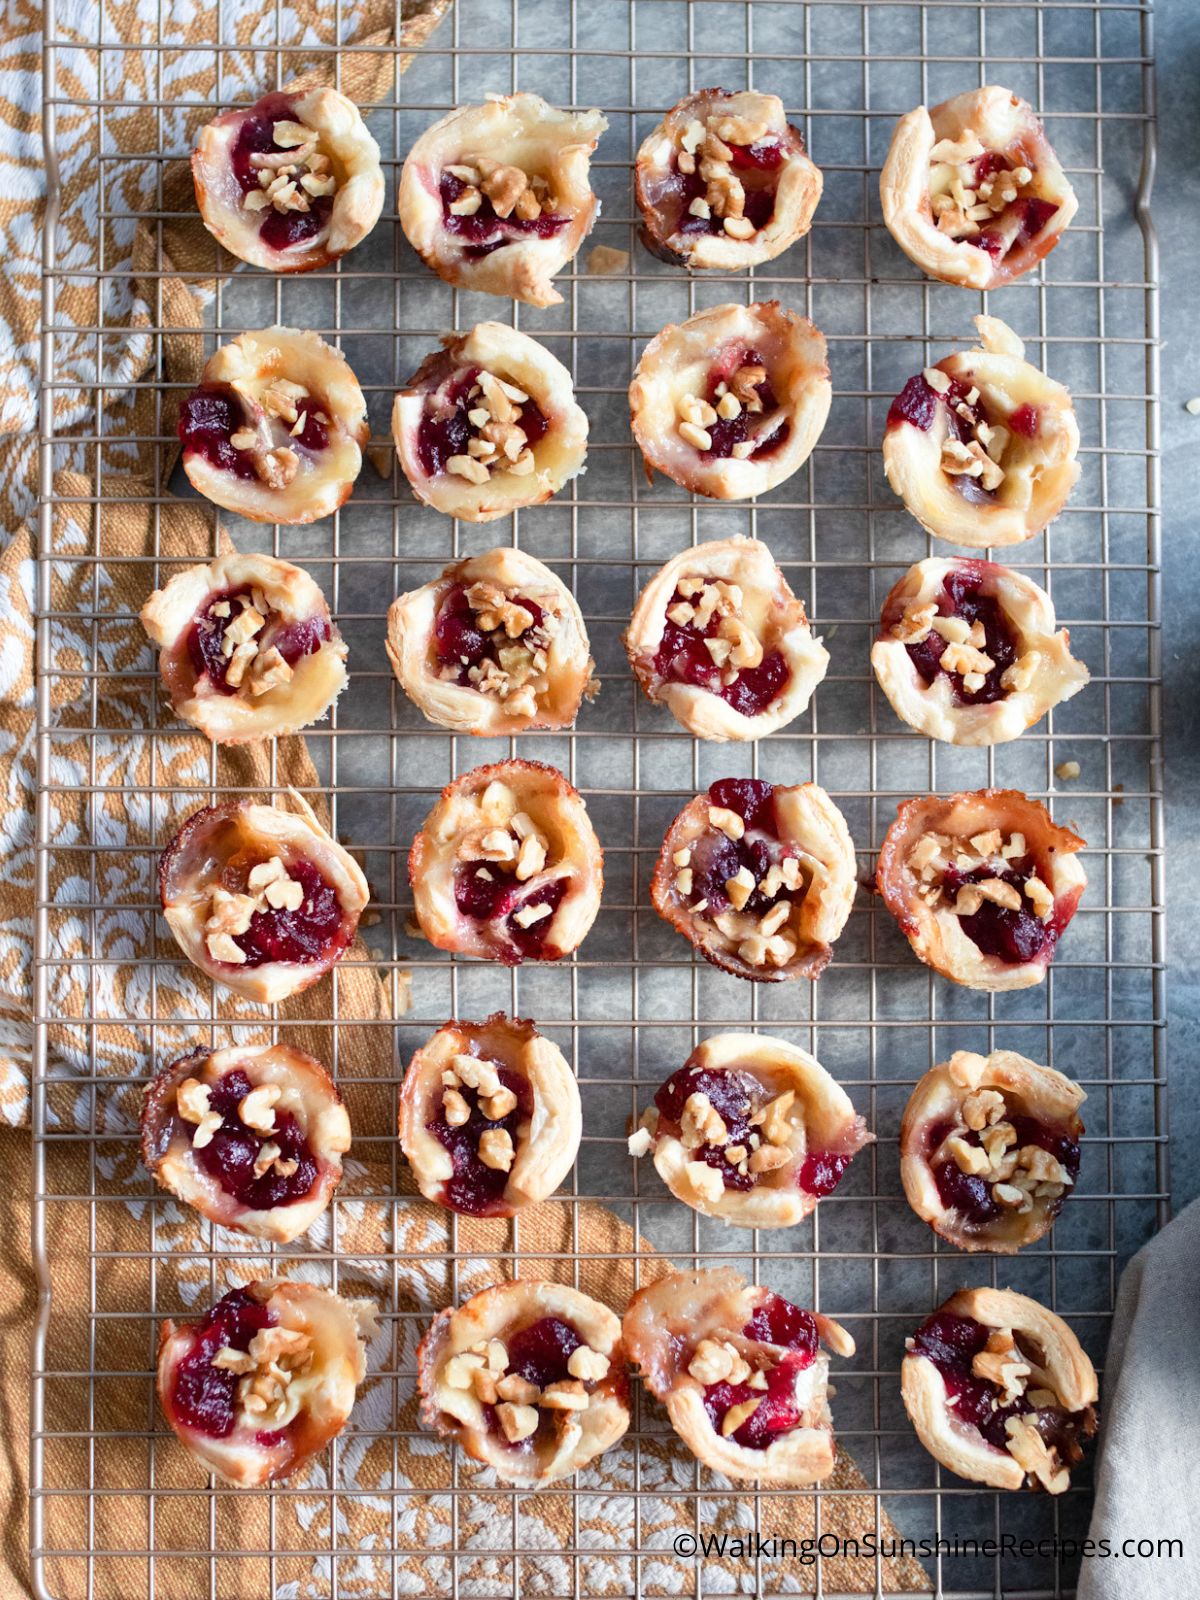
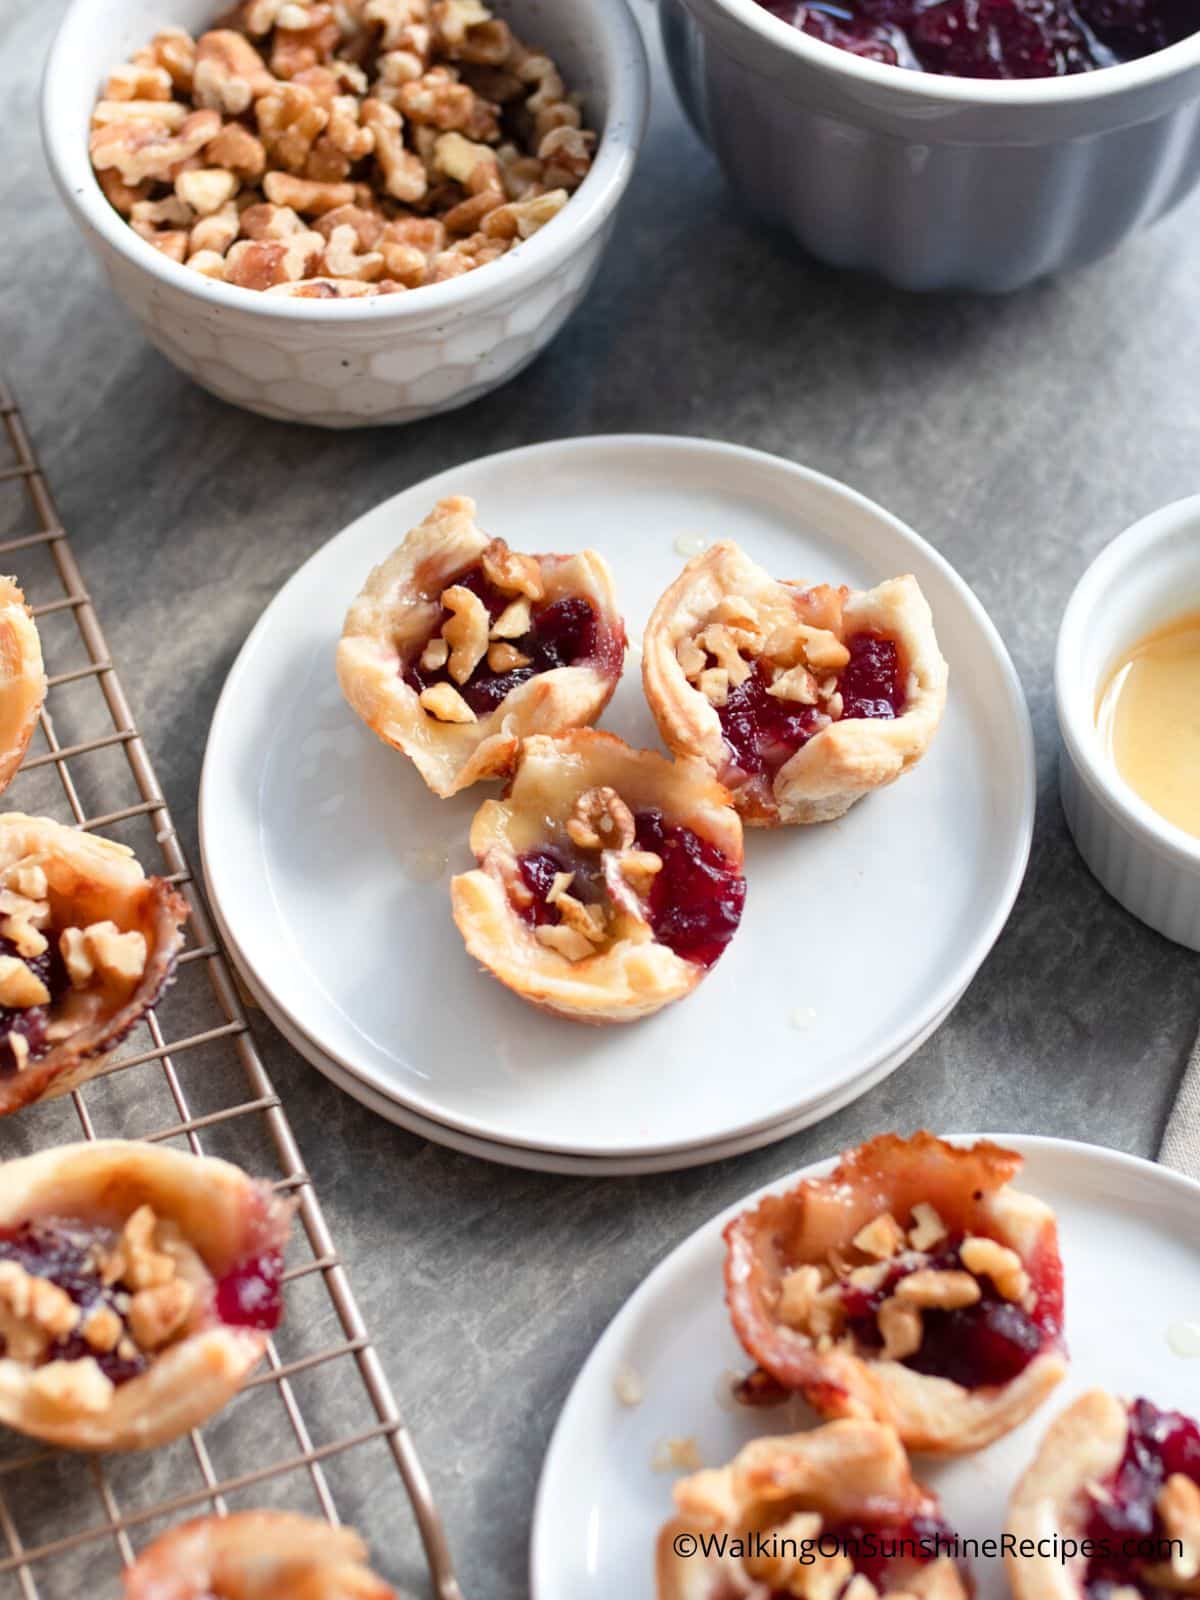
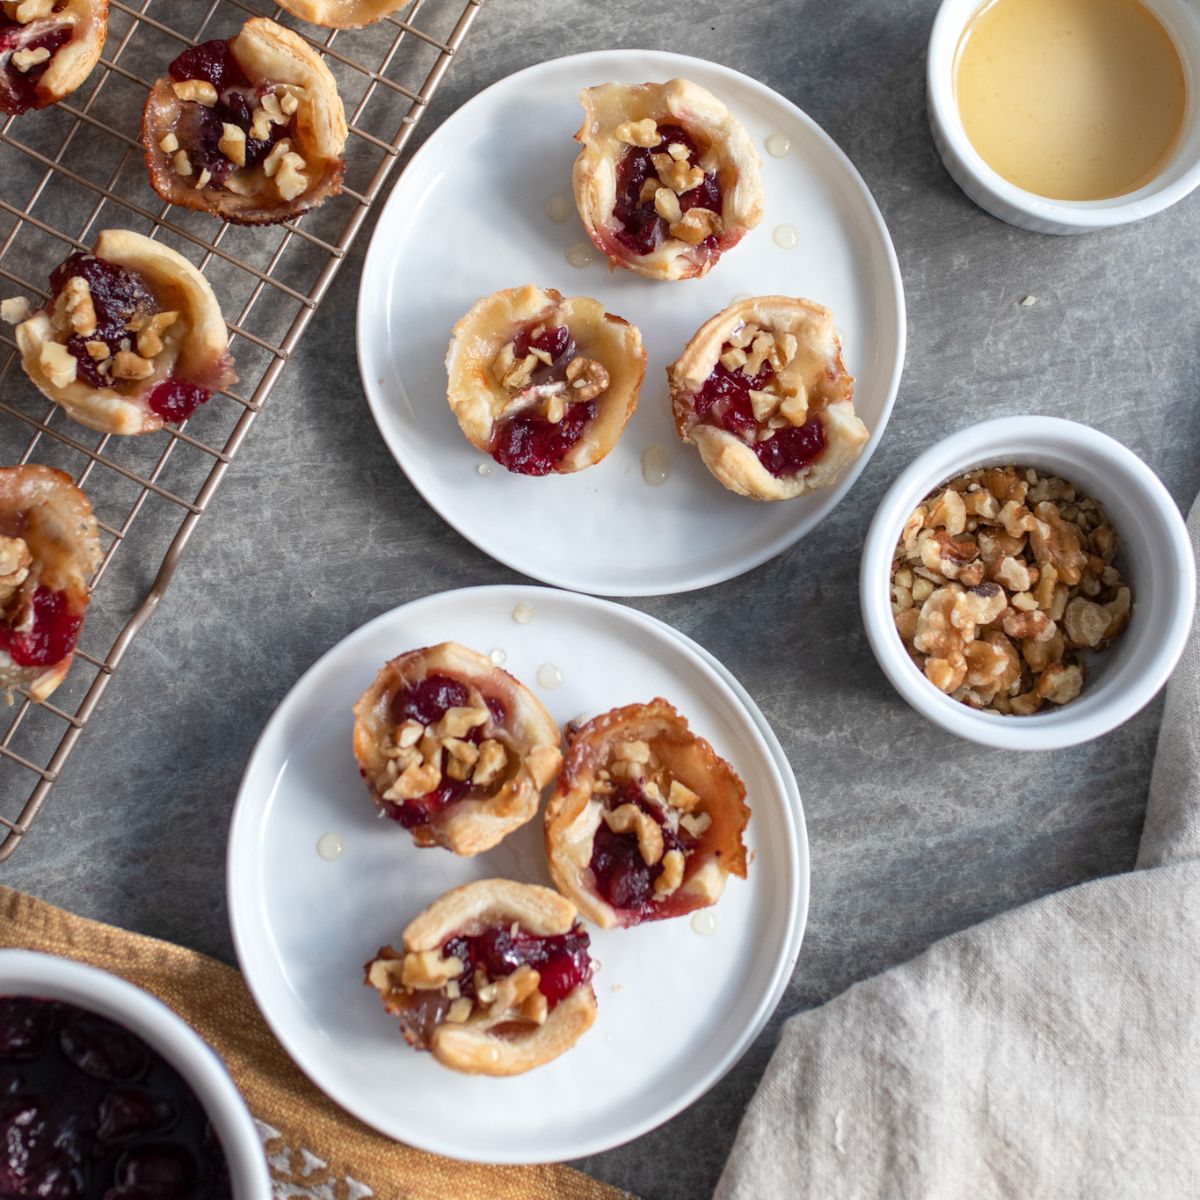
Step 5: Refrigerate or freeze to re-chill the dough before baking. Bake in a preheated 400°F oven for 10-12 minutes until puffed up and golden. Transfer the pastries to a cooling rack and sprinkle with chopped walnuts.
Step 6: Drizzle with a little honey before serving.
LOVE this recipe? SAVE it for Later!
❤️Tap the heart icon in the lower right corner to add the recipe to your recipe box for easy access anytime.
If you made it, leaving a star rating or quick review is always appreciated and helps other readers too.
You can prepare this recipe up to two days before you need to serve them. After they are put together, wrap them with plastic wrap and then in the refrigerator until you're ready to bake and serve.
Storing and Reheating Tips
Refrigerator: Make sure that the appetizers have cooled down before putting them away in an airtight container or Ziploc bag. If you plan to eat them within a few days, you can store them in the refrigerator.
Reheating Tips: To reheat, simply bake them in the oven until they are warmed through. You could also reheat them in the air fryer, but not the microwave as that will make the dough soggy.
Recipe FAQ's
To view the answers, simply click on the down arrow (⬇) next to each question. If you have any other questions not answered here, please leave a comment!
Do you take the rind off brie before baking?
The rind is edible, so you can keep it on, but if you prefer to take it off, use a serrated knife to to cut along the edges to slice the rind off.
Are you supposed to eat the rind on brie?
Yes, the rind on brie cheese is perfectly safe and edible, adding a unique flavor to the cheese. While some may not enjoy its texture, many find that eating the rind enhances the overall brie experience.
Cooking for More (or Less?)Scale this recipe up or down. Adjust the number of servings above to automatically update ingredient amounts.
Method
Preheat oven to 400°F.
On a lightly floured surface or piece of parchment paper, unfold the sheet of puff pastry. Using a rolling pin, gently press out the creases in the puff pastry.
Slice the puff pastry into half and then half again so you have four pieces. Then slice each of those four pieces into 3 pieces, so you have 12 pieces. Finally, slice each of the 12 pieces in half, so you have 24 pieces total. Coat the mini muffin pan with non-stick baking spray and press a square of puff pastry into each well of the pan. Use the tart tamper to press the pastry in without tearing it.
Cut brie into 1 ½ inch wide and ½ inch thick slices
Place a piece of brie in each pastry cup.
Spoon a small amount of cranberry sauce on top, about 1-2 teaspoons (don't add too much or the pastries will be too sweet).
Place the muffin pan in the refrigerator or even the freezer to re-chill the dough for 30 minutes before baking.
Bake for 10-12 minutes or until they are puffed up and golden.
Chop the walnuts into smaller pieces.
Remove the puff pastry appetizers from the muffin tin to a cooling rack.
Sprinkle with the chopped walnuts.
Drizzle a little honey on top just before serving.
Be sure to re-chill the puff pastry dough after assembling the pastry bites so that the butter layers can chill again and then puff up while baking in the hot oven.
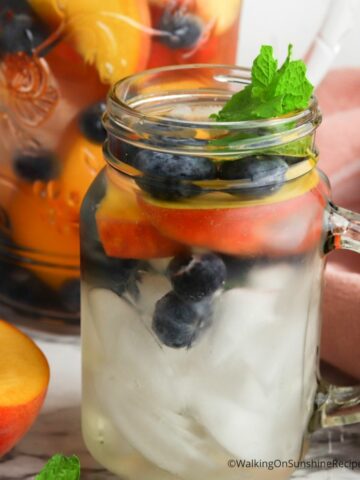
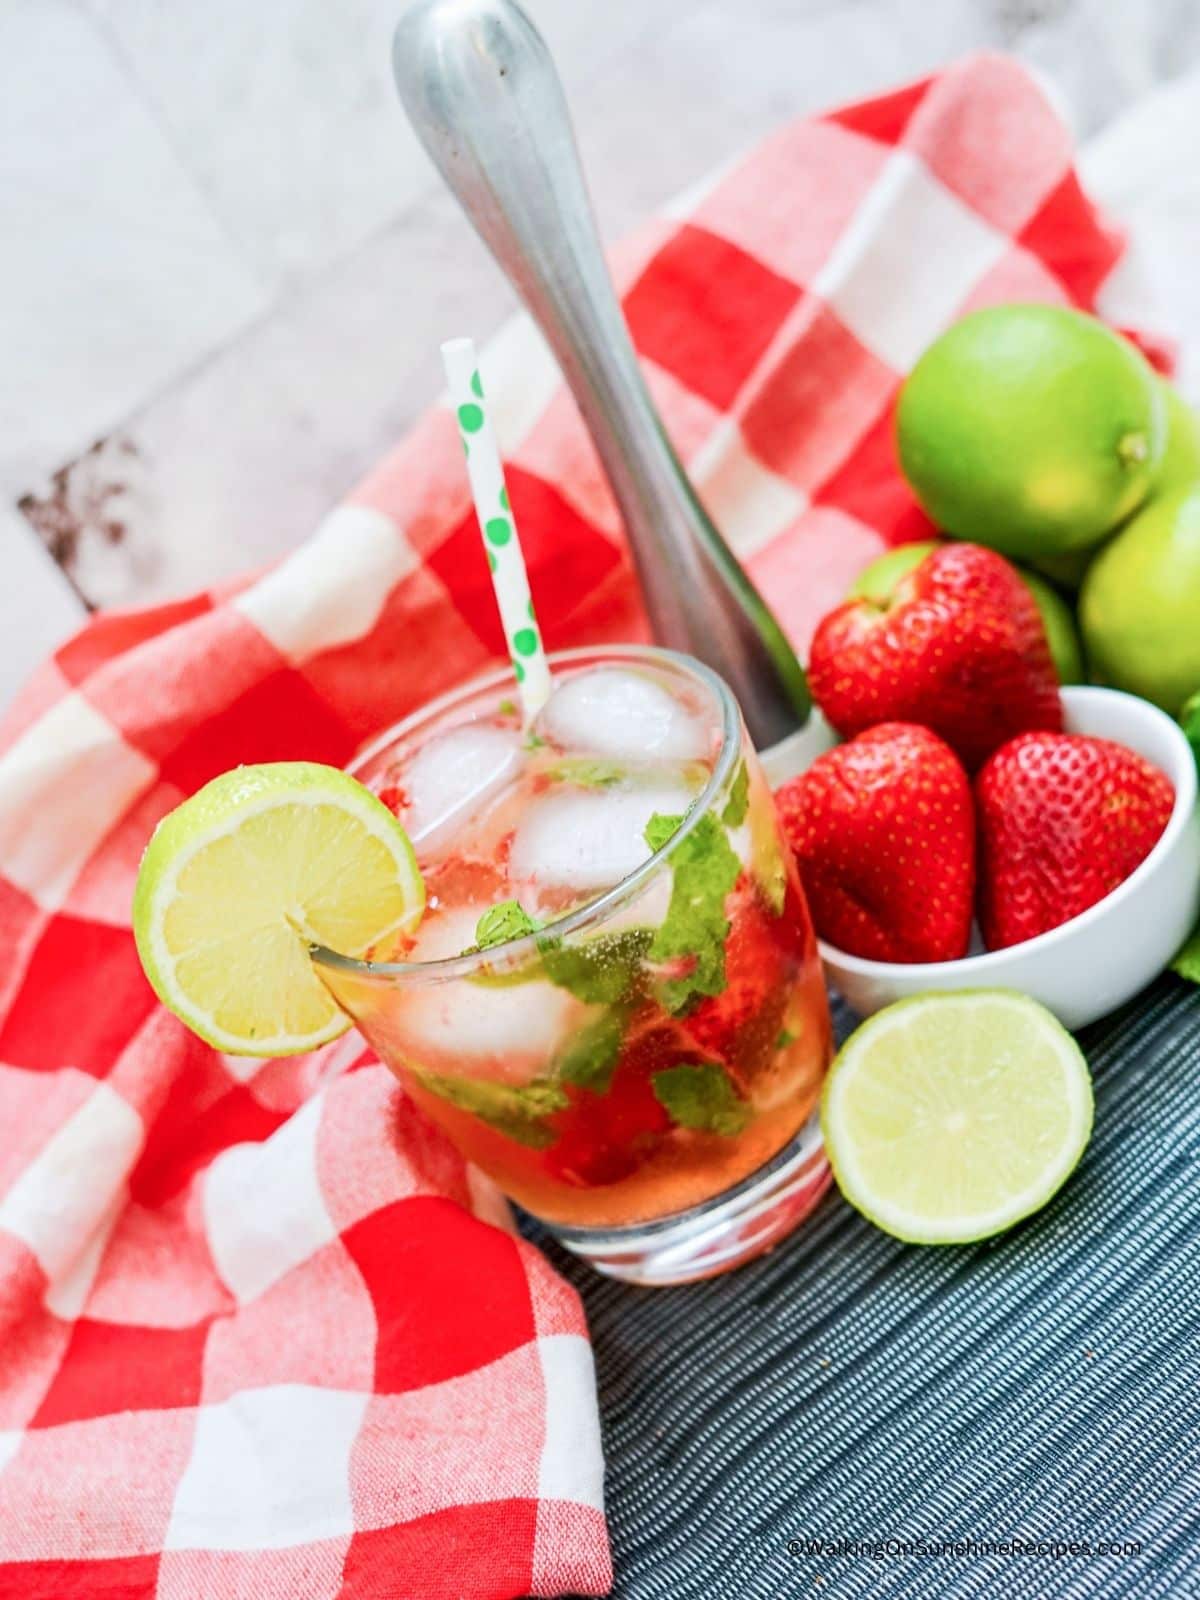
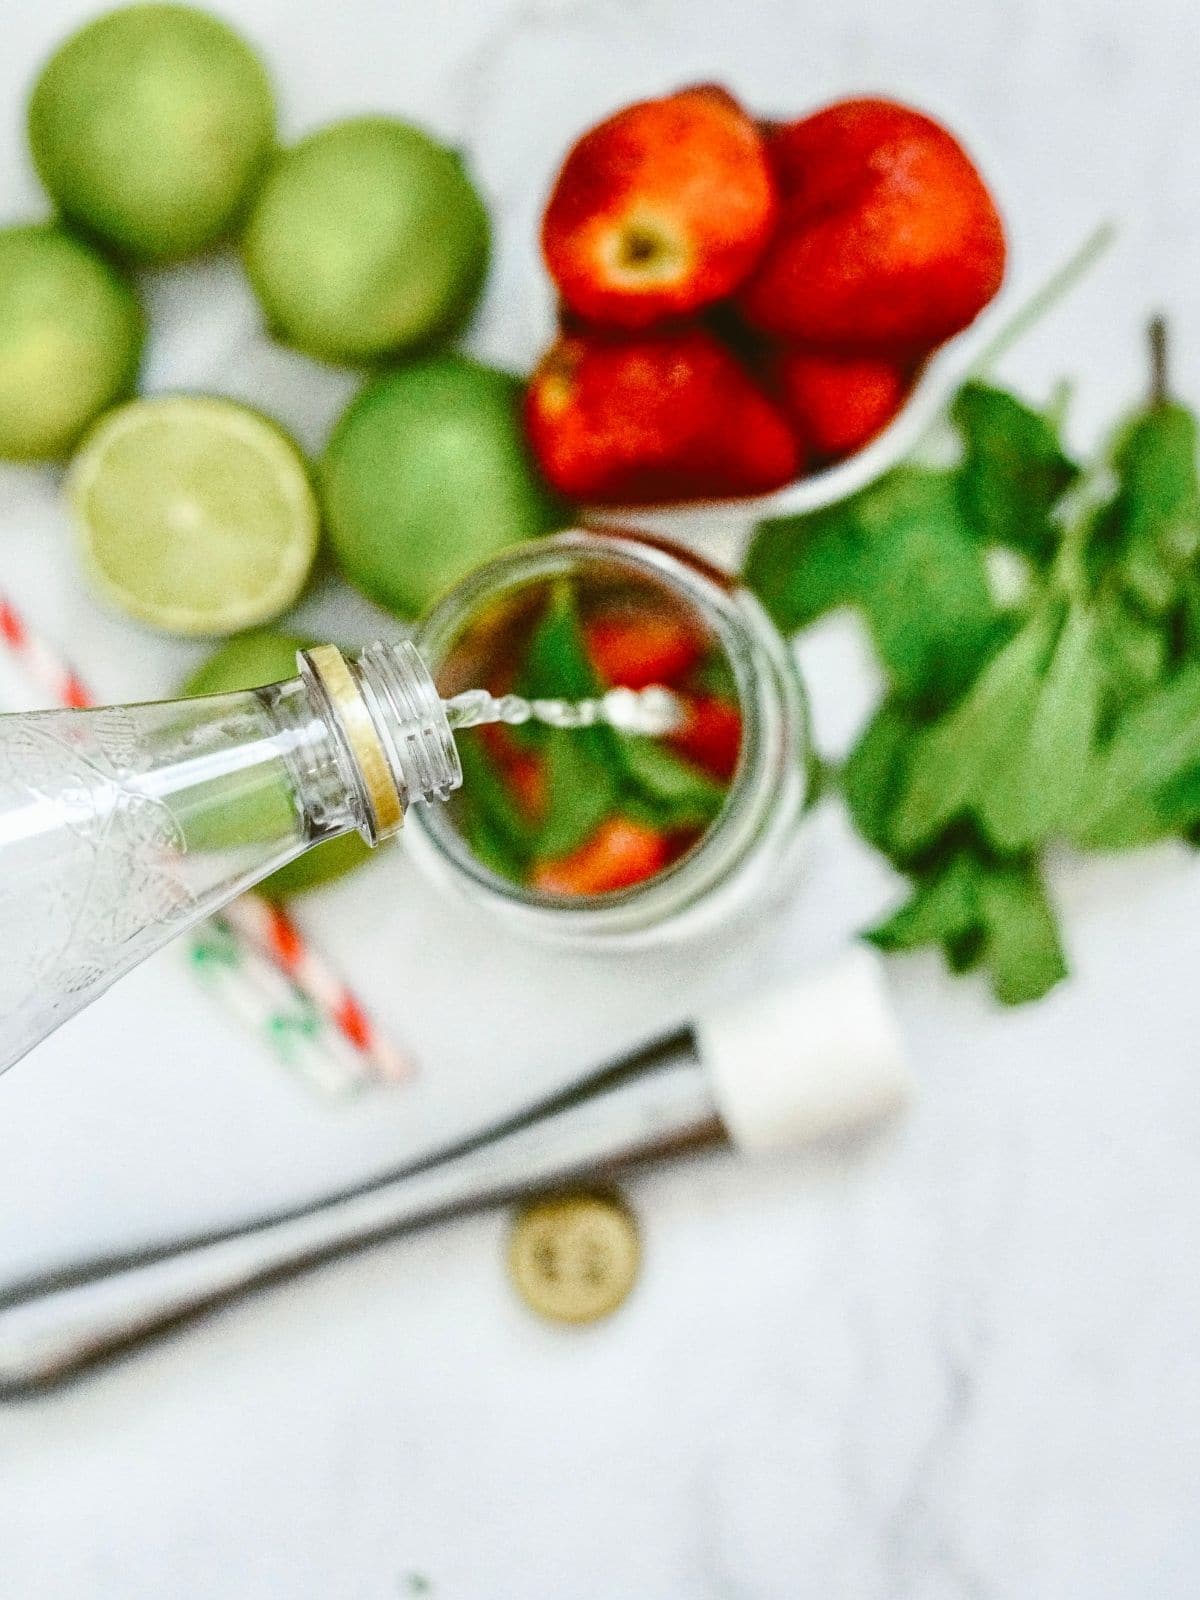
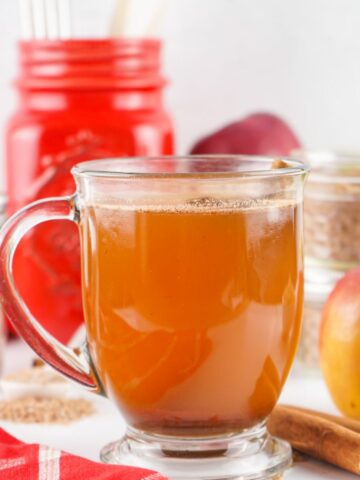
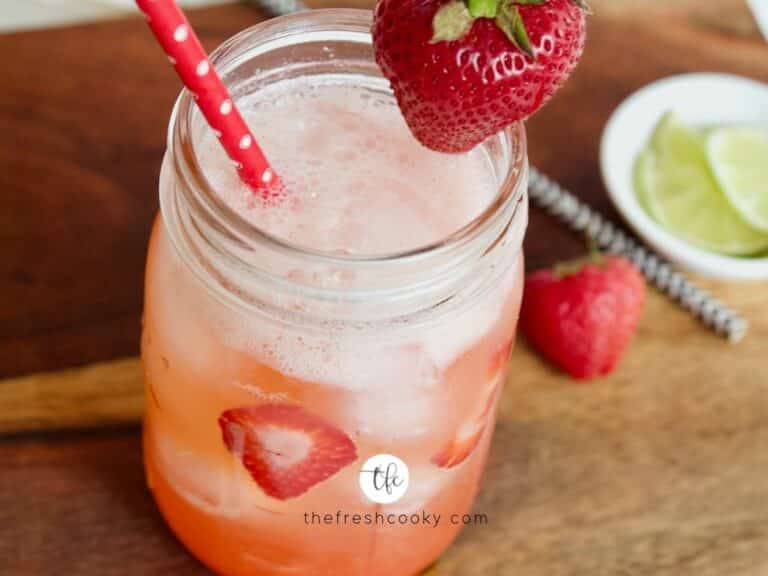
This infused water recipe for Strawberry sparkling water is made with fresh strawberries, sparkling water, and a small amount of simple syrup for sweetness.
It’s light, bubbly, and easy to serve for warm weather, brunch, or casual gatherings. It's a bright, fruity drink that looks just as good as it tastes.
Recipe at a Glance
Prep: 10 min |Difficulty: Easy | Servings: 1
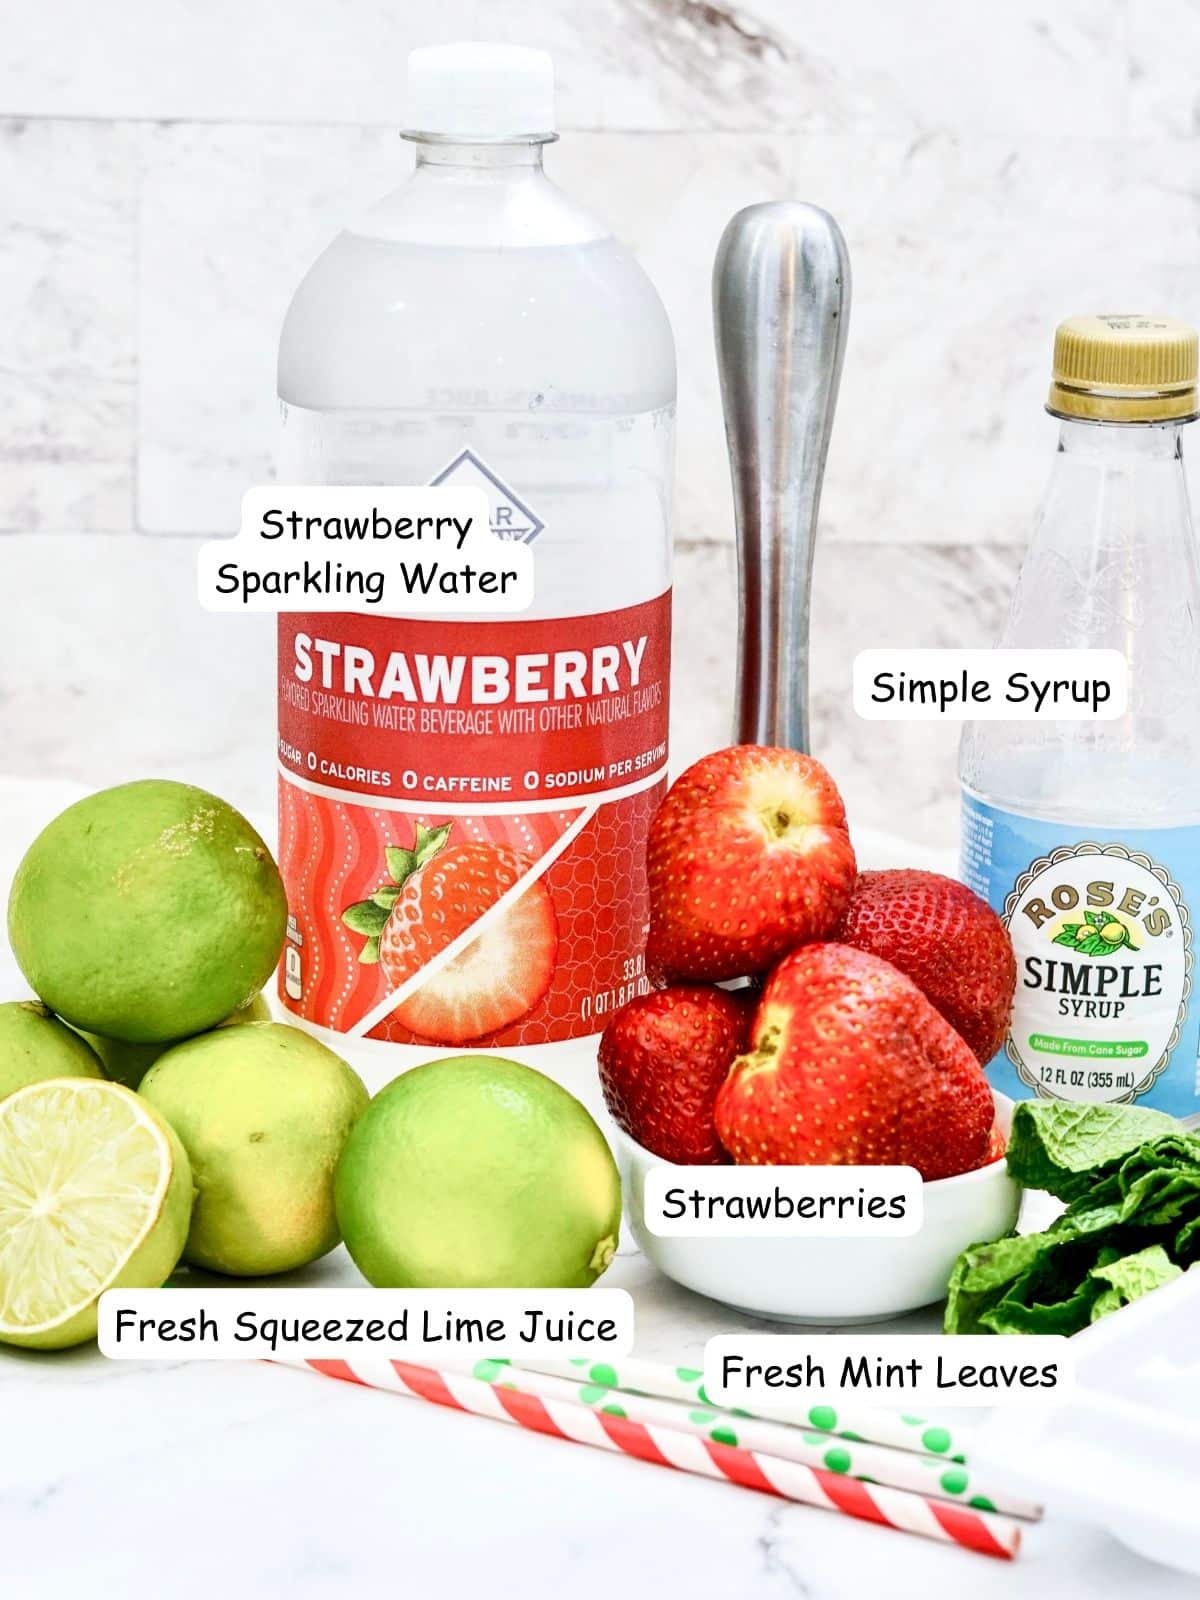
Main Ingredients: strawberries, sparkling water, simple syrup, lime juice, mint Best For: Refreshing single-serve drink, brunch, warm weather sipping Make Ahead: Slice the strawberries and mix the lime juice and simple syrup ahead of time; add sparkling water just before serving Storage: Best enjoyed right away; once combined with sparkling water, it does not store well
"Even without the mint, this was a delicious and refreshing drink made with ingredients I already had on hand. I was looking for a sparkling water option instead of store-bought energy drinks, and the strawberry flavor was perfect."
~ Ninja's Mom
⭐⭐⭐⭐⭐
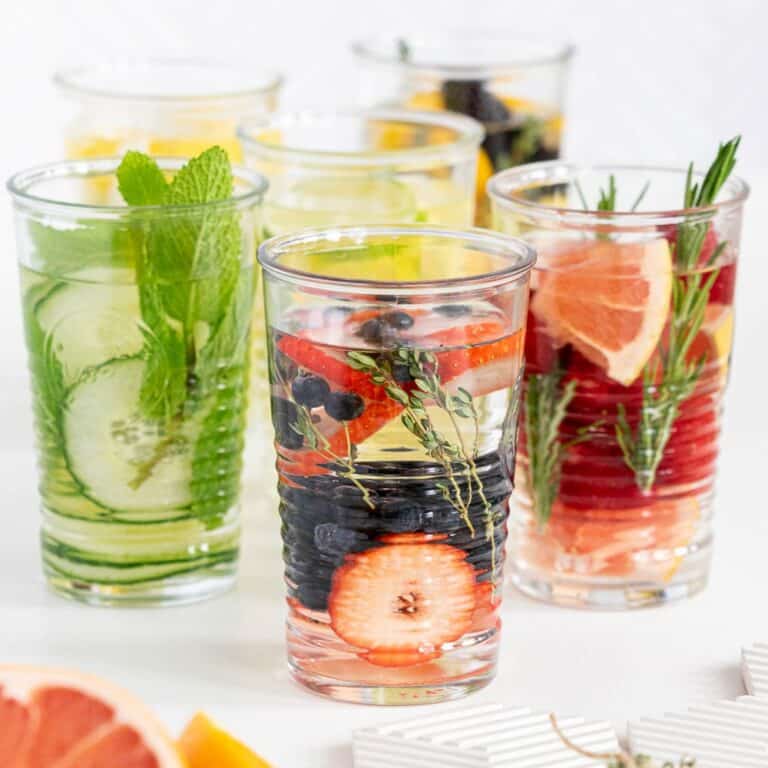
What Can You Add to Sparkling Water?
This recipe starts with a purchased strawberry-flavored sparkling water which makes this drink quick to prepare, and it’s easy to enhance the flavor using fresh ingredients.
You can add strawberries to sparkling water to boost the flavor, or customize it with fresh fruit, citrus juice, mint, or a small amount of simple syrup.
Here's a quick overview of the ingredients for this recipe. Find the exact amounts and click the Instacart button to easily add them to your cart – all in the printable recipe card below!
Substitutions and Variations
Fruit: Swap the strawberries for cherries, peaches, or another favorite fruit.
Citrus: Use lemon juice instead of lime for a slightly different citrus flavor.
Herbs: Replace the mint with fresh basil for a mild, herbal twist.
Sweetener: This recipe uses store-bought simple syrup for convenience. If you prefer homemade simple syrup, see my Strawberry Infused Water recipe for instructions.
More Ideas: If you enjoy fruit-infused drinks, you may also like my Berry Infused Water recipe.
Step-by-Step Instructions
This section includes step-by-step photos and instructions to guide you through the recipe. For the complete printable version, scroll down to the recipe card below.
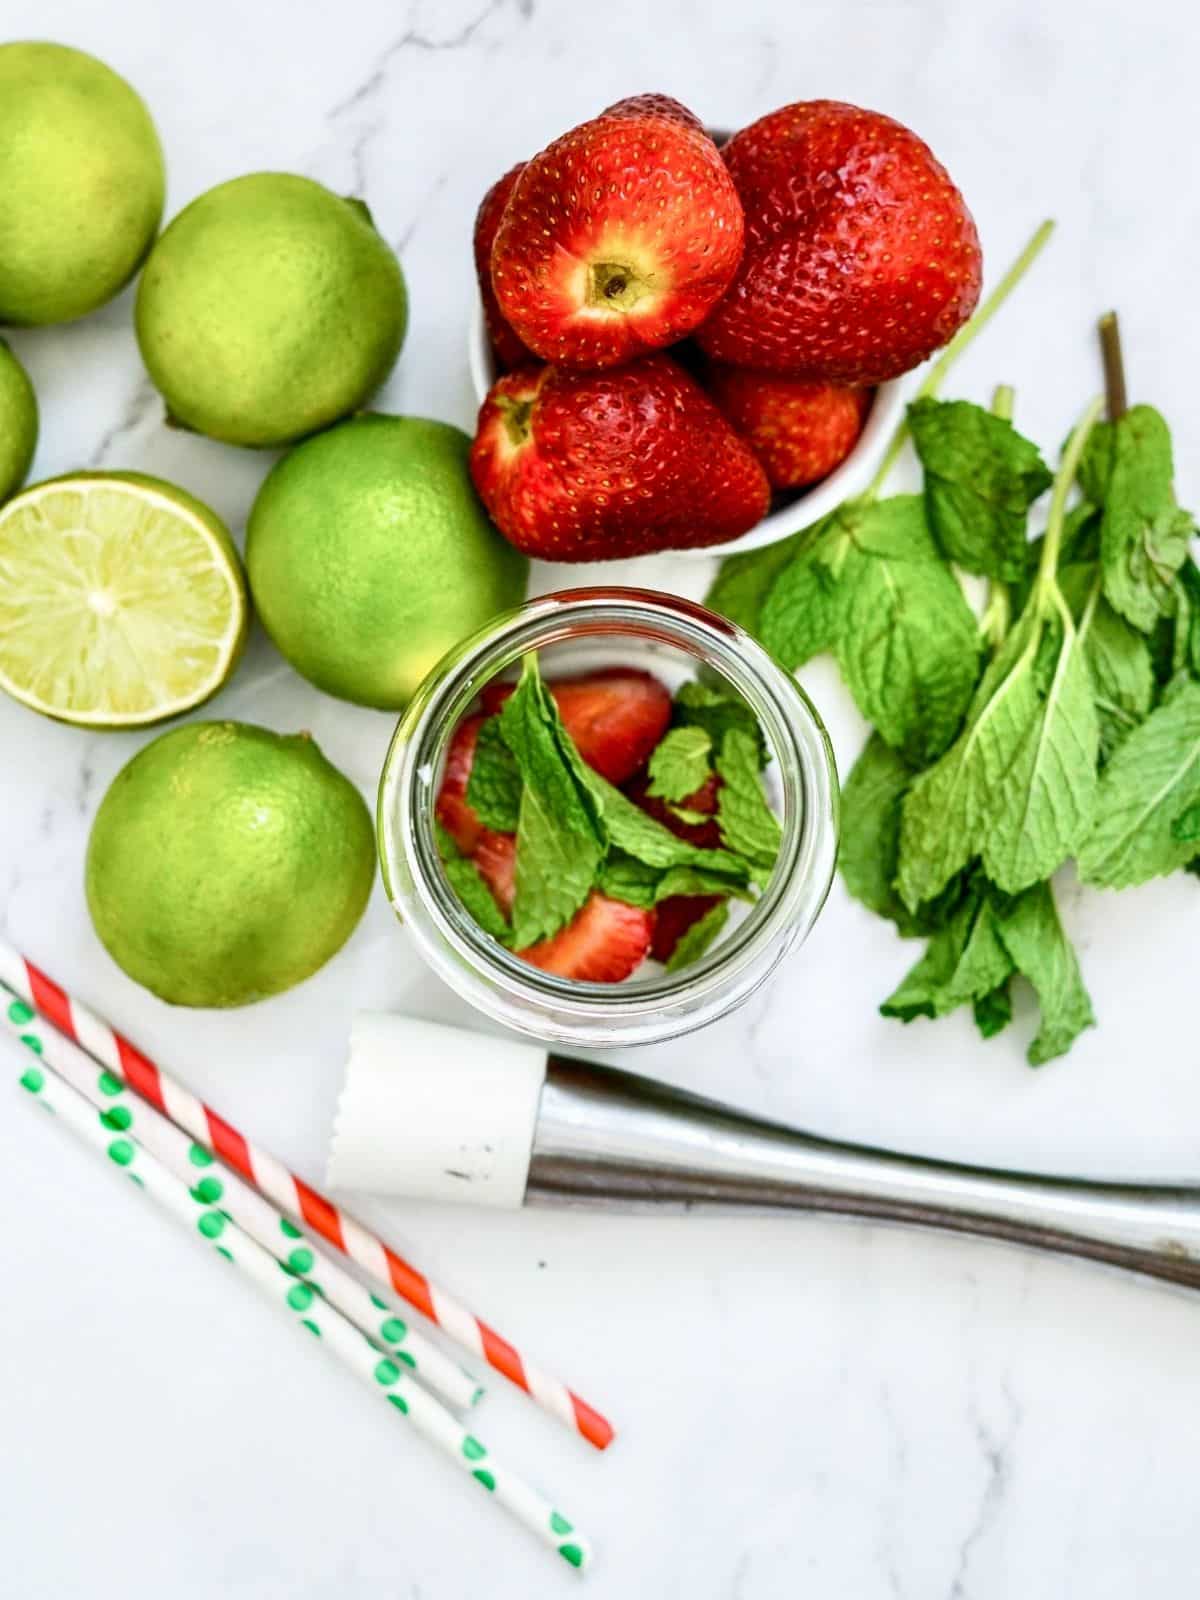
Step 1: Start by adding strawberries, fresh mint leaves, and lime juice to a glass. This will create a flavorful and refreshing base for your drink.
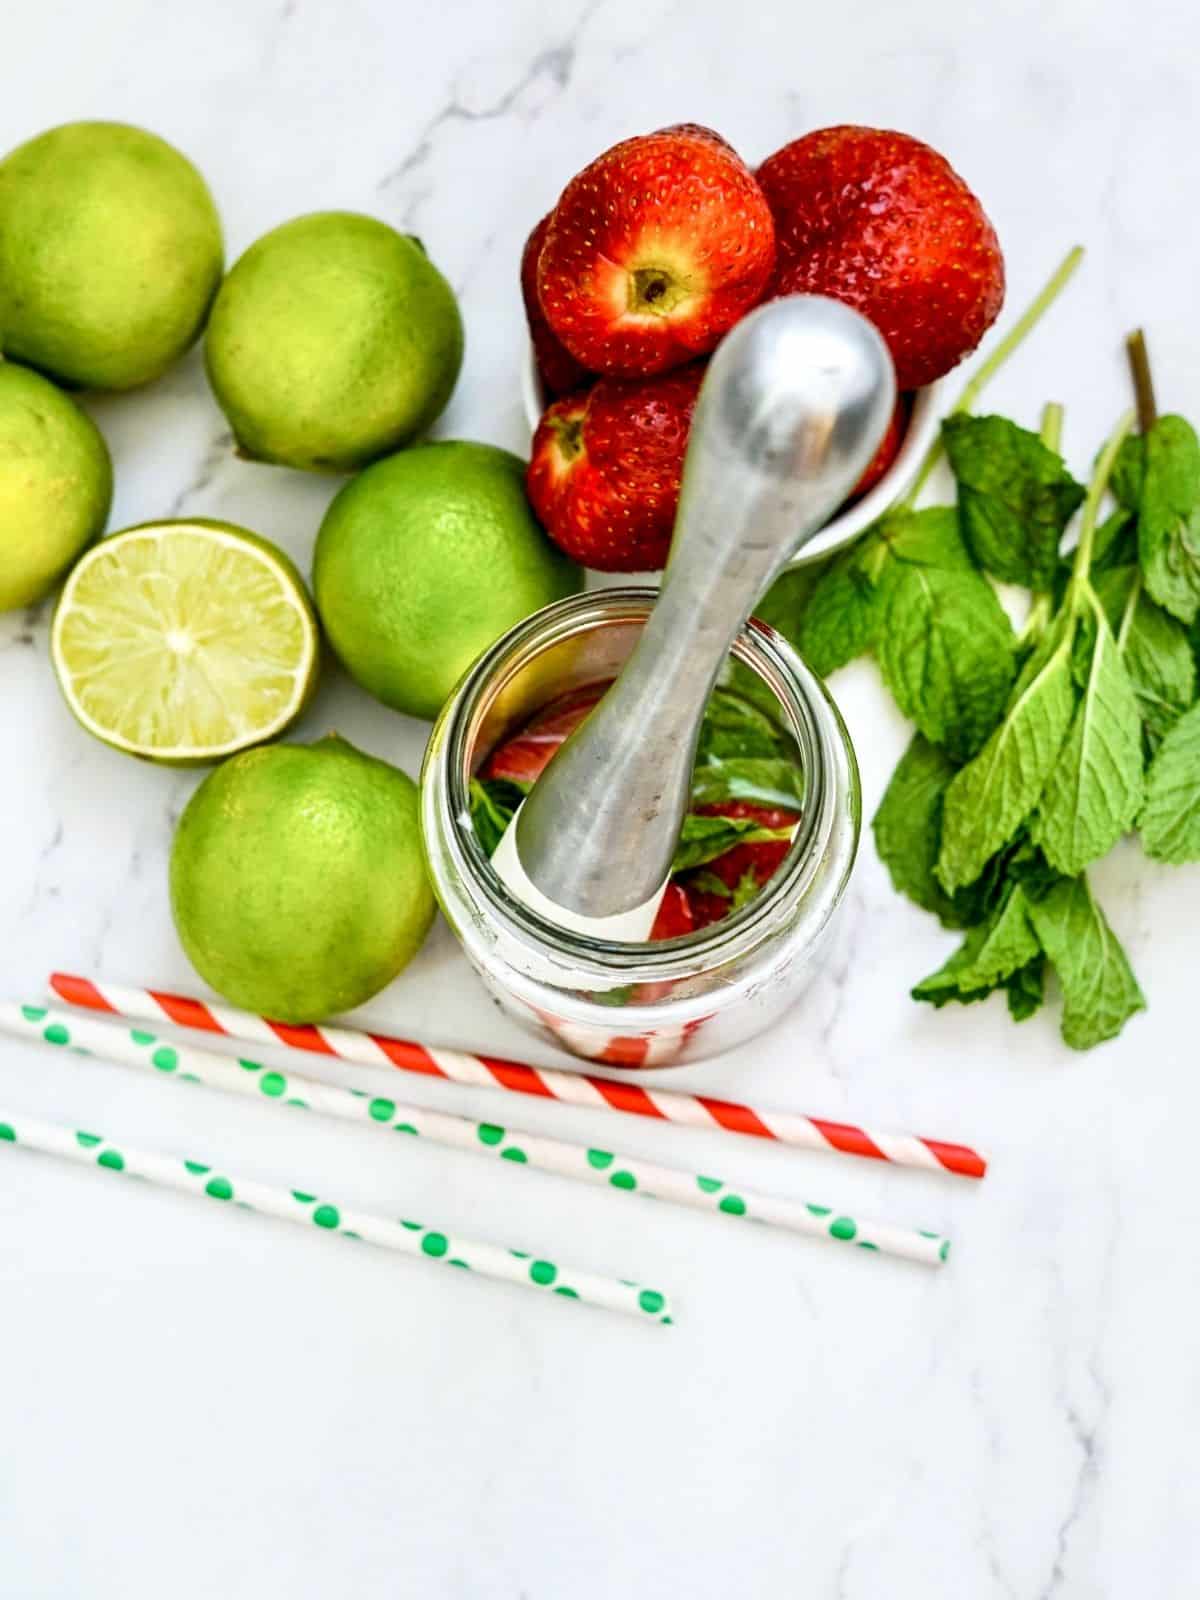
Step 2: Using a Muddle or the back of a spoon, gently mash the strawberries, mint, and lime together. This will release the juices and fragrant oils, enhancing the flavor of your drink.
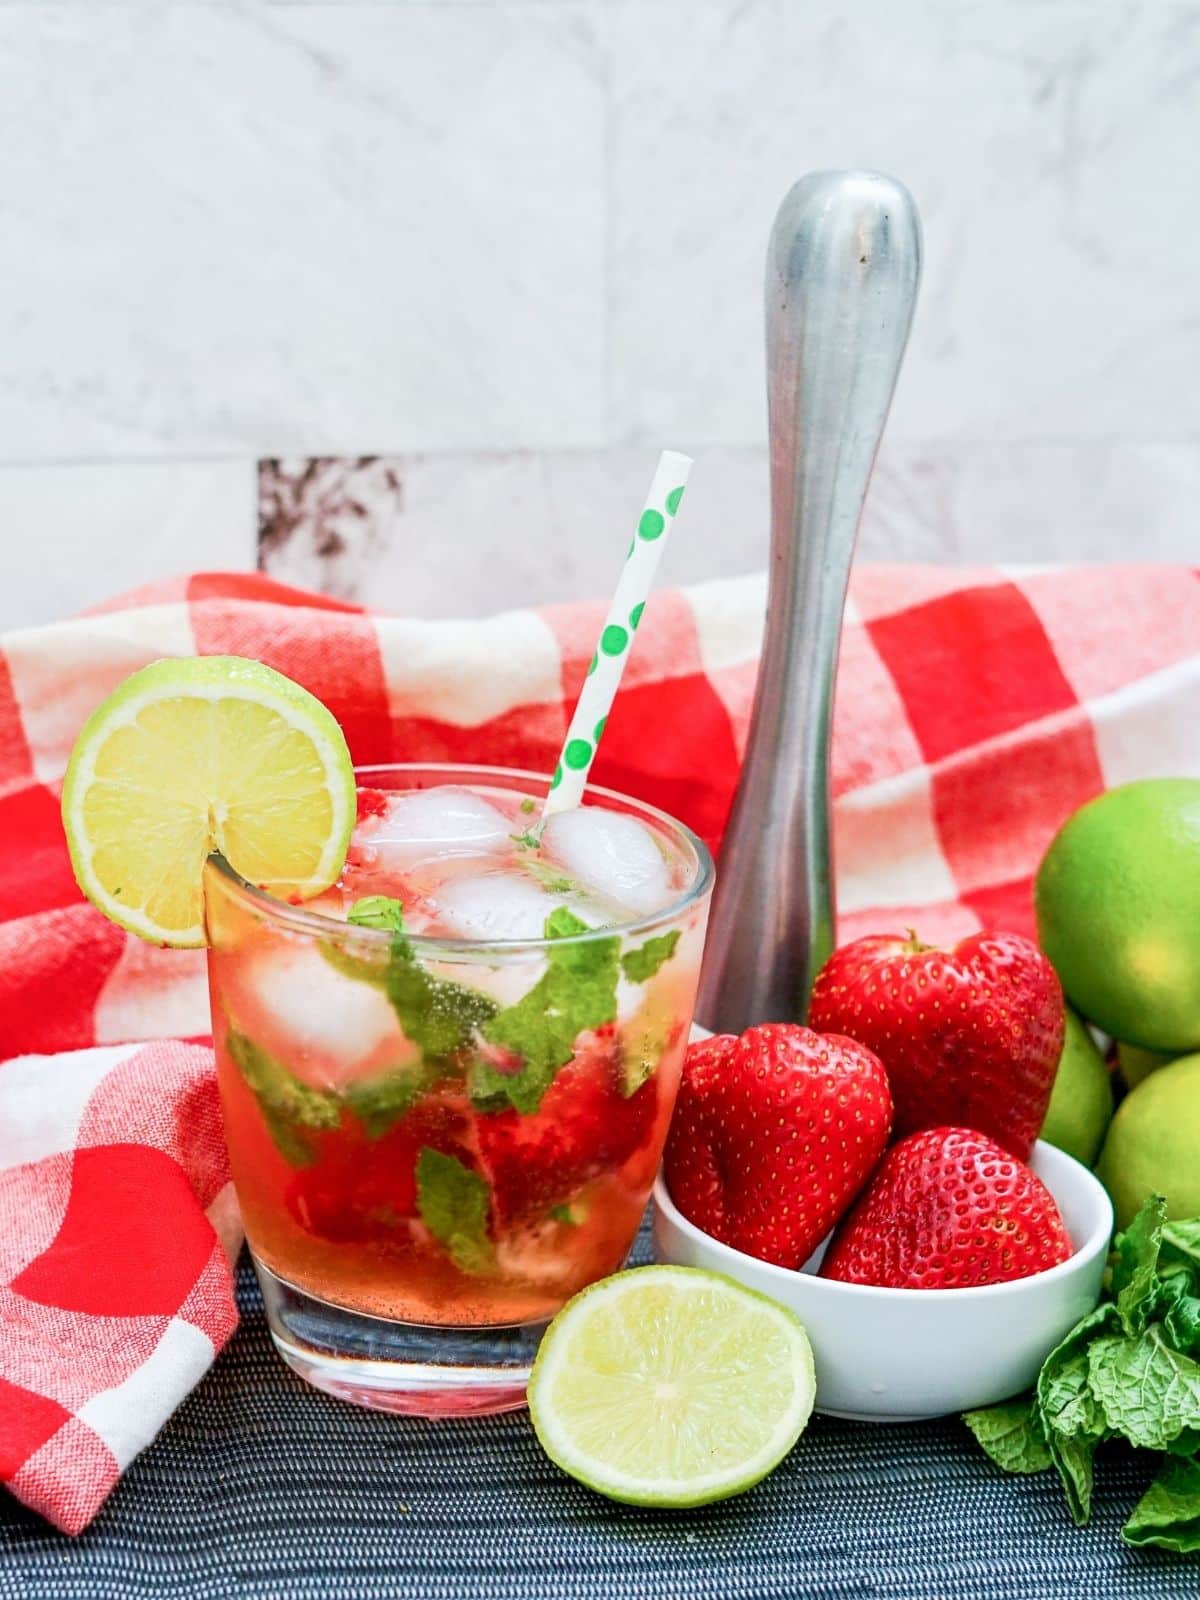
Step 3: Add the simple syrup to the muddled strawberry, mint, and lime. Fill the glass with ice, top it off with strawberry sparkling water, and give it a good stir.
Step 4: Finally, add a lime slice as a garnish for a refreshing finishing touch!
Insider Tips from my Kitchen to Yours
✔️ DO let the strawberries, lime juice, mint, and simple syrup infuse together in the refrigerator for at least an hour, then add the sparkling water right before serving for the best flavor. ❌ DO NOT use bottled lime juice or add the sparkling water too early, as both can dull the fresh taste and reduce the bubbles.
Storage Tips
Refrigerator: Store the sparkling water with strawberries in the refrigerator. To avoid the mint leaves going bad, the water should be consumed the same day it's made.
Freezer: Freeze any leftovers in an ice cube tray then pop out and store in a plastic freezer bag. These flavored ice cubes will make a fun drink!
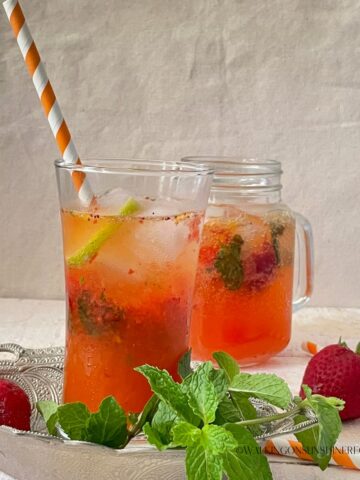
This strawberry sparkling water is a simple, refreshing drink made with fresh strawberries, sparkling water, lime juice, and simple syrup. It’s lightly sweetened, easy to customize, and perfect for a single-serve beverage at home or for casual entertaining.
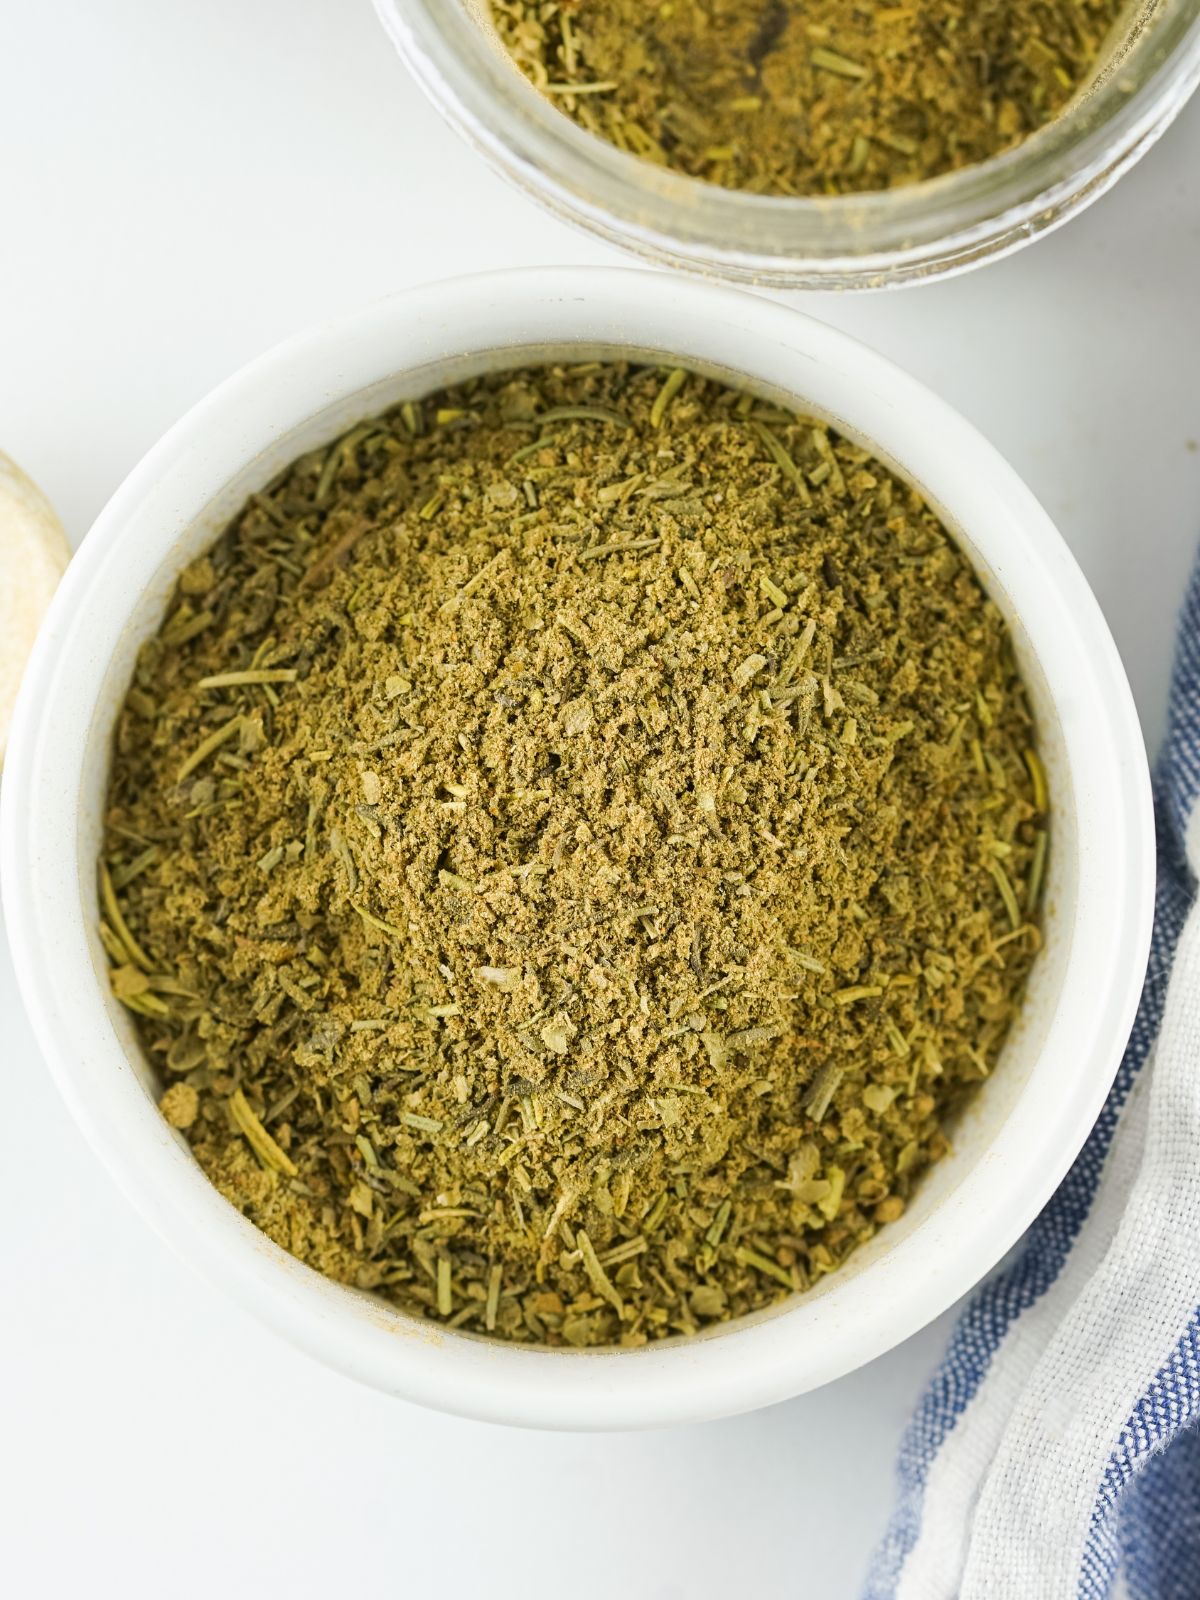
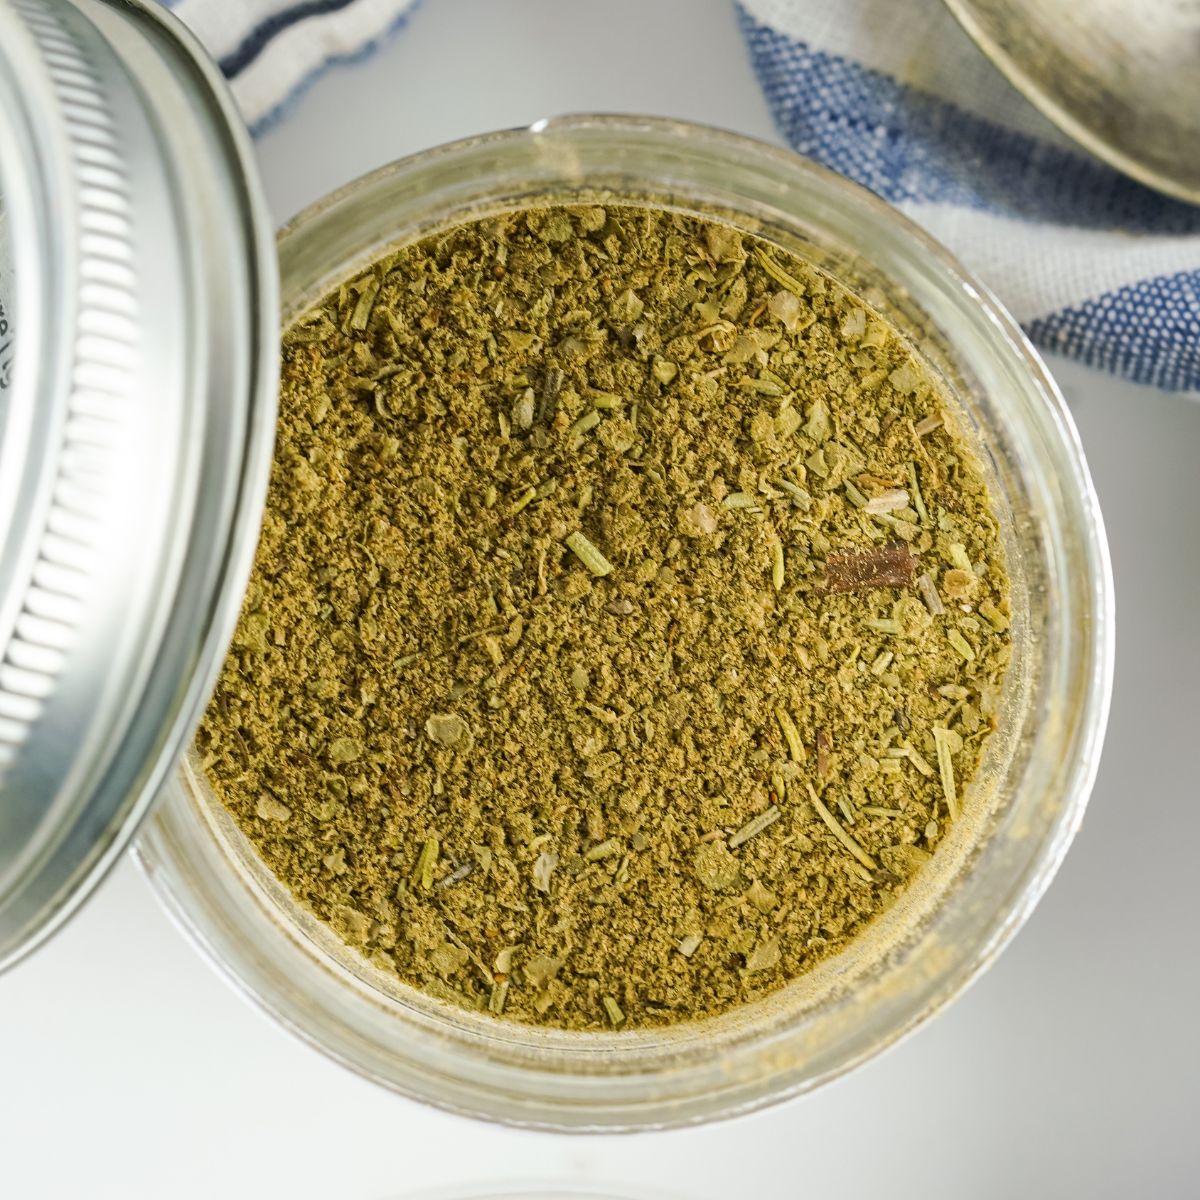
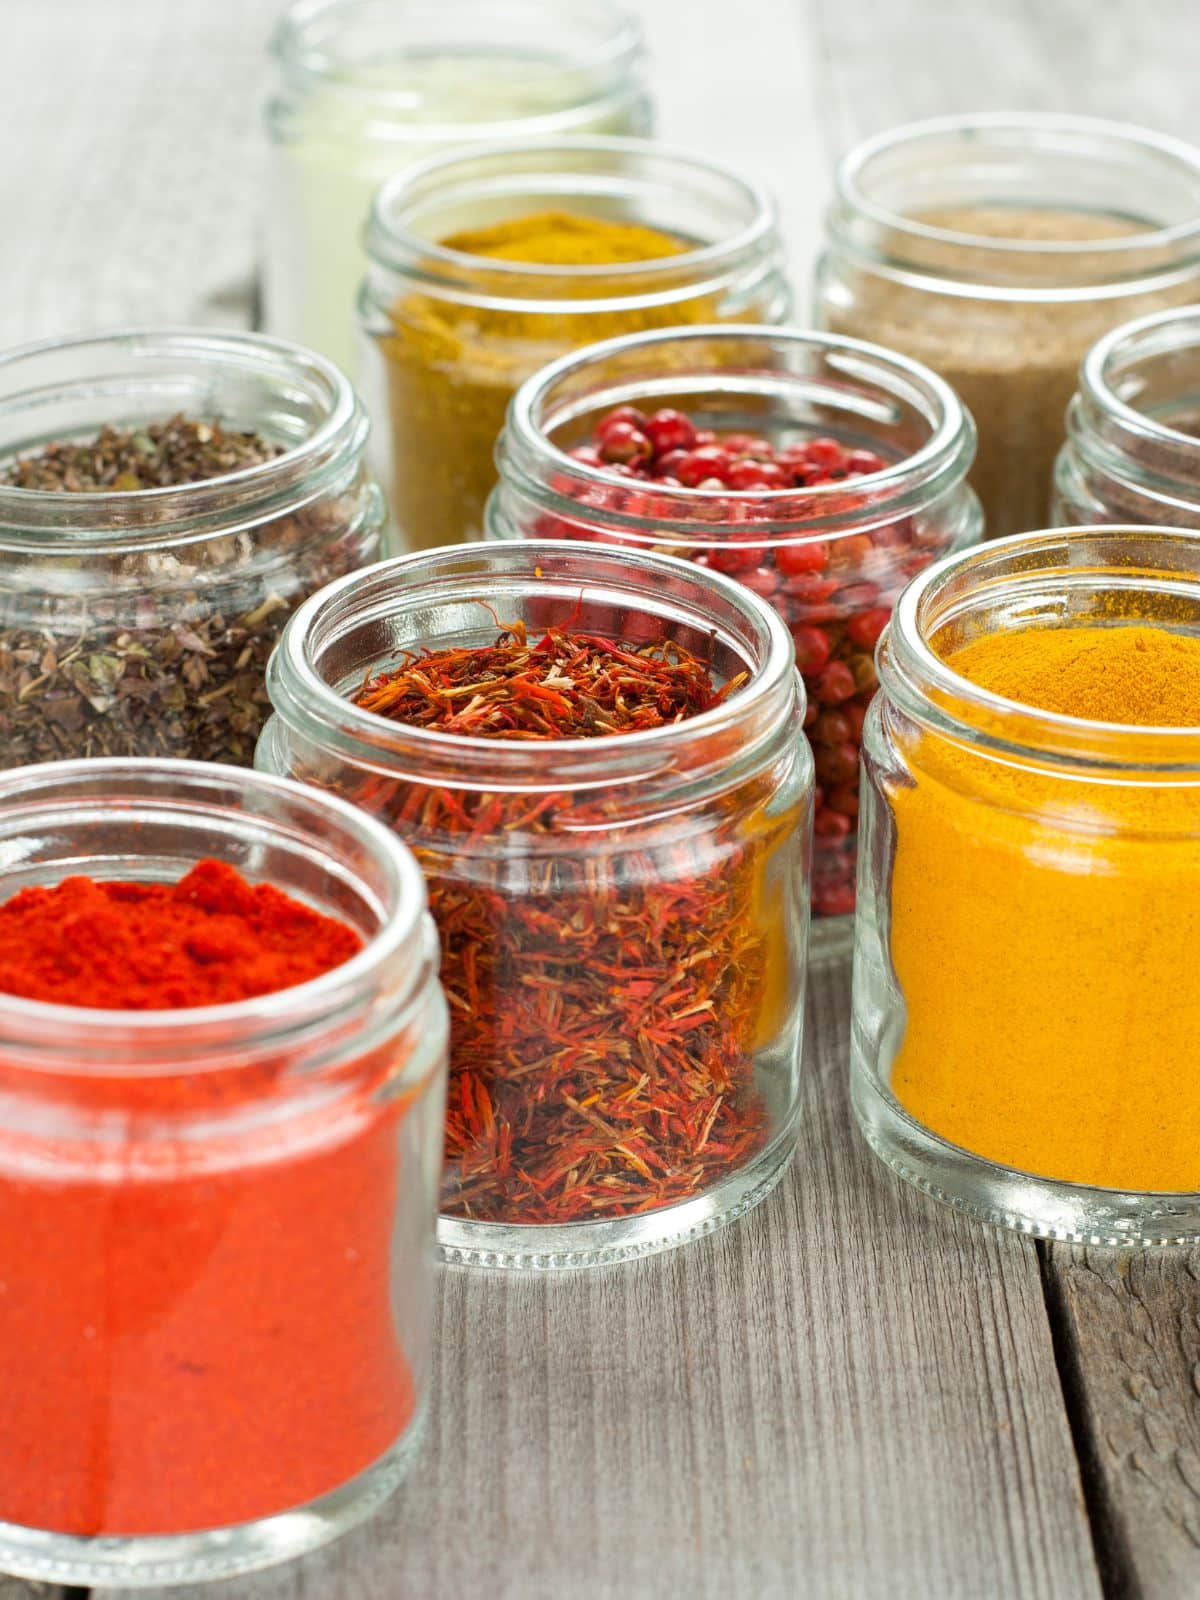
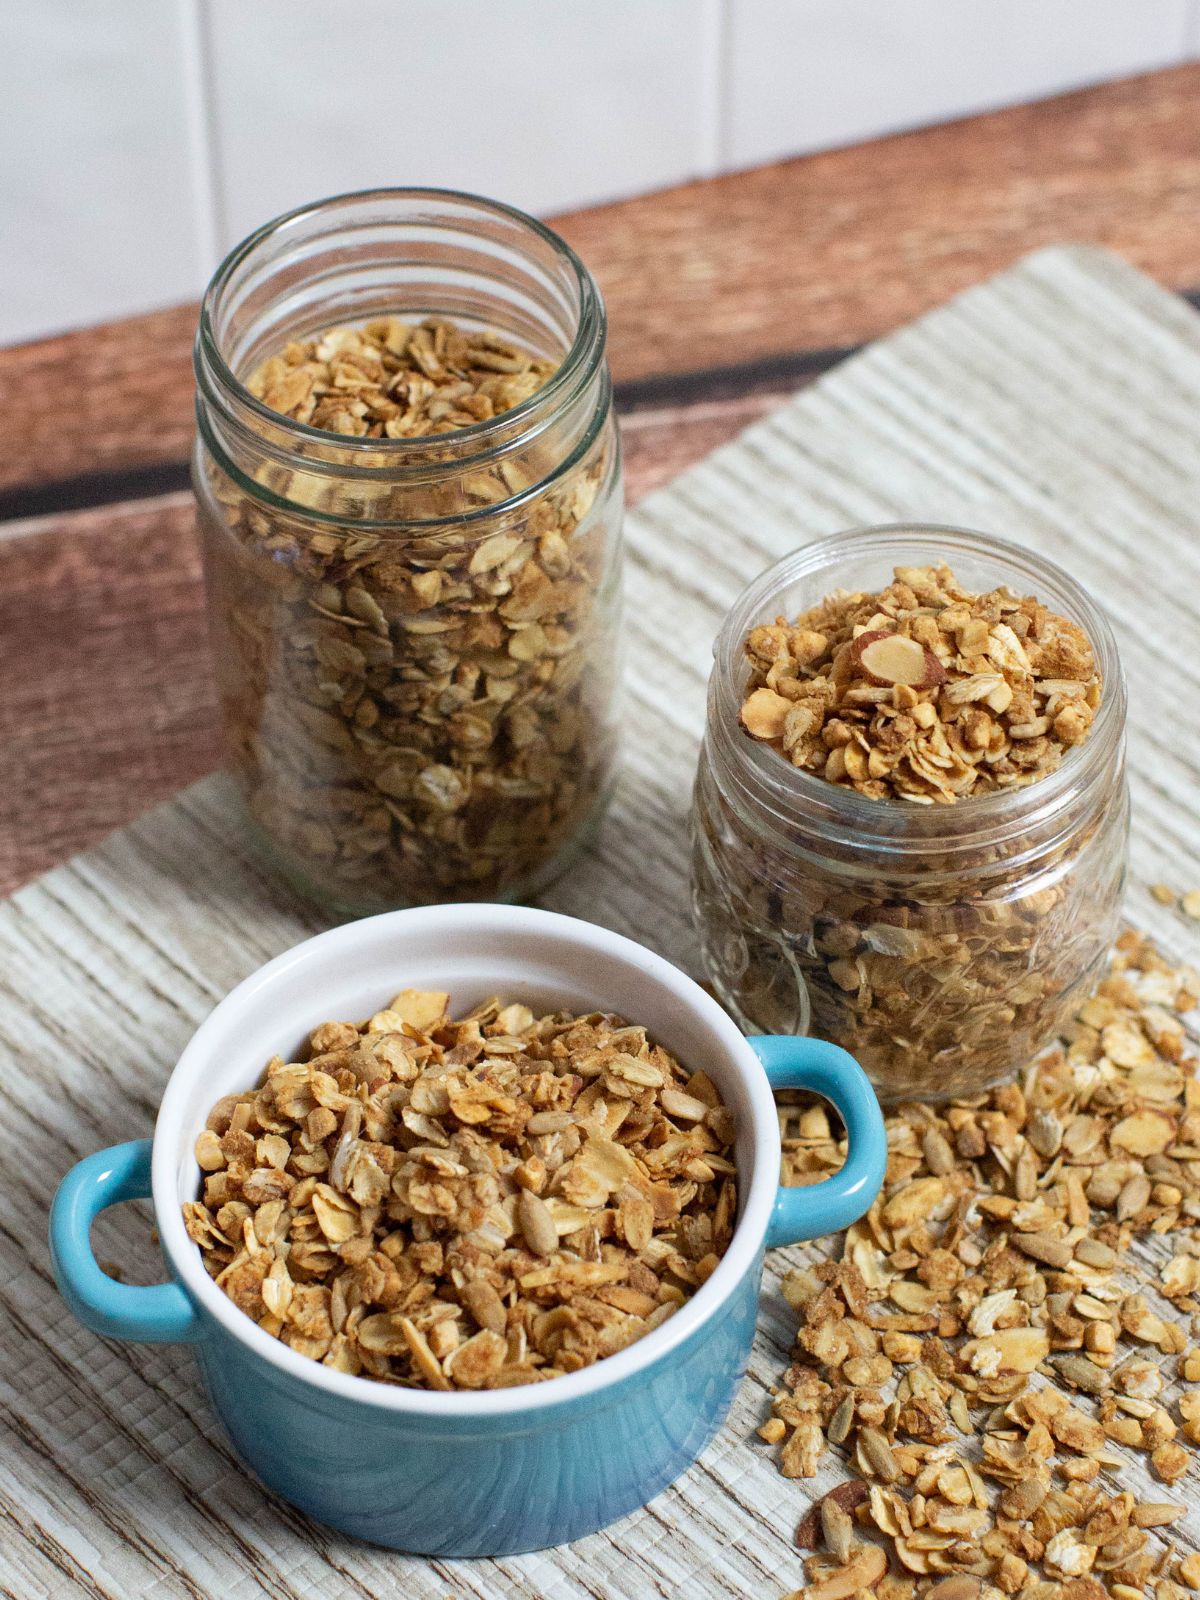
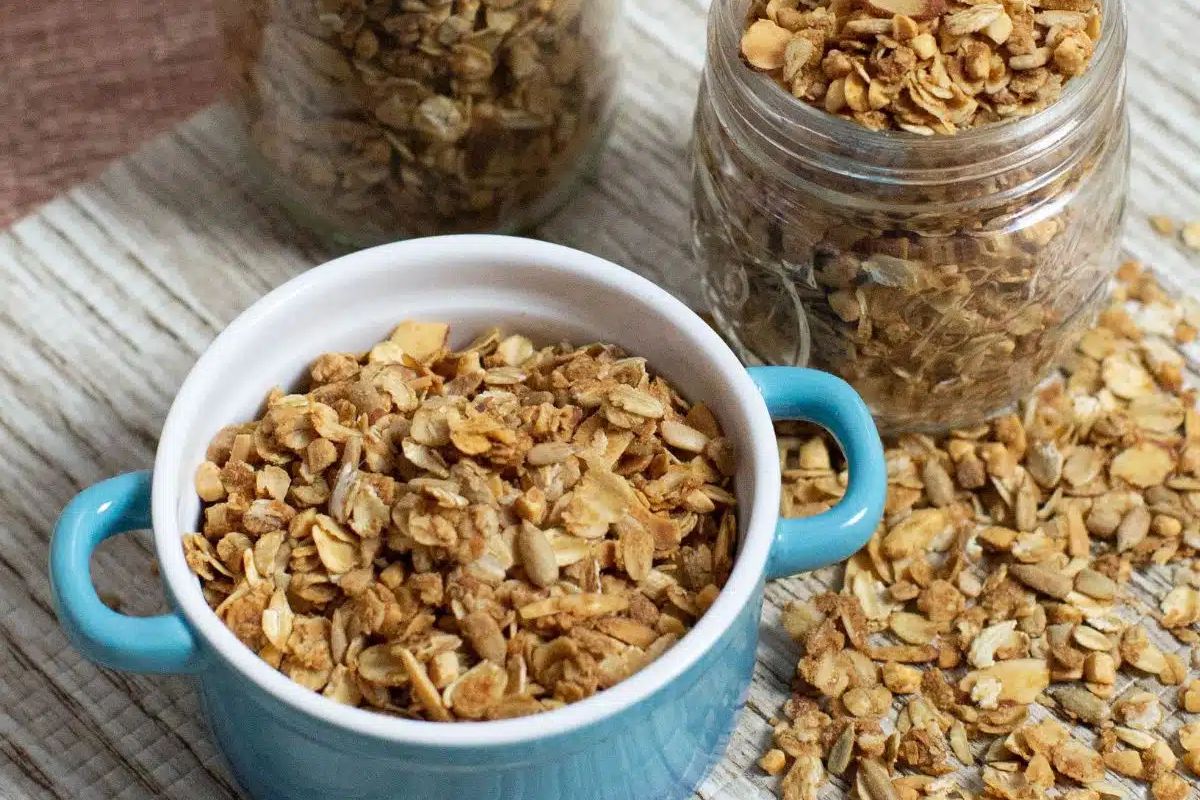
If you want to kick up the flavor of your chicken or turkey, give this homemade poultry seasoning a go! A classic blend of spices that pair perfectly with any type of poultry or even white meat in general.
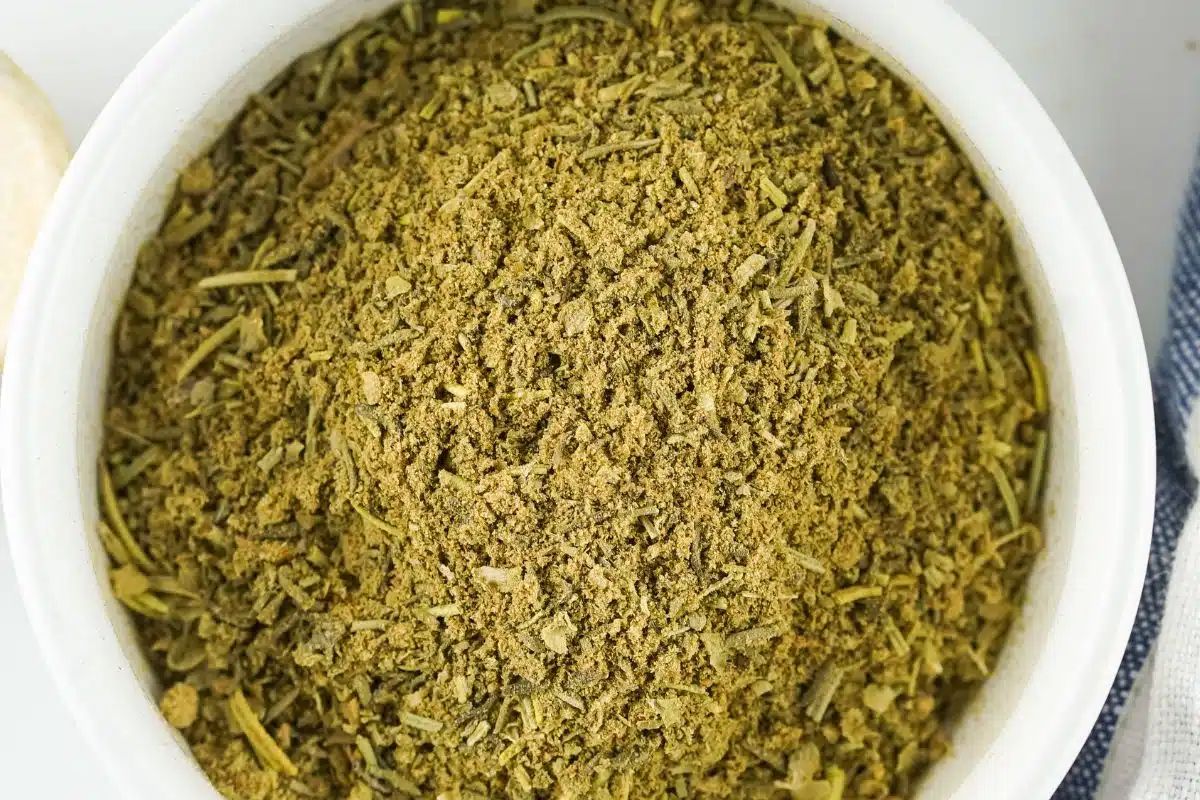
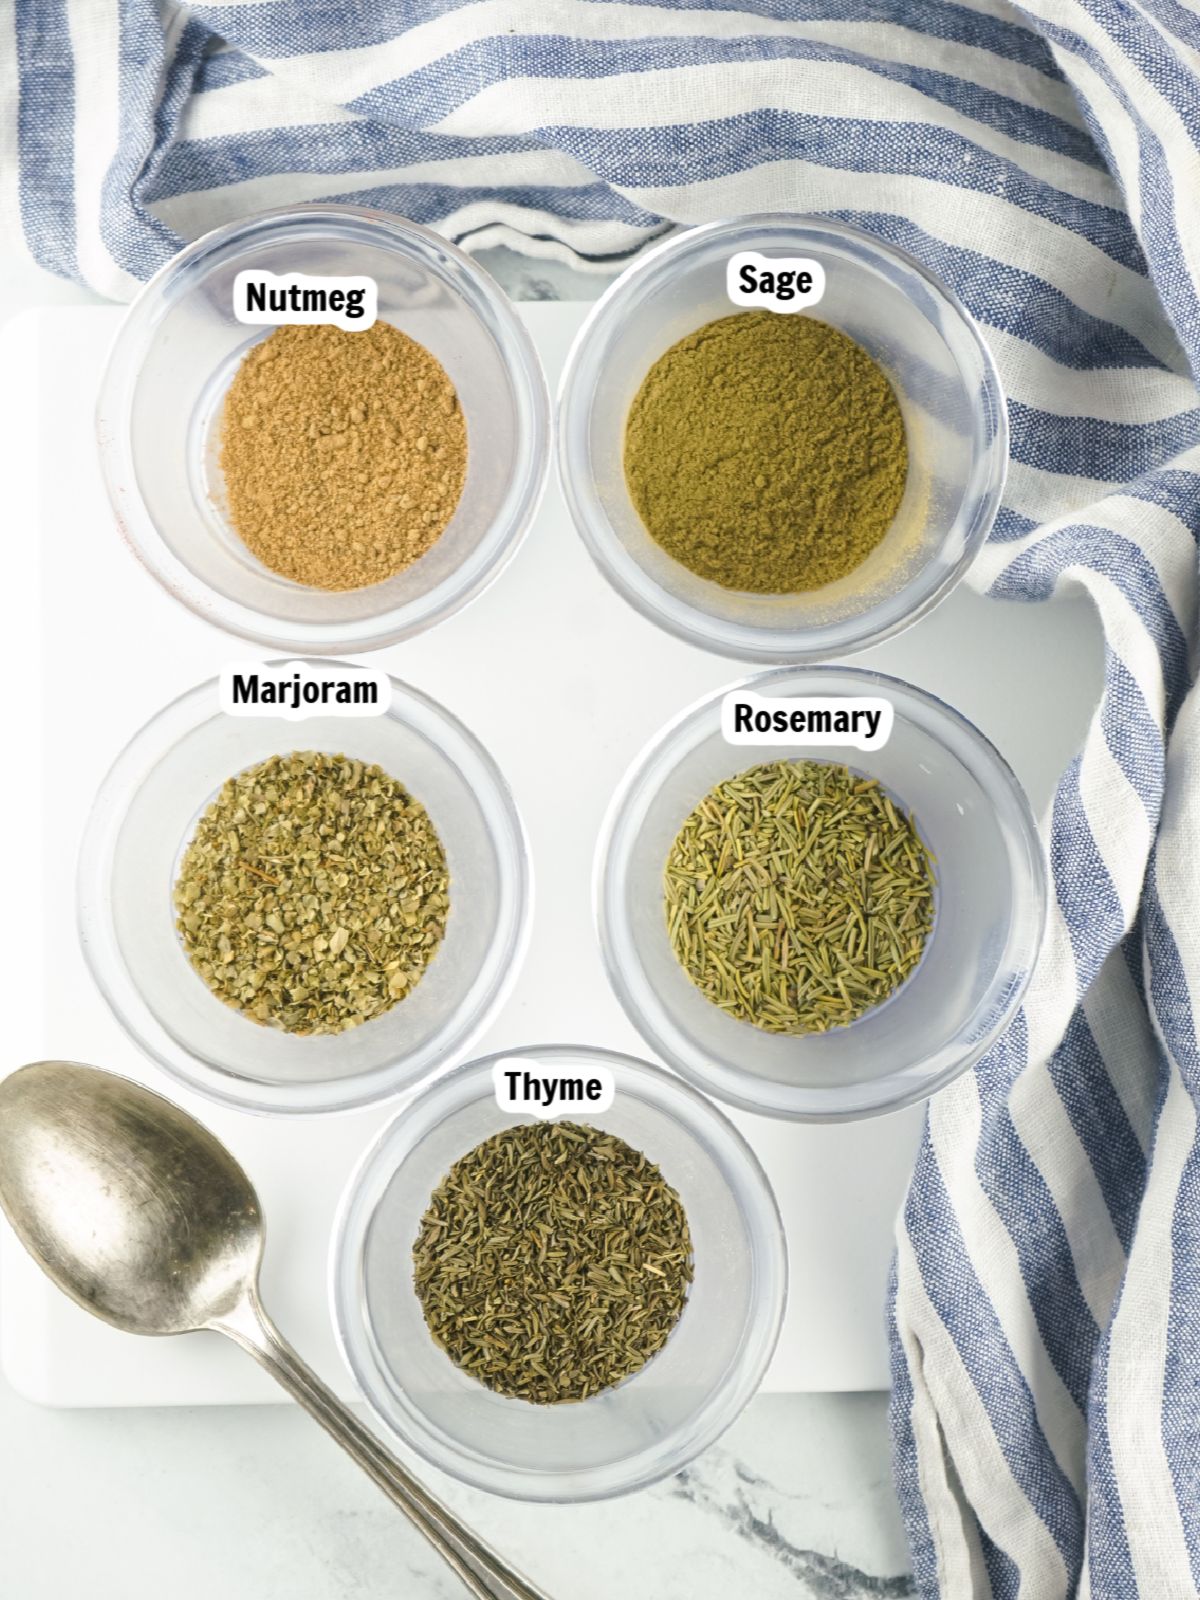
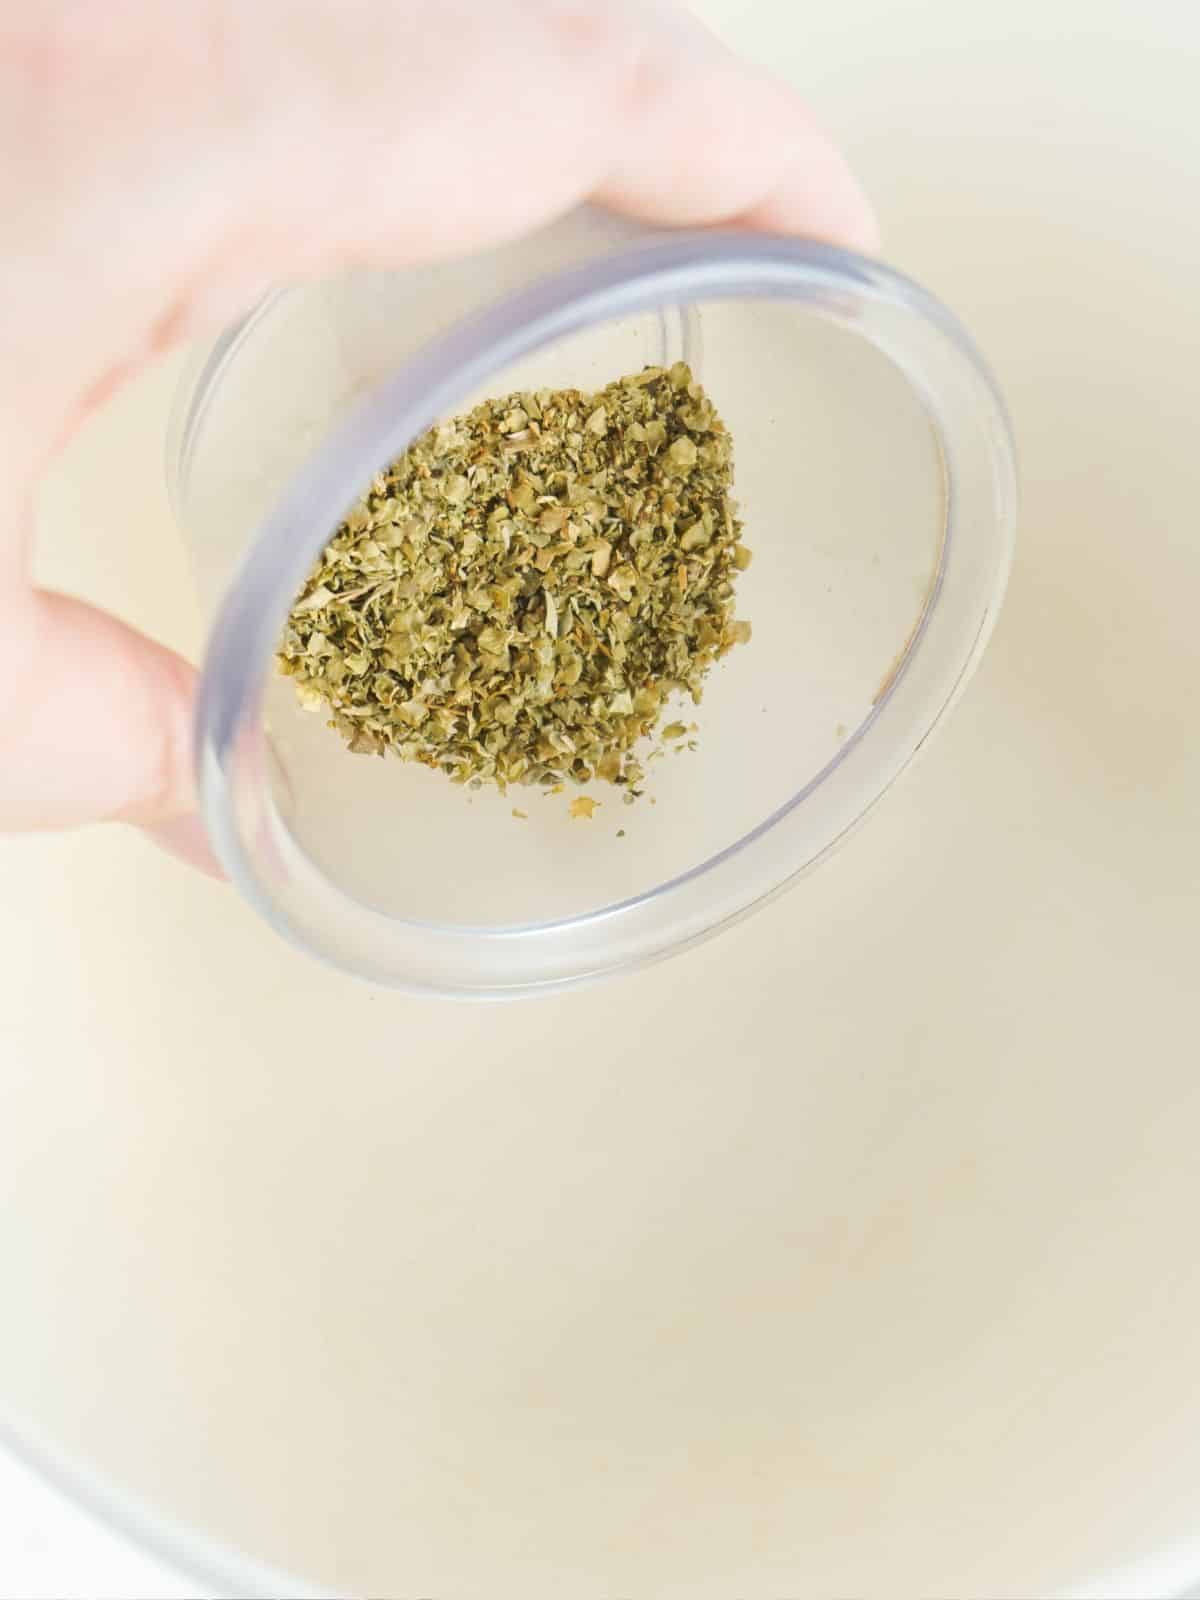
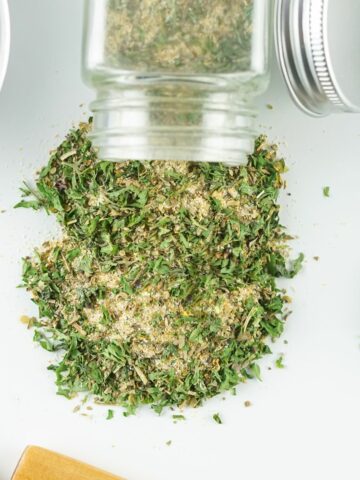
This homemade seasoning blend tastes even better than the store-bought kind. It's the perfect combination of sage, thyme, marjoram, rosemary, and nutmeg!
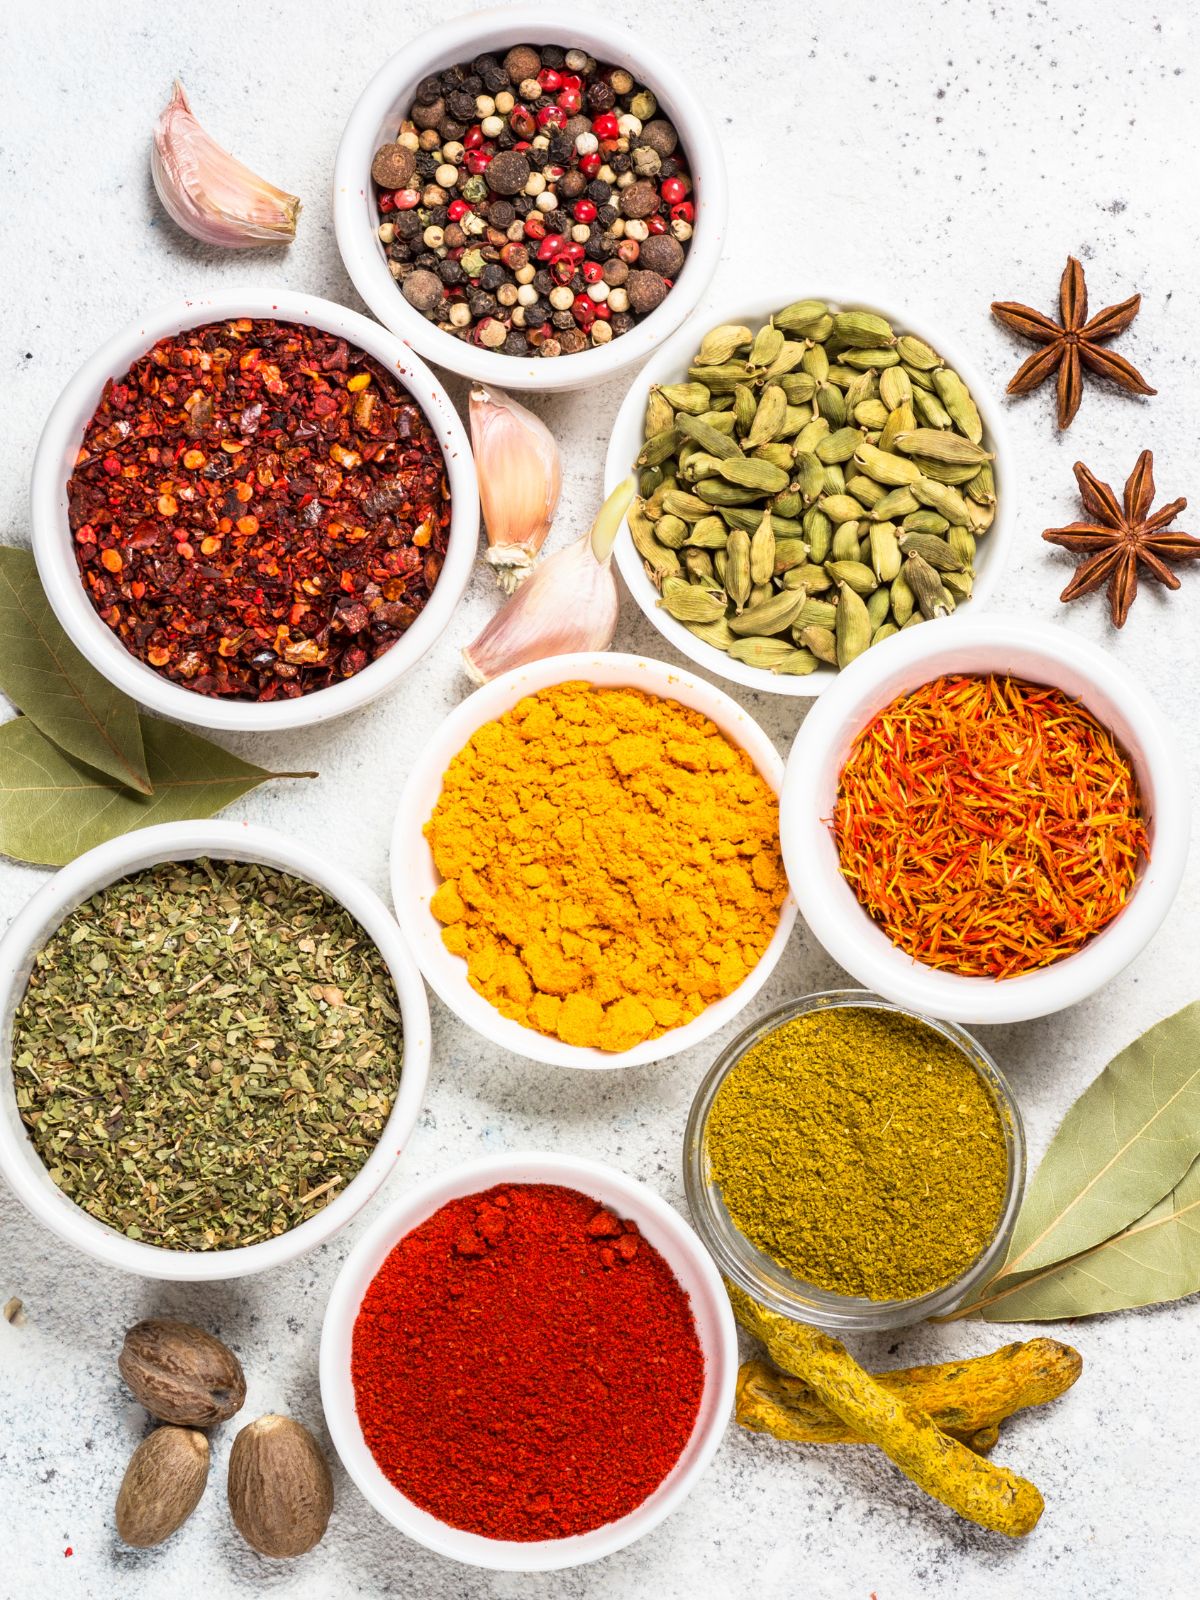
Poultry seasoning is a blend of herbs and spices used to impart flavor to poultry dishes. Not only can it be used on poultry, but try it on other meat, vegetables, stuffing and even gravy!
Common herbs and spices in poultry seasoning blends include sage, thyme, rosemary, marjoram, oregano, garlic powder, onion powder, paprika, salt, pepper and nutmeg.
You probably have all the ingredients in your pantry to put together this recipe.
Check out all the other Family Favorite Chicken Recipes for even more delicious recipes you can use with this easy-to-make poultry seasoning.
Here's a quick overview of the ingredients for this recipe. Find the exact amounts and click the Instacart button to easily add them to your cart – all in the printable recipe card below!
Recipe Substitutions and Variations
Adjust the seasoning to your preference! You don't have to use the exact amounts of each ingredient that I listed.
This section includes step-by-step photos and instructions to guide you through the recipe. For the complete printable version, scroll down to the recipe card below.
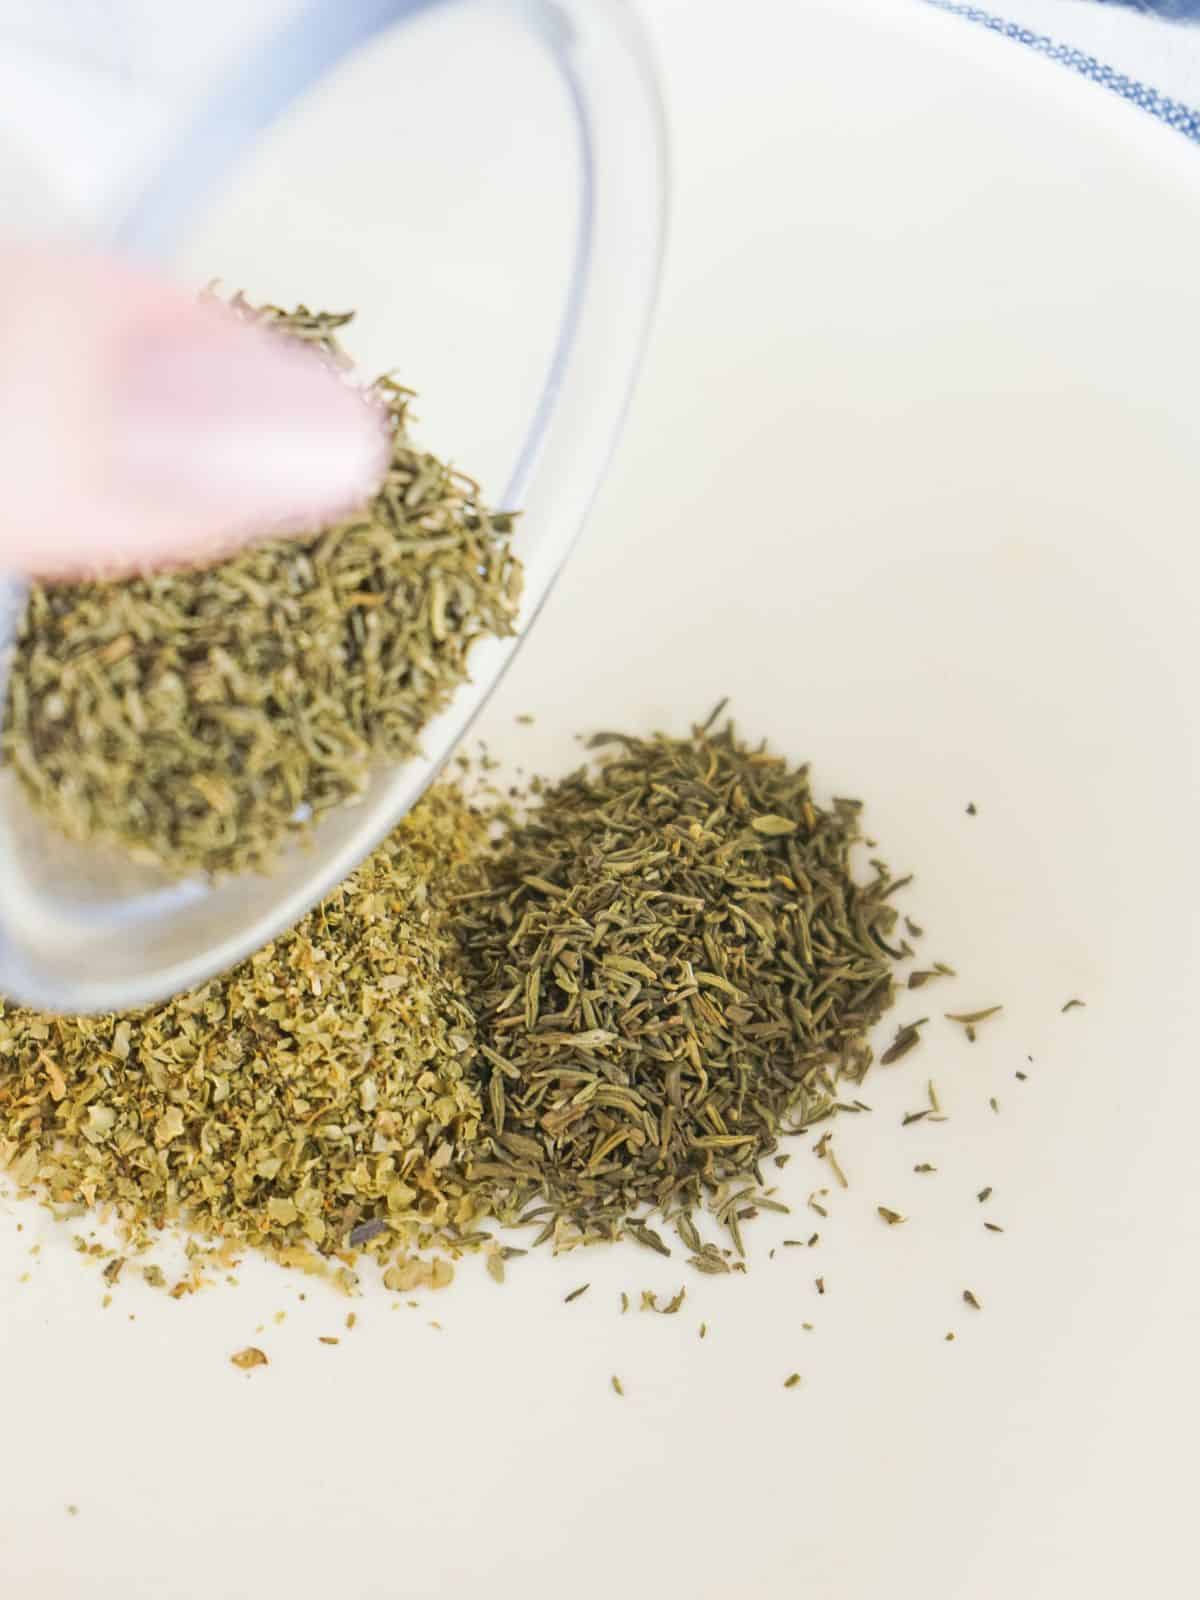
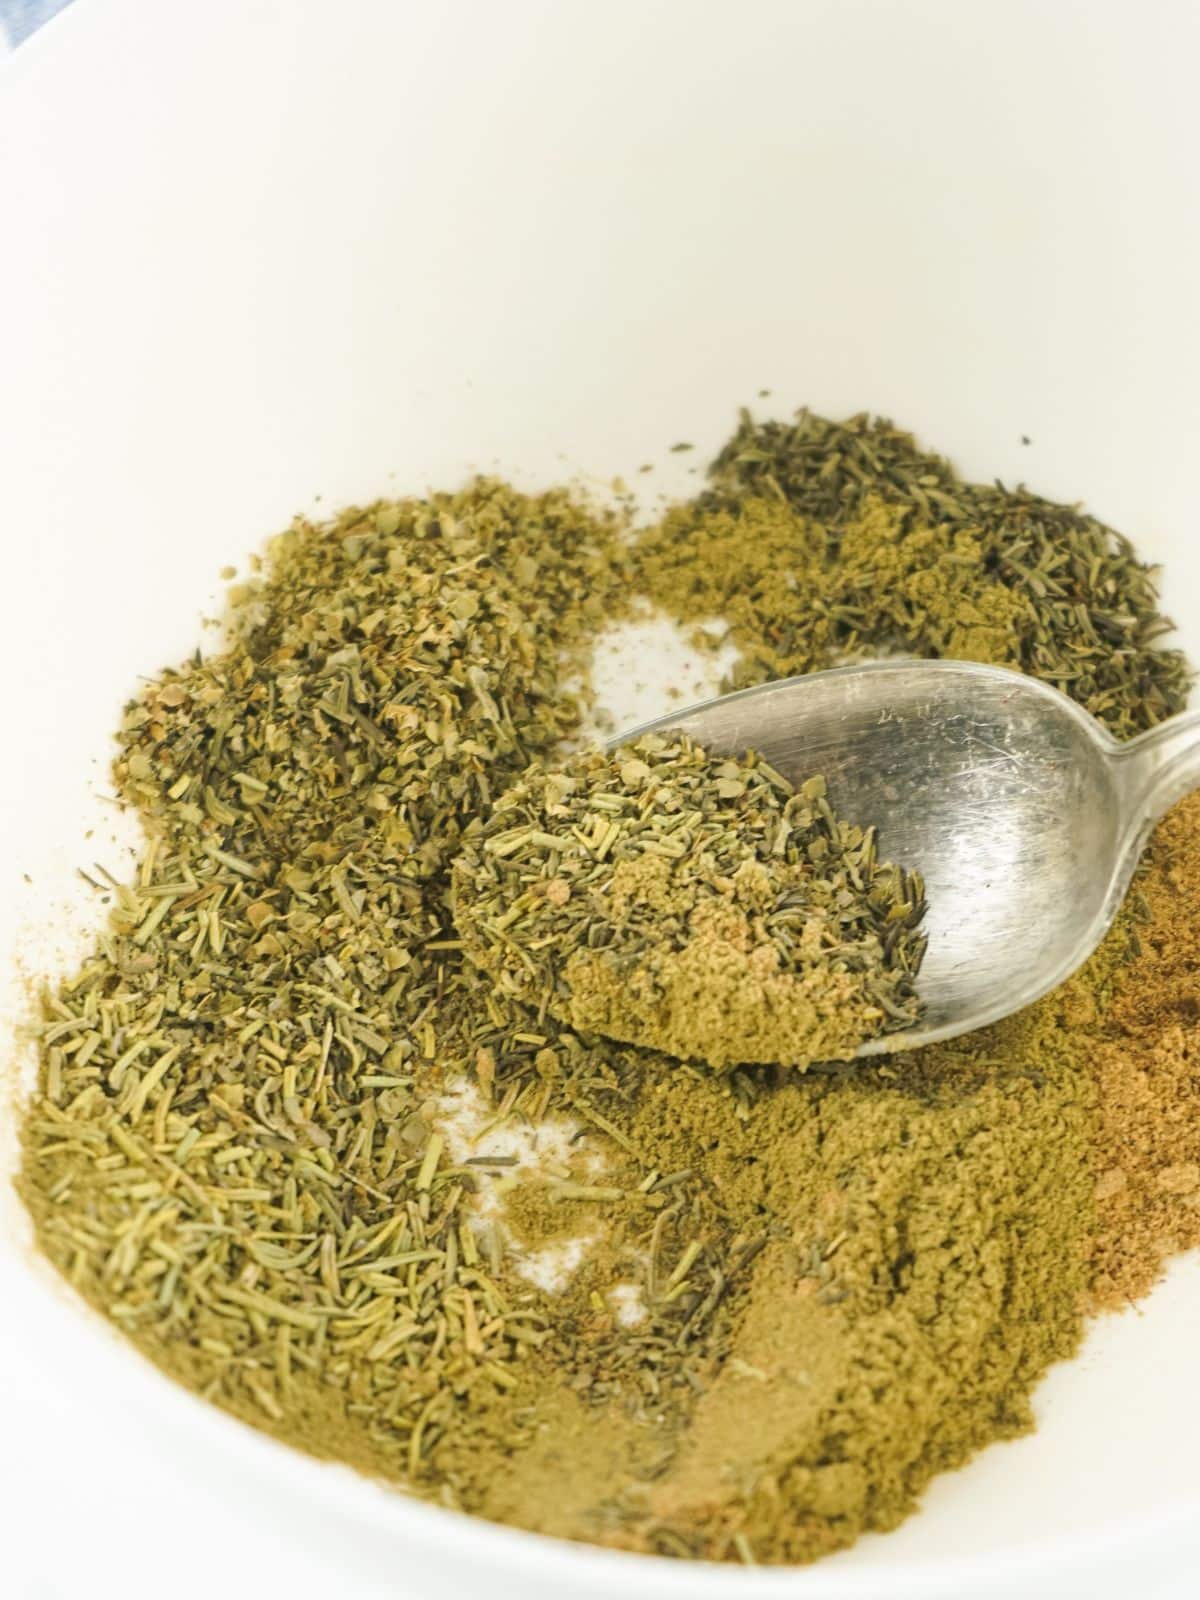
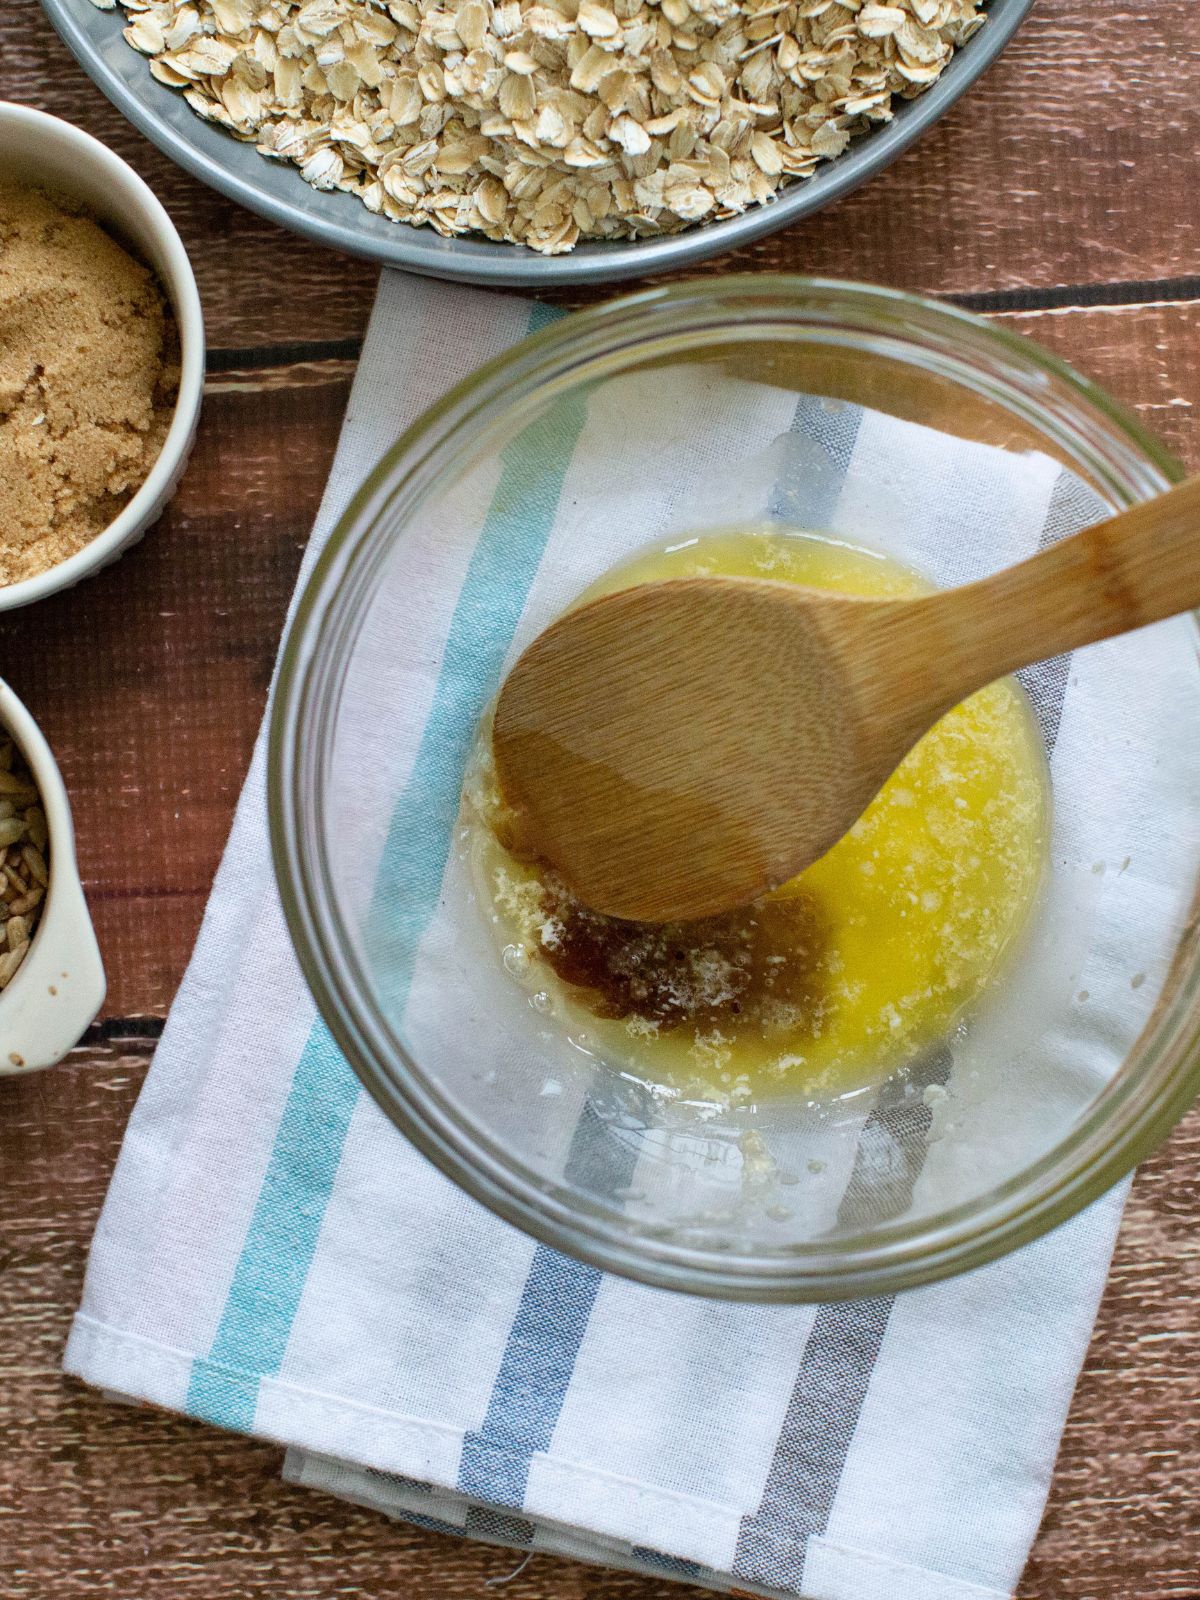
Step 1: Mix all of the ingredients in a small bowl.It's ready to use now or you can store it in a sealed jar or air tight container.
Step 2: The amount needed to season varies from dish to dish. Start out small and add more as needed.
Top Tip
Don't be afraid of the nutmeg! This common ingredient in poultry seasoning is often found in mixtures at the store. If you do decide to omit it, it'll cut out a dynamic flavor component of the seasoning.
LOVE this recipe? SAVE it for Later!
❤️Tap the heart icon in the lower right corner to add the recipe to your recipe box for easy access anytime.
If you made it, leaving a star rating or quick review is always appreciated and helps other readers too.
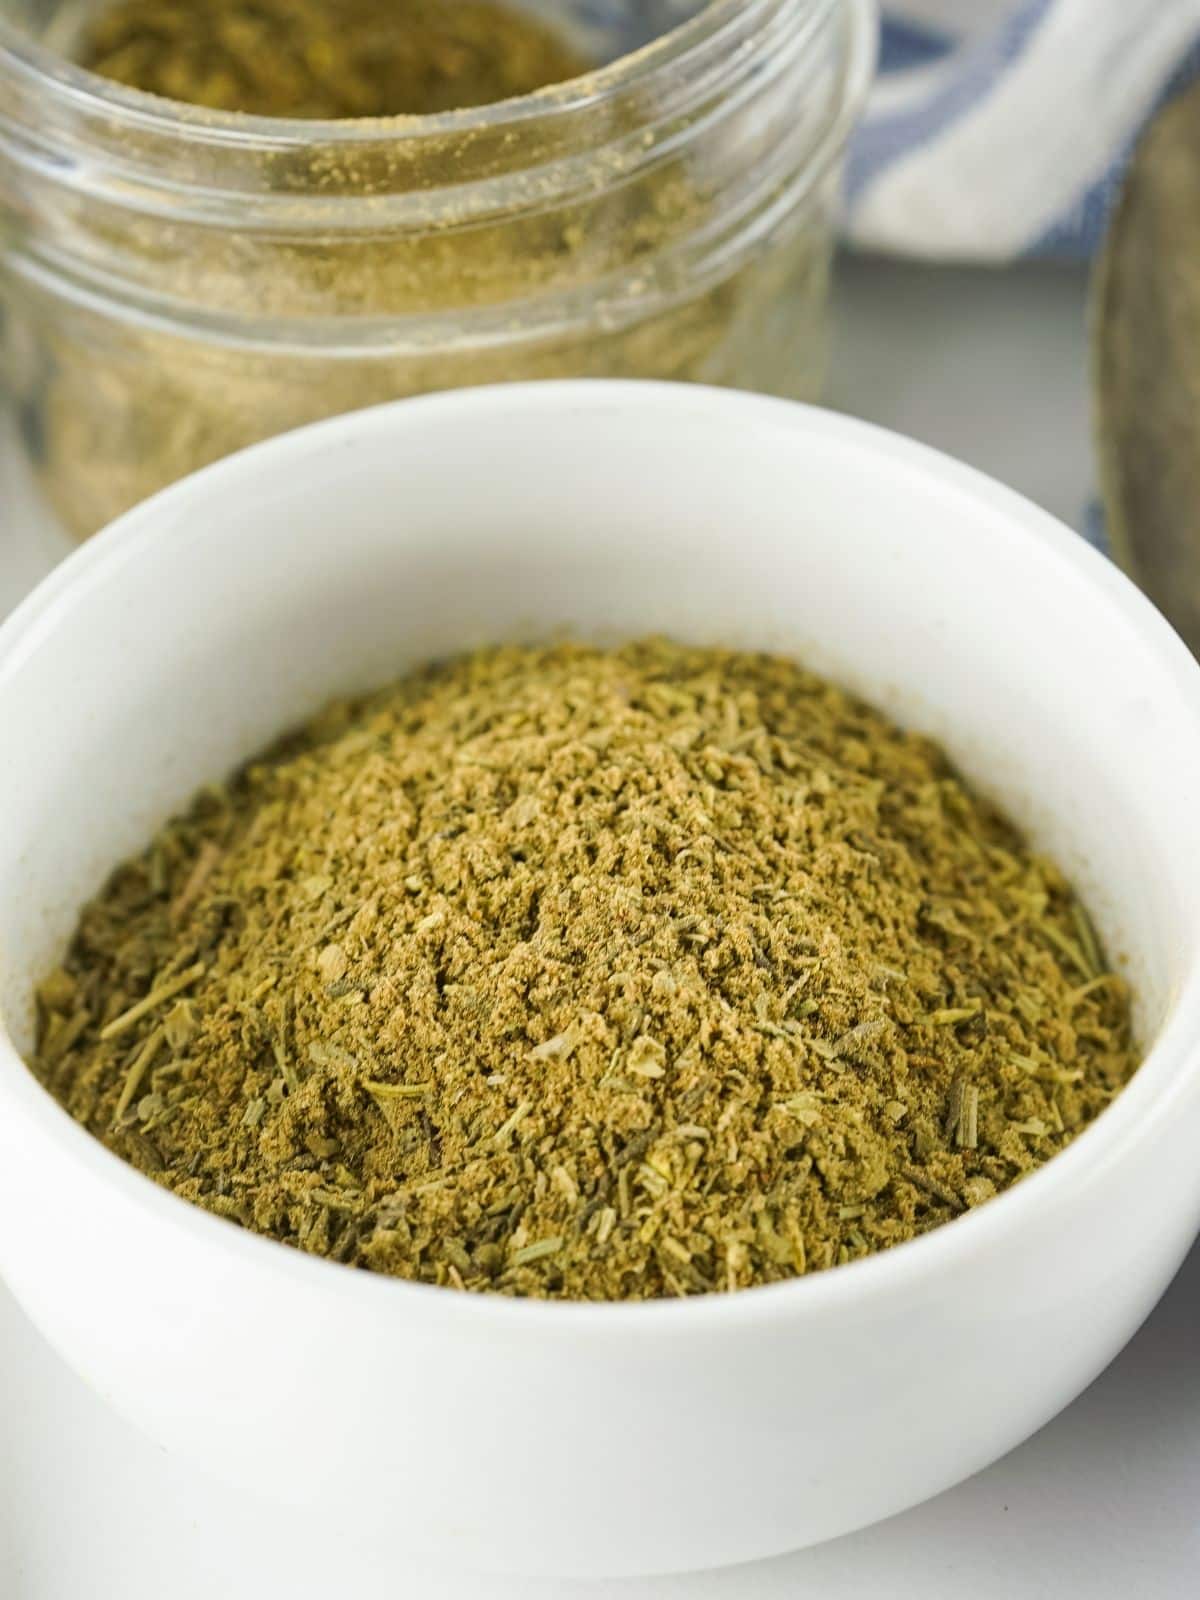
Store poultry seasoning in an airtight container in a cool, dry, dark place like your cupboard for 2-3 months.
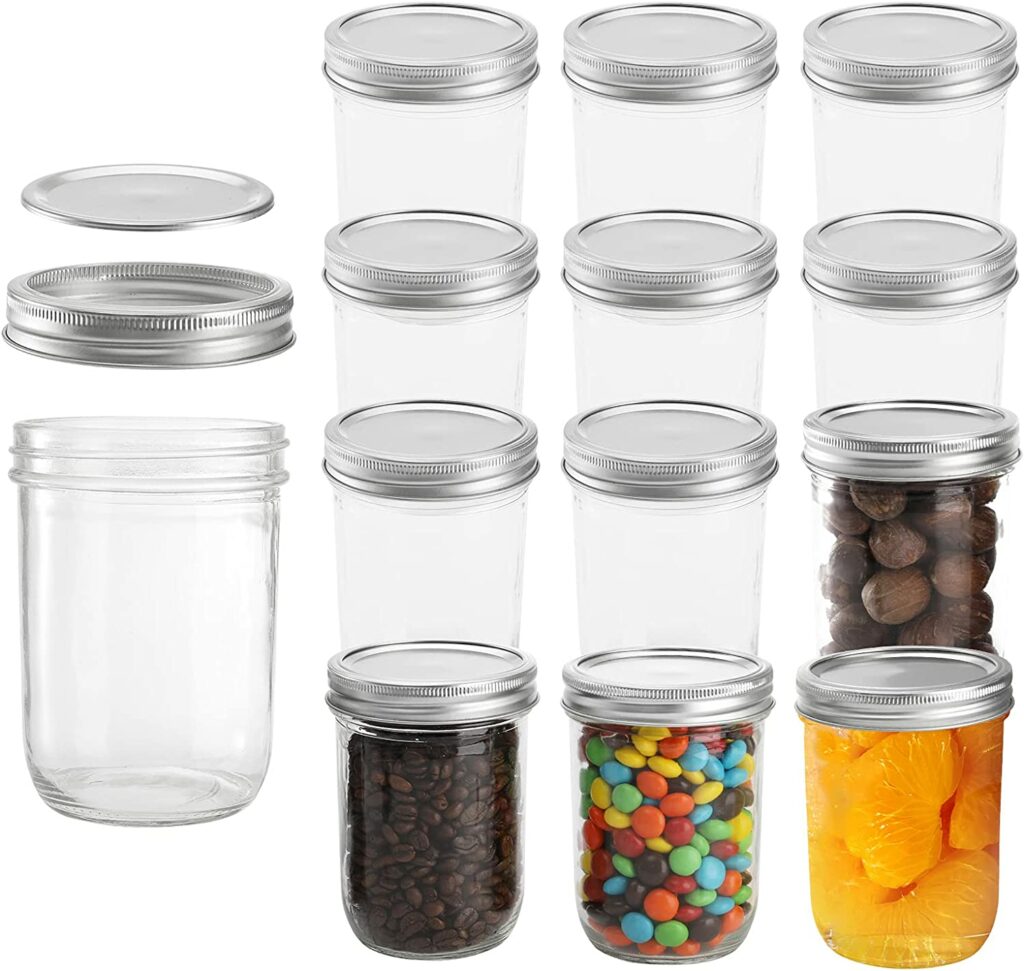
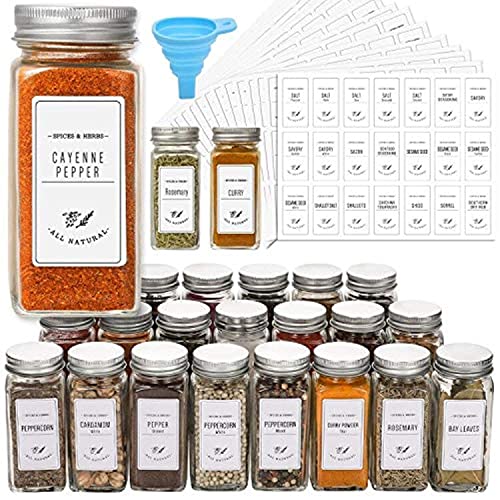
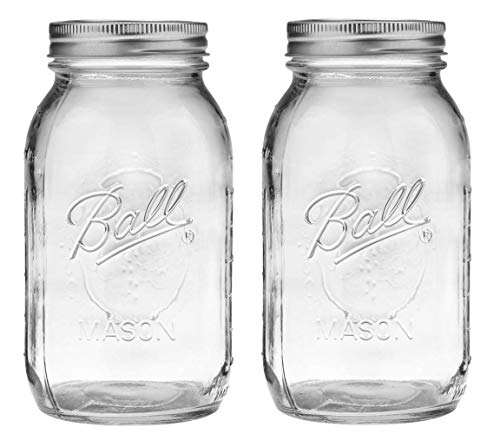
My Favorite Mason Jars: Perfect for storing homemade spices. Ideal for sliced fruits and vegetables, pickles, tomato-based juices, and sauces. BPA-free, dishwasher safe, reusable. New and improved sure tight lids.
To view the answer, simply click on the down arrow (⬇) next to the question. If you have any other questions not answered here, please leave a comment!
Can I use chicken bouillon instead of poultry seasoning?
Yes, you can use chicken bouillon instead of poultry seasoning. However, you should note that it will not provide the same level of flavor as a blend of herbs and spices. It is best used when combined with other seasonings to achieve a flavorful dish.
If you want to kick up the flavor of your chicken or turkey, give this homemade poultry seasoning a go! A classic blend of spices that pair perfectly with any type of poultry or even white meat in general.
Cooking for More (or Less!)Scale this recipe up or down! Adjust the number of servings above to automatically update ingredient amounts.
Instructions
Combine all the ingredients in a small dish and mix well.
Use immediately or store in a sealed jar or dish in the pantry for up to a month.
Notes
I don't add salt and pepper to my poultry seasoning mixtures because you'll want to add that to taste per each dish. It will vary from meal to meal on how much salt and pepper you might need.
Don't be afraid of the nutmeg. This is a very common ingredient in many poultry seasoning mixtures you'll find at the store. If you really don't want to add the nutmeg, you don't have to, but it will cut out one of the dynamic flavor components of the seasoning.
I don't have a specific amount to suggest to use as it varies for me per dish. Just add as much as you need, starting small and working your way up.
Once you taste the seasoning, adjust the seasoning levels to your preferences. There's no reason you need to stick with the exact amounts I list above.
Nutritional estimates are provided using an online calculator and is an estimate per serving. Calorie accuracy isn't guaranteed.
Tried this recipe?Leave a comment and star rating!
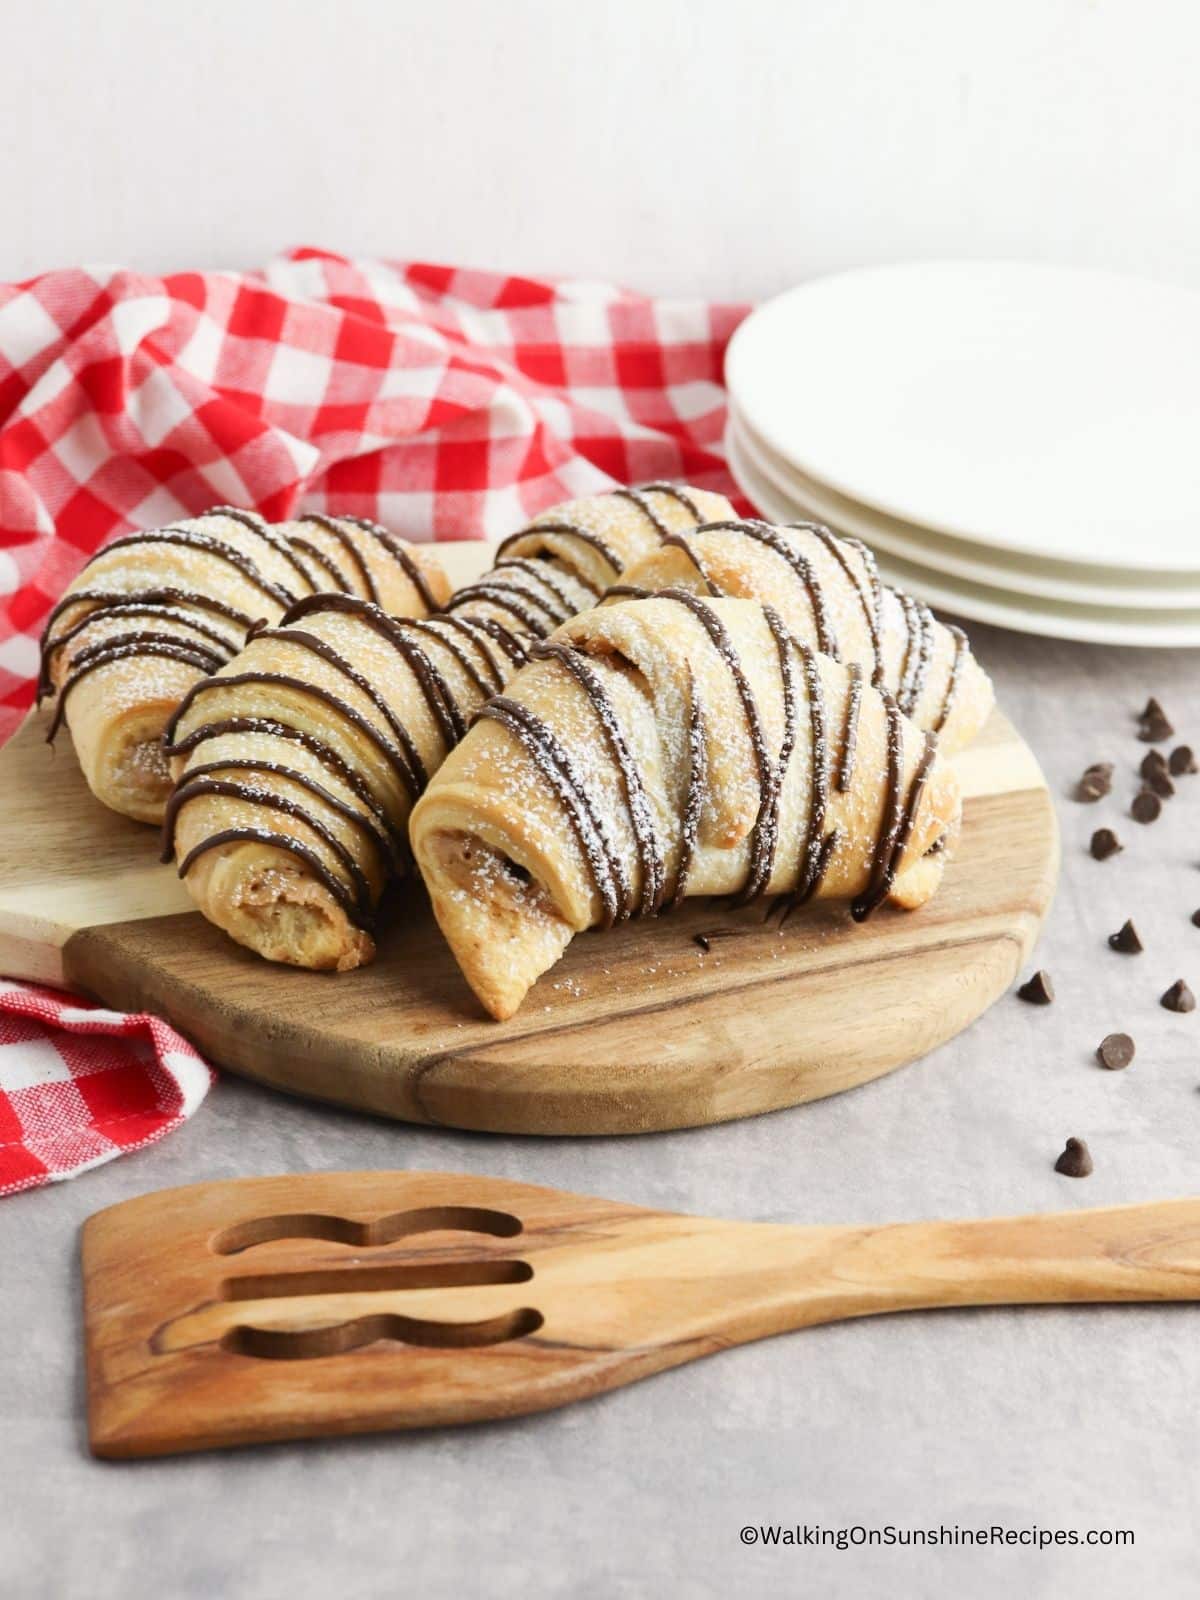
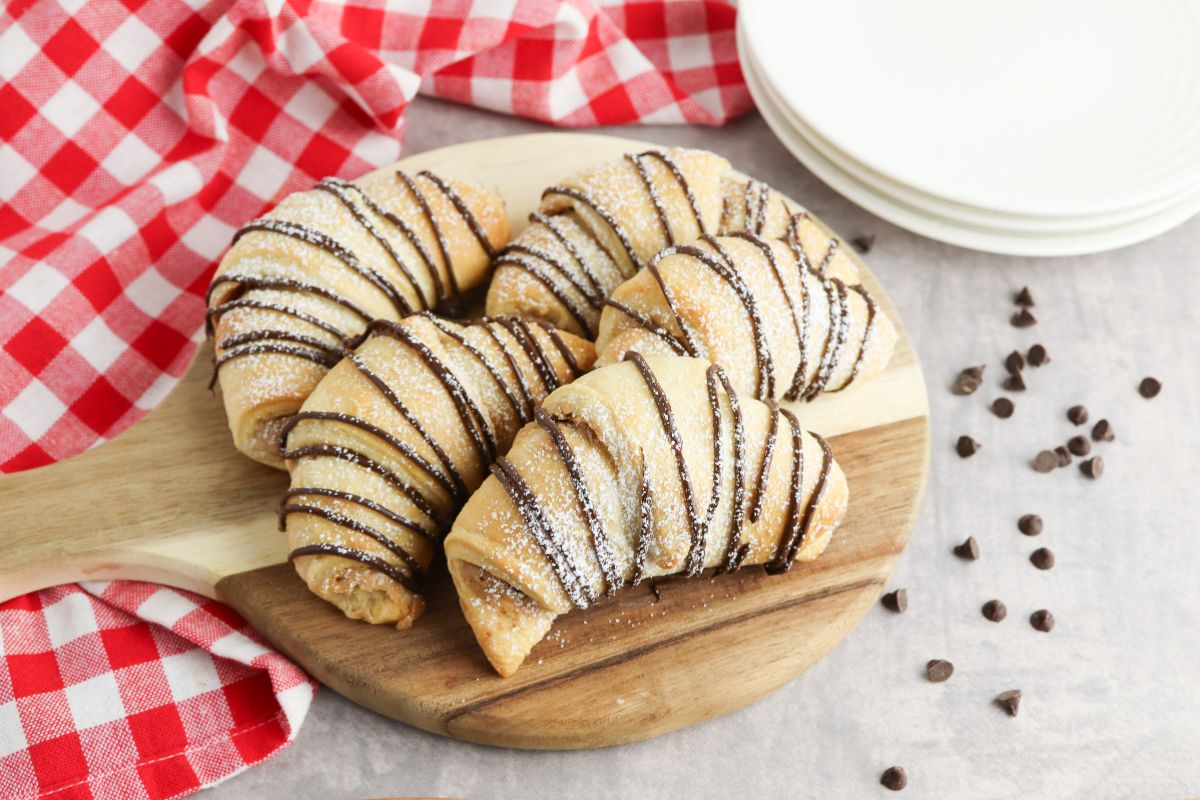
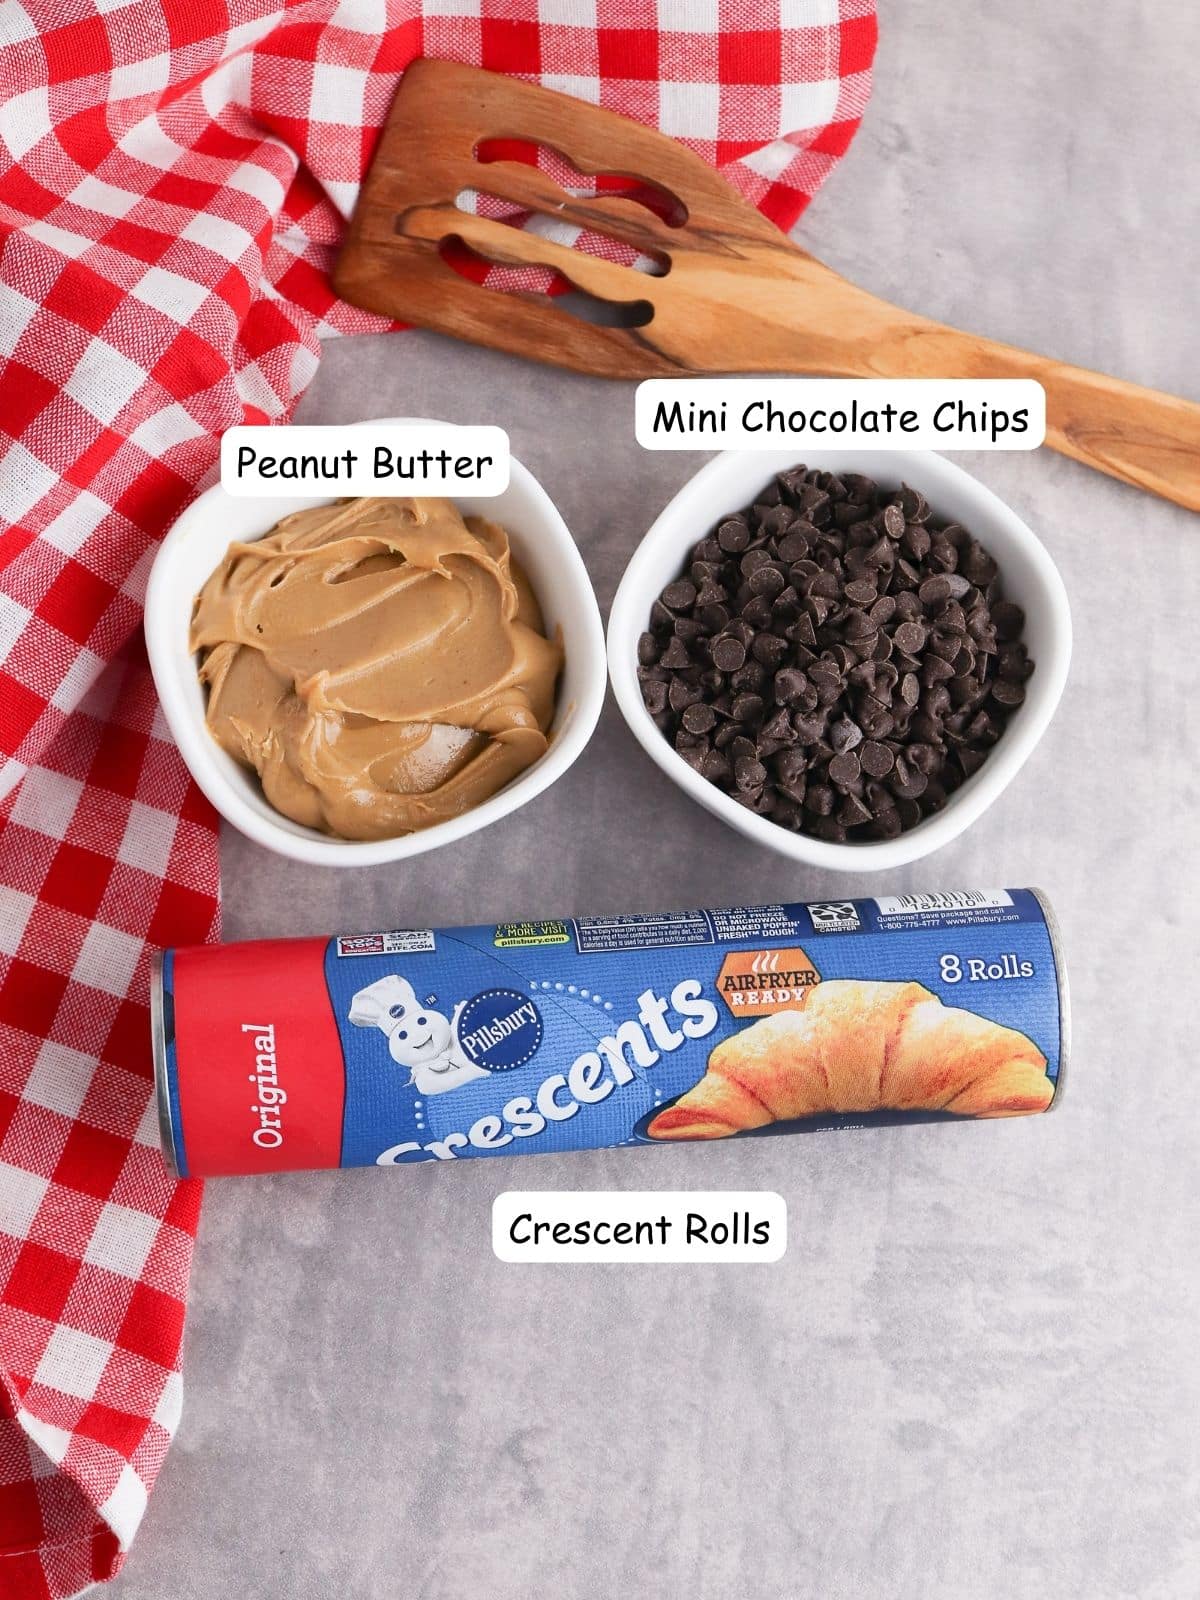
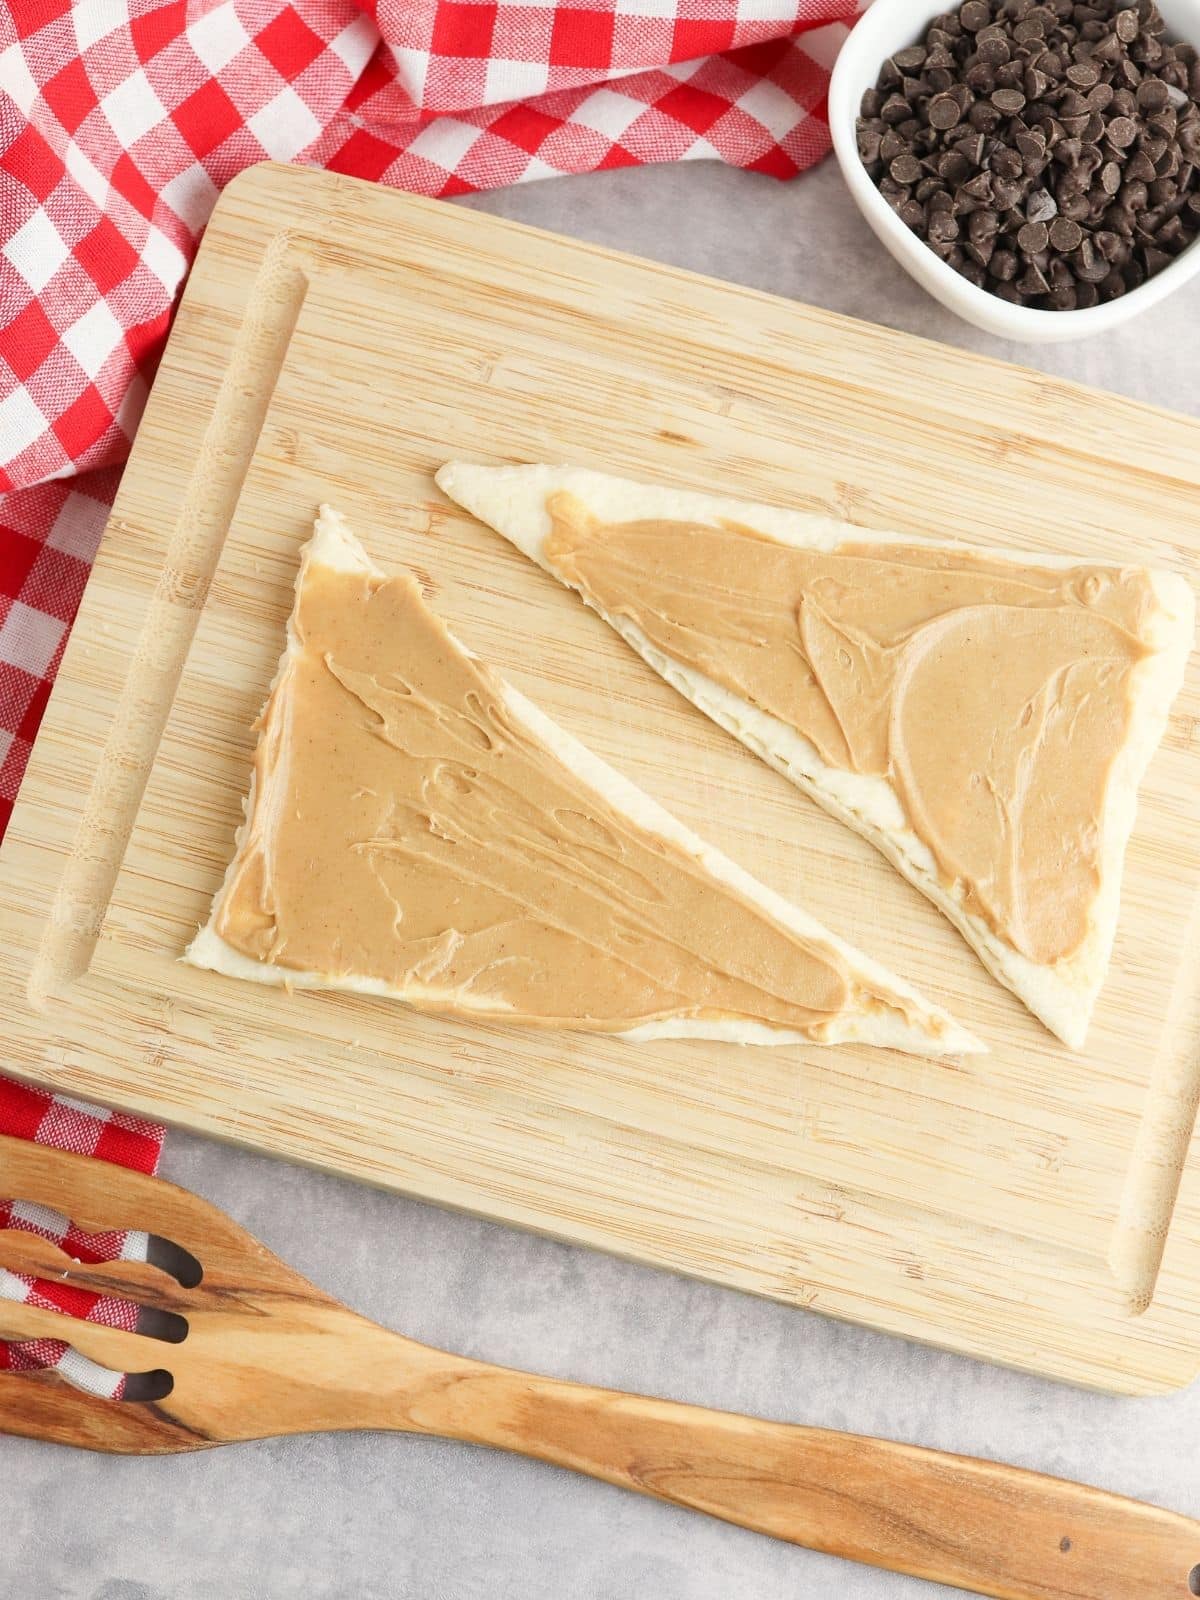
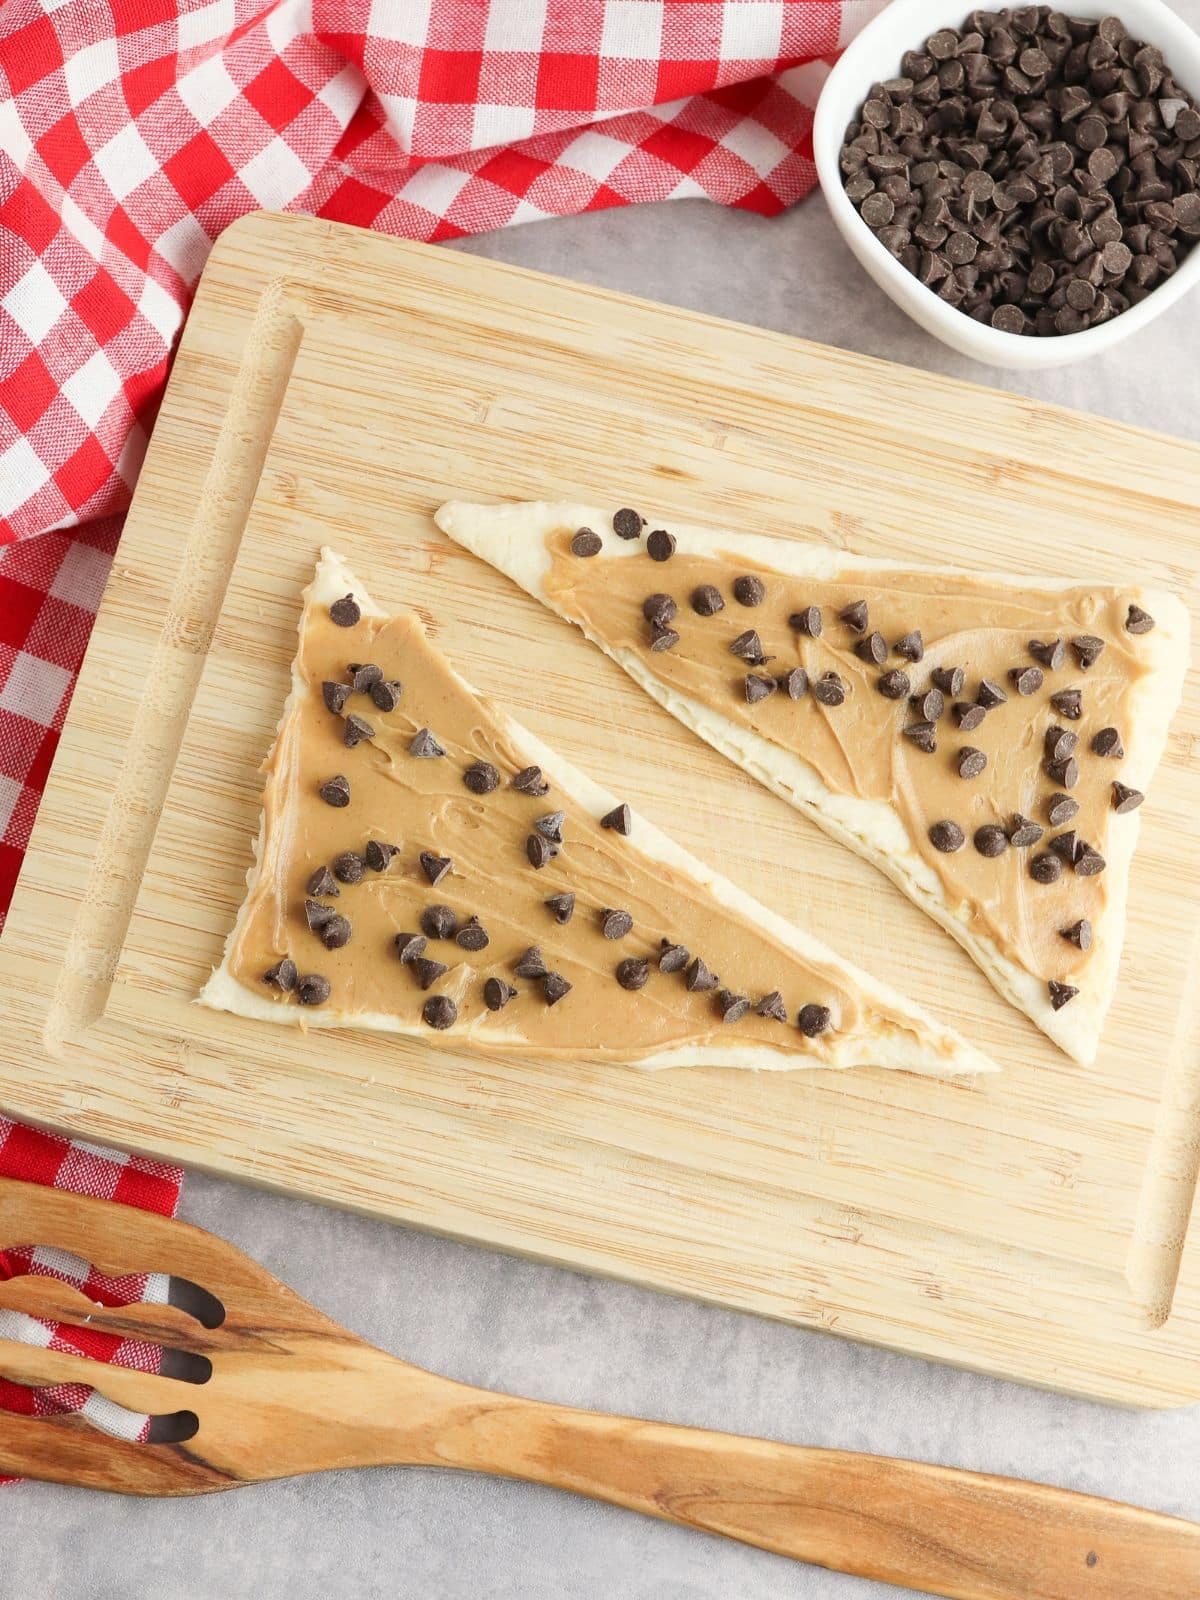
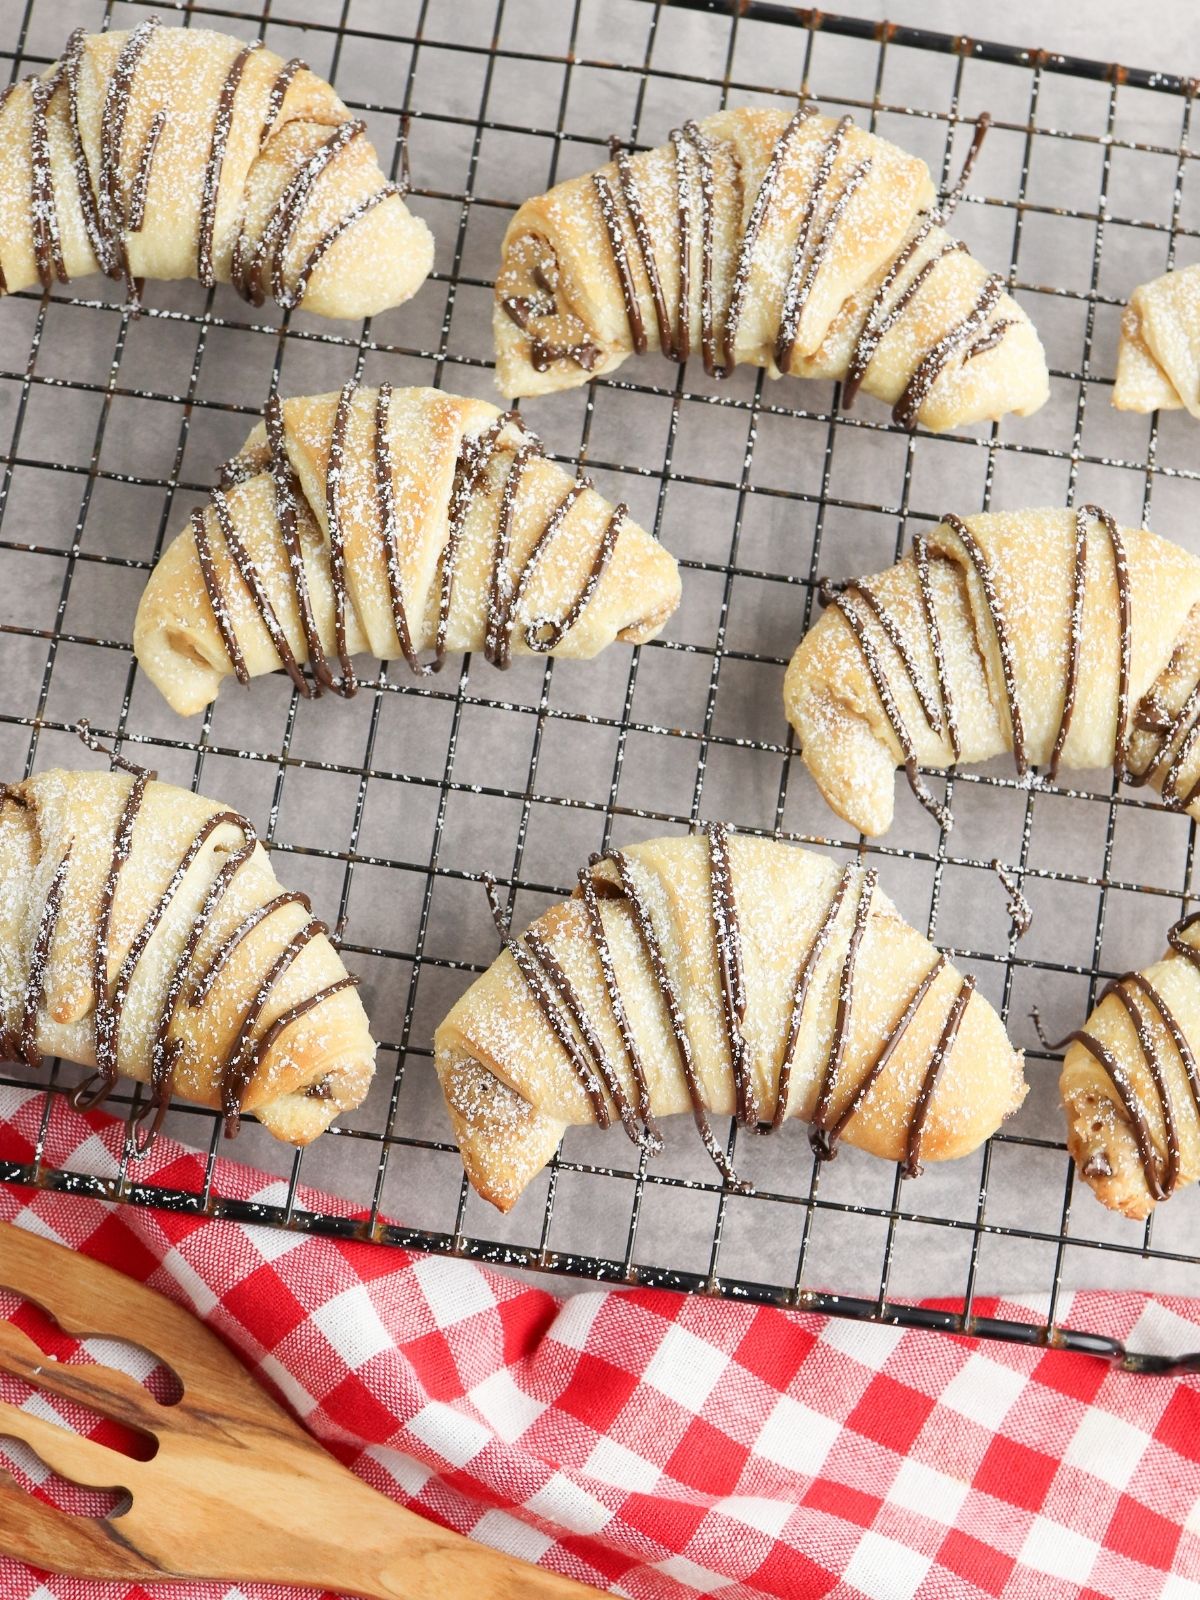
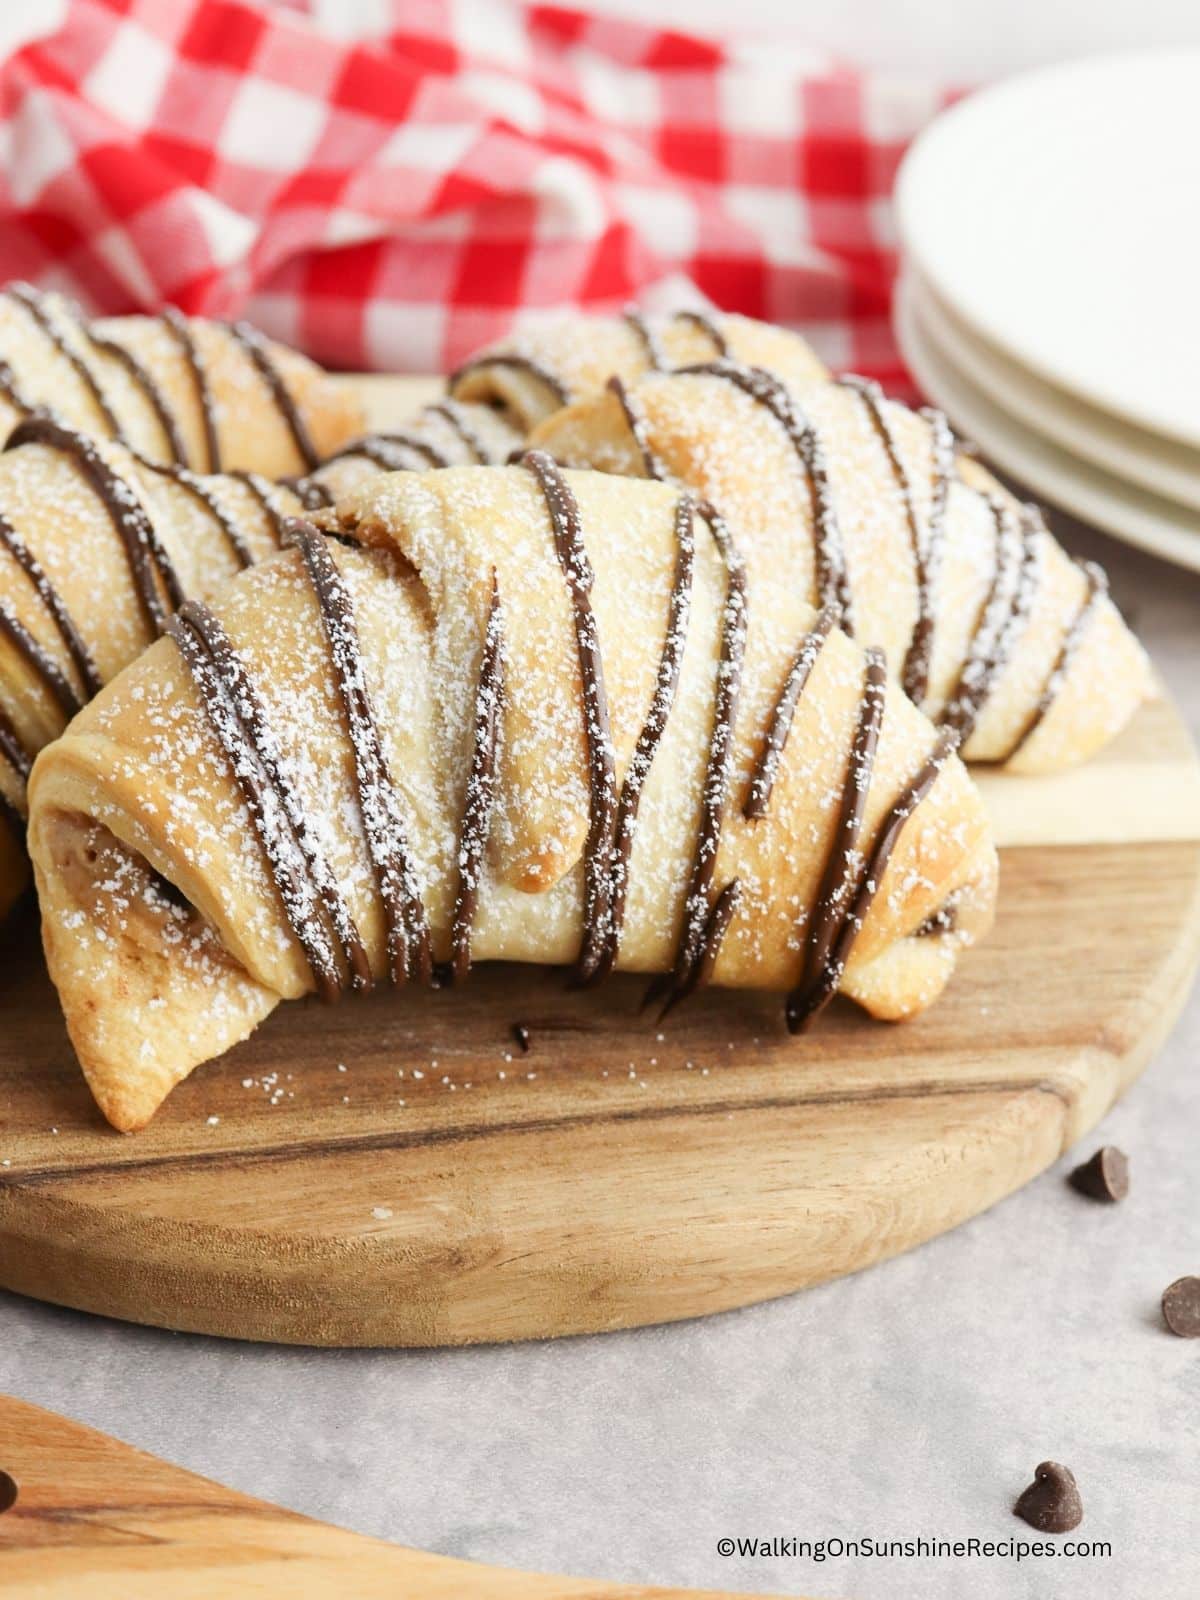
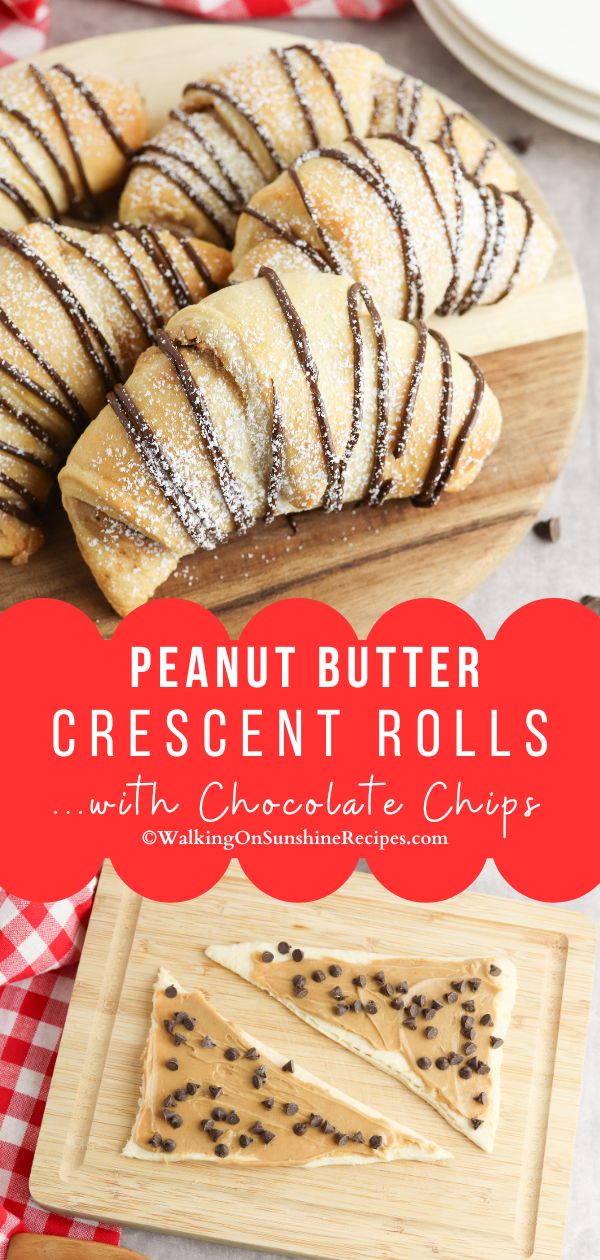
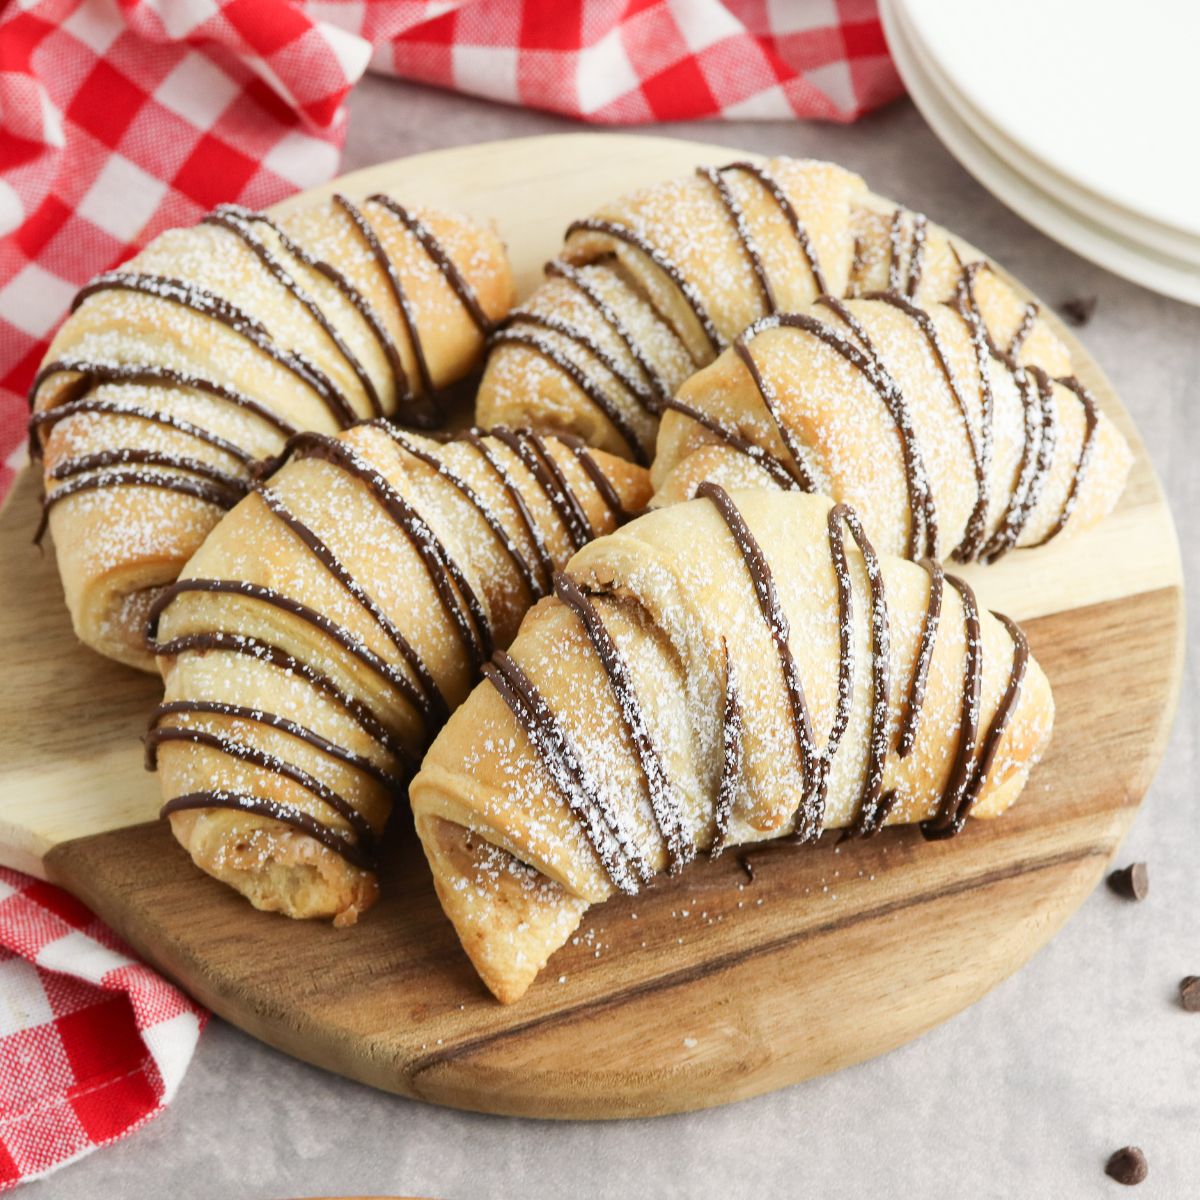
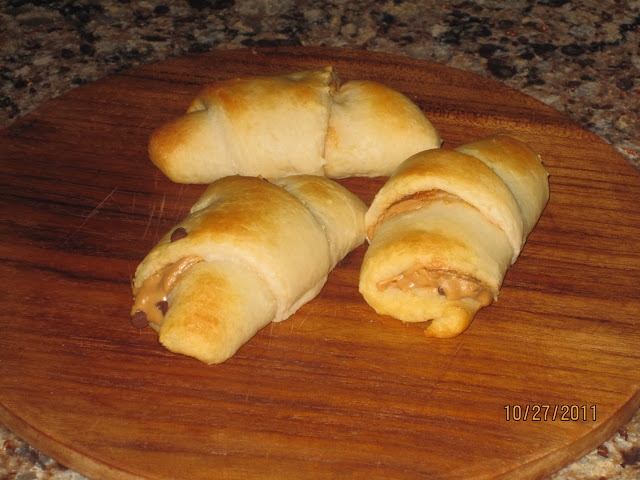
Craving something sweet but short on time? These peanut butter chocolate chip crescents are warm, flaky, and ready in minutes.
Not only will this recipe have your mouth watering but it requires minimal prep time...no more than 10 minutes!
If you want an indulgent yet guilt-free snack (or even breakfast!) then be sure to give this Crescent Roll Recipe a try.
Made with just crescent rolls, peanut butter, and chocolate chips, this recipe couldn’t be easier. The flaky layers bake up golden with a creamy, chocolatey center, creating a treat that feels special any time of day.
With only a few ingredients, you’ll have a warm snack or dessert that’s sure to disappear fast.
Just popped them in the oven as an after-school snack for my kindergartener, and they were a hit! Such a quick and easy idea that made snack time fun. Thanks for sharing this recipe—I’ll definitely be making it again.
~ Em
Reasons to Try This Easy Crescent Roll Recipe
Quick & simple – ready in about 10 minutes with minimal prep
Only 3 ingredients – crescent rolls, peanut butter, and chocolate chips
Versatile treat – enjoy as a snack, dessert, or even a fun breakfast
Kid-friendly – great for after-school or weekend baking
Delicious flavor combo – flaky crescents with creamy peanut butter and melty chocolate
Can I make these Peanut Butter Chocolate Chip Crescents in the Air Fryer?
Prepare the recipe as directed below, then air fry at 330°F for 5-7 minutes, or until golden brown and heated through.
Then allow them to cool for a few minutes before adding the chocolate drizzle topping.
Here's a quick overview of the ingredients for this recipe. Find the exact amounts and click the Instacart button to easily add them to your cart – all in the printable recipe card below!
Substitutions and Variations
Sprinkle with Cinnamon Sugar – Brush the crescents lightly with melted butter and dust with cinnamon sugar before baking for a sweet, crunchy finish.
Drizzle with Chocolate or Caramel – Add a drizzle of melted chocolate or caramel sauce on top after baking for an extra indulgent touch.
Add Marshmallows – Place a few mini marshmallows inside with the peanut butter and chocolate chips for a s’mores-inspired version. Or try cutting up a Reese's Peanut Butter Cup and place it in the center!
Use White Chocolate Chips – Swap regular chocolate chips for white chocolate for a creamy, slightly sweeter flavor.
Top with Chopped Nuts – Sprinkle crushed peanuts, pecans, or walnuts inside or on top before baking for added crunch.
Step-by-Step Instructions
This section includes step-by-step photos and instructions to guide you through the recipe. For the complete printable version, scroll down to the recipe card below.
Step 1: Lay out the crescent rolls on a flat surface and spread the peanut butter on top of each one.
Step 2: Add the chocolate chips on top of the peanut butter.
How to Roll Crescents
Step 3: Starting at the biggest end, roll the crescents up and place on a baking sheet.
Baking Instructions
Step 4: Bake at 375°F until they are golden brown.
Add Chocolate Drizzle
Step 5: You can eat these right out of the oven or jazz them up a bit by melting the remaining chocolate chips and drizzling on top of the crescents. Dust the crescents with powdered sugar.
LOVE this recipe? SAVE it for Later!
❤️Tap the heart icon in the lower right corner to add the recipe to your recipe box for easy access anytime.
If you made it, leaving a star rating or quick review is always appreciated and helps other readers too.
Want to make this recipe even better? Don’t miss my favorite tips below for boosting flavor, perfecting texture, and saving time in the kitchen!
✔️ DO use parchment paper or a silicone mat to prevent sticking and make cleanup easier. ❌ DO NOT overfill the crescents, or the filling may ooze out while baking.
Storage, Freezing and Reheating Tips
Refrigerator: Once the crescents have cooled, store in an airtight container for up to 3 days.
Reheating: Reheat in the air fryer for a couple of minutes at 350°F or in the microwave for 20-30 seconds.
Freezer: You can freeze leftovers for up to 2 months in an airtight container.
Thawing: To reheat, thaw overnight in the fridge or at least 30 minutes at room temperature then place in the air fryer for a couple of minutes at 350°F or in the microwave for 20-30 seconds.
This recipe has been updated since it first appeared in 2012 with new photos, information and a new printable recipe card that includes nutritional information. I hope you enjoy the updates as much as I enjoyed working on them!
Are you looking for the perfect Easter recipe to wow your family and friends this holiday? This Italian Easter Bread Recipe is made with a delicious soft, fluffy brioche-style dough.
Not only does it taste amazing but it also looks stunning with its festive array of brightly colored eggs nestled inside. With just a few simple steps, you'll soon be on your way to creating an unforgettable Easter tradition!
This classic recipe takes some time and love from start to finish, but when all is said and done you'll have an incredibly flavorful result that will leave lasting memories for everyone involved.
If you're looking for a shortcut version of this recipe using frozen bread dough, check out my Individual Easter Bread Rings. Especially if you find yourself a little too busy to make a homemade bread recipe, so this is a nice alternative.
Or maybe the thought of working with a yeast dough is intimidating? Try my Bread Machine Easter Bread recipe that uses the bread machine to make and rise the dough.
[feast_advanced_jump_to]
What does Italian Easter Bread symbolize?
Do you have a family tradition for Easter? Easter Breads are festive and makes such a pretty presentation. It also makes a lovely gift to bring to the hostess for Easter Sunday dinner.
There are a few different ways to prepare Italian Easter Bread. One is in the shape of a wreath to symbolize the crown of thorns worn by Jesus Christ when he was crucified.
The other is to braid the dough to represent the Holy Trinity. Some breads have eggs and some don't. The eggs symbolize "rebirth" which in turn symbolizes Christ rising from the dead.
Here's a quick overview of the ingredients for this recipe. Find the exact amounts and click the Instacart button to easily add them to your cart – all in the printable recipe card below!
Recipe Substitutions and Variations
This bread dough recipe is delicious any time of year. You don't have to use it only for Easter bread.
Once the dough has risen, you can form it any way you'd like as well. You can divide the dough into smaller loaves or make individual braided rings.
Step 1: In a small bowl, combine the heated milk with the package of dry yeast and 2 tablespoon sugar. Set aside until the mixture is foamy.
Step 2: In a mixing bowl with the dough hook attached, add 4 cups of the flour. Then add the eggs.
Step 3: Slowly add the melted butter and combine.
Step 4: Next, add the sugar.
Step 5: Then add in the salt, lemon zest and almond extract.
Step 6: Once the yeast mixture has "proofed" add it to the mixing bowl as well and begin to combine everything together. If the dough becomes too sticky or wet, add more of the remaining flour.
Step 7: As soon as the dough begins to pull away from the sides of the bowl and come together, set your kitchen timer for 8 minutes and let the machine "knead" the dough for you.
Allow the Dough to Rise
Step 8: Remove the dough from the mixing bowl to a floured surfaced and knead by hand for a minute.
Step 9: Place the dough in a bowl with a little oil. Cover and let rise until doubled in size.
How to Braid the Dough
Step 10: After the dough has risen once, remove it from the bowl onto a floured surface. Work the dough into two long strips or ropes and begin to braid.
Step 11: And yes, I know technically this is not a braid. If you want you can make three long strips and then make a traditional braid like I do with my Bread Machine Italian Easter Bread.
Important Tip
It's important that you use RAW colored eggs with this recipe. The eggs will cook in the oven while the bread bakes. If you use hard-boiled eggs, they might explode in the oven while the bread bakes.
Baking Instructions
Step 12: Tuck the ends of the braids together and then add aluminum foil place holders for the eggs. This step is not necessary, but I like to do it so the dough doesn't rise up around the eggs. Cover with plastic wrap loosely and allow the bread to double in size.
Step 13: Insert the RAW colored eggs into sections of the braided dough. Don't worry, the eggs will cook in the oven as the bread bakes. Brush with the egg wash and bake in a preheated 350°F oven for about 20 minutes or until the bread is golden brown.
Before You Begin!
If you make this recipe, please leave a review and star rating. This helps my business thrive and continue providing FREE recipes.
Storage Tips
Wrap the loaf tightly in plastic wrap or store in a paper bag to keep it from drying out.
You can also place the bread inside an airtight container or zip-top bag and store at room temperature for up to two days.
For longer storage, place in the refrigerator or freezer.
Recipe FAQ
To view the answer, simply click on the down arrow (⬇) next to each question. If you have any other questions not answered here, please leave a comment!
What is Easter bread made of?
Easter bread is a type of sweet egg bread traditionally made around the Easter holiday. It is usually made with flour, eggs, butter, milk, sugar, and yeast. Some recipes may also include fruits or nuts such as raisins or almonds. The dough is given time to rise before it is shaped into a loaf or braid with pastel colored eggs and baked until golden brown.
In a small bowl, combine the heated milk with the package of dry yeast and 2 tbsp. sugar. Set aside until the mixture is foamy.
In a mixing bowl with the dough hook attached, add 4 cups of the flour along with the remaining ingredients.
Once the yeast mixture has "proofed" add it to the mixing bowl as well and begin to combine everything together.
If the dough becomes too sticky or wet, add more of the remaining flour.
Once the dough begins to pull away from the sides of the bowl and come together, set your kitchen timer for 8 minutes and let the machine "knead" the dough for you.
Remove the dough from the mixing bowl to a floured surfaced and knead by hand for a few minutes.
Place the dough in another clean mixing bowl that has a little bit of oil rubbed over the entire bowl.
Cover the bowl with plastic wrap or a kitchen towel...set aside to rise until doubled in size.
While the dough is rising, dye 3 eggs...keeping them RAW.
After the dough has doubled, punch it down and transfer to a floured surface.
Divide the dough into two balls and slowly work them into long ropes.
Braid the two ropes into one loaf and place on a baking tray that is lined with parchment paper.
Insert the RAW colored eggs into sections of the braided loaf of bread.
Cover with plastic wrap and set aside to double again.
Make the egg wash using the yolk and 1 tablespoon of water.
Carefully brush the bread with the egg wash.
Bake in a 350 degree oven for 20 minutes or until the bread is golden brown.
This recipe has been updated since it first appeared in 2014 with new photos and a new printable recipe card that includes nutritional information. I hope you enjoy the updates as much as I enjoyed working on them!
Adding a fun holiday touch to a traditional dessert is a great way to celebrate any holiday. These delicious Chocolate Cadbury Egg Brownies combine everything you love about homemade brownies with festive chocolate candy Easter eggs.
This recipe makes a great dessert for Easter Sunday or it's a delicious way to use up extra candy the day after all the celebration.
Your loved ones will thank you many times over after tasting these rich brownies and their crunchy-sweet topping – let’s get started!
Check out all the other Easter Desserts for even more delicious recipes.
This is a homemade brownie recipe, but you can definitely use a boxed brownie mix if life is a little busy right now.
Create a richer and more indulgent version of your favorite brownie recipe with a few simple ingredients; one of which is a box of cake mix! Instead of following the directions on the back of the box, simply add the oil and eggs.
This will make it denser and resemble the texture of fudgy brownies. For the perfect cake mix brownie, don't overbake them! Remove them from the oven when they're baked around the edges and slightly underdone in center.
Also, wait to slice them until they've cooled completely. You can use any flavor of cake mix...not just chocolate! Check out this recipe for Cake Mix Brownies for more help.
It's the ultimate guide to crafting your dream Easter brunch featuring 11 easy-to-make recipes, Prep-Ahead Tips, Planning Checklists, and Fun Kid's Activities!
Here's a quick overview of the ingredients for this recipe. Find the exact amounts and click the Instacart button to easily add them to your cart – all in the printable recipe card below!
Substitutions and Variations
There are so many ways you can make this recipe for homemade brownies your own!
Instead of the Cadbury Easter Egg candies, you can use pastel colored M&Ms or pretty sprinkles for spring.
Try adding peanut butter chips or white chocolate chips.
Top the brownies with marshmallows halfway through baking for a fun s'mores style brownie.
🥣Step-by-Step Instructions
Step 1: Melt the butter in a small saucepan over medium low heat. When the butter is melted, add the sugar and cook for two more minutes, stirring constantly.
Step 2: Pour the butter and sugar mixture into a large bowl and add the cocoa powder.
Step 3: Mix to combine and then mix in the eggs, salt, baking powder, and vanilla extract.
Step 4: Slowly add in the flour ½ cup at a time, mixing between each addition.
Step 5: Fold in chocolate chips.
Step 6: Pour batter into a baking pan lined with parchment paper.
Top Tip
Place the bag of candy coated chocolate eggs in the freezer as you prepare the brownies. That way they don't "melt" when you add them to the baked brownies.
Baking Instructions
Step 7: Bake for 30 minutes in the preheated 350°F oven. Once the brownies are baked, remove the chocolate eggs from the freezer.
Step 8: Decorate the brownies with the chocolate eggs immediately after removing the pan from the oven.
Step 9: Allow the brownies to cool for 10 minutes in the pan then use the parchment paper edges to lift the brownies out of the pan and transfer them to a wire rack to cool completely.
Tips for Slicing Brownies Evenly
Remove the brownies from the pan using the overhang of parchment paper.
Set on a baking rack or cutting board to cool completely before attempting to slice. Patience is key!
The real secret to perfectly sliced brownies is to use either a serrated knife, plastic knife or an electric knife.
If you're still finding it difficult to slice the brownies, dip the knives in hot water first.
Before You Begin!
If you make this recipe, please leave a review and star rating. This helps my business thrive and continue providing FREE recipes.
Storage Tips
Let the brownies cool completely. Wrap the brownies tightly in plastic wrap, or place them in an airtight container.
If you're going to stack the brownies, use parchment paper between the layers to prevent sticking.
Label the container with the date and contents, then store in the refrigerator for up to 5 days.
Freezing Tips
You can also freeze the brownies for up to 3 months. Be sure to follow the storage tips above before placing the brownies in the freezer.
Thawing and Reheating Tips
When ready to enjoy, remove from the freezer the night before and allow them to thaw completely in the refrigerator overnight.
Try warming them up in the microwave for a few seconds before serving...yum!
More Recipes to Love
Chocolate Covered Peanut Butter Eggs are just like the insanely popular Peanut Butter Bars here on the blog only made in the shape of Easter eggs.
Preheat the oven to 350 degrees and prepare a 9x13 baking pan by lining it with parchment paper. Allow the parchment paper to hang over the edges for easy removal after baking. Grease the parchment paper and any exposed areas of the pan with nonstick cooking spray and set aside.
Place bag of candy coated chocolate eggs in the freezer as you prepare the brownies.
Melt the butter in a small saucepan over medium low heat. When the butter is melted, add the sugar and cook for two more minutes, stirring constantly.
Pour the butter and sugar mixture into a large bowl and add the cocoa powder. Mix to combine.
Mix in the eggs, salt, baking powder, and vanilla extract.
Slowly add in the flour ½ cup at a time, mixing between each addition.
Fold in chocolate chips.
Pour batter into prepared baking pan and bake for 30 minutes.
Remove chocolate eggs from the freezer. Decorate the brownies with the chocolate eggs immediately after removing the pan from the oven.
Allow the brownies to cool for 10 minutes in the pan then use the parchment paper edges to lift the brownies out of the pan and transfer them to a wire rack to cool completely before slicing.
This recipe has been updated since it first appeared in 2019 with new photos and a new printable recipe card that includes nutritional information. I hope you enjoy the updates as much as I enjoyed working on them!
This easy-to-make breakfast casserole with tater tots combines all of your favorite morning flavors into one convenient recipe. Made with eggs, sausage, cheese then topped with tater tots, this recipe is not only delicious but super simple to make.
It can be put together in the morning you plan on serving it or prepped ahead the night before. I know this recipe is going to become an instant family favorite!
Looking for more ways to brighten up your mornings? Discover more delicious breakfast ideas here!
Breakfast casseroles are one of the easiest ways to feed a crowd! And this tater tot casserole recipe is no exception.
I know mom's would love to be served this as part of their Mother's Day Brunch for her special celebration! You could even prepare this casserole and serve it for dinner...it's that hearty!
Check out the recipe notes and variations following the step-by-step photos for any possible substitutions or tips on making the recipe your own.
Here's a quick overview of the ingredients for this recipe. Find the exact amounts and click the Instacart button to easily add them to your cart – all in the printable recipe card below!
Recipe Substitutions and Variations
Tater Tots - you'll need a 32-ounce bag of tater tots that you can find in the freezer section. Keep them frozen until you put them on top of the casserole or they won’t bake up as crispy.
Breakfast Sausage or Bulk Sausage - which is simply sausage that that has not been made into links. For this recipe I used Jimmy Dean. You can replace the sausage with diced ham or cooked, crumbled bacon.
Add some veggies like diced onions and bell peppers.
Step 1: Whisk the eggs, half and half, garlic powder, salt, and pepper until combined. Cook the sausage until no longer pink, then drain the grease.
Step 2: Grease a 9x13 baking dish, and spread the sausage in an even layer over the bottom of the dish. Pour the egg mixture over the sausage. Add the cheese, then add the tater tots evenly on top of the mixture.
Step 3: Bake the casserole for about 50 minutes. Once it's done baking, remove from the oven and let it sit for 5 minutes. Serve and enjoy!
Quick Tips:
A glass 9x13 baking dish works best for this recipe.
Be sure to spray your baking dish with cooking spray so the eggs don't stick!
Check to see if the casserole is done by inserting a knife in the middle. When it comes out clean, it's ready!
LOVE this recipe? SAVE it for Later!
❤️Tap the heart icon in the lower right corner to add the recipe to your recipe box for easy access anytime.
If you made it, leaving a star rating or quick review is always appreciated and helps other readers too.
You can easily assemble the breakfast casserole according the night before, however, don't add the tater tots to the top.
After you have the recipe put together, tightly cover it with plastic wrap. You can either place it in the refrigerator for up to 24 hours or freeze for 2 months.
When ready to bake, remove the casserole dish from the refrigerator and allow the dish to come to room temperature while the oven preheats.
Place the tater tots on top of the casserole right before baking.
If you have frozen the casserole, remove it from the freezer the day before you plan on serving. Allow it to defrost in the refrigerator. Follow the steps above for baking.
Storing and Reheating Tips
Refrigerator: Any leftovers can be store in an airtight container for up to 3-5 days.
Freezer: You can freeze the leftovers in an airtight container for up to two months.
Thawing and Reheating: Defrost in the refrigerator and reheat in the microwave. Reheat in the microwave until warmed through. If you try to reheat this breakfast casserole in the oven or air fryer it will dry it out.
Recipe FAQ
To view the answers, simply click on the down arrow (⬇) next to each question. If you have any other questions not answered here, please leave a comment!
Can I make this Breakfast Casserole with Tater Tots in advance?
You can! Make mornings easy by assembling the casserole, except the tater tots, the night before, cover with aluminum foil, and refrigerate. Take the casserole out of the fridge, top it with the tater tots, then bake per the recipe instructions.
This easy-to-make breakfast casserole with tater tots combines all of your favorite morning flavors into one convenient recipe. Made with eggs, sausage, cheese then topped with tater tots, this recipe is not only delicious but super simple to make.
Craving something sweet for breakfast? These mouth-watering sticky buns with biscuits are made with refrigerated biscuit dough and loaded with a brown sugar, pecan, and cinnamon filling.
They come together quickly so you can enjoy them in just about 30 minutes from start to finish. Plus, they store beautifully in an airtight container for up to one week—if you can keep yourself away that long!
Explore a variety of tantalizing Cinnamon Roll Recipes for even more mouthwatering options.
Look no further than the most delicious homemade sticky buns you'll ever have! ! Soft and gooey rolls with cinnamon-sugar make for an irresistible breakfast pastry that's sure to wow.
This recipe works because it's ready in around 45 minutes and has simple, everyday ingredients that you probably already have on hand in your pantry.
This recipe calls for heavy cream to be poured over the refrigerator biscuits. The addition of heavy cream creates very moist, large, and soft cinnamon rolls. This really elevates the taste of a canned roll and make them taste homemade!
Below is a quick preview of the ingredients you’ll need. For exact amounts, check the recipe card below. You can also use the "Shopping List button" to create a printable shopping list, or the "Get Ingredients button" in the recipe card to order groceries online.
Step 1: Combine brown sugar, butter, salt, and cinnamon in a pan.
Step 2: Simmer gently over low heat until it reaches a caramel-like consistency.
Step 3: In another skillet, add the pecans and lightly brown them until fragrant.
Step 4: Then add the pecans along with the vanilla extract to the sugar mixture.
Expert Tip
Make sure you spray the bundt cake pan very well so nothing sticks when you remove the buns after baking then place the bundt pan on a cookie sheet before baking in case of any spillage.
Fill the Bundt Pan
Step 5: Add the pecan and sugar mixture to the bottom of a bundt pan that's been sprayed with non-stick baking spray.
Step 6: Arrange the cinnamon rolls vertically on top of the pecan mixture.
Heavy Cream with Cinnamon Rolls
Step 7: Drizzle heavy cream over the cinnamon rolls.
Baking Instructions
Step 8: Wrap the bundt pan with foil and bake at 350°F for 30 minutes. Uncover and bake for an additional 5 minutes. Allow it to cool briefly before flipping it onto a serving tray.
Cinnamon Roll Icing
Step 9: Drizzle the icing provided with the canned cinnamon rolls over the top. I warmed the icing in the microwave to make it easier to pour over all the buns.
LOVE this recipe? SAVE it for Later!
❤️Tap the heart icon in the lower right corner to add the recipe to your recipe box for easy access anytime.
If you made it, leaving a star rating or quick review is always appreciated and helps other readers too.
Make some breakfast parfaits with fresh fruit, yogurt, and granola to go along with your sticky buns.
Bacon and eggs are also a great accompaniment to sticky buns, so try my Scrambled Egg Muffins.
Storage, Freezing and Reheating Tips
Refrigerator: Keep at room temperature wrapped or covered for a couple of days. Refrigerate for up to 5 days. Pop in the microwave for 30 seconds to reheat.
Freezer: Wrap the sticky buns well in cling wrap or foil and place in an airtight container. Freeze for up to 3 months.
Reheating: Thaw in the refrigerator overnight and reheat a sticky bun in the microwave for 30 seconds or until warmed through.
Make sure you spray the bundt cake pan very well so nothing sticks when you remove the buns after baking then place the bundt pan on a cookie sheet before baking in case of any spillage.
Today I'm sharing with you easy 5 Hard Boiled Egg Recipes to help you create a quick weeknight meal for your family.
You can easily add them to salads, soups, sandwiches, and even vegan burgers. They make a great snack when topped with herbs, spices, and seasonings like paprika or cumin.
Looking for more mealtime inspiration? Don’t forget to check out all my easy and delicious family dinner ideas!
Included in this collection are a traditional deviled egg recipe, chocolate chip cookies and even a tasty boiled egg pizza recipe!
Hard-boiled eggs are a healthy choice since they’re cooked without oil or butter. Each one packs 6 grams of protein, keeps you feeling full, and works for any meal—breakfast, dinner, or a quick snack with a pinch of sea salt.
To view the answers, simply click on the down arrow (⬇) next to each question. If you have any other questions not answered here, please leave a comment!
How long does a boiled egg last?
If the egg is peeled, it's best to eat it within 4 to 5 days and store it in an airtight container with a damp paper towel to prevent it from drying out. Always keep boiled eggs refrigerated and label the date for freshness!
Do you put eggs in boiling water or cold water?
Place the eggs in a pot, cover them with cold water, then bring the water to a boil. This gradual heating helps prevent the shells from cracking and makes peeling easier later.
LOVE these recipes? SAVE them for Later!
❤️Tap the heart icon in the lower right corner to add them to your recipe box.
Made any of them? A quick star rating or short review is always appreciated.
This recipe has been updated since it first appeared in 2019 with new photos, and information. I hope you enjoy the updates as much as I enjoyed working on them!
This coming week is crazy busy so we're keeping it easy but I'll still be cooking every night for my family. If you're already stressing out over what to cook for dinner this week, join me as I share the 7 Easy Dinner Recipes my family will be enjoying.
Meal prepping at the start of the week one day a week is an excellent way to stay organized, think ahead, save time and make nutritious meals.
Read on for tips, tricks and some tasty recipe ideas that will help keep dinnertime running smoothly all week long.
Check out the other Weekly Meal Plans available for you and grab the FREE Pantry List Essentials Printable below!
Are you trying to eat better, save money, and lessen the stress of planning last-minute weeknight dinners? Look no further than these 7 easy recipes featured this week.
With just a few ingredients and little effort you can create delicious recipes that will have your family looking forward to every meal!
Monday - Meatless, Vegetarian or even Leftovers from the weekend.
Tuesday - Taco Tuesday or Mexican Recipe
Wednesday - Chicken, Beef or Fish
Thursday - Pasta or Italian Night
Friday - Sandwiches and Soup
Saturday - Pizza or Eat Out, Order In
Sunday - Comfort Food Meal
How to plan dinner for the week
Planning dinner for the week can help save time and money while still providing nutritious, delicious meals. Here are some tips to help you plan dinner for the week:
Choose recipes you know your family will eat.
Check your pantry and fridge for ingredients you already have on hand, then make a grocery list for the remaining items.
Plan out how many nights you want to prepare dinner at home, and how many leftovers or takeout meals you’ll need for the rest of the week.
Make sure to prepare extra food when cooking so that it can be used throughout the week as lunch or dinner options.
Lastly, don’t forget to enjoy the process of planning – getting creative with recipes and experimenting with flavors is part of what makes cooking so fun!
Once you have the main dish selected, choose a side dish to serve alongside. Side dishes should include potatoes or rice along with one or two veggies. A tossed salad with homemade ranch salad dressing is always nice too.
Become a Member!
If you're looking for more detailed meal plans for TWO PEOPLE that include grocery lists, you're going to love Eat at Home Menu Plans for TWO. The Eat at Home Menu Planning does all the work for you. For only a few dollars per week and you get four different menu plans for every week.
This recipe has been updated since it first appeared in 2018 with new photos and a new printable meal plan. I hope you enjoy the updates as much as I enjoyed working on them!
If you’re planning an Easter gathering, having a few festive, alcohol-free drinks on hand makes the celebration even more fun.
This collection of Easter drinks includes refreshing punches, mocktails, lemonades, and other easy non-alcoholic options that everyone can enjoy.
Family-friendly options: Alcohol-free drinks everyone at the table can enjoy. Easy to make: Simple recipes with minimal prep and common ingredients. Great for a crowd: Includes punches and big-batch drinks for gatherings. Flexible choices: Mocktails, lemonades, and fruit drinks to fit different tastes. Perfect for Easter: Works for brunch, parties, and spring celebrations.
Setting up a beverage station for Easter makes serving drinks easier and keeps the food table less crowded. Choose a separate spot for drinks and stock it with everything guests will need.
Start with the basics: glasses, ice, and water.
Offer a mix of drinks, including several alcohol-free options.
Use pitchers or drink dispensers for easy serving.
Set out simple extras like sweeteners, straws, and napkins.
Keep drinks cold with ice buckets or chilled pitchers.
Add fun garnishes like fruit slices or fresh mint for a festive touch.
Make flavored ice cubes by freezing lemon or lime slices, fresh mint, or sliced strawberries in water for a simple, festive touch.
Citrus Flavored Water is the perfect way to get a burst of flavor with each sip - just add some colorful citrus slices for delicious refreshment that's sure to leave you feeling energized!
Celebrate in style with a vibrant, festive non-alcoholic punch! Combining cranberry juice, ginger ale and orange sherbet with yummy fruit – it's the perfect way to get everyone together for an unforgettable gathering.
Enjoy the perfect Easter Brunch with this fruity and flavorful Punch! Combining zesty oranges, juicy strawberries and two types of juices creates an irresistible non-alcoholic beverage that's sure to please kids - as well as adults - whatever the occasion. Whip up a batch today for your next gathering or dinner party!
The Best Easy Healthy Strawberry Lemonade (Sugar-free)
No heating or straining required for this Easy Healthy Strawberry Lemonade. Whip up a batch for an instantly refreshing treat. Perfectly versatile, you can make it keto/sugar free too - whatever your preference may be!
Get ready for a refreshing drink like no other! This sugar-free lemonade is an innovative combination of sweet strawberries and basil blended with tart lemons, all backed by the subtle sweetness of grape juice. Perfectly balanced and naturally delicious - pure indulgence without any added sugar!
Who doesn't love a summertime refresher? Watermelon juice is the quintessential thirst-quencher when mixed with mint and lime! This perfect combination of sweet and zesty tastes even better with just a hint of maple syrup and salt.
Celebrate all the best moments with a bubbly Mimosa Mocktail! Crafted from refreshing alcohol-removed champagne and sweet orange juice, these two ingredient drinks will make any brunch or baby shower sparkle. Perfect for your everyday celebrations too!
Get ready for your brunch with this delicious Sunrise Mocktail Spritzer! Made in just 5 minutes using real grenadine – it's the perfect way to spice up your holiday!
This Lime Sherbet Punch is a bright, refreshing drink made with citrus flavor and creamy sherbet for a fun, crowd-friendly treat. It’s easy to mix, perfect for parties, and a great alcohol-free option for spring gatherings and Easter celebrations.
Easter is right around the corner and what better way to celebrate than with these individual sugar cookie egg fruit pizza!
Made with refrigerator sugar cookie dough, homemade cream cheese frosting and assorted fruit, this easy dessert is sure to make an impression with your family and friends.
Check out all the other Easter Desserts for even more holiday ideas and delicious recipes to make for your family.
In addition to Easter egg-shaped Spring sugar cookies, another delightful treat that can add color and flavor to your holiday gathering are mini fruit pizzas in the shape of eggs!
Whether as a dessert for Easter brunch or a snack after the egg hunt, these mini fruit pizzas are sure to add a touch of spring freshness to your Easter celebration.
This recipe was inspired by Pretty in Pink Easter Egg Fruit Pizza, but only in a mini version and made with a sugar cookie dough. The larger recipe is made with a refrigerator pizza dough!
There are a few different ways you can make a fruit pizza for a special event or holiday. You can use a sugar cookie dough like I do with this recipe, and with my Flag Sugar Cookie Fruit Pizza.
Choose fresh fruit that is not watery. You could use watermelon, but add the watermelon to the pizza right before serving.
The same goes with apples and bananas. Not because they're watery, but because once the flesh of the fruit is exposed to the air, it will start to turn brown.
Easter Egg Fruit Pizza Cookies
These adorable Easter Egg Fruit Pizza Cookies are a festive treat perfect for your spring celebrations. The combination of buttery sugar cookie, creamy frosting, and fresh fruit is both delicious and visually appealing.
This easy cookie recipe will bring a smile to everyone's face and make a delightful addition to any Easter gathering.
Here's a quick overview of the ingredients for this recipe. Find the exact amounts and click the Instacart button to easily add them to your cart – all in the printable recipe card below!
Use your favorite, but think of how the fruit and colors go together to create a colorful looking "Easter egg." Canned fruit would work but only if you drain the fruit really well.
Add a little food coloring to tint the frosting a pastel color similar to how we dye Easter eggs.
You could even use Nutella Hazelnut Spread! Yum!
Or you might enjoy this mini fruit pizza recipe to serve year-round.
Step-by-Step Instructions
Step 1: Remove the cookie dough from the package and mix ¼ cup flour into the cookie dough and roll out on a floured surface to ¼ inch thickness. Cut out Easter egg shapes with a cookie cutter, place on a parchment-lined baking sheet, and refrigerate for 30 minutes before baking.
Quick Tip
Once you have the egg shapes cut out and on the baking trays, place them in the refrigerator for at least 30 minutes. This will help the cookies from spreading too much while they're baking. You don't want to lose that pretty egg shape!
Baking Instructions
Step 2: Bake the cookies 8 to 11 minutes or until lightly browned around the edges. Allow the egg-shaped cookies to cool completely before spreading the frosting on top.
Prepare the Cream Cheese Frosting
Step 3: In a bowl, beat the softened cream cheese, granulated sugar, and vanilla with an electric mixer until smooth and creamy.
Top Tip
Make sure the fruit is dry before adding it to the top of the cream cheese frosting when decorating your mini fruit pizza's. This will help the sugar cookies from getting soggy.
Fruit Pizza Decorating Ideas
Step 4: Once the cookies have cooled, frost them with the cream cheese frosting. Decorate each cookie with a colorful fruit arrangement and refrigerate until you're ready to enjoy!
LOVE this recipe? SAVE it for Later!
❤️Tap the heart icon in the lower right corner to add the recipe to your recipe box for easy access anytime.
If you made it, leaving a star rating or quick review is always appreciated and helps other readers too.
To prevent fruit pizzas from getting soggy, it is important to keep them tightly covered once they are put together. Make sure the fruit is very dry before adding it to the top of the cream cheese frosting. If you can, try to put the pizzas together 30 minutes before serving to help keep the moisture away from the cookie dough base.
Does fruit pizza need to be refrigerated?
Any leftovers can be store in an airtight container or wrapped in plastic wrap and placed in the refrigerator for up to 3 days. Although this recipe is best served the day it is put together.
Made with refrigerator sugar cookie dough, homemade cream cheese frosting and assorted fruit, this sugar cookie egg fruit pizza is sure to make an impression with your family and friends.
If you find the dough is still too sticky to roll out, try placing it between two pieces of parchment paper.
Refrigerate the cut out cookies before baking for about 30 minutes. This will help them not to spread while baking. If you find the cookies have spread too much after they have baked, use the cookie cutter again.
Make sure the cream cheese is soft before preparing the frosting.
Make sure the fruit is completely dry before adding to the top of the frosting.
If you are making these ahead, frost the cookies but wait to add theruiit until right before serving.
No holiday celebration is complete without something sweet, but what about family and friends who need to watch their sugar intake?
This collection of diabetic Easter desserts is the perfect answer for anyone following a sugar-free or low-sugar diet during the holiday.
From cakes, cookies, and cupcakes to creamy pudding desserts, explore even more festive ideas in our full collection of Easter desserts so everyone can enjoy something sweet this holiday.
This recipe roundup has been updated since it first appeared in 2022 with new photos, information.
At-a-Glance
Lower-sugar dessert options: A collection of sweet treats made with sugar substitutes or reduced-sugar ingredients.
Holiday-friendly choices: Festive cakes, cookies, and creamy desserts perfect for an Easter dessert table.
Great for mixed gatherings: Helpful when hosting family or friends who need diabetic-friendly dessert options.
Flexible for holiday menus: Works well for Easter brunch, dinner desserts, or a spring celebration.
Join the series and get recipes, menu ideas, and inspiration for hosting a delicious Easter brunch.
Why You'll Love These Diabetic Friendly Easter Treats
Lower-Sugar Dessert Ideas: A collection of cakes, cookies, and creamy treats that fit a lower-sugar lifestyle.
Festive Easter Options: Sweet desserts that still feel special enough for Easter brunch or holiday dinner.
Variety of Flavors: Includes chocolate, fruit-based, and classic dessert favorites.
Simple to Serve: Many of these recipes are easy to prepare and perfect for sharing with family and friends.
Common Sugar Substitutes Used in Diabetic-Friendly Desserts
If you're looking for diabetic dessert recipes, many bakers use alternative sweeteners instead of traditional white or brown sugar. These ingredients can help reduce the overall sugar content while still providing sweetness in baked goods and desserts.
I often use Splenda in baking and haven't noticed an aftertaste, but it’s always a good idea to check with your doctor or nutrition professional about which sweeteners work best for your dietary needs.
Some commonly used sugar substitutes in diabetic-friendly desserts include:
If you're planning an Easter menu and need something sweet that fits a lower-sugar lifestyle, these diabetic Easter desserts offer plenty of festive options to try.
Low-Carb Easter Cookies and Bar Cookies
Sugar Free Peanut Butter Cookie with Flour
Craving something sweet but worried about the sugar content? Don't worry - with this amazing recipe, you can have your cake and eat it too! Enjoy a delicious peanut butter cookie that still has all of those classic flavors we've come to know and love. It's easy enough for anyone in the family to make so everyone can enjoy some guilt-free sweetness any time they please.
These light and crispy sugar-free meringue cookies are a simple treat made without traditional sugar. They’re perfect for adding a sweet bite to a diabetic-friendly Easter dessert table.
This Gluten Free Strawberry Shortcake is a healthy remake on the classic summer dessert made with fresh strawberries, coconut whipped cream and fluffy and tender gluten free biscuits.
Indulge in a guilt-free, delicious treat! Our Diabetic Chocolate Peanut Clusters are the perfect way to satisfy your sweet tooth without any added sugar. They're chock full of yummy melted chocolate and salted peanuts - what more could you ask for?
A simple keto lemon meringue pie that's dairy-free, nut-free, and gluten-free. It's perfect for a special treat any time there's a craving for something a little sweet.
This light and tender lemon ricotta cake is a great spring dessert with bright citrus flavor. Versions made with sugar substitutes or low-carb ingredients make it a wonderful option for a diabetic Easter dessert spread.
The crust – coconut. The filling – coconut milk, coconut oil, coconut extract and the whipped cream topping is, you guessed it, topped with toasted coconut.
Low Carb Keto Sugar-Free Carrot Cake Recipe with Almond Flour
This moist carrot cake uses almond flour and low-carb sweeteners to create a delicious sugar-free dessert. It’s a classic Easter favorite that works well for those looking for diabetic Easter desserts.
Keto Sugar-free Vanilla Cupcakes Recipe With Raspberry Frosting
These moist vanilla cupcakes are sweetened with keto-friendly ingredients and topped with raspberry frosting. They’re a great sugar-free option when you're looking for diabetic-friendly Easter desserts that still feel festive.
Fresh strawberries layered with fluffy biscuits and whipped topping create a classic spring dessert. Low-sugar or gluten-free variations make this a beautiful option for an Easter dessert that everyone can enjoy.
To view the answers, simply click on the down arrow (⬇) next to each question. If you have any other questions not answered here, please leave a comment!
Are sugar-free desserts safe for people with diabetes?
Sugar-free desserts can be a helpful option, but they may still contain carbohydrates from other ingredients like flour or fruit. Reading ingredient lists and enjoying desserts in moderation is still important.
Can people with diabetes eat dessert at Easter?
Yes. People with diabetes can still enjoy dessert, especially when recipes use sugar substitutes or lower-carbohydrate ingredients. Paying attention to portion size and overall carbohydrate intake can help keep blood sugar levels balanced.
Sweeteners Often Used in Diabetic-Friendly Desserts
If you'd like to learn more about stevia and how it works as a sugar substitute, this helpful article from WebMD explains the basics and how it’s used in place of sugar
Easter is the perfect time to bake something fun and chocolatey, and these Easter brownie recipes are always a hit.
From Cadbury egg brownies to colorful mini egg treats, these easy desserts are perfect for family gatherings, Easter baskets, or just a sweet way to celebrate the holiday.
Be sure to browse my full collection of Easter Desserts for even more festive ideas. No matter which you choose, these brownies are guaranteed to disappear fast!
[feast_advanced_jump_to]
Here’s What’s Included
Easy Easter brownie recipes: Simple desserts made with classic brownie mixes and festive toppings.
Cadbury egg and mini egg ideas: Popular Easter candy used in fun and creative brownie variations.
Quick and beginner-friendly options: Recipes that are easy to follow with minimal prep time.
Fun desserts for kids and families: Colorful treats perfect for Easter baskets, parties, and gatherings.
Variety of flavors and styles: From fudgy and gooey to decorated and candy-topped brownies.
Looking for more brownie recipes and easy desserts? My Coffee and Brownies Recipe is perfect for serving, and my Homemade Brownie Mix with free printable gift tags makes a great gift idea.
Get Easter Brunch Ideas Delivered to Your Inbox
Join the series and get recipes, menu ideas, and inspiration for hosting a delicious Easter brunch.
How to Cut Brownies
The best way to cut brownies is with a sharp knife for clean, even slices. Wipe the blade between each cut to keep the edges neat.
For softer or fudgy brownies, a plastic knife works especially well. It glides through without dragging, helping you get smooth, even pieces.
How to Pack Brownies for Gifts
Brownies make a great Easter gift and are easy to package for sharing. Wrap each brownie individually in wax paper, then place them in a gift box lined with shredded paper.
Finish with a ribbon and a simple tag for a thoughtful homemade treat that’s perfect for Easter baskets or spring gatherings.
These are my go-to Easter brownie recipes that are fun, festive, and perfect for celebrating the holiday with family. From colorful decorations to classic chocolate treats, these are easy desserts everyone will love.
Easter Brownies
These festive Easter brownies are topped with colorful candies and decorations, making them a fun and easy dessert for holiday gatherings or Easter baskets.
These adorable carrot-shaped brownies are perfect for Easter celebrations, combining rich chocolate flavor with a creative presentation that’s great for kids and parties
Give your Easter treats a festive flair with this one bowl wonder! Brownie mix, decorating candy gels and cookie cutters join forces to craft creative egg-shaped brownies that will make any holiday dessert table shine. Add these fun designs to your spread for an extra dose of joy - no baking skill required!
If you love baking with classic Easter candy, these Cadbury egg brownies are rich, chocolatey, and perfect for adding a festive touch to your dessert table.
Chocolate Cadbury Egg Brownies
These Cadbury egg brownies are rich, chocolatey, and packed with seasonal candy, making them a must-have dessert for Easter.
Mini egg brownies are one of the most popular Easter desserts, combining crunchy candy shells with soft, fudgy brownies for a colorful and crowd-pleasing treat.
Easter Mini Egg Brownies
These mini egg brownies are easy to make and packed with chocolate flavor, making them a perfect Easter dessert for sharing.
To view the answers, simply click on the down arrow (⬇) next to each question. If you have any other questions not answered here, please leave a comment!
What candy works best for Easter brownies?
Mini eggs, Cadbury eggs, and chocolate candies work best because they hold their shape and add both color and texture.
Can I use boxed brownie mix for Easter brownies?
Yes, boxed brownie mix is a great shortcut. Simply prepare the mix as directed and add your favorite Easter candy on top before or after baking.
How do I keep brownies soft and fudgy?
Avoid overbaking and let the brownies cool completely before cutting. Slightly underbaking helps keep the center soft and rich.
Here's an easy cookie recipe you can make for your family. These Easter Cookies have a deliciously crunchy exterior and ooey-gooey center, thanks to the special ingredient of a box of instant vanilla pudding!
They're made with pantry staples and pretty pastel M&M candies stirred into the dough to celebrate spring!
Check out all the other Easter Desserts for even more delicious recipes.
The inside of these cookies is delicious while the outside is crisp, making it a tasty combination you won't be able to resist. I mean, can you really eat just one cookie???
You can easily customize each cookie by adding white chocolate chips, or mini marshmallows. The possibilities are endless when you start with a basic cookie dough batter.
Here's a quick overview of the ingredients for this recipe. Find the exact amounts and click the Instacart button to easily add them to your cart – all in the printable recipe card below!
Vanilla Pudding Mix - It must be instant pudding mix (not cook & serve). Do not add the other ingredients on the back of the box. This will help make the cookies extra soft.
Bake the cookies as bar cookies by simply spreading the dough into a prepared 15X10 jelly roll pan sprayed with non-stick baking spray. Bake for 20 - 25 minutes or until golden brown. Allow to cool and slice.
Step 1: Combine the butter with both sugars using an electric mixer.
Step 2: Then add the eggs, vanilla extract and pudding mix. Mix again until everything is combined.
Freezing Tip
You can freeze the cookies at this point! Once the cookies are scooped out an on the baking tray, place the baking tray into the freezer for 30 minutes. When the cookie dough balls have frozen, place them in a freezer bag and store in the freezer. Read more about my tips in the Freezing Cookie Dough post.
Step 3: Combine the dry ingredients together in a bowl. Then slowly add them to the wet ingredients. Make sure you combine thoroughly between each addition.
Step 4: Finally add the pastel candies using a rubber spatula. If you use the mixer, the candy shells might break off.
Baking Instructions
Step 5: Place rounded tablespoonfuls or cookie scoops of dough onto parchment paper-lined baking sheets. Bake for 10 to 12 minutes, or until the cookies turn slightly golden and set on the surface. Once out of the oven, let them cool for a few minutes before transferring to a cooling rack to cool completely.
LOVE this recipe? SAVE it for Later!
❤️Tap the heart icon in the lower right corner to add the recipe to your recipe box for easy access anytime.
If you made it, leaving a star rating or quick review is always appreciated and helps other readers too.
It's the ultimate guide to crafting your dream Easter brunch featuring 11 easy-to-make recipes, Prep-Ahead Tips, Planning Checklists, and Fun Kid's Activities!
➡️Top Recipe Tips
Make sure the ingredients you’re using are fresh. If you don’t bake often, you might want to purchase a new box of baking soda or baking powder before you start a new recipe.
Don’t over-mix the dough.
Watch the cookies as they bake. Baking time for most recipes is a “guideline” but you know your oven better than me. Cookies are done when the edges are set and lightly browned.
Remember, cookie centers will continue to cook for a few minutes while they’re out of the oven and cooling.
Storage Tips
Allow the cookies to cool completely to room temperature before storing in an airtight container at room temperature for up to one week.
I always layer cookies between waxed paper or parchment paper so there's no sticking.
It must be instant pudding mix (not cook & serve). Do not add the other ingredients on the back of the box. This will help make the cookies extra soft.
Spring is here and there's no better way to show your excitement than with these Easter mini bundt cakes! Transform a basic boxed cake mix into festive treats for the whole family.
Not only will these delicious little cakes fill up the dessert table, but they are so easy to make that even the kids can join in on the fun.
These mini cakes are perfect for Easter, Mother's Day or as a sweet treat for your family.
Check out all the other Easter Desserts for even more delicious recipes.
These mini bundt cakes use a cake mix and can be made for any occasion. However, I think they're perfect for Easter.
Are you ready to wow your family and friends this Easter with beautiful mini bundt cakes from cake mix? These mini cakes will look great on a dessert buffet table after the holiday meal.
Check out my other Cake Mix Baking Secrets and grab the free printable with tips on creating delicious, easy desserts using a box of cake mix.
I've used this mini bundt pan a few times and it's proven to work really well. It washes well in the dishwasher as long as you first rinse it with warm water.
Using a bundt pan like this with a cake mix should give you 24 cakes.
I like to use cooking spray with flour when I bake with a fancy pan. It really helps with not having the baked good stick to the pan.
Here's a quick overview of the ingredients for this recipe. Find the exact amounts and click the Instacart button to easily add them to your cart – all in the printable recipe card below!
Vanilla Cake Mix - 15.25 ounce size; plus all the ingredients listed on the back of the cake mix.
1 container of icing - 16 ounce size. I chose a cream cheese flavor. I had a little extra vibrant purple icing leftover that I also used to decorate the cakes.
Mini chocolate candy eggs or colorful sprinkles to decorate. You'll need about 48 chocolate eggs.
Shredded coconut - I chose to toast the coconut, but, again, that's up to you.
🥣Step-by-Step Instructions
Step 1: Locate the directions on the back of the box. Follow the instructions carefully to prepare the batter.
Step 2: Next, using a cookie scoop, fill the wells of the pan that have been sprayed with either non-stick cooking spray or cooking spray with flour.
Baking Instructions
Bake the Easter mini bundt cakes in a preheated 350 degree oven for 10 -15 minutes. You need to check them frequently to make sure they don't over-bake. My mini cakes were done in 10 minutes.
How to Trim the Cake Bottoms
Step 3: Want perfectly flat mini bundt cakes? Here's the secret: After baking, use a serrated knife to gently trim the rounded top.
Step 4: Bonus: you get a tasty snack while you decorate!
Decorate the Cakes
Step 5: Warm the icing up in the microwave for 10 to 15 seconds. However, be careful! If you keep the icing in the microwave for too long, you'll have a liquid mess on your hands.
Step 6: Add the coconut. You can either toast it or use it plain. Follow these tips for How to Toast Coconut from The Pioneer Woman.
Top Tip
If you find that the chocolate candy eggs aren't sticking, you can add a little of the icing to the bottom of a candy egg and then gently hold it in place on top of the mini bundt cake.
Step 7: Now comes the fun part! Add a chocolate candy egg to each cake.
Before You Begin!
If you make this recipe, please leave a review and star rating. This helps my business thrive and continue providing FREE recipes.
Top Tip
An easy tip for using store-bought icing is to warm the icing up in the microwave for 10 to 15 seconds. However, be careful! If you keep the icing in the microwave for too long, you'll have a liquid mess on your hands.
You could use a spoon to drizzle the icing on, but I love using my chocolate drizzler tool.
Once the icing is on top of the cakes, then sprinkle the toasted coconut followed by the chocolate candy eggs.
Storage Tips
Store the mini bundt cakes in airtight containers and refrigerate for up to 3 days since it has cream cheese icing.
Delicious vanilla cakes topped with colorful icing, toasted coconut and candy pieces. These mini cakes are perfect for Easter, Mother’s Day or as a sweet treat for your family.
Prepare the cake mix according to the directions on the back of the box.
Divide the batter evenly and pour into the mini bundt pan that has been sprayed with non-stick cooking spray.
Bake in a preheated 350 degree oven for about 15 minutes. Checking frequently to make sure you don't overcook the cakes! My mini cakes were done in 10 minutes.
Let the cakes cool for about 5 minutes or so before removing from the pan. Place on a cooling rack to cool completely before decorating.
How to Decorate the Mini Bundt Cakes:
Place half the cream cheese icing in a microwavable safe bowl and heat for 10 seconds. You do not want the icing to be too melted, so be careful not to over-melt.
Drizzle the icing over the mini bundt cakes.
Add the coconut to the top of the mini bundt cakes right away.
Add the mini chocolate eggs to the top of the cakes. You may need to dip the bottom of the eggs in the icing to act as a glue so they stay on top and don't fall off.
This recipe has been updated since it first appeared in 2017 with new photos and a new printable recipe card that includes nutritional information. I hope you enjoy the updates as much as I enjoyed working on them!
This week's meal plan is featuring crock pot recipes! It's the perfect solution for making meal-time easy.
This week's recipes include, chicken taquitos, honey garlic chicken with veggies and a slow cooked brisket recipe that's the perfect weekend Sunday comfort food recipe.
Check out the other Weekly Meal Plans available for you and grab the FREE Pantry List Essentials Printable below!
Using your crock pot to help you cook dinner means less time spent in the kitchen actively cooking. There's usually few dishes to wash and there's nothing like coming home to a hot meal that's waiting for you.
In this week's meal plan, I've included a few of my Family Favorite Crock Pot Recipes that use the slow cooker so you can spend more time with your family enjoying dinner and less time in the kitchen!
When you're ready to start layer all your ingredients in the crock pot according to the directions in the recipe. Some recipes may call for the meat to be marinated before adding it to the crock pot.
If the recipe calls for liquid, always add that at the end. Then set the crock pot on low so it slowly cooks throughout the day. Which will give you plenty of time to come home to a delicious finished dinner.
Complete your Meal Planning
Once you've decided on dinner, pick a side dish to serve with the recipes listed below. Side dishes should include potatoes or rice along with one or two veggies.
If you're looking for more detailed meal plans for TWO PEOPLE that include grocery lists, you're going to love Eat at Home Menu Plans for TWO. The Eat at Home Menu Planning does all the work for you. For only a few dollars per week and you get four different menu plans for every week.
Forget about complicated recipes - you can now create a delicious meal with no fuss! Combine all your ingredients into one pot and voilà, dinner is served. It's never been easier to get the perfect dish in record time.
Slow-cook that flavorful creaminess, roll it up with soft tortillas and bake – you've got a magnificent meal the whole family will adoringly request again and again! Savour in this delicious dish for an effortless yet scrumptious dinner.
This recipe for BBQ Chicken can be made either in the slow cooker or in your instant pot. Same ingredients...only the slow cooker will cook the chicken longer than the instant pot.
Enjoy a delicious Sunday dinner with this tried and true pot roast recipe! Made in the crockpot, each savory bite of juicy meat will always be cooked to perfection.
Craving a savory meal that's bursting with flavor? Try this slow-cooker brisket! The chili sauce and crock pot combine to create the perfect blend of smoky, juicy taste. Enjoy tender meat made easy in your own kitchen!
This recipe has been updated since it first appeared in 2018 with new photos, and information. I hope you enjoy the updates as much as I enjoyed working on them!
The Easter Egg Cake is a fun way to impress your family for your holiday celebration this year. Made with a cake mix and a fun egg-shaped cake pan, everyone will love this fun easy dessert.
With just a few basic ingredients and steps, you'll have this colorful cake mix recipe ready in no time.
Check out all the other Easter Desserts for even more delicious recipes.
Are you looking for a creative way to add some extra excitement and joy to Easter Sunday? If so, why not make something special for the occasion - a cake in the shape of an egg!
For this recipe, I took the easy way out and used an egg-shaped cake pan. However, the particular one I used is no longer available, so I posted a very close duplicate in my Helpful Kitchen Tools section.
How do you make a box mix taste like a bakery cake?
To make a boxed cake mix taste like you're serving a cake purchased from a bakery or even a homemade recipe, swap out the oil for real butter.
If you're making a chocolate cake mix, try swapping out the water with coffee. Chocolate combined with coffee really brings a deeper flavor to the cake.
Looking for more tips on making a cake mix taste like a bakery cake? Check out my 5 Cake Mix Baking Secrets post.
Here's a quick overview of the ingredients for this recipe. Find the exact amounts and click the Instacart button to easily add them to your cart – all in the printable recipe card below!
Recipe Substitutions
Use your favorite cake flavor to make this cake. A lemon cake mix would be great for Easter.
You could also use your favorite homemade cake recipe.
🥣Step-by-Step Instructions
Step 1: First, follow the directions on the back of the cake mix box to prepare the batter. Once your batter is ready, proceed to the next step.
Step 2: This is what the cake pan looks like before the batter is poured in. It has a fun design that will help us decorate
Top Tip
Don't have an egg shaped pan? Bake in a 9x13 pan and use a template made of parchment paper to cut out the egg shape.
Make sure the cake is completely cooled before cutting.
Step 3: Prepare your egg-shaped pan by greasing it thoroughly with baking spray. Then, pour the prepared batter into the pan.
Step 4: Let the cake cool completely. This will help prevent your decorations from melting or smearing.
Prepare the Frosting
Step 5: Divide the frosting into three separate bowls. Gradually add food coloring to each bowl, a little at a time, until you achieve your desired colors. Then, fit piping bags with star tips and fill them no more than ⅔ full to prevent messy overflows.
Decorate the Cake
Step 6: Prepare your piping bag by twisting the top closed or securing it with a rubber band or bag tie. Then, gently squeeze the bag while holding it in your palm, and pipe stars in your favorite design to transform your cake into a festive Easter egg!
Step 7: Store your decorated creation in the refrigerator until it's time to enjoy.
LOVE this recipe? SAVE it for Later!
❤️Tap the heart icon in the lower right corner to add the recipe to your recipe box for easy access anytime.
If you made it, leaving a star rating or quick review is always appreciated and helps other readers too.
Store in a cake keeper or cake box and refrigerate for up to 3 days.
Freezing Tips
To freeze the decorated cake, place the cake in the freezer for about an hour to firm up the frosting. Once the frosting is firm, wrap the cake in plastic wrap then wrap in aluminum foil.
🔁 Thawing Tips
To defrost, remove the aluminum and plastic wrap so as to not mess up the frosting once it has defrosted.
Place in the fridge overnight for it to thaw. Set on the counter about an hour before serving to come to room temperature.
Top Tip
Transfer the cooled cake to the serving platter before you start decorating.
Don't have an egg shaped pan? Bake in a 9x13 pan and use a template made of parchment paper to cut out the egg shape. Make sure the cake is completely cooled before cutting.
Transfer the cooled cake to the serving platter before you start decorating.
Join the series and get recipes, menu ideas, and inspiration for hosting a delicious Easter brunch.
Healthy and Low-Carb Easter Desserts
Here are a few quick tips to keep in mind when making healthy and low-carb Easter desserts using sugar substitutes:
• Many of these sugar-free Easter desserts are also great options for anyone looking for healthier or low-carb Easter treats.
• Using sugar substitutes allows you to enjoy sweet desserts while reducing added sugar.
• Always read the product description and ingredient list when baking with sugar substitutes.
• Some sweeteners don’t bind ingredients the same way regular sugar does, which can affect texture.
• Choosing the right sugar alternative helps create lighter desserts everyone can enjoy at your Easter celebration.
Sugar Substitutions and Variations
When making sugar-free Easter desserts, choosing the right sweetener can make a big difference in flavor and texture. Some substitutes work better for baking, while others are best for no-bake desserts.
Common sugar substitutes used in sugar-free and low-carb desserts include:
Monk fruit extract
Stevia
Sucralose
Saccharin
Erythritol or monk fruit blends
For recipes that are simply looking for a lighter option rather than fully sugar-free, natural sweeteners like honey or maple syrup may sometimes be used as alternatives depending on the recipe.
When using sugar substitutes, remember that a little often goes a long way. Many sweeteners are much stronger than regular sugar, so start with a small amount and adjust as needed.
Transform your Instant Pot into a creamy cheesecake paradise! This Keto-friendly recipe is the perfect mix of ricotta, lemon zest and pressure cooker cooking that will create luscious layers of delicious low carb pleasure. So get creative in the kitchen with this amazing twist on classic dessert - it's sure to be an unforgettable treat for all.
Indulge in the deliciousness of this creamy blueberry cheesecake recipe - a low-carb treat that will tantalize your taste buds, leaving you wondering how something so decadent could still fit into your Keto lifestyle!
Indulge in a delectable keto-friendly treat with this Triple Chocolate Mousse Cake! With dark, milk, and white chocolate flavors all featured across three sensational layers - you'll be sure to impress your guests. Plus it's as easy to make as it is delicious.
Indulge your sweet tooth with this heavenly Sugar Free Angel Food Cake! This easy-to-make, low carb delight is the perfect diabetes friendly dessert. Enjoy a taste of paradise without all that sugar overload!
Enjoy a healthy, guilt-free treat with this quick and easy recipe for Sugar-Free Jello Whips! Each creamy, fruity serving contains just 35 calories and 2g net carbs. Have your cake - or in this case jello whip - without any of the consequence!
Satisfy your sweet tooth with this delectable and effortless Low Carb/Keto Jello Salad! Perfect for dessert, it's made without sugar so everyone can enjoy the fluffy texture of this amazing treat.
Looking for a foolproof crowd-pleaser to bring life to your next holiday celebration? Look no further! Sugar Free Deviled Jell-O Eggs are quick and easy - just mix up the colors of our favorite childhood snack in advance, then give them an extra boost with whipped cream right before serving. Make memories that will last forever – without ever having to worry about any sugar overloads!
Treat yourself to a surprisingly light and zesty keto treat! This key lime pound cake is the perfect balance between sweet, tart, creamy & crunchy. Made with almond flout for an added dose of protein and health benefits; it's gluten-free, low in carbs but full of flavor - ideal for any citrus fanatics' delight!
If you're looking for a delicious, healthier way to satisfy your sweet tooth then this is the recipe for you! Our low carb carrot cake cupcakes are made with wholesome ingredients and have no added sugar. They come out moist and flavorful - especially when topped off with our fluffy cream cheese frosting!
Satisfy your sweet tooth with delicious, no-bake brownies made from only 3 simple ingredients. Forget empty calories and refined sugar - these naturally sweet treats are rich in flavor yet low on fuss. In addition to being beloved by taste buds everywhere, they can also be enjoyed guilt free as they're gluten-free, dairy-free, vegan AND eggless!
These low-carb, sugar free Italian Cream Cupcakes are sure to be a hit! Impress your friends and family with this professional frosting recipe - they won't believe it's healthy.
To view the answers, simply click on the down arrow (⬇) next to each question. If you have any other questions not answered here, please leave a comment!
Can sugar substitutes be used in baking?
Yes, many sugar substitutes can be used in baking. However, they often behave differently than regular sugar, so it's important to follow recipes that are specifically designed for sugar-free baking.
Are sugar-free desserts the same as low-carb desserts?
Not always. A dessert can be sugar-free but still contain carbohydrates from ingredients like flour or fruit. Some sugar-free desserts may also be low-carb, but it depends on the full list of ingredients used in the recipe.
What sweeteners are best for sugar-free desserts?
Common sweeteners used in sugar-free desserts include monk fruit, stevia, erythritol, and sucralose. These substitutes provide sweetness while reducing or eliminating added sugar in many recipes.
Are you ready to transform the way you plan your meals? With a few simple steps, you can create delicious and hassle-free meals and Recipes using Pantry Staples.
Whether your family loves pasta dishes or tacos, planning out your meals with items found in the pantry allows for greater flexibility when it comes to deciding what's for dinner.
I hope to ease the burden of trying to figure out what's for dinner every night this week with easy recipes you can prepare without a trip to the grocery store.
Check out the other Weekly Meal Plans available for you and grab the FREE Pantry List Essentials Printable below!
This week's featured recipes are all created using items that are found in your pantry...well if you're pantry is well-stocked.
When you have a well-stocked pantry and freezer, you'll be able to create delicious meals for your family without having to run to the grocery store a few times a week.
So what should you have in your pantry? I'm including a free printable to help you see what some of the popular items should be in a well-organized pantry.
This printable is just a guideline. Don't purchase items you know your family is not going to eat.
Pantry Meal Planning
This is just an example of how I like to meal plan. You could also incorporate a “leftover meal” or even “clean out the refrigerator” night.
Try to use what you have in your pantry and freezer to plan meals. It helps to keep a list so you know exactly what you have on hand.
Assign each day of the week a different category and then plan a meal according to that category.
Monday - Meatless, Vegetarian or even Leftovers from the weekend.
Tuesday - Taco Tuesday or Mexican Recipe
Wednesday - Chicken, Beef or Fish
Thursday - Pasta or Italian Night
Friday - Sandwiches and Soup
Saturday - Pizza or Eat Out, Order In
Sunday - Comfort Food Meal
Become a Member!
If you're looking for more detailed meal plans for TWO PEOPLE that include grocery lists, you're going to love Eat at Home Menu Plans for TWO. The Eat at Home Menu Planning does all the work for you. For only a few dollars per week and you get four different menu plans for every week.
Dinnertime just got easier with this recipe for Pizza Crescent Rolls. Buttery, flaky crescent rolls layered with sliced pepperoni and mozzarella cheese then baked to perfection.
This recipe has been updated since it first appeared in 2020 with new photos, and information. I hope you enjoy the updates as much as I enjoyed working on them!
If you're looking for something a little extra special to serve your family this year, why not try this Easter Salad that's formed in the shape of an egg!
Serve this Easter Salad for brunch by simply layering your favorite salad ingredients on a platter to make it look like a beautifully decorated Easter egg.
Check out all the other Easter Brunch Ideas to help make your holiday celebration special!
Easter is a great excuse to get creative with your cooking! If you're looking for something a bit more special this year, why not try making an Easter-themed salad?
Instead of an regular salad in a bowl, lay out your salad ingredients to make it look like a pretty decorated egg. This salad is made with lettuce, tomatoes, corn, cabbage, olives...really whatever you like!
Check out the recipe notes and variations following the step-by-step photos for any possible substitutions and tips. Just think of using "bright" and colorful ingredients to keep the egg pretty.
It's the ultimate guide to crafting your dream Easter brunch featuring 11 easy-to-make recipes, Prep-Ahead Tips, Planning Checklists, and Fun Kid's Activities!
Can I prep the salad the night before?
It's easy to prep this salad ahead of time so you're not rushed at the last minute putting it together.
Wash and dry the vegetables thoroughly. Chop lettuce, carrots, cabbage, and other veggies. When storing, wrap them in paper towel before placing them in airtight containers or plastic bags to absorb moisture.
Boil the eggs but refrain from peeling and chopping until assembling the salad. Store ingredients separately to prevent flavor mixing.
Prepare the homemade ranch salad dressing and store it in a mason jar so you can easily shake it up right before adding it to the top of the salad.
All of these ingredients can then be kept separately overnight ready for assembling the next day just prior to serving.
Recipe FAQ
How do you keep premade salad from getting soggy?
Begin by combining all the ingredients in a bowl. Next, place the mixture into an airtight container lined with a layer of paper towel at the bottom to prevent excess moisture from the lettuce.
Before sealing the container, add another layer of paper towel on top of the lettuce. By following these steps, you'll ensure that your salads are bursting with flavor every time.
Here's a quick overview of the ingredients for this recipe. Find the exact amounts and click the Instacart button to easily add them to your cart – all in the printable recipe card below!
Recipe Variations
There are so many ways you can make this recipe your own by swapping out a few of the ingredients I used to prepare our Easter Salad.
Choose a different cheese. Add chopped cucumbers or black olives instead of green olives.
Step 1: Start arranging the vegetables on the platter. Working from both the top and bottom, in the desired order.
Step 2: Place the chopped ham first. Then layer with cheese and chopped hard-boiled eggs.
Top Tip
Remember to layer the vegetables in the same order at the top and bottom of the oval shaped platter. You want the salad to resemble a colorful Easter egg!
Step 3: Next, proceed to fill in the gaps with slices of tomatoes, green olives. Then add the finely diced red onions.
Step 4: Consider placing pickled garlic cloves and hot jalapenos on top of the egg to make it convenient for your guests. Then, arrange chopped lettuce around the platter edges. Just before serving, drizzle with homemade ranch dressing.
LOVE this recipe? SAVE it for Later!
❤️Tap the heart icon in the lower right corner to add the recipe to your recipe box for easy access anytime.
If you made it, leaving a star rating or quick review is always appreciated and helps other readers too.
Since we're only drizzling the dressing on top, have a bowl of extra salad dressing on the side for your guests to add a little more to their serving.
Storage Tips
When storing leftover salad, it is important to make sure that everything will stay fresh and remain safe to eat. The best way to store salad is in a very tightly closed container in the refrigerator.
Make sure you squeeze as much air out of the container as possible before closing it up.
Salad can last up to five days if stored correctly, however check for any spoilage before consuming it within this time period.
Top Tip
Keep the pickled garlic cloves and hot jalapeno peppers near the top of the salad layers.
That way your guests can be sure not to take any if they don't want anything hot and spicy.
Serve this Easter Salad for brunch by simply layering your favorite salad ingredients on a platter to make it look like a beautifully decorated Easter egg.
Cooking for More (or Less?)Scale this recipe up or down. Adjust the number of servings above to automatically update ingredient amounts.
Method
On an oval platter, arrange the red cabbage, corn, carrots as shown in the photo. Work from the top and bottom of the platter, in the order you'd like them to be. You want to layer them in rows to get the effect of a decorated Easter egg.
Arrange the cheese and ham in rows as well as the chopped hard-boiled eggs.
Then add the choppoed green olives in their own row.
Sprinkle the red onions arond the green olives.
Add the sliced tomatoes in their own row towards the top or bottom of the "egg" design.
If you are using the pickled garlic and hot jalepenoes, add them also towards the top or bottom of the "egg" design.
Arrange the chopped lettuce around the edges of the vegetables, cheese,
Drizzle with the homemade ranch dressing right before serving.
Whether you're hosting a family brunch or dinner, you're sure to find something delectable included in this collection of Easter Cupcake Ideas.
From basic candy topped cupcakes to sunflower decorated cupcakes, there's a recipe here to please and put a smile on you face!
Check out all the other Easter Desserts for even more delicious recipes. Don't miss out on these fun cupcake ideas!
Cupcakes are often overlooked when it comes to serving desserts for a holiday celebration. However, I think they're the perfect ending to any family gathering...especially if they're as adorable as the collection featured today.
There are so many ways you can decorate cupcakes. You can add pre-cut toppers to a plain frosted cupcake or you can go all out and use different frosting techniques combined with sprinkles or candy to create fun Easter cupcakes.
Skip spending money on store-bought treats; choose one of these cupcake recipes to serve to family and friends this holiday.
Festive & Fun Designs – These cupcakes bring Easter to life with cute decorations like bunnies, chicks, and pastel colors.
Make-Ahead Friendly – Many of these cupcakes can be baked in advance, saving time for Easter celebrations.
Perfect for Easter Gatherings – Whether for brunch, school parties, or a holiday dessert table, these cupcakes make a festive centerpiece.
Recipe Tips That Worked for Me
Bringing eggs, butter, and milk to room temperature before baking helps create a smoother batter and fluffier cupcakes. Cold ingredients don’t mix as well, leading to dense cupcakes.
Spray the paper cupcake liners with non-stick baking spray before adding the batter. This will help the baked cupcakes not to stick when removing the liners right before serving.
One of the easiest way to do this is by using an ice cream or cookie scoop. Try to use a scoop that holds about ¼ cup of batter...which will give you the perfect sized cupcake.
Fill liners about two-thirds full to avoid overflowing. This helps achieve perfectly domed cupcakes instead of ones that spread too much.
Even slightly warm cupcakes will melt frosting, making it slide off or look uneven. To speed up cooling, place them on a wire rack or pop them in the fridge for 10–15 minutes.
Freezing Tips
I would not freeze cupcakes that are decorated or frosted.
Allow cupcakes to cool completely before placing them on a baking tray and then in the freezer to flash freeze for 30 minutes. Remove from the freezer and store in an airtight container or freezer safe plastic bag for up to 3 months.
Remove the cupcakes from the freezer the night before you need them. Then decorate and frost them once fully defrosted.
Recipe FAQ
To view the answer, simply click on the down arrow (⬇) next to each question. If you have any other questions not answered here, please leave a comment!
What is the secret to moist cupcakes?
Try not to overmix the batter. When you do that, the air bubbles will collapse giving you a dense cupcake. Also, be sure not to overbake the cupcakes as well. This can cause them to be dry.
With a little bit of creativity and the right tools, anyone can make beautiful cupcakes. I'll demonstrate how to turn ordinary treats into works of art with fondant and homemade buttercream icing!
With just a few quick steps, your home or party can be hopping with these adorable bunny cupcakes! It's never been easier to create an eye-catching dessert that everyone will love.
Don't be fooled by their cuteness; these bunny cupcakes are as easy to make as they are adorable! In just a few short steps, you can create an entire litter of sweet bunnies that'll have your dessert table hopping in no time.
Celebrate the start of spring with these charming chick cupcakes! These darling treats are simple to make and sure to delight everyone at your upcoming celebration.
Brighten up your Easter celebration with these adorable and easy-to-make Chick Cupcakes! Not only do they look eggstra special, but their delightful color is sure to bring a smile to everyone's face. They're perfect for bake sales and festive parties alike – get creative this holiday season!
Easy Spring Cupcakes Tutorial with Free Printable Vintage Seed Packet Cupcake Toppers
Get a jump on spring with these deliciously-easy sweet cupcakes! With the help of vintage seed packet toppers, they look like gardens waiting for sprouts.
Turn your kids' Easter candy into something creative and fun! This Spring Break, celebrate by making these adorable Easy Easter Cupcakes - a perfect project to keep the little ones occupied.
Easter, birthday parties, baby showers – they all have one thing in common: these delicious cupcakes! Perfect for gatherings of any kind throughout the spring season.
Get your taste buds ready! In a flash, you can cook up some adorable and delicious carrot cupcakes that look like a bunny is digging up carrots on Easter morning!
Get ready to enjoy an indulgent Easter-inspired treat with our Coconut Cupcakes topped off with a creamy coconut buttercream frosting and garnished with shredded coconut and malted milk robin egg candy. Our delectable cupcake is sure to be the sweet finale of your holiday festivities!
Enjoy these delightful Carrot Patch Cookie Cups - a chocolaty delight filled with creamy buttercream and topped with Oreos for crunch and cute carrot candies to bring on the Easter vibes.
Enjoy a festive touch of Easter with these delightful chocolate cupcakes topped off with smooth buttercream frosting and uniquely adorned to look like a delicious Cadbury Egg! An easy, mouthwatering treat for the holiday season.
These Easter Gnome Cupcakes are made with chocolate-dipped strawberries, sugar cookie cups filled with luscious vanilla frosting and topped off adorably by chocolate candy noses complete the look.
Make Easter a treat this year with delicious vanilla cake batter cupcakes topped off with mini Eggs! These easy-to-make delights are sure to be everyone's favorite.
Are you looking for a fun and delicious way to celebrate Easter? Look no further than chocolate-covered peeps.
These marshmallow treats are a simple, easy treat to make for your Easter celebration. You can even get the kids involved in helping you create them.
Explore all the other Easter Desserts for you to prepare for your family's celebration!
Easter is in a few days and ever since our daughter was a little girl there have been Peeps in our house around this time of year.
This year, why not add a little sweetness to the end of your Easter celebration with these adorable chocolate dipped peeps! Kids of all ages are going to love these!
They're easy to prepare...all you need to do is dip the marshmallow bunnies in melted chocolate and decorate with festive sprinkles. They'll look cute on a platter next to your holiday traditional desserts.
It's the ultimate guide to crafting your dream Easter brunch featuring 11 easy-to-make recipes, Prep-Ahead Tips, Planning Checklists, and Fun Kid's Activities!
Tips for Melting Chocolate
These marshmallow Peeps are easy to make, but with any recipe that includes melting chocolate you do need to follow a few important tips to make sure your chocolate melts smoothly:
Make sure the chocolate does not come in contact with any water. If it does, discard the chocolate. There is no rescuing it.
You can use candy melts, almond bark or chocolate chips.
Make sure the chocolate is chopped into uniform pieces...which is why I like to use Almond Bark. It's so easy to break apart the pre-sectioned chunks.
Place a few of the almond bark squares in a microwave-safe bowl.
Melt in 30 second increments, stirring after each time.
You can store any unused melted chocolate in a plastic container in the refrigerator for up to 2 - 3 weeks to use again for another recipe or as a topping for ice cream.
How many Peeps are sold each year?
According to Food Network, around 2 billion Peeps marshmallow candies are produced and sold around the world! This sugary confection is especially popular during Easter season, when over 1.5 billion of these little chicks and bunnies fill store shelves across the United States.
Whether you like them plain or prefer them dipped in chocolate, Peeps make for a fun and festive addition to any Easter celebration.
Here's a quick overview of the ingredients for this recipe. Find the exact amounts and click the Instacart button to easily add them to your cart – all in the printable recipe card below!
Substitutions and Variations
Use different colored melting candies! I think these would be cute dipped in pink, blue and white melted chocolate too!
Don't limit yourself to only dipping the marshmallow bunnies. Try dipping the bottoms only of the original marshmallow chicks.
Step-by-Step Instructions
Step 1: Line a baking sheet with parchment or waxed paper. Follow the instructions on the package to melt the chocolate almond bark. Next, gently insert a bamboo skewer into the bottom of a marshmallow bunny Peep.
Step 2: Submerge the marshmallow Peep into the melted chocolate, ensuring full coverage. Place it flat on the baking sheet and gently remove the wooden skewer or lollipop stick.
Top Tips
When melting chocolate, make sure the container is dry and there is no water at all added to the chocolate.
Use a bamboo skewer to help dip the marshmallow bunnies in the melted chocolate.
Step 3: Place it flat on the baking sheet and gently remove the wooden skewer or lollipop stick.
Step 4: Sprinkle the decorations immediately after placing the coated items on the waxed paper to ensure they stick well.
Step 5: Wait for the chocolate to fully set before removing from the waxed paper.
Before You Begin!
If you make this recipe, please leave a review and star rating. This helps my business thrive and continue providing FREE recipes.
Storage Tips
Room Temperature: Chocolate-covered marshmallows can be stored at room temperature in an airtight container for up to two weeks.To prevent condensation from forming, it's best to store the marshmallows in a cool, dry place away from direct sunlight.
You can also add a paper towel to the container to absorb any excess moisture that collects in the container.
Chocolate Covered Peeps are a fun Easter treat the whole family is going to love. They’re so easy and fast to make that you can get the kids involved in helping you create these yummy treats.
This Easter Bunny Cake is going to be the show-stopper at your Easter Brunch Celebration this year! Made with a simple cake mix, cream cheese frosting and shredded coconut, yet it's decorated with the cutest embellishments!
Even if you don't have any "decorating skills," you can still create this adorable cake. Get ready to wow your family with this amazing Easter-inspired dessert.
Explore the full selection of Easter Desserts to discover even more delicious recipes!
When looking to put together a fun Easter Bunny Cake, I thought of the fun ways of using a bunny cake pan or perhaps baking a few round cakes and shaping them into a bunny.
However, I wanted something EASY! That everyone could do and not be intimated by the design.
I searched on Amazon and found this cute bunny ears and face cake topper that would fit perfectly on top of a simple white cake made with a box of cake mix.
The best thing about this cake is there is no real decorating involved! If you can bake a cake using a boxed cake mix, you can create this adorable whimsical cake!
Make sure you check out my other Easter Egg Cake recipe next!
When you want to doctor your cake mix up a little to make it taste like it came from a bakery, try adding milk in place of water and an extra egg. You can also replace the oil called for by doubling the amount with melted butter.
Check out my other Cake Mix Baking Secrets and grab the free printable with tips on creating delicious, easy desserts using a box of cake mix.
It's the ultimate guide to crafting your dream Easter brunch featuring 11 easy-to-make recipes, Prep-Ahead Tips, Planning Checklists, and Fun Kid's Activities!
How do you decorate a cake in a simple way?
For this cake, I decided to keep it really easy and purchase a bunny decorating kit that comes with the bunny ears, eyes, and nose. Below is the exact kit I ordered from Amazon. It can be used again, so it's a great investment!
Adding coconut adds a cute fur texture and the frosting doesn't have to be perfect since it's covered with coconut.
Here's a quick overview of the ingredients for this recipe. Find the exact amounts and click the Instacart button to easily add them to your cart – all in the printable recipe card below!
Recipe Variations
Add half a teaspoon of almond extract to the cake batter for a delicious flavor!
Step 1: Follow the instructions on the cake mix to prepare the batter.
Step 2: Divide the batter evenly between two 9-inch round cake pans and bake according to the package directions. Once baked, allow the cakes to cool completely before decorating.
Quick Tip
For a fun pop of color when you cut into the cake, you can use pink frosting to spread between the two cake layers.
Step 3: Place one layer of cake on top of the other, spreading a layer of frosting between them. Frost the top and sides of the cake with the remaining frosting.
Step 4: To achieve a smooth finish, dip the offset spatula or a bench scraper in warm water, then wipe it dry before using it to smooth the frosting on the cake. This helps the spatula glide over the frosting without sticking, resulting in a more even surface.
Step 5: Coat the entire cake with shredded coconut. Gently press handfuls of shredded coconut onto the sides and top of the frosted cake.
Step 6: Lightly pat the coconut onto the frosting to ensure it adheres well without disturbing the frosting underneath.
Step 7: Finally, add the bunny ears to the top of the cake and the eyes and mouth to the front of the cake.
LOVE this recipe? SAVE it for Later!
❤️Tap the heart icon in the lower right corner to add the recipe to your recipe box for easy access anytime.
If you made it, leaving a star rating or quick review is always appreciated and helps other readers too.
Cover with a cake keeper or cake box and refrigerate for up to 3 days since it has cream cheese icing.
Freezing Tips
To freeze the decorated cake, place the cake in the freezer for about an hour to firm up the icing. Once the icing is firm, wrap the cake in plastic wrap really well then wrap in a layer of aluminum foil.
To defrost, remove the aluminum and plastic wrap so you won't mess up the icing once it's defrosted. Place in the fridge overnight for it to thaw. Set on the counter an hour before serving to warm up to room temperature.
Top Tip
Make sure the cake is completely cooled before you start decorating it.
Set your cake up over a sheet pan to catch the coconut that falls while pressing it into the sides of the cake for easy clean up.
Should you refrigerate a cake with cream cheese frosting?
Yes, it is recommended to refrigerate a cake with cream cheese frosting. Cream cheese frosting can spoil quickly if left at room temperature and needs to be stored in an airtight container in the refrigerator.
To keep the cake fresh for up to 5 days, store it in an airtight container or wrap it securely with plastic wrap. Make sure to allow the cake to come to room temperature before serving for the best flavor.
This Easter Bunny Cake is going to be the show-stopper at your Easter Brunch Celebration this year! Made with a simple cake mix, cream cheese frosting and shredded coconut, yet it's decorated with the cutest embellishments!
One way to make getting dinner on the table every night is to prep ahead several freezer meal plans for your family.
It's no secret that weeknights can be a whirlwind of activities, but with a few simple strategies you can have dinner on the table without having to resort to takeout.
I love the idea of taking the time now to prepare a meal that you can enjoy with your family and also freeze a portion to enjoy later when life is busy.
Check out the other Weekly Meal Plans available for you and grab the FREE Freezer Printable below!
Whether your family loves tacos or casseroles, get ready to stock your kitchen with ingredients and whip up delicious one-dish dinners without the stress.
One of my favorite freezer recipes to make in large quantities is Italian Breaded Chicken Cutlets. Once, they're made I wrap them individually in aluminum foil and place in a freezer safe plastic bag.
Then on busy nights, I can pull as many as I need to easily defrost, reheat and serve with a salad or mashed potatoes. They also work great as the base for preparing my Chicken Parmesan Recipe; another recipe that comes together fast from the freezer!
This week I'm including a FREE Freezer Inventory Printable to everyone. Print this out and use it when planning your family favorite freezer recipes and meals this week.
Prep Ahead Tips
Having meals ready to put together straight from the freezer is definitely a solution to making sure you can prepare dinner every night for your family.
Here are a few tips to help ensure everyone still gets a healthy, delicious meal without taking too much of your time at the end of a busy day:
Brown a few extra pounds of ground beef over the weekend and freeze in portion sizes that work for your family.
Chop vegetables the night before that can be used the next day.
If you're preparing a casserole, make two at the same time. One to eat and one to freeze for a future meal.
Wash the lettuce and store wrapped in paper towels in air-tight baggies or containers so you can easily put together a salad.
Assign each day of the week a different category and then plan a meal according to that category.
Monday - Beef.
Tuesday - Italian Night.
Wednesday - Chicken, Beef or Fish
Thursday - Pasta or Italian Night
Friday - Sandwiches and Soup
Saturday - Pizza or Eat Out, Order In
Sunday - Comfort Food Meal
Become a Member!
If you're looking for more detailed meal plans for TWO PEOPLE that include grocery lists, you're going to love Eat at Home Menu Plans for TWO. The Eat at Home Menu Planning does all the work for you. For only a few dollars per week and you get four different menu plans for every week.
This Meal Plan has been updated since it first appeared in 2020 with new information and two new printables to help you plan dinner for your family. I hope you enjoy the updates as much as I enjoyed working on them!
Prepare to whip up the most tantalizing, delicious dishes when you learn how to make your own spice blends to use in your favorite recipes.
Once you have your very own homemade seasoning mixes you'll be able to keep all of your recipes consistent and flavorful. And you'll know exactly what's in the spices! No mystery ingredients!
Make sure you grab the Free Printable Cheat Sheet with 8 spice blend recipes!
Get creative when you're making your own homemade spice blends at home. Spice up regular recipes, or create something totally new.
You can also customize the spices to your taste. If you don't like the taste of a particular spice, just leave it out when creating a specific blend.
For example, I don't care for the taste of oregano, so I usually leave it out of my Homemade Italian Seasoning Mix. You'll figure out soon exactly what you and your family likes and how to incorporate that into your recipes.
When you make your own spices at home, they're always fresh. It's very likely that the spices we purchase at the grocery stores have been sitting on the shelves for awhile.
[feast_advanced_jump_to]
Get Your Homemade Spice Blends Printable
Homemade Spice Blends for Every Occasion
Figure out which spice blends work for the recipes and dishes your family enjoys. There's no sense in creating an exotic blend if no one cares for it!
For example, my family loves roast chicken, so I created my Chicken Spice Rub blend. I also created a salt, pepper and garlic powder blend that I refer to as my House Seasoning.
Once you make your own spice blend, make sure you label the container clearly with the date. You can even store the homemade spices in a small airtight container and place in the freezer to assure freshness.
You want to make sure you use the right type of containers to store the blends in. Small jars or bottles with tight-fitting lids work best.
Try to purchase the spices whole and blend them yourself using a mortar and pestle or a hand-held electric grinder.
There's no question about it, purchasing little spice mixes at the grocery store can be expensive. However, you may not actually save money making your own.
Instead, when you make your own homemade spices you are in control of what goes into the blends. You won't be adding any preservatives or chemicals.
Homemade is always worth it for the taste as well as confidence that you know what you're serving your family.
Don't forget to add dried herbs to your spice blends. Especially if you grow your own in your vegetable garden on in pots on your back porch.
Growing your own herbs like oregano, basil, and rosemary requires very little effort. Once you harvest them, you'll have to dry them and them grind them up to add to your spice blends.
You can use a mortar and pestle or an electric herb grinder so they blend in perfectly with the other spices you're using.
Homemade Spice Blends for Gifts
I love to give homemade gifts around the holidays or to bring to someone's home when visiting. Giving homemade spice blends for gifts is a pretty thoughtful way to show someone you care!
It's a pretty easy project as well and if you have kids, they'll love helping you. Follow a few of these simple tips:
Use glass jars with tight-fitting lids so the blends stay fresh.
Decorate the jar with a ribbon.
Don't forget to add a gift tag! You may want to include special instructions on how to use the spice blend on the tag.
This recipe has been updated since it first appeared in 2016 with new photos and information. I hope you enjoy the updates as much as I enjoyed working on them!
Drop the store-bought cakes and spice up your Easter celebration with delicious homemade Easter bundt cakes ideas. There are over 20 recipes for you to choose from that are sure to impress your relatives and friends.
From light and airy lemon glazes to moist and candy topped cakes, you won't find a tastier way to make Easter extra special.
Check out all the other Easter dessertsto help make your holiday celebration special!
If you're looking for something new to make for your Easter celebration this year, why not try one of these bundt cake recipes? Using a bundt cake pan produces not only a delicious recipe, but a pretty one!
Just take a look at these beautiful recipe photos and you have to agree that the shape of a bundt pan produces a lovely dessert. With just a little effort you can bake a delicious dessert that will definitely please everyone at the table.
Here are a few baking tips so your bundt cake recipes come out perfect every time:
Make sure you spray the pan with a good non-stick cooking spray before adding the batter to the pan.
Do not overfill the pan. Try to fill the pan with batter two-thirds full. Any more batter will cause the batter to overflow as the cake bakes.
Use silicone, bamboo or rubber utensils so you don't scratch the surface of the pan.
Once the cake is baked, allow it to cool in the pan before removing it. If you try to remove it too soon while the cake is hot, there's a good possibility it will stick.
With a moist and flavorful cake mix base, you can whip together an impressive dessert in no time! The real showstopper comes when you make it your own by topping off the cake with plenty of colorful candy eggs for delightful decoration.
Delight your guests with a truly special treat: an exquisite blend of flavors and textures that will tantalize their taste buds. Make it the crowning glory of any celebration!
Enjoy the simple delicacy of Cream Cheese Pound Cake! Its moist, tender slices have a delightfully golden top that'll be sure to bring joy. This one-bowl recipe is so effortless to make; whip it up for any special occasion or holiday and your guests will love you for it!
Enjoy the sweet harmony of lemon and lavender in one exquisite package. Let that delicate hint of floral essence perfectly complementa bright, zesty twist - all kissed with a honey glaze for an unforgettable flavor sensation!
Celebrate the sweet moments of life with mini cakes packed full of personality! Enjoy these delightful treats, which feature layers of scrumptious vanilla cake iced in vibrant colors and decorated with toasted coconut bits plus a sprinkling of candy pieces. Perfect for Easter Sunday brunch or as an extra-special way to surprise Mom on Mother's Day - your family will love them!
Enjoy the springtime season with these scrumptious mini Easter bundt cakes! These delicate little treats are sure to bring a pop of festivity to your celebration, and they're easy enough for even novice bakers. Best yet? They'll be beautifully adorned in pastel hues – perfect for any occasion.
Enjoy the springtime season with these scrumptious mini Easter bundt cakes! These delicate little treats are sure to bring a pop of festivity to your celebration, and they're easy enough for even novice bakers. Best yet? They'll be beautifully adorned in pastel hues – perfect for any occasion.
Experience the deliciousness of homemade Nothing Bundt Cake with this easy-to-make mini lemon bundt recipe! Combining a boxed cake mix, pudding and freshly squeezed lemon juice results in mouthwatering citrusy perfection that's topped off with an irresistible glaze. Get ready to savor pure delight - one bite at a time!
Satisfy your sweet tooth cravings with this delicious and nutty Poppy Seed Cake! Crafted from a mix of pantry staples, sour cream, and poppy seeds for extra crunch - it's sure to make all the family drool. Lusciously light yet moist in texture, prepare yourself for a heavenly slice of yumminess!
Impress your friends and family this Easter with a festive Coconut Bundt cake! This Instant Pot recipe is the perfect combination of sour cream, toasted coconut flakes, and white cake mix that will bring any spring gathering to life.
An indulgent treat awaits with this delightful bundt cake! Crafted from the perfect combination of spongy texture, bursting blueberries and zesty lemon - all topped off with a sweet citrus glaze. Get ready for an unforgettable experience with each bite!
Indulge in a delightful classic white cake! This delectable treat is loaded with sweet sprinkles and topped off with an irresistibly creamy white chocolate ganache. An absolute must-try for those wanting to satisfy their dessert cravings.
This classic homemade dessert is perfect for any event or gathering! The batter comes together in minutes, and bakes into a soft, moist cake that will have everyone wanting seconds. It's sure to be the star of your celebration – no one can resist its deliciousness!
Savory and sweet, this delectable Lemon Raspberry Bundt Cake is a simple-to-prepare treat that's sure to tantalize your taste buds! Bursting with flavor in every moist bite, it will make the perfect after dinner dessert.
Taking a break has never been so sweet! Lemon cakes are the ideal treat for summertime, bringing light and refreshing flavor to your day. Enjoy them with coffee or tea - blissful sips guaranteed.
Introducing a delicious dessert that is sure to impress at any event - Coconut Lemon Bundt Cake! With its tender lemon taste, sprinkled with sweet coconut flakes and topped off by an irresistible icing, it's something special you can be proud of.
Enjoy a bowl of sunshine with this unique lemon bundt cake recipe! The moist, creamy and fluffy texture adds great depth to the tart yet sweet flavor all topped off with a zesty glaze. A delectable treat for any citrus lover's taste buds!
Pizza dough, butter and a few Italian seasonings are all you need to whip up this delicious quick breadsticks recipe that your family will love.
Forget the garlic bread to serve for dinner! Simply put together this recipe from the pantry staples in your kitchen and enjoy the comforting aroma of freshly baked bread ready fast!
This is an easy-to-make side dish to go along with any of our Family Dinner Ideas.
Looking for an easy, delicious side dish to serve with chicken cutlets this week?
These semi-homemade breadsticks made from store-bought pizza dough are soft, buttery, and loaded with garlic and Italian seasoning.
They bake up golden and irresistible—perfect for weeknight dinners, and yes, everyone will ask for seconds!
Fresh dough from your local pizza restaurant—many will sell it to you!
Prep the Dough Properly: If using store-bought or frozen dough, be sure to let it come to room temperature before rolling it out for easier handling and better results.
Here's a quick overview of the ingredients for this recipe. Find the exact amounts and click the Instacart button to easily add them to your cart – all in the printable recipe card below!
Substitutions and Variations
Herb Infused: Add 1-2 teaspoons of dried herbs like rosemary, thyme, or basil to the dough for aromatic bread.
Cheesy Delight: Mix in ½ cup of shredded cheese such as cheddar or parmesan for a savory twist.
Sweet Touch: Incorporate ¼ cup of raisins or dried cranberries and a tablespoon of honey for a mildly sweet loaf.
Garlic and Onion: Mix in minced garlic or dried onion flakes for a savory flavor boost.
Step-by-Step Instructions
This section includes step-by-step photos and instructions to guide you through the recipe. For the complete printable version, scroll down to the recipe card below.
Step 1: Roll out the pizza dough onto a floured surface. Cut the rectangle into 12 even strips of dough.
Step 2: Arrange the twisted breadsticks on a baking tray lined with parchment paper—even if you’re using a non-stick pan. The parchment helps them crisp up beautifully. Let the breadsticks rise for 30 minutes before baking.
Baking Instructions
Step 3: Brush the breadsticks with melted butter, then generously sprinkle with garlic salt and Parmesan cheese. Preheat your oven to 425°F and bake for 10 to 12 minutes, or until golden brown and fragrant.
LOVE this recipe? SAVE it for Later!
❤️Tap the heart icon in the lower right corner to add the recipe to your recipe box for easy access anytime.
If you made it, leaving a star rating or quick review is always appreciated and helps other readers too.
Refrigerate: Store leftover breadsticks in an airtight container or zip-top bag in the refrigerator for up to 4 days.
Freezer: Place cooled breadsticks in a single layer on a baking sheet to flash freeze. Once frozen, transfer to a freezer-safe bag or container and store for up to 2 months.
Thaw and Reheat: Thaw breadsticks at room temperature or in the fridge overnight. To reheat, place them on a baking sheet and warm in a 350°F oven for 5–7 minutes, or until heated through. For extra crispiness, lightly brush with butter before reheating.
How to Reheat Breadsticks in Air Fryer
Recipe FAQ
To view the answer, simply click on the down arrow (⬇) next to the question. If you have any other questions not answered here, please leave a comment!
Can I make breadsticks ahead of time?
Make the recipe according to directions up until the baking instructions. Cover the tray of bread sticks with greased plastic wrap and store in the refrigerator for up to 2 days. Allow the breadsticks to sit at room temperature about an hour before you bake them.
This recipe has been updated since it first appeared in 2013 with new photos, information and a new printable recipe card that includes nutritional information. I hope you enjoy the updates as much as I enjoyed working on them!
Looking for a fun and festive way to serve up Easter brunch this year? Check out this Cute Easter Appetizer!
Made with fresh veggies, cheese and a dip, it's made in the shape of a bunny and is sure to be a hit with the whole family.
Serving cheese and crackers as an appetizer is the perfect way to greet family and friends when they arrive at your home for a holiday celebration. This is an easy-to-assemble recipe that is going to make a huge impression on everyone!
Check out all the other Easy Appetizers for even more delicious ideas waiting to be discovered!
Easter is just around the corner, and if you're like me, you're looking for a few new recipes and ideas to serve for Easter Sunday Brunch.
Why go with something you've prepared year after year? Say goodbye to the ordinary and say hello to a cute Easter appetizer in the shape of a bunny!
This charcuterie board is easy to prep ahead and put together right before your guests arrive. If you have kids still at home, they'll love helping you too!
It's can be customized to fit any diet or taste preference, and everyone is going to love it.
If love creating charcuterie boards for the holidays, you'll need to check out a few different ones available here on the blog for you. Try my 4th of July Charcuterie Board which is fun all summer long!
Another fun holiday board idea is my Christmas Tree Cheese Board that is, yes, in the shape of a Christmas tree.
All you need to create a board is arrange a variety of cheeses, meats and crackers on your board. Then add fresh fruit or grapes for color followed by accompaniments like honey, fig jam, olives, nuts or whatever else you'd like!
Try adding my Easy Easter Appetizer carrot peppers to your Easter Charcuterie Boards!
Have available small plates, forks, and knives to make it easier for your guests to enjoy everything.
Recipe FAQs
How to keep crackers from getting soggy on charcuterie board?
Choose sturdy crackers that can hold up to the various toppings you place on a charcuterie board. You may want to place a layer of waxed paper on top of the board before adding the crackers.
This will help absorb any moisture that accumulates during your celebration. Try to place any "wet items" like cheese, meats and crackers away from the crackers.
Instead place the crackers near different cheeses or small bowls filled with olives and jams.
Can I make a charcuterie board the day before?
Yes! With the exception of the crackers, everything can be placed on the board and wrapped with plastic wrap and stored up to 24 hours ahead of time.
Add the crackers once you take the board out of the fridge so they don't become soggy.
Here's a quick overview of the ingredients for this recipe. Find the exact amounts and click the Instacart button to easily add them to your cart – all in the printable recipe card below!
Substitutions and Variations
Use any assortment of vegetables, fruit, cheeses, nuts, and meats that you like!
Step 1: Select a cutting board or platter to display your cute Easter appetizer on. Arrange the crackers into bunny ears starting at the top and going towards the center of the board.
Step 2: Add the bowl of hummus at the base of the crackers to make the bunny head. Arrange the olives, asparagus, and tomato for the bunny face.
Quick Tip
The cutting board used in these photos is approximately 12 x 16 inches.
Fill in the Bunny Charcuterie Board
Step 3: Now create the "body" of the bunny using the cauliflower and celery.
Step 4: Add the yellow cheddar cheese to the centers of the bunny ears. Fill the remaining space on the board with the vegetables and white cheddar.
Before you Begin!
If you make this recipe, please leave a review and star rating. This helps my business thrive and continue providing FREE recipes.
Prep Ahead Tips
Prep Ingredients: Wash and slice any fruits and vegetables. Cut cheeses and meats into bite-sized portions. Prepare the dip and place inside a small airtight container.
Arrange Ingredients: Lay out the cutting board or platter you plan to use for the charcuterie board. Begin arranging the ingredients on the board, keeping similar items grouped together. Leave space between items for the dip, crackers and breadsticks. These will be placed on the board right before serving.
Cover and Refrigerate: Once the charcuterie board is assembled, cover it tightly with plastic wrap and then a layer of aluminum foil. Place it in the refrigerator to keep the ingredients fresh until serving.
Final Touches Before Serving: Before serving, remove the charcuterie board from the refrigerator and let it sit at room temperature for about 30 minutes to allow the flavors to meld. Add the crackers and any other final touches, such as fresh herbs or additional garnishes, right before serving.
Storage Tips
Store the leftover cheese by wrapping it in parchment paper then placing in a plastic zip top bag or wrapped in plastic wrap. Use within 7 days.
Store the cut vegetables in a zip top bag or container with a moist paper towel. Use within 2-3 days.
Store carrots and celery by putting them in a container of water to keep them crisp for up to a week.
Freezing Tips
Leftover cheddar cheese can be frozen for up to nine months if wrapped well to prevent freezer burn. Wrap in parchment, then in a plastic bag with as much air removed as possible.
Leftover cut vegetables can be frozen by laying them in a single layer and freezing until solid. Then add to a freezer bag or container and save for up to a year.
Cooking for More (or Less?)Scale this recipe up or down. Adjust the number of servings above to automatically update ingredient amounts.
Method
On top of a large cutting board or platter, arrange the crackers in rows to form two bunny ears leading to the center of the board.
Place the bowl of hummus in the center of the board.
Place 2 black olives halved widthwise in the hummus to serve as the bunny's eyes.
Place a cherry tomato in the center of the hummus for the bunny's nose.
Cut another black olive lengthwise into multiple pieces to form a mouth in the hummus.
Place 3 trimmed asparagus on each side of the cherry tomato nose to represent bunny whiskers.
Use the yellow cheddar cheese cubes to fill in the center of the bunny ears.
Finally arrange the cauliflower florets, celery sticks, red pepper slices, cubed white cheddar cheese, and broccoli florets on the board, filling in any remaining space on the board.
This delicious and easy-to-make homemade granola is made with almonds, brown sugar and peanut butter; two of our favorite ingredients.
This recipe is perfect for breakfast or a snack, and I know you’re going to love it!There's no going back to the store version once you've tasted this homemade recipe!
Looking for more morning recipe inspiration? Explore our other delicious Breakfast Ideas!
This easy-to-make recipe for homemade granola is not only delicious, but it's a much healthier alternative to store-bought brands that have tons of added sugar and additivies.
This recipe is a basic recipe. However, you can add your own favorite stir-in's after it has baked and cooled. Sometimes I like to add chocolate chips and coconut like my Coconut Pecan Chocolate Chip Granola recipe.
If you add the chocolate chips too soon, the heat from the granola will melt the chips. Anything is possible when you make a recipe from scratch at home in your own kitchen.
If you're looking for a tasty snack to keep your body energized throughout the day, try whipping up some homemade granola!
Granola is perfect for enjoying as a snack or sprinkled on top of a bowl of yogurt or cereal with fruit. I like to add it to the top of applesauce that's been heated in the microwave for 30 seconds.
You can add homemade granola to smoothies for added crunch. Or add it to the top of baked goods like muffins and banana bread. How about sprinkling it on top of pudding cups? Yummy!
Is homemade granola healthy for you?
YES! Many store-bought granola recipes are made up of a combination of healthy and not-so-healthy ingredients. Which is why it’s important and so much better for you to make it homemade. That way you can control exactly what goes into the granola.
Here's a quick overview of the ingredients for this recipe. Find the exact amounts and click the Instacart button to easily add them to your cart – all in the printable recipe card below!
Recipe Substitutions and Variations
Dried Fruit: Add your favorite dried fruits such as raisins, cranberries, apricots, dates, cherries, blueberries, or mangoes.
Sweetener: This recipe uses brown sugar, but if you want to change things, you could also use honey, maple syrup, or agave nectar to adjust the sweetness level to your liking.
Coconut: Toss in some shredded coconut or coconut flakes for a tropical twist.
Chocolate Chips: For a special treat, fold in some dark or milk chocolate chips after baking.
Step-by-Step Instructions
Step 1: Combine the dry ingredients in large bowl and set aside. Melt the butter using the microwave and then combine it with the peanut butter and brown sugar.
Step 2: Continue heating in 15-second intervals using the microwave just long enough to combine everything easily.
Combine the Wet and Dry Ingredients
Step 3: Pour wet ingredients over dry and mix thoroughly.
Step 4: Spread evenly on large baking sheet that has an edge.
Baking Instructions
Step 5: Bake the granola in a preheated 350°F oven for 15 minutes. Remove the baking tray, stir the granola, then bake for another 15 minutes. Stir granola once more and cook for 15 more minutes (for a total of 45 minutes). Let cool completely and store in an airtight container.
LOVE this recipe? SAVE it for Later!
❤️Tap the heart icon in the lower right corner to add the recipe to your recipe box for easy access anytime.
If you made it, leaving a star rating or quick review is always appreciated and helps other readers too.
Pantry: Once the granola has cooled, you can store it in an airtight container to keep it fresh. I love storing my homemade granola in mason jars. They're airtight, keeping the granola perfectly fresh, and they add a charming touch to my pantry.
Refrigerator: Store in an airtight container in the refrigerator for up to two weeks.
Freezer: You can also freeze the granola in a freezer-safe container or freezer-safe bag for up to 4 months.
My Favorite Mason Jars: Ideal for granola, sliced fruits and vegetables, pickles, tomato-based juices, and sauces. BPA-free, dishwasher safe, reusable. New and improved sure tight lids.
Homemade granola with almonds, brown sugar, and peanut butter beats any store-bought version! Try this easy recipe for a healthy and delicious breakfast or snack.
Combine dry ingredients in large bowl and set aside.
Place the butter in a microwave-safe bowl and melt it in 15 - 30 second intervals until it is completely melted.
Then add in the peanut butter and brown sugar. Continue heating in the microwave in 15 second intervals to heat up the peanut butter long enough to make mixing easier.
Pour wet ingredients over dry and mix thoroughly.
Spread evenly on large cookie sheet with edge. Bake for 15 minutes.
Stir granola, then bake for another 15 minutes.
Stir granola once more and cook for 15 more minutes (for a total of 45 minutes).
Let cool completely and store in an airtight container.
This recipe has been updated since it first appeared in 2011 with new photos, information and a new printable recipe card that includes nutritional information. I hope you enjoy the updates as much as I enjoyed working on them!